
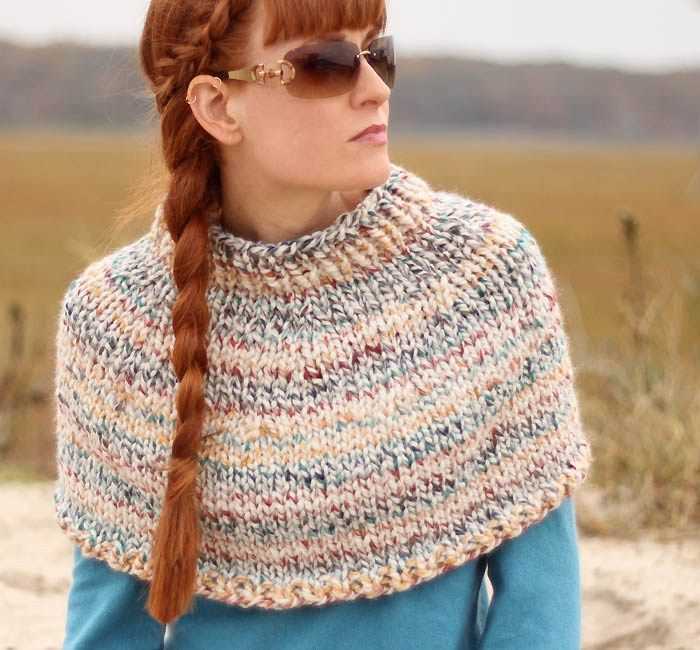
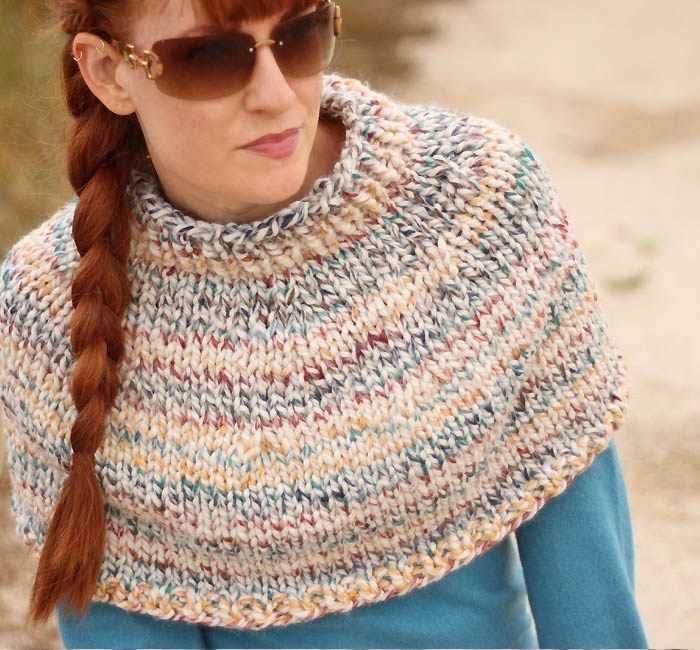
The chunky cape knitting pattern is a popular choice among knitters looking to create a cozy and stylish garment for the cooler months. This pattern creates a versatile and timeless cape that can be worn over any outfit, making it a great addition to any wardrobe. Whether you’re a beginner or an experienced knitter, this pattern is perfect for anyone looking to expand their knitting skills and create a beautiful piece.
One of the great things about this chunky cape knitting pattern is its simplicity. With just a few basic stitches and techniques, you can create a stunning cape in no time. The chunky yarn used in this pattern adds warmth and texture to the finished garment, making it perfect for chilly days and nights. Plus, the chunky weight of the yarn means that the cape will knit up quickly, so you can enjoy wearing it sooner rather than later.
This pattern also gives you the opportunity to get creative with your knitting. While the basic pattern is easy to follow, you can easily add your own personal touch by experimenting with different stitch patterns or adding embellishments such as buttons or fringe. This allows you to make your chunky cape truly unique and tailor it to your own style and preferences.
Materials needed for chunky cape knitting
Knitting a chunky cape requires a few specific materials to ensure that the final product turns out just right. Here is a list of the essential items you will need to complete your chunky cape knitting project:
1. Chunky yarn:
Choose a high-quality chunky yarn in your desired color. Chunky yarn will give your cape a cozy and warm feel, making it perfect for chilly days. Make sure to check the label for the recommended needle size for the yarn you choose.
2. Circular knitting needles:
Since a chunky cape is typically knitted in the round, you will need a set of circular knitting needles. Choose a needle size that matches the gauge specified on your yarn label. Circular needles are ideal for larger projects like capes as they can hold a large number of stitches comfortably.
3. Stitch markers:
Stitch markers are essential for marking specific points in your knitting, such as the beginning of a round or the placement of a certain stitch pattern. You can use either plastic or metal stitch markers, whichever you find most comfortable to work with.
4. Tapestry needle:
A tapestry needle, also known as a yarn needle, is needed for weaving in the ends of your cape once you have finished knitting. Choose a needle with a large eye to make threading the yarn easier.
5. Scissors:
A good pair of scissors is essential for any knitting project. You will need them to cut the yarn, trim any loose ends, and make adjustments as necessary.
6. Measuring tape:
A measuring tape is necessary for taking accurate measurements of your cape and ensuring that it fits correctly. You can use it to measure the length, width, and any other dimensions required in the pattern.
With these materials on hand, you will be well-equipped to start knitting your chunky cape. Always make sure to read through the entire pattern before you begin and double-check that you have all the necessary supplies. Happy knitting!
Choosing the Right Yarn for Your Chunky Cape
When it comes to knitting a chunky cape, choosing the right yarn is essential for achieving the desired look and warmth. The yarn you select plays a significant role in determining the overall appearance, texture, and drape of your finished project. Here are some factors to consider when choosing the perfect yarn for your chunky cape.
1. Weight: Since you are looking for a chunky cape, it is important to choose a yarn that is classified as bulky or super bulky. These yarn weights are thicker and heavier, resulting in a cozy and warm finished cape. Be sure to check the yarn label for the weight category before making your selection.
2. Fiber Content: The fiber content of the yarn can greatly affect the feel and performance of your chunky cape. Wool is an excellent choice for its insulating properties and ability to retain warmth. If you’re looking for a vegan option, acrylic or cotton blends can provide a similar bulky look and feel.
When selecting a yarn, consider the climate you will be wearing your cape in. If you live in a colder climate, a wool blend or pure wool yarn would offer the necessary warmth. On the other hand, if you live in a milder climate, a cotton or acrylic blend may be more suitable.
3. Texture: The texture of the yarn can add visual interest to your chunky cape. Consider yarns with a twist or boucle effect to create a unique and textured look. If you prefer a more classic and smooth appearance, opt for a yarn with a plied construction. Swatch different yarns to see how the texture will enhance your cape’s overall aesthetic.
By carefully selecting the right yarn for your chunky cape project, you can ensure that your finished piece is not only visually appealing but also warm and comfortable to wear. Take your time to explore different yarn options and consider the weight, fiber content, and texture to find the perfect match for your knitting project.
Sizing guide for chunky cape knitting
When it comes to knitting a chunky cape, it’s important to ensure that you choose the appropriate size to ensure a proper fit. Here is a sizing guide to help you determine the right dimensions for your project.
1. Measurements:
Before starting your knitting, it’s crucial to take accurate measurements of yourself or the intended wearer. The key measurements you’ll need are the bust/chest circumference, shoulder width, and desired length of the cape. These measurements will help determine the appropriate size to knit.
2. Choosing the size:
Once you have your measurements, refer to the knitting pattern and sizing guide provided. Most patterns offer a range of sizes, usually indicated by the bust/chest circumference. Select the size that corresponds closest to your bust/chest measurement. It’s always better to choose a slightly larger size if you prefer a looser fit, rather than a snug one.
Note: Keep in mind that chunky yarn tends to create a more bulky and oversized look. If you prefer a more fitted or tailored style, you may need to adjust the size accordingly.
3. Adjusting the size:
If you find that the available sizes in the pattern do not match your measurements, you can make adjustments to achieve a custom fit. This can be done by altering the number of stitches and rows worked, as well as the gauge. However, be mindful that making significant modifications to the pattern may require additional calculations and adjustments to ensure proper shaping and proportions.
By following this sizing guide, you’ll be able to choose the right size for your chunky cape knitting project. Remember to always check the recommended gauge and adjust accordingly to achieve the desired dimensions and fit.
Getting started with chunky cape knitting

If you’re ready to tackle a chunky cape knitting project, you’re in for a cozy and stylish treat. Chunky yarn creates a thick and warm fabric, perfect for keeping you snug during the colder months. Whether you’re a beginner knitter or have some experience under your belt, this pattern is a great way to practice new techniques and create a fashionable accessory.
Choosing the right yarn: When selecting yarn for your chunky cape, look for a bulky or super bulky weight yarn. This will give you the desired thickness and warmth. Consider the fiber content as well – wool or a wool blend will provide extra insulation. Don’t forget to check the gauge on the yarn label and choose needles that will produce the correct tension.
Supplies needed:
- Chunky weight yarn in your chosen color
- Knitting needles in the appropriate size
- A cable needle (if the pattern includes cables)
- Scissors and a tapestry needle for finishing
Reading the pattern: Before you begin knitting, take some time to thoroughly read through the pattern. Familiarize yourself with any abbreviations or special stitches that are used so you can have a clear understanding of the instructions. The pattern may also include a schematic or diagram, which can be helpful for visualizing the finished cape and understanding shaping and construction.
Tip: If you’re new to reading knitting patterns, it can be helpful to highlight or make notes on the pattern as you go along. This will make it easier to keep track of where you are and stay organized.
Getting started: Once you have your supplies and are comfortable with the pattern, it’s time to cast on and begin knitting. Follow the instructions for the cast-on method specified in the pattern. This will typically involve creating a foundation row of stitches on your needle. Take your time and make sure your stitches are even and not too tight.
Tip: If you’re having trouble with your tension or finding it difficult to keep an even gauge, try using a larger needle size or knitting with a looser grip. Swatching can also be helpful to determine the correct needle size before diving into the main project.
Knitting your cape: As you work through the pattern, be sure to keep track of your row count and mark any increases, decreases, or stitch patterns that are specified. This will help you stay on track and ensure your finished cape looks the way it’s intended to. If you’re using circular needles, be mindful of joining the rounds and avoid twisting your work.
Finishing touches: Once you’ve completed the body of the cape, follow the pattern instructions for any finishing touches such as binding off, blocking, and sewing seams. This is your opportunity to bring the garment together and make any adjustments needed for fit and drape. Take your time and enjoy the process of putting the final touches on your chunky cape.
Remember, knitting is a skill that improves with practice. Don’t be discouraged if your first attempt doesn’t turn out exactly as planned – each project is an opportunity to learn and grow as a knitter. Have fun experimenting with different textures and colors, and don’t be afraid to personalize your cape with unique details or modifications.
Basic stitches for chunky cape knitting
When knitting a chunky cape, it’s important to use stitches that will create a thick and warm fabric. Here are a few basic stitches that are commonly used in chunky cape knitting:
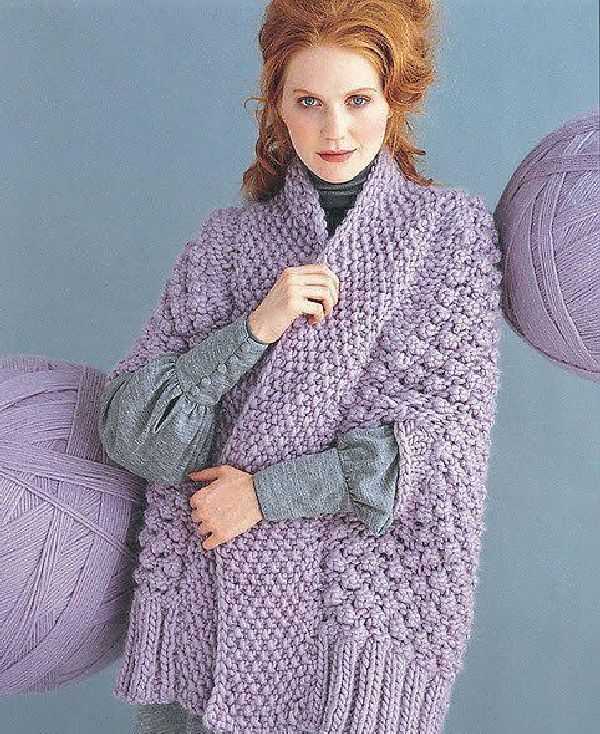
- Garter stitch: This stitch is created by knitting every stitch in every row. It creates a bumpy texture and is great for adding thickness to your cape.
- Stockinette stitch: This stitch is created by knitting one row and then purling the next row. It creates a smooth and flat fabric, and is often used for the main body of the cape.
- Rib stitch: This stitch is created by alternating knit and purl stitches in a specific pattern, such as knit 2, purl 2. It creates a stretchy and textured fabric, and is often used for the edges or cuffs of the cape.
By combining these basic stitches, you can create a variety of patterns and textures in your chunky cape. You can also experiment with different stitch combinations to add more interest to your design. Remember to choose a stitch that matches the thickness and weight of your yarn to ensure the best results.
Adding pattern to your chunky cape
If you have a chunky cape that you want to give a unique touch, adding a pattern is a great way to do it. Whether you’re an experienced knitter or just starting out, there are many patterns available that can enhance the look of your cape. By following a pattern, you’ll be able to create a beautiful and intricate design that will make your cape stand out.
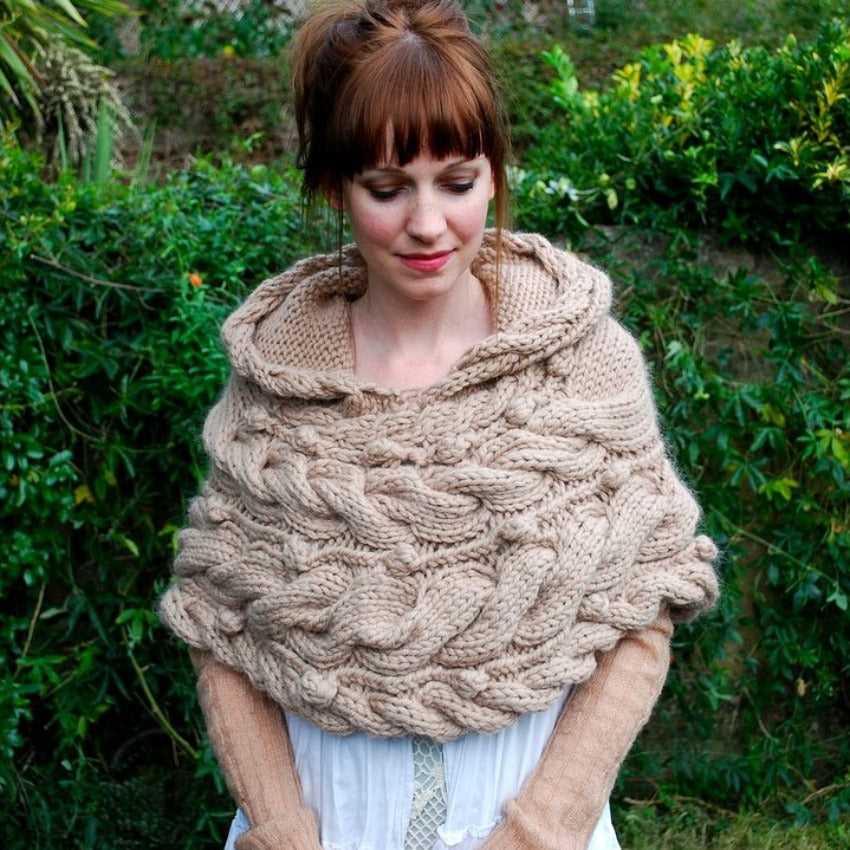
One option for adding a pattern to your chunky cape is using cables. Cables are created by crossing stitches over each other to create a braided effect. This technique adds texture and dimension to your cape, making it visually interesting. You can find cable patterns online or in knitting books to guide you through the process.
Step-by-step guide for adding a cable pattern to your chunky cape:
- Choose a cable pattern that you like. You can find patterns in knitting books or online.
- Make sure you have the appropriate knitting needles and yarn for your chosen pattern.
- Start by knitting a swatch to determine your gauge. This will ensure that your finished cape will fit correctly.
- Follow the cable pattern instructions, which will typically involve knitting stitches out of order to create the cable effect.
- Continue knitting the pattern until you have completed the desired length for your cape.
- Finish off your cape according to the pattern instructions, which may involve binding off stitches or adding a decorative border.
- Block your cape to even out the stitches and help the pattern stand out.
Another option for adding a pattern to your chunky cape is using colorwork. Colorwork involves knitting with multiple colors to create a pattern or design. Fair Isle and stranded knitting are popular techniques used for colorwork. These techniques can be used to create intricate patterns, such as geometric shapes or floral motifs, on your cape.
Adding a pattern to your chunky cape is a great way to personalize your garment and showcase your knitting skills. Whether you choose to use cables or colorwork, following a pattern will guide you through the process and help you create a stunning finished product.
Creating the collar for your chunky cape
When knitting a chunky cape, the collar is an important feature that not only adds warmth but also enhances the overall look of the garment. Here are some steps to guide you in creating the collar for your chunky cape.
1. Measure the circumference of your neck: Before you start creating the collar, it is important to measure the circumference of your neck to ensure a proper fit. This will help you determine the number of stitches to cast on for the collar.
2. Cast on stitches: Based on your neck circumference measurement, cast on the required number of stitches using the chosen knitting technique. It is recommended to use a smaller size needle compared to the one used for the main body of the cape to achieve a snug fit.
3. Choose a suitable stitch pattern: The stitch pattern for the collar can be chosen to match or contrast with the main body of the cape, depending on your preference. You can opt for a simple ribbing pattern or experiment with different stitch patterns to add texture and interest to the collar.
4. Knit in the desired length: Continue knitting in the chosen stitch pattern for the desired length of the collar. You can refer to the knitting pattern for the cape for guidance on the appropriate length, or customize it according to your preference.
5. Bind off stitches: Once you have reached the desired length, bind off the stitches to secure the collar. Make sure to bind off loosely to prevent the collar from tightening around the neck.
6. Seam the collar to the cape: After completing the collar, it is time to seam it to the cape. Align the collar with the neck opening of the cape and use a yarn needle to sew it in place. Take care to match the stitches and ensure a seamless finish.
By following these steps, you can create a cozy and stylish collar for your chunky cape. Whether you choose a classic ribbed design or experiment with different stitch patterns, the collar will add an extra touch of elegance to your cape.
Finishing touches for your chunky cape
Once you have finished knitting your chunky cape, it’s time to add some finishing touches to complete the look. These final details will bring your cape to life and make it a unique accessory that you’ll love to wear.
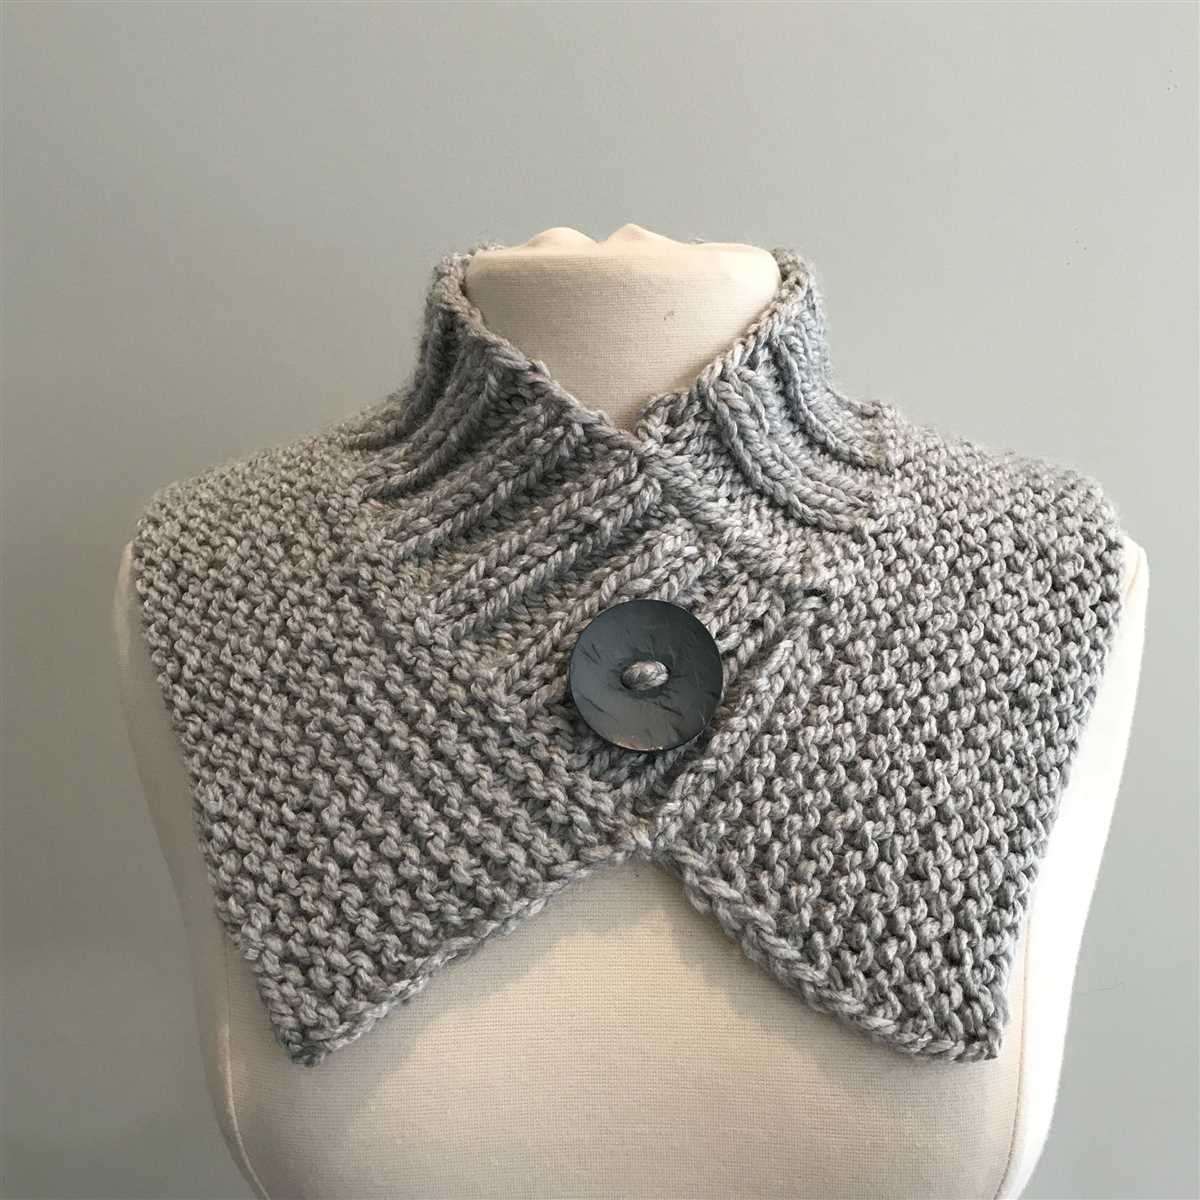
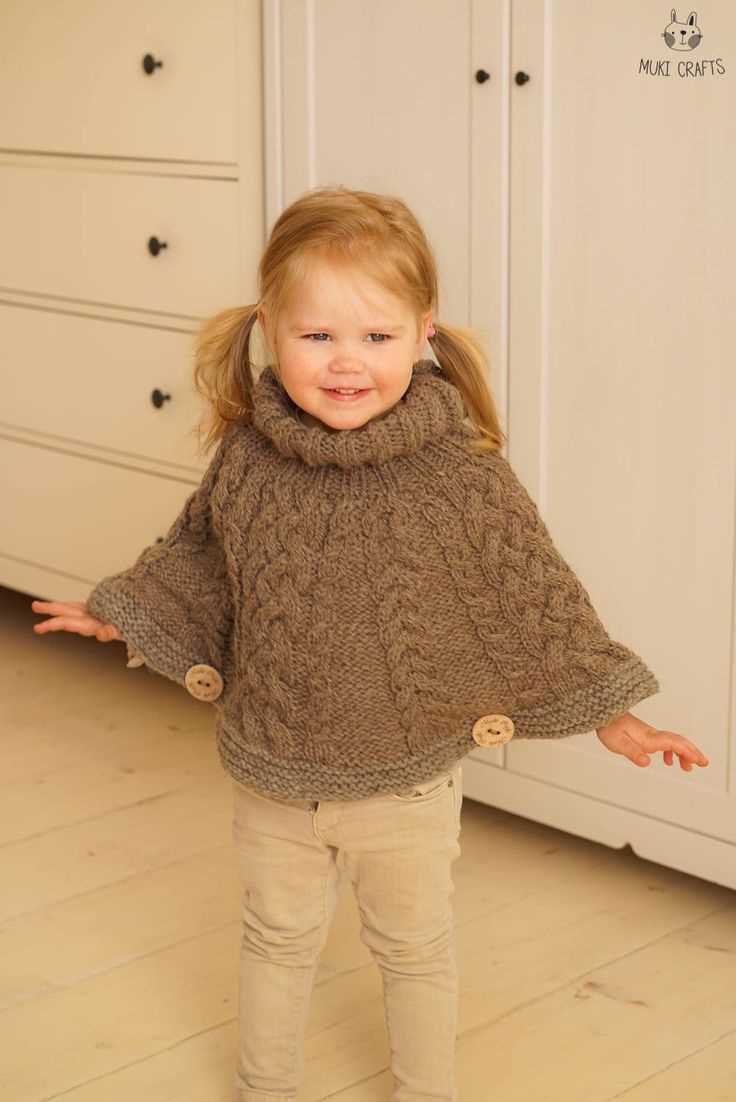
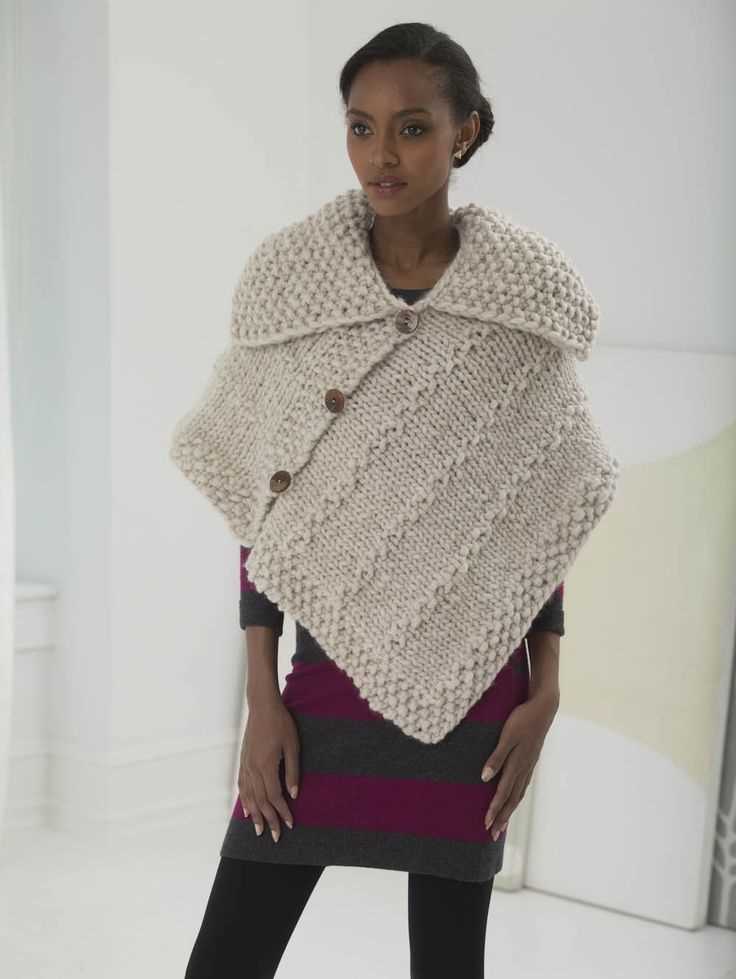
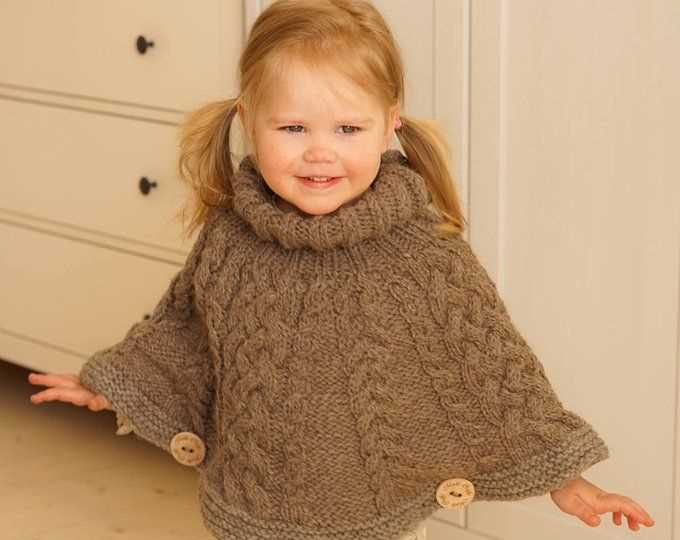
Selecting the right buttons: The choice of buttons can make a big difference in the overall look of your cape. Consider the color and size of the buttons in relation to the yarn and the style of your cape. Wooden or metal buttons can add a rustic touch, while colorful or patterned buttons can add a playful or chic element.
Adding a hood or collar: Depending on your personal style and the functionality you’re looking for, you might want to add a hood or a collar to your cape. A hood can add an extra cozy and warm touch, while a collar can give your cape a more sophisticated and tailored appearance. Consider the shape and size that best complements the overall design of your cape.
Decorative stitching: If you’re feeling adventurous, you can add some decorative stitching to your chunky cape. Embroidery or contrasting colored yarn can be used to create unique patterns or intricate designs. This can elevate the look of your cape and make it truly one-of-a-kind.
Blocking and steaming: After completing your cape, it’s important to block and steam it to ensure that it retains its shape and the stitches are even. Blocking will help to open up any lace or cable patterns, while steaming will give your cape a professional finish. Follow the care instructions for your yarn to determine the appropriate blocking and steaming techniques.
Final touches with accessories: To complete your chunky cape, consider adding some accessories to enhance your outfit. A wide belt can cinch in the waist and create a more tailored look, while a brooch or a pin can add a touch of elegance or whimsy. Experiment with different accessories to find the ones that best suit your personal style.
Blocking and caring for your chunky cape
Once you have finished knitting your chunky cape, it is important to block it to give it that final professional touch. Blocking is a process in which you wet the knitted garment and reshape it to the desired measurements. This helps to even out the stitches, open up lace patterns, and ensure that the cape hangs nicely when worn. Here are the steps to block your chunky cape:
1. Wet your cape:
Fill a basin or sink with lukewarm water and add a small amount of mild soap or wool wash. Gently submerge your cape into the water and let it soak for about 15 to 20 minutes. Avoid agitating or rubbing the cape to prevent felting.
2. Remove excess water:
After soaking, carefully lift the cape out of the water and squeeze it gently to remove excess water. Do not wring or twist the cape as this can distort its shape.
3. Shape the cape:
Lay a clean towel on a flat surface and place the damp cape on top. Use your hands to gently stretch and shape the cape to its desired measurements. Pay attention to the edges and any lace patterns, making sure they are evenly stretched.
4. Pin the cape:
Once the cape is in the desired shape, use rust-proof T-pins or blocking wires to secure it to the towel. Start at the center and work your way to the edges, pinning the cape at regular intervals. Smooth out any wrinkles or unevenness as you go.
5. Let it dry:
Leave the pinned cape to air dry completely. This can take anywhere from 24 to 48 hours, depending on the humidity and thickness of your cape. Avoid direct sunlight or heat sources as they can damage the fibers.
When it comes to caring for your chunky cape, it is recommended to hand wash it using a gentle detergent specifically designed for wool or delicate fabrics. Avoid using bleach or fabric softeners as they can cause damage. Gently squeeze out excess water after washing and lay it flat to dry. If needed, you can also lightly steam the cape to freshen it up and remove any wrinkles.
Properly blocking and caring for your chunky cape will help it maintain its shape and look its best for years to come. So take the time to give your cape the care it deserves, and you will be rewarded with a beautiful and cozy garment.
Chunky Cape Knitting Variations
Chunky cape knitting patterns offer a range of possibilities for creating unique and stylish capes. With their thick yarn and larger needles, chunky cape knitting projects are perfect for beginners and experienced knitters alike. These patterns allow for quick and satisfying projects, making them a popular choice among knitters looking for instant gratification.
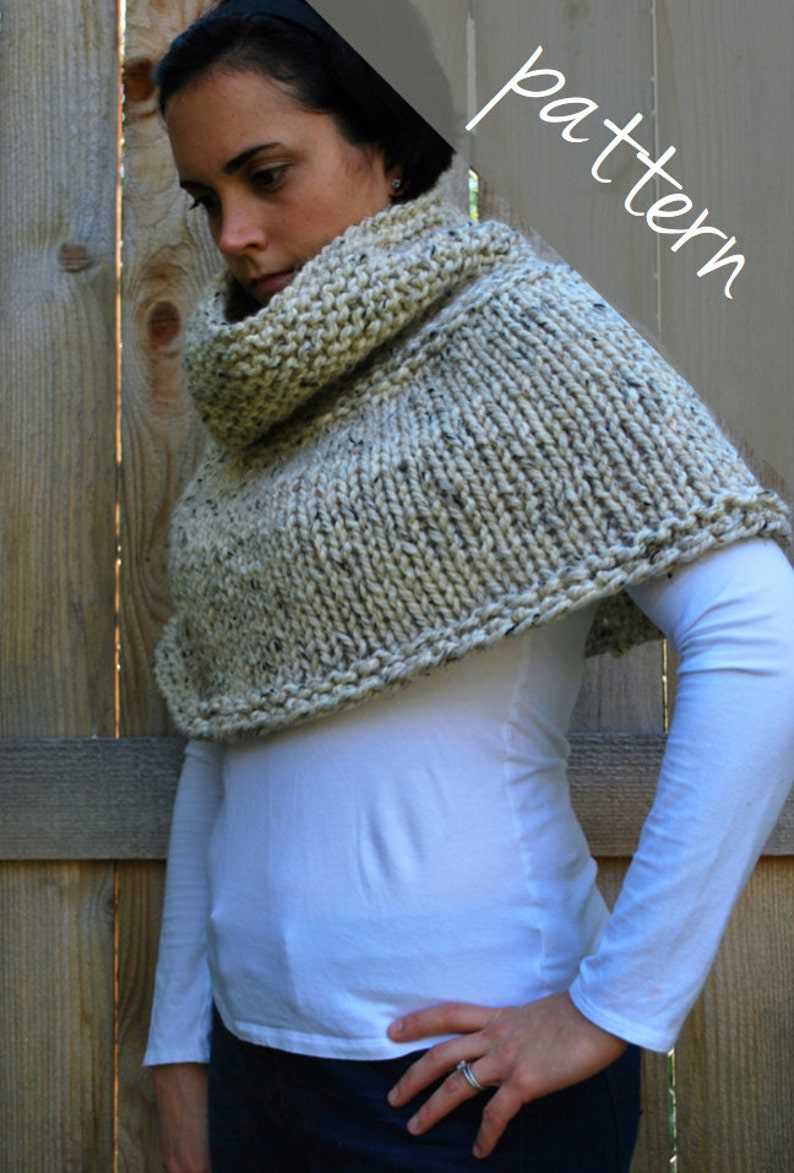
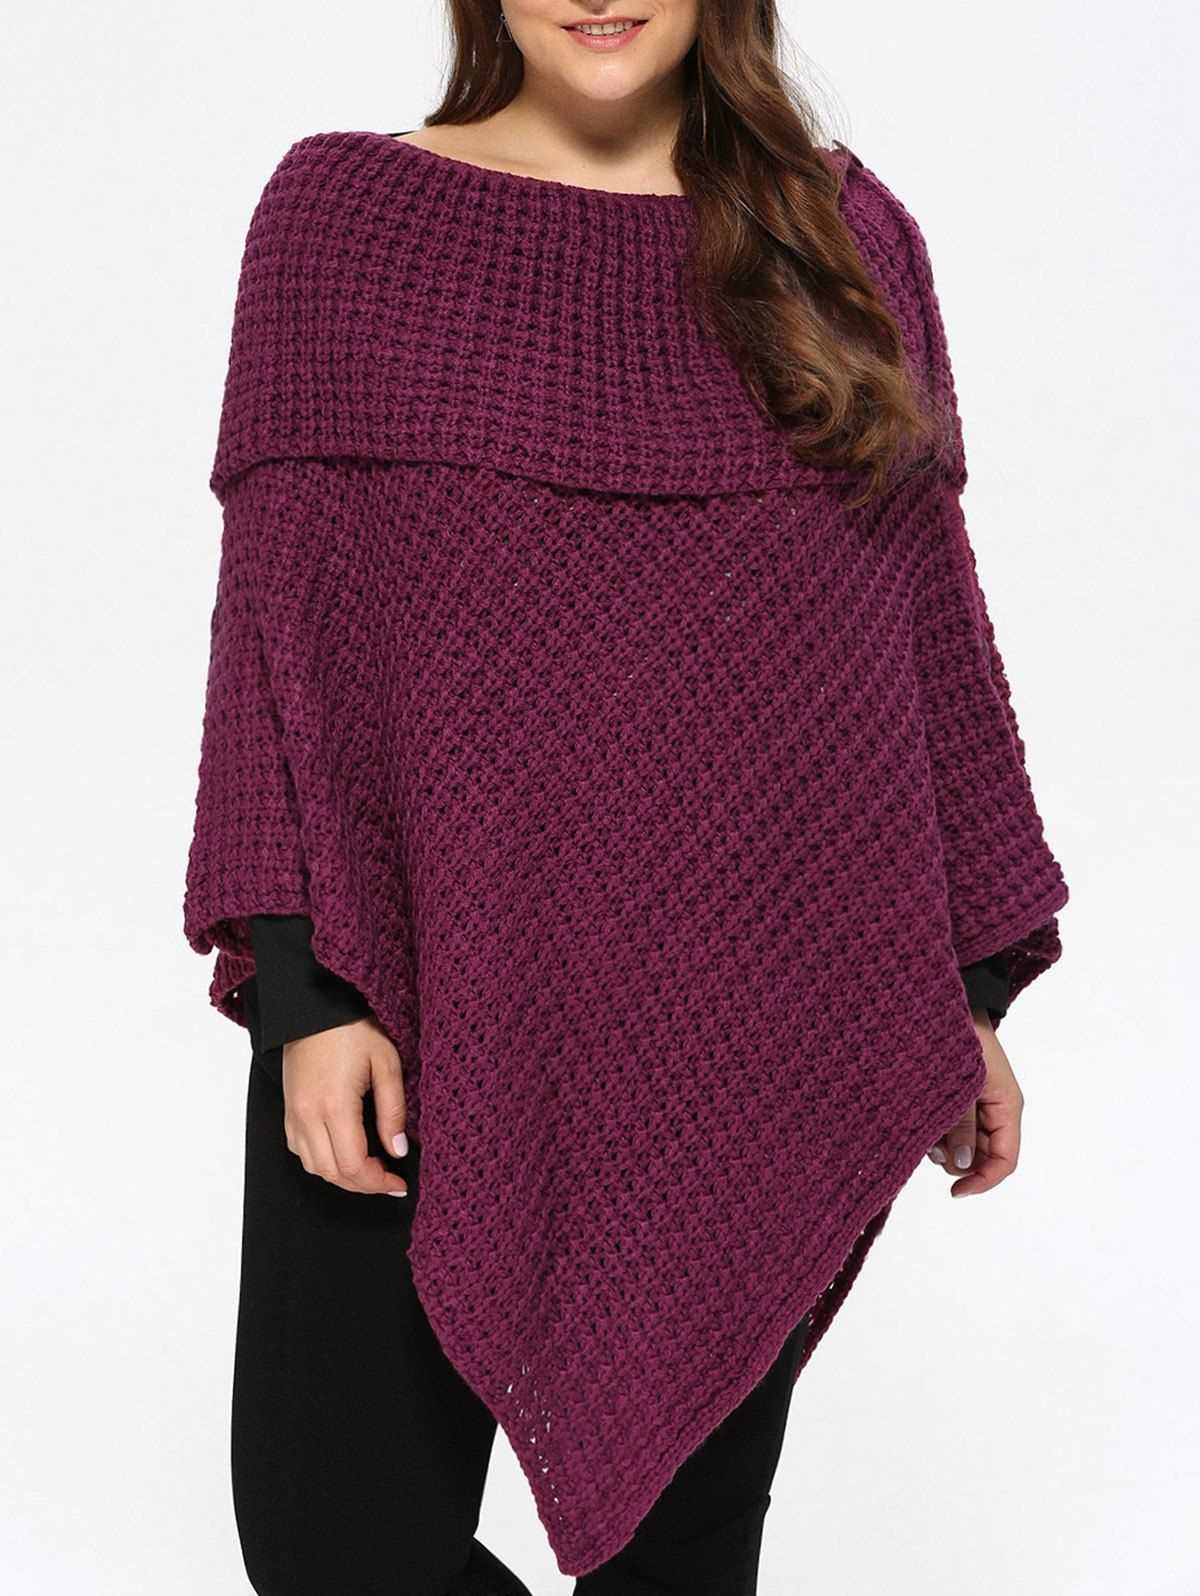
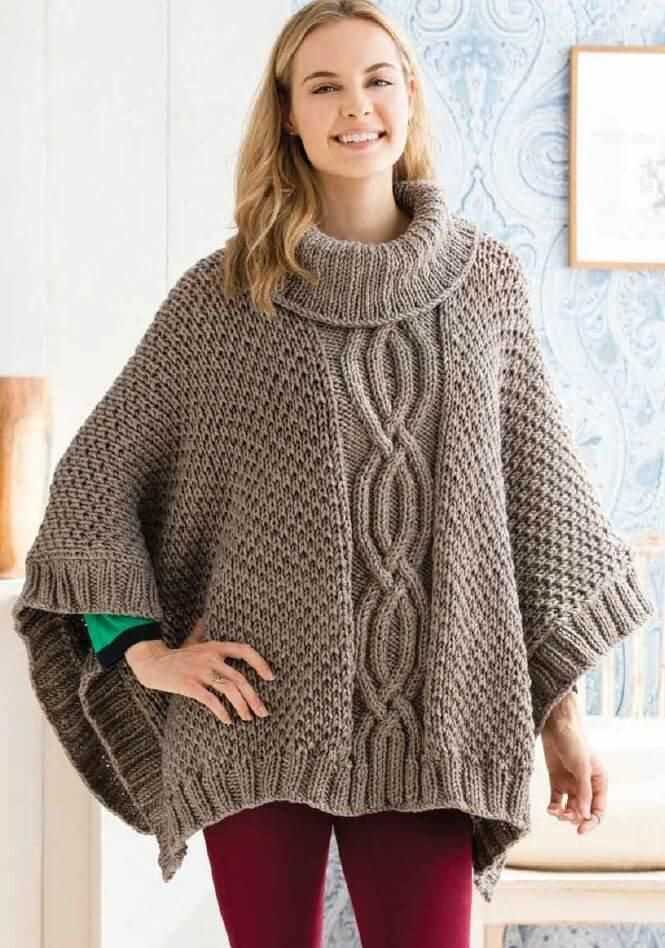
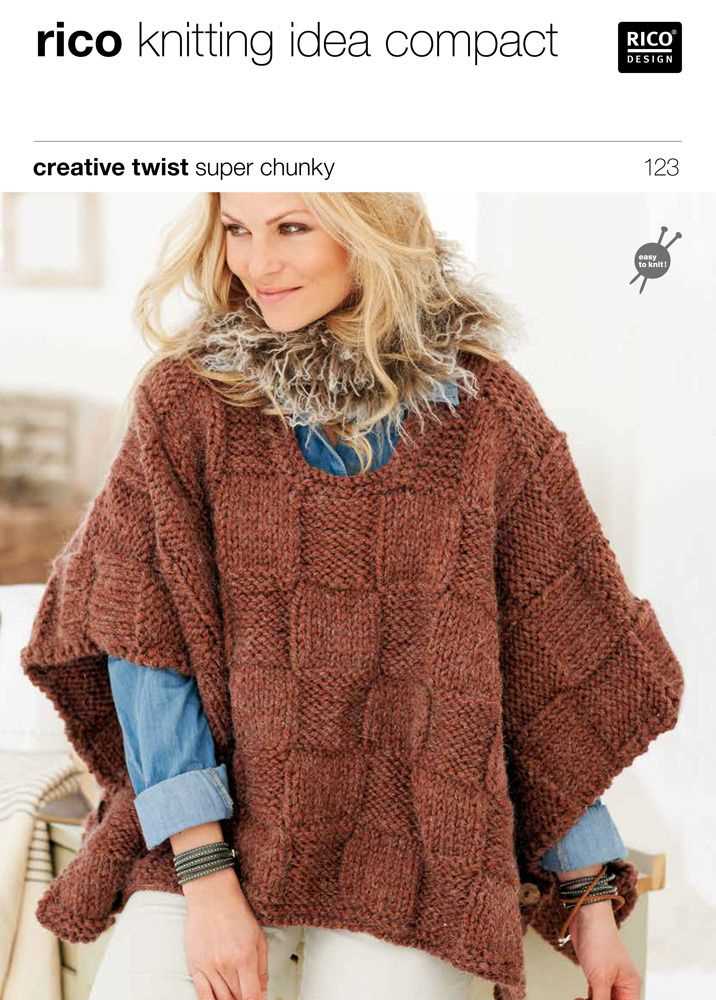
One popular variation of the chunky cape knitting pattern is the oversized cape. This style features a longer length and wider width, creating a loose and relaxed fit. The oversized cape is perfect for layering over sweaters and long-sleeve tops, adding a cozy and fashionable touch to any outfit. To create this variation, simply adjust the number of cast-on stitches and rows to achieve the desired dimensions.
Pattern Variation: Hooded Cape
Another popular variation is the hooded cape. This style adds an extra element of warmth and protection by incorporating a hood into the design. The hooded cape is perfect for chilly autumn and winter days, providing both style and functionality. To create this variation, simply follow the main chunky cape knitting pattern and add a separate hood section at the end. This can be done by picking up stitches along the neckline and knitting in the round or knitting the hood separately and sewing it onto the cape.
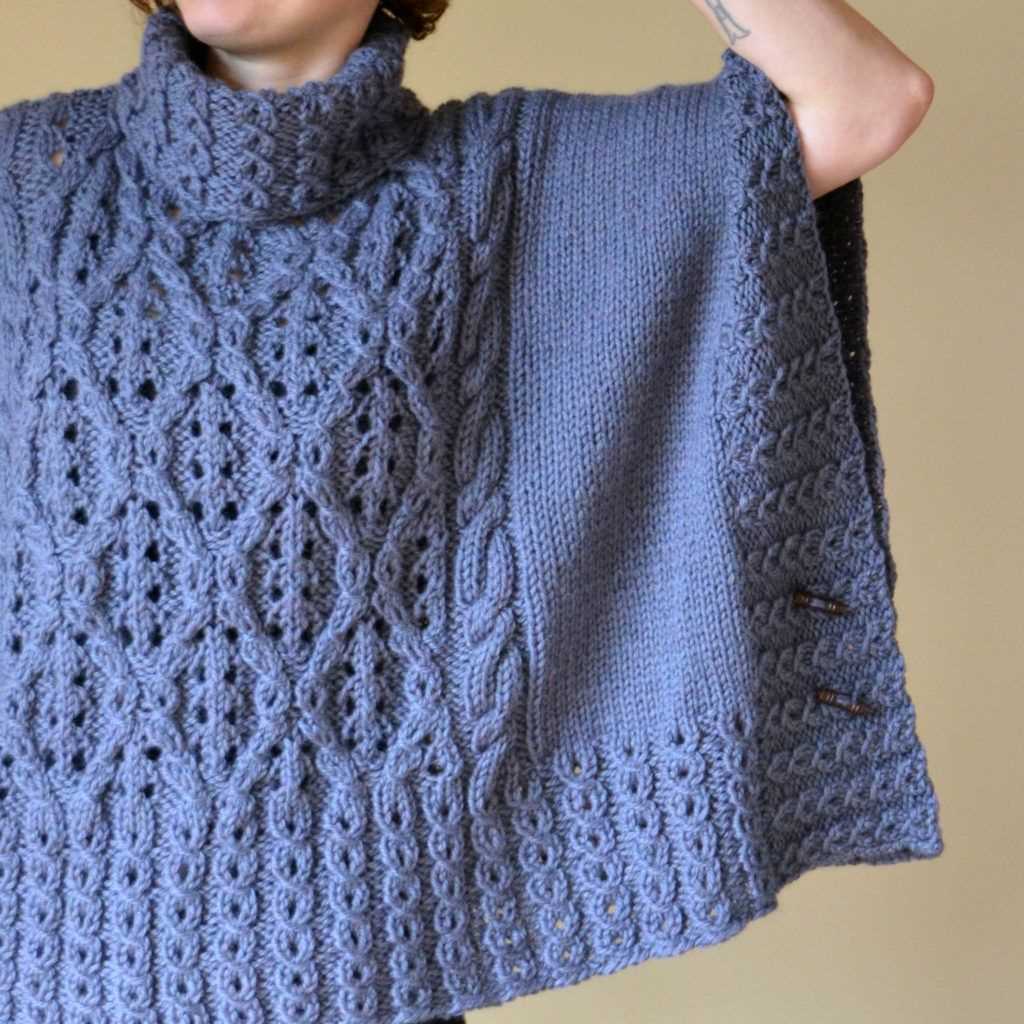
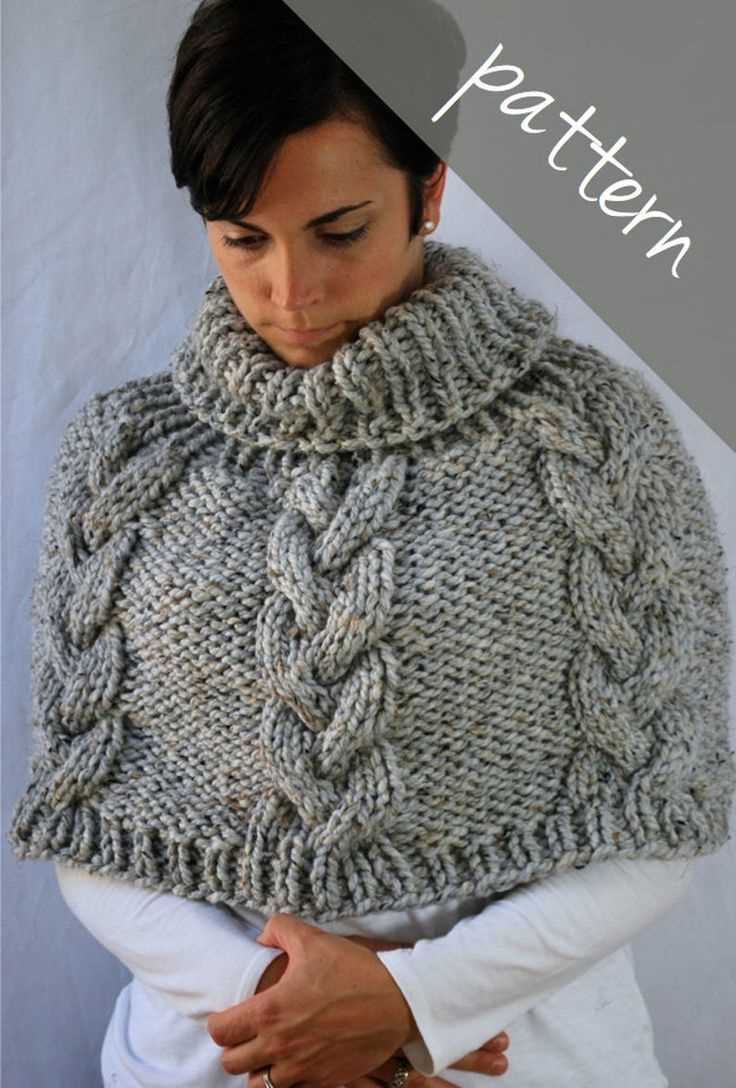
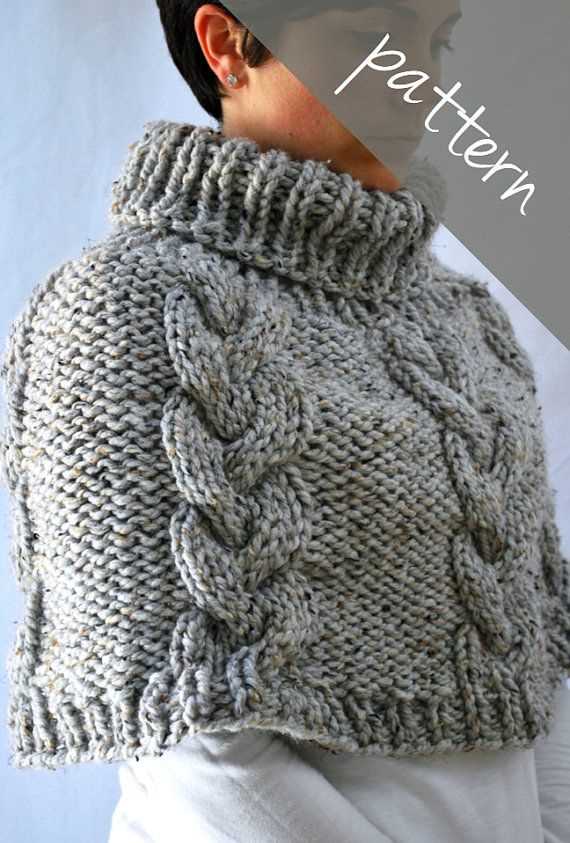
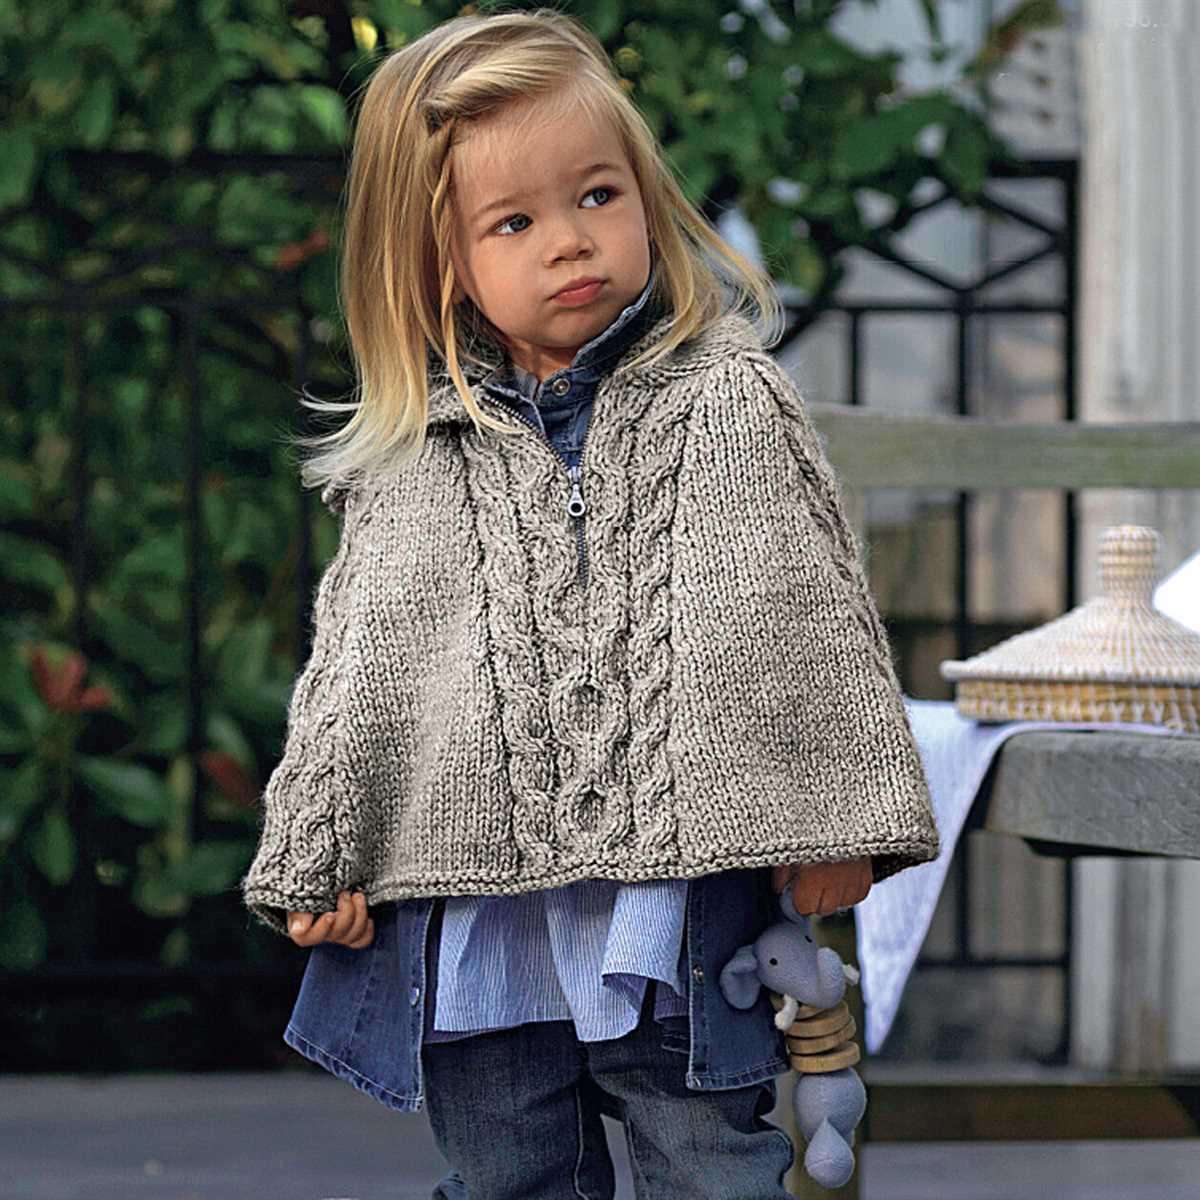
Pattern Variation: Cable Knit Cape
If you want to add texture and visual interest to your chunky cape, consider trying a cable knit variation. Cable knitting involves crossing stitches to create intricate patterns that stand out on the finished cape. This variation adds a touch of sophistication and elegance to the chunky cape, making it a versatile accessory for both casual and formal occasions. There are various cable knit patterns available, allowing you to explore different designs and create a unique cape that reflects your personal style.
In conclusion, chunky cape knitting variations offer endless possibilities for customization and creativity. Whether you prefer an oversized cape, a hooded cape, or a cable knit design, there is a pattern out there to suit your preferences. So grab your chunky yarn and knitting needles and start experimenting with these variations to create the perfect cape for yourself or as a thoughtful handmade gift for someone special.
Chunky Cape FAQs
Are you interested in knitting a chunky cape but have some questions before you start? Here are some frequently asked questions about chunky cape knitting patterns to help you get started:
What is a chunky cape?
A chunky cape is a cozy and fashionable accessory that can be worn over your shoulders and provides warmth during colder seasons. It is typically knit with chunky yarn and larger knitting needles to create a chunky and textured appearance.
Are chunky cape knitting patterns suitable for beginners?
Yes, chunky cape knitting patterns can be suitable for beginners. However, it is recommended to have some basic knitting skills such as casting on, knitting, purling, and binding off before attempting a chunky cape project. It is also helpful to have experience with knitting in the round or working with circular needles.
What materials do I need to knit a chunky cape?
To knit a chunky cape, you will need chunky yarn, typically labeled as bulky or super bulky, and larger knitting needles, such as US size 11 or larger. You may also need circular needles if you prefer to work in the round. Additionally, you will need basic knitting tools like stitch markers, a yarn needle, and scissors.
How long does it take to knit a chunky cape?
The time it takes to knit a chunky cape will vary depending on the complexity of the pattern, your knitting speed, and the amount of time you can dedicate to knitting each day. On average, it can take a few days to a couple of weeks to complete a chunky cape project.
Can I customize the size of a chunky cape?
Yes, you can customize the size of a chunky cape to fit your preferences. Most knitting patterns will include instructions on how to adjust the size by adding or decreasing stitches or rows. It is important to check your gauge before starting the project to ensure the cape will fit correctly.
Hopefully, these FAQs have answered some of your questions about knitting a chunky cape. Now you can confidently begin your chunky cape knitting project and enjoy the cozy and stylish result!
Chunky Cape Knitting Inspiration
If you’re looking for a cozy and stylish addition to your wardrobe, a chunky cape is the perfect choice. The versatility of a cape allows you to wear it casually or dress it up for a more elegant look. Whether you’re new to knitting or an experienced knitter, there are plenty of chunky cape knitting patterns available to inspire your next project.
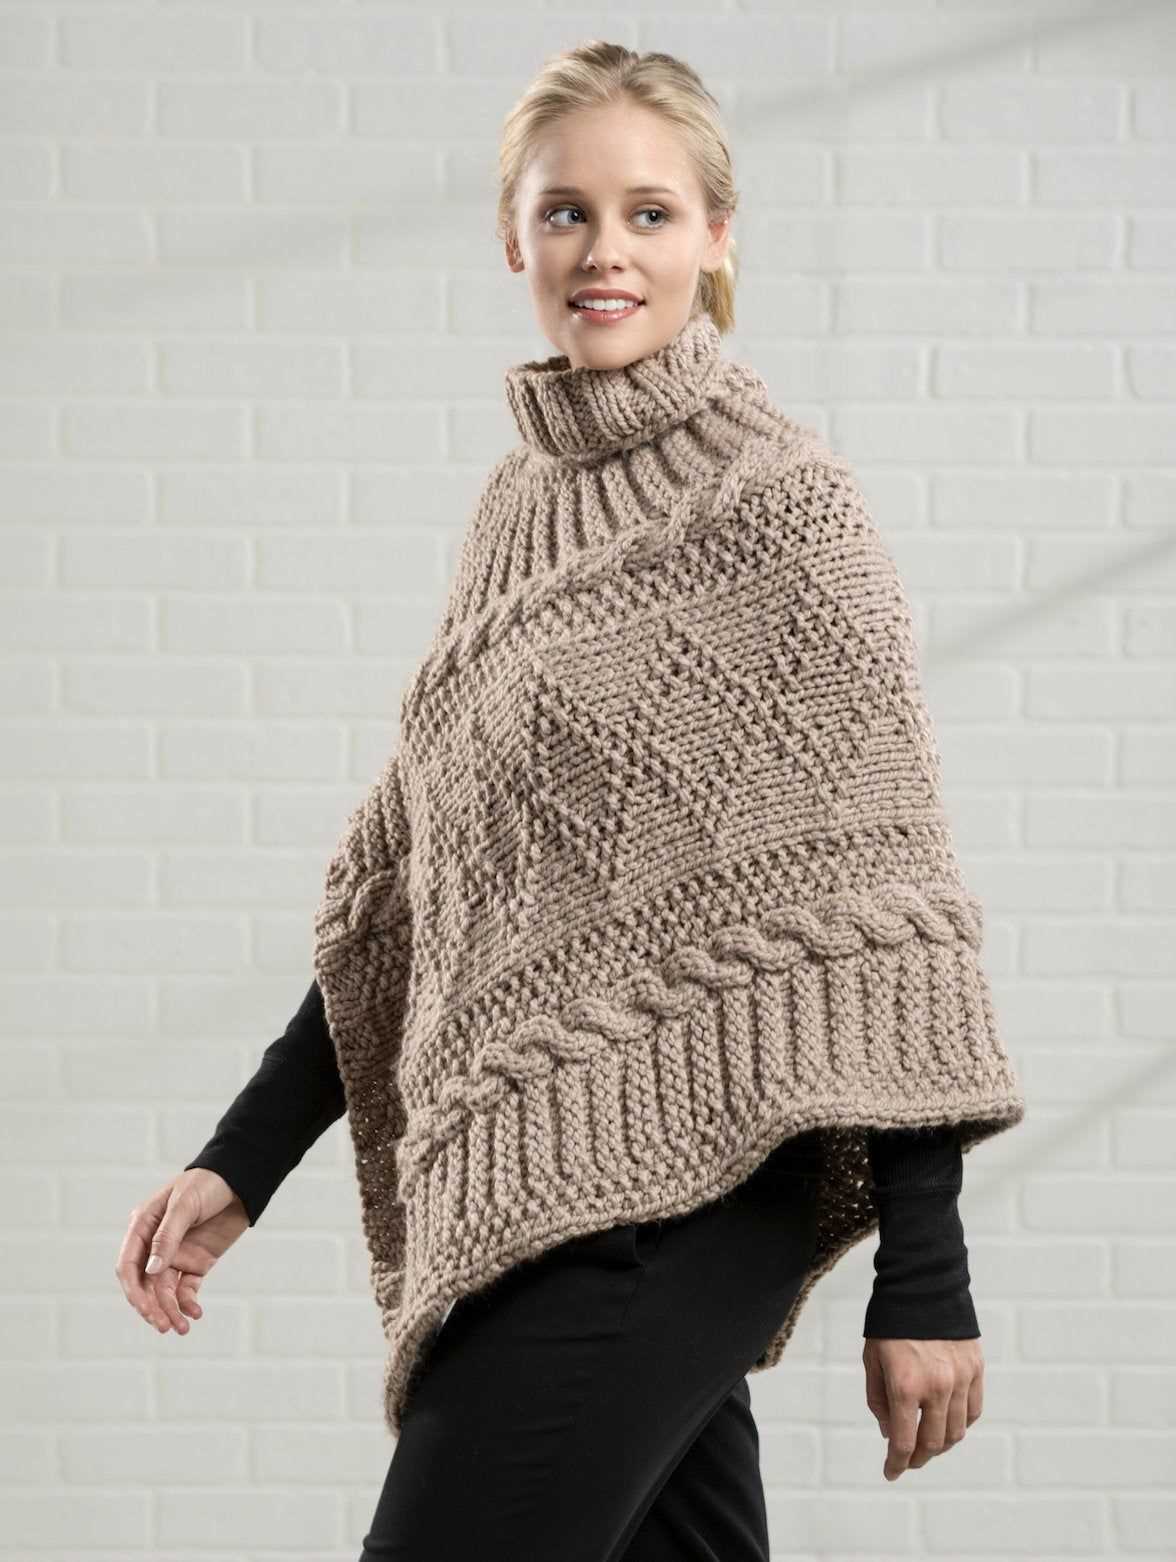
One popular chunky cape knitting pattern is the cable knit cape. This pattern features intricate cable designs that add texture and interest to the garment. The chunky yarn used creates a warm and cozy feel, perfect for colder weather. The cable knit cape can be worn with jeans and a sweater for a casual look, or paired with a dress and boots for a more dressed-up ensemble.
Another popular option is the oversized chunky cape. This style is perfect for those who love a dramatic look. The oversized design allows for maximum comfort and movement, while still keeping you warm. Knit with chunky yarn and large needles, this cape is a quick and satisfying project that will make a statement in your wardrobe.
For those looking for a more classic silhouette, the simple chunky cape knitting pattern is a great choice. This pattern features a clean and modern design that can be easily customized to your preference. Whether you prefer a longer length or a shorter cape, the simple chunky cape can be knit to your desired specifications.
Overall, chunky cape knitting patterns offer endless inspiration for creating a cozy and stylish addition to your wardrobe. Whether you choose a cable knit, oversized, or simple design, a chunky cape is sure to become a staple in your winter outfits. So grab your knitting needles and chunky yarn, and get ready to start your next project!