
Knitted pine cones are a popular and unique decoration that can add a touch of nature to your home or holiday decor. With their intricate texture and delicate shape, they are a fun and challenging project for knitters of all levels.
This article will provide you with a step-by-step guide on how to create your own knitted pine cones. We will cover the materials needed, the stitches required, and the techniques to achieve the desired texture. Whether you are a beginner knitter or an experienced one looking for a new challenge, this pattern is sure to inspire and bring a sense of creativity to your projects.
Knitted pine cones are versatile and can be used in various ways. You can use them as ornaments for your Christmas tree, as decorative accents for a wreath or garland, or even as standalone pieces on a mantelpiece or side table. The possibilities are endless, and you can let your imagination run wild with different color combinations and yarn choices to match your desired aesthetic.
What is a knitted pine cone pattern?
A knitted pine cone pattern is a set of instructions that allows you to create a knitted replica of a pine cone. This pattern typically includes details on the type of yarn and needles to use, as well as step-by-step instructions on how to create the various stitches needed to form the cone shape.
The pattern may also include instructions on how to add additional details such as protruding “scales” or a stem to make the knitted pine cone more realistic. Some patterns may even include suggestions on different color combinations to create a variety of pine cone looks.
Creating a knitted pine cone can be a fun and creative project for knitters of all skill levels. Whether you’re a beginner looking to practice your knitting skills or an experienced knitter looking for a unique and decorative project, a knitted pine cone pattern can provide an exciting challenge and a beautiful finished piece.
Knitted pine cones can be used in a variety of ways. They can be used as decorative ornaments for a holiday tree, incorporated into a wreath or garland, or even used as decorations for gift wrapping. They also make unique gifts for friends and family who appreciate handmade items.
Why choose a knitted pine cone pattern?
1. Unique and eye-catching: Knitted pine cones stand out from traditional decorations and add a touch of charm and whimsy to any setting.
2. Customization: With a knitted pine cone pattern, you can choose the colors and details that match your personal style and home decor.
3. Relaxing and rewarding: Knitting can be a calming and therapeutic activity, and creating a knitted pine cone allows you to enjoy the process while creating a beautiful finished piece.
4. Versatile and multifunctional: Knitted pine cones can be used in various ways, making them a versatile addition to your holiday or home decor.
5. Handmade and meaningful: Handmade items are always special, and gifting a knitted pine cone shows that you put time, effort, and love into creating something unique for someone.
Materials needed for knitting a pine cone pattern
When it comes to knitting a pine cone pattern, there are several materials you will need to gather before getting started. These materials are essential for creating the intricate texture and design that makes this pattern so unique.
- Yarn: Choose a yarn that is suitable for the project, such as a medium weight yarn in a color that resembles a pine cone, such as brown or beige.
- Knitting Needles: You will need a pair of knitting needles in a size appropriate for your chosen yarn. The size will be specified in the pattern or you can use the recommended size on the yarn label.
- Tapestry Needle: This needle is used for weaving in ends and sewing any necessary seams.
- Stitch Markers: Stitch markers are helpful for keeping track of certain sections or stitches within the pattern.
- Scissors: A pair of scissors is necessary for cutting the yarn when needed.
In addition to these basic materials, you may also need some optional tools or materials depending on the pattern or your personal preferences. These could include:
- Cable Needle: If the pine cone pattern includes cables, a cable needle will be required for crossing stitches.
- Row Counter: A row counter can be helpful for keeping track of your progress and ensuring accuracy.
- Blocking Tools: If you wish to block your finished project, you may need blocking pins and a blocking mat.
- Embroidery Thread or Beads: Some pine cone patterns include embellishments such as embroidered stitches or beads. If desired, you will need the necessary materials for these decorative elements.
By gathering these materials before starting your pine cone knitting project, you will be well-prepared to create a beautiful and intricate design that captures the essence of nature’s beauty.
Basic knitting stitches used in the pattern
In the knitted pine cone pattern, several basic knitting stitches are used to create the intricate texture and shape of the pine cone. These stitches include the knit stitch, purl stitch, and yarn over.
Knit stitch: The knit stitch is the most basic and commonly used stitch in knitting. It is created by inserting the right needle into the front of the stitch on the left needle, wrapping the yarn around the right needle, and pulling it through to create a new loop on the right needle. This stitch creates a smooth and neat fabric.
Purl stitch: The purl stitch is another basic stitch in knitting. It is essentially the reverse of the knit stitch. To create a purl stitch, the right needle is inserted into the front of the stitch on the left needle, but instead of wrapping the yarn around the right needle, it is wrapped in front of the right needle. The yarn is then pulled through to create a new loop on the right needle. The purl stitch creates a bumpy texture on the fabric, which is often used for ribbing or adding contrast to a knitted piece.
Yarn over: The yarn over stitch is used to increase the number of stitches in a row and create decorative eyelet holes in the knitting. It is done by simply wrapping the yarn around the right needle before knitting the next stitch. This creates an extra loop on the right needle, which is then counted as a stitch. Yarn overs are often used in lace knitting patterns to create intricate designs and patterns.
The combination of these basic knitting stitches in the knitted pine cone pattern results in a beautiful and textured pine cone design that can be used for various knitting projects, such as hats, scarves, or decorative ornaments.
Step-by-step instructions for knitting a pine cone
In this tutorial, we will guide you through the process of knitting a pine cone using a simple pattern. Knitting a pine cone can be a fun and creative way to add a touch of nature to your home décor or to create unique accessories.
Materials:
- Worsted weight yarn in brown
- Knitting needles (size 6)
- Tapestry needle
- Scissors
Instructions:
- Cast on 6 stitches.
- Row 1: Knit all stitches.
- Row 2: Purl all stitches.
- Row 3: Increase in each stitch (12 stitches).
- Row 4: Knit all stitches.
- Row 5: Purl all stitches.
- Row 6: *(Knit 1, increase 1)* repeat the pattern till the end of the row.
- Row 7: Purl all stitches.
- Row 8: Knit all stitches.
- Row 9: *(Knit 2, increase 1)* repeat the pattern till the end of the row.
- Row 10: Purl all stitches.
- Row 11: Knit all stitches.
- Row 12: *(Knit 3, increase 1)* repeat the pattern till the end of the row (30 stitches).
Continue knitting in stockinette stitch (knit one row, purl one row) until your pine cone reaches the desired height. Once you are satisfied with the height, you can start decreasing stitches to give the pine cone its conical shape.
To decrease stitches:
- Row 1: *(Knit 3, knit 2 together)* repeat the pattern till the end of the row.
- Row 2: Purl all stitches.
- Row 3: *(Knit 2, knit 2 together)* repeat the pattern till the end of the row.
- Row 4: Purl all stitches.
- Row 5: *(Knit 1, knit 2 together)* repeat the pattern till the end of the row.
- Row 6: Purl all stitches.
- Row 7: *(Knit 2 together)* repeat the pattern till the end of the row.
Once you have decreased all stitches, cut the yarn leaving a long tail and thread it through the tapestry needle. Pass the needle through the remaining stitches and pull tight to close the top of the pine cone. Weave in any loose ends and your knitted pine cone is complete!
Tips and Tricks for Creating a Realistic Texture
When creating a knitted pine cone pattern, it’s important to pay attention to the texture in order to make it look as realistic as possible. Here are some tips and tricks to help you achieve the desired effect:
1. Choose the right yarn:
The type of yarn you use can greatly impact the texture of your knitted pine cone. Opt for a yarn with a bit of texture, such as a tweed or boucle yarn, to create depth and dimension. Look for yarns that have variations in color or thickness to mimic the natural variations in a pine cone.
2. Use textured stitches:
Experiment with different stitch patterns to add texture to your knitted pine cone. Consider using seed stitch, moss stitch, or even cables to create the appearance of overlapping scales or ridges. These textured stitches will help to mimic the natural texture of a pine cone.
3. Incorporate colorwork:
To make your knitted pine cone pattern even more realistic, consider incorporating colorwork techniques. Use different shades of brown and green to mimic the natural colors of a pine cone. Introduce subtle color changes within your knitting to create depth and dimension.
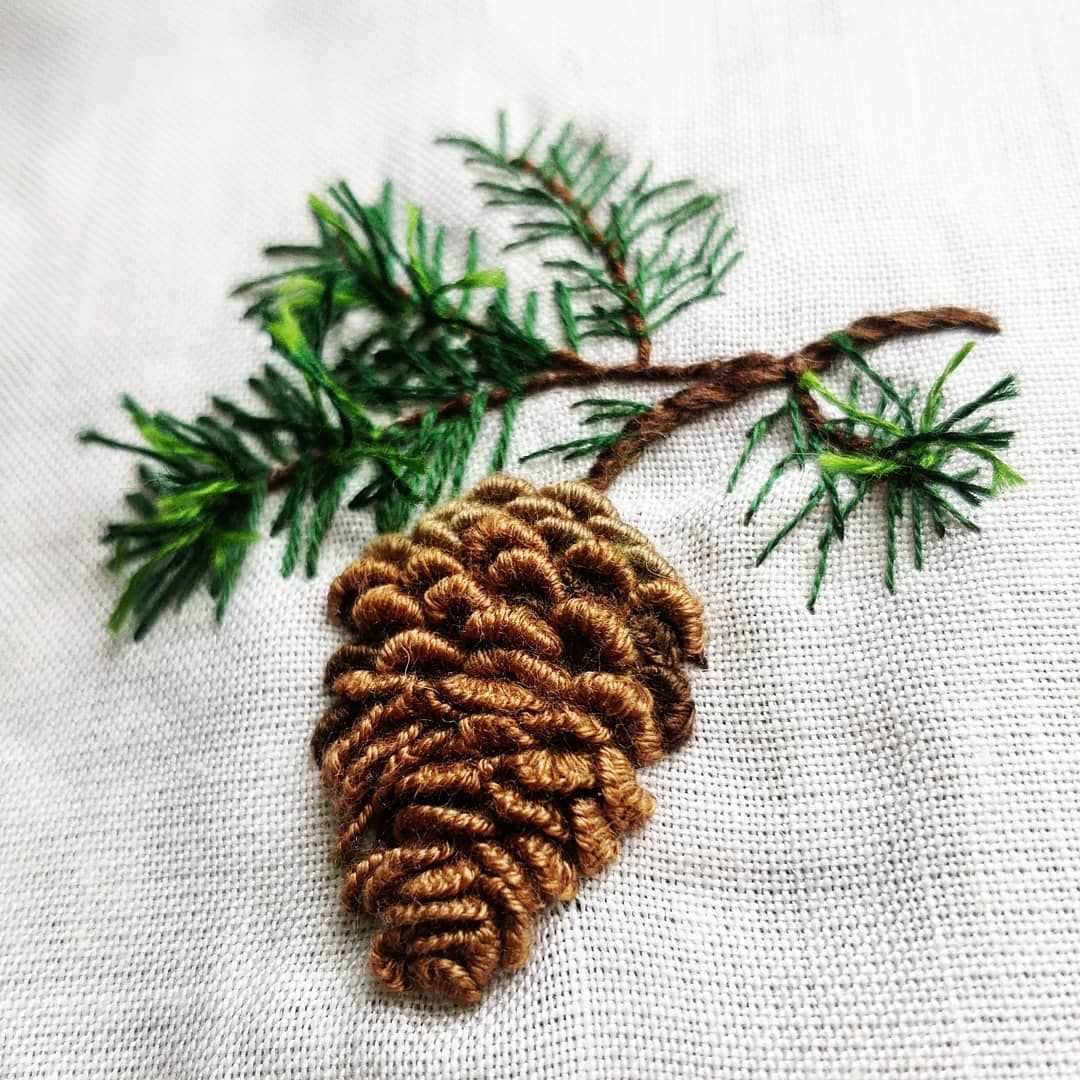
4. Add details with embroidery:
To really bring your knitted pine cone to life, add some details with embroidery. Use a contrasting color of yarn to create small stitches that mimic the texture of scales or small lines on the pine cone. These details will help to make your knitted pine cone look even more realistic.
- Choose the right yarn.
- Use textured stitches.
- Incorporate colorwork.
- Add details with embroidery.
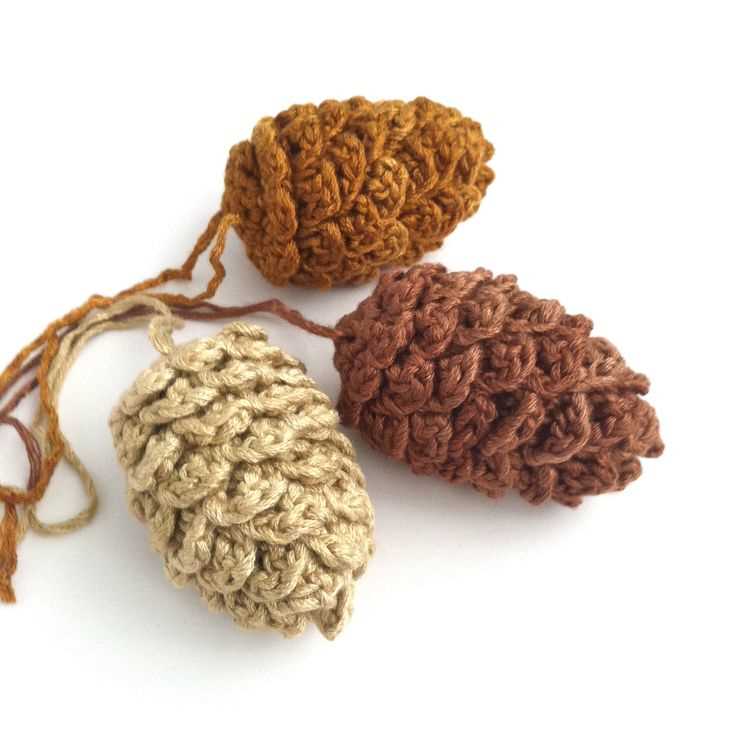
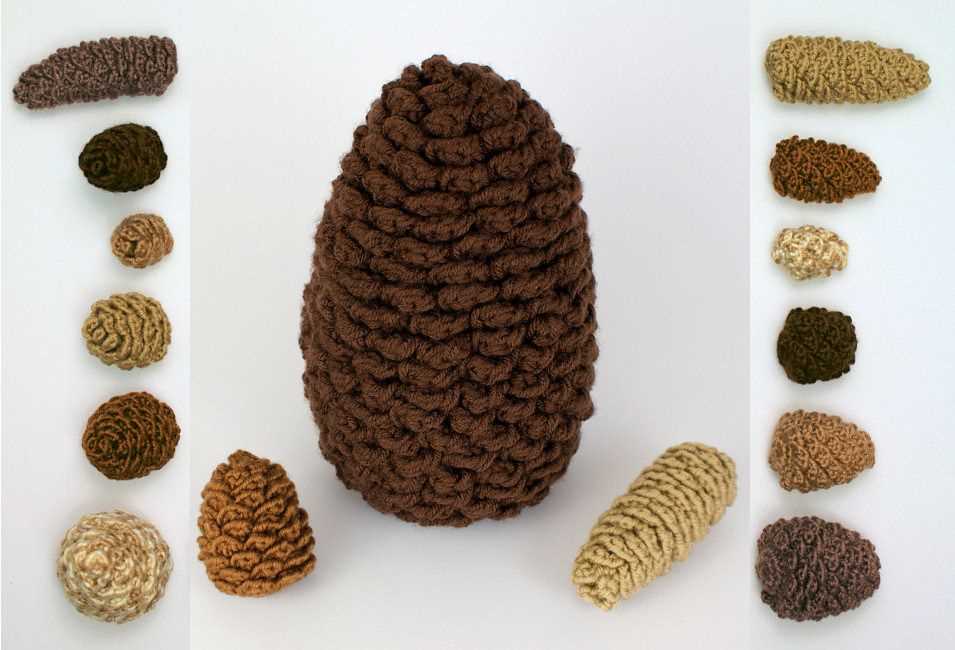
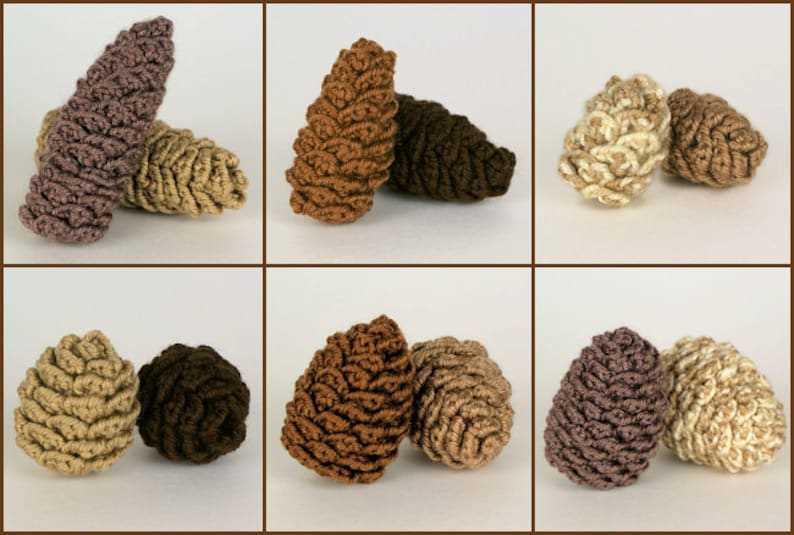
Different Variations and Sizes of Knitted Pine Cones
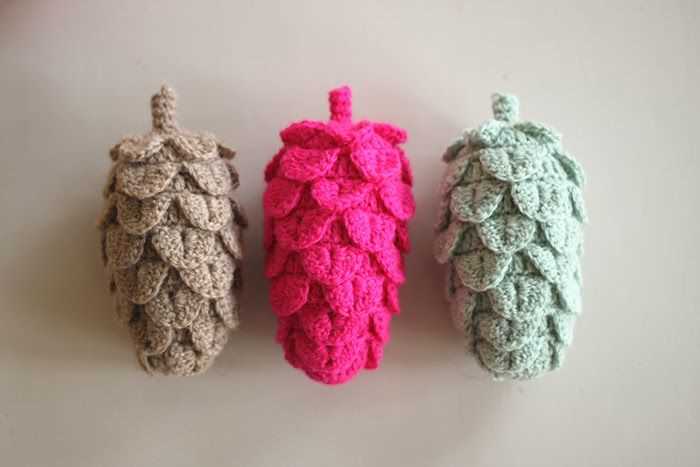
If you are a fan of knitting and looking for a unique and nature-inspired project, knitted pine cones are a great option. These adorable and realistic pine cones can be used as decorative items, Christmas ornaments, or even as toys for children. The best part is that you can create them in different variations and sizes to suit your preferences and needs.
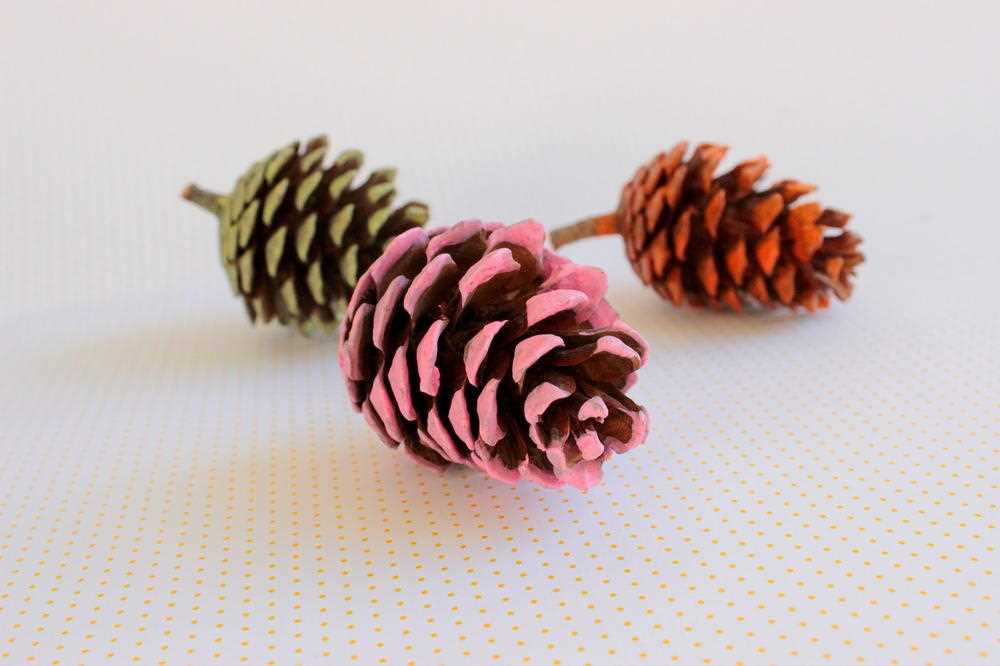
When it comes to knitting pine cones, there are plenty of possibilities. You can experiment with various yarn colors and textures to achieve different effects. For a more natural look, you can use brown or green yarn to mimic the colors of real pine cones. Alternatively, you can get creative and use vibrant and contrasting colors to make your pine cones stand out.
Furthermore, you can vary the size of your knitted pine cones to create a diverse collection. From tiny miniatures that can be attached to keychains or used as charms, to larger sizes that can be displayed as standalone decorative pieces, the choice is yours. Knitting patterns for different sizes of pine cones can be found online, or you can even come up with your own designs based on your knitting skills and experience.
Whether you are an experienced knitter or just starting out, knitting pine cones can be a fun and rewarding project. So grab your knitting needles, choose your favorite yarn, and start creating your very own collection of knitted pine cones today!
Choosing the right yarn for a pine cone pattern
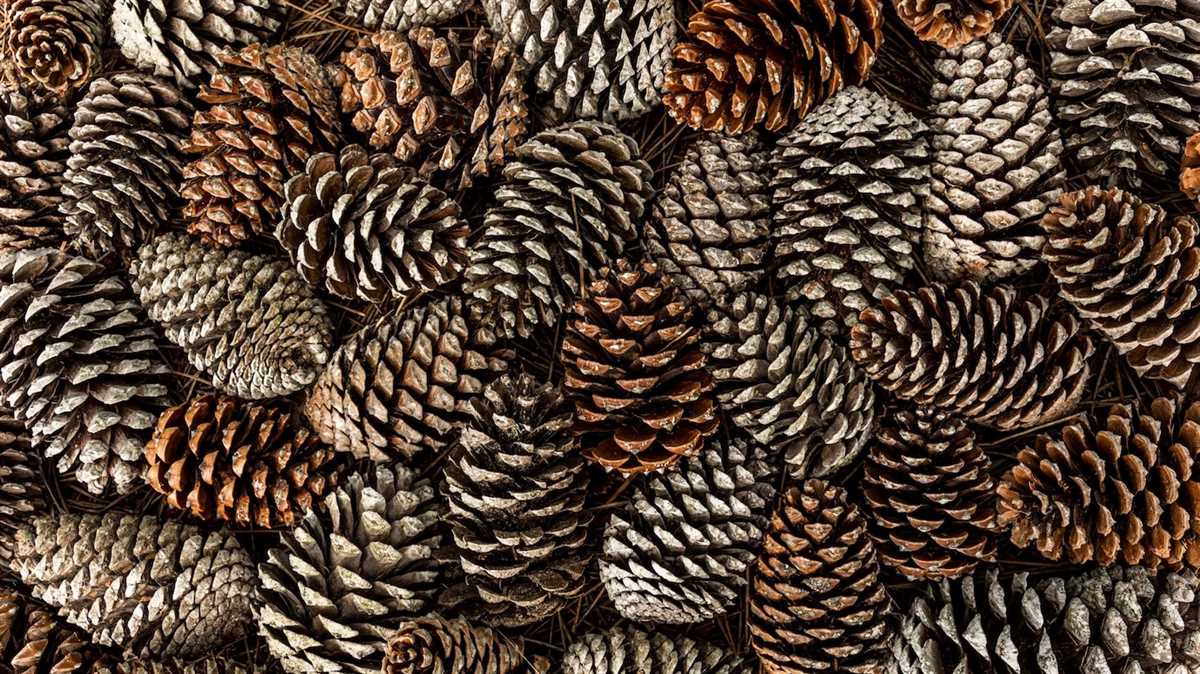
When it comes to knitting a pine cone pattern, choosing the right yarn is an important decision that will greatly impact the final result. The texture, weight, and color of the yarn will all play a role in bringing out the intricate details and adding character to the pine cone design.
Texture: A yarn with a textured feel, such as a tweed or boucle, can mimic the appearance of the pine cone’s natural texture. This can enhance the overall look and make the knitting project more visually appealing.
Weight: The weight of the yarn will determine the size and density of the pine cone. If you want a smaller, more delicate pine cone, opt for a finer weight yarn such as lace or fingering. On the other hand, if you prefer a larger and more substantial pine cone, choose a bulkier weight yarn like chunky or bulky.
Color: The color of the yarn is another important consideration. To create a realistic pine cone, choose a yarn color that closely resembles the natural shades of pine cones, such as brown, tan, or gray. However, if you want a more whimsical or creative interpretation of a pine cone, feel free to experiment with different color options.
Fiber: The choice of fiber can also impact the final result. Natural fibers like wool, alpaca, or cotton can provide warmth and texture, while synthetic fibers like acrylic can offer durability and easy care. Consider the intended use of the knitted pine cone and choose a fiber that aligns with your preferences.
Overall, selecting the right yarn for a pine cone pattern requires careful consideration of texture, weight, color, and fiber type. Experimenting with different options can help you achieve the desired effect and create a unique knitted pine cone masterpiece.
Adding Embellishments to Enhance the Pine Cone Design
When it comes to knitting a pine cone pattern, adding embellishments can take the design to the next level. By incorporating various techniques and materials, you can enhance the texture and visual appeal of your knitted pine cone.
1. Beads: One way to add a touch of elegance to your knitted pine cone is to incorporate beads into the design. You can strategically sew on beads to mimic the scales of a pine cone, creating an eye-catching effect. Consider using beads in earthy tones such as brown or gold to stay true to the natural appearance of a pine cone.
2. Embroidery: Another way to enhance the pine cone design is through embroidery. You can use contrasting yarn colors to embroider delicate details on the knitted surface, such as the lines and grooves found on a real pine cone. This technique adds depth and dimension, making your knitted pine cone look more realistic.
3. Felted leaves: To complete the pine cone motif, you can knit or crochet small leaves and felt them to add a touch of green. These felted leaves can be attached to the base of the pine cone, creating a more organic and nature-inspired design. Consider using different shades of green for a more realistic and vibrant look.
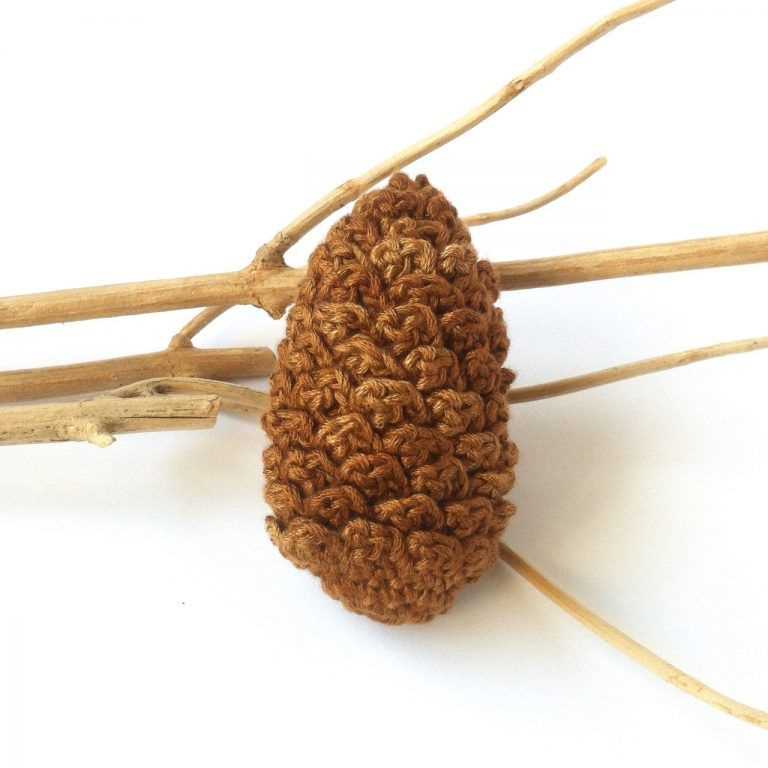
4. Ribbon or twine: If you want to add an element of rustic charm to your knitted pine cone, consider attaching a ribbon or twine to the top. This can act as a hanging loop or simply add a decorative touch. Choose a ribbon or twine in earthy tones or opt for a natural material like jute for an authentic and rustic feel.
5. Glitter or metallic thread: For a more festive or glamorous twist on the knitted pine cone, consider incorporating glitter or metallic thread into your design. You can use these materials to highlight certain areas of the pine cone, adding sparkle and shine. Just be mindful of the overall aesthetic you want to achieve and use these embellishments sparingly.
- By adding beads, embroidery, felted leaves, ribbon or twine, and glitter or metallic thread, you can enhance the pine cone design and elevate it from a simple knitting project to a unique and eye-catching decorative piece.
- Experiment with different embellishments and techniques to achieve the desired effect for your knitted pine cone. You can also combine multiple embellishments to create a one-of-a-kind design.
- Remember to consider the overall style and purpose of your knitted pine cone when selecting embellishments. Whether you want a natural and earthy look or a more festive and glamorous appearance, there are countless ways to enhance the pine cone design.
Finishing touches and blocking techniques
When you have finished knitting your pine cone pattern, there are a few steps you can take to ensure that your project looks its best. Adding the right finishing touches and employing blocking techniques can make a significant difference in the overall appearance of your knitted pine cones.
Blocking Techniques:
- Steam blocking: One way to block your knitted pine cones is by using steam. Gently hover the steam iron a few inches above the knitted piece, being careful not to touch it directly. The steam will help relax and shape the stitches, resulting in a more polished look.
- Wet blocking: Another blocking technique involves wetting the knitted pine cones and then pinning them into shape. Fill a basin with lukewarm water and a small amount of mild detergent. Immerse the pine cones in the water and let them soak for about 10-15 minutes. Remove excess water by gently pressing the pieces against a towel. Then, using rust-proof pins or blocking wires, pin the pine cones into the desired shape and allow them to dry completely.
Finishing Touches:
Once your knitted pine cones are blocked and dry, you can add some finishing touches to enhance their visual appeal:
- Embroidery: Use embroidery floss or a thin yarn in a contrasting color to add small details to your pine cones. Embroider stitches to mimic the scales, veins, or any other texture you desire.
- Attach a stem: To make your pine cones more realistic, you can attach a small piece of twine or twisted yarn as a stem. Secure it to the top center of the pine cone using a yarn needle and small stitches.
- Add a loop: If you plan to use the knitted pine cones as ornaments, you can add a loop for hanging. Take a piece of ribbon or yarn, fold it in half, and create a small loop at the fold. Attach it to the top center of the pine cone using a yarn needle and small stitches.
By incorporating these finishing touches and applying the appropriate blocking techniques, you can elevate the appearance of your knitted pine cones and create stunning decorative pieces that will impress everyone who sees them.
Creative ways to use knitted pine cones
Knitted pine cones can be an incredibly versatile and creative craft item to incorporate into various projects. With their charming texture and unique shape, they can add a touch of nature-inspired beauty to any project. Here are a few creative ways you can use knitted pine cones:
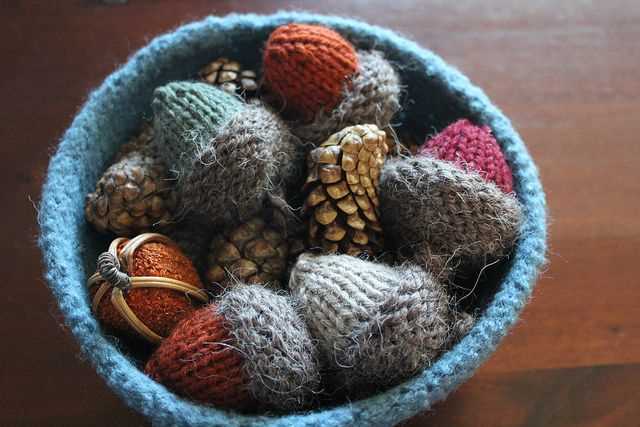
1. Home decor
Knitted pine cones can make beautiful additions to your home decor. You can use them as decorative accents on shelves or coffee tables, or even string them together to create a unique garland. Their soft texture and earthy color can bring a cozy and natural feel to any room.
2. Holiday ornaments
Knitted pine cones can also be turned into adorable holiday ornaments. You can hang them on your Christmas tree or use them to decorate wreaths or gift packages. By choosing different colors of yarn and adding small embellishments like beads or ribbons, you can create personalized and festive ornaments.
3. Jewelry
If you’re looking for a unique and nature-inspired accessory, consider using knitted pine cones to create jewelry. You can turn them into earrings, necklaces, or bracelets by attaching them to chains or cords. The intricate design of the knitted cone will add an artistic and eye-catching element to your jewelry collection.
4. Table centerpieces
Knitted pine cones can also be a charming addition to your table centerpieces. Combine them with other natural elements like flowers, leaves, or twigs to create a rustic and elegant display. You can arrange them in a bowl or scatter them across the table for a natural and cozy touch.
5. Gift toppers
Add a special touch to your gifts by using knitted pine cones as unique gift toppers. Simply attach them to the ribbons or bows on your presents, and they will instantly elevate the overall look. Your recipients will appreciate the handmade and thoughtful touch.
These are just a few examples of how you can get creative with knitted pine cones. Their versatility and natural charm make them an excellent choice for various craft projects. Let your imagination guide you, and enjoy the process of incorporating these knitted beauties into your creative endeavors!
Troubleshooting common issues in knitting pine cones
Knitting pine cones can be a fun and rewarding project, but it’s not always smooth sailing. Here are some common issues you may encounter while knitting pine cones and how to troubleshoot them.
1. Uneven stitches
If your stitches are not coming out evenly, it can affect the overall look of your pine cone. This can be caused by various factors such as inconsistent tension or using the wrong size needles. To fix this issue, try to maintain consistent tension throughout your knitting and make sure you are using the correct needle size recommended in the pattern.
2. Gaps between stitches
Gaps between stitches can make your pine cone look less polished. This can happen when you accidentally skip a stitch or don’t knit it tightly enough. To fix this, carefully review your pattern and make sure you are not skipping any stitches. Additionally, pay attention to your tension and make sure to knit each stitch tightly enough to avoid gaps.
3. Uneven shaping

Shaping is an important part of knitting pine cones, but sometimes it can turn out uneven. This can happen if you are not following the shaping instructions accurately or if you are not counting your stitches correctly. To tackle this issue, double-check the shaping instructions in the pattern and make sure you are counting your stitches accurately. Using stitch markers can also help you keep track of your stitches during shaping.
4. Wrong size pine cone
If your knitted pine cone turns out to be a different size than what is specified in the pattern, it can be frustrating. This can be caused by using different yarn weights or not achieving the correct gauge. To avoid this issue, make sure to use the recommended yarn weight and always check your gauge before starting your project. Adjust your needle size if necessary to match the pattern’s gauge and achieve the correct size.
Conclusion
Knitting pine cones can be a fun and enjoyable project, but it’s important to be prepared for common issues that may arise. By troubleshooting uneven stitches, gaps between stitches, uneven shaping, and wrong sizing, you can overcome obstacles and create beautiful knitted pine cones. Remember to always carefully follow the pattern instructions and pay attention to your tension and stitch count for the best results.