
Knitting a warm and cozy ski hat is the perfect project for both beginners and experienced knitters. Whether you’re hitting the slopes or just braving the winter chill, a hand-knit hat is a stylish and practical accessory. With this simple knitting pattern, you’ll be able to create your own ski hat in no time.
This pattern calls for basic knitting stitches and techniques, making it suitable for knitters of all skill levels. The hat is worked in the round from the brim to the crown, ensuring a seamless and comfortable fit. With a ribbed brim for extra warmth and a classic design, this hat is sure to become a favorite in your winter wardrobe.
Knitting your own ski hat allows you to choose the yarn and colors that best suit your style. Experiment with different fibers and weights to create a hat that is as unique as you are. Whether you prefer bold and bright colors or classic neutrals, the possibilities are endless when it comes to customizing your ski hat.
Ski Hat Knitting Pattern: Stay Warm and Stylish on the Slopes
When hitting the slopes this winter, it’s essential to stay warm and stylish. And what better way to do that than with a hand-knit ski hat? With our ski hat knitting pattern, you can create a hat that not only keeps you cozy but also adds a touch of personal style to your winter outfit.
Our ski hat knitting pattern is designed to be both beginner-friendly and functional. The pattern includes detailed instructions, as well as tips and techniques for creating the perfect fit. The hat features a ribbed brim that provides extra warmth and ensures a snug fit. The body of the hat is worked in a simple knit stitch, allowing you to customize it with different colors and patterns.
To start knitting your ski hat, you will need a few basic supplies, including circular knitting needles, yarn, and a set of double-pointed needles. The pattern is worked in the round, making it easier to create a seamless and polished look. The ribbed brim is knit using the circular needles, while the body of the hat is worked using the double-pointed needles.
This ski hat knitting pattern offers endless possibilities for customization. You can choose to use a chunky yarn for a more cozy and warm hat or opt for a lighter-weight yarn for a more breathable option. You can also experiment with different color combinations or add your own unique touches, such as pom-poms or cable stitches.
So, whether you’re a seasoned knitter or just starting out, our ski hat knitting pattern is the perfect project for you. With this pattern, you can stay warm, stylish, and stand out on the slopes this winter.
Choose the Perfect Yarn for Your Ski Hat
When it comes to knitting a ski hat, choosing the right yarn is essential to ensure warmth, durability, and comfort. With the wide variety of yarns available, it can be overwhelming to make a decision. Here are some factors to consider when selecting the perfect yarn for your ski hat.
1. Warmth:
To keep your head protected from the cold weather on the slopes, opt for a yarn that provides excellent insulation. Look for yarns made from materials like merino wool, alpaca, or cashmere, as they are known for their warmth. These fibers trap heat close to the body, keeping you cozy in even the coldest conditions.
2. Durability:
A ski hat is likely to endure a lot of wear and tear, from the wind whipping past as you ski downhill to being packed in your bag. Choose a yarn that is known for its durability, such as a blend of wool and nylon. This combination offers both strength and elasticity, ensuring your ski hat will last for many seasons to come.
3. Moisture-wicking:
Skiing can be a sweaty activity, so it’s important to choose a yarn that is moisture-wicking. Look for yarns that have moisture-wicking properties or are made from natural fibers like merino wool, which can absorb moisture without feeling damp. This will help to keep your head dry and comfortable throughout your ski session.
4. Comfort:
A ski hat should be comfortable to wear for long periods of time. Consider the softness of the yarn and how it feels against your skin. Many yarns, such as those made from merino wool or cashmere, are known for their softness and will feel cozy and luxurious on your head.
By considering these factors and choosing the right yarn, you can knit a ski hat that not only looks stylish but also provides the necessary warmth and comfort for your winter adventures on the slopes.
Needles and Gauge: Getting Started with Your Ski Hat
When it comes to knitting a ski hat, one of the most important things to consider is the type of needles you will be using. The size and material of the needles can have a significant impact on the final result of your hat.
For beginners, it is recommended to use circular needles for knitting a ski hat. Circular needles allow you to easily knit in the round and create a seamless hat. The length of the circular needles will depend on the size of your hat. Typically, a 16-inch circular needle is suitable for adult-sized hats, while a 12-inch circular needle is ideal for child-sized hats.
Another important factor to consider is the gauge of your knitting. Gauge refers to the number of stitches and rows per inch in your knitted fabric. To ensure that your ski hat fits properly, it is crucial to match the gauge specified in the knitting pattern.
To determine your gauge, knit a small swatch using the same yarn and needles you plan to use for your hat. Measure a 4×4-inch square of the fabric and count the number of stitches and rows. If your gauge does not match the pattern’s gauge, you may need to adjust your needle size to achieve the correct gauge.
A proper gauge is essential for creating a well-fitting and comfortable ski hat. It ensures that your hat will have the right dimensions and will not be too loose or too tight. Take the time to check your gauge before starting your ski hat project to avoid any unexpected surprises.
Casting On: Starting Your Ski Hat
The first step in knitting a ski hat is casting on, which is the process of creating the foundation row of stitches. To start, you will need your knitting needles and the yarn of your choice. It’s important to choose a yarn that is warm and durable, as it will need to withstand cold weather conditions.
There are several different casting on methods to choose from, but one of the most common and simple methods is known as the long-tail cast on. To begin, measure a tail of yarn that is approximately three times the width of your finished hat. Make a slipknot at the end of the tail and place it on one of your needles. Hold the needle with the slipknot in your right hand, and the other needle in your left hand.
Step 1: Insert the tip of your left needle into the slipknot from top to bottom, bringing the needle underneath the tail of the yarn.
Step 2: Take the tail yarn and wrap it over the top of the left needle and under the right needle, creating a loop around both needles.
Step 3: With your right needle, pull the loop through the slipknot, while keeping the loop on the left needle.
Step 4: Slip the new stitch onto your left needle, and tighten the stitch by pulling gently on both yarn tails.
Step 5: Repeat steps 1-4 until you have cast on the desired number of stitches for your ski hat. Make sure to count your stitches as you go to ensure accuracy.
Once you have finished casting on, you are ready to begin knitting the body of your ski hat. You can now follow a knitting pattern or create your own design to make your ski hat unique. Enjoy the process and stay warm on the slopes!
Knitting the Ribbing: Creating a Snug Fit
When knitting a ski hat, the ribbing is an important step that helps create a snug fit. The ribbing is typically done at the bottom of the hat and is made using a combination of knit and purl stitches. This technique creates a stretchy fabric that hugs the head and ensures a comfortable fit.
To begin knitting the ribbing, you will need to cast on the desired number of stitches. Typically, a smaller needle size is used for the ribbing to create a tighter fabric. It is important to choose a needle size that works well with the yarn you are using to achieve the desired tension.
Step 1: Knit Stitch
Start the ribbing by working a few rows of knit stitches. The knit stitch is created by inserting the right-hand needle through the front loop of the stitch on the left-hand needle, bringing the yarn over the right-hand needle, and pulling it through the loop to create a new stitch.
Continue knitting each stitch across the row until you reach the end. Repeat this process for several rows until the desired width of the ribbing is achieved.
Step 2: Purl Stitch
After completing the knit stitches, it’s time to introduce the purl stitch into the ribbing pattern. The purl stitch is the opposite of the knit stitch and is created by inserting the right-hand needle through the back loop of the stitch on the left-hand needle, bringing the yarn in front of the right-hand needle, and pulling it through the loop to create a new stitch.
Alternate between knitting and purling stitches across the row, maintaining the established pattern from the previous rows. This alternating pattern creates the ribbing effect and adds elasticity to the fabric. Continue knitting and purling in this manner for several more rows until the desired length of the ribbing is achieved.
By following these steps and alternating between knit and purl stitches, you can create a snug fit for your ski hat. The ribbing not only adds a decorative element to the hat but also ensures that it stays in place and keeps you warm during your skiing adventures. Happy knitting!
Shaping the Brim: Adding a Stylish Touch
When it comes to knitting a ski hat, one of the most important details is shaping the brim. This not only adds a stylish touch to the hat, but also ensures a comfortable fit. There are several different techniques you can use to shape the brim, depending on the look you want to achieve and your knitting skills.
One of the simplest ways to shape the brim is by decreasing the number of stitches as you work towards the edge. This can be done by knitting two stitches together at regular intervals. This technique creates a tapered effect, with a narrower brim at the edge of the hat. It is a classic style that works well for both men and women.
If you want to add a little more flair to your ski hat, you can try using a ribbing pattern for the brim. Ribbing is created by alternating knit and purl stitches, and it adds texture and elasticity to the fabric. By starting the ribbing pattern at the brim and continuing it for a few inches, you can create a visually appealing and functional detail.
Another option for shaping the brim is by adding a folded edge. This creates a clean and polished look, and it can be achieved by knitting a few extra rows before starting the ribbing or decreasing. Once you have the desired length, you can fold the edge over and sew it in place. This technique is great for adding structure to the brim and giving the hat a finished appearance.
Overall, shaping the brim of a ski hat is an opportunity to add a stylish touch to your project. Whether you choose to decrease the stitches, incorporate a ribbing pattern, or create a folded edge, the key is to find a technique that both complements your knitting skills and achieves the look you desire. With a little creativity and attention to detail, you can create a ski hat that is both fashionable and functional.
Knitting the Body of the Ski Hat: Stay Warm on the Slopes
When it comes to skiing, staying warm is crucial. One of the best ways to keep your head and ears cozy on the slopes is by knitting your own ski hat. Knitting your own hat not only allows you to customize the design and fit, but it also gives you the satisfaction of creating something with your own hands. Follow these instructions to knit the body of the ski hat and ensure you’re prepared for the cold weather.
Before you begin knitting, gather the necessary materials: yarn in your chosen color, knitting needles in the appropriate size, and a tape measure or ruler. Once you have everything you need, you can start casting on stitches. The number of stitches will vary depending on the size of the hat you want to create. Refer to your chosen knitting pattern or use a standard hat sizing chart to determine the correct number of stitches for your desired size.
Once you have cast on the required number of stitches, you can begin knitting the body of the hat. Work in the round, using either circular needles or double-pointed needles, depending on your preference. Knit each row until the hat reaches your desired length, measuring it periodically to ensure the correct fit. If you want a slouchy hat, you may need to add a few extra inches to the length. If you prefer a snug fit, you can stop knitting sooner.
Tip: To add a touch of style to your ski hat, consider incorporating colorwork or textured stitches. Fair Isle or stranded knitting techniques can create beautiful patterns, while cables or ribbing can add a unique texture. Be sure to follow the instructions in your knitting pattern or experiment with different stitch patterns to customize your hat.
- Use the
knitstitch for the body of the hat to create a smooth, stretchy fabric that will provide warmth and comfort. - Remember to switch to double-pointed needles or a smaller circular needle when you decrease the number of stitches for the crown of the hat.
- Consider adding a pom-pom or tassel to the top of your hat for an extra touch of fun and flair.
Knitting your own ski hat is a rewarding and practical project for any skiing enthusiast. The body of the hat is where you can really unleash your creativity, whether through colorwork, textured stitches, or customizing the fit. By following these instructions and incorporating your own personal style, you’ll be able to stay warm and stylish on the slopes.
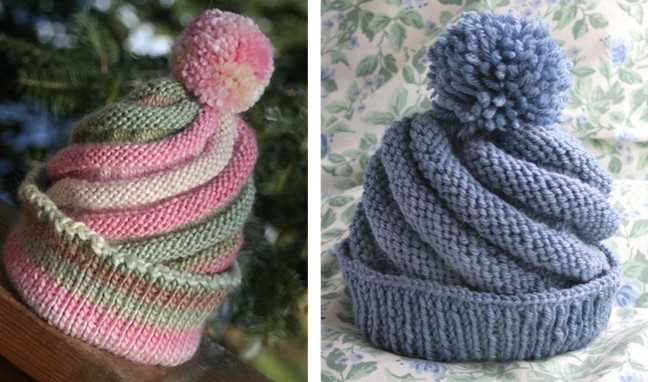
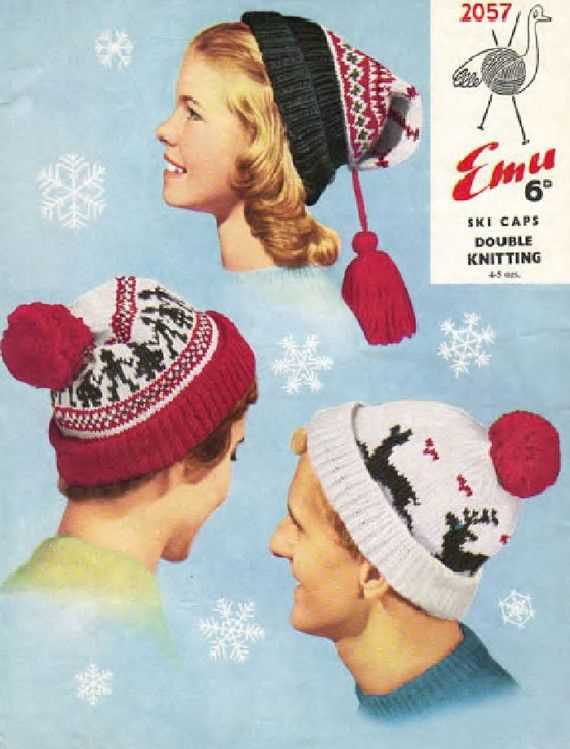
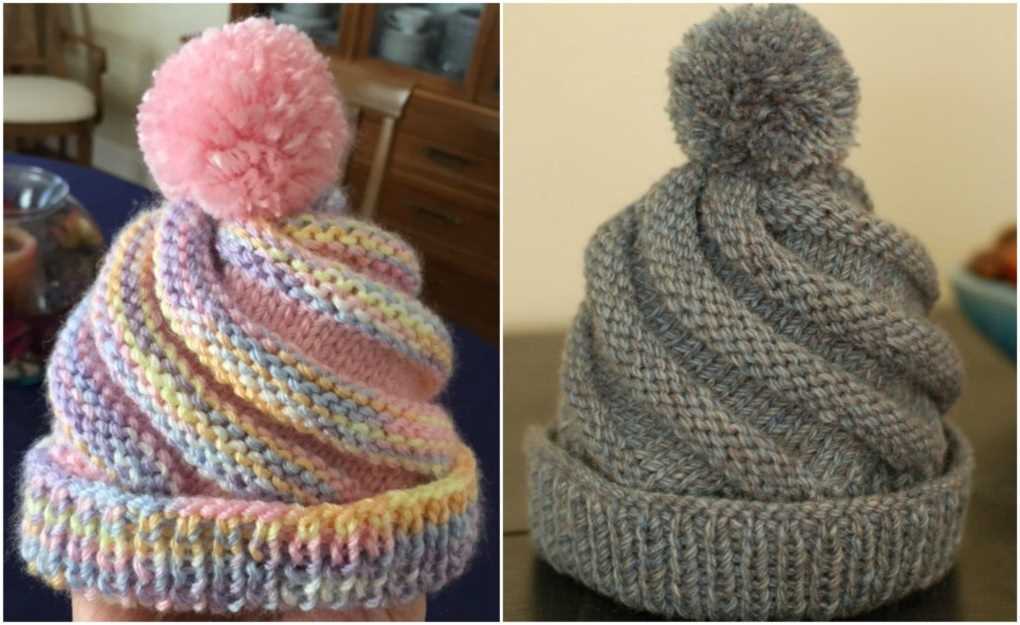
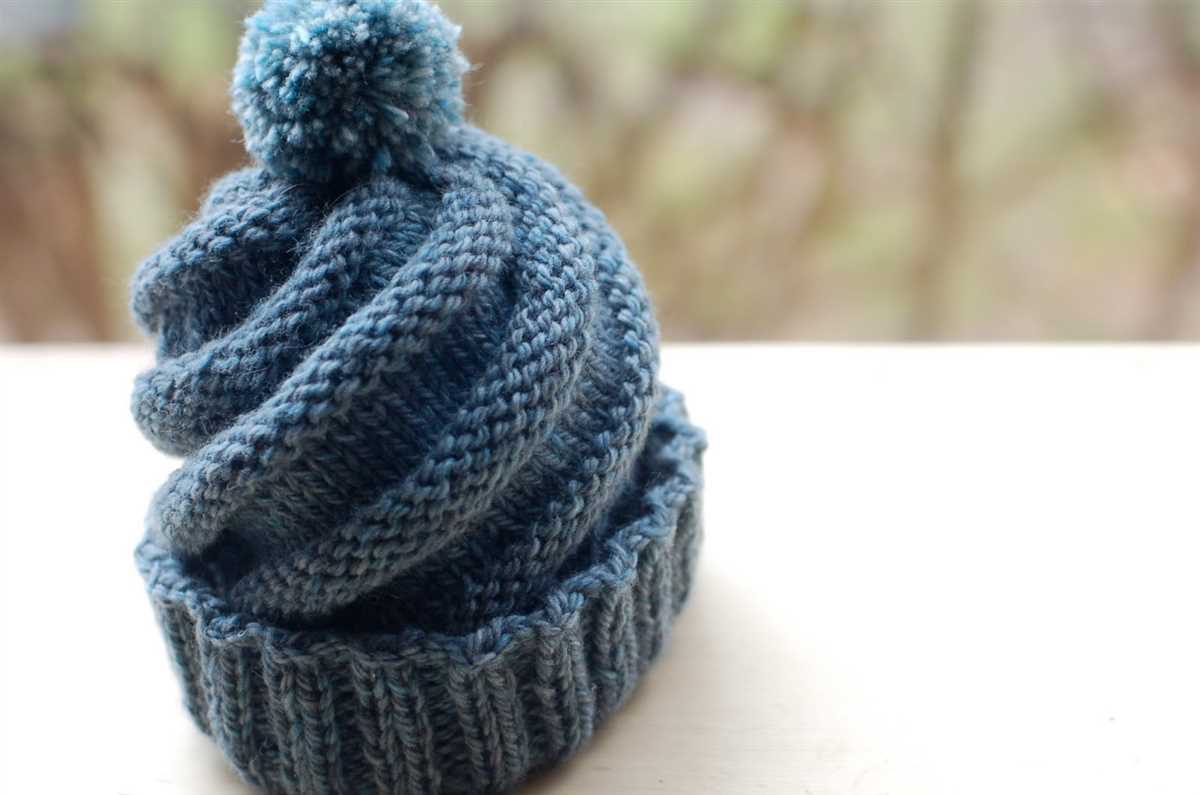
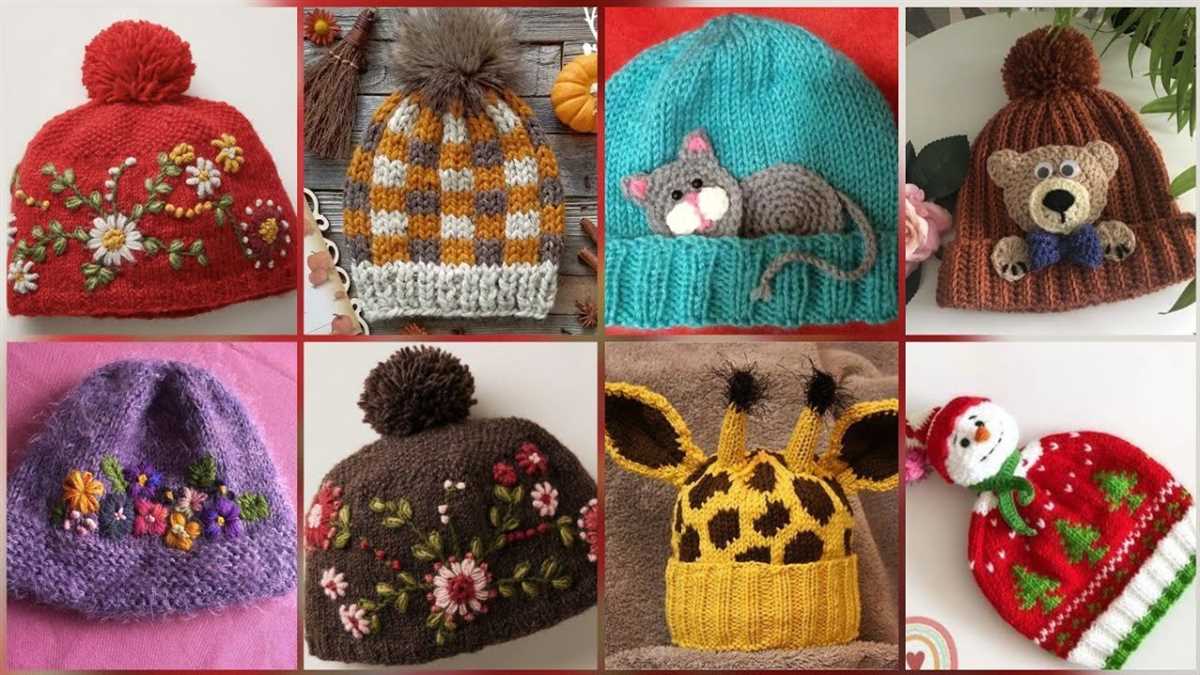
Creating a Fun Pom Pom: Adding a Playful Element
When it comes to knitting a ski hat, one way to add a playful element to your design is by incorporating a fun and fluffy pom pom. A pom pom is a small ball made of yarn that is typically attached to the top of the hat. It not only adds a decorative touch but also provides an extra layer of warmth.
To create a pom pom, you will need a few supplies. Start by selecting a yarn color that complements your ski hat design. You can choose a contrasting color for a bold look or a matching color for a more subtle effect. Additionally, you will need a pom pom maker, scissors, and a yarn needle.
The pom pom maker is a handy tool that helps you create perfectly round and fluffy pom poms. It typically consists of two hinged plastic arms with notches or holes on each side. Simply open the arms, wrap the yarn around them, close the arms, and start cutting the yarn along the notches. Once all the yarn is cut, secure it tightly by tying a knot in the center. Finally, release the arms of the pom pom maker and fluff the pom pom to shape it.
Once your pom pom is ready, you can attach it to your ski hat using a yarn needle. Thread the needle with a piece of yarn and insert it through the top of the hat. Then, push the needle through the center of the pom pom and make a knot to secure it in place. Trim any excess yarn, and your ski hat with a playful pom pom is complete!
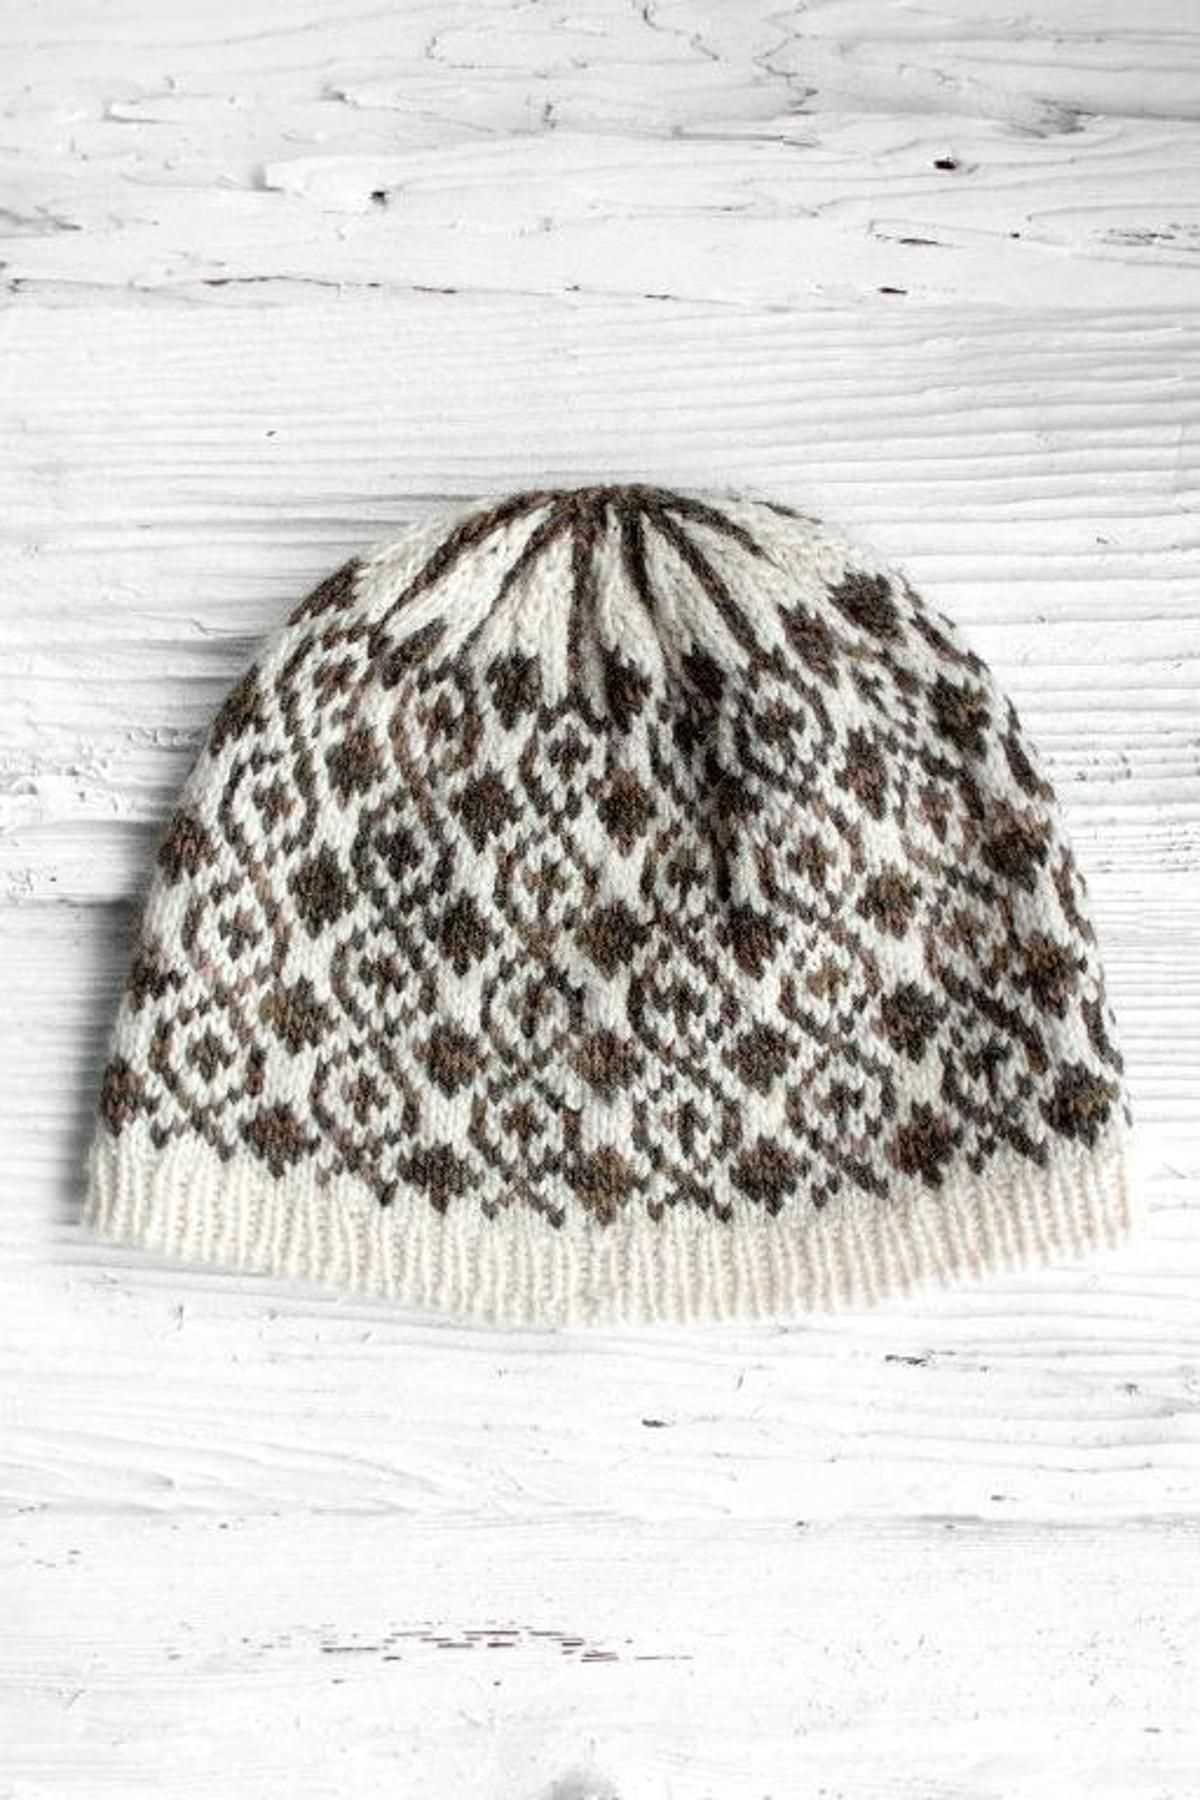
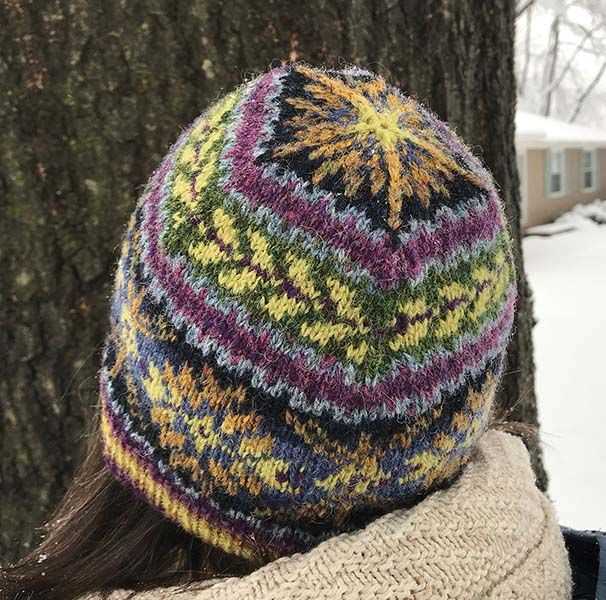
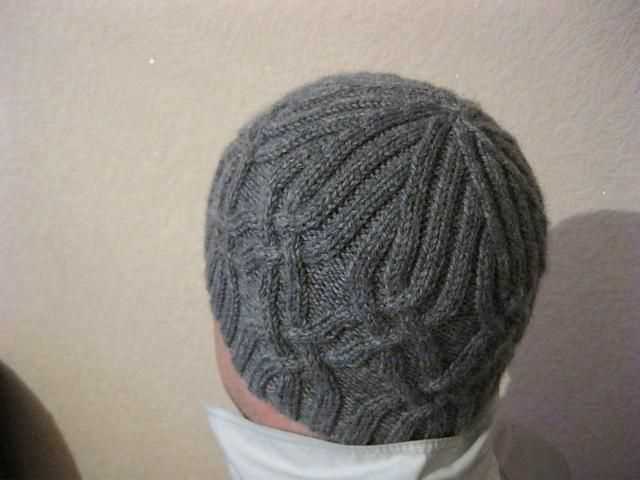
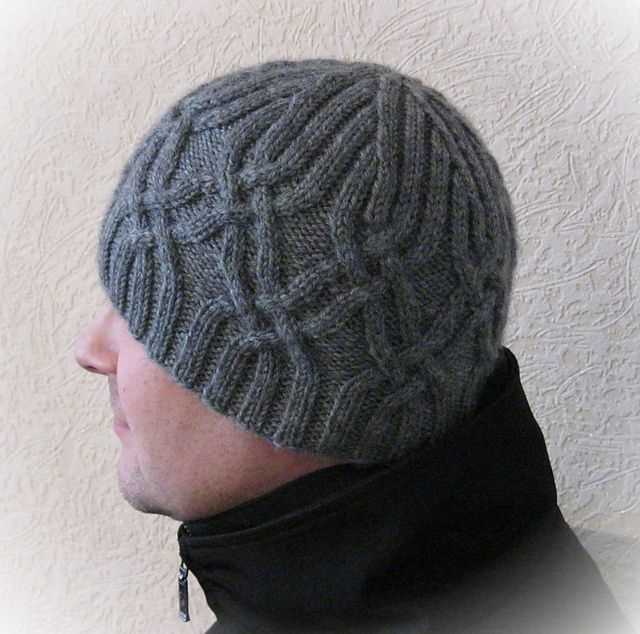
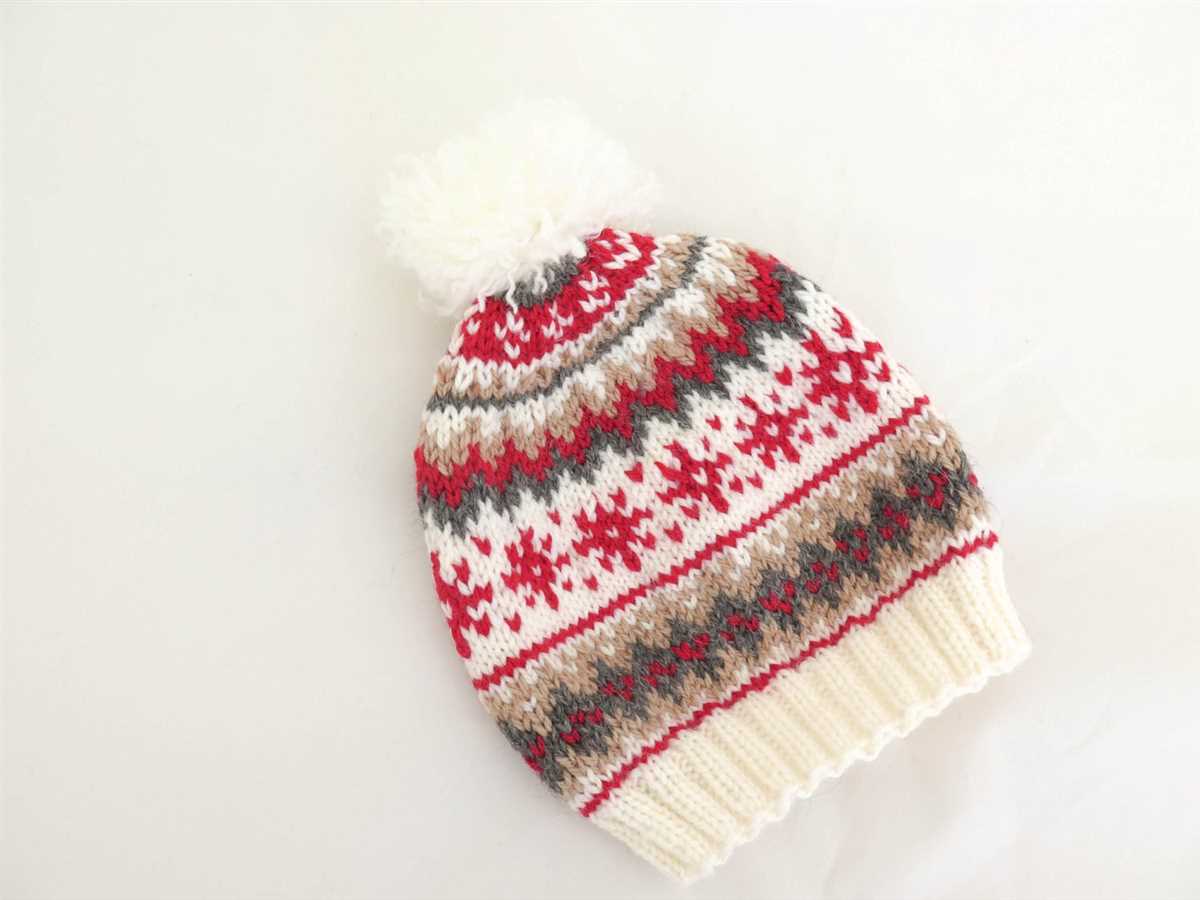
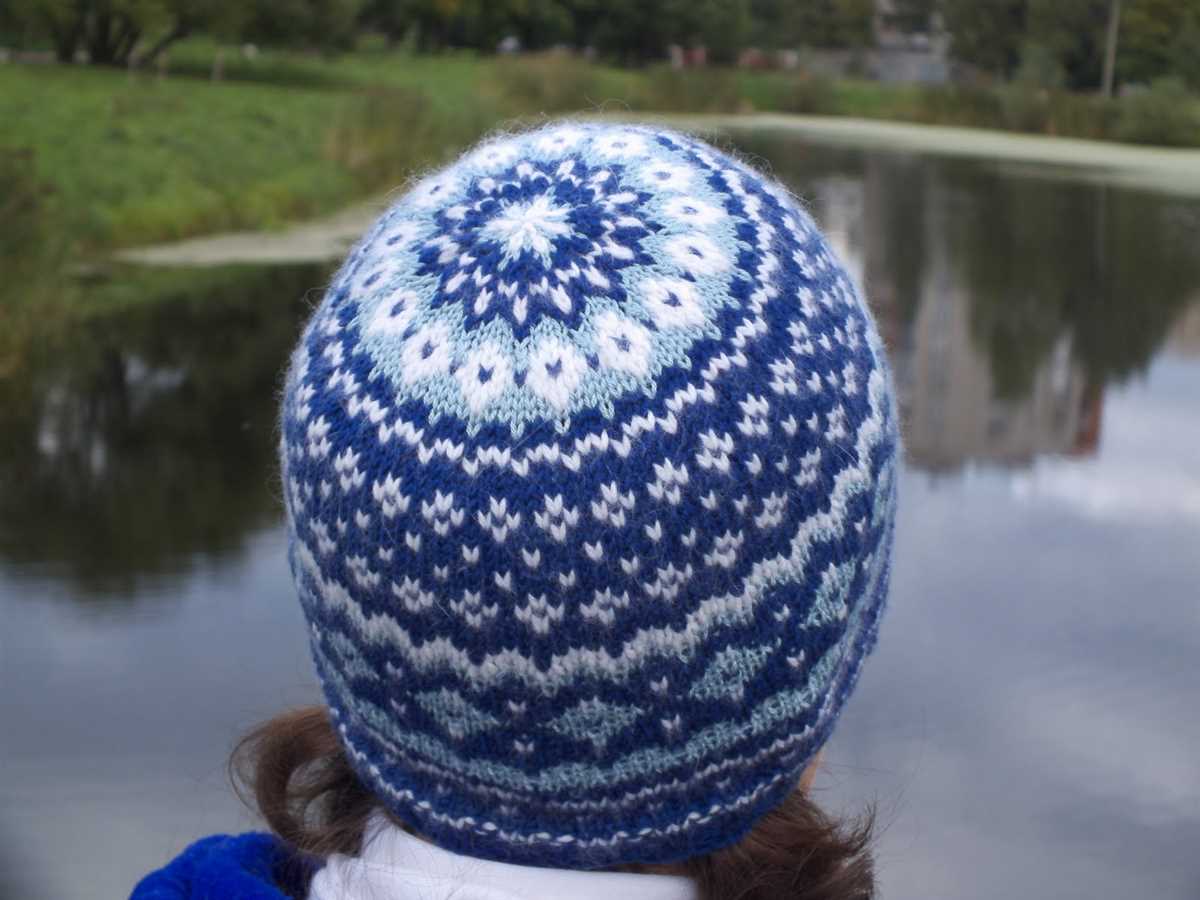
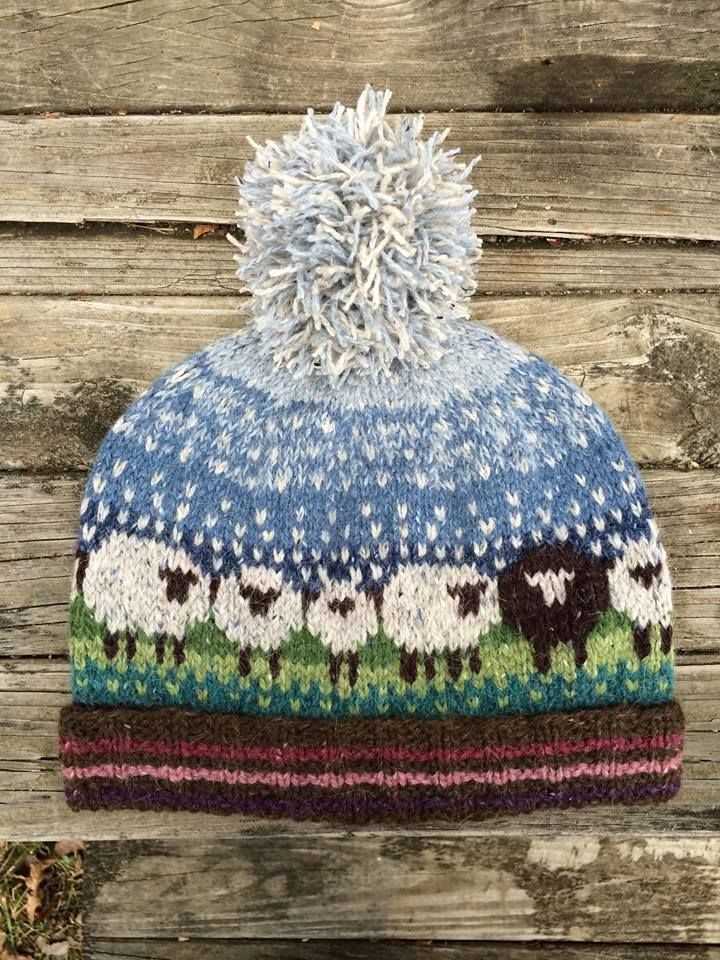
Adding Cables or Colorwork: Taking Your Ski Hat to the Next Level

If you’re looking to make your ski hat truly stand out and add some extra flair, consider incorporating cables or colorwork into your design. These techniques can elevate your hat from a simple knitted accessory to a unique and eye-catching winter accessory.
1. Cables: Adding cables to your ski hat can create a classic and timeless look. Cables are created by crossing stitches over each other, creating a twisted and textured pattern. There are many different cable patterns to choose from, ranging from simple twists to intricate braids. Incorporating cables into your ski hat can add depth and visual interest to the design, making it a standout piece.
2. Colorwork: Another way to take your ski hat to the next level is by incorporating colorwork. Colorwork involves using multiple colors of yarn to create patterns or designs within your knitting. Fair Isle and stranded knitting are common techniques used in colorwork. These techniques allow you to add vibrant and striking designs to your ski hat. From geometric patterns to nature-inspired motifs, the possibilities are endless when it comes to colorwork.
When adding cables or colorwork to your ski hat, it’s important to keep a few things in mind. First, make sure to choose yarns that have good stitch definition, as this will highlight the texture and patterns created by the cables or colorwork. Additionally, it’s important to pay attention to your tension while knitting. Cables and colorwork can sometimes affect the stretchiness and fit of the hat, so be sure to check your gauge and make any necessary adjustments.
By incorporating cables or colorwork into your ski hat, you can create a truly unique and personalized accessory. Whether you opt for classic cables or playful colorwork, these techniques will add an extra layer of style and creativity to your winter wardrobe.
Finalizing the Ski Hat: Bind Off and Weave in Ends
After completing the final row of your ski hat knitting pattern, it’s time to bind off your stitches and weave in any loose ends. Binding off is the process of securing the stitches so they don’t unravel, while weaving in ends ensures a clean and professional finish.
To bind off, knit the first two stitches as usual. Then, insert the left needle into the first stitch on the right needle and pull it over the second stitch and off the needle. Knit one more stitch and repeat the process of lifting the first stitch over the second. Continue this pattern until you have only one stitch left on your right needle. Cut the yarn, leaving a long tail, and pull it through the remaining stitch to secure.
To weave in the loose ends, thread the tail of yarn onto a tapestry needle. Starting on the wrong side of the hat, insert the needle under several neighboring stitches to secure the yarn. Then, weave the needle back and forth along the inside of the hat, following the path of the yarn until the tail is completely hidden. Trim any excess yarn.
For a neat and professional finish, make sure to weave in all loose ends as you go, rather than waiting until the end. This will help prevent any loose threads from poking out and keep your ski hat looking sharp. Now that you’ve bound off and woven in the ends, your ski hat is complete and ready to keep you cozy on your next winter adventure.
Blocking Your Ski Hat: Giving it the Perfect Shape
Blocking is an essential step in the knitting process that helps give your ski hat the perfect shape and appearance. It involves wetting and shaping the knitted hat to achieve the desired fit and form. Blocking not only ensures that your hat fits comfortably but also enhances its overall look.
1. Prepare your materials: Before blocking your ski hat, gather the necessary materials. You will need a large basin or sink, cool water, a mild detergent or wool wash, towels, and rustproof pins.
2. Soak the hat: Fill the basin or sink with cool water and add a small amount of mild detergent or wool wash. Gently place your knitted hat in the water and press it down to submerge it completely. Let the hat soak for about 15-20 minutes, allowing the fibers to absorb the water.
3. Shape the hat: After soaking, carefully remove the hat from the water and gently squeeze out the excess water without wringing or twisting. Lay the hat on a clean, dry towel and reshape it to the desired size and form. Pay attention to any decreases or increases in the pattern that need to be maintained.
4. Pin the hat: Once the hat is reshaped, secure it in place with rustproof pins. Start by pinning the brim of the hat and then move on to the body, smoothing out any wrinkles or uneven areas. Make sure to maintain the stitch pattern and avoid stretching the fabric too much.
5. Let it dry: Leave the hat pinned in place until it is completely dry. This may take anywhere from a few hours to overnight, depending on the thickness of the hat and the humidity in the room. Avoid moving or disturbing the hat while it is drying to preserve its shape.
6. Enjoy your perfectly shaped hat: Once the hat is completely dry, unpin it and try it on. You will notice how blocking has helped the hat take its intended shape, ensuring a snug and comfortable fit. Now, you can proudly wear your hand-knit ski hat with confidence!
Adding a Fleece Lining: Extra Coziness for Cold Days
When the temperature drops and the wind picks up, there’s nothing better than a warm and cozy ski hat to keep you comfortable. And while a hand-knit hat is already a great option for chilly weather, adding a fleece lining takes it to the next level of coziness.
A fleece lining not only provides an extra layer of warmth, but it also adds a luxurious softness against your skin. The fleece material helps to trap heat and prevent cold air from seeping in, making it an ideal choice for those frosty winter days on the slopes.
Here’s how you can add a fleece lining to your ski hat knitting pattern:
- Choose a soft and lightweight fleece fabric in a color that complements your hat design.
- Measure the circumference of the inside of your hat and cut a piece of fleece fabric to match this measurement.
- Sew the edges of the fleece fabric together to form a tube that matches the circumference of your hat.
- Turn the knitted hat inside out and slide the fleece tube inside, aligning the top edges.
- Pin the fleece tube to the hat fabric, making sure it is evenly distributed.
- Using a needle and thread or a sewing machine, stitch the fleece tube to the hat along the bottom edge, securing it in place.
- Turn the hat right side out, and your ski hat with a fleece lining is ready to keep you cozy and warm on those cold days!
In addition to adding extra warmth, a fleece lining also adds a touch of style to your ski hat. You can choose a contrasting color of fleece fabric to create a fun and playful look, or opt for a matching color to keep the lining more discreet. Whichever option you choose, the fleece lining is sure to make your ski hat even more comfortable and cozy.
Styling Your Ski Hat: Pairing it with Your Winter Outfits
Once you have completed knitting your ski hat using the provided pattern, it’s time to style it with your winter outfits. Your ski hat can be a versatile accessory that adds a cozy and fashionable touch to your winter wardrobe. Here are some tips and ideas on how to pair your ski hat with different winter outfits:
1. Casual Everyday Look
For a casual everyday look, pair your ski hat with a chunky sweater, a pair of jeans, and ankle boots. This combination is perfect for running errands or meeting friends for a coffee. Choose a ski hat color that complements the colors of your outfit.
2. Sporty Outdoor Look
If you’re planning to hit the slopes or engage in any winter sports, pair your ski hat with a technical jacket, ski pants, and snow boots. Opt for a ski hat made from a warm and moisture-wicking material to keep you comfortable during your outdoor activities.
3. Dressy Winter Look
Don’t be afraid to dress up your ski hat for a more formal winter look. Pair it with a wool coat, a sweater dress, tights, and knee-high boots. Consider choosing a ski hat in a neutral color like black or gray to complement your dressy attire.
4. Layered Look
Layering is key during the cold winter months. Pair your ski hat with a cozy scarf, gloves, and a long coat for extra warmth and style. Mix and match different textures and patterns to add visual interest to your outfit.
In conclusion, your ski hat can be a versatile accessory that enhances your winter outfits. Experiment with different pairings and have fun expressing your personal style. Whether you’re going for a casual, sporty, dressy, or layered look, your ski hat will add a fashionable touch while keeping you warm and cozy.