
For those who are new to knitting or looking for an easier way to create beautiful projects, loom knitting is the perfect solution. Loom knitting involves using a loom rather than traditional knitting needles to create stitches and patterns. This method is particularly well-suited for beginners, as it eliminates the need for complex needle techniques and allows for a more relaxed and enjoyable knitting experience. If you’re interested in trying out loom knitting, here are some straight loom knitting patterns that are perfect for beginners.
One of the easiest and most versatile patterns for beginners is the simple scarf. With just a straight loom and some yarn, you can create a cozy scarf that will keep you warm all winter long. The basic knit stitch is all you need to know for this project, and you can experiment with different yarn colors and textures to create a unique and personalized scarf. As you become more comfortable with loom knitting, you can start to add more complex stitches and patterns to your scarf for added interest.
Another great pattern for beginners is the basic hat. Loom knitting a hat is a fun and satisfying project that can be completed in just a few hours. With a straight loom and some bulky yarn, you can create a warm and stylish hat that will be the envy of all your friends. The basic hat pattern is simple to follow and allows for endless customization options, so you can create a hat that perfectly matches your style. Once you’ve mastered the basic hat pattern, you can try adding pom poms or other embellishments to take your creations to the next level.
Basic loom knitting techniques
If you are a beginner to loom knitting, there are a few basic techniques that you should know. These techniques will help you create a variety of projects and get started on your loom knitting journey.
Casting on: The first technique you will need to learn is casting on. This is the process of getting your yarn on the loom and ready to start your project. There are different methods for casting on, such as the e-wrap or the chain cast on, and you can choose the one that you find most comfortable.
Knitting: Once you have casted on, you will begin the knitting process. This involves using the loom tool to lift the bottom loop over the top loop, creating a knitted stitch. You will continue this process until you have knitted the desired number of rows or until your project reaches the desired length.
Purling: Purling is the opposite of knitting and creates a textured stitch. To purl, you will insert the loom tool from the top into the loop on the peg, hook the working yarn, and then pull it through the loop on the peg. This will create a purl stitch. Purling can be used to add variety and texture to your loom-knitted projects.
Increasing and decreasing: Increasing and decreasing stitches are essential techniques for shaping your projects. To increase, you will add stitches to your work, usually by wrapping the same peg multiple times. To decrease, you will remove stitches, usually by knitting or purling two stitches together. These techniques allow you to create different shapes and sizes in your projects.
Binding off: Once you have completed your project, you will need to bind off to secure the stitches and finish the edges. This involves knitting or purling two stitches together, moving the resulting stitch back to the previous peg, and continuing until you have one loop left. You can then cut the working yarn and pull it through the final loop to secure it.
These basic loom knitting techniques will help you get started on creating a variety of projects. With practice, you will become more comfortable with these techniques and be able to explore more complex patterns and designs.
How to Choose the Right Loom and Yarn for Straight Loom Knitting Patterns
When starting out with straight loom knitting patterns for beginners, it’s important to choose the right loom and yarn for your project. The loom and yarn you select will have a significant impact on the outcome of your project, so it’s essential to make informed choices.
Choosing the Right Loom:
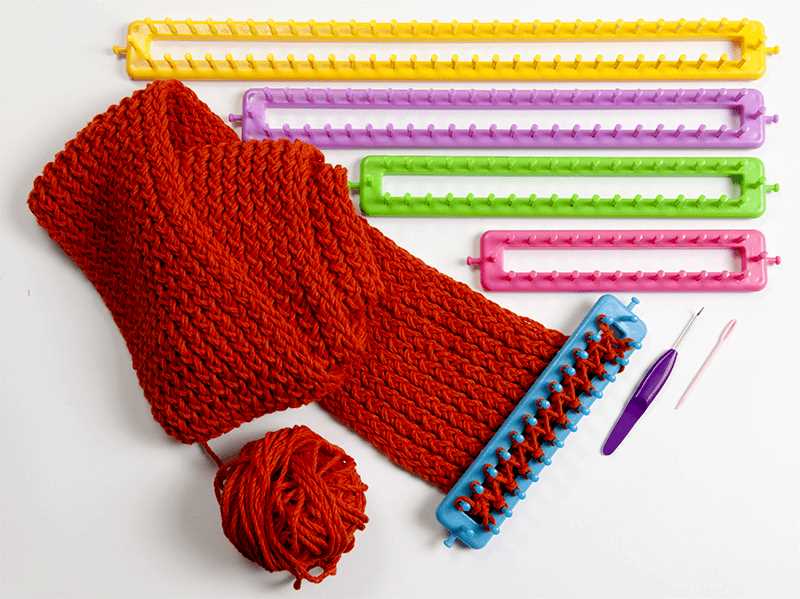
There are various types and sizes of looms available for loom knitting, so it’s crucial to choose one that suits your project. For beginners, a loom with a simple design and fewer pegs is recommended. This will make it easier to understand the process and ensure that you don’t get overwhelmed. Look for looms with adjustable peg spacing, as this will allow you to create different project sizes without buying multiple looms.
Choosing the Right Yarn:
The type of yarn you choose will greatly affect the look and feel of your finished project. For beginners, it’s best to start with a medium-weight yarn, such as worsted weight or bulky yarn, as these are easier to handle and provide more visibility of the stitches. Acrylic yarn is a popular choice for beginners due to its affordability and wide range of colors available. However, you can also experiment with different fiber types, such as cotton or wool, to achieve different textures and effects in your projects.
When selecting yarn, consider the color and pattern of your project. Solid colors can highlight the stitch patterns, while variegated yarns can add interest and complexity. Additionally, check the yarn label for recommended needle or loom size to ensure that it’s compatible with your loom.
By choosing the right loom and yarn for your straight loom knitting project, you’ll set yourself up for success and enjoy the process of creating beautiful and functional knit items.
Simple Hat Knitting Pattern for Beginners
If you’re new to loom knitting and looking for a simple project to start with, a hat is a great choice. With just a few basic stitches and techniques, you can create a cozy and stylish hat to keep you warm during the colder months.
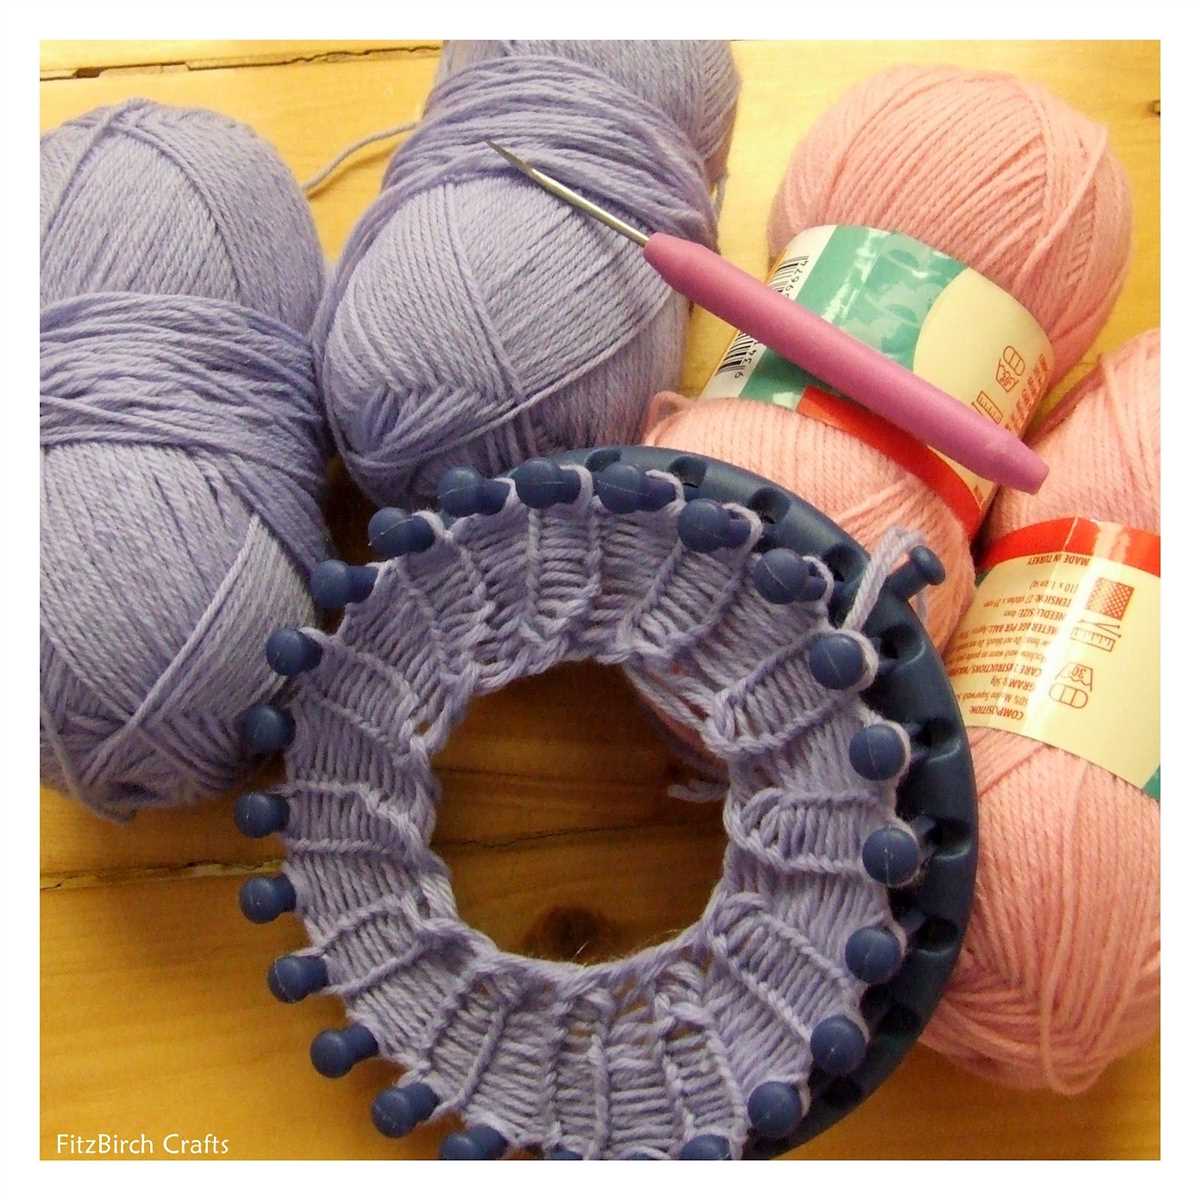
To begin, gather your materials: a round loom, a loom hook, and your choice of yarn. It’s best to start with a medium or chunky weight yarn, as it will be easier to work with and will knit up quicker. You’ll also want to choose a loom with an appropriate number of pegs for your desired hat size.
Step 1: Casting On
Begin by casting on your stitches. To do this, tie a slipknot and place it over the first peg on your loom. Then, wrap the working yarn clockwise around the next peg, pulling it tightly to create a snug stitch. Repeat this process for each peg until you’ve completed a full round.
Step 2: Knitting the Body of the Hat
Once you’ve cast on your stitches, you’ll begin knitting the body of the hat. Using your loom hook, lift the bottom loop on the first peg up and over the top loop, dropping it off the peg. Repeat this process for each peg, working in a clockwise direction around the loom.
Continue knitting in this manner until your hat reaches the desired length. For a beanie-style hat, you’ll generally want to knit for 6-8 inches. However, you can adjust the length to your preference.
Step 3: Binding Off
When you’re ready to finish your hat, it’s time to bind off. Starting with the first peg, knit two stitches together by lifting the bottom loop over the top loop and dropping it off the peg. Repeat this process for each peg until you have one stitch remaining.
Cut the working yarn, leaving a long tail. Thread the tail through the final loop, pulling it tight to secure the stitches. Finally, weave in any loose ends using a yarn needle or crochet hook.
With these simple steps, you can create a basic hat using a loom knitting technique. Once you’ve mastered the basics, you can experiment with different stitch patterns, colors, and embellishments to create unique and personalized hats for yourself and your loved ones.
Step-by-step instructions for making a scarf on a loom
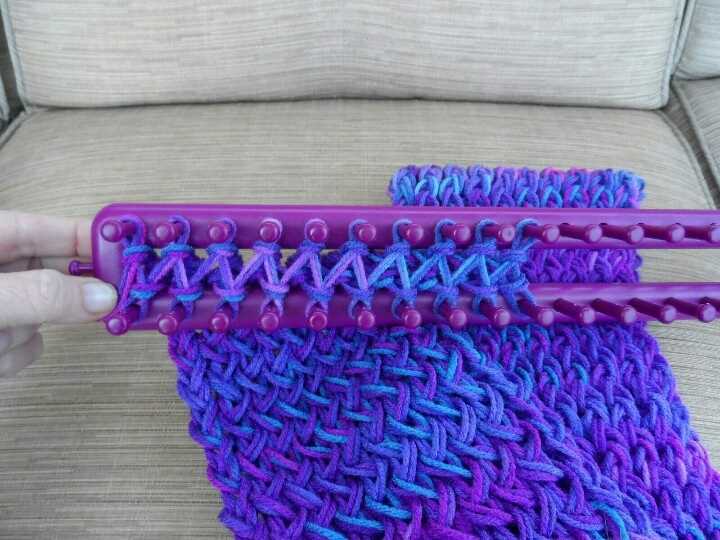
Making a scarf on a loom is a great project for beginners in loom knitting. With just a few simple steps, you can create a cozy and stylish scarf to keep you warm during the colder months. Here’s a step-by-step guide on how to make a scarf using a loom:
Step 1: Set up your loom

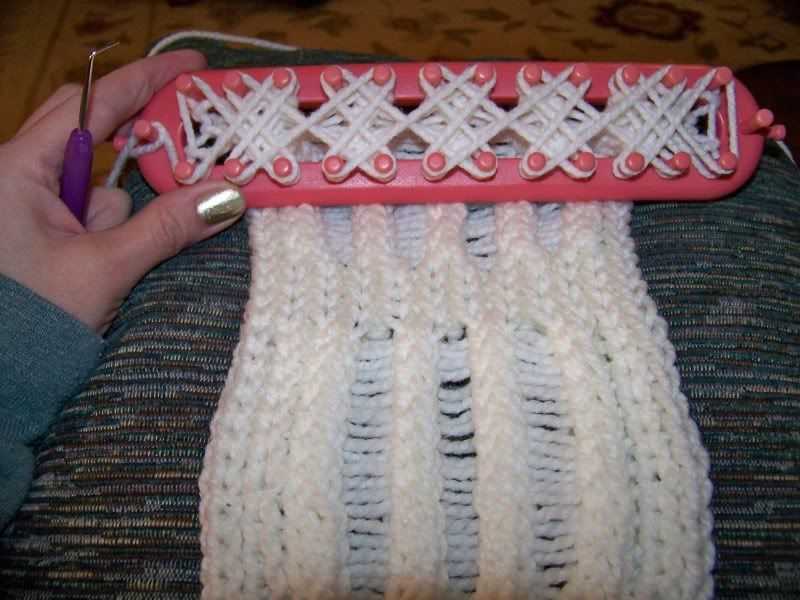
Start by setting up your loom. Make sure it is clean and all the pegs are in place. You can use any size loom, depending on the width you want for your scarf. Attach your yarn to the first peg on one side of the loom and then wrap it around each peg, moving in a figure-eight pattern until you reach the last peg on the other side.
Step 2: Knit the first row
Once your loom is set up, it’s time to start knitting. Take your working yarn and loop it around the second peg on the bottom row. Use a knitting tool or your fingers to pull the bottom loop over the top loop and off the peg. Continue this process for each peg on the bottom row until you reach the end. This is called the knit stitch.
Step 3: Continue knitting
After you finish the first row, continue knitting by repeating Step 2. Loop the yarn around the next peg on the bottom row, pull the bottom loop over the top loop, and continue until you reach the end. Repeat this process for each row until your scarf reaches the desired length.
Step 4: Bind off
Once your scarf is the desired length, it’s time to bind off. Knit the first two pegs as usual, then use your knitting tool to pull the bottom loop over the top loop on the second peg. This will create a new loop on the first peg. Knit the next peg and repeat the process until you reach the end. Cut the yarn, leaving a long tail, and thread it through the last loop to secure the end.
And there you have it – a beautiful scarf made on a loom! This step-by-step guide is perfect for beginners and will help you create a cozy accessory for yourself or a loved one. Happy knitting!
Easy loom knitting patterns for baby booties
When it comes to knitting baby booties, using a loom can make the process much easier, especially for beginners. Loom knitting is a technique that uses a circular or rectangular loom to create seamless and professional-looking projects. With the right loom and some basic skills, you can easily knit beautiful booties for your little one.
One simple and popular loom knitting pattern for baby booties is the basic garter stitch booties. This pattern uses the garter stitch, which is simply knitting every row, to create a cozy and cute pair of booties. The garter stitch is great for beginners as it only requires basic knitting skills and creates a stretchy and comfortable fabric.
To knit the basic garter stitch booties, you will need a loom with at least 24 pegs, a crochet hook, and some soft baby yarn. Start by casting on the pegs on the loom and then work in the garter stitch until the bootie reaches the desired length. Once the main part of the bootie is finished, you can close the toe and the sides using the crochet hook and weave in any loose ends.
Another easy loom knitting pattern for baby booties is the ribbed cuff booties. This pattern combines the garter stitch with a ribbed cuff to create a stylish and snug fit for your baby’s feet. The ribbed cuff adds a decorative touch to the booties and allows for some stretch and adjustability.
To knit the ribbed cuff booties, you will need a loom with at least 30 pegs, a crochet hook, and some soft baby yarn. The pattern starts with a ribbed cuff, which is created by alternating between knit and purl stitches. Once the cuff is finished, you can continue knitting the main part of the bootie in the garter stitch. Finally, close the toe and the sides using the crochet hook and finish off the booties with a decorative bow or button.
- Basic garter stitch booties:
- Materials needed: loom with at least 24 pegs, crochet hook, soft baby yarn
- Cast on the pegs on the loom
- Knit every row to create the garter stitch
- Continue knitting until the bootie reaches the desired length
- Close the toe and the sides using the crochet hook
- Weave in any loose ends
- Ribbed cuff booties:
- Materials needed: loom with at least 30 pegs, crochet hook, soft baby yarn
- Create a ribbed cuff by alternating between knit and purl stitches
- Continue knitting the main part of the bootie in the garter stitch
- Close the toe and the sides using the crochet hook
- Finish off with a decorative bow or button
Creating a Cozy Blanket Using a Loom
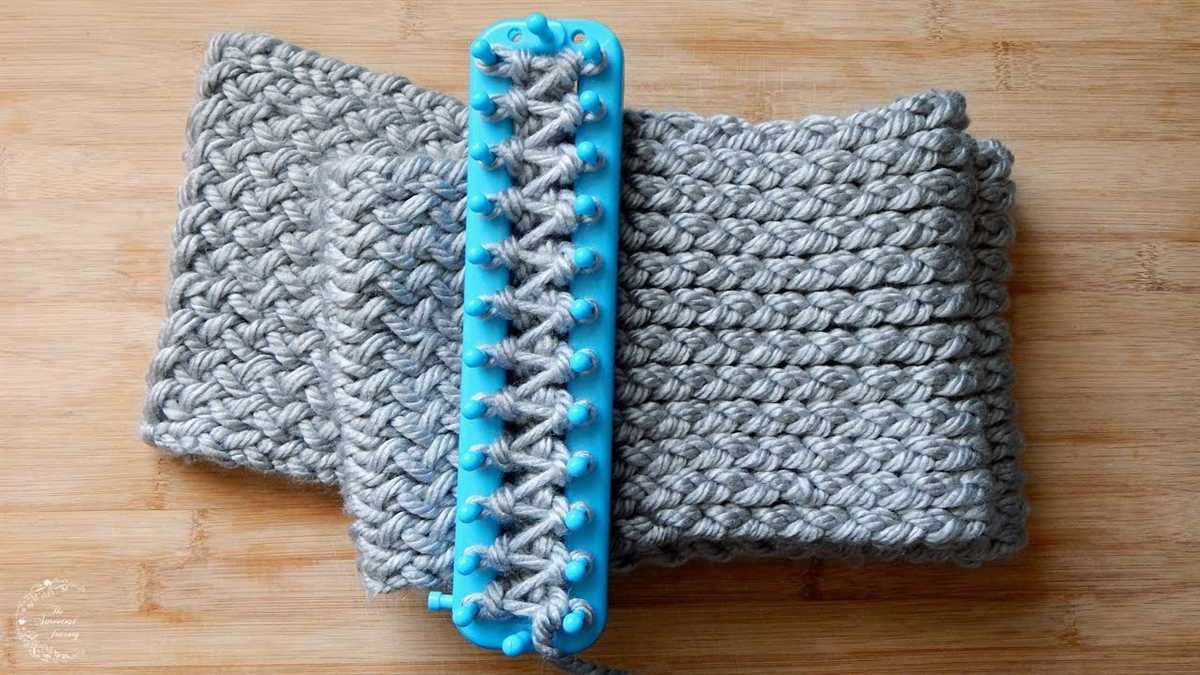
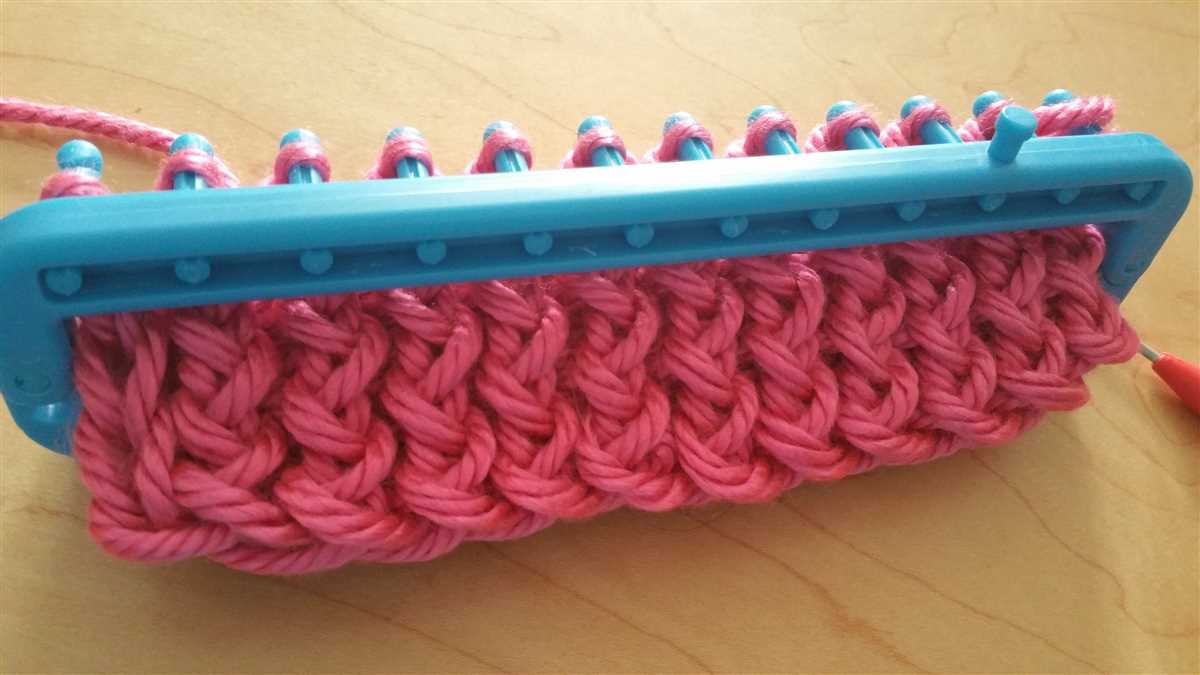
For beginners looking to take on a loom knitting project, creating a cozy blanket is a perfect choice. Loom knitting is a technique that allows you to create beautiful, knitted items using a circular or straight loom. It’s an easy and fun way to make blankets, scarves, hats, and more.
To start creating your cozy blanket, you will need a straight loom with the desired number of pegs and a soft, chunky yarn. You can choose any color or pattern that matches your style and decor. It’s a great way to personalize your blanket and add a touch of warmth to your home.
Step 1: Casting On
Begin by casting on your first row of stitches onto the loom. This is done by wrapping the yarn around each peg, creating a loop around each peg. Continue wrapping the yarn around each peg, moving from left to right, until all the pegs are covered. This will create the foundation for your blanket.
Step 2: Knitting
Once you have cast on your stitches, it’s time to start knitting. Using a knitting tool or hook, pull the bottom loop over the top loop on each peg, one by one. This will create a knit stitch. Continue knitting each row, pulling the bottom loop over the top loop, until your blanket reaches the desired length. This repetitive motion is relaxing and therapeutic, making it a perfect project for beginners.
Step 3: Binding Off
When you have reached the desired length for your blanket, it’s time to bind off. Knit the first two stitches on the loom, then use your knitting tool or hook to pull the first loop over the second loop, creating a bind off stitch. Repeat this process for each pair of stitches until you have finished binding off all the loops on the loom. Cut the yarn, leaving a long tail, and thread it through the last loop to secure it.
With these simple steps, you can create a cozy and warm blanket using a loom. Whether you’re a beginner or an experienced knitter, loom knitting is a great technique to try. Start your loom knitting journey today by creating your very own cozy blanket.
Loom Knitting Patterns for Beginner Mittens
If you’re new to loom knitting and looking to make your own mittens, there are plenty of beginner-friendly patterns available. Loom knitting is a great alternative to traditional knitting with needles, as it allows you to create beautiful and functional items without the need for complex techniques.
One simple loom knitting pattern for mittens involves using a round loom and a basic rib stitch. To begin, you’ll cast on using the e-wrap method and then work in a rib stitch pattern, alternating between knit and purl stitches. This creates a stretchy fabric that is perfect for mittens.
Another option is to use a rectangular loom and a basic knit stitch to create your mittens. This pattern involves casting on and then simply working back and forth in knit stitches until you reach the desired length. Once the main body of the mitten is complete, you can use the loom’s pegs to create a thumb opening and finish off the mitten.
If you’re feeling adventurous, you can also try a loom knitting pattern for mittens that incorporates colorwork. This involves using multiple colors of yarn to create patterns and designs on the mittens. You can use the intarsia technique, where you twist the different colored yarns together at the back of the work, or the stranded knitting technique, where you carry the different colors along as you work.
When selecting yarn for your loom knitting mittens, it’s important to choose a soft and warm yarn that will keep your hands cozy. Look for yarns that are specifically labeled as suitable for mittens or gloves, as these will often have a blend of wool or acrylic for warmth and durability.
With a bit of practice and patience, you’ll soon be able to create your own cozy mittens using loom knitting. Whether you choose a simple rib stitch pattern or experiment with colorwork, loom knitting is a fun and accessible way to make your own winter accessories.
Knitting a stylish headband on a loom
Knitting a stylish headband on a loom is a great project for beginners. With just a few simple techniques, you can create a fashionable accessory that will keep you warm and add a trendy touch to your outfit.
To start, you will need a straight loom, yarn of your choice, a loom pick or crochet hook, and a pair of scissors. Choose a yarn color that complements your style and the season. A thicker yarn will create a chunkier headband, while a thinner yarn will result in a more delicate look.
Begin by casting on your stitches using the e-wrap method. This involves wrapping the yarn around each peg and creating a loop. Repeat this process until you have cast on the desired number of stitches, depending on how wide you want your headband to be. Once cast on, use your loom pick or crochet hook to knit each stitch over the pegs until you have reached the end of the row. This will create a row of knitted loops on your loom.
Continue knitting rows using the same method, remembering to wrap the yarn around each peg and then knitting each stitch over. As you progress, you will see your headband taking shape. If you want to add some texture or a different stitch pattern, you can experiment with different knitting techniques such as ribbing, seed stitch, or cables.
When your headband is the desired length, it’s time to cast off. Cut the yarn, leaving a long tail. Thread the tail through a yarn needle and then sew it through each loop on the loom, removing the loops as you go. Once all the loops are off the loom, pull the tail tight and secure it. Your headband is now complete!
Now that you have learned the basics of knitting a stylish headband on a loom, you can let your creativity shine by adding embellishments such as buttons, bows, or flowers. Experiment with different yarn colors and textures to create unique headbands that suit your personal style.
Making a trendy cowl with a loom
If you’re a beginner in loom knitting and want to create something fashionable, making a trendy cowl is a perfect project for you. A cowl is a versatile accessory that can be worn in multiple ways, making it a staple in any wardrobe. With a straight loom, you can easily create a cozy and stylish cowl that will keep you warm and elevate your outfit.
Materials Needed:
- A straight loom
- Medium weight yarn
- Loom hook
- Yarn needle
- Scissors
Instructions:
- Start by casting on your yarn onto the loom. You can choose any cast-on method that you’re comfortable with, such as the e-wrap cast on or the e-wrap cast on with the flat method. Make sure to leave a long tail for later use.
- Once you have cast on all the stitches, start knitting in your desired stitch pattern. You can create a basic knit stitch or experiment with different textured stitches like the rib stitch or the seed stitch. Continue knitting until your cowl reaches your desired length.
- Once you’re satisfied with the length of your cowl, it’s time to bind off. There are various bind-off methods you can use, such as the basic bind off or the gathered bind off. Choose the method that suits your project and bind off all the stitches.
- After binding off, cut the yarn, leaving a long tail. Thread the tail through the yarn needle and weave it through the bound-off stitches to secure them.
- Finally, close the cowl by sewing the cast-on and bind-off edges together. Use the long tail from the cast-on to sew the edges neatly. Make sure to hide any loose ends by weaving them in.
- Your trendy cowl is now ready to be worn! You can style it in various ways, such as draping it loosely around your neck or pulling it up as a hood to protect yourself from the cold.
This loom knitting project is perfect for beginners as it allows you to practice basic stitches and techniques while creating a fashionable accessory. With different yarn colors and stitch patterns, you can customize your cowl to match your personal style. So grab your loom and yarn, and start making a trendy cowl that will keep you cozy and stylish throughout the season.
Loom Knitting Patterns for Beginners: Fingerless Gloves
Fingerless gloves are a popular project for beginners in loom knitting. They are not only practical but also allow you to practice different basic stitches while creating a stylish accessory. With just a few simple techniques, you can easily create beautiful fingerless gloves on a loom.
To start, you will need a loom knitting tool, a loom with pegs, and yarn of your choice. It is recommended to choose a yarn that is appropriate for the type of glove you want to create, either for warmth or for a fashion statement. Lighter yarns are great for spring or fall, while heavier, warm yarns are perfect for winter.
Basic Fingerless Glove Pattern
1. Cast on: Begin by casting on the desired number of stitches on your loom. This depends on the size of your hand and the fit you prefer for your gloves. Make sure the stitches are evenly distributed across the pegs.
2. Knit stitch: Using the knit stitch, work your way around the loom, wrapping the yarn around each peg and then lifting the bottom loop over the top loop. Repeat this process for each peg until you reach the end of the round.
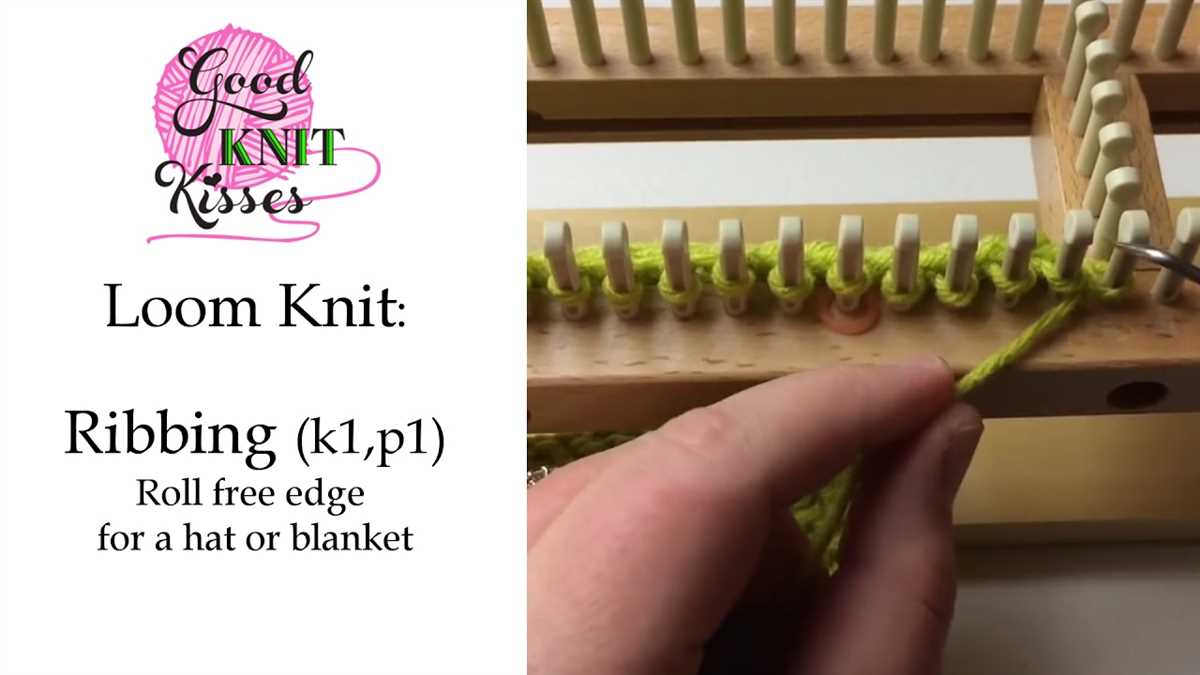
3. Rib stitch (optional): For a stretchier cuff, you can alternate between knit and purl stitches for a rib stitch pattern. This adds a nice texture to the gloves.
4. Body of the glove: Continue knitting in the round using the knit stitch or any other desired stitch pattern until you reach the desired length for your gloves. You can create a shorter glove that covers only the wrist or a longer one that covers part of the fingers.
5. Bind off: To finish the gloves, bind off the stitches by removing the loops from each peg and threading the yarn through them. This ensures that the gloves will not unravel and gives a neat edge.
6. Finger holes (optional): If you prefer gloves with individual finger holes, you can create them by simply skipping a few pegs on the loom while knitting in the round. This will leave gaps for the fingers, giving you more flexibility.
Once you have completed one glove, repeat the steps to create a matching pair. You can experiment with different stitch patterns, colors, and variations to personalize your fingerless gloves. With loom knitting, even beginners can create stylish and functional accessories like fingerless gloves!
How to Knit Basic Stitches on a Loom
When it comes to loom knitting, learning basic stitches is essential for beginners. With just a few simple techniques, you can create a variety of projects using a loom. In this guide, we will walk you through the steps to knit basic stitches on a loom.
Gather Materials
Before you begin, make sure you have all the necessary materials. You will need a loom, yarn, a loom hook or knitting tool, and scissors. Choose a loom that suits your project size and yarn weight. Now let’s get started!
Knit Stitch
The knit stitch is the most basic stitch you can learn on a loom. Here’s how to do it:
- Start by securing the yarn on the first peg of your loom with a slip knot.
- Take your loom hook and insert it under the first loop on the peg.
- Hook the working yarn and pull it through the loop, creating a new loop.
- Continue this process on each peg until you reach the end of the row.
- To start the next row, wrap the yarn around the last peg and work your way back in the opposite direction.
- Repeat these steps until you’ve reached your desired length.
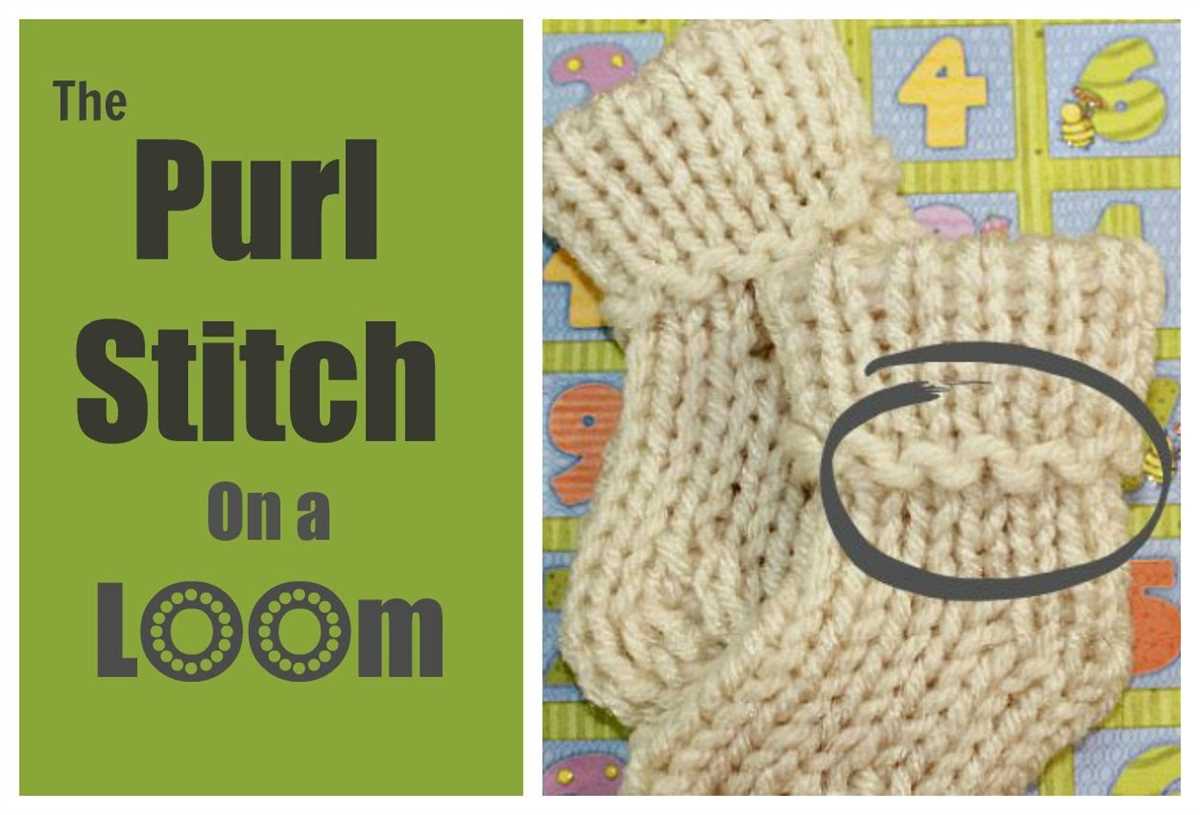
Purl Stitch
The purl stitch is another basic stitch that you can learn on a loom. It creates a textured fabric with bumps on the front side. Here’s how to purl on a loom:
- Start with the working yarn in front of the peg and bring it behind the peg.
- Insert your loom hook from top to bottom through the loop on the peg.
- Hook the working yarn and pull it through the loop, creating a new loop.
- Continue this process on each peg until you reach the end of the row.
- To start the next row, wrap the yarn around the last peg and work your way back in the opposite direction.
- Repeat these steps until you’ve reached your desired length.
With these basic stitches, you can create a wide range of projects on a loom. Practice and experiment with different yarns and patterns to expand your loom knitting skills. Enjoy the process and have fun creating beautiful knit items!
Tips and Tricks for Successful Loom Knitting
As a beginner in loom knitting, it’s important to familiarize yourself with some tips and tricks that can help you achieve successful results. Here are some handy suggestions to consider:
- Choose the right loom: There are different types and sizes of looms available, so it’s essential to choose the appropriate one for your project. Consider the thickness of the yarn you’re using and the desired size of your finished item.
- Start with simple patterns: Begin by tackling straightforward patterns that involve basic stitches. This will help you build your skills and confidence before attempting more complex projects.
- Follow instructions carefully: Pay close attention to the pattern instructions, especially when it comes to stitch counts and row repetitions. Marking your progress with stitch markers or a row counter can be helpful.
- Tension is key: Practice maintaining an even tension on your yarn as you knit. Too loose or too tight of tension can affect the appearance and quality of your work. Experiment until you find a comfortable and consistent tension.
- Don’t be afraid to make mistakes: Making mistakes is a natural part of the learning process. Embrace them as opportunities to improve and grow as a loom knitter. Don’t be afraid to unravel and start over if needed.
- Block your finished projects: Blocking is a technique that can help smooth out the stitches and give a more professional finish to your knitted items. Follow the blocking instructions specific to your yarn and project to achieve the best results.
By following these tips and tricks, you’ll be well on your way to mastering loom knitting. Remember to be patient with yourself and enjoy the process of creating beautiful knitted items with your loom. Happy knitting!