
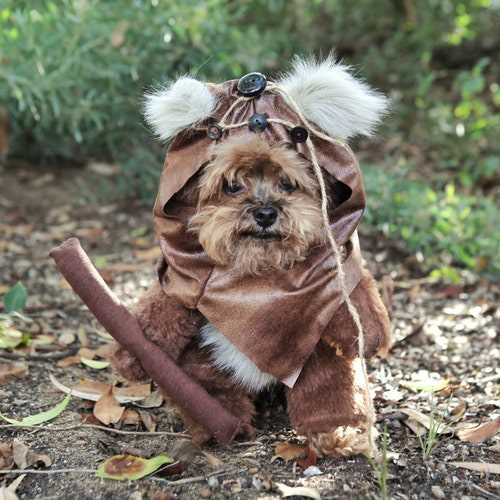
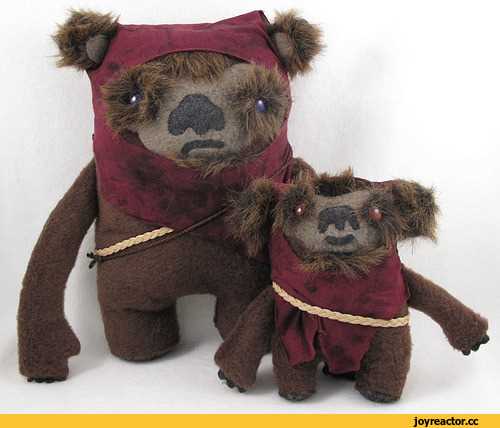
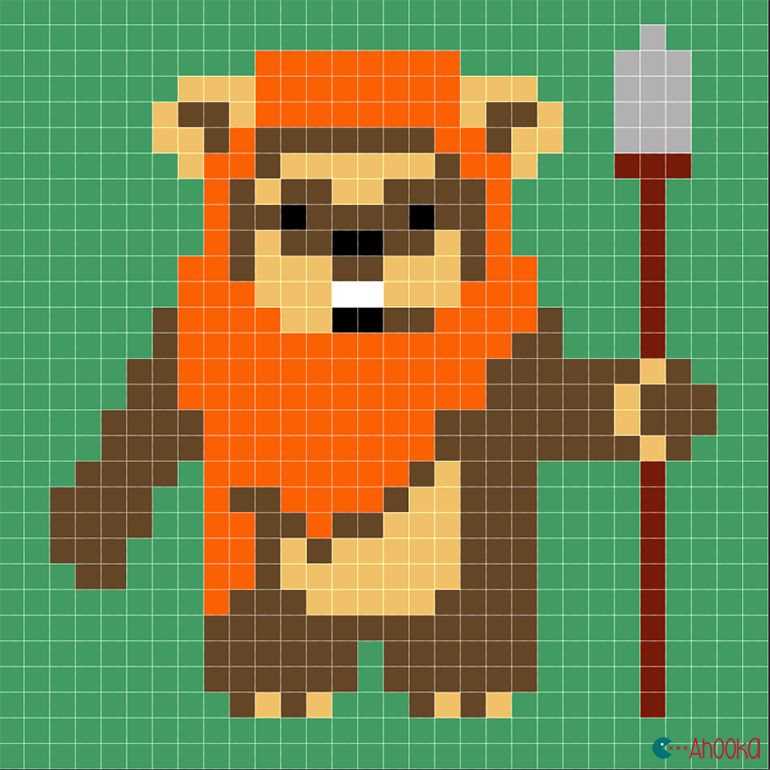
Are you a Star Wars fan and love to knit? Look no further, because we have the perfect knitting pattern for you! Introducing the adorable Ewok knitting pattern. Now you can bring these cute and furry creatures from the forest moon of Endor to life with just a ball of yarn and your knitting needles.
Whether you’re a beginner or an experienced knitter, this pattern is suitable for all skill levels. With step-by-step instructions and clear illustrations, you’ll be able to create your very own Ewok in no time. It’s a fun and creative project that is sure to bring a smile to your face and make a great gift for any fellow Star Wars enthusiast.
This pattern allows you to personalize your Ewok by choosing different yarn colors and adding unique details, such as a miniature spear or a cute little hood. You can also experiment with different knitting techniques to give your Ewok a special touch. The possibilities are endless!
So grab your knitting needles and get ready to embark on a galactic knitting adventure. May the force be with you as you bring these lovable Ewoks to life through the power of knitting!
What is an Ewok?

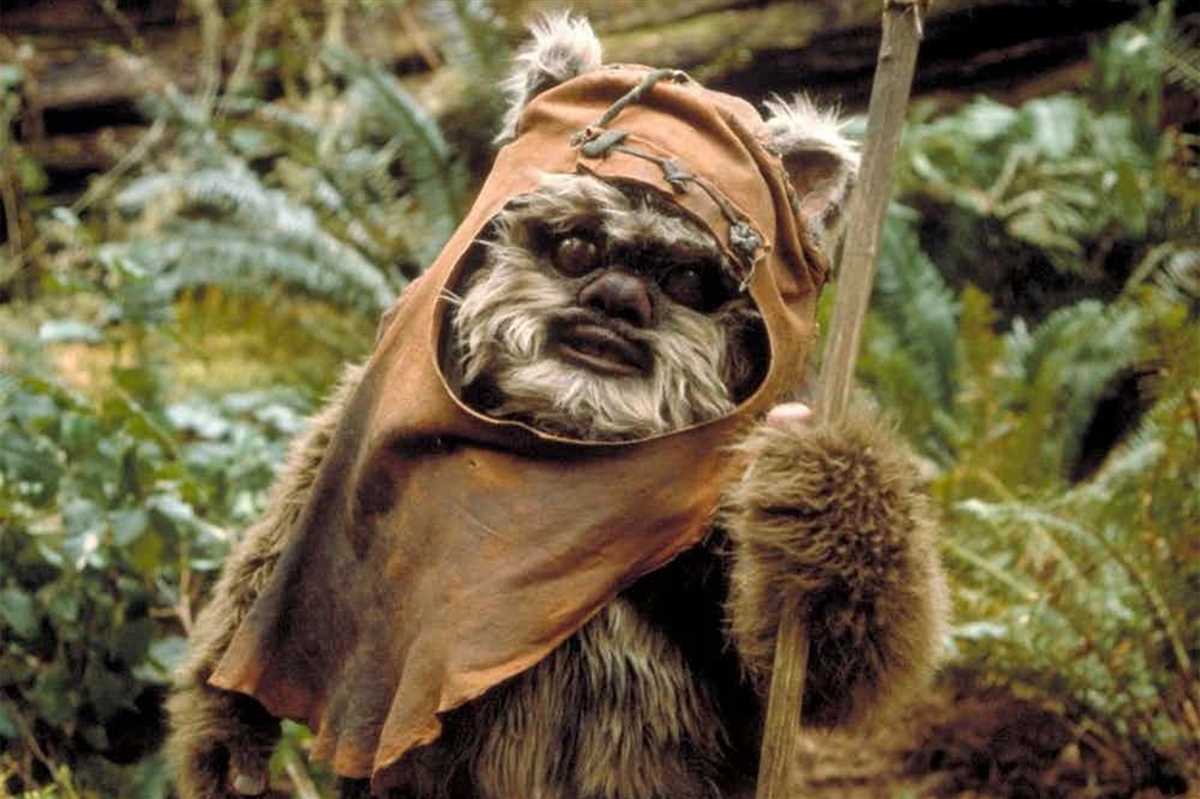
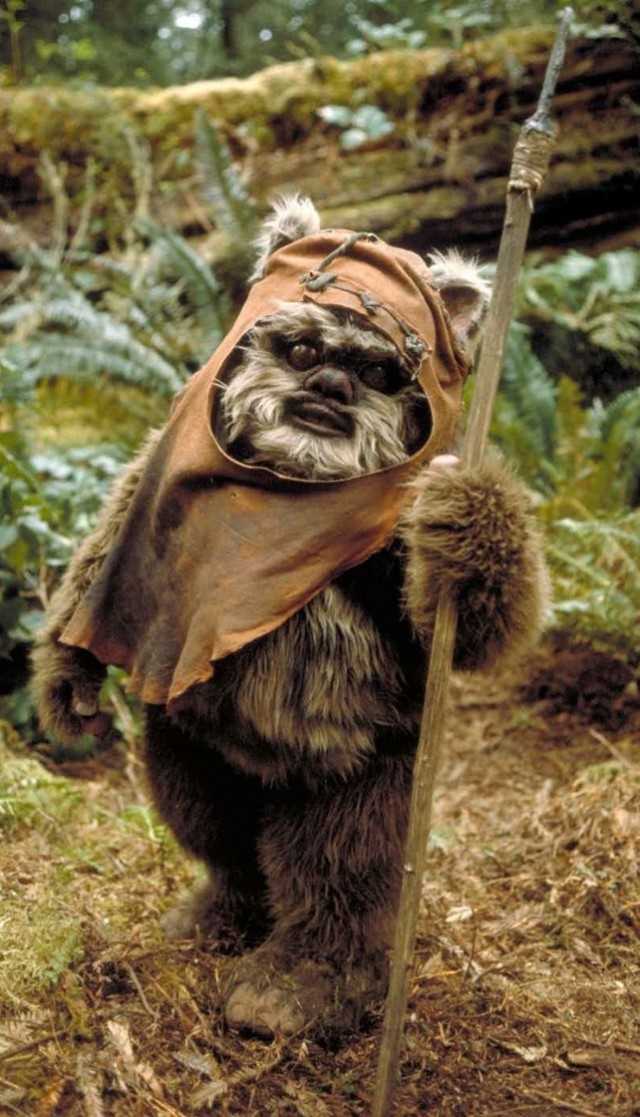
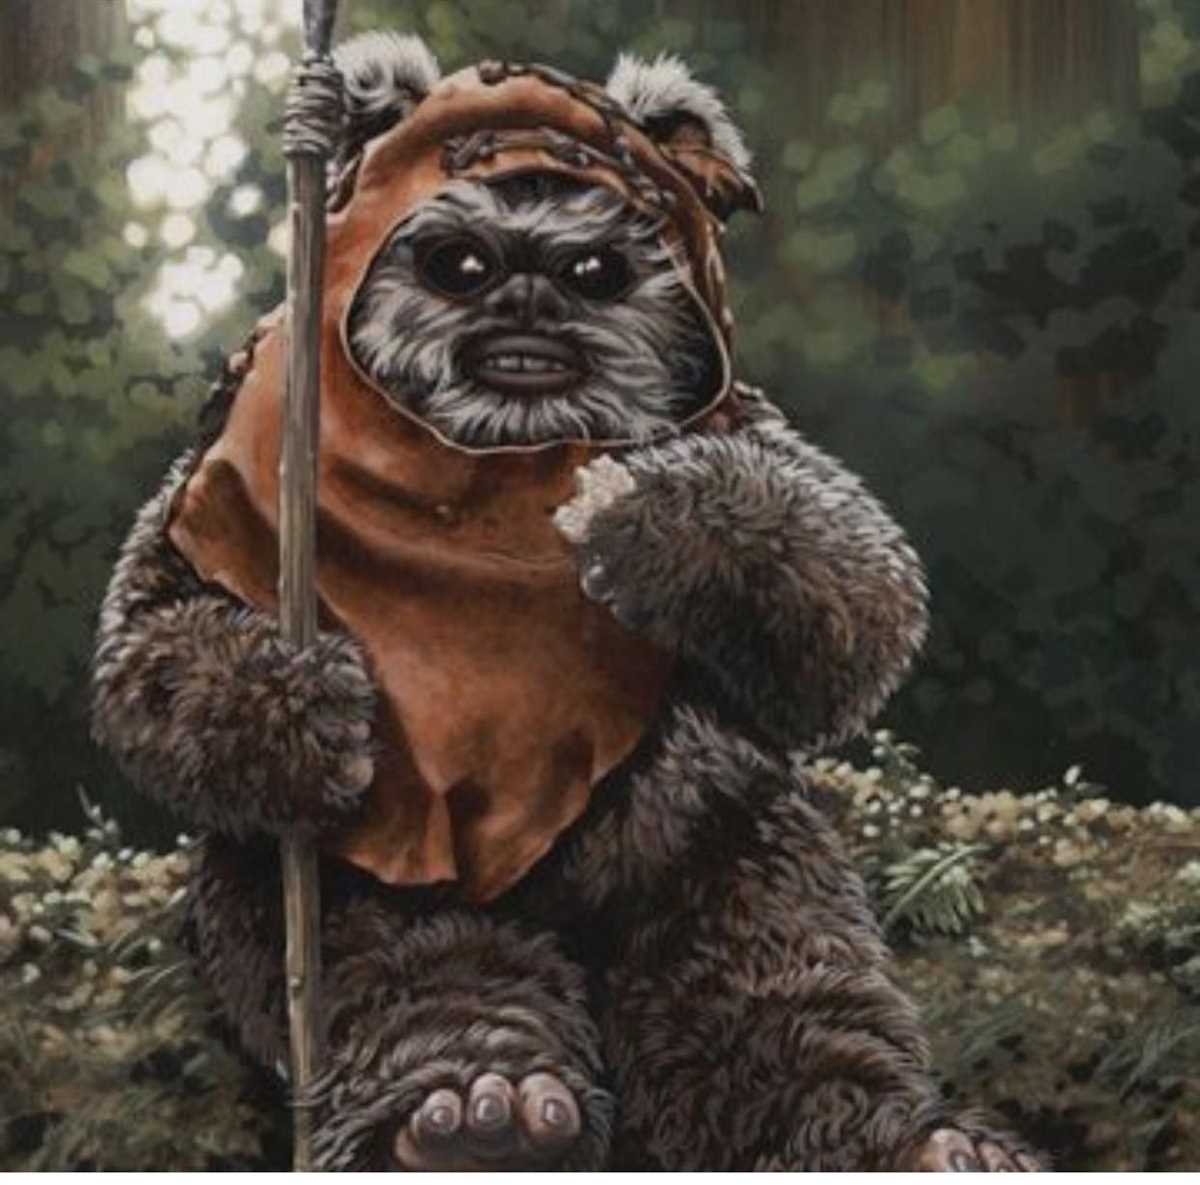
An Ewok is a fictional species of small, bear-like creatures that exist in the Star Wars universe. They are native to the forest moon of Endor, which played a significant role in the original Star Wars trilogy. Ewoks are known for their distinctive appearance and their unique culture.
These adorable creatures have a height ranging from one to one and a half meters tall, and they are covered in fur, which can vary in color from brown to gray. They have large, expressive eyes and stand on two short, stubby legs. Ewoks also have two cuddly-looking ears that perk up from the sides of their heads, adding to their charming appearance.
One of the most fascinating things about Ewoks is their tribal society and their ability to create advanced technology using primitive resources. They live in tree-like huts and are skilled hunters and gatherers. Ewoks also have a strong sense of community and are known for their close-knit families. They have a unique language that combines playful-sounding chitters, growls, and cries.
Throughout the Star Wars saga, Ewoks have become beloved characters, known for their bravery and resourcefulness. They played a crucial role in helping the Rebel Alliance defeat the Imperial forces in the Battle of Endor in “Return of the Jedi.” Ewoks have captured the hearts of fans worldwide with their charm, cuteness, and fierce loyalty to their friends and allies.
Why knit an Ewok?
Knitting an Ewok can be a fun and creative project for both Star Wars fans and knitting enthusiasts alike. With their cute and furry appearance, Ewoks make for adorable companions that can be added to your collection or even gifted to fellow fans.
1. Personalized crafts: Knitting an Ewok allows you to create a one-of-a-kind item that reflects your own style and creativity. You can choose from a variety of colors and yarns to customize your Ewok’s appearance, making it unique to you.
2. Enhancing knitting skills: Knitting an Ewok can be a challenging yet rewarding project that helps you improve your knitting skills. From shaping the body to creating facial features and accessories, this pattern offers a chance to learn and practice various techniques.
3. Connecting with the Star Wars universe: If you’re a Star Wars fan, knitting an Ewok can be a great way to show your love for the franchise and connect with its iconic characters. Whether you’re a seasoned knitter or a beginner, creating an Ewok can be a delightful tribute to this unique part of the Star Wars universe.
4. Gift ideas: Knitting an Ewok can also be a thoughtful and meaningful gift idea for friends or family members who are Star Wars enthusiasts. Handmade gifts often carry a special sentimental value, and a knitted Ewok can be a cherished keepsake that brings joy and nostalgia.
So why not pick up your knitting needles and embark on a creative and enjoyable journey to knit your very own Ewok? Whether you’re making it for yourself or someone else, this project is sure to bring a smile to anyone’s face.
Choosing the right knitting materials
When it comes to knitting, choosing the right materials is essential to ensure the success of your project. The type of yarn and needles you use can greatly affect the final outcome, so it’s important to consider a few key factors before starting.
Type of yarn: There are various types of yarn available, each with its own unique characteristics. The weight, fiber content, and texture of the yarn can all impact the drape, warmth, and overall look of your finished piece. For the Ewok knitting pattern, a soft and fluffy yarn would be ideal to create that adorable and cozy look.
Needle size: The needle size you choose will depend on the gauge specified in the knitting pattern. The gauge refers to the number of stitches and rows per inch, and it ensures that your finished piece matches the size specified in the pattern. Using the correct needle size is crucial for achieving the right tension and ensuring that your stitches are uniform.
Other tools: Besides yarn and needles, you may also need additional tools such as stitch markers, scissors, and a tapestry needle for finishing touches. Stitch markers help you keep track of your progress and mark important points in the pattern, while a tapestry needle is useful for weaving in loose ends and seaming pieces together.
Yarn substitutes: If you’re unable to find the exact yarn recommended in the pattern, you can always look for substitutes. Just make sure the substitute yarn has similar characteristics in terms of weight and fiber content. You can also create interesting effects by using different colors or mixing yarns together.
By carefully considering the yarn, needle size, and other tools, you can ensure a successful knitting project and create beautiful Ewok plushies with the desired look and feel.
Getting Started with the Basic Stitches
When starting your Ewok knitting project, it’s important to familiarize yourself with the basic stitches. These stitches will form the foundation of your knitting work and allow you to create the intricate patterns and designs that make the Ewok knitting pattern so unique and special. Whether you’re a beginner or an experienced knitter, mastering these stitches will be essential to your success.
The first stitch you’ll need to learn is the knit stitch, also known as the garter stitch. This stitch is created by inserting the knitting needle into the loop on the left needle, from front to back, and then pulling the yarn through the loop to create a new loop on the right needle. Repeat this process for each stitch across the row. The knit stitch creates a smooth texture on the right side of the fabric and is often used for the main body of the Ewok pattern.
Knit Stitch Instructions:
- Insert the right-hand needle into the front of the first stitch on the left needle from left to right.
- Bring the working yarn behind the right-hand needle, and use the right-hand needle to pull a loop of yarn through the stitch on the left needle.
- Slide the stitch off the left needle and onto the right needle. You have completed one knit stitch.
- Repeat steps 1-3 for each stitch across the row.
The second basic stitch that is commonly used in the Ewok knitting pattern is the purl stitch. The purl stitch is the reverse of the knit stitch and creates a bumpy texture on the right side of the fabric. It is often used for creating details and textures within the Ewok pattern. To create a purl stitch, simply insert the right-hand needle from right to left into the loop on the left needle, slide the stitch off the left needle and onto the right needle, then repeat for each stitch across the row.
Purl Stitch Instructions:
- Insert the right-hand needle into the back of the first stitch on the left needle from right to left.
- Wrap the working yarn counter-clockwise around the right-hand needle.
- Pull a loop of yarn through the stitch on the left needle, and slide the stitch off the left needle and onto the right needle.
- Repeat steps 1-3 for each stitch across the row.
By mastering the knit and purl stitches, you’ll be well on your way to creating your own Ewok knitting pattern. Once you feel comfortable with these basic stitches, you can explore more advanced techniques and patterns to take your Ewok knitting to the next level.
Tips and Tricks for Knitting an Ewok
If you want to create your very own adorable Ewok using a knitting pattern, there are a few tips and tricks that can help you along the way. Whether you’re an experienced knitter or just starting out, these pointers will ensure your Ewok turns out beautifully.
1. Choose the Right Yarn

When knitting an Ewok, it’s important to select the right type of yarn. Look for a soft and fluffy yarn that mimics the fur of an Ewok. Mohair or an acrylic blend can work well for this purpose. Consider choosing a yarn in a brown or tan color to match the traditional Ewok appearance.
2. Follow the Pattern Carefully
Knitting patterns can be complex, so it’s crucial to carefully follow the instructions provided. Read through the pattern before you begin and familiarize yourself with the different stitches and techniques required. Use stitch markers to keep track of your progress and ensure you don’t miss any important steps.
3. Pay Attention to Gauge
Gauge refers to the number of stitches and rows per inch in a knitted fabric. It’s essential to match the gauge specified in the pattern to ensure your Ewok turns out the correct size. Use the recommended needle size and yarn weight, and swatch before you start to ensure you have the correct tension.
4. Add Embellishments
To give your Ewok a personalized touch, consider adding some embellishments. You can sew on small buttons or beads for eyes, embroider a nose and mouth, or even knit a tiny hat or scarf for your Ewok to wear.
5. Don’t Be Afraid to Experiment
While it’s important to follow the pattern, don’t be afraid to experiment and make small changes to create a unique Ewok. You can modify the color of the yarn, adjust the size, or add your own creative touches. Knitting is a wonderful way to express your individuality, so have fun with it!
With these tips and tricks in mind, you’ll be well on your way to knitting a cute and cuddly Ewok. Enjoy the process and let your imagination run wild as you bring this beloved Star Wars character to life!
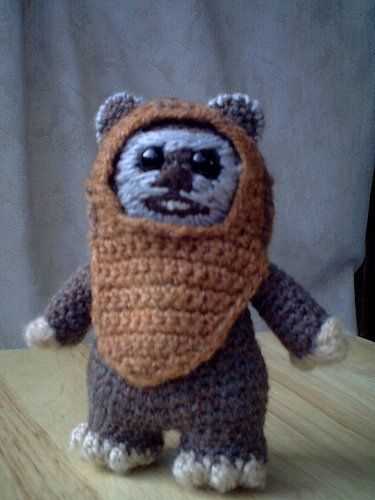
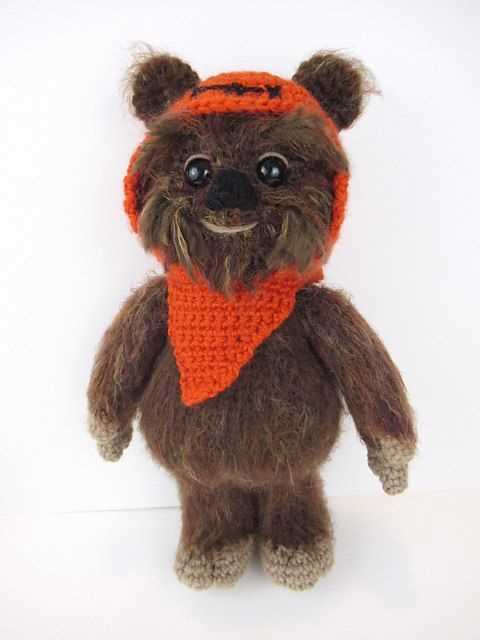
Adding details and personal touches
Once you have mastered the basic Ewok knitting pattern, it’s time to add some special details and personal touches to make your Ewok truly unique. These extra details will bring your creation to life and make it even more fun to knit and display.
1. Facial features: One way to add character to your Ewok is by embroidering the facial features. Use black yarn or embroidery floss to create the eyes, nose, and mouth. You can make the eyes bigger or smaller depending on the expression you want to give your Ewok.
2. Clothing and accessories: Another way to personalize your Ewok is by knitting or crocheting tiny clothing and accessories. You can create a mini hat, scarf, or even a tiny backpack for your Ewok. This will not only add a touch of style to your creation but also allow you to experiment with different stitch patterns and colors.
3. Fur texture: To give your Ewok a more realistic look, consider adding a fur texture to your knitting. You can achieve this by using a technique called ‘loop stitch’ or by attaching small strands of yarn to the body of your Ewok. This will make your Ewok look fluffy and cuddly.
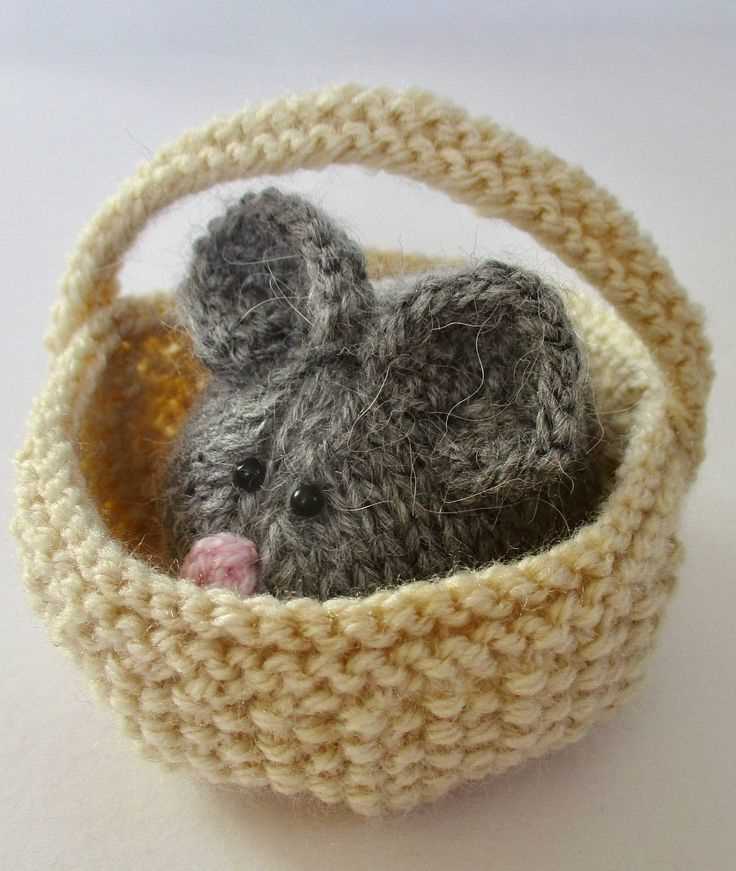
4. Accessories and props: Lastly, you can add more personal touches to your Ewok by knitting or crocheting accessories and props. For example, you can make a tiny basket filled with flowers or a mini lightsaber for your Ewok. These additional details will add depth to your creation and allow you to showcase your creativity.
- Embroider the facial features
- Create clothing and accessories
- Add a fur texture
- Add accessories and props
Remember, knitting is a creative and artistic process, so don’t be afraid to experiment and make your Ewok truly unique. Whether it’s through facial features, clothing, fur texture, or accessories, adding personal touches will make your Ewok stand out and become a special piece in your knitting collection or a delightful gift for a Star Wars fan.
Finishing and Assembling Your Knitted Ewok
Once you have completed knitting your Ewok, it’s time to finish and assemble all the parts to bring it to life. Follow these steps to ensure a professional-looking final result.
1. Weaving in Ends: Start by weaving in all the loose ends of yarn that you have from changing colors or starting and ending your knitting. Use a yarn needle to carefully weave the ends into the stitches, making sure they are secure and hidden within the fabric.
2. Stuffing: Next, it’s time to stuff your Ewok. Use polyester fiberfill or any other stuffing material of your choice. Begin by stuffing the head firmly, making sure to shape it as desired. Continue filling the body, arms, and legs, adjusting the amount of stuffing to give your Ewok a soft and cuddly appearance.
3. Sewing: To sew the parts together, use a yarn needle and the same yarn color as your Ewok. Start by attaching the head to the body, making sure it is centered and securely sewn. Then, sew the arms and legs onto the body at the desired positions, taking care to align them symmetrically.
4. Facial Features: Embroider the Ewok’s facial features using embroidery thread or yarn. Use black thread for the eyes, nose, and mouth. You can use a running stitch or satin stitch to create the desired shapes. Refer to the pattern instructions for the exact placement and design of the facial features.
5. Accessories: Finally, add any additional accessories to your Ewok, such as a small belt, pouch, or hood. You can use the same yarn or different colors to create these details. Sew them onto the body using a yarn needle and secure them tightly.
Congratulations! You have now finished knitting and assembling your Ewok. Give it a final inspection to make sure all the parts are secure and the facial features are in place. Your knitted Ewok is now ready to be displayed or gifted to a fellow Star Wars fan!
Displaying and Caring for Your Knit Ewok
Once you’ve completed your adorable knit Ewok, you’ll want to display it proudly for all to see. There are a few options for showcasing your creation, depending on your personal style and preferences. One popular option is to place your Ewok on a designated shelf or display case, surrounded by other Star Wars memorabilia. This creates a themed area that pays homage to the beloved franchise and allows your knit Ewok to shine.
Another option is to incorporate your knit Ewok into your home decor. You can place it on a cozy armchair or couch, allowing it to become a unique and whimsical accent piece. You could also hang it on a wall as a delightful and unexpected piece of art. Whichever method you choose, make sure your knit Ewok is strategically placed where it can be admired and enjoyed.
Caring for Your Knit Ewok
To ensure your knit Ewok remains in great condition for years to come, it’s important to take proper care of it. Here are some tips to help you keep your beloved creation looking its best:
- Regularly dust your knit Ewok: Use a soft, dry cloth or a gentle duster to remove any dust that may accumulate on the surface of your Ewok. This will help prevent it from looking dull or dirty over time.
- Avoid direct sunlight: Excessive exposure to sunlight can cause the colors of your knit Ewok to fade. Keep it away from windows or other areas with direct sunlight to preserve its vibrant appearance.
- Store it properly: If you need to store your knit Ewok for an extended period, make sure it’s in a clean, dry, and well-ventilated space. Avoid folding or compressing it to prevent any permanent creases or damage to the stuffing.
- Spot clean carefully: If your knit Ewok gets dirty, gently spot clean it with mild soap and water. Test the cleaning solution on a small, inconspicuous area first to ensure it doesn’t cause any damage or discoloration.
- Avoid excessive handling: While it’s tempting to cuddle or play with your knit Ewok, excessive handling can cause it to lose its shape or wear out more quickly. Limit handling to ensure it remains in excellent condition.
By following these simple care tips, your knit Ewok will continue to bring joy and warmth to your home for years to come. Display it proudly and enjoy the admiration it receives as a testament to your knitting skills and love for Star Wars.
Frequently Asked Questions about Knitting Ewoks
Here are some commonly asked questions about knitting Ewoks:
1. Can I use any yarn to knit an Ewok?
While you have some flexibility in choosing yarn for your Ewok, it is recommended to use a lightweight and soft yarn, such as acrylic or cotton. This will help in achieving the desired texture and comfort for your finished Ewok.
2. Do I need any special knitting needles or tools?
You will need a set of double-pointed needles (DPNs) in a size suitable for your chosen yarn. Additionally, you may require a stitch marker, tapestry needle, and a pair of scissors. It’s always helpful to have a row counter or notebook to keep track of your progress too.
3. What skill level is required to knit an Ewok?
The knitting pattern for an Ewok can vary in difficulty, but most patterns are suitable for intermediate knitters. Basic knitting techniques such as casting on, knitting, purling, and decreasing are typically used. However, some patterns may include more advanced techniques such as colorwork or intricate stitch patterns.
4. How long does it take to knit an Ewok?
The time required to knit an Ewok can vary depending on the pattern, the size of the Ewok, and your knitting speed. On average, it may take a few days to a week to complete an Ewok toy. However, this can be shorter or longer depending on your knitting experience and the amount of time you can dedicate to the project.
5. Can I modify the pattern to make a larger or smaller Ewok?
Yes, you can modify the pattern to adjust the size of your Ewok. To make a larger Ewok, you can use thicker yarn and larger needles. To make a smaller Ewok, you can use finer yarn and smaller needles. However, keep in mind that modifications to the pattern may require adjustments to the stitch counts and increases or decreases to maintain the correct proportions.
Summary:
- Choose a lightweight and soft yarn for your Ewok.
- Use double-pointed needles (DPNs) and basic knitting tools.
- Most patterns are suitable for intermediate knitters.
- The time required to knit an Ewok can vary.
- You can modify the pattern to make a larger or smaller Ewok.
With these frequently asked questions answered, you are now ready to embark on your knitting journey to create your very own Ewok toy!