
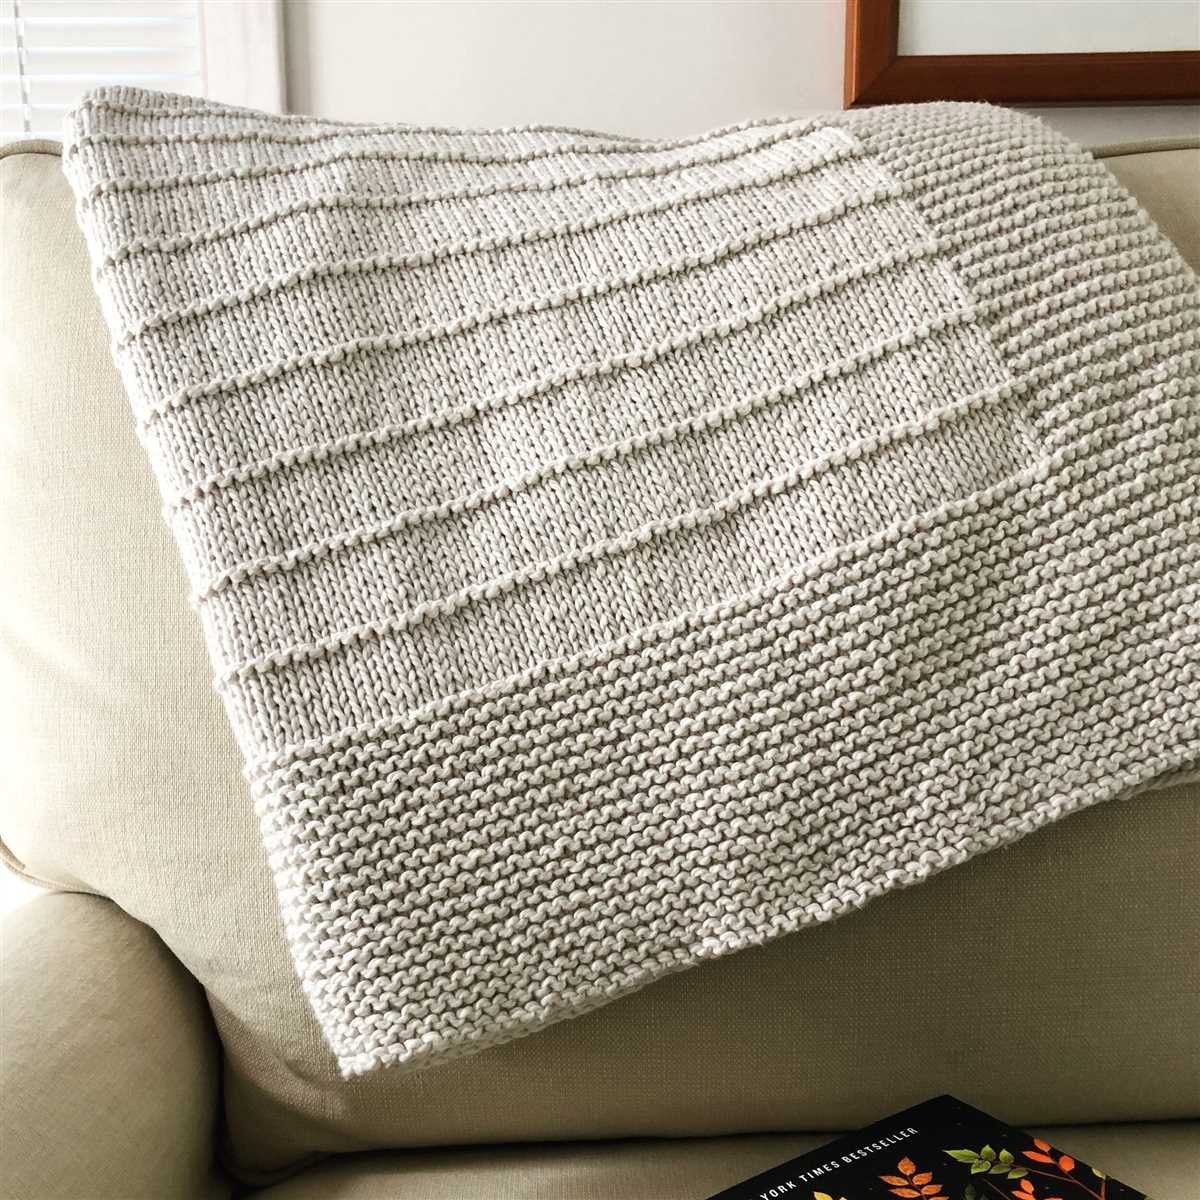
Knitting is a popular hobby that allows people to express their creativity and create cozy items for themselves or their loved ones. One such item that is both practical and comforting is the knee blanket. A knee blanket is a smaller version of a full-sized blanket, designed to cover your legs and provide warmth and comfort during those chilly evenings.
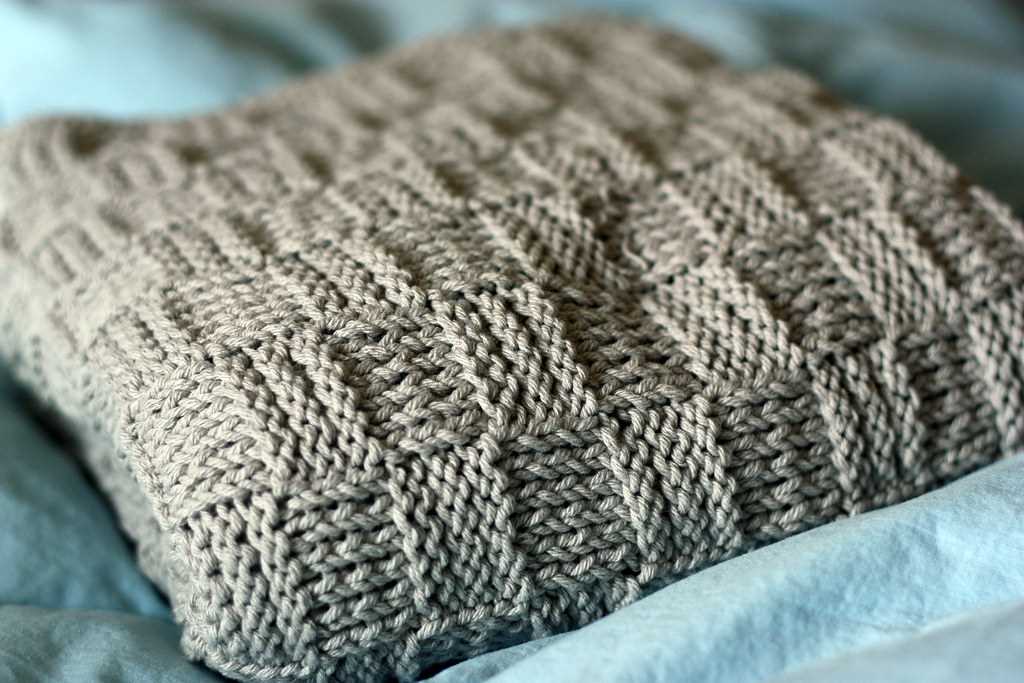
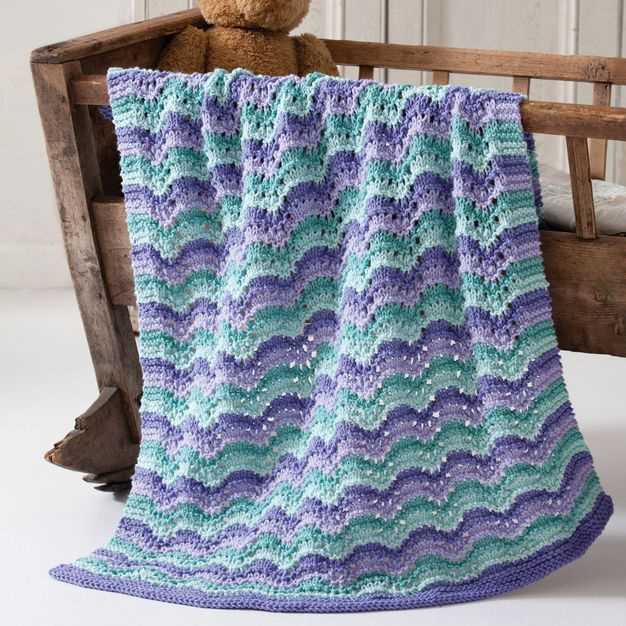
If you are a knitting enthusiast and are looking for a new project, this knee blanket knitting pattern is perfect for you. It is an intermediate-level pattern that combines various knitting techniques to create a beautiful and functional knee blanket. The pattern uses a combination of knit and purl stitches, as well as decreases and increases, to create a textured and visually appealing design.
To knit this knee blanket, you will need a set of knitting needles and a few balls of your favorite yarn. The pattern provides instructions on how to knit the blanket in a specific size, but you can easily adjust the size by adding or subtracting stitches and rows. The finished blanket will not only keep you warm but also make a wonderful personal or handmade gift for someone special.
Knee Blanket Knitting Pattern: Stay Warm and Cozy
When the weather gets chilly, there’s nothing better than snuggling up on the couch with a warm and cozy knee blanket. Not only does it provide extra warmth, but it also adds a touch of comfort and style to any living space. With a knee blanket knitting pattern, you can create your own personalized blanket that perfectly suits your taste and needs.
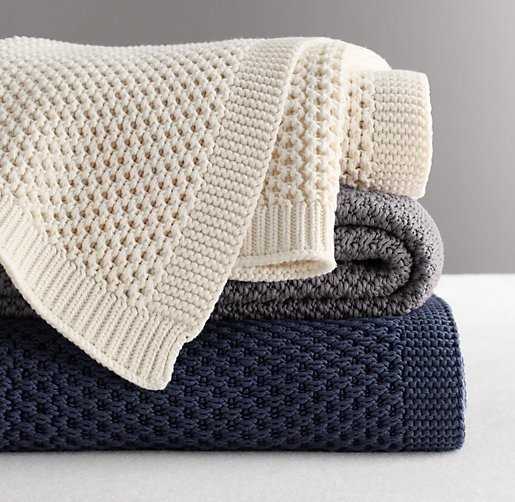
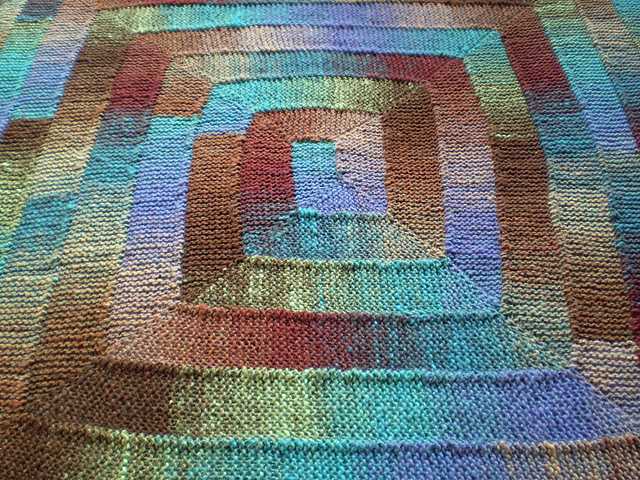
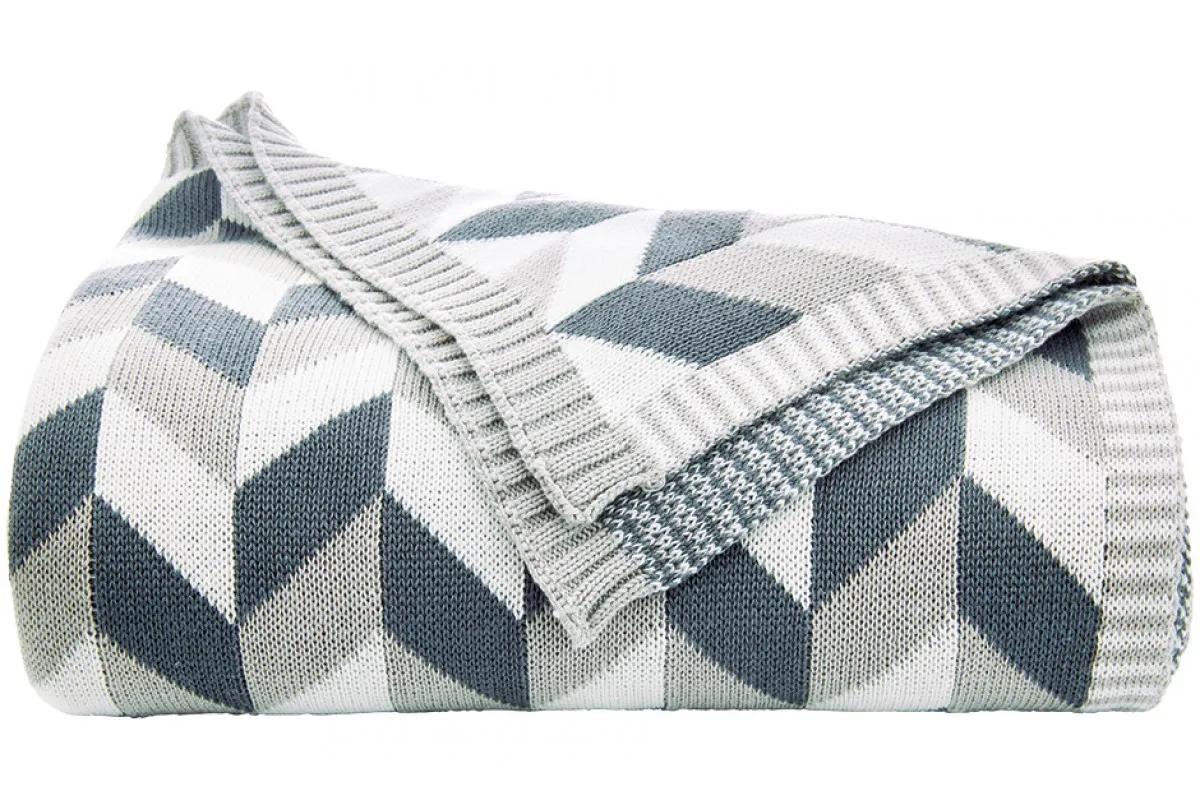
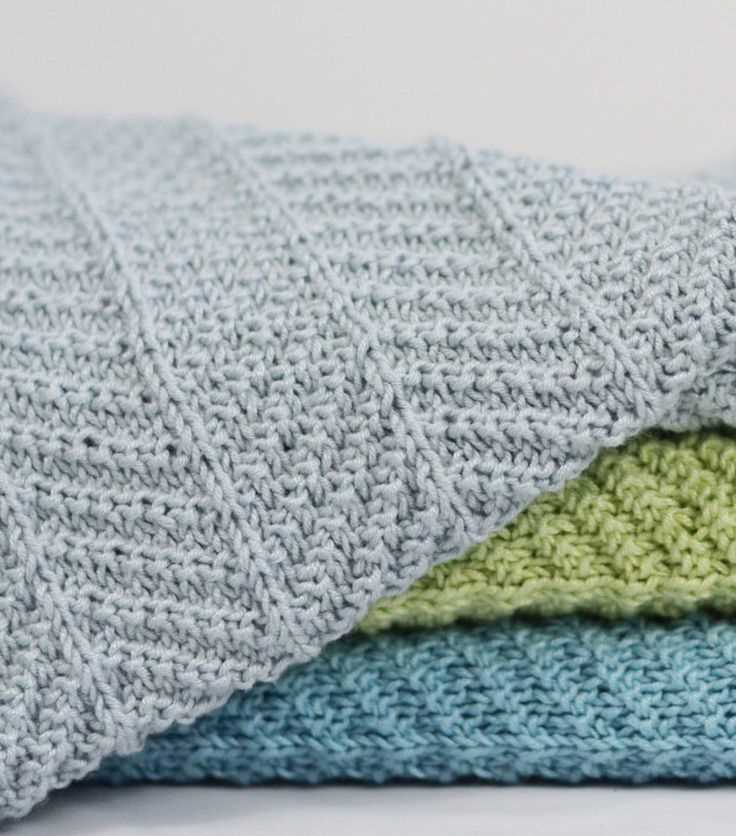
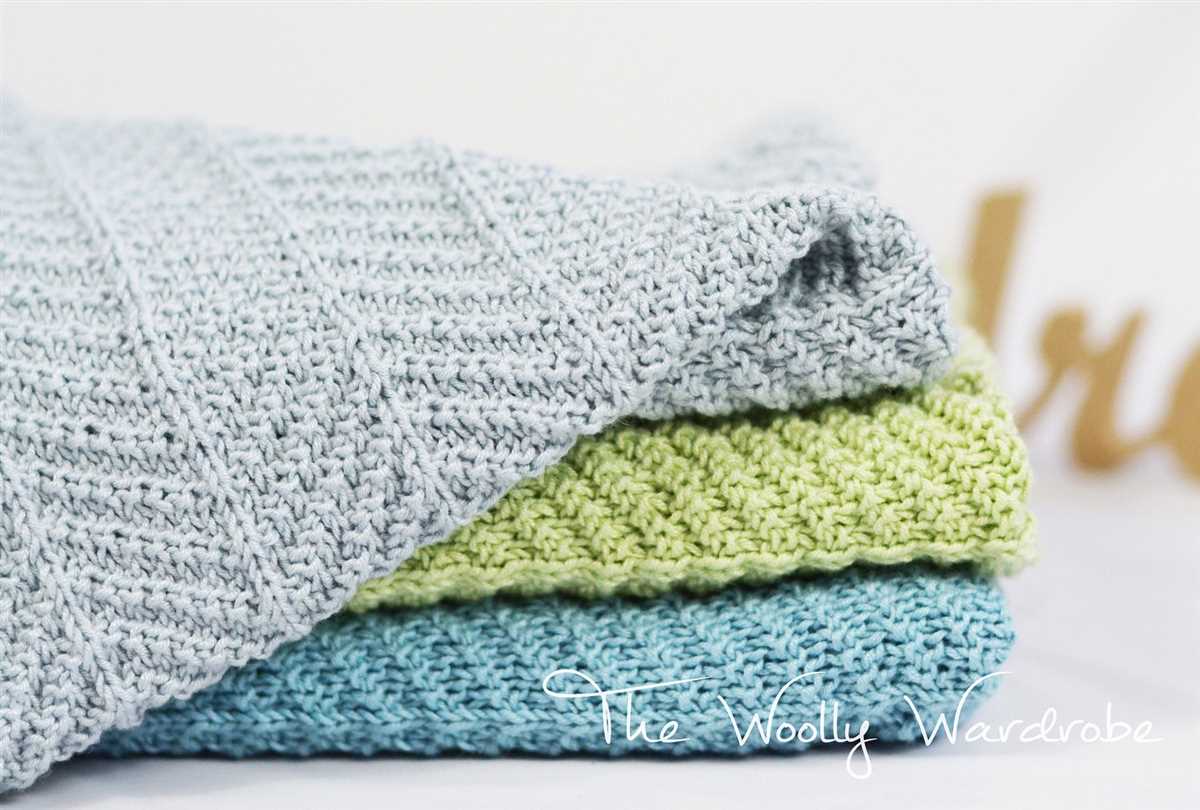
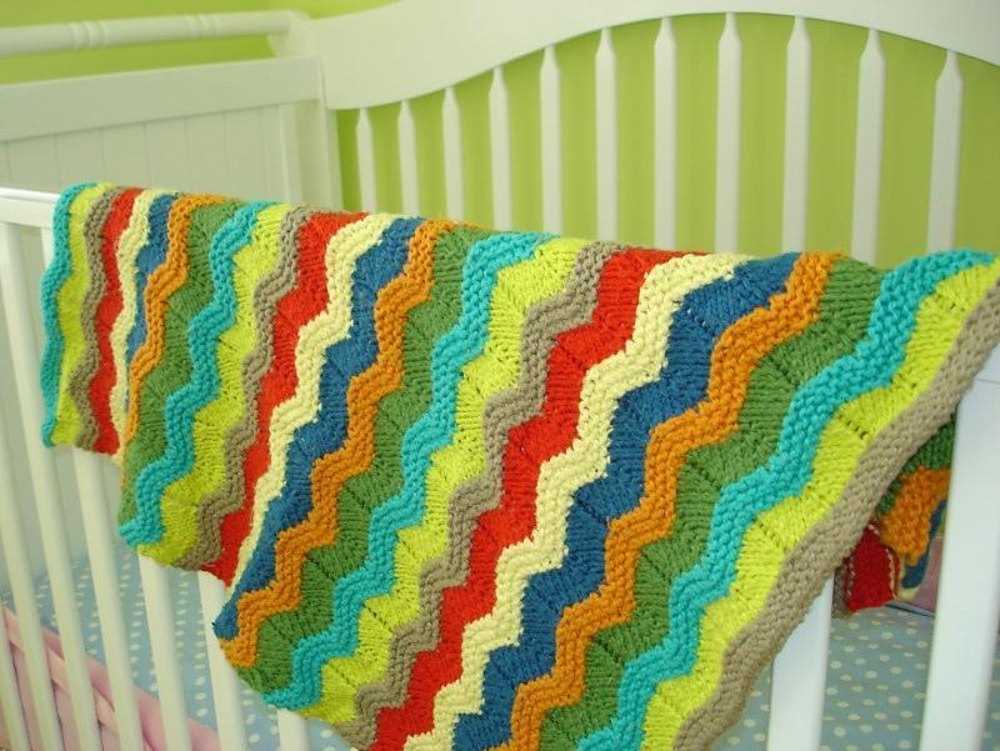
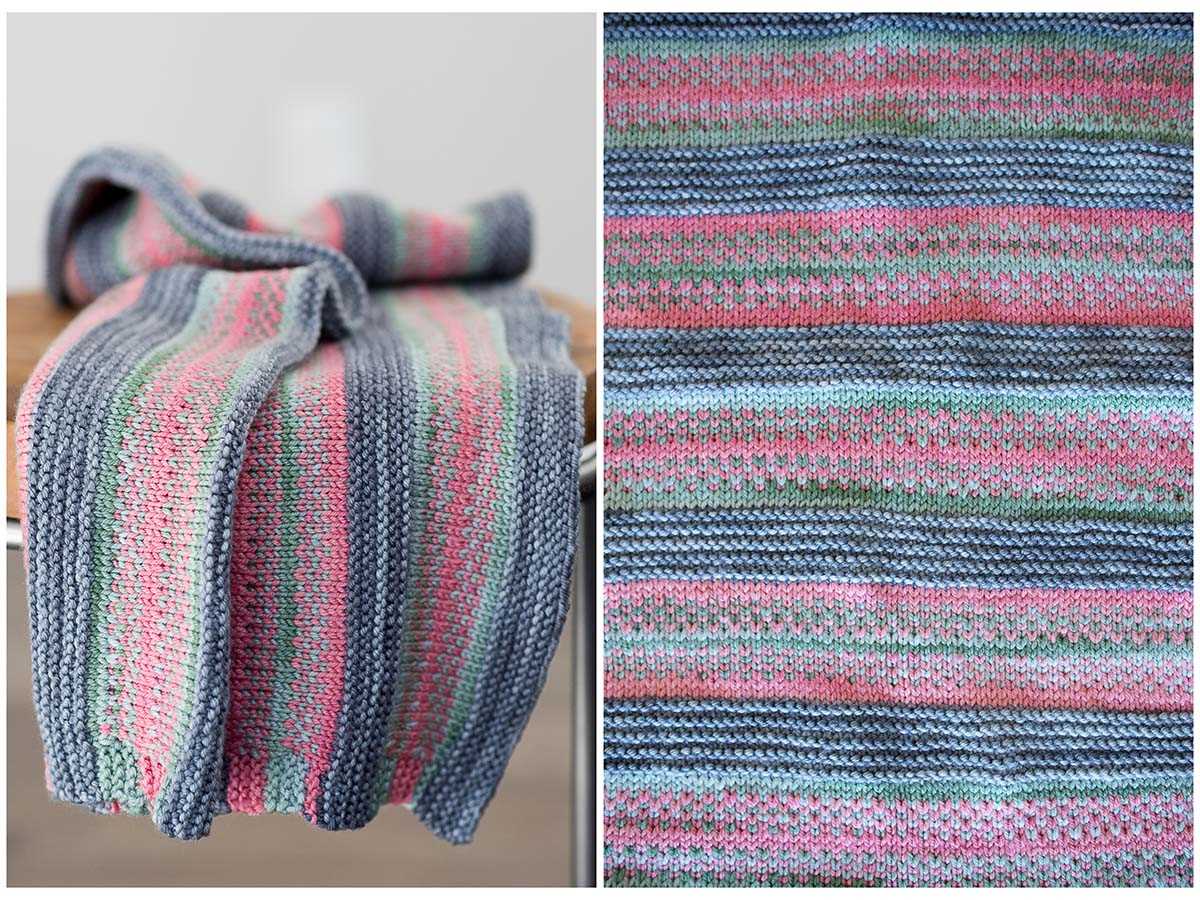
One of the great things about knitting your own knee blanket is that you have complete control over the materials and design. You can choose from a wide variety of yarns, colors, and patterns to create a blanket that reflects your unique style. Whether you prefer a traditional cable pattern or a modern geometric design, the possibilities are endless.
Materials Needed:
- Knitting needles (size and type dependent on the yarn chosen)
- Yarn of your choice (wool, acrylic, or a blend)
- Tapestry needle
- Scissors
- Stitch markers (optional)
Instructions:
- Choose your desired yarn and knitting needles, keeping in mind the gauge recommended on the yarn label.
- Using a cast-on method of your choice, cast on the desired number of stitches. This will depend on the width of the blanket you want to create.
- Begin knitting your chosen pattern, following the instructions row by row. Remember to count your stitches regularly to ensure accuracy.
- Continue knitting until your desired length is reached, keeping in mind that the average knee blanket measures around 40-60 inches in length.
- Once you reach the desired length, bind off your stitches to finish the blanket.
- Weave in any loose ends using a tapestry needle to give your blanket a polished look.
- If desired, add fringe or other decorative elements to personalize your knee blanket.
- Finally, give your knee blanket a gentle steam block or wash according to the yarn’s care instructions to ensure it retains its shape and softness.
With this knee blanket knitting pattern, you can create a cozy and functional accessory that will keep you warm during chilly evenings. Whether you’re knitting for yourself or making a thoughtful gift, a knee blanket is a practical and stylish addition to any home.
The Joy of Knitting
Knitting is not just a hobby, it is a form of art that brings immense joy and satisfaction to those who indulge in it. Whether you are a seasoned knitter or just a beginner, there is something magical about the rhythmic motion of the needles and the gradual formation of a beautiful piece of fabric. The feeling of accomplishment when you complete a knitting project is like no other.
One of the greatest joys of knitting is the ability to create something unique and personalized. With an endless variety of yarns, colors, and patterns to choose from, you have the freedom to design and customize your own creations. Whether you are knitting a cozy blanket, a warm sweater, or a pair of mittens, the possibilities are endless. Each stitch is an opportunity to express your creativity and make something truly one-of-a-kind.
Knitting is also a wonderful way to relax and destress. The repetitive motion of knitting has a calming effect on the mind and can help to reduce anxiety and promote mindfulness. It is a mindful activity that allows you to focus on the present moment and let go of any worries or distractions. Knitting can also serve as a form of meditation, as the process of knitting can be rhythmic and soothing, helping to cultivate a sense of tranquility and inner peace.
Furthermore, knitting is a social activity that brings people together. Joining a knitting circle or taking a knitting class can provide an opportunity to connect with others who share your passion for knitting. It is a great way to make new friends, share tips and techniques, and inspire and motivate one another. Knitting can be a communal experience that fosters a sense of community and belonging.
In conclusion, knitting is not just a hobby, it is a source of joy, self-expression, and relaxation. The act of knitting allows you to create something beautiful and unique, while also providing a sense of calm and connection to others. So pick up your needles, choose your favorite yarn, and let the joy of knitting envelop you. Happy knitting!
Choosing the Right Yarn and Needles
When knitting a knee blanket, it is important to choose the right yarn and needles to ensure that the blanket turns out the way you want it to. The type of yarn you choose will determine the overall texture and warmth of the blanket, while the size of the needles will affect the gauge and drape of the finished product.
Yarn:
When choosing yarn for a knee blanket, consider both the fiber content and weight of the yarn. Common options for knee blankets include wool, acrylic, and blends of different fibers. Wool is a popular choice due to its warmth and natural moisture-wicking properties. Acrylic yarns, on the other hand, are often preferred for their affordability and low-maintenance care. Blends can offer a combination of the best qualities of different fibers.
Additionally, consider the weight of the yarn. Lighter weight yarns, such as lace or fingering, will result in a more delicate and lightweight blanket, while heavier weight yarns, such as bulky or super bulky, will create a chunkier and warmer blanket. Consider the intended use of the blanket when choosing the weight of the yarn, as a heavier weight may be more suitable for colder climates or outdoor use.
Needles:
The size of the needles you use will impact the final gauge and drape of the knee blanket. The needle size should be appropriate for the weight of the yarn you have chosen. Thicker yarns will require larger needles, while thinner yarns will require smaller needles. Most knitting patterns will provide a recommended needle size, but it is important to also consider your personal knitting tension and gauge to achieve the desired result.
Additionally, consider the type of needles you prefer to work with. Circular needles can be more comfortable to use for larger projects like knee blankets, as they distribute the weight of the blanket more evenly. Straight needles can be used for smaller sections or if you prefer the traditional knitting method.
- Consider the fiber content and weight of the yarn when choosing yarn for a knee blanket.
- Thicker yarns will require larger needles, while thinner yarns will require smaller needles.
- Circular needles may be more comfortable for knitting larger projects like knee blankets.
Getting Started: Casting On
Before you can start knitting your knee blanket, you need to learn how to cast on. Casting on is the first step in any knitting project and sets the foundation for your stitches. There are different methods for casting on, but the long-tail cast on is commonly used for most projects.
To begin casting on, you will need your knitting needles and your yarn. Make a slipknot at the end of your yarn, leaving a long tail that is about three times the width of your knee blanket. Insert one of your knitting needles into the slipknot and pull it tight, making sure to leave a loop on the needle.
Next, hold your knitting needle with the slipknot in your right hand and the other knitting needle in your left hand. With your right hand, hold the long tail of the yarn and drape it over your left thumb, making sure it is behind the knitting needle in your left hand. Then, use your right index finger to pass the yarn over the top of your left thumb, creating a loop.
Continue this process of passing the yarn over your left thumb and creating loops until you have the desired number of stitches on your knitting needle. Make sure to keep the tension of the yarn consistent throughout, as loose stitches can result in an uneven knitting pattern.
Once you have cast on all the stitches for your knee blanket, you are ready to start knitting! Remember to follow the specific knitting pattern instructions for your knee blanket to ensure that you create the desired design and size.
Knitting Stitches: Basic and Beyond
Knitting is a versatile craft that allows you to create beautiful and functional items using a variety of stitches. Whether you’re a beginner looking to learn the basics or an experienced knitter seeking new challenges, there are endless possibilities when it comes to knitting stitches.
Basic Stitches:
The first step in learning to knit is mastering the basic stitches. These include the knit stitch and the purl stitch. The knit stitch is created by inserting the right needle into the front of the stitch on the left needle, wrapping the yarn around the right needle, and pulling the loop through. The purl stitch, on the other hand, is created by inserting the right needle into the front of the stitch on the left needle, but wrapping the yarn around the right needle in the opposite direction before pulling the loop through.
Beyond the Basics:
Once you have mastered the basic stitches, you can move on to more advanced techniques and stitches. This includes lace knitting, cable knitting, and colorwork. Lace knitting involves creating delicate and intricate patterns using a combination of yarn overs and decreases. Cable knitting creates textured and braided designs by crossing stitches over each other. Colorwork, such as Fair Isle and intarsia, allows you to incorporate multiple colors into your knitting to create beautiful patterns and designs.
Resources and Inspiration:
There are countless resources available to help you expand your knitting stitch repertoire. Books, online tutorials, and knitting magazines are great sources of inspiration and instruction. Additionally, joining a knitting group or taking a knitting class can provide opportunities to learn new stitches and techniques from experienced knitters. So grab your needles and explore the world of knitting stitches – there’s no limit to what you can create!
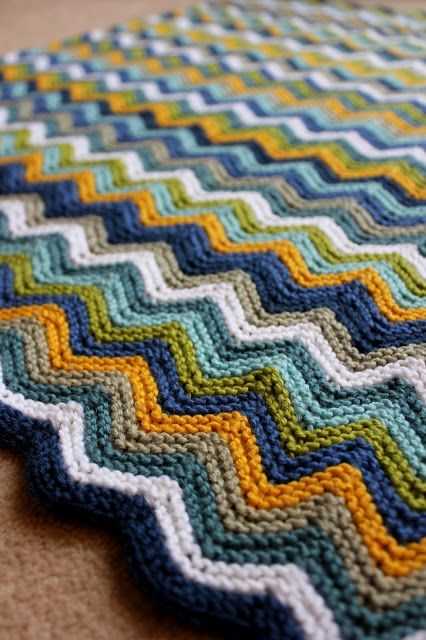
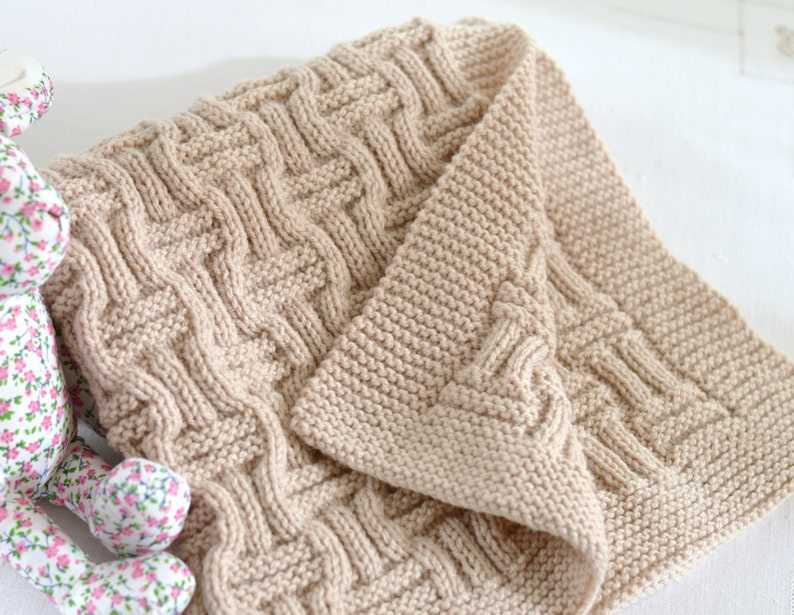
Creating Patterns: Adding Texture and Design
When it comes to knitting patterns, adding texture and design can take your project to a whole new level. Incorporating different stitch patterns and techniques can create a visually interesting and unique piece. Whether you’re working on a knee blanket or any other knitted item, understanding how to add texture and design will allow you to customize your patterns and create something truly special.
1. Stitch Patterns: One of the easiest ways to add texture and design to your knitting is by using different stitch patterns. From simple knit and purl combinations to more intricate lace or cable patterns, there are endless possibilities. Experiment with different stitch patterns and practice them on small swatches before incorporating them into your project. This will allow you to see how the pattern looks and ensure that you’re comfortable executing it.
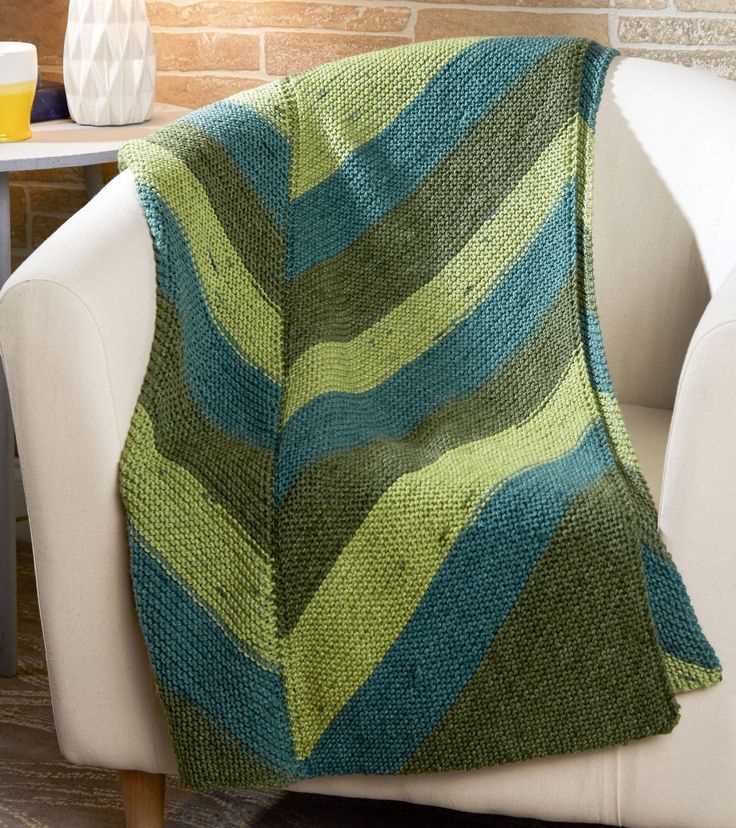
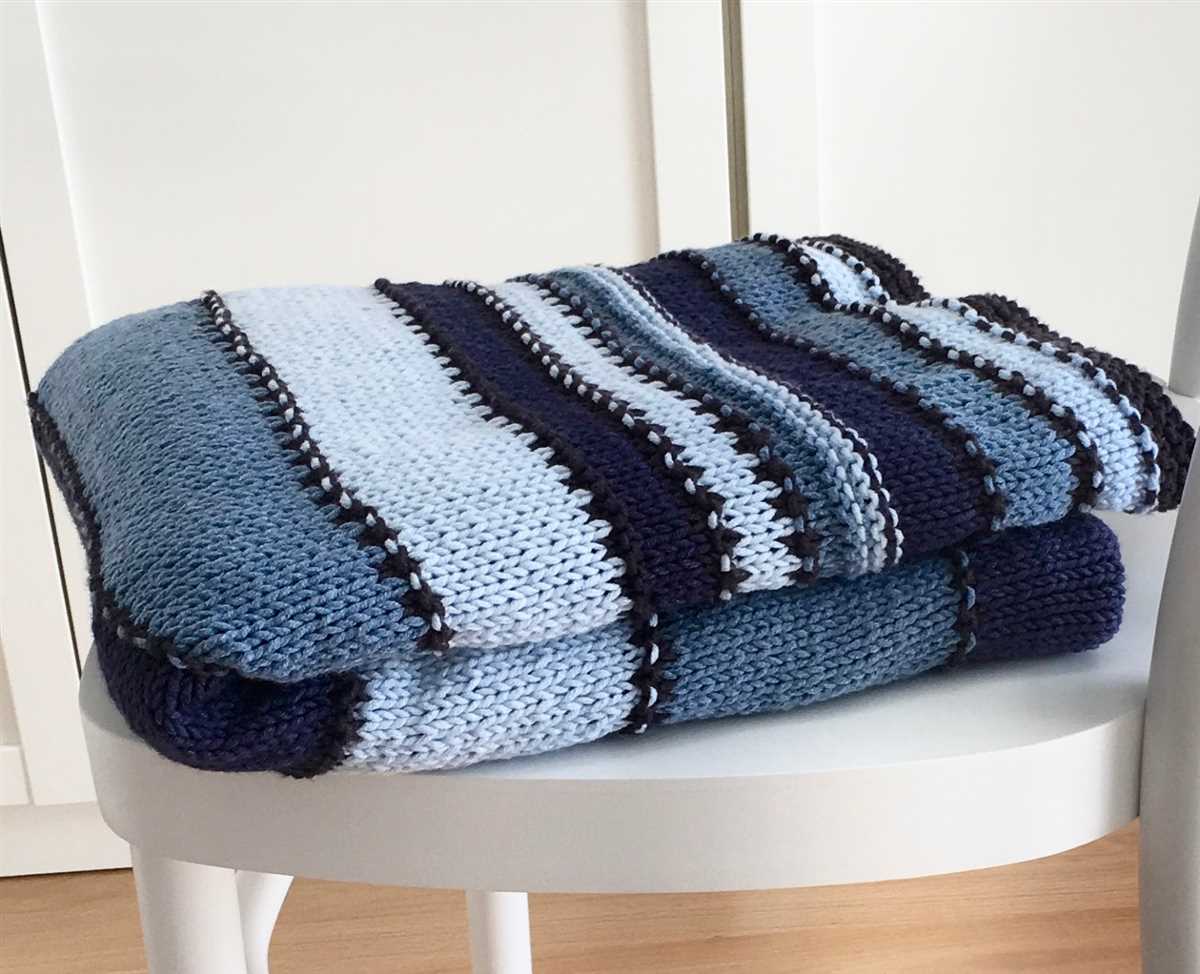
2. Colorwork: Another way to add visual interest to your knitting is by incorporating colorwork. This can be done through stranded knitting, also known as Fair Isle, where two or more colors are used in a single row. You can also experiment with intarsia, where different colors are used to create separate blocks of color. Colorwork allows you to create intricate patterns and designs that can really make your knitting stand out.
- Consider using complementary or contrasting colors to make your design pop.
- When working with multiple colors, it’s important to keep your tension even to ensure that your stitches are uniform.
- Practice colorwork techniques on small swatches before incorporating them into your project.
3. Embellishments: Adding embellishments to your knitting can also enhance its design. Consider adding buttons, beads, or embroidery to create intricate details and texture. You can use these embellishments to highlight specific areas of your knitting or to add subtle accents throughout.
Remember, adding texture and design to your knitting allows you to create unique and personalized pieces. Take the time to explore different stitch patterns, experiment with colorwork, and have fun with embellishments. With practice and creativity, you’ll be able to design knitted items that are truly one-of-a-kind.
Useful Knitting Techniques: Increasing and Decreasing
When knitting, it is often necessary to increase or decrease the number of stitches in a row or round to shape the fabric. These techniques are essential for creating various garment shapes, such as sleeves, necklines, and waistlines. In this guide, we will explore two important knitting techniques: increasing and decreasing.
Increasing
Increasing stitches is done to add more width or fullness to a knitted piece. There are several methods for increasing stitches, including:
- Knit Front and Back (KFB): With this technique, you knit into the front and back of the same stitch, creating two stitches from one.
- Make One (M1): This technique involves picking up the horizontal strand between two stitches and knitting into it, creating a new stitch.
- Yarn Over (YO): By simply wrapping the yarn around the needle, you create an extra stitch.
Decreasing
Decreasing stitches is necessary to shape the fabric or create a taper in a knitted piece. Here are some common methods for decreasing stitches:
- K2tog (Knit Two Together): With this technique, you knit two stitches together as one, reducing the total stitch count by one.
- SSK (Slip, Slip, Knit): This technique involves slipping two stitches knitwise, then knitting them together through the back loops.
- P2tog (Purl Two Together): Similar to K2tog, this technique is used when working in purl stitches.
- SSP (Slip, Slip, Purl): Slip two stitches knitwise, then purl them together through the back loops.
Mastering these knitting techniques will allow you to create beautifully shaped garments and accessories. Whether you’re a beginner or an experienced knitter, it’s important to practice and experiment with these techniques to become more skilled and confident in your knitting projects.
Tailoring the Pattern to Your Needs
When it comes to knitting a knee blanket, one size does not fit all. Fortunately, adjusting the pattern to fit your specific requirements is easier than you might expect. With a few simple modifications, you can customize the blanket to your desired dimensions, ensuring a perfect fit.
Measuring for Proper Sizing: Before making any adjustments to the pattern, it’s crucial to accurately measure the intended recipient. Begin by measuring the length from the top of the knee to the desired blanket length. This will determine the height of the blanket. Next, measure the width around the knees or thighs to determine the desired width. These measurements will serve as a guide during the adjustment process.
Adjusting the Length:
To increase or decrease the length of the knee blanket, simply add or subtract rows from the pattern. Each row in the pattern increases the blanket’s length by a specific amount. Calculate the desired increase or decrease in length and divide it by the length added per row. Round the result to the nearest whole number to determine the number of rows to add or subtract from the pattern.
Modifying the Width:
If the blanket needs to be wider or narrower, adjustments can be made by adding or removing stitches. The pattern typically specifies how many stitches to cast on initially and provides stitch counts for each row. Calculate the desired increase or decrease in width and divide it by the number of rows in the pattern to determine how many stitches should be added or removed for each row.
Note: Keep in mind that altering the blanket’s dimensions will affect the amount of yarn required for the project. Make sure to calculate the new yardage needed before starting to avoid running out of yarn before completion.
By following these steps and making the necessary adjustments, you can create a knee blanket that fits perfectly and provides maximum comfort. Whether you’re knitting for yourself or a loved one, tailoring the pattern to fit ensures a finished product that will be cherished for years to come.
Adding the Final Touch: Binding Off
Once you have completed your knee blanket knitting pattern and are satisfied with its length and width, it is time to add the final touch by binding off. This process ensures that the stitches are secured and prevents them from unraveling.
To bind off, begin by knitting the first two stitches as usual. Then, using your left-hand needle, lift the first stitch over the second stitch and off the right-hand needle. This creates a loop on the right-hand needle. Knit the next stitch and repeat the process of lifting the previous stitch over the newly knitted one until you reach the end of the row.
It is important to maintain a consistent tension throughout the binding off process to ensure that the edge of your knee blanket remains neat and even. As you work, periodically check the tension and adjust if necessary.
After completing the binding off process, you can cut the yarn, leaving a tail of about 6 inches. Thread the tail through the last stitch and pull it tight to secure the end. Finally, weave in any remaining loose ends using a tapestry needle to ensure a polished finish to your knee blanket knitting project.
With the binding off complete and all loose ends secured, your knee blanket is ready to be enjoyed. Whether you choose to keep it for yourself or give it as a gift, the cozy warmth and handmade charm of your knitted knee blanket will surely be appreciated.
Seamless or With Seams: Finishing Options
When knitting a knee blanket, one of the decisions you will have to make is whether to knit it seamlessly or with seams. Both options have their advantages and disadvantages, and it ultimately comes down to personal preference and the desired finished look.
Seamless knitting:
Knitting a knee blanket seamlessly means that you will be working the entire piece without any seams. This can result in a smooth and continuous fabric, with no visible lines or interruptions. The seamless technique is often favored for its clean and polished appearance. However, it can be more challenging and time-consuming to knit, especially for beginners or those with limited knitting experience.
There are different ways to achieve a seamless finish, such as using circular needles or knitting in the round. Circular needles allow you to knit in a continuous loop, avoiding the need for any seams. This is a popular choice for those who enjoy the convenience and ease of knitting without interruptions.
With seams:
If you prefer a simpler and quicker knitting process, you may opt for knitting the knee blanket with seams. This involves knitting separate panels or blocks and then sewing them together at the end. The seams can add structure and stability to the blanket, and they can also be utilized as decorative elements.
When knitting with seams, you have more flexibility in terms of stitch patterns and designs. You can easily incorporate different textures or stitch combinations into each panel, creating a unique and visually appealing blanket. Additionally, seams can make it easier to customize the size or shape of the blanket, as you can adjust the number of panels to achieve the desired dimensions.
In conclusion, whether you choose to knit a knee blanket seamlessly or with seams, both options can result in beautiful and functional finished products. Consider your knitting skills, time constraints, and desired outcome to make an informed decision. Happy knitting!
Finishing Touches: Blocking and Washing
Once you have completed knitting your knee blanket, there are a few final steps to take to ensure that it looks its best and will last for a long time. The first step is blocking, which involves gently stretching and shaping the knitted fabric to even out any irregularities caused by the knitting process. This step is especially important for larger projects like knee blankets, as it helps to give the finished piece a professional and polished appearance.
To block your knee blanket, start by filling a basin or sink with lukewarm water and adding a small amount of mild detergent. Gently swirl the water to mix in the detergent, then carefully place the blanket into the water, making sure it is fully submerged. Allow the blanket to soak for about 15 minutes, then carefully remove it from the water and gently squeeze out any excess moisture.
Next, lay the blanket out on a clean towel and gently roll it up, pressing down to remove even more moisture. Once you have rolled the blanket, carefully unroll it and lay it flat on a clean, dry surface. Use your hands to gently shape and stretch the blanket back to its desired size and shape. Pay attention to any specific areas that may need extra shaping, such as the corners of the blanket.
Note: Knitting can sometimes cause the fabric to curl or warp, so blocking is essential to straighten out the edges and create a smooth and even finish. Blocking also helps the stitches to relax and settle into place, which can give the blanket a softer and more cohesive look.
After blocking, it’s important to properly wash and care for your knee blanket to keep it looking fresh and clean. Follow the care instructions for the specific yarn you used to knit the blanket, as different types of yarn may require different washing methods. In general, it is recommended to hand wash knitted items to avoid stretching or damaging the delicate fibers.
To hand wash your knee blanket, fill a basin or sink with lukewarm water and add a small amount of gentle detergent. Gently agitate the water to mix in the detergent, then place the blanket into the water and let it soak for about 10 minutes. Carefully remove the blanket from the water and gently squeeze out any excess moisture, being careful not to wring or twist the fabric.
Finally, reshape the blanket if necessary and lay it flat on a clean, dry towel to air dry. Avoid hanging the blanket to dry, as this can cause it to stretch or lose its shape. Once the blanket is dry, give it a final inspection to make sure it looks its best, and then it’s ready to be used or gifted to someone special.
Getting Creative: Embellishments and Personalization
In addition to the basic knitting pattern for a knee blanket, there are plenty of opportunities to get creative and add embellishments and personalization to your project. These small details can really make your blanket unique and special.
Colorwork: One simple way to add visual interest to your knee blanket is through colorwork. This can be achieved through techniques such as stripes, checks, or even intricate fair isle or intarsia designs. Experiment with different color combinations to create a stunning effect that complements your personal style.
Embroidery: Another way to personalize your knee blanket is through embroidery. You can add delicate floral motifs, monograms, or even quotes or sayings that hold a special meaning to you. Embroidery can be done using different stitches like satin stitch, backstitch, or French knots, and can be as intricate or simple as you like.
Applique: Adding applique pieces can be a fun and creative way to decorate your knee blanket. You can create shapes or designs using fabric, felt, or even knitting or crochet pieces. Applique can be hand-stitched or sewn onto the blanket, adding texture and dimension to your finished project.
Pom-poms and Tassels: For a playful touch, consider adding pom-poms or tassels to the corners of your knee blanket. These can be made using yarn in coordinating or contrasting colors, and attached securely to prevent them from coming loose during use.
Personalized Tags or Labels: To truly make your knee blanket one-of-a-kind, consider adding a personalized tag or label. You can include your name or initials, the date the blanket was made, or even a small message. This not only adds a personal touch but also serves as a reminder of the time and effort you put into creating the blanket.
With these embellishment ideas, you can take your knee blanket from a simple knitting project to a personalized piece of art that reflects your creativity and style.
Share Your Creations: Showcasing and Inspiring
Thank you for joining us in exploring the world of knee blanket knitting patterns. We hope that you have found this guide helpful in your journey to create beautiful and cozy knee blankets. Now, we invite you to share your creations with us and inspire others in the knitting community.
Whether you followed one of the patterns mentioned in this article or created your own unique design, we would love to see what you have made. Share photos of your knee blankets on social media using the hashtag #KnitKneeBlanket and tag us @KnittingInspiration. We will feature some of our favorite creations on our website and social media channels, showcasing your talent and creativity.
Showcasing your work not only allows you to receive recognition for your knitting skills but also provides inspiration to other knitters who may be looking for their next project. Your creations can serve as a starting point for someone else’s knitting journey or spark ideas for new patterns and designs.
Don’t forget to also share your experiences and any tips or tricks you discovered along the way. Describe the yarn you used, the stitch patterns, and any modifications you made. This will help others who want to recreate your knee blanket or use your ideas as a starting point for their own projects.
By sharing your creations, you become part of a vibrant and supportive knitting community. Together, we can inspire each other and continue to grow and innovate in our craft. So, grab your camera and share your knee blanket knitting projects with us. We can’t wait to see what you have created!
Q&A:
What is a knee blanket?
A knee blanket is a small blanket that is used to cover a person’s legs, specifically their knees, to provide warmth and comfort.
What materials are typically used to knit a knee blanket?
Common materials used to knit a knee blanket include soft acrylic or wool yarn. Other materials such as cotton or chenille can also be used depending on personal preference.
What size should a knee blanket be?
A knee blanket is typically smaller in size compared to a regular blanket. It can vary in dimensions, but a common size range is around 30 inches by 40 inches (76 cm by 102 cm).
Are there specific knitting patterns for knee blankets?
Yes, there are many knitting patterns available specifically for knee blankets. These patterns often include variations of simple stitch patterns like garter stitch or seed stitch, as well as more complex designs like cable or lace patterns.
How long does it usually take to knit a knee blanket?
The time it takes to knit a knee blanket depends on the complexity of the pattern, the knitter’s skill level, and the amount of time dedicated to knitting each day. On average, it can take anywhere from a few days to a few weeks to complete a knee blanket.