
Knitting has always been a popular craft for creating cozy sweaters, scarves, and hats. But did you know that it’s also the perfect technique for bringing a little bit of Irish folklore into your home? With our leprechaun knitting pattern, you can create your own adorable miniature leprechaun that is sure to bring a touch of luck to your space.
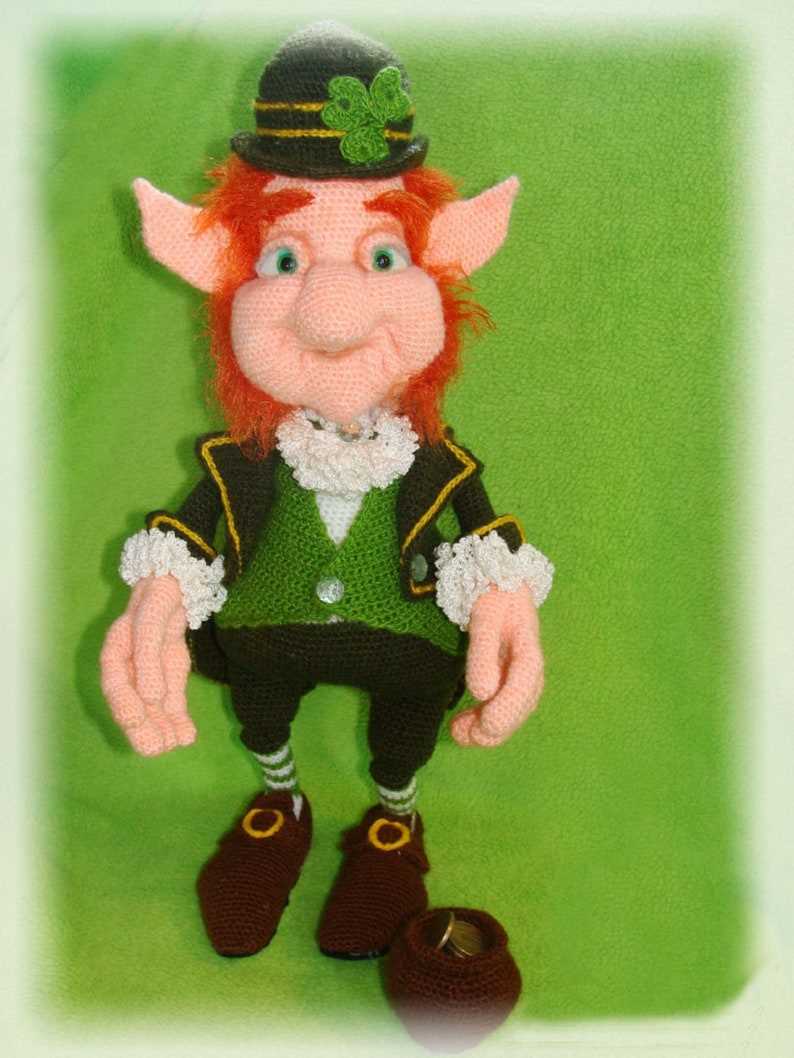
Legend has it that leprechauns are mischievous fairies from Irish mythology. They are known for their distinctive green outfits, pointy hats, and their obsession with treasure and mischief. With this knitting pattern, you can recreate these iconic characteristics and add a cute and whimsical touch to your home decor.
Knitting your own leprechaun is a fun and creative project that allows you to showcase your knitting skills while also adding a unique piece to your collection. Whether you’re a beginner knitter or an experienced pro, this pattern is suitable for all skill levels, and we provide step-by-step instructions to guide you through the process.
So grab your knitting needles and get ready to create your own lucky leprechaun! This charming little creature will make a delightful addition to your seasonal decorations, or you can gift it to a friend or family member who loves all things Irish. Either way, this leprechaun knitting pattern is sure to bring a little extra luck and joy into your life.
Getting started with the leprechaun knitting pattern
Knitting is a wonderful craft that allows you to create unique and personalized items. If you love the magic and charm of leprechauns, then knitting your own leprechaun doll can be a fun and rewarding project. With the leprechaun knitting pattern, you can create an adorable little character that will bring a touch of Irish charm to your home.
Materials:
- Size 4 double-pointed knitting needles
- Worsted weight yarn in green, white, and gold
- Yarn needle
- Polyester fiberfill
- Embroidery thread in black and red
- 2 small black buttons
Step 1: Cast on and knit the body
Begin by casting on 24 stitches using the green yarn. Knit in the round for approximately 4 inches to create the leprechaun’s body. Make sure to leave a long tail when cutting the yarn.
Step 2: Shape the head and add features
Next, shape the head by decreasing stitches gradually until you have 12 stitches left. Cut the green yarn, leaving another long tail. Using the yarn needle, weave the tail through the remaining stitches and pull tight to close the top of the head. Use the black embroidery thread to embroider the leprechaun’s eyes and mouth, and use the red embroidery thread to add a nose. Sew the buttons in place for the eyes.
Continue knitting his legs, arms, and hat using the same techniques. Once all the pieces are complete, stuff them with polyester fiberfill and sew them onto the body. Finally, give your leprechaun a mischievous smile by embroidering a curved line for his mouth.
You can customize your leprechaun by adding a gold buckle to his hat or knitting him a pot of gold. Experiment with different colors and yarn textures to make your leprechaun unique. Happy knitting!
Materials needed for the leprechaun knitting pattern
Knitting a leprechaun requires a few specific materials to capture the charm and whimsy of this Irish folklore character. Here is a list of the essential items you will need to bring your leprechaun to life:
- Yarn: Choose a green yarn for the leprechaun’s outfit and hat. You can also use other colors for additional details such as the face, hands, and accessories.
- Knitting Needles: Select a size of knitting needles that matches the weight of your chosen yarn. The standard size for worsted weight yarn is usually US size 8 (5mm).
- Tapestry Needle: A tapestry needle will be used for sewing up seams and weaving in loose ends.
- Scissors: A good pair of scissors is essential for cutting yarn and trimming any excess.
- Stuffing: You will need stuffing to fill the leprechaun and give it shape. Use polyester fiberfill or another suitable material.
- Buttons or Embroidery Thread: For the eyes, mouth, and other details on the leprechaun’s face, you can use buttons or embroidery thread to sew them on.
- Ribbon or Yarn: You may want to add some decorative elements, such as a ribbon belt or a yarn pom-pom for the leprechaun’s hat.
Gather these materials before starting your leprechaun knitting project to ensure you have everything you need to create a charming and festive character.
Choosing the right yarn for your leprechaun
If you’re planning to knit your own leprechaun, one of the most important decisions you’ll make is choosing the right yarn. The yarn you select will not only determine the overall look and feel of your leprechaun, but also its durability and ease of maintenance. Here are some key factors to consider when making your yarn choice.
Fiber type:
There are various types of yarn fiber available, each with its own unique characteristics. For a leprechaun, you’ll want a yarn that is soft and comfortable, as your finished project will likely be handled and touched frequently. Natural fibers like merino wool or alpaca are excellent choices, as they are soft, warm, and have a luxurious feel. Alternatively, you could opt for a blend that includes synthetic fibers like acrylic or nylon, which can add durability and make your leprechaun easier to care for.
Color:
The color of your yarn is another important consideration when knitting a leprechaun. Traditional leprechauns are often depicted wearing shades of green and gold, so you may want to choose yarn in these colors to give your leprechaun an authentic look. Additionally, you can have fun with different shades and variations of green to create depth and dimension in your knitting. Don’t be afraid to experiment and play with different color combinations to make your leprechaun truly unique.
Weight and gauge:
The weight of your yarn, as well as the corresponding gauge, will impact the size and appearance of your leprechaun. If you want a larger leprechaun, choose a heavier weight yarn, such as bulky or worsted weight. Conversely, if you prefer a smaller leprechaun, opt for a lighter weight yarn, such as fingering or sport weight. Make sure to check the recommended gauge on your knitting pattern and match it with the gauge of your chosen yarn to ensure the correct sizing and fit.
Care instructions:
Consider the care instructions for your yarn before making a decision. Some yarns may require hand-washing, while others can be machine-washed. Keep in mind that leprechauns are likely to be handled and played with, so you’ll want a yarn that can withstand regular cleaning and use. Consider selecting a yarn that is easy to care for and can handle machine-washing, as this will make it more convenient and practical in the long run.
Ultimately, the choice of yarn for your leprechaun will depend on your personal preferences and the specific characteristics you desire in your finished project. Take the time to explore different options, touch and feel the yarn, and consider how it will complement your knitting skills to create a one-of-a-kind leprechaun that is truly magical.
Basic Stitches for the Leprechaun Knitting Pattern
When knitting the leprechaun pattern, it is important to be familiar with a few basic stitches. These stitches will help you create the various elements of the leprechaun’s outfit, including the hat, beard, and jacket. Here are some of the stitches you will need to know:
1. Knit Stitch:
The knit stitch is the most basic stitch in knitting. It forms a ‘v’ shape on the right side of the fabric. To knit, insert the right needle into the first stitch on the left needle, from front to back. Wrap the yarn around the right needle counterclockwise and pull the loop through the stitch, slipping the old stitch off the left needle. This creates a new stitch on the right needle.
2. Purl Stitch:
The purl stitch creates a horizontal line on the right side of the fabric. To purl, insert the right needle into the first stitch on the left needle, from back to front. Wrap the yarn around the right needle counterclockwise and pull the loop through the stitch, slipping the old stitch off the left needle. This also creates a new stitch on the right needle.
3. Increase Stitch:
An increase stitch is used to add stitches to your knitting. There are different methods for increasing stitches, but one common method is the knit front and back (kfb) increase. To kfb, knit into the front of the stitch as usual, but instead of slipping it off the left needle, leave it on. Then, knit into the back of the same stitch and slip it off the left needle. This creates two stitches from one.
4. Decrease Stitch:
A decrease stitch is used to remove stitches from your knitting to shape it. One common decrease stitch is the knit two together (k2tog) decrease. To k2tog, insert the right needle into the next two stitches on the left needle, from left to right. Wrap the yarn around the right needle counterclockwise and pull the loop through the two stitches, slipping them off the left needle. This creates one stitch from two.
These basic stitches will form the foundation of your leprechaun knitting pattern. With these stitches, you will be able to create all the intricate details of the leprechaun’s outfit, resulting in a charming and festive finished project.
How to Knit the Leprechaun’s Body
Knitting the leprechaun’s body is an exciting and fun project that will bring a touch of Irish charm to your knitting collection. Whether you’re an experienced knitter or just starting out, this pattern is perfect for creating a delightful leprechaun doll.
To begin, gather the necessary materials: green yarn, knitting needles (size may vary depending on your desired leprechaun size), stuffing, and a tapestry needle. It’s also helpful to have scissors and stitch markers on hand.
Start by casting on the number of stitches required for the leprechaun’s body. This pattern typically uses a combination of knit and purl stitches to create a textured effect. Take your time and follow the pattern instructions carefully to ensure that the body is knitted evenly.
Tip: Use stitch markers to keep track of your stitches and to help avoid any mistakes in the pattern.
Once you’ve reached the desired length for the leprechaun’s body, it’s time to bind off the stitches. This will create a nice edge and give the body a finished look. Cut the yarn, leaving a long tail for sewing the body together later.
Next, using a tapestry needle, sew up the side seam of the body, leaving a small opening at the bottom for stuffing. Add the stuffing, making sure to evenly distribute it to create a plush and well-shaped leprechaun body.
Finally, use the tapestry needle to close up the remaining opening. Weave in any loose ends of yarn to ensure a neat and tidy finish. Your leprechaun’s body is now complete and ready to be dressed in festive attire!
Continue with the leprechaun knitting pattern to create the arms, legs, and head. Once all the pieces are complete, you can assemble them together to bring your adorable leprechaun to life!
Creating the leprechaun’s head and torso
In order to create a leprechaun doll using a knitting pattern, it is important to start with the head and torso. These parts form the foundation of the doll’s body and give it its unique character.
Materials needed: Before you begin, gather the necessary materials, including a set of double-pointed knitting needles, yarn in green, orange, and white colors, and stuffing material. Additionally, you will need a set of stitch markers to keep track of your progress.
Starting with the head: Begin by casting on the required number of stitches using green yarn. Knit in the round using a combination of knit and purl stitches to create the desired shape. Use the stitch markers to denote the beginning and end of each round, ensuring that your stitches do not unravel.
Shaping the head: As you knit, incorporate decreases strategically to shape the head. Create a subtle curve by knitting two stitches together at regular intervals. Continue this shaping until the head reaches the desired height, taking care to stuff it lightly as you go.
Moving on to the torso: Once the head is complete, set it aside and move on to knitting the torso. Using orange yarn, cast on the required number of stitches and knit in the same manner as the head, working in the round. Use stitch markers to keep track of your progress and maintain an even stitch count.
Shaping the torso: To create a more defined shape for the leprechaun’s body, incorporate increases and decreases strategically. Introduce increase stitches to create a slight flare at the bottom of the torso, and decrease stitches to taper it towards the neckline. Take care to stuff the torso lightly as you knit, ensuring it retains its shape.
Finishing touches: Once both the head and torso are complete, secure any loose ends and join the two parts together. Thread a yarn needle with matching yarn and stitch the head onto the top of the torso, creating a seamless connection. With a few final adjustments and embellishments, such as adding facial features and a hat, the leprechaun’s head and torso will be complete.
Knitting the leprechaun’s arms and legs
When knitting a leprechaun doll, one of the key parts to focus on are the arms and legs. These appendages give the doll a playful and lifelike appearance. To create the arms and legs, follow the knitting pattern provided, which typically consists of a combination of knit and purl stitches.
Start by casting on the required number of stitches for the desired length of the arms and legs. It’s important to ensure that the cast-on stitches are tight enough to prevent any gaps or loose stitches. From there, follow the pattern instructions for the specific design, which may include increasing or decreasing stitches at certain intervals to create the shape of the limbs.
When working on the arms, remember to knit two separate pieces, one for each arm. This will allow for a more symmetrical finished result. Similarly, for the legs, knit two separate pieces as well. Once the arms and legs are complete, carefully stuff them with fiberfill or another suitable stuffing material to give them a soft and plushy feel.
For added detail and dimension, consider incorporating different colors or stitch patterns to highlight the leprechaun’s features. For example, you could use a contrasting color for the cuffs of the sleeves or add small bobbles to create texture on the legs. Be sure to follow the pattern instructions for any color changes or additional stitch techniques.
- Knit the arms and legs separately in two identical pieces.
- Stuff them with fiberfill or stuffing material.
- Consider adding different colors or stitch patterns for added detail.
Adding personality to your leprechaun
Knitting a leprechaun can be a fun and creative project. One way to make your leprechaun stand out is by adding personality to it. Whether you’re knitting a small toy leprechaun or a larger decorative piece, there are plenty of ways to give it a unique and charming character.
1. Choose the right colors: The traditional colors associated with leprechauns are green, gold, and red. However, don’t be afraid to get creative with your color choices. Consider incorporating different shades of green, adding pops of other bright colors, or even using variegated yarn to give your leprechaun a vibrant and playful look.
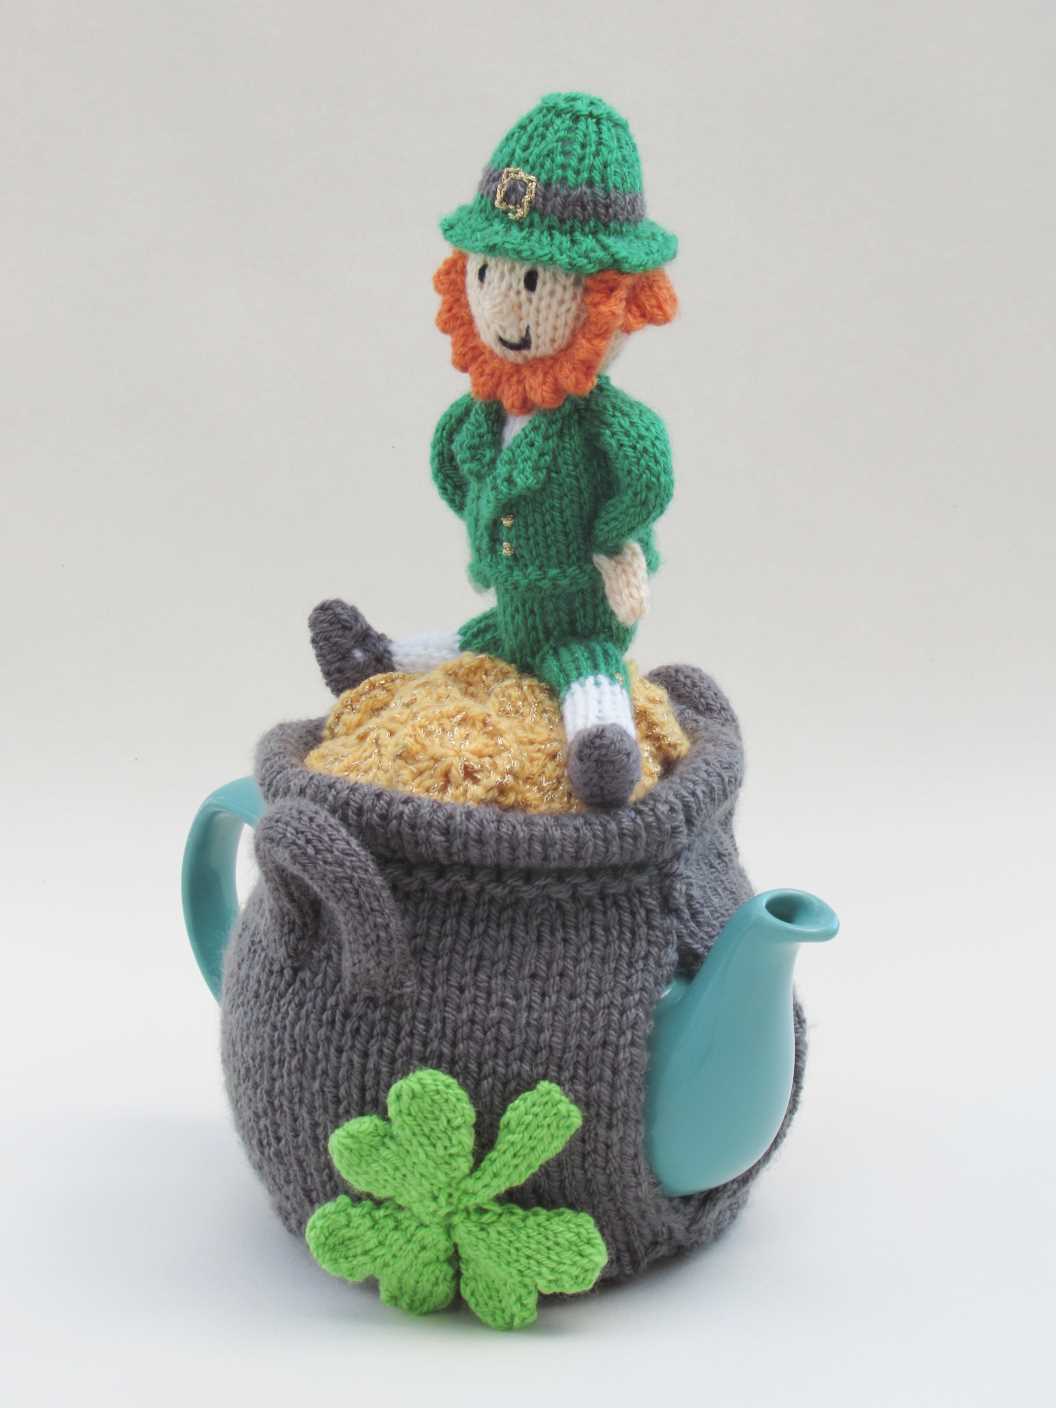
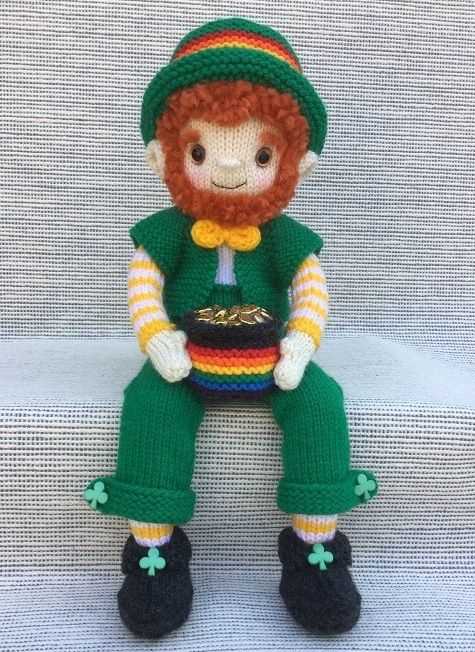
2. Add accessories: Accessories can greatly enhance the personality of your leprechaun. Consider knitting a tiny hat or a patchwork coat for your leprechaun. You can also knit a small pot of gold or a four-leaf clover to include in your leprechaun’s hands. These little details can make your leprechaun feel more alive and magical.
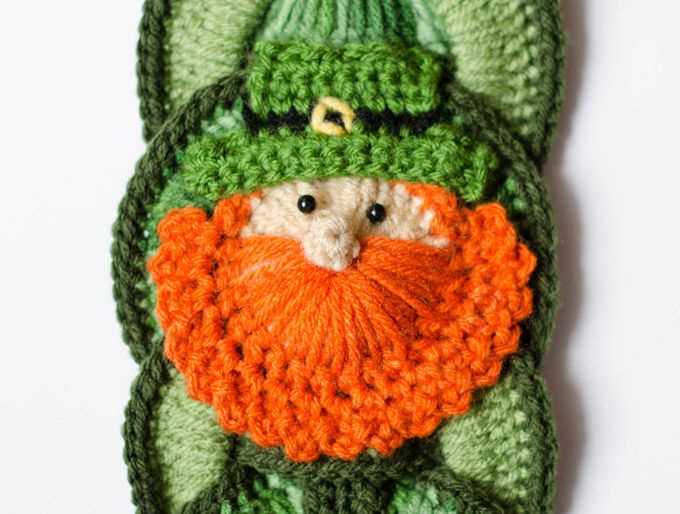
3. Play with facial expressions: The face is a great place to add personality to your leprechaun. Experiment with different facial expressions using embroidery or buttons for eyes. You can create mischievous or friendly expressions to give your leprechaun a distinct character. Don’t forget to use a different color yarn or thread for the eyebrows and mouth to further enhance the expression.
4. Incorporate different textures: By combining different yarn textures, you can add another dimension to your leprechaun’s personality. Consider using fuzzy yarn for the beard or hair, or using a metallic or sparkly yarn for the accessories. These textures will not only make your leprechaun look more interesting but also add a touch of whimsy to its overall appearance.
5. Play with proportions: You can make your leprechaun even more unique by playing with proportions. Experiment with different sizes for the head, hands, and feet to create a more caricature-like look. This will give your leprechaun a whimsical and charming appearance that will surely make it stand out.
By following these tips and getting creative with your knitting, you can add personality to your leprechaun and make it a truly one-of-a-kind creation. So grab your knitting needles and let your imagination run wild!
Creating the leprechaun’s facial features
When knitting a leprechaun, one of the most important aspects to pay attention to is the facial features. The facial features bring the character to life and give it personality. It’s important to take your time and carefully craft each facial feature to ensure the leprechaun looks just right.
Eyes: Start by knitting two small circles for the leprechaun’s eyes. You can use black or brown yarn for a traditional look or get creative with different colors for a more whimsical touch. Sew the eyes onto the head, making sure they are evenly spaced and symmetrical.
Nose: The leprechaun’s nose can be knitted separately or as part of the head. If knitting it separately, create a small oval shape, using a flesh color for a realistic look or a bright color for a playful appearance. Sew the nose onto the center of the face, just below the eyes.
Mouth: The leprechaun’s mouth can be created using simple embroidery stitches. Start by using a backstitch to create a smile shape. You can make the smile as wide or as narrow as you’d like, depending on the expression you want to give to your leprechaun. Fill in the shape by using satin stitches, making sure to keep the stitches tight and even.
Eyebrows and Beard: To add character to your leprechaun, consider knitting bushy eyebrows and a beard. Use a fluffy yarn in a light or white color for the eyebrows and beard. For the eyebrows, create two small triangular shapes and sew them onto the head, just above the eyes. For the beard, knit a long rectangle and sew it onto the chin, allowing it to hang down slightly.
Adding hair and a hat to your leprechaun
When it comes to finishing touches on your leprechaun knitting project, adding hair and a hat can really bring your little character to life. There are several techniques you can use to create the hair and hat, and here are a few ideas to get you started.
1. Yarn hair
One of the simplest ways to give your leprechaun some hair is by using yarn. You can choose a color that matches the leprechaun’s beard or go for a contrasting shade. Cut several strands of yarn to the desired length, and then sew them onto the top of the leprechaun’s head using a tapestry needle. You can create a full head of hair or just a few tufts, depending on the look you want to achieve.
2. Felt hat
A classic accessory for a leprechaun is a hat, and making one out of felt is a great option. Cut a circle of felt that is slightly larger than the circumference of the leprechaun’s head. Fold up the edges to form a hat shape, and secure them with fabric glue or small stitches. You can add a decorative band or bow to the hat for an extra touch of whimsy. Attach the hat to the leprechaun’s head using a few stitches or a small amount of glue.
These are just a couple of ideas to help you add hair and a hat to your leprechaun knitting project. Feel free to get creative and make adjustments as needed to fit your personal style. Remember, the goal is to have fun creating a unique and charming leprechaun that will bring a touch of Irish magic to your home.
Finishing touches for your leprechaun
Creating your own leprechaun is a fun and creative project that allows you to add your own personal touch to this iconic Irish symbol. After following the knitting pattern and completing the main body and hat, it’s time to add some finishing touches to make your leprechaun truly special.
1. Eyes: Give your leprechaun some personality by adding eyes. You can use small buttons, embroidery thread, or even beads. Sew them securely onto the face, making sure they are evenly spaced.
2. Nose: A leprechaun’s nose can be made from a small triangle of fabric or you can use a pom-pom for a playful touch. Sew it onto the face, just below the eyes.
3. Beard: No leprechaun is complete without a bushy white beard. You can use fluffy white yarn or faux fur to create the beard. Cut it into small, even pieces and sew it onto the bottom of the leprechaun’s face, leaving a small space clear for the mouth.
4. Mouth: Using red embroidery thread or a small piece of red felt, create the leprechaun’s mouth. You can make it into a smile or a mischievous grin. Sew it onto the face, just below the beard.
5. Accessories: Finally, add some accessories to your leprechaun to make it even more unique. You can knit a small pot of gold, a four-leaf clover, or a pipe using the same or complementary yarn, and attach it to the leprechaun’s hands or place it alongside them. You can also sew on small buttons or beads for buttons, or even add a belt using a thin ribbon or strip of fabric.
With these finishing touches, you’ll have a charming leprechaun ready to bring some Irish luck and cheer to your home or to give as a special gift to someone who appreciates the magic of these mythical creatures.
Assembling and stuffing the leprechaun
Once you have finished knitting all the separate pieces of the leprechaun, it is time to assemble and stuff him. Start by placing the body piece on a flat surface and aligning the arms and legs with the designated spots on the body. Sew the ends of the arms and legs securely to the body using a yarn needle and matching yarn color.
Next, stuff the leprechaun’s body firmly with fiberfill or stuffing of your choice. Make sure to distribute the stuffing evenly to create a smooth and well-shaped body. You can use a small dowel or knitting needle to help push the stuffing into narrow areas, such as the feet or hands, if needed.
After stuffing the body, it’s time to attach the head. Sew the head piece onto the top of the body, making sure it is centered and securely attached. You can use additional stuffing to fill any gaps between the head and body if necessary.
Once the head is attached, stitch on the leprechaun’s facial features using embroidery floss or yarn in contrasting colors. Use a yarn needle to carefully embroider the eyes, nose, and mouth onto the face, following the pattern or creating your own design.
Finally, add any additional details or accessories to personalize your leprechaun. You can attach a small hat, a knitted beard, or even a pot of gold using the same sewing techniques as before. Once you are satisfied with the finished look, your leprechaun is ready to bring luck and charm to your St. Patrick’s Day celebrations!
Adding final details and finishing touches
Once you have completed the basic knitting of your leprechaun, it’s time to add the final details and finishing touches to bring your creation to life. These small details are what make each leprechaun unique and add personality to your finished project.
1. Facial features
Start by embroidering the facial features of your leprechaun using black yarn or embroidery thread. Stitch two small “X” shapes for the eyes and a small half-circle for the mouth. Be sure to secure the ends of your embroidery thread to prevent unraveling.
2. Hat and clothing
Create a hat for your leprechaun using green yarn. You can either knit or crochet a simple triangular hat shape and sew it onto the top of the leprechaun’s head. Add a small brim by knitting a few rows in a contrasting color and folding it up.
To complete the leprechaun’s outfit, knit or crochet a small vest and pants using a different color of yarn. Sew these pieces onto the body, leaving openings for the arms and legs to go through. You can also add buttons or other decorative elements to the clothing for further customization.
3. Accessories
To give your leprechaun character, consider adding accessories such as a belt, buckle, or suspenders. These can be made by knitting or crocheting small strips of yarn and attaching them to the clothing. You can also create a little bag or pot of gold using yellow or gold yarn.
4. Hair and beard
For the leprechaun’s hair, you can use yarn in a different color or texture than the rest of the body. Cut strands of yarn to the desired length and sew them onto the head to create a full head of hair or a beard. Trim the yarn as needed to achieve the desired look.
Once you have added all the final details, take a step back and admire your finished leprechaun! You can now display it as a decorative item or give it as a unique gift. Have fun experimenting with different colors and accessories to create your own personalized leprechaun.