
A kippah, also known as a yarmulke, is a traditional Jewish head covering. It is worn by Jewish men and sometimes women as a sign of respect and reverence. The kippah is typically a small, rounded cap that sits on the top of the head, covering the crown. It is often made from fabric or knit using yarn.
In recent years, there has been a resurgence of interest in traditional crafts and handmade items, including kippahs. Knitting your own kippah allows you to create a personalized and meaningful head covering. Plus, it’s a great way to showcase your knitting skills and add a touch of style to your outfit.
To help you get started, we have put together a kippah knitting pattern that is suitable for both beginner and experienced knitters. This pattern uses basic stitches and techniques, making it accessible to anyone with basic knitting skills. Whether you’re looking to make a kippah for yourself or as a gift for a loved one, this pattern will guide you through the process step by step.
Kippah Knitting Pattern: Everything You Need to Know
A kippah, also known as a yarmulke, is a small round skullcap traditionally worn by Jewish men as a sign of respect and reverence. Knitting a kippah can be a meaningful and enjoyable project, allowing you to create a personalized accessory that reflects your unique style and religious beliefs. Whether you are an experienced knitter or a beginner, here is everything you need to know about kippah knitting patterns.
Choosing the Right Yarn and Needles
When selecting yarn for your kippah, it’s important to consider the style and overall look you want to achieve. Lighter weight yarns, such as fingering or sport weight, are commonly used for kippahs as they create a more delicate and comfortable finished product. It’s also recommended to choose a yarn that has a bit of stretch, like wool or cotton blends, to ensure a snug fit.
As for needles, circular needles in a small size, such as US size 3 or 4, are most commonly used for knitting kippahs. This allows you to comfortably work in the round and create a seamless design.
Following a Pattern or Designing Your Own
If you’re new to knitting, it may be helpful to start with a kippah knitting pattern that provides step-by-step instructions and guidance. Many free patterns can be found online or in knitting books specifically dedicated to Jewish-themed knitting. Following a pattern can help you understand the construction and shaping techniques necessary to create a well-fitting kippah.
For more experienced knitters, designing your own kippah can be an exciting opportunity to showcase your creativity. You can experiment with different stitch patterns, color combinations, and embellishments to make a truly unique kippah that reflects your personal style and preferences.
Adding Personal Touches
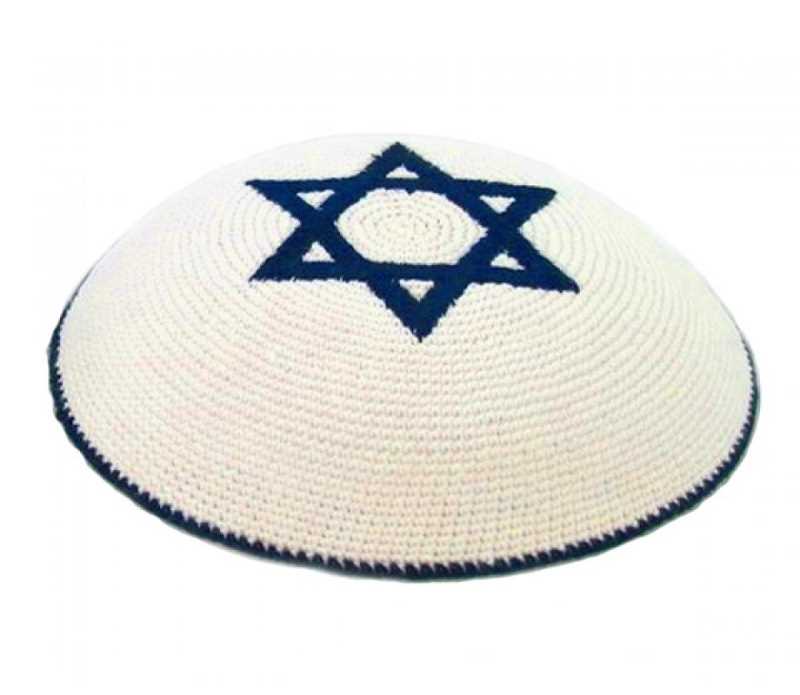
To make your kippah even more special, consider adding personal touches such as embroidery, beads, or appliques. These embellishments can be used to create symbols or designs that hold personal or religious significance to you or your intended recipient. Just be mindful of the weight and placement of the embellishments to ensure that the kippah remains comfortable to wear.
Practice and Patience
Knitting a kippah, like any knitting project, requires practice and patience. The small size of the kippah may present some challenges, especially for beginners. It’s important to take your time, practice your knitting techniques, and not be discouraged by any mistakes or setbacks. Remember, knitting is a skill that improves with practice, and the end result will be a beautiful and meaningful kippah that you can proudly wear or gift to someone else.
In conclusion, knitting a kippah is an opportunity to create a personalized and meaningful accessory that reflects your religious beliefs and style. With the right yarn, needles, and pattern or design, you can create a unique kippah that holds significance for you or your loved ones.
What is a Kippah?
A Kippah, also known as a yarmulke, is a small brimless cap worn by Jewish men as a sign of reverence and respect to God. It is a religious head covering that is typically made from cloth and is often worn during prayer, religious ceremonies, and other important Jewish occasions.
The word “Kippah” is derived from the Hebrew word “kippot,” which means “dome” or “covering.” The Kippah is traditionally worn to acknowledge that God is above and watching over the wearer at all times, serving as a constant reminder of one’s faith and connection to the divine.
Historically, Kippahs were more commonly worn by Orthodox Jewish men, but their use has become widespread among Jews of various denominations and even some non-Jews. Today, Kippahs come in a variety of materials, colors, and designs, allowing individuals to express their personal style while still adhering to religious customs.
Wearing a Kippah is considered a sign of religious identity and a symbol of Jewish heritage. It serves as a visual representation of a person’s commitment to their faith and their connection to the Jewish community. The act of covering one’s head is seen as a way to show humility and acknowledgement of a higher power.
Although traditionally worn by men, women in some Jewish communities also wear head coverings, such as scarves or hats, as a sign of modesty and religious observance. The Kippah, however, remains an iconic symbol of Judaism and is often associated with Jewish men in particular.
The History of Kippahs
The kippah, also known as a yarmulke, is a religious head covering worn by Jewish men, symbolizing their acknowledgment of God’s presence above them. The tradition of wearing a kippah dates back thousands of years and has a rich history rooted in Jewish culture.
The origins of the kippah can be traced back to ancient times when Jewish men would cover their heads as a sign of respect and reverence. In the Talmud, the sacred Jewish text, there are several references to the necessity of covering one’s head during prayer and study of the Torah. This practice gradually evolved into wearing a small, circular cloth on the crown of the head, which eventually became the kippah we know today.
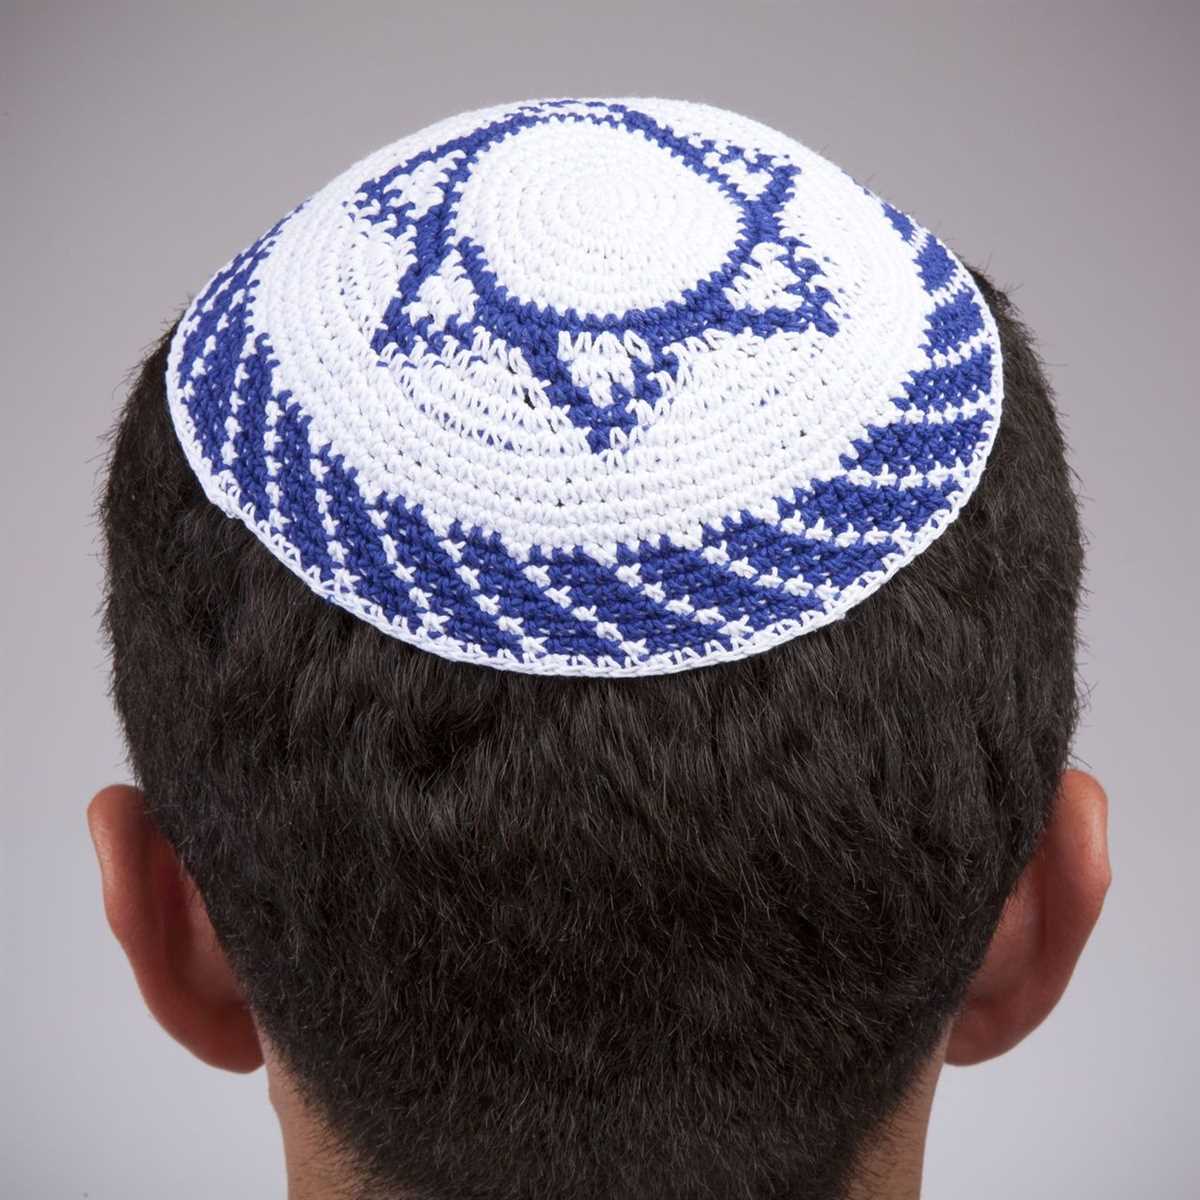
Throughout history, the style and material of kippahs have varied, reflecting the cultural and regional influences of the Jewish community. In some communities, kippahs were made of velvet or satin and adorned with intricate embroidery or embellishments. In other communities, kippahs were simpler in design, made of knitted fabric or crocheted by hand.
The kippah has also become a symbol of Jewish identity and solidarity. It is commonly worn by Jewish men during religious services, but many individuals choose to wear a kippah in their daily lives as a constant reminder of their faith and connection to the Jewish community. In recent years, there has been a resurgence of interest in kippah knitting patterns, as individuals seek to create their own personalized kippahs.
Today, kippahs come in a wide variety of colors, materials, and designs, reflecting the diverse and vibrant nature of Jewish culture. Whether handcrafted or store-bought, the kippah continues to be a cherished symbol of Jewish tradition and a visible expression of religious devotion.
Choosing the Right Yarn for Your Kippah
If you are planning to knit your own kippah, one of the most important decisions you will have to make is choosing the right yarn. The yarn you choose will not only affect the overall look and feel of your kippah, but it will also determine how comfortable it is to wear.
When selecting yarn for a kippah, it is important to consider both the aesthetic and practical aspects. You want a yarn that is durable and will hold its shape, as a kippah is often worn daily and needs to withstand regular use. Additionally, the yarn should be soft and lightweight, as comfort is key when wearing a kippah for extended periods of time.
- Fiber content: Opt for natural fibers such as cotton, silk, or bamboo, as they are breathable and gentle against the skin. These fibers will provide comfort and allow your head to breathe, making them a great choice for warmer weather.
- Weight: Choose a lightweight yarn, preferably in a thinner gauge, to ensure that your kippah is not too heavy or bulky. This will make it more comfortable to wear and less likely to slip off.
- Color: Select a color that reflects your personal style and matches your wardrobe. Neutrals like black, white, or beige are versatile options, while vibrant colors and fun patterns can add a touch of personality to your kippah.
- Care instructions: Consider the care instructions of the yarn, especially if you plan to wear your kippah frequently. Look for yarn that is machine-washable and easy to care for to ensure that your kippah remains clean and in good condition.
By taking these factors into account, you can choose the perfect yarn for your kippah that meets your style preferences while also providing comfort and durability.
Essential Knitting Tools for Kippah Making
When it comes to making a kippah, having the right knitting tools is essential. From selecting the perfect yarn to finding the right needles, having the proper tools can make the knitting process easier and more enjoyable. Here are some essential knitting tools for kippah making:
1. Yarn:
Selecting the right yarn is crucial for kippah making. Opt for a soft and lightweight yarn that is comfortable to wear. Cotton and acrylic yarns are popular choices as they are easy to work with and come in a variety of colors. Choose a yarn that matches your desired kippah style and color scheme.
2. Knitting Needles:
Choosing the right knitting needles is important for achieving the desired tension and gauge in your kippah. Circular needles are a popular choice as they allow for knitting in the round, which is often required for kippah patterns. Make sure to select needles that are the correct size for your chosen yarn weight.
3. Stitch Markers:
Stitch markers are handy tools that help you keep track of your stitches and pattern repeats. They are especially useful when working on kippah patterns that involve intricate stitch patterns or color changes. Use stitch markers to mark important sections or to indicate when to switch colors.
4. Tapestry Needle:
A tapestry needle is essential for weaving in loose ends and finishing your kippah. After completing your knitting, use a tapestry needle to sew in any loose yarn tails and secure them neatly. This will give your kippah a polished and professional finish.
5. Blocking Tools:
Blocking tools such as blocking mats and pins are useful for shaping and stretching your finished kippah. Blocking helps to even out stitches, open up lacy patterns, and give your kippah its final shape. Follow the instructions for your specific yarn and pattern to determine the best blocking method.
With these essential knitting tools, you’ll be well-equipped to create beautiful and personalized kippahs. Happy knitting!
Understanding Kippah Knitting Patterns
Introduction
Kippah knitting patterns are instructions for creating the traditional Jewish head covering known as a kippah or yarmulke. These patterns guide knitters through the process of creating a circular piece of fabric that can be worn on the top of the head. Kippahs are commonly worn by Jewish men and symbolize a connection to God and a reminder of the presence of a higher power.
Knitting kippahs is a cherished tradition in many Jewish communities, and there are numerous patterns available for knitters of all skill levels. These patterns vary in complexity, with some featuring basic stitches and others incorporating intricate designs and colorwork. Understanding kippah knitting patterns is essential for anyone interested in creating their own kippah or knitting one as a gift for a loved one.
1. Basic Construction
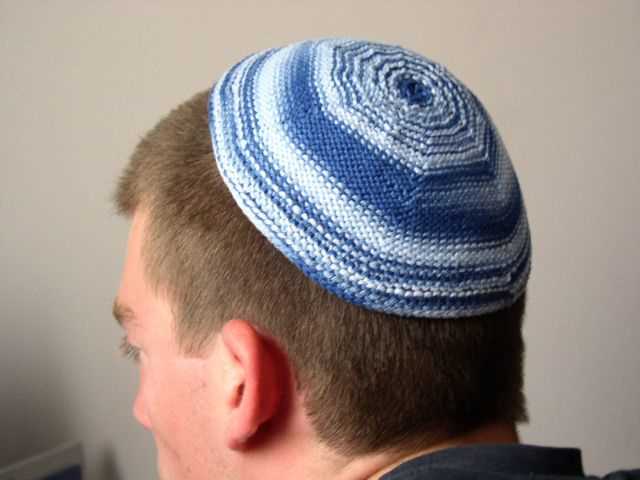
Most kippah knitting patterns start with a small circular cast-on and then continue with increases to shape the fabric into a larger circle. The number of stitches and the rate of increases will vary depending on the desired size and fit of the kippah. A circular needle or double-pointed needles are typically used to accommodate the growing number of stitches.
Once the desired circumference is reached, the pattern may instruct the knitter to work even in a specific stitch pattern or continue with additional shaping for a more tailored fit. Finally, the kippah is typically finished off with a bind-off and any necessary finishing touches, such as weaving in loose ends.
2. Stitch Patterns and Design
Kippah knitting patterns often showcase a variety of stitch patterns and designs to add visual interest to the finished kippah. Common stitch patterns include ribbing, lace, cables, and colorwork. The choice of stitch pattern and design is a personal preference and can be customized to reflect the knitter’s style or incorporate traditional Jewish motifs.
Some kippah patterns may also include instructions for incorporating additional elements, such as a decorative border or a personalized motif. Knitters can get creative with these patterns, adding their own unique touches to make each kippah truly one-of-a-kind.
3. Resources and Considerations
When selecting a kippah knitting pattern, it is important to consider the skill level required, the materials needed, and the intended recipient’s preferences. Beginner-friendly patterns typically use basic stitches and provide detailed instructions, while advanced patterns may assume familiarity with more complex techniques.
There are numerous resources available for finding kippah knitting patterns, including online knitting communities, specialized knitting websites, and knitting books. Additionally, knitters can also find inspiration from existing kippah designs and modify them to suit their preferences.
In conclusion, understanding kippah knitting patterns is crucial for anyone interested in creating their own kippahs. These patterns guide knitters through the process of constructing the circular fabric and incorporating various stitch patterns and designs. With the right resources and considerations, knitters can create unique and meaningful kippahs to wear or gift to others.
Step-by-Step Guide to Knitting a Basic Kippah
Knitting a kippah, also known as a yarmulke, is a popular project for those interested in Jewish traditions, religious attire, or simply knitting. With this step-by-step guide, you will be able to knit your own basic kippah.
Materials:
- Yarn in a color of your choice
- Knitting needles in a size suitable for your chosen yarn
- Tapestry needle
- Scissors
1. Start by choosing your yarn and knitting needles. You can use any type or weight of yarn, as long as the needles you choose are appropriate for the yarn. Thinner yarn will create a more delicate kippah, while thicker yarn will result in a bulkier one.
2. Cast on the desired number of stitches. The number of stitches will depend on the size of kippah you want to create. A good starting point is to cast on 80 stitches, but you can adjust this to make it smaller or larger.
3. Knit every row in a basic knit stitch. This creates the garter stitch pattern, which is simple yet sturdy. Continue knitting every row until your kippah reaches the desired circumference. You can try it on occasionally to check the fit.
4. Once your kippah is the right size, bind off all the stitches. Cut the yarn, leaving a tail of a few inches. Thread the tapestry needle with the tail and weave it through the bound-off stitches to secure them.
5. Fold the knitted piece in half, bringing the cast-on edge and the bound-off edge together. Use the tapestry needle to sew the two edges together, creating a seam along the folded edge. This will form the structure of the kippah.
6. To add a decorative touch, you can embroider a design or add a small crocheted border around the outer edge of the kippah. This step is optional but can personalize your kippah and make it even more special.
Once you have completed these steps, your basic kippah is ready to be worn or gifted. Knitting a kippah can be a meaningful and enjoyable project, allowing you to connect with Jewish traditions and create something with your own hands.
Advanced Kippah Knitting Techniques
In the world of kippah knitting, there are always new techniques to explore and master. These advanced techniques allow experienced knitters to create unique and intricate designs that truly stand out. Whether you’re looking to push the boundaries of traditional kippah patterns or simply want to challenge yourself with a new knitting skill, here are some advanced techniques to consider:
Cable Knitting
Cable knitting is a technique that involves crossing stitches to create a twist or braid-like pattern. By using a cable needle or knitting without a cable needle, you can add beautiful texture and dimension to your kippah design. Experiment with different cable patterns, such as the classic rope cable or the intricate diamond cable, to create stunning visual effects.
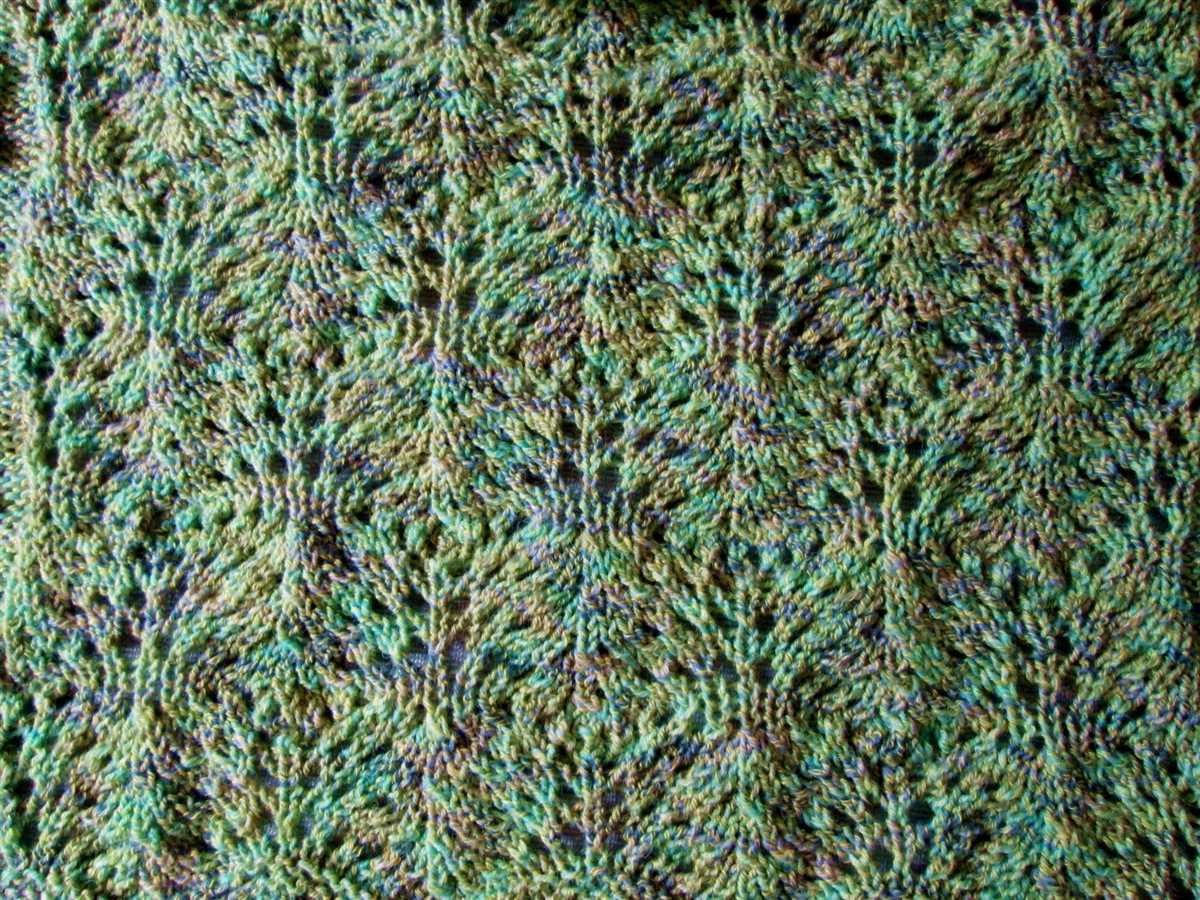
Lace Knitting
Lace knitting is all about creating delicate and intricate patterns using a combination of yarn overs and decreases. Incorporating lace motifs into your kippah can add an elegant and feminine touch. You can choose from various lace stitch patterns, such as the classic feather and fan or the more intricate leaf lace, to achieve the desired effect.
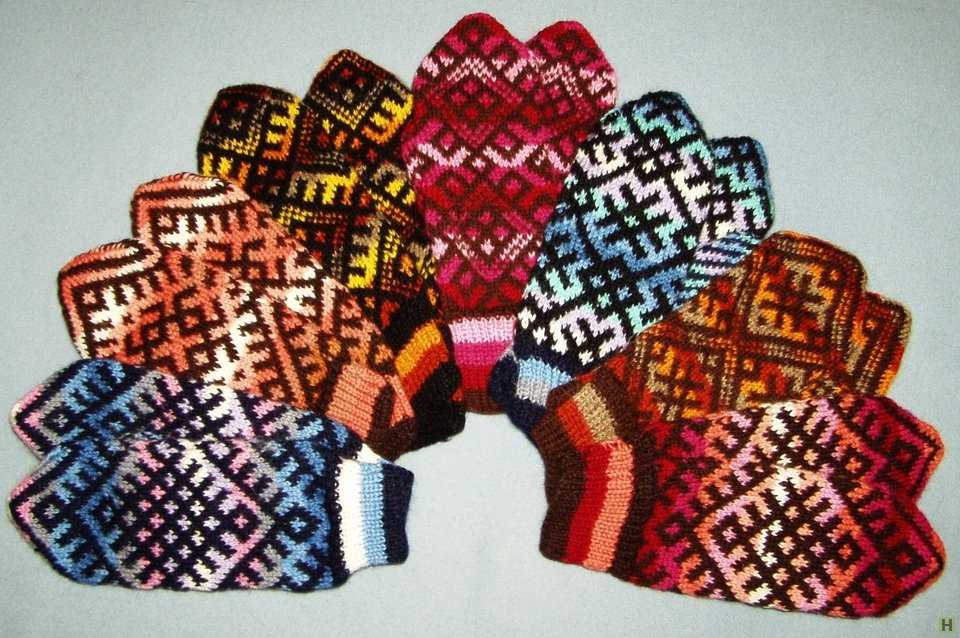
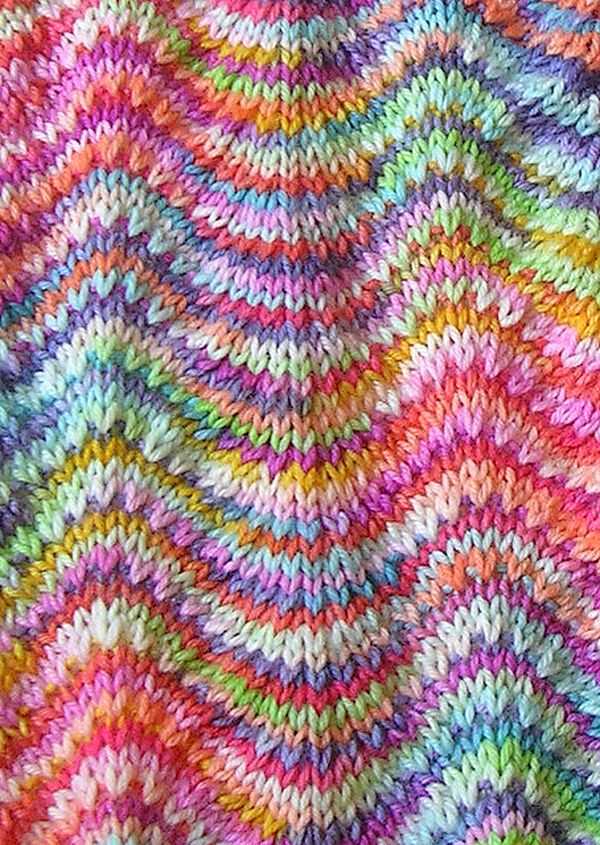
Colorwork
Colorwork involves using multiple colors of yarn in your knitting project to create beautiful patterns or images. Fair Isle and intarsia are two popular colorwork techniques that can be used to add complexity and visual interest to your kippah design. Experiment with different color combinations and charted patterns to create a unique and personalized kippah.
Embroidery and Embellishments
Take your kippah to the next level by incorporating embroidery or embellishments into your knitting. You can use embroidery techniques, such as cross-stitch or duplicate stitch, to add intricate designs or lettering to your kippah. Additionally, you can add beads, sequins, or buttons to create texture and visual interest.
Remember, mastering these advanced knitting techniques takes time and practice. Start by experimenting with small projects or swatches before incorporating them into your kippah designs. With dedication and a little creativity, you can create kippahs that are truly one-of-a-kind.
Adding Personal Touches to Your Kippah
Knitting your own kippah allows you to add personal touches and create a unique accessory that reflects your style and personality. By incorporating different patterns, colors, and materials into your design, you can make a kippah that truly stands out.
1. Choose Your Yarn
When selecting yarn for your kippah, consider the texture, thickness, and color. You can experiment with different types of yarn, such as cotton, wool, or acrylic, to achieve the desired look and feel. Opt for vibrant colors or subtle shades that complement your overall style.
2. Explore Various Knitting Patterns
Get creative with your kippah by exploring different knitting patterns. You can try basic stitch patterns like garter stitch or stockinette for a simple yet stylish look. Alternatively, you can explore more intricate patterns like cables, lace, or colorwork to make your kippah truly unique and eye-catching.
3. Add Embellishments
To further personalize your kippah, consider adding embellishments. You can sew on decorative buttons, beads, or sequins to add a touch of sparkle and glamour. Embroidery or applique can also be used to create intricate designs or add personalized initials or symbols that hold special meaning to you.
4. Experiment with Shape
While traditional kippahs are round, there is no rule that says you can’t experiment with different shapes. Feel free to explore oval, square, or even triangular designs. You can also experiment with different sizes to find a kippah that fits your head comfortably and suits your personal style.
5. Consider the Occasion
When knitting a kippah, consider the occasion or event where you plan to wear it. For casual events, you can go for a more relaxed and playful design. For more formal occasions, opt for sophisticated colors and patterns that complement your outfit. This way, your kippah will not only have a personal touch but also be appropriate for the occasion.
Remember, knitting your own kippah allows you to express your individuality and connect with your heritage. Take advantage of the limitless possibilities and enjoy creating a one-of-a-kind kippah that truly reflects your personal style.
Tips and Tricks for a Perfect Kippah Finish
Knitting a kippah, a traditional Jewish head covering, can be a meaningful and rewarding experience. To achieve a perfect finish for your kippah, here are some helpful tips and tricks:
1. Choose the right yarn:

When selecting yarn for your kippah, it’s important to choose a lightweight and breathable option. Cotton or linen yarns are popular choices as they provide comfort and durability.
2. Use circular needles:
Knitting a kippah is usually done in the round, so using circular needles is the most efficient way to achieve a seamless finish. Circular needles also help distribute the weight of the project evenly, making it more comfortable to work with.
3. Pay attention to gauge:
Getting the gauge right is crucial for a well-fitted kippah. Make sure to check your tension and adjust your needle size if needed. A smaller gauge can result in a tighter and sturdier fabric, while a larger gauge will create a looser and airier texture.
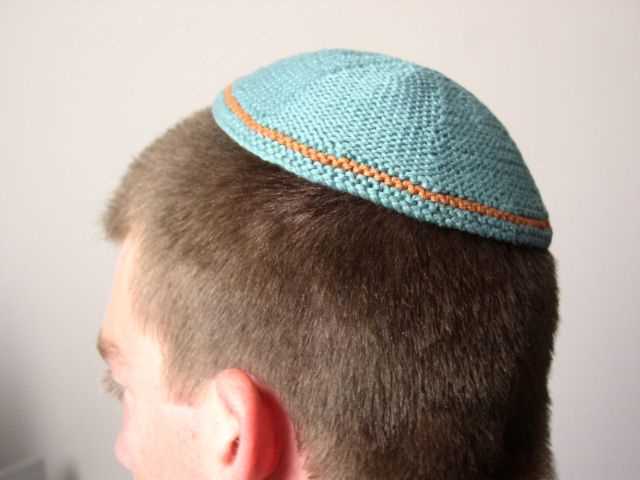
4. Add a ribbed edge:
To give your kippah a polished look, consider adding a ribbed edge. This can be achieved by alternating knit and purl stitches or incorporating a ribbing pattern. A ribbed edge not only adds visual interest, but it also helps the kippah stay in place on the head.
5. Block your finished kippah:
Blocking is an important step to ensure that your kippah maintains its shape and lays flat. Gently soak the finished kippah in lukewarm water, squeeze out the excess moisture, and then shape it on a blocking mat or towel. Allow it to dry completely before wearing or storing.
By following these tips and tricks, you can create a kippah with a perfect finish that will be both functional and meaningful. Remember to choose materials and techniques that suit your preferences and enjoy the process of knitting this cherished accessory.
Inspiring Ideas for Customizing Your Kippah
Wearing a custom kippah can be a meaningful and personal expression of your identity and beliefs. With a little creativity, you can transform a simple kippah into a unique and eye-catching accessory. Here are some inspiring ideas for customizing your kippah:
1. Embroidery
Add a personal touch to your kippah by embroidering your initials, a meaningful symbol, or a favorite verse. Choose contrasting colors for the thread to make the design stand out. Embroidery can be a relaxing and therapeutic activity, and it allows you to create a truly one-of-a-kind kippah.
2. Beads and Sequins
Add a touch of glamour to your kippah by embellishing it with beads and sequins. Create a pattern or simply scatter them randomly for a sparkling effect. Beads and sequins come in a variety of shapes and colors, so you can create a design that reflects your personal style.
3. Appliqué
Add texture and dimension to your kippah by attaching fabric or decorative patches using the appliqué technique. You can choose fabric that represents your heritage, such as tartan for Scottish Jews or African prints for Ethiopian Jews. Appliqué allows you to incorporate different fabrics and patterns, making your kippah truly unique.
4. Paint or Tie-Dye
Get creative with paint or tie-dye to add a splash of color to your kippah. Use fabric paints and brushes to create intricate designs or experiment with tie-dye techniques for a vibrant and psychedelic effect. Painting or tie-dyeing your kippah allows you to express your artistic side and create a kippah that is visually striking.
Summary:
Customizing your kippah is a great way to add a personal touch to your religious attire. Whether you prefer embroidery, beads and sequins, appliqué, or paint, there are countless ways to make your kippah unique. Have fun exploring different techniques and materials, and let your creativity shine through your customized kippah.