
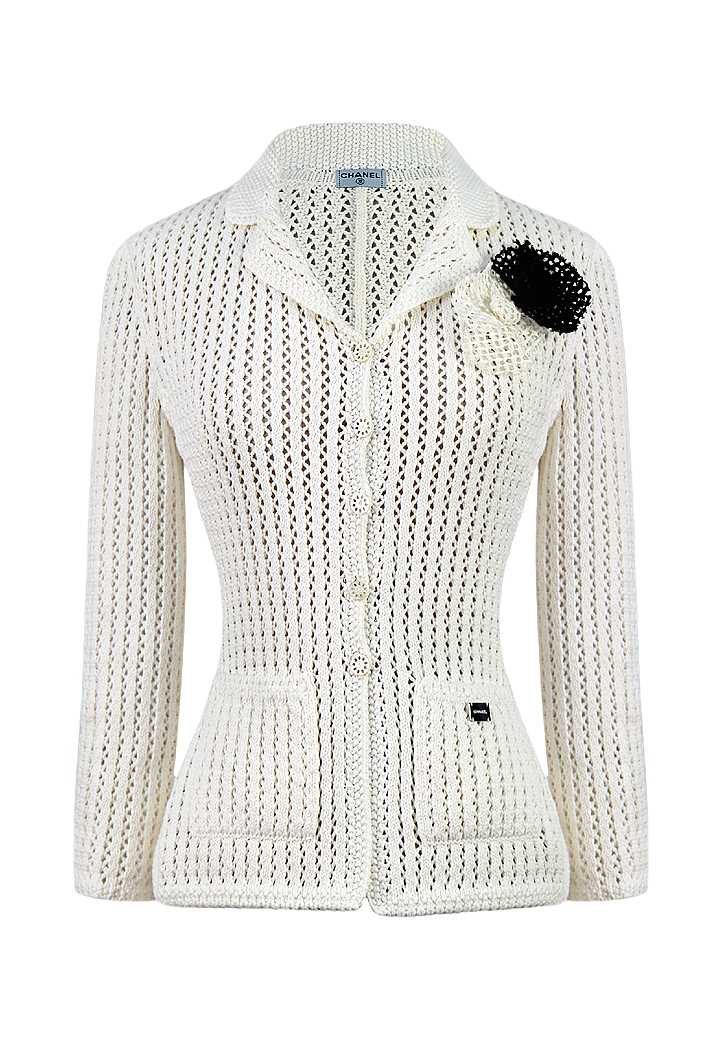
Knitted garments are both comfortable and stylish, and one iconic piece that stands out is the Chanel jacket. Known for its timeless elegance and luxurious feel, the Chanel jacket has become a staple in every fashionista’s wardrobe. This classic piece can elevate any outfit, whether it’s worn with jeans for a casual look or paired with a dress for a more formal occasion.
With its intricate design and intricate techniques, knitting a Chanel jacket may seem like a daunting task. However, with the right pattern and a little patience, you can create your own high-fashion Chanel-inspired jacket. Not only will this project allow you to showcase your knitting skills, but it will also result in a unique and personalized garment that you can be proud of.
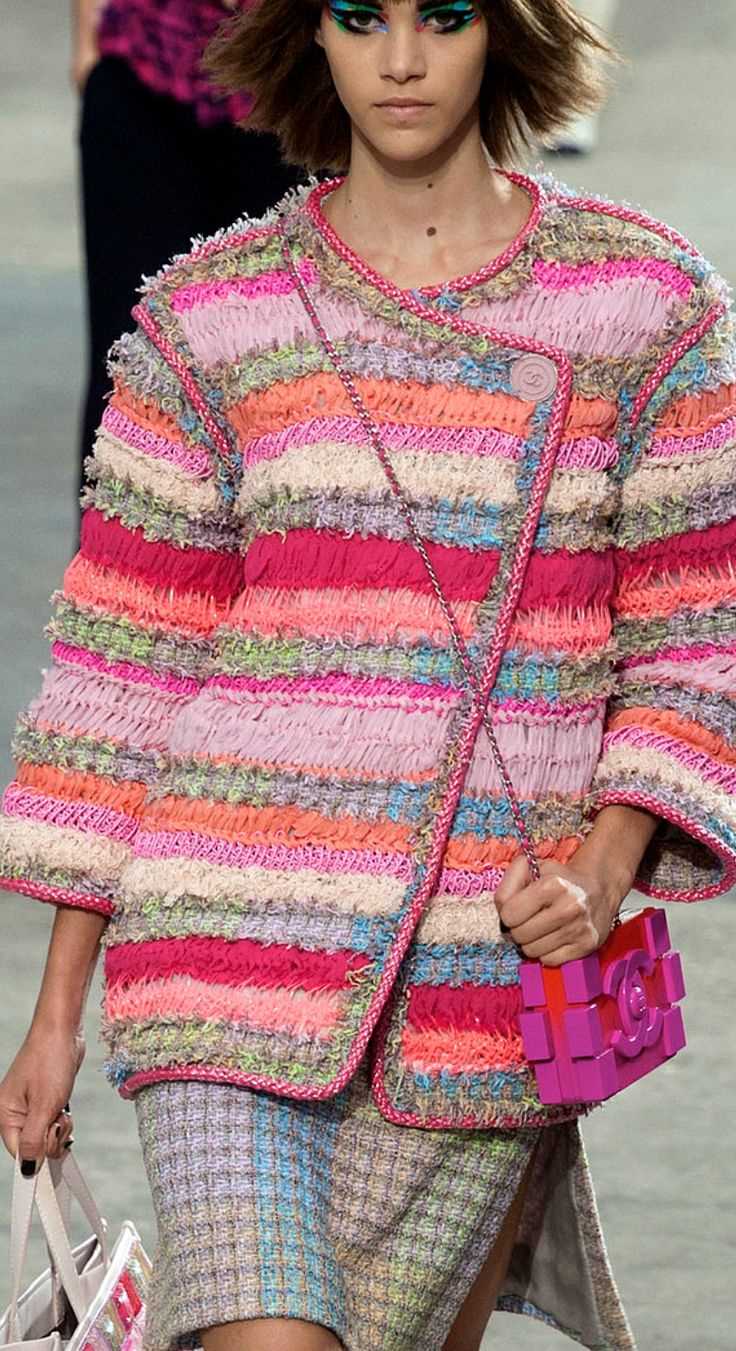
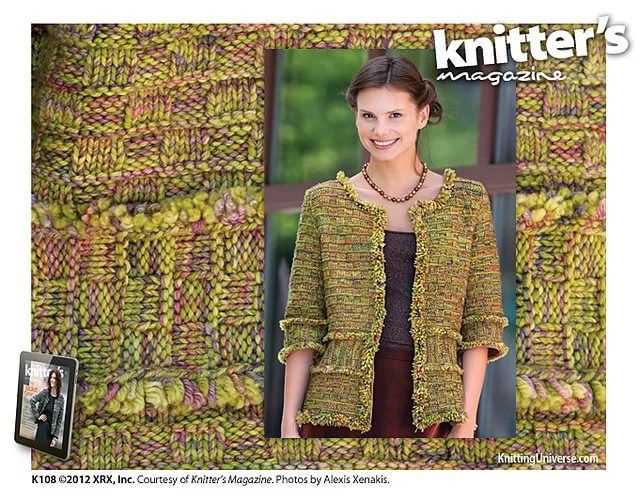
The key to knitting a Chanel jacket lies in selecting the right yarn and color combination. Classic Chanel jackets are typically made with a tweed yarn that adds texture and depth to the garment. The color palette is often neutral, with shades of beige, black, and white dominating the design. However, you can also experiment with bold hues or add a pop of color to make your jacket truly stand out.
Knitted Chanel Jacket Pattern
A knitted Chanel jacket is a classic and timeless piece that every fashion enthusiast should have in their wardrobe. It is an iconic design that originated from the fashion house of Chanel, known for its elegant and sophisticated style.
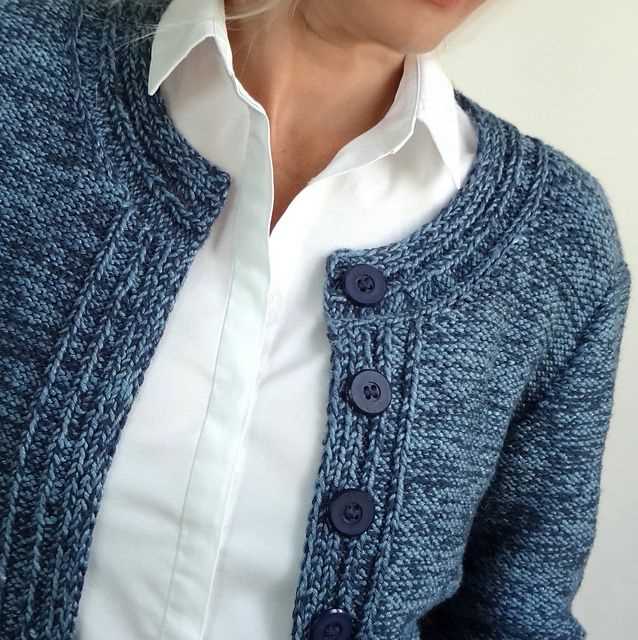
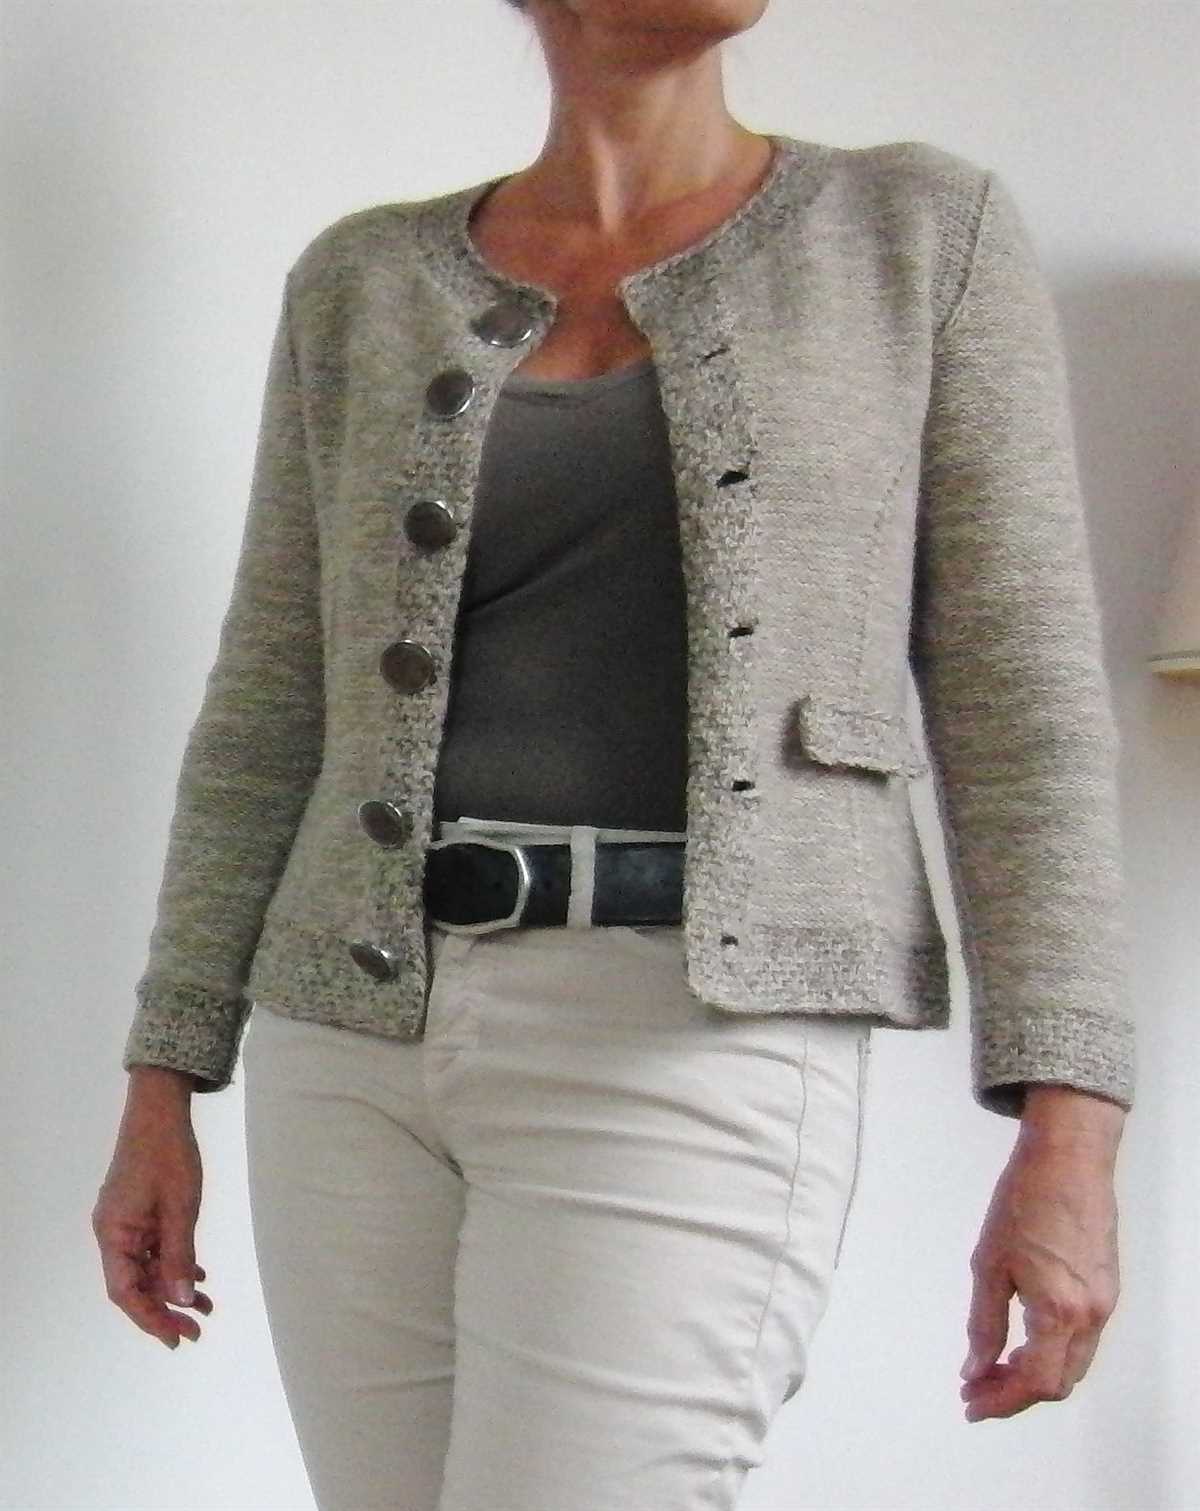
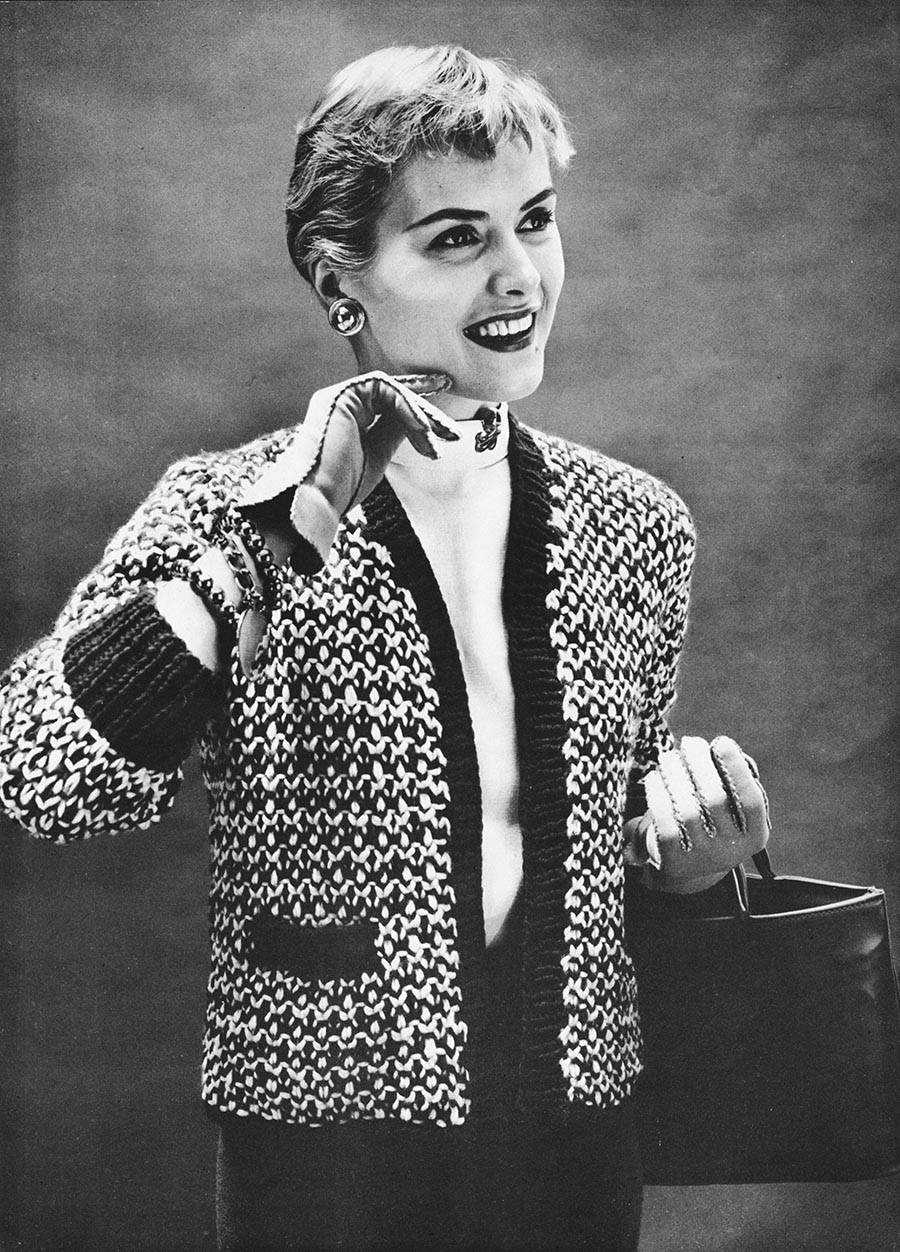
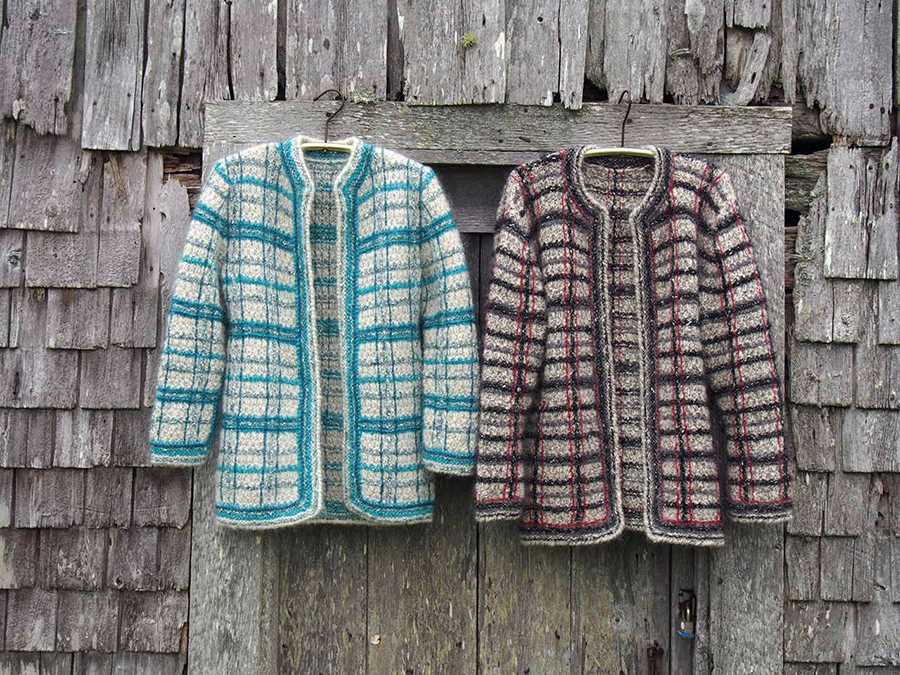
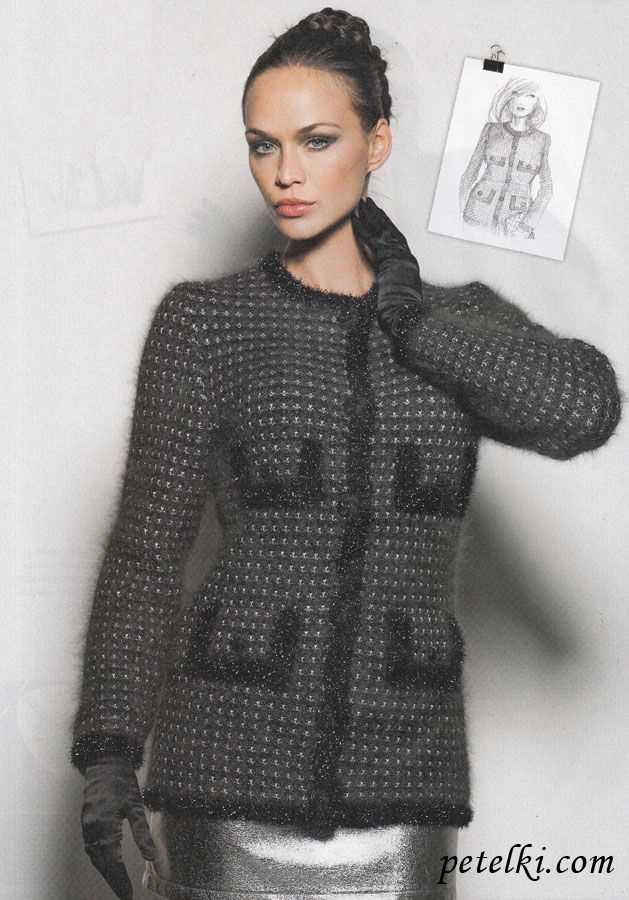
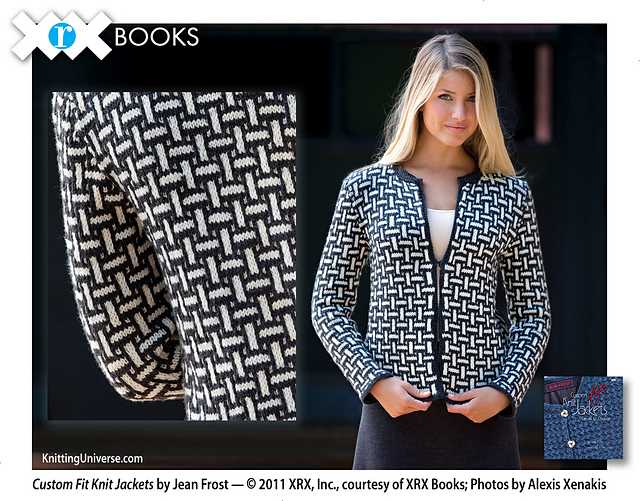
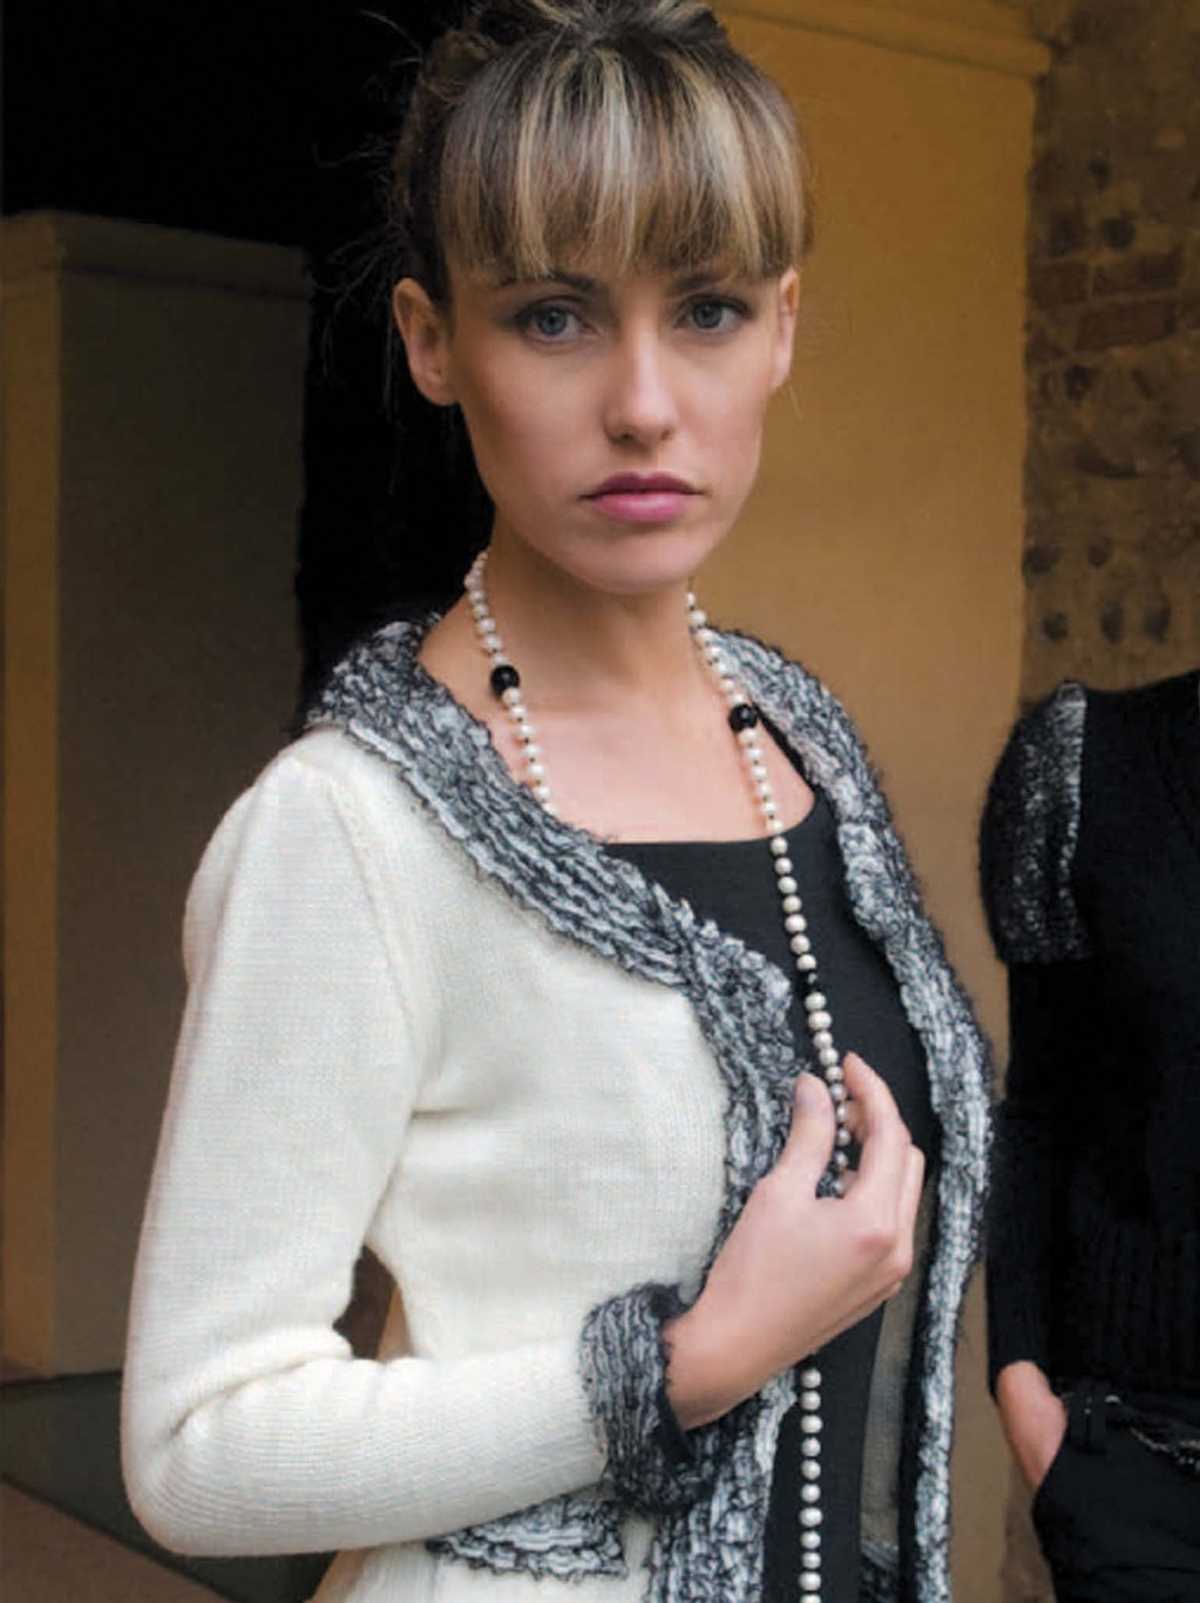
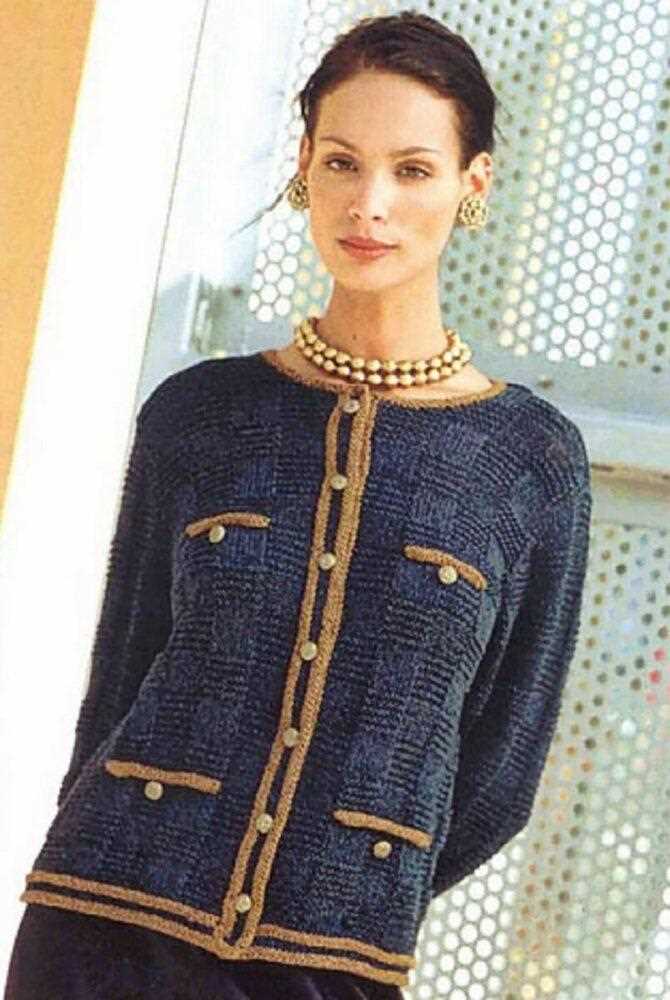
The knitted Chanel jacket pattern is a popular choice for those who enjoy knitting and want to recreate the luxurious look of the original design. It typically features a boxy silhouette with a round neckline, four pockets, and contrasting trim. The jacket is often made from high-quality yarns such as tweed or boucle to achieve the signature textured appearance.
To knit a Chanel jacket, you will need intermediate to advanced knitting skills and knowledge of various techniques such as knitting in the round, picking up stitches, and creating buttonholes. The pattern usually includes detailed instructions and charts to guide you through each step of the process.
When selecting a yarn for your knitted Chanel jacket, it is important to choose a high-quality option that closely resembles the original fabric. Tweed or boucle yarns with flecks of contrasting colors are ideal for achieving the classic Chanel look. The pattern may also specify the recommended gauge and needle size to ensure the proper fit and drape of the jacket.
Once you have finished knitting the pieces of the jacket, it is time to assemble and finish the garment. This involves sewing the seams together, adding the trim and buttons, and blocking the jacket to ensure it retains its shape and structure.
Overall, knitting a Chanel jacket can be a challenging but rewarding project that allows you to create a timeless and elegant piece of clothing. Whether you wear it for special occasions or incorporate it into your everyday wardrobe, a knitted Chanel jacket is sure to make a stylish statement.
Materials Needed
To create your own knitted Chanel jacket, you will need a few essential materials. These include:
- Knitting Needles: Choose a pair of knitting needles that are appropriate for the thickness of your yarn. The size may vary depending on your personal tension and the desired fit of the jacket.
- Yarn: Select a yarn that closely matches the weight and texture of the original Chanel jacket. The yarn should be soft and durable, with good stitch definition.
- Scissors: Keep a pair of sharp scissors nearby for cutting yarn and snipping any loose threads.
- Tapestry Needle: A tapestry needle will be useful for weaving in loose ends and sewing any necessary seams.
- Stitch Markers: Use stitch markers to keep track of important sections or pattern repeats in your knitting.
- Measuring Tape: A measuring tape is essential for checking your gauge and ensuring the correct dimensions of your jacket.
- Button(s): Find buttons that complement the style of your jacket and are the appropriate size for the buttonholes.
With these materials in hand, you will be ready to begin knitting your very own stylish Chanel-inspired jacket. Take your time to choose the perfect yarn and gather all the necessary tools before diving into this exciting project.
Choosing the Right Yarn
When making a knitted Chanel jacket, choosing the right yarn is essential to achieve the desired result. The yarn you choose will determine the overall look, feel, and drape of the finished garment. There are several factors to consider when selecting the appropriate yarn for this project.
1. Fiber Content
The first consideration is the fiber content of the yarn. Chanel jackets are typically made with luxurious and high-quality materials such as wool, cashmere, or silk. These fibers provide warmth, softness, and a luxurious feel to the garment. It is important to choose a yarn that closely matches the desired fiber content to ensure the jacket has the same high-end look and feel.
2. Weight and Gauge
The weight and gauge of the yarn are also important factors to consider. The original Chanel jackets are usually knit with a medium weight yarn, such as a DK or worsted weight. Knitting the jacket with a yarn that is too bulky or too fine may result in an ill-fitting or unflattering final product. It is important to choose a yarn that has a similar weight and gauge to the pattern or to adjust your needle size accordingly.
3. Color and Texture
The color and texture of the yarn can also play a significant role in the overall look of the jacket. Chanel jackets often feature intricate patterns and textures, so choosing a yarn with a similar texture can help to enhance the design. Additionally, selecting a yarn in a color that complements your skin tone and personal style will ensure the jacket is both flattering and fashionable.
By carefully considering the fiber content, weight and gauge, as well as the color and texture of the yarn, you can choose the right yarn for your knitted Chanel jacket project. This will help you create a jacket that is not only stylish and fashionable but also has the same luxurious look and feel as the original Chanel designs.
Getting Started: Casting On
Before you can begin knitting your Chanel jacket, you’ll need to cast on your stitches. Casting on is the process of creating the foundation row of stitches on your knitting needle. This is the first crucial step in any knitting project.
There are several methods you can use to cast on, but for this particular Chanel jacket pattern, we recommend using the long tail cast on method. This method creates a neat, even edge and is perfect for garments with a polished finish. To use the long tail cast on, you’ll need to estimate the length of yarn you’ll need to cast on the required number of stitches plus a few extra inches for the tail.
Once you have your yarn ready, hold the tail end in your right hand and the working yarn in your left hand. Make a slipknot by crossing the two strands of yarn over each other and pulling the working yarn through the loop. Slide the slipknot onto your knitting needle and tighten it slightly. This slipknot counts as your first stitch.
Now, insert the right-hand needle into the loop on the left-hand needle, going from front to back. Wrap the working yarn counterclockwise around the right-hand needle, making sure to keep both strands of yarn behind the needle. Then, bring the right-hand needle back through the loop, pulling the working yarn with it. Slip the new stitch onto the left-hand needle, and repeat this process until you have cast on the required number of stitches for your Chanel jacket pattern.
Remember to take your time and keep your tension even as you cast on. It’s important for the foundation row to be consistent, as it sets the tone for the rest of your knitting. Once you have successfully cast on all your stitches, you’ll be ready to move on to the next step in creating your beautiful knitted Chanel jacket.
The Main Body: Knitting and Purling
When knitting a Chanel jacket, the main body is typically worked in a combination of knit and purl stitches. The pattern will often specify a certain number of rows and stitches to create the desired texture and design. Knitting and purling are the basic stitches used in knitting, and understanding how to work them correctly is essential for this project.
Knitting is the process of looping the yarn around the needle to create new stitches. This is typically done by inserting the right-hand needle into the stitch on the left-hand needle, wrapping the yarn around the needle, and pulling it through to create a new stitch. Purling, on the other hand, is the reverse of knitting. Instead of wrapping the yarn around the needle from back to front, it is wrapped from front to back, and the stitch is worked from the back side.
When following a knitting pattern for a Chanel jacket, it is important to pay attention to the specific instructions for knitting and purling. The pattern may indicate to knit or purl a certain number of stitches in a row, or it may specify a combination of knit and purl stitches to create a specific texture or design. It is essential to follow these instructions accurately to achieve the desired result.
To ensure even tension and consistent stitches, it is important to maintain a steady rhythm and tension while knitting and purling. It may be helpful to practice these stitches on a small swatch before starting the main body of the jacket. This will allow you to familiarize yourself with the pattern and ensure that you are comfortable with the knitting and purling techniques required.
In addition to following the instructions for knitting and purling, it is also important to keep track of your progress as you work on the main body of the jacket. Using stitch markers or a row counter can help you keep track of the number of rows and stitches completed, ensuring that you stay on track with the pattern.
Creating the Chanel Logo
The Chanel logo is one of the most iconic and recognizable logos in the fashion industry. It has become synonymous with luxury, elegance, and timeless style. The logo consists of two interlocking letters, the uppercase C and lowercase C, which stand for the founder of the brand, Coco Chanel.
When creating the Chanel logo, Coco Chanel aimed to design a simple yet distinctive symbol that would represent her brand. She chose the interlocking C’s as a nod to her own name and also because of the visual balance they created. The design of the logo is clean and minimalist, reflecting the brand’s commitment to simplicity and refinement.
To create the logo, the typography was carefully chosen. The letters are bold and symmetrical, giving them a strong and balanced appearance. The corners of the C’s are rounded, softening the overall look of the logo. The spacing between the letters is also important, as it creates a harmonious and well-proportioned design.
- Typography: The Chanel logo uses a custom typeface specifically created for the brand. The font is elegant, sophisticated, and evokes a sense of luxury.
- Color: The Chanel logo is usually displayed in black or white, emphasizing the timeless and classic nature of the brand. Occasionally, the logo is presented in gold or silver, adding a touch of opulence.
- Placement: The Chanel logo is typically placed on products in a prominent and visible position. It is often found on the buttons of Chanel jackets, handbags, and accessories, as well as on the packaging of their perfumes and cosmetics.
- Recognition: The Chanel logo has become an instantly recognizable symbol of luxury and style. It is widely known and appreciated by fashion enthusiasts and consumers around the world.
Overall, the creation of the Chanel logo was a carefully thought-out process, resulting in a timeless and iconic emblem. It is a testament to the brand’s commitment to elegance and simplicity, and continues to be a powerful symbol of luxury and fashion excellence.
Knitting the Sleeves
When knitting the sleeves for your knitted Chanel jacket, it is important to carefully follow the pattern instructions to ensure that they match the desired length and fit. Start by casting on the required number of stitches, which will typically be specified in the pattern.
Row 1: Begin by knitting the first row, following the stitch pattern provided. This may include a combination of knit and purl stitches, as well as any special pattern stitches for the sleeve.
Decreasing: As you continue knitting the sleeves, you may come to a point where you need to decrease the number of stitches to shape the armhole or create a tapering effect. This is typically done by knitting two stitches together or working a decrease stitch, as indicated in the pattern. Make sure to keep track of your stitch count and follow the instructions carefully to achieve the correct shape and fit.
Length: The length of the sleeves will vary depending on your personal preference and the style of the jacket. The pattern should specify the desired length, which can be measured from the cuff to the underarm. Make sure to check the length as you knit to ensure it matches your desired fit.
Finishing: Once you have reached the desired length and shape for your sleeves, you can finish them off by binding off the stitches. This can be done by knitting two stitches together and passing the previous stitch over, or by using any other bind-off method suggested in the pattern. Make sure to secure the last stitch and weave in any loose ends for a clean finished look.
Assembling the Jacket
Once all the pieces of the knitted Chanel jacket have been completed, it is time to assemble them together. This process requires careful attention to detail to ensure that the finished jacket looks professional and well-made.
1. Sewing the shoulder seams: Begin by sewing the two back panels to the front panel at the shoulder seams using a tapestry needle and the same yarn used for knitting the jacket. Make sure to align the stitches and sew them together using an even, invisible stitch.
2. Attaching the sleeves: Next, lay the jacket flat and align the sleeves with the armhole openings. Pin the sleeves in place and sew them to the jacket, starting at the shoulder seam and working your way down to the cuff. Repeat this step for the second sleeve.
3. Sewing the side and sleeve seams: With the right sides facing each other, sew the side seams of the jacket using a mattress stitch or any other invisible seam technique. Make sure to match the pattern and align the stitches as accurately as possible. Repeat this step for the sleeve seams.
4. Sewing the collar: To assemble the collar, first, sew the center back seam together. Then, attach the collar to the neckline of the jacket, making sure it is evenly distributed. Sew it in place using the same invisible stitch technique.
5. Finishing touches: Once all the major seams are sewn, check for any loose ends or imperfections and weave them in to ensure a neat and polished look. Steam block the jacket to set the stitches and give it a professional finish.
By carefully following these steps, you can assemble the knitted Chanel jacket and create a beautiful and stylish garment that showcases your knitting skills.
Finishing Touches: Buttons and Trims

When it comes to creating a knitted Chanel jacket, the finishing touches are what truly make the garment stand out. Buttons and trims play a crucial role in adding that signature Chanel touch to the overall design. Whether you opt for classic and elegant buttons or prefer more intricate trims, the possibilities are endless in creating a unique and personalized jacket.
Choosing the right buttons is essential in achieving the desired look for your knitted Chanel jacket. Classic options include gold or silver buttons embossed with the iconic Chanel logo. These buttons not only add a touch of luxury but also exude timeless elegance. For a more modern and edgy twist, you can experiment with buttons in different shapes, such as rectangular or square, or even opt for buttons with unique detailing like pearls or crystals.
Trims are another essential element in bringing your knitted Chanel jacket to life.
Adding trims to the edges and cuffs of the jacket can elevate its overall appearance and make it more visually appealing. Classic trim options include braided trims, which give a timeless and sophisticated look. These trims can be made from matching or contrasting yarn to create a subtle or bold effect. Crocheted trims are also a popular choice, as they add a delicate and feminine touch to the jacket.
If you’re feeling more adventurous, you can experiment with unconventional trims such as feathers, fringes, or sequins. These trims can add a playful and contemporary twist to your knitted Chanel jacket, making it a true statement piece. Remember that the choice of trim should complement the overall design and style of the jacket, ensuring a harmonious and cohesive look.
Final Thoughts
In conclusion, the knitted Chanel jacket pattern is a versatile and timeless piece that can be a wonderful addition to any wardrobe. Its classic design and intricate details make it a true statement piece that can elevate any outfit.
Knitting this jacket requires intermediate to advanced knitting skills, but the end result is definitely worth the effort. Whether you choose to knit it for yourself or as a gift for someone special, it is sure to be cherished and worn for many years to come.
Remember to choose high-quality yarn and take your time to ensure proper fit and finish. Be sure to follow the pattern carefully and make any necessary adjustments to achieve the desired size and length.
This pattern offers a great opportunity to practice different knitting techniques, such as colorwork and shaping, so don’t be afraid to challenge yourself and learn something new!
Happy knitting!