
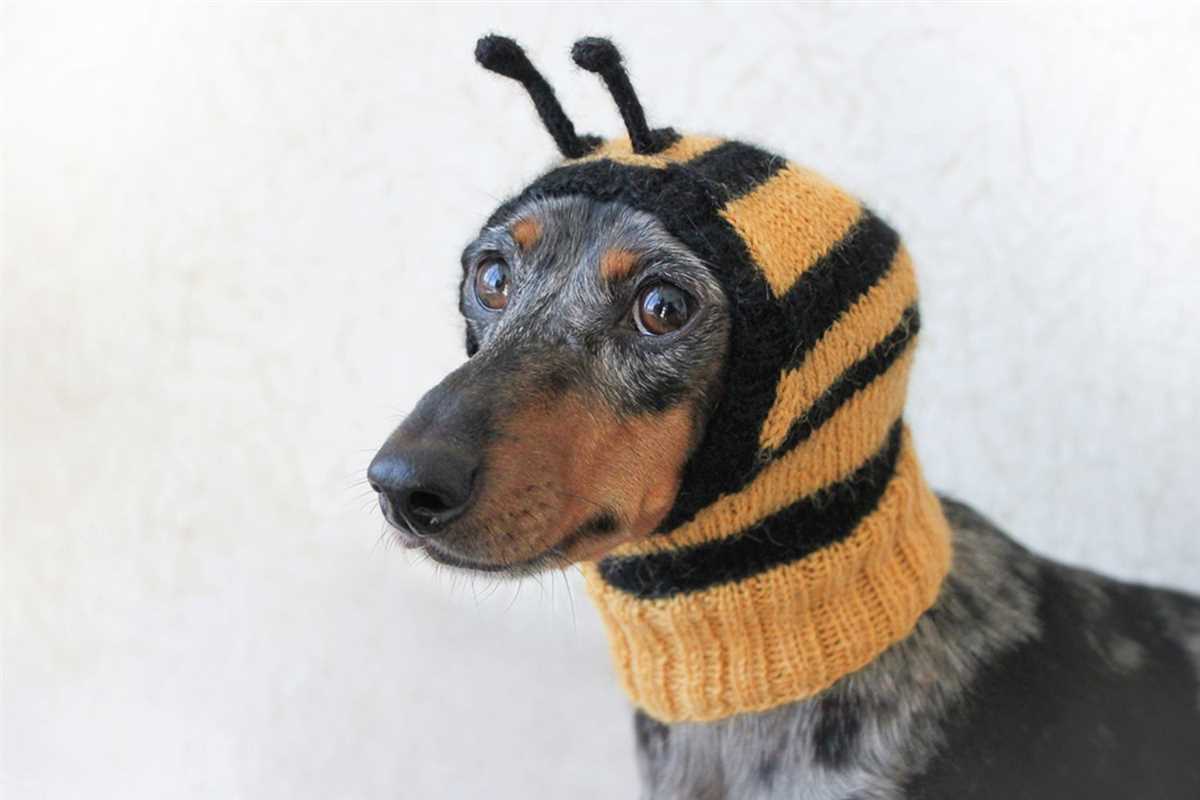
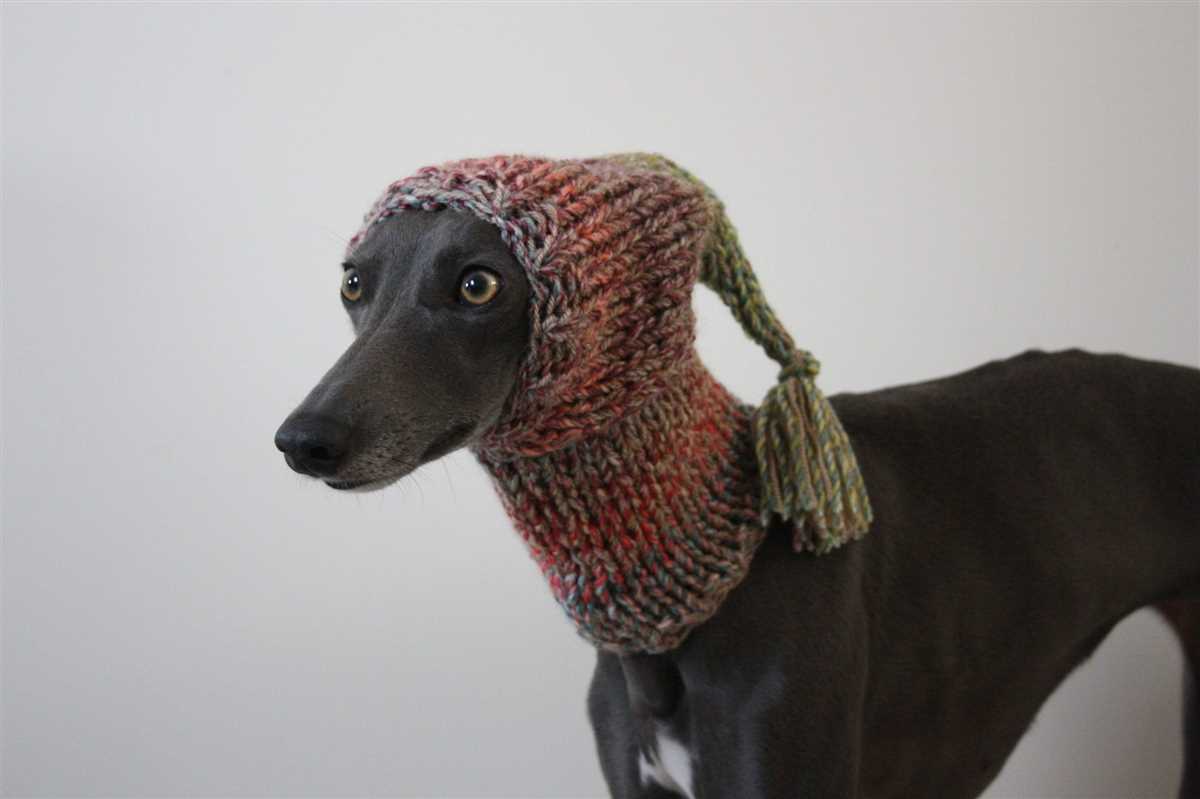
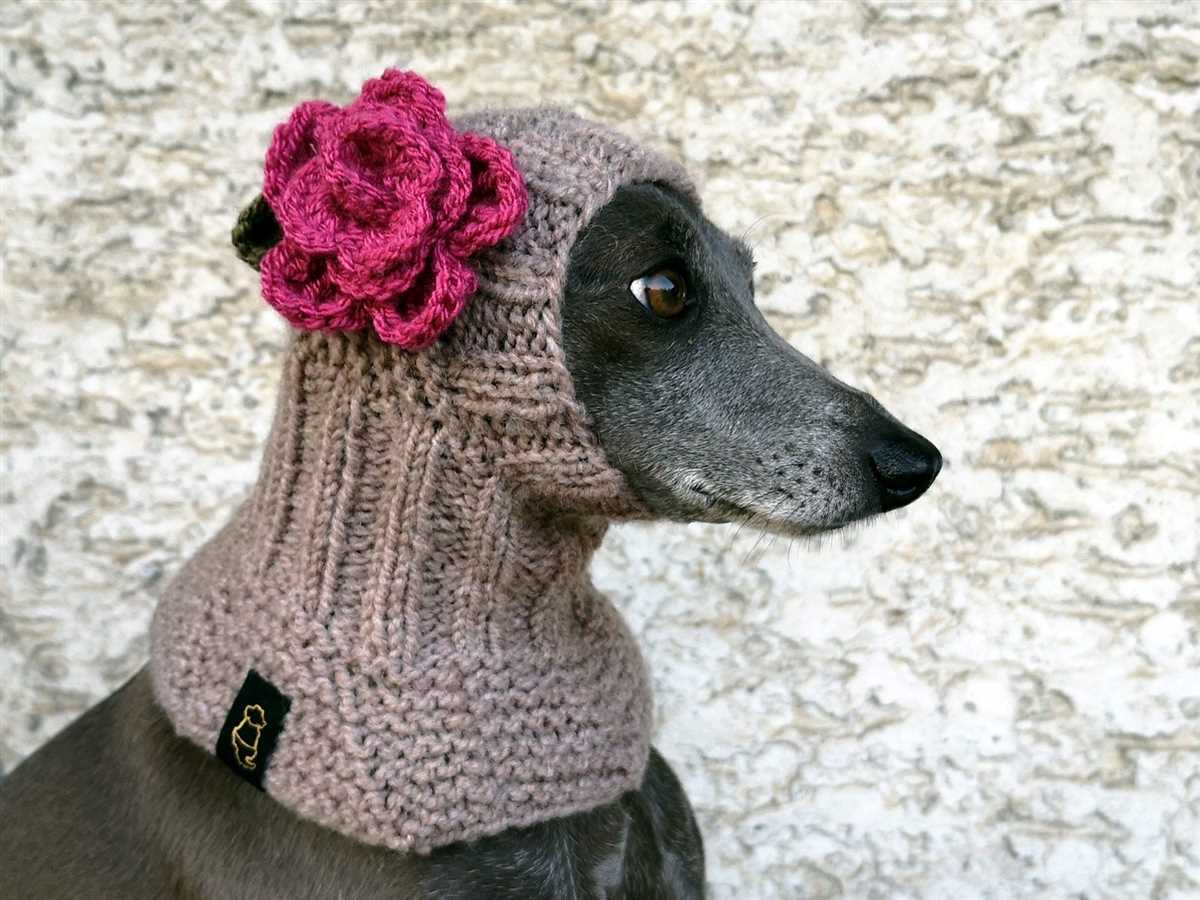
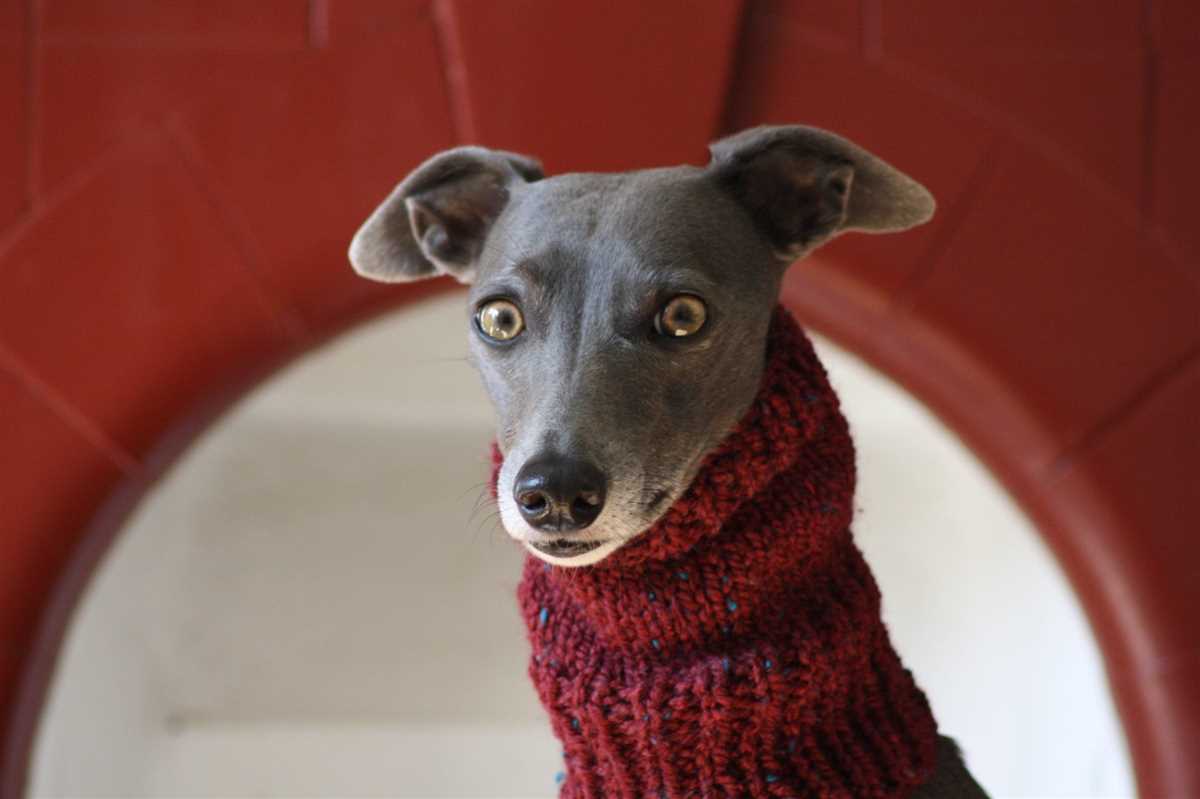
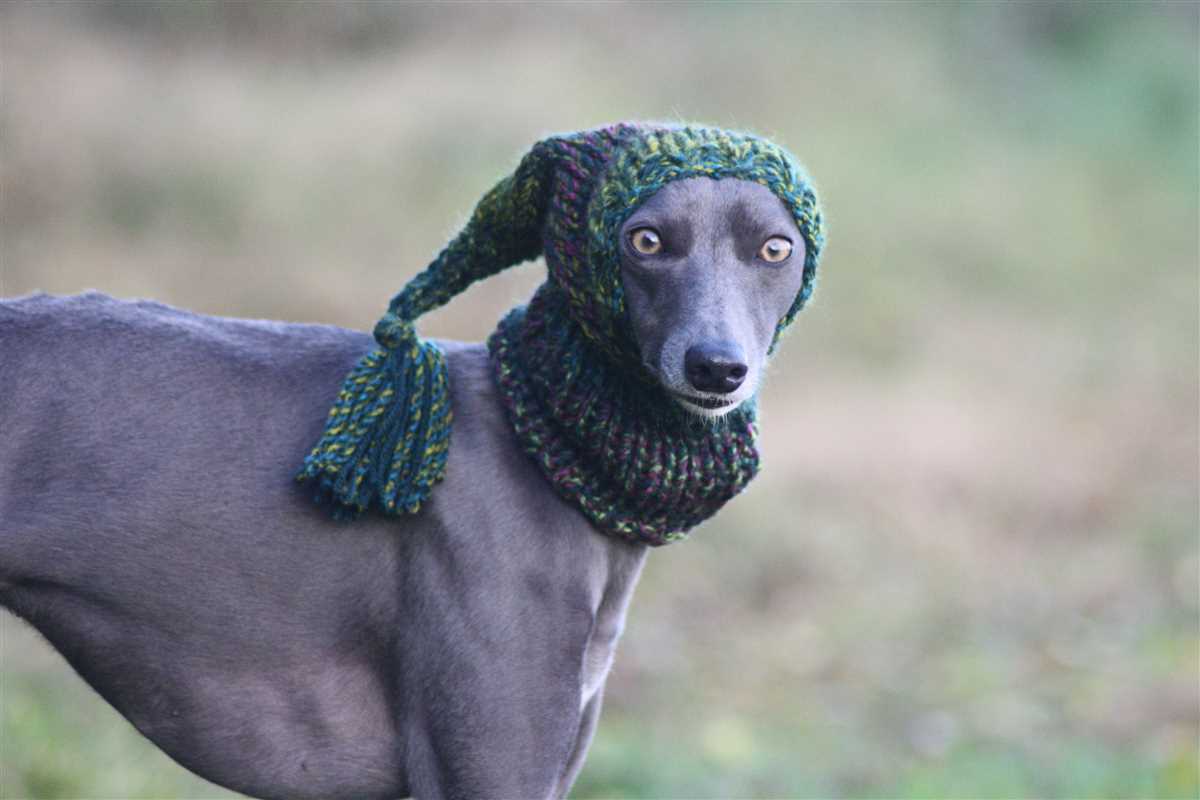
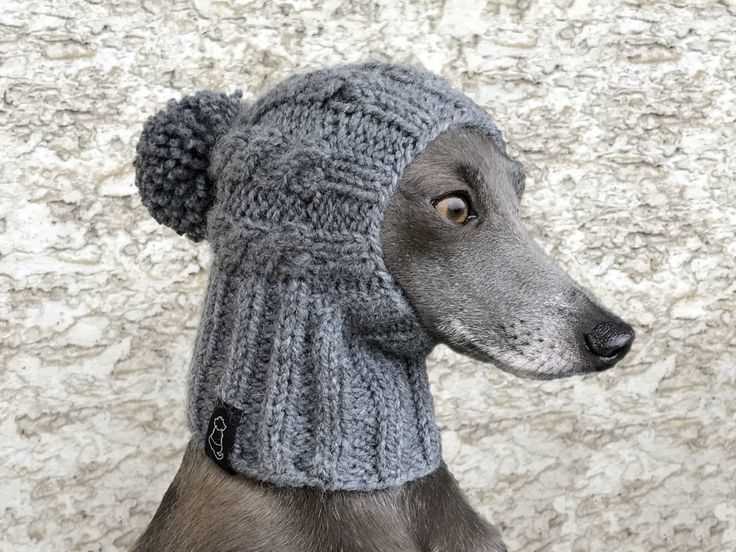
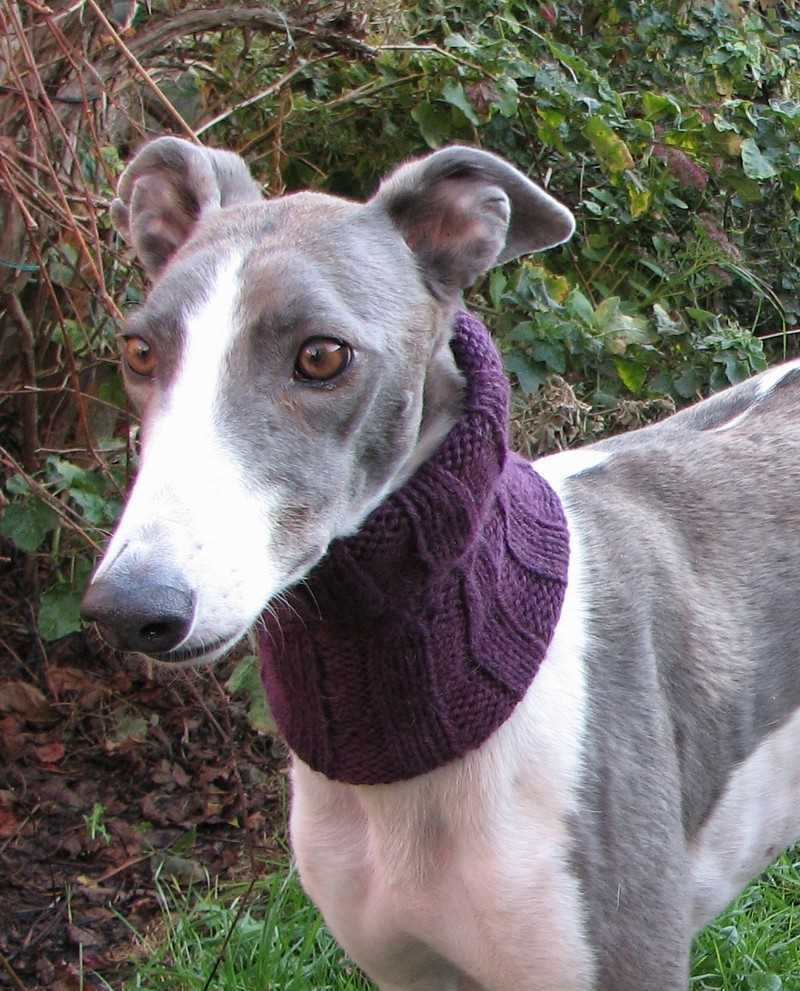
If you are a dog owner, you know how important it is to keep your furry friend warm and comfortable, especially during the colder months. This is especially true for greyhounds, who have thin coats and can get cold easily. One great way to keep your greyhound warm is by knitting them a snood.
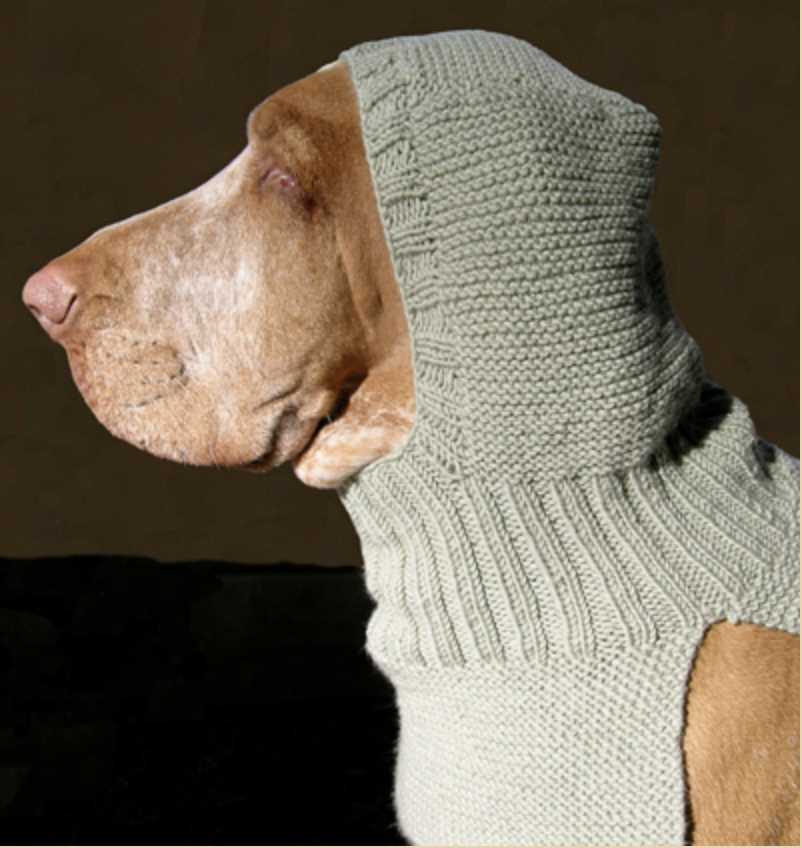
A snood is a type of headgear that covers the head and neck, and it can be a stylish and functional accessory for your greyhound. Not only does it help keep them warm, but it also adds a touch of style to their appearance. And the best part is, you can easily knit a snood for your greyhound with a simple knitting pattern.
Knitting a snood for your greyhound is a fun and rewarding project. Not only will you be able to create a unique and personalized accessory for your beloved pet, but you can also enjoy the process of knitting and creating something with your own hands. With the right knitting pattern and a little bit of time and effort, you can create a snood that fits your greyhound perfectly and keeps them cozy and warm all winter long.
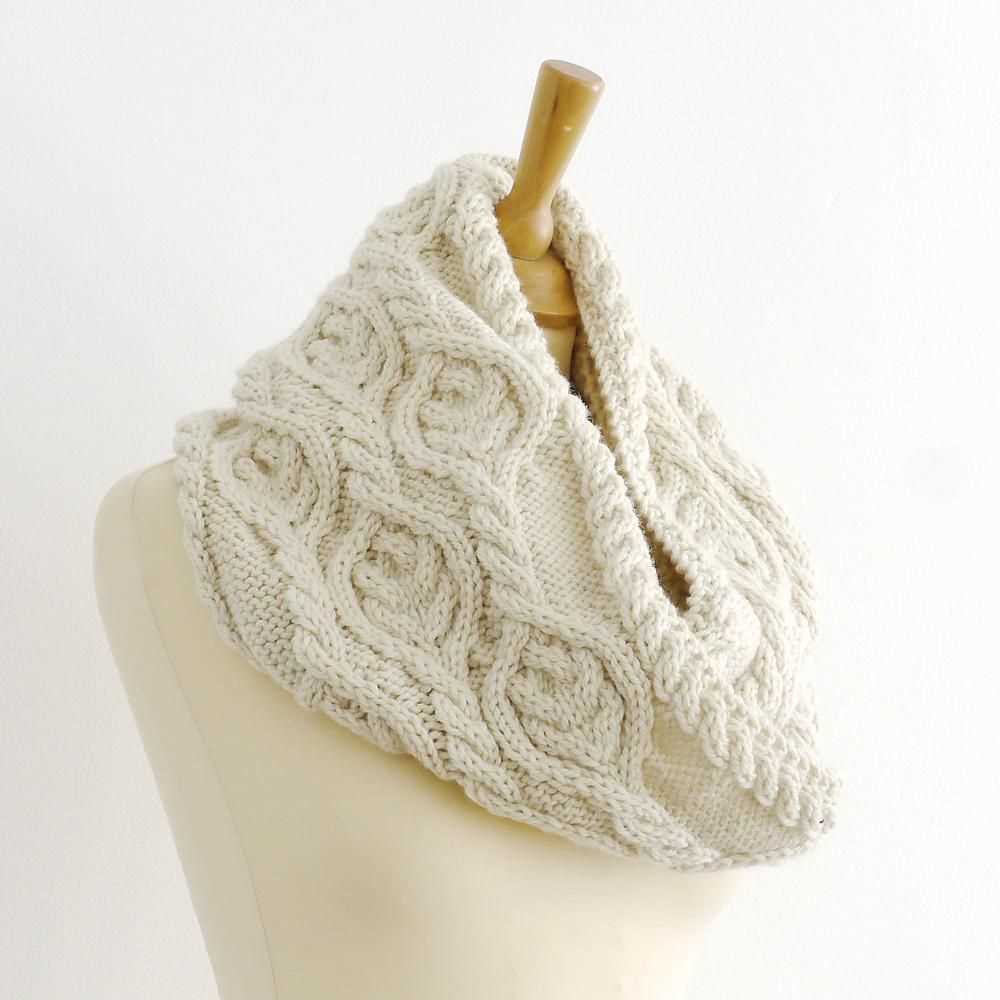
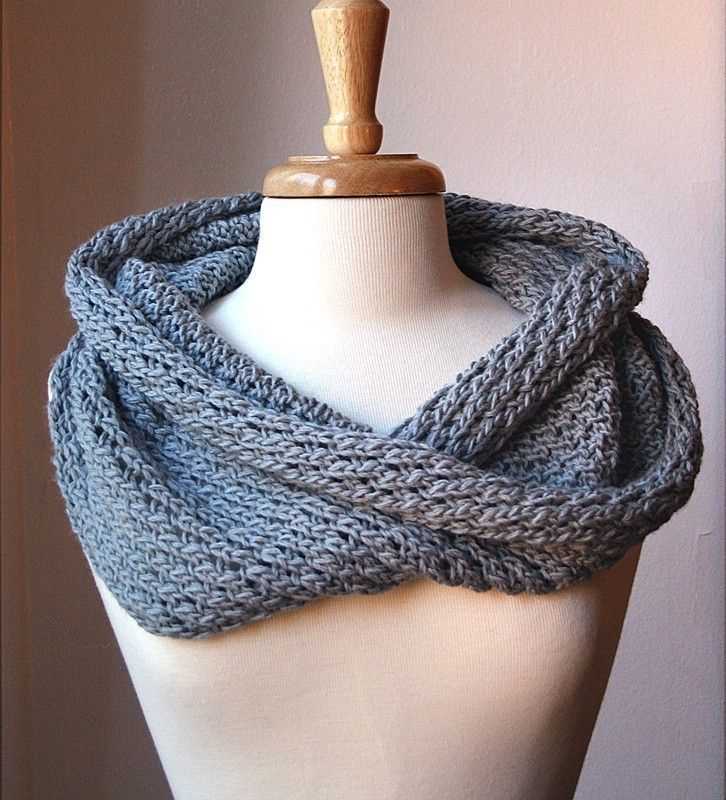
How to Knit a Greyhound Snood: Step-by-Step Knitting Pattern
A snood is a type of scarf or hood that is specifically designed to fit a greyhound’s long neck and narrow head shape. It is a practical and stylish accessory that helps keep these sensitive dogs warm during colder seasons. Knitting a greyhound snood is a fun and rewarding project that allows you to create a customized and cozy accessory for your four-legged friend. Follow these step-by-step instructions to knit your own greyhound snood.
Materials:
- Yarn: Choose a soft and warm yarn, such as acrylic or wool, in a color of your choice. Approximately 200-300 yards of yarn is typically enough for a greyhound snood.
- Knitting Needles: Select knitting needles in an appropriate size for your chosen yarn. The recommended needle size is usually US 8 (5mm) or US 9 (5.5mm).
- Tapestry Needle: This needle will be used for weaving in the loose ends of yarn.
Instructions:
- Cast On: Start by casting on 60 stitches using the long tail cast on method. This will form the base of your snood.
- Ribbing: Knit in a rib stitch pattern for the first few rows to create a stretchy and snug fit. You can use a 2×2 rib stitch pattern (knit 2, purl 2) or a 1×1 rib stitch pattern (knit 1, purl 1) for the desired effect. Repeat the rib stitch pattern for about 1 inch or desired length.
- Main Body: Switch to a stockinette stitch pattern (knit one row, purl one row) for the main body of the snood. Continue knitting in this pattern until the snood reaches the desired length, which is typically around 12 inches or long enough to comfortably cover the greyhound’s neck.
- Shaping: To shape the top of the snood, begin decreasing stitches gradually. Knit 2 stitches together at the beginning and end of every knit row until there are only 10 stitches remaining on your needles.
- Final Rows: Knit these final 10 stitches for a few rows to create a neat edge. Then, bind off all the stitches to finish the snood.
- Finishing Touches: Use a tapestry needle to weave in any loose ends of yarn and neatly secure them. Trim any excess yarn.
Once you have completed these steps, you will have a beautifully knitted greyhound snood that is ready to be worn by your furry friend. Remember to measure your greyhound’s neck size before starting to ensure a proper fit. Knitting a greyhound snood not only provides warmth and comfort for your dog but also allows you to showcase your knitting skills and create a unique accessory for your beloved pet.
Materials and Supplies Needed for Knitting a Greyhound Snood

Knitting a greyhound snood requires a few essential materials and supplies. Here is a list of what you will need:
Yarn:
Choose a soft and warm yarn that is suitable for winter weather. Acrylic or wool blend yarns are good options as they provide warmth and durability. Make sure to select a yarn color that complements your greyhound’s coat.
Knitting Needles:
You will need a pair of knitting needles in the appropriate size for your chosen yarn. Use a size that will give you the desired gauge and create a snood that fits comfortably around your greyhound’s neck.
Tapestry Needle:
A tapestry needle is used for weaving in loose ends and sewing any seams. Make sure to choose one with a large eye that can accommodate the thickness of your yarn.
Scissors:
A pair of sharp scissors is essential for cutting the yarn and trimming any excess. Make sure they are suitable for cutting through yarn without fraying or damaging the fibers.
Measuring Tape:
Having a measuring tape on hand will allow you to accurately measure your greyhound’s neck circumference before starting the project. This will help ensure a proper fit for the snood.
Stitch Markers (optional):
If you are working on a pattern that requires stitch markers, you may want to have a few on hand. These can help you keep track of specific stitch patterns or increases/decreases.
Pattern:
Lastly, you will need a knitting pattern for a greyhound snood. Search online or check knitting pattern books for a pattern that suits your style and skill level. Make sure to follow the instructions carefully to achieve the desired result.
Choosing the Right Yarn for Your Greyhound Snood
When it comes to knitting a snood for your greyhound, choosing the right yarn is crucial. The yarn you select will not only determine the look and feel of the snood, but also its functionality and durability. Here are some factors to consider when picking the perfect yarn for your greyhound snood:
1. Weight and Thickness:
The weight and thickness of the yarn are important considerations. You want to choose a yarn that is lightweight and thin enough to provide comfort for your greyhound, while still offering adequate warmth. Look for yarns labeled as “sport” or “DK” weight, as they are often the ideal choice for snood knitting.
2. Fiber Content:
The fiber content of the yarn will affect the overall look, feel, and performance of the snood. For a snood that is soft and cozy, opt for yarns made of natural fibers like wool or alpaca. These fibers are known for their warmth and breathability, making them perfect for keeping your greyhound comfortable during colder months.
Note: Avoid yarns with acrylic or synthetic fibers, as they can cause discomfort and irritation to your greyhound’s sensitive skin.
3. Washability:
Since the snood will be used on a regularly basis, it’s important to choose a yarn that is easy to care for. Look for yarns that are labeled as machine washable, as they will make your life much easier when it comes to cleaning the snood. This way, you can keep the snood clean and fresh without any hassle.
4. Color and Design:
The color and design of the yarn will contribute to the overall aesthetic of the snood. Consider the color of your greyhound’s coat and choose a yarn that complements it. You can also get creative with different patterns and textures to add visual interest to the snood. Just make sure to select a yarn that is not too busy or distracting, as it may overwhelm the natural beauty of your greyhound.
By taking these factors into account, you can select the perfect yarn for your greyhound snood that combines both style and functionality. Knitting a snood with the right yarn will not only keep your greyhound warm and cozy, but also turn heads with its unique and stylish design.
Selecting the Proper Knitting Needles for Your Greyhound Snood
When it comes to knitting a greyhound snood, choosing the right knitting needles is crucial to achieving the desired results. The size and type of needles can affect the overall look and fit of the snood, so it’s important to make an informed decision. Here are some factors to consider when selecting knitting needles for your greyhound snood:
1. Needle Size: The needle size you choose will depend on the thickness of the yarn you are using for your snood. If you are using a thicker yarn, you will need larger needles, while a thinner yarn will require smaller needles. It’s important to check the yarn label for recommended needle sizes and use that as a starting point.
2. Needle Type: There are different types of knitting needles available, such as straight needles, circular needles, and double-pointed needles. For a greyhound snood, circular needles or double-pointed needles may be more suitable, as they allow you to knit in the round without any seams. This can result in a smoother and more comfortable fit for your greyhound.
3. Material: Knitting needles can be made from various materials, including metal, wood, and plastic. Each material has its own unique characteristics that can affect your knitting experience. Metal needles are durable and glide smoothly, while wooden needles provide a warm and comfortable grip. Plastic needles are lightweight and easy to handle. Consider your personal preference and knitting style when selecting the material of your needles.
4. Length: The length of your knitting needles will depend on the desired circumference of your greyhound snood. If you are knitting a larger snood, longer needles may be more convenient to hold all the stitches. However, if you are knitting a smaller snood or prefer a shorter needle length, that is also a viable option. It’s important to choose a needle length that feels comfortable for you to work with.
By considering these factors and experimenting with different needle sizes and types, you can find the perfect knitting needles for your greyhound snood project. Remember to take your time and enjoy the process of creating a cozy and stylish accessory for your furry friend.
Understanding the Gauge for Your Greyhound Snood
When it comes to knitting a greyhound snood, understanding the gauge is crucial for achieving the perfect fit for your furry friend. The gauge refers to the number of stitches and rows per inch in your knitting. By following the recommended gauge, you can ensure that the snood will fit comfortably and provide the necessary warmth and protection for your greyhound.
Measuring the gauge: To determine the gauge for your greyhound snood, you will need to knit a gauge swatch. This is a small square of fabric, using the same yarn and needles that you plan to use for the snood. Use a measuring tape or ruler to count the number of stitches and rows in a 1-inch section of your swatch. This will give you the stitch and row gauge.
Importance of gauge: Paying attention to gauge is important because it ensures that the snood will fit properly. If your gauge is too loose, the snood may be too big and not provide adequate coverage. On the other hand, if your gauge is too tight, the snood may be too small and uncomfortable for your greyhound to wear. It is essential to match the gauge specified in the knitting pattern to achieve the desired fit.
Adjusting gauge: If your gauge does not match the pattern’s gauge, you may need to adjust your knitting tension or change to a different needle size. To make the snood larger, use larger needles or relax your tension. Conversely, to make the snood smaller, use smaller needles or tighten your tension. Remember to knit another gauge swatch after making adjustments to ensure the correct gauge is achieved.
Checking gauge throughout the project: Gauge can change as you knit, especially if you are feeling more relaxed or tense. It’s important to periodically check your gauge while knitting the snood to ensure that it remains consistent. This will help you avoid any surprises when it comes to the final fit of the snood.
Final thoughts: Understanding and achieving the correct gauge for your greyhound snood is essential for a proper fit. Taking the time to knit a gauge swatch and adjusting your tension or needle size when necessary will help ensure that your snood is comfortable, functional, and stylish for your furry friend.
Casting on Stitches for Your Greyhound Snood
When starting to knit your greyhound snood, the first step is casting on your stitches. The number of stitches you need to cast on will depend on the size of your greyhound’s head and how snug you want the snood to fit. It’s always a good idea to measure your greyhound’s head before you start and use this measurement as a guide.
To cast on stitches, you can use the long-tail cast-on method, which creates a nice, stretchy edge. To begin, make a slipknot and place it on your knitting needle. Hold the working yarn in your right hand and the needle with the slipknot in your left hand.
1. Make sure the tail end of the yarn is over your index finger and the working end is over your thumb. This will create the “long tail” needed for the cast-on method.
2. Insert your needle between the two strands of yarn on your thumb from front to back.
3. With your right index finger, bring the yarn under the needle, creating a loop.
4. Slip the old loop off your thumb, keeping the new loop on the needle.
5. Repeat steps 2-4 until you have cast on the desired number of stitches.
Once you have cast on the required number of stitches, you can begin working the pattern for your greyhound snood. It’s important to check your cast-on edge for any twists or tangles before you start knitting. If you notice any, simply unravel the cast-on row and start again. With the stitches cast on, you’re ready to start creating a cozy snood for your greyhound!
Knitting the Body of the Greyhound Snood
When knitting the body of the greyhound snood, it is important to start by casting on the desired number of stitches using a circular knitting needle. This will allow you to knit in the round, creating a seamless tube that will fit comfortably around your greyhound’s neck.
Once you have cast on the stitches, you can begin working the main body of the snood using the chosen stitch pattern. It is recommended to use a stretchy stitch pattern, such as ribbing or seed stitch, to ensure a snug and comfortable fit for your greyhound. You can also use a combination of knit and purl stitches to create an interesting texture.
To knit the body of the snood, simply continue working the chosen stitch pattern in the round until the desired length is reached. It is important to regularly measure the length of the snood as you knit to ensure it will fit properly around your greyhound’s neck. Adjust the length accordingly if needed.
If you want to add any additional design elements, such as a contrasting color stripe or a decorative panel, you can incorporate them into the body of the snood as you knit. This will add a unique touch to the finished snood.
Remember to maintain an even tension while knitting, and take breaks if needed to prevent hand fatigue. Once you have completed the body of the snood, you can move on to the next step, which is knitting the edging and creating the openings for the greyhound’s ears.
Creating the Ribbing for the Greyhound Snood
When knitting a greyhound snood, the ribbing is an important element of the design. It not only adds a decorative touch, but also helps the snood to stay snugly in place around the dog’s neck. Creating the ribbing is a straightforward process that requires basic knitting skills.
To begin, choose a suitable yarn for your snood. A soft and stretchy yarn, such as a wool blend, is recommended. You will also need appropriately sized knitting needles to achieve the desired gauge.
1. Cast on Stitches
Start by casting on the desired number of stitches, keeping in mind the width of the snood’s ribbing. The ribbing can be made with any multiple of stitches, but a common choice is a multiple of two. For example, you could cast on 20 stitches for a narrower ribbing or 40 stitches for a wider one.
2. Knit the Ribbing
Once you have cast on your stitches, it’s time to begin knitting the ribbing. The most common ribbing pattern is the 2×2 rib, which alternates between knitting and purling stitches. Knit two stitches, then purl two stitches, and repeat this pattern until you reach the desired length for the ribbing.
3. Bind off Stitches
When you have reached the desired length of the ribbing, it’s time to bind off the stitches. Use a standard bind off method, such as the basic bind off or the stretchy bind off, to ensure a neat and flexible edge for your snood.
With the ribbing completed, you can now continue knitting the body of the snood using your preferred stitch pattern. Whether you choose a simple stockinette stitch or an intricate cable pattern, the ribbing will provide a secure foundation for your project.
Shaping the Head Opening for the Greyhound Snood
In order to create a well-fitting greyhound snood, it is important to shape the head opening properly. This will ensure that the snood stays securely in place and provides maximum comfort for your dog. To shape the head opening, you will need to make strategic increases and decreases in your knitting pattern.
First, you will start by knitting the desired length of the snood body. Once you reach the point where the snood should start covering the head, you can begin shaping the head opening. This is typically done by decreasing the number of stitches gradually in a specific pattern.
One common method is to decrease a few stitches at the beginning and end of each row. For example, you can knit 2 together at the beginning of the row and then knit 2 together at the end of the row. Repeat this decrease pattern for several rows until you reach your desired head opening size.
Another method is to create a curved shape for the head opening. This can be achieved by decreasing a few stitches at the beginning and end of each row, as well as in the middle of the row. This will create a gradual curve that will fit the shape of the greyhound’s head more accurately.
It is important to keep trying the snood on your greyhound as you shape the head opening to ensure a perfect fit. Adjust the number of decreases or increases as needed until the snood fits comfortably around your dog’s head without slipping off.
Remember, every greyhound has a slightly different head shape, so it may take some trial and error to get the shaping just right. But with patience and practice, you will be able to create a snug and stylish snood for your beloved greyhound.
Binding off Stitches for the Greyhound Snood
As you near the end of your knitting project for the greyhound snood, it’s important to properly bind off so that the stitches don’t unravel. This final step will give your snood a neat and finished edge.
To bind off, you will need a set of knitting needles and a pair of scissors. Begin by knitting the first two stitches as usual. Then, insert the left-hand needle into the first stitch on the right-hand needle and lift it over the second stitch and off the needle. You will be left with one stitch on your right-hand needle.
Continue knitting the next stitch and repeating the process of lifting the previous stitch over until you have only one stitch remaining. Once you have one stitch left, cut the yarn, leaving a tail about 6 inches long. Thread the tail through the last stitch and pull tight to secure.
Note: It’s important to bind off loosely to ensure that the snood has some stretch to it when it is worn. If you bind off too tightly, the snood may not fit comfortably around the greyhound’s neck.
Once you have completed the bind off, you can weave in any loose ends of yarn using a tapestry needle. Simply thread the needle with the yarn end and weave it through the stitches on the wrong side of the snood. This will help to secure the ends and create a neat finish.
Pro tip: Before binding off, you can try the snood on your greyhound to ensure that it fits properly. If it feels too tight or too loose, you can adjust the tension of your bind off accordingly.
With the binding off stitches complete, your greyhound snood is now ready to be worn by your furry friend. This cozy accessory will not only keep them warm but also add a stylish touch to their wardrobe.
Adding Finishing Touches to the Greyhound Snood
Once you have completed knitting the main body of the Greyhound snood, it’s time to add the finishing touches to make it functional and stylish. These final steps will ensure that the snood fits snugly around your Greyhound’s neck and stays in place while they move around.
1. Attaching the drawstring: One of the most important components of the snood is the drawstring, which keeps it securely in place. To attach the drawstring, thread it through the eyelets or stitches at the top of the snood. Make sure it is long enough to comfortably tie around your Greyhound’s neck, leaving a bit of extra length for adjustments. Once the drawstring is attached, tie it in a secure knot or bow to keep the snood in place.
2. Sewing on buttons or snaps: To add a stylish touch and provide additional security, you can sew on buttons or snaps at the ends of the snood. These will help keep the snood in place and prevent it from slipping off your Greyhound’s head. Choose buttons or snaps that match the color and style of the snood, and sew them securely to the fabric.
3. Embellishing with decorative elements: If you want to add a personal touch to your Greyhound’s snood, you can embellish it with decorative elements such as ribbons, bows, or embroidery. These can be sewn onto the fabric or attached with strong fabric glue. Just make sure that any embellishments are securely attached and won’t pose a choking hazard to your Greyhound.
By completing these finishing touches, you will not only ensure that the Greyhound snood fits properly and stays in place, but you will also add a touch of style to your canine companion’s accessory. Remember to regularly check the snood for any signs of wear and tear, and make any necessary repairs or replacements to keep your Greyhound looking fashionable and comfortable.
Blocking and Washing the Greyhound Snood
Blocking and washing your knitted greyhound snood is an important step to ensure that it retains its shape and stays in good condition. Here are some tips on how to properly block and wash your snood:
Blocking
- Pin it out: Start by gently pinning the snood to a flat surface, such as a blocking board or towel, making sure to stretch it to its desired size and shape. Use rust-proof T-pins or blocking wires to secure the snood in place.
- Mist it: Once the snood is pinned out, lightly mist it with water using a spray bottle or sponge. This will help relax the fibers and make them easier to shape.
- Let it dry: Leave the snood to dry completely before removing the pins. It is important to let it dry in its stretched-out shape to ensure that it maintains its form.
Washing
- Fill a basin: Fill a basin with lukewarm water and add a small amount of wool wash or gentle detergent. Gently swirl the water to create suds.
- Submerge the snood: Carefully place the snood in the water, making sure it is fully submerged. Gently agitate the water with your hands to clean the snood, but avoid rubbing or wringing it.
- Rinse and squeeze: Drain the soapy water and refill the basin with clean, lukewarm water. Submerge the snood again and squeeze out any excess water, being careful not to twist or wring it.
- Dry flat: Lay the snood flat on a towel and roll it up to absorb the remaining water. Then, carefully unroll the towel and lay the snood in its stretched-out shape on a clean, dry towel or blocking mat. Allow it to air dry completely, away from direct heat or sunlight.
By following these simple steps, you can ensure that your greyhound snood stays in great condition and continues to keep your furry friend warm and stylish. Remember to always read and follow the care instructions for your specific yarn to avoid any damage or shrinkage.
Tips and Troubleshooting for Knitting a Greyhound Snood
Knitting a greyhound snood can be a fun and rewarding project, but it can also come with its fair share of challenges. Here are some tips and troubleshooting suggestions to help you along the way.
Tips
- Choose the right yarn: It’s important to select a soft and cozy yarn that will be comfortable for your greyhound to wear. Consider using a medium-weight yarn that is machine washable for easy care.
- Take accurate measurements: Before starting your snood, make sure you measure your greyhound’s head and neck accurately. This will ensure a proper fit and prevent any discomfort or slippage.
- Follow the pattern instructions: Pay close attention to the pattern instructions and follow them carefully. It’s important to maintain the correct stitch count and gauge to achieve the desired fit and look.
- Use stitch markers: Stitch markers can be helpful for keeping track of your progress, especially if the pattern has multiple sections or repeats. They can help you avoid mistakes and make it easier to count your stitches.
- Take breaks if needed: Knitting for long periods of time can cause fatigue and strain on your hands. Take breaks, stretch your fingers, and rest as needed to avoid discomfort.
Troubleshooting
- Uneven tension: If you notice that your tension is uneven throughout your knitting, try relaxing your grip on the yarn and the needles. Practice and experience will also help you improve your tension over time.
- Dropped stitches: Dropped stitches can be easily fixed by using a crochet hook or a knitting needle to pick up the dropped stitch and bring it back into place. Pay attention to any dropped stitches and fix them as soon as you notice them.
- Wrong stitch count: If you find that your stitch count is off, carefully review the pattern instructions and double-check your work. It’s easy to accidentally skip or add stitches, so take your time and make sure to count accurately.
- Snood too tight or too loose: If your snood is too tight or too loose, you may need to adjust your needle size or change the number of stitches you cast on. It’s helpful to try the snood on your greyhound as you go to ensure the right fit.
In conclusion, knitting a greyhound snood can be a fulfilling and enjoyable project. By following these tips and troubleshooting suggestions, you can overcome any challenges that may arise and create a beautiful and functional accessory for your furry friend.