
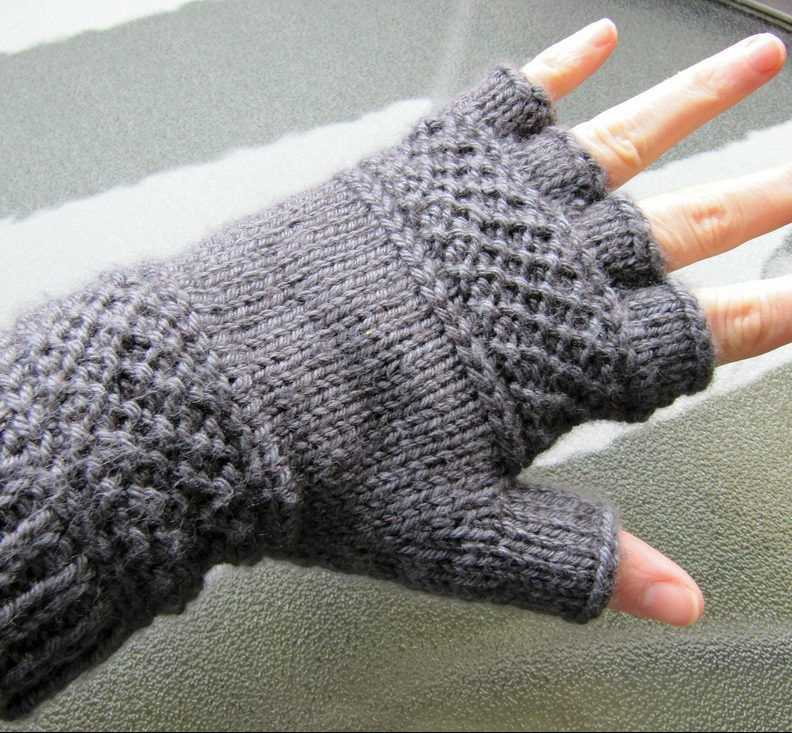
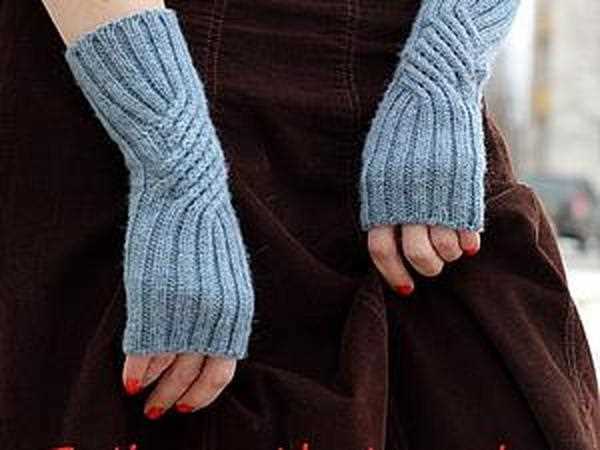
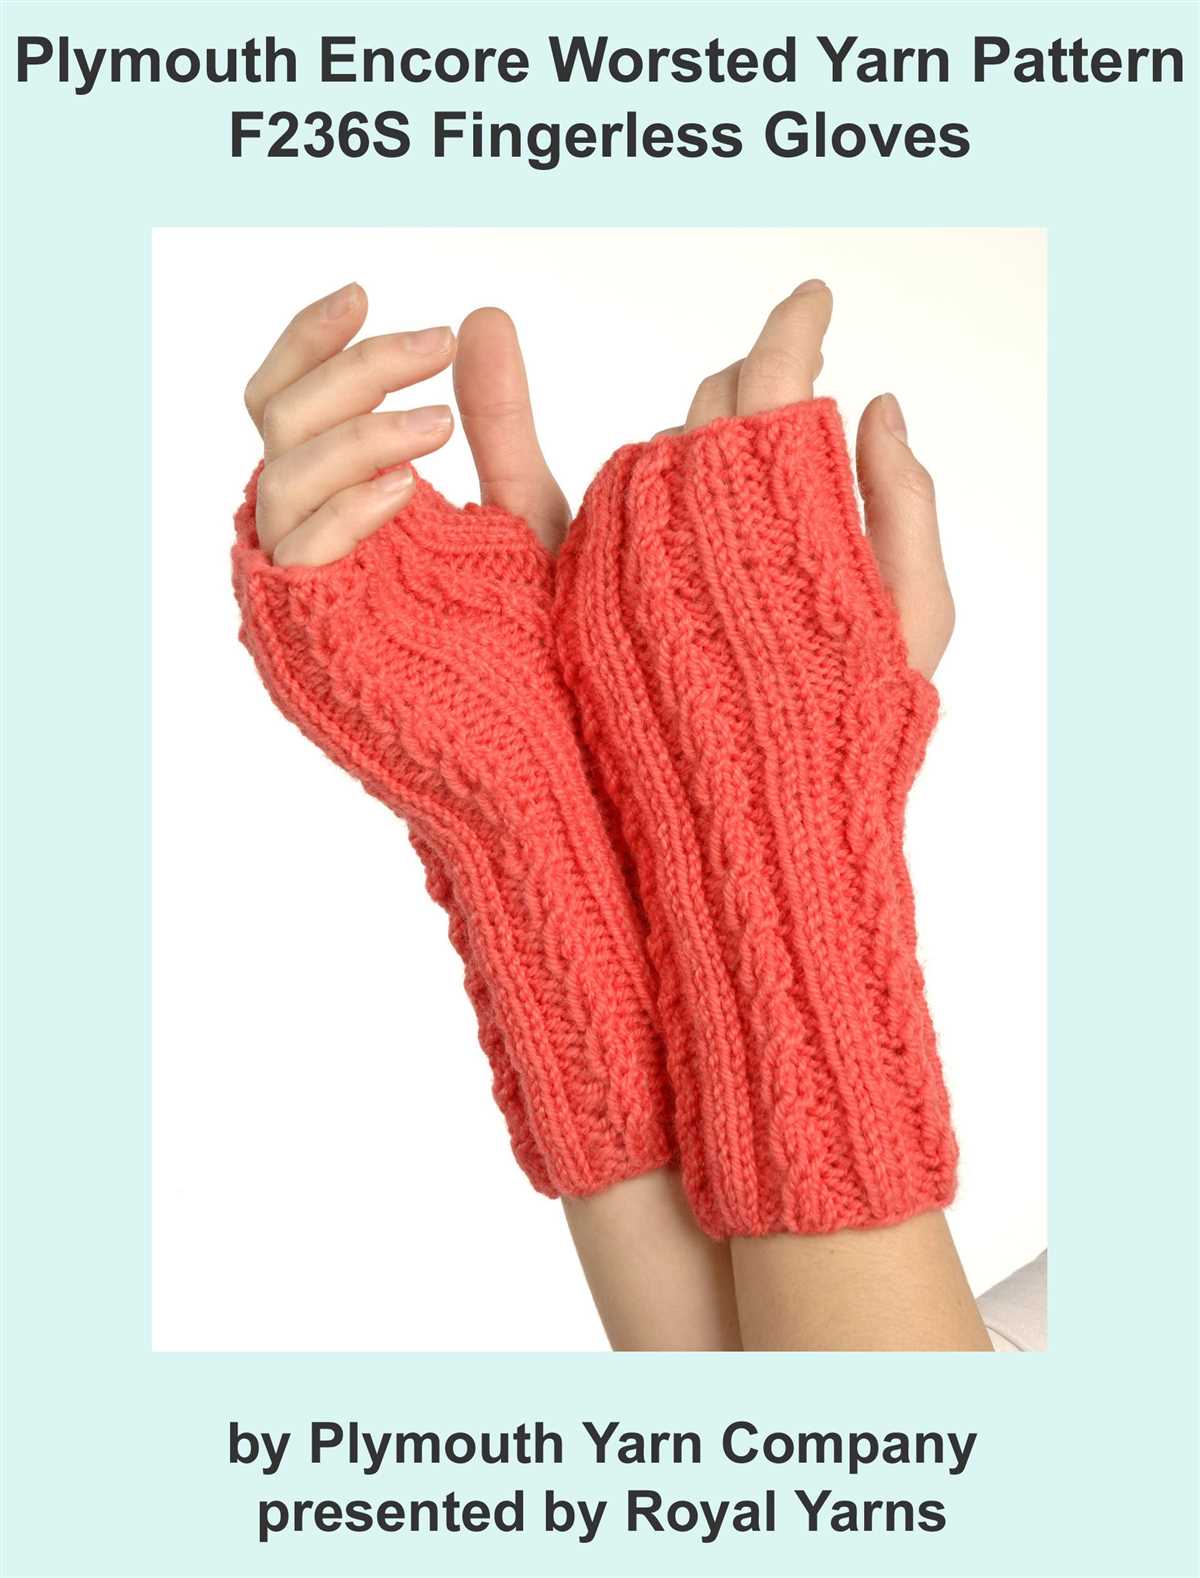
Knitting is not only a popular pastime but also a way to create unique and handmade accessories. Aran fingerless gloves are a great project for both beginners and experienced knitters. With their intricate cables and cozy texture, these gloves are not only stylish but also functional.
This free knitting pattern allows you to create your own pair of Aran fingerless gloves. The pattern includes instructions for various sizes, so you can make gloves that fit perfectly. From the ribbed cuffs to the thumb gusset, each step is detailed and easy to follow.
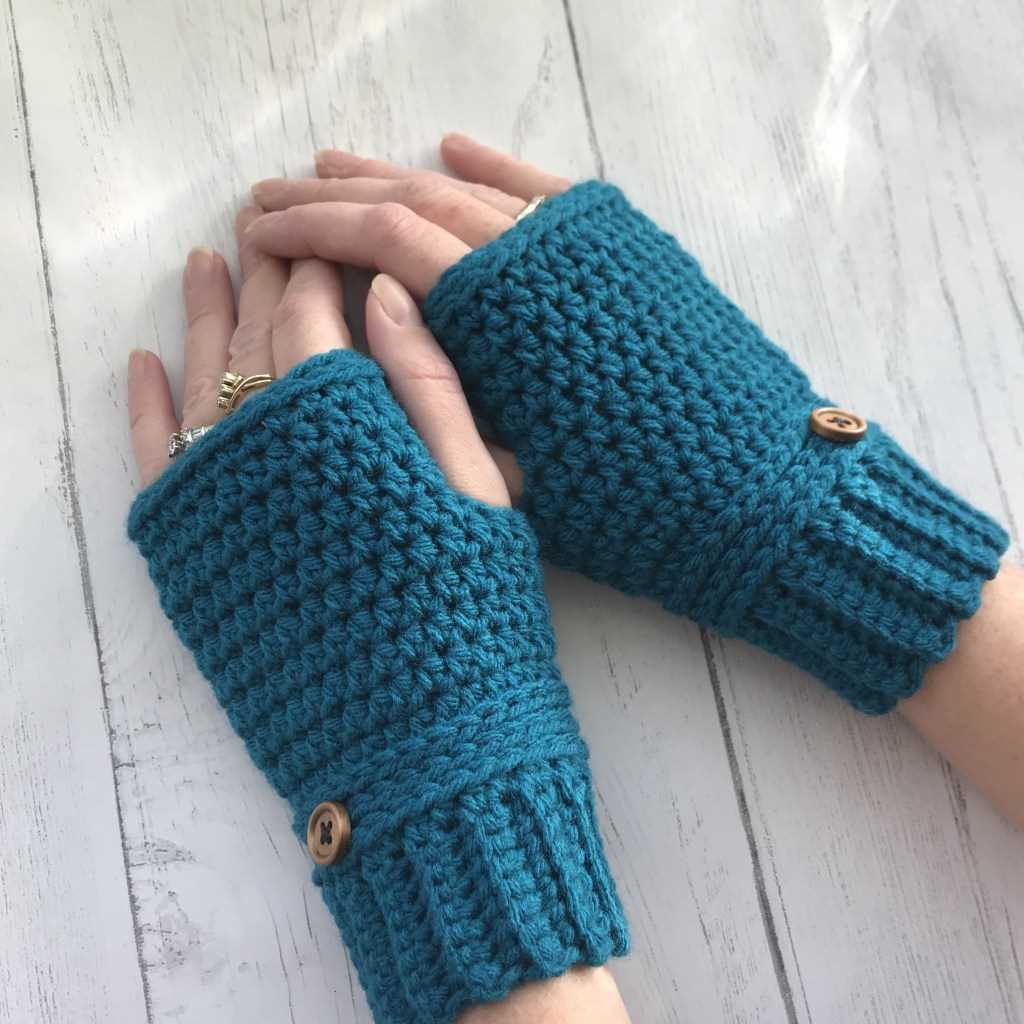
One of the great things about fingerless gloves is that they provide warmth and dexterity at the same time. Whether you need to use your phone or knit on a cold day, these gloves will keep your hands cozy while allowing your fingers to move freely. The Aran stitch pattern adds a classic touch to the gloves, making them a versatile accessory that can be paired with any outfit.
Aran Fingerless Gloves Free Knitting Pattern
If you are looking for a cozy and stylish addition to your winter wardrobe, look no further than the Aran fingerless gloves free knitting pattern. These gloves are designed to keep your hands warm while still allowing your fingers to be free for dexterity. The Aran pattern is known for its intricate cables and textured stitches, making these gloves a beautiful and functional accessory.
The Aran fingerless gloves free knitting pattern is suitable for intermediate knitters, as it requires knowledge of basic knitting stitches such as knit, purl, and cables. The pattern provides detailed instructions and a chart for the cable pattern, making it easier for you to follow along and create your own pair of gloves.
To knit the Aran fingerless gloves, you will need a set of double-pointed needles or circular needles in a size suitable for the yarn you choose. The pattern suggests using Aran weight yarn, which will provide the right level of warmth and coziness for the gloves.
The gloves are knit in the round from the cuff up, starting with a ribbed cuff for a snug fit. The cable pattern is then worked on the back of the hand, adding both style and warmth to the gloves. The fingerless design allows your fingers to be free for tasks such as typing, texting, or even knitting!
Whether you are a seasoned knitter or just starting out, the Aran fingerless gloves free knitting pattern is a great project to challenge your skills and create a practical and stylish accessory. Give it a try and enjoy the warmth and comfort of handmade gloves during the colder months.
Materials Needed
In order to knit the Aran fingerless gloves, you will need the following materials:
- Yarn – You will need approximately 200 yards of worsted weight yarn. Choose a soft and warm yarn that will be comfortable to wear.
- Knitting Needles – You will need a set of double-pointed needles in size 7 (4.5mm). These needles will allow you to knit the gloves in the round.
- Cable Needle – You will need a cable needle to create the beautiful Aran cable pattern on the gloves. Choose a cable needle that is the same size as your knitting needles.
- Tapestry Needle – You will need a tapestry needle to weave in the ends of the yarn and finish the gloves. Choose a needle with a large eye that will easily thread the yarn.
- Stitch Markers – Stitch markers will help you keep track of your rounds and stitches. You will need at least 4 stitch markers.
- Scissors – You will need a pair of scissors to cut the yarn when necessary.
With these materials, you will be ready to start knitting the Aran fingerless gloves and create a cozy and stylish accessory for the colder months.
Getting Started
Welcome to the Aran fingerless gloves free knitting pattern! This pattern is perfect for those looking to create a cozy and stylish pair of gloves to keep their hands warm during the colder months. Whether you’re an experienced knitter or a beginner, this pattern is suitable for all skill levels.
Before you begin knitting, there are a few things you’ll need to gather. Firstly, you’ll need to choose your yarn. For this pattern, it is recommended to use a bulky weight yarn in a color of your choice. You’ll also need a pair of size 8 (5mm) knitting needles, a cable needle, and a set of double-pointed needles in the same size.
Yarn: The yarn you choose for this project will determine the overall look and feel of your gloves. Opt for a soft and warm yarn, such as merino wool or alpaca, for added comfort. Make sure to check the yarn label for the recommended gauge and yardage.
Needles: Use a pair of size 8 (5mm) knitting needles for the main body of the gloves. These needles will help you achieve the desired tension and create a cozy fabric.
Other materials: Apart from the yarn and needles, you’ll also need a cable needle for the intricate cable stitch pattern used in this pattern. This will help you create the beautiful and unique design on the gloves. Additionally, you’ll need a set of size 8 (5mm) double-pointed needles for knitting in the round.
Gauge: It is important to match the gauge given in the pattern to ensure the size and fit of the gloves. To determine your gauge, knit a swatch using the recommended yarn and needles. Measure the number of stitches and rows per inch and adjust your needle size if necessary.
Now that you have all your materials ready, you’re ready to begin knitting the Aran fingerless gloves! Follow the instructions carefully and enjoy the process of creating a cozy and stylish accessory.
Knitting the Cuff

When knitting the cuff of the Aran fingerless gloves, you will start by casting on the required number of stitches. In this pattern, it is recommended to use the long-tail cast-on method for a neat and stretchy cuff. Make sure to leave a long enough tail so that you have ample yarn to work with throughout the cuff knitting process.
Once you have cast on the stitches, you will begin working the ribbing pattern for the cuff. In this pattern, the cuff is knitted in a 1×1 ribbing pattern, which means alternating between knitting one stitch and purling one stitch. This creates a stretchy and textured fabric that will fit snugly around the wrist.
As you knit the cuff, make sure to maintain an even tension and check your gauge to ensure that the size of the cuff matches the desired measurements. Adjust your needle size if necessary to achieve the correct gauge.
After completing the desired length for the cuff, you will then bind off the stitches. It is recommended to use a stretchy bind-off method, such as the sewn bind-off, to ensure that the cuff remains comfortable and flexible.
Once the cuff is finished, you can continue on to the main body of the fingerless gloves, following the instructions provided in the pattern. The cuff serves as the foundation for the gloves and provides a cozy and stylish touch to the overall design.
Creating the Thumb Hole

The thumb hole is an essential element of fingerless gloves, allowing for free movement of the fingers while keeping the hands warm. To create the thumb hole, you will need to follow a specific pattern and make some adjustments to the knitting.
1. Determine the placement: First, you need to decide where you want to place the thumb hole on your gloves. This will depend on your hand size and personal preference. Generally, the thumb hole is located on the side of the glove, slightly below the base of the thumb.
2. Mark the stitches: Once you have determined the placement, use stitch markers or contrasting yarn to mark the stitches where the thumb hole will be created. This will help you keep track of the stitches and ensure that the hole is evenly placed.
3. Create the thumb hole: To start creating the thumb hole, you will need to knit a certain number of stitches on the needle, skip the marked stitches, and then continue knitting the remaining stitches. The exact pattern for creating the thumb hole may vary depending on the specific gloves pattern you are following.
4. Adjust the pattern: After creating the thumb hole, you may need to make some adjustments to the pattern to account for the missing stitches. This could involve decreasing the number of stitches on subsequent rows or working additional rows to fill in the gap left by the thumb hole.
5. Finishing touches: Once you have completed the thumb hole, continue knitting the gloves according to the pattern instructions. Make sure to double-check the stitch count and pattern to ensure that everything is aligned correctly.
By following these steps, you can easily create a thumb hole in your fingerless gloves, providing both functionality and style. There are many variations and patterns available, so feel free to experiment and find the perfect thumb hole design for your gloves.
Knitting the Hand
When it comes to knitting gloves, one of the most important parts to focus on is the hand. The hand is what allows us to perform various tasks, and it requires careful attention when creating gloves to ensure the perfect fit and functionality.
Knitting the hand involves creating a pattern that follows the natural contours and movements of the hand. One crucial step is to take precise measurements of the hand, including the circumference and length of the palm and fingers. This information helps to determine the number of stitches and rows needed for each section of the glove.
Starting with the palm, the pattern should account for the curves and lines of this area. Depending on the desired fit, increases and decreases might be necessary to ensure a snug yet comfortable glove. The thumb placement is also an important consideration, as it should allow for unrestricted movement.
Next, the finger sections must be carefully constructed. Each finger should have a defined shape that mirrors the natural tapering of the hand. This can be achieved through shaping techniques such as decreasing stitches gradually. The pattern should also account for the length of each finger, ensuring that they cover the digits adequately without being too long or short.
Overall, knitting the hand requires attention to detail and precision. With the right measurements and careful planning, a well-fitted and functional glove can be created, providing warmth and dexterity for those who wear it.
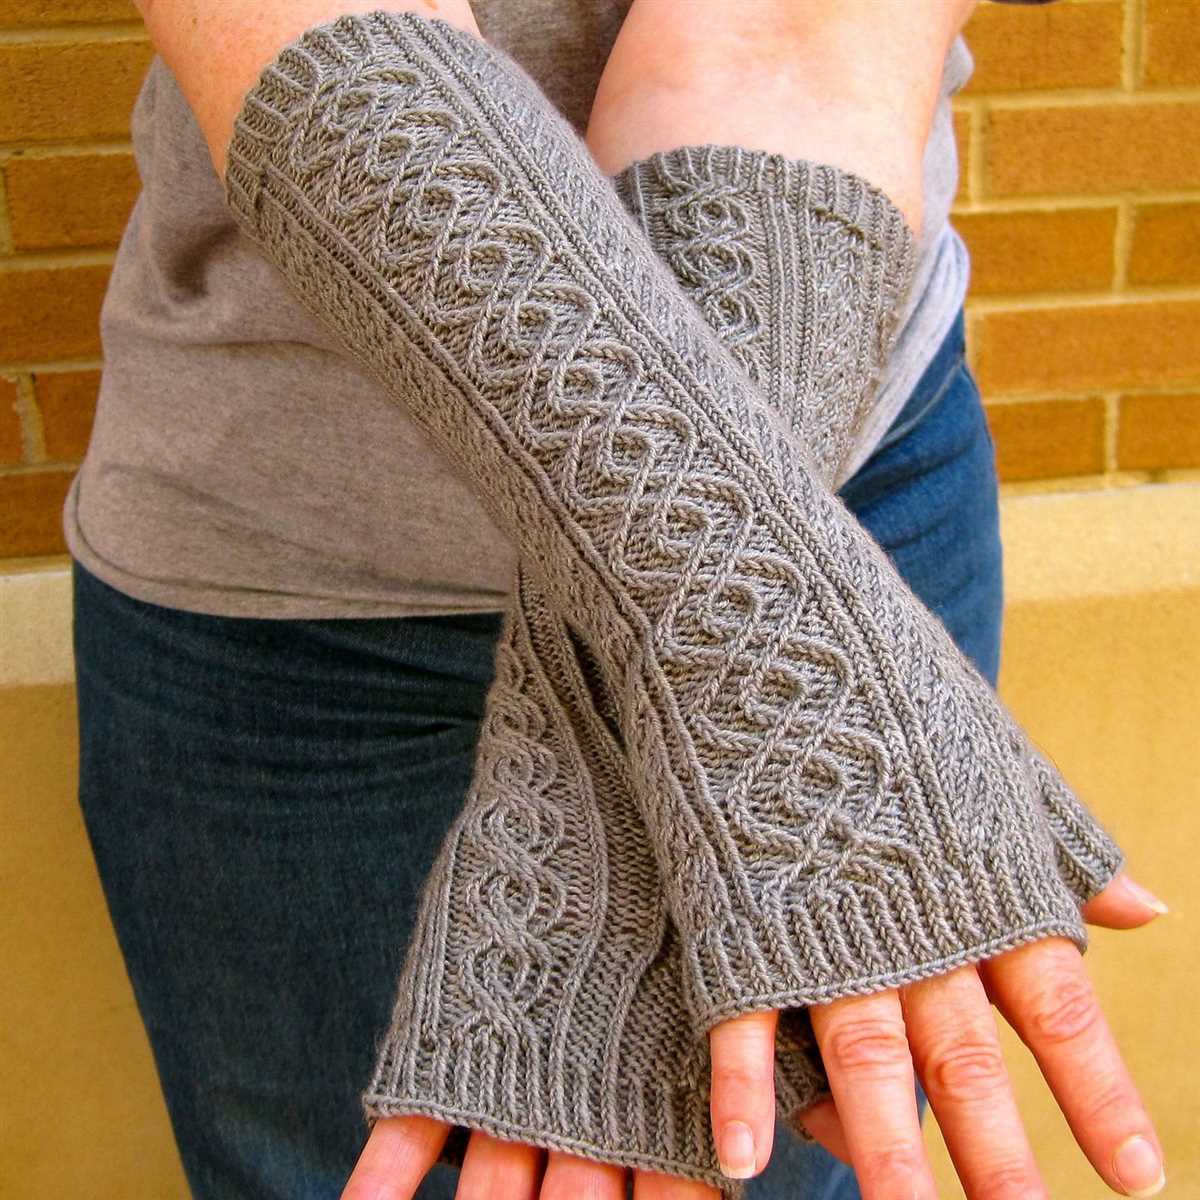
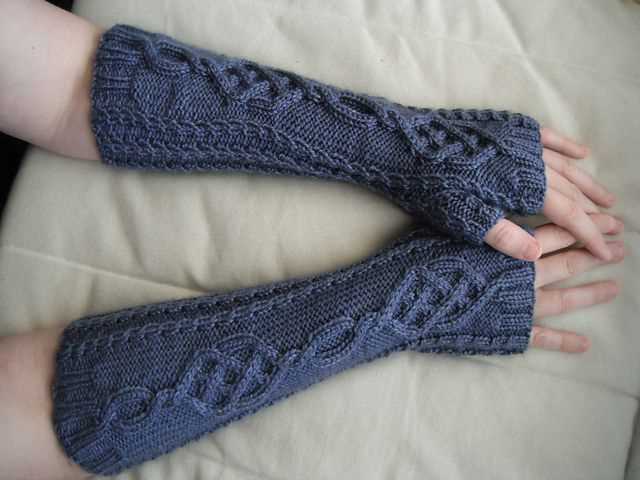
Adding Cable and Aran Patterns
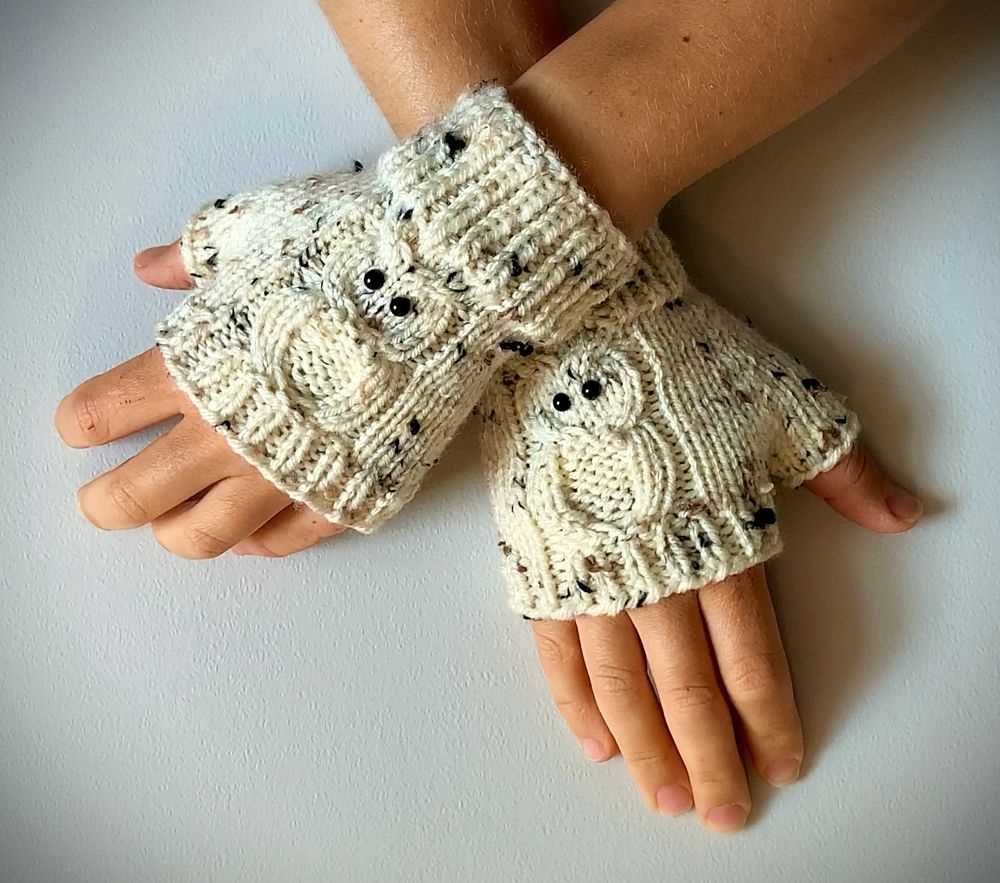
One way to add some extra flair and texture to your Aran fingerless gloves is by incorporating cable and Aran patterns into the design. These patterns involve knitting stitches in a specific sequence to create intricate and visually appealing designs.
There are several cable and Aran patterns that you can choose from to enhance the look of your gloves. One popular option is the classic cable pattern, which involves crossing stitches over each other to create a braided effect. This pattern adds a timeless and elegant touch to any knitted item, including fingerless gloves.
To incorporate a cable pattern into your gloves, you’ll need to follow a specific set of instructions. These instructions will guide you through the process of crossing stitches and creating the desired cable pattern. It’s important to carefully follow the pattern and keep track of your stitches to avoid any mistakes.
In addition to cable patterns, you can also incorporate Aran patterns into your fingerless gloves. Aran patterns typically involve a combination of different stitches, such as cables, bobbles, and moss stitch, to create intricate and textured designs. These patterns can be more challenging to knit, but they result in stunning and unique finished products.
When adding cable and Aran patterns to your gloves, it’s important to consider the overall design and placement of the patterns. You may choose to add a single cable running up the center of the glove or create a more complex pattern that covers the entire hand. Experiment with different patterns and placements to find the one that best suits your personal style and preferences.
Finishing the Gloves
After you have completed knitting the Aran fingerless gloves using the free pattern, it’s time to finish them off and make them ready to wear. Here are the steps to follow for finishing the gloves:
1. Weave in loose ends: Start by weaving in any loose ends of yarn that may be sticking out. Use a tapestry needle to thread the ends through the stitches on the wrong side of the gloves. This will help secure the yarn and prevent it from unraveling.
2. Block the gloves: To give the gloves a polished and professional look, you may want to block them. Wet the gloves in cold water and gently squeeze out the excess moisture. Lay them flat on a clean towel and reshape them to your desired size. Then, let them dry completely before wearing or storing.
3. Add any desired embellishments: If you want to add some decorative elements to your gloves, now is the time. You can sew on buttons, appliques, or even embroidery to enhance the design. Be creative and personalize your gloves to make them unique.
4. Make adjustments if necessary: Try on the gloves and see if any adjustments need to be made. If the fit is too loose or too tight in certain areas, you can use a needle and thread to make alterations. This will ensure that the gloves fit comfortably and snugly on your hands.
5. Enjoy your finished gloves: Once you have completed all the finishing touches, your Aran fingerless gloves are ready to be worn. They will not only keep your hands warm but also showcase your knitting skills. Enjoy wearing your cozy and stylish gloves!
Tips and Tricks
When knitting the Aran fingerless gloves, there are a few tips and tricks that can help you achieve the best results. Here are some handy tips to keep in mind:
- Choose the Right Yarn: Be sure to select a yarn that is suitable for fingerless gloves. Look for yarn with good stitch definition and a fiber content that provides warmth.
- Check Your Gauge: Always make a gauge swatch before starting your project. This will ensure that your glove will fit properly and the stitch pattern will look the way it’s supposed to.
- Use Stitch Markers: Stitch markers can be very helpful to keep track of your stitch pattern, especially if it’s a complex one. Place them at the beginning and end of each repeat to make counting stitches easier.
- Don’t Be Afraid to Frog: If you notice a mistake in your knitting, don’t hesitate to rip back and fix it. It’s better to take the time to fix mistakes rather than have a finished pair of gloves that you’re not happy with.
- Block Your Gloves: Blocking your gloves can help even out your stitches and make the finished gloves look more polished. Follow the instructions on your yarn label for the best blocking method.
In conclusion, the Aran fingerless gloves pattern is a versatile and stylish option for keeping your hands warm while still having mobility. With the right yarn and attention to detail, you can create a beautiful pair of gloves that you’ll love wearing. Remember to gauge swatch, use stitch markers, and don’t be afraid to fix mistakes. Happy knitting!