
If you’re a fan of knitting and want to create something unique and meaningful, look no further than the Welsh dragon knitting pattern. This iconic symbol of Wales is not only a beautiful design but also represents Welsh pride and heritage. Whether you’re a beginner or an experienced knitter, this pattern is a great way to challenge yourself and create a one-of-a-kind piece.
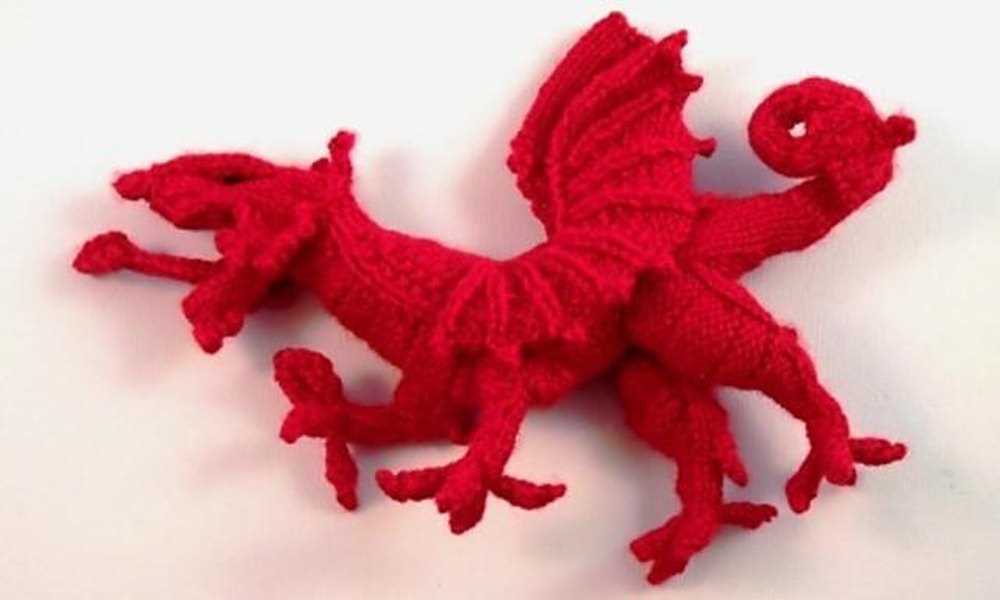
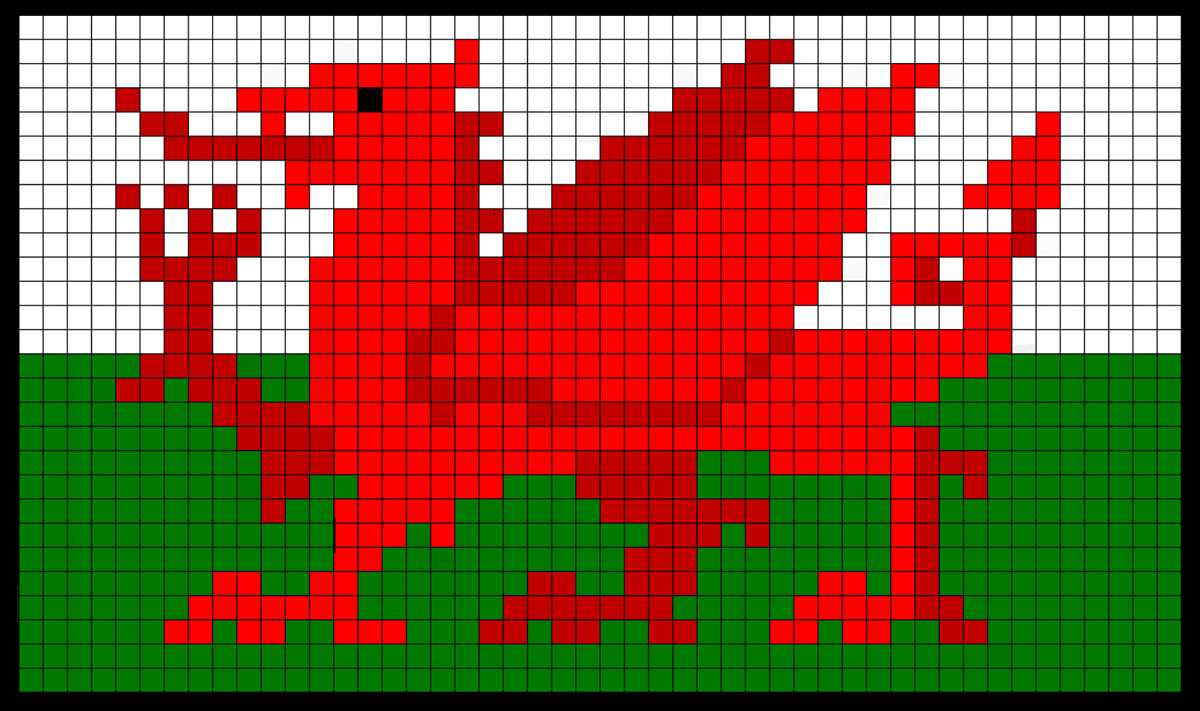
The Welsh dragon is a red dragon that has been associated with Wales for centuries. It holds a significant place in Welsh mythology and is a symbol of power, strength, and protection. The dragon is often depicted on the Welsh flag and is seen as a representation of the country’s history and identity.
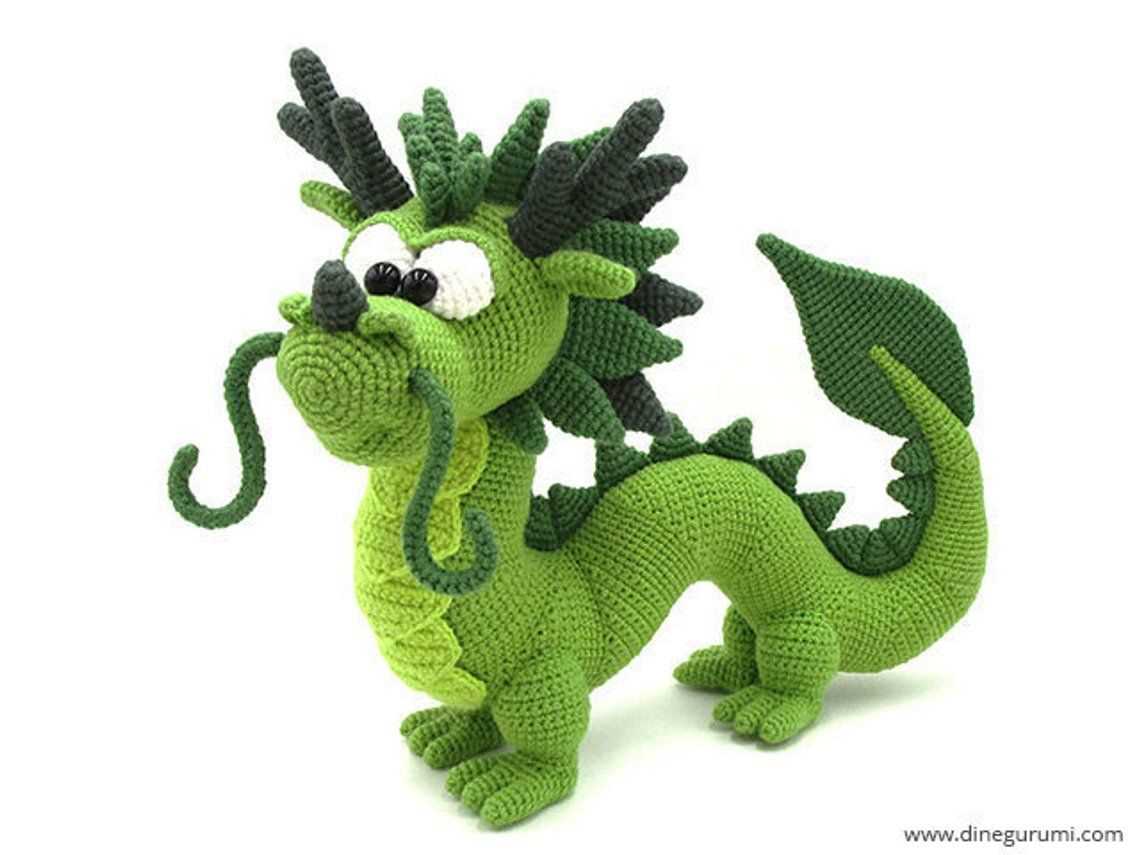
Knitting a Welsh dragon can be a fun and rewarding project. There are various patterns available, ranging from simple designs for beginners to more complex patterns for experienced knitters. The pattern typically includes instructions for creating the dragon’s body, wings, and tail, as well as details such as scales and claws. You can choose to knit the dragon in one color or use different shades to create a more detailed and vibrant design.
How to Knit a Welsh Dragon: Step-by-Step Guide
Knitting a Welsh dragon can be a fun and rewarding project for any knitting enthusiast. With its iconic red body and intricate design, the Welsh dragon is a symbol of Welsh pride and heritage. Follow this step-by-step guide to create your own knitted Welsh dragon.
Materials:
- Red yarn
- Black yarn
- White yarn
- Knitting needles (size may vary depending on your preference)
- Yarn needle
- Scissors
Step 1: Cast On
Begin by casting on the required number of stitches using red yarn. The size of your project will determine the number of stitches you need, so refer to your pattern or desired dimensions for guidance. Make sure to leave a long tail of yarn to use for sewing and finishing later.
Step 2: Knit the Body
Continuing with the red yarn, knit rows of stockinette stitch to create the body of the dragon. The number of rows will depend on the desired length of the body. Remember to keep your stitches even and check your tension periodically.
Step 3: Add the Details
Now it’s time to add the intricate design of the Welsh dragon. Switch to black yarn and begin knitting the scales and other details according to your pattern. This may involve different stitches, such as cables or intarsia, so follow the instructions carefully.
Step 4: Knit the Wings
Using black yarn, knit the wings separately. You can either knit them flat and sew them onto the body afterwards, or use double-pointed needles or circular needles to knit them in the round. Pay attention to the shaping and finishing details to achieve the desired look.
Step 5: Sew and Finish
Once all the pieces are knitted, it’s time to sew them together and finish the dragon. Use the long tail of yarn from the cast on to sew the body and wings together, making sure to secure the stitches tightly. Weave in any loose ends and trim them neatly.
Congratulations! You have successfully knitted a Welsh dragon. Display it proudly or give it as a thoughtful gift to someone who appreciates the art of knitting. Enjoy the process and the beautiful result of your hard work!
Materials Needed for Knitting a Welsh Dragon
To knit a Welsh dragon, you will need a variety of materials to bring this mythical creature to life. Here is a list of the key items you will need:
- Yarn: Choose a vibrant red yarn to represent the body of the dragon. You will also need smaller amounts of green and white yarn for the details.
- Knitting Needles: Use appropriate knitting needles for the thickness of your chosen yarn. A set of double-pointed needles may be useful for shaping the dragon’s body.
- Tapestry Needle: This needle will be used for seaming and weaving in loose ends.
- Stuffing: To give your dragon a three-dimensional shape, you will need a soft stuffing material such as polyester fiberfill.
- Scissors: A pair of sharp scissors will be necessary for cutting yarn and trimming excess fabric.
- Stitch Markers: These markers will help you keep track of important points in your knitting, such as the beginning of a round or the placement of details.
- Safety Eyes: For added character, consider using safety eyes to give your Welsh dragon a lifelike appearance. Alternatively, you can embroider eyes using black yarn.
With these materials on hand, you will be well-equipped to knit your very own Welsh dragon. Remember to follow the knitting pattern carefully and have fun as you bring this legendary creature to life!
Choosing the Right Yarn for Your Welsh Dragon
When it comes to knitting a Welsh dragon, choosing the right yarn is crucial to create the perfect result. The yarn you use not only affects the overall look of the dragon, but also determines its texture and durability. Here are some factors to consider when selecting the yarn for your project:
Type of Yarn:
There are various types of yarn available, each with its own unique characteristics. For a Welsh dragon, it is recommended to use a wool or wool blend yarn. Wool provides excellent stitch definition and adds warmth to the finished project. A blend of wool and acrylic yarn is another option, as it offers durability and easy care.
Weight of Yarn:
The weight of the yarn determines the thickness and drape of the finished dragon. For a detailed and intricate design, it is best to use a lightweight yarn, such as fingering or sport weight. On the other hand, if you prefer a larger and more substantial dragon, a heavier yarn, such as worsted or bulky weight, may be more suitable. Consider the desired size and level of detail when choosing the yarn weight.
Color:
The color of the yarn plays a significant role in bringing the Welsh dragon to life. Traditional Welsh dragons are depicted in shades of red, but you can choose any color that represents your personal style and preferences. Opt for a bold and vibrant color that stands out, or go for a more subtle and natural tone. Variegated yarns with multiple shades can also add depth and interest to your dragon.
Texture:
Consider the texture of the yarn and how it will complement the dragon’s features. A smooth and even yarn will showcase the intricate stitches and details, while a yarn with a bit of fuzz or halo can add a whimsical touch. Experiment with different textures to achieve the desired effect, whether it be sleek and polished or textured and cozy.
In conclusion, selecting the right yarn for your Welsh dragon is an important decision. Take into account the type of yarn, its weight, color, and texture to create a dragon that is both visually appealing and enjoyable to knit. With the right yarn, you can bring this iconic symbol of Wales to life in your own unique way.
Knitting Techniques for Creating the Dragon’s Body
When it comes to knitting the body of the Welsh dragon, there are a few key techniques to keep in mind. To achieve the desired shape and texture, it’s important to pay attention to the stitch patterns and shaping methods used.
1. Using Different Stitch Patterns
To create the scales and other intricate patterns on the dragon’s body, it’s best to experiment with different stitch patterns. For example, you can utilize the seed stitch or moss stitch to achieve a textured look. Alternatively, you can try using cable knitting techniques to create raised patterns that resemble scales. These stitch patterns can bring the dragon to life and add a realistic touch to your knitted creation.
2. Shaping Techniques
Proper shaping is essential to give the dragon’s body a three-dimensional appearance. One technique you can use is increasing and decreasing stitches to create curves and angles. For example, to shape the dragon’s tail, you can gradually decrease stitches towards the tip. Similarly, for the neck and head, you can increase stitches to create a more round shape. It’s important to follow the pattern and instructions carefully to achieve the desired shape and proportions.
3. Embroidery and Embellishments
In addition to the stitch patterns and shaping techniques, adding embroidery and embellishments can enhance the dragon’s body even further. This can include embroidering the eyes, mouth, and claws with contrasting yarn to make them stand out. You can also consider adding small beads or sequins to give the dragon’s body a touch of sparkle or using yarns with metallic or silk fibers to create a more luxurious appearance.
Overall, creating the body of the Welsh dragon through knitting requires attention to detail, a variety of stitch patterns, and careful shaping techniques. By utilizing these techniques and adding personal touches, you can create a stunning and impressive knitted dragon that showcases your knitting skills.
Essential Stitches for Knitting the Welsh Dragon
Creating a Welsh dragon knitting pattern requires a good understanding of various knitting stitches. Here are some essential stitches that you’ll need to master in order to successfully knit the iconic Welsh dragon design.
1. Garter Stitch:
The garter stitch is a basic stitch pattern that is achieved by knitting every row. It creates a dense and textured fabric, which is perfect for knitting the body of the Welsh dragon. This stitch is great for beginners and provides a solid base for more intricate stitches.
2. Stockinette Stitch:
The stockinette stitch is another fundamental stitch that is commonly used in knitting. It is created by knitting on the right side and purling on the wrong side of the fabric. This stitch creates a smooth and flat surface, making it ideal for knitting the dragon’s wings and other intricate details.
3. Slip Stitch:
The slip stitch is a simple technique used to create texture and colorwork in knitting. By slipping stitches instead of knitting or purling them, you can create interesting patterns and designs. This stitch is useful for incorporating the dragon’s scales or other decorative elements into your knitting.
4. Cable Stitch:
The cable stitch is a popular technique that adds depth and dimension to knitted fabric. It involves crossing stitches over each other to create a twisted cable effect. This stitch can be used to create the dragon’s tail or other intertwined elements in the design, adding an intricate and eye-catching touch.
5. Bobble Stitch:
The bobble stitch is a fun and decorative stitch that adds a three-dimensional texture to knitting. It is created by knitting multiple stitches together into one and then increasing them back into individual stitches. This stitch can be used to create the dragon’s eyes or other raised features, giving your knitting a playful and whimsical look.
By mastering these essential stitches, you’ll be well-equipped to take on the challenge of knitting the Welsh dragon. With practice and patience, you’ll be able to create a unique and beautiful representation of this iconic symbol of Welsh heritage.
Knitting the Dragon’s Wings and Tail
When knitting the Welsh dragon pattern, the wings and tail are two of the most important and eye-catching elements. These parts add a sense of depth and movement to the overall design, making the dragon come to life.
Wings: To knit the dragon’s wings, you will need to follow the pattern instructions carefully. Typically, the wings are knitted separately and then sewn onto the body of the dragon. The pattern might involve knitting the wing sections in different colors or using different stitch patterns to create a textured effect. Once the wings are completed, they are attached to the sides of the dragon’s body, giving it the appearance of being ready to take flight.
Tail: The dragon’s tail is another important feature that adds character to the finished piece. Just like the wings, the tail is usually knitted separately and then attached to the body of the dragon. The pattern may include different techniques to create the desired tail shape, such as increasing or decreasing stitches or using short rows. The tail can be left straight or curled, depending on the look you want to achieve. Knitting the dragon’s tail requires attention to detail to ensure it complements the overall design and gives the dragon a sense of balance.
Overall, knitting the wings and tail of the Welsh dragon pattern requires careful attention to detail and following the pattern instructions accurately. These elements add depth and movement to the finished piece, bringing the dragon to life. With the right techniques and a bit of patience, you can create a stunning knitted dragon with captivating wings and a tail that will surely impress. Happy knitting!
Adding Details to the Welsh Dragon’s Face
When knitting the Welsh Dragon pattern, adding details to the dragon’s face is an essential step to bring it to life. By carefully incorporating different techniques and stitches, you can create a face that is full of character and expression. Here are some key details to consider:
Eyes:
The eyes are the windows to the dragon’s soul, so it’s important to make them stand out. Use contrasting yarn colors to create a vibrant effect. Embroider the eyes using a satin stitch or French knots for a realistic and detailed look. You can also add a touch of sparkle by incorporating a bit of metallic or shimmering thread.
Nostrils:
The dragon’s nostrils add a touch of fierceness to its face. To create them, use a small crochet hook and insert it into the knitting at the desired location. Pull a small loop of yarn through and secure it by making a knot at the back of the work. Trim any excess yarn to keep the nostrils neat and tidy.
Mouth:
The mouth is where the dragon’s fiery breath emerges, so it should have a distinct shape. Use a combination of knit and purl stitches to form the lips, adding depth and texture. You can even make the mouth open slightly by leaving a small gap between stitches. To give the appearance of teeth, use a crochet hook to create small loops along the edge of the mouth, then secure them with knots.
Horns:
The dragon’s horns are a prominent feature that add to its fierce and majestic appearance. To create the horns, use a combination of knitting and crochet techniques. Start by knitting a short tube in a pointed shape, then use a small crochet hook to add details such as ridges or spirals. Attach the horns to the dragon’s head securely, making sure they are symmetrical and well-positioned.
Finishing Touches: Sewing and Embroidery
Once you have completed the knitting portion of your Welsh dragon, it’s time to add the finishing touches with sewing and embroidery. These details will bring your dragon to life and make it truly unique. Here are some tips and techniques to help you achieve the desired result.
Sewing the Pieces Together

To assemble your dragon, start by laying out all the knitted pieces and matching them up according to the pattern. Use a yarn needle and the same yarn that you used for knitting to sew the pieces together. The stitches should be neat and secure to ensure that the dragon retains its shape. Take your time and be patient, as this step can be time-consuming but is essential for a professional finish.
Adding Embroidered Details
Embroidery is the perfect way to add intricate details and bring your dragon to life. You can use different colors of embroidery thread to create different effects. For example, you can use black thread to embroider the eyes and nose, and red thread to create the dragon’s tongue. Additionally, you can use a combination of straight stitches, satin stitches, and French knots to add texture and dimension to the dragon’s body.
When embroidering, it’s important to use a small embroidery hoop to keep the fabric taut and prevent it from bunching up. You can refer to the pattern or use your creativity to decide where to add embroidery. Remember to secure the threads at the back of the fabric to prevent them from unraveling.
By sewing and embroidering your Welsh dragon, you can make it a truly one-of-a-kind piece. The finishing touches will add personality and charm to your creation, making it a cherished item for years to come. Take your time and enjoy the process, and soon you’ll have a beautiful Welsh dragon that you can proudly display or gift to a loved one.
Blocking and Shaping the Knitted Welsh Dragon
Once you have finished knitting the Welsh dragon pattern, the next step is to block and shape it. Blocking is the process of manipulating the knitted fabric to ensure that it lays flat and even. It also helps to set the stitches and improve the overall appearance of the finished project. In the case of the Welsh dragon, blocking is particularly important as it helps to define the intricate details of the dragon’s scales and wings.
To block the knitted Welsh dragon, you will need a blocking board or mat, rustproof pins, and a spray bottle filled with water. Start by laying the dragon on the blocking board, making sure that it is positioned as desired. Use the rustproof pins to secure the edges of the dragon to the board, stretching out any areas that need to be shaped or smoothed. For example, you may want to stretch out the wings to make them appear more open and lifelike.
After securing the dragon to the blocking board, lightly mist it with water using the spray bottle. This will help to relax the fibers and make the fabric more pliable. Gently shape the dragon’s scales and wings as desired, using your fingers to smooth out any wrinkles or uneven areas. Take your time and work carefully to achieve the desired shape and definition.
Once you are satisfied with the shape of the dragon, leave it to dry completely. This may take several hours or even overnight, depending on the thickness of the yarn and the humidity in the air. Avoid removing the dragon from the blocking board until it is completely dry to ensure that it retains its shape.
Blocking and shaping the knitted Welsh dragon is an important final step in the knitting process. It allows you to bring the dragon to life, enhancing its details and ensuring that it lays flat and even. By taking the time to block and shape your dragon, you will be rewarded with a finished project that is truly stunning and worthy of display.
Tips and Tricks for Knitting the Welsh Dragon
Knitting the Welsh Dragon can be a fun and challenging project for any knitting enthusiast. Whether you’re a beginner or an experienced knitter, here are some tips and tricks to help you create a beautiful and intricate dragon pattern.
1. Start with the right yarn and needles
Choosing the right yarn and needles is crucial to achieving the desired outcome. Opt for a medium-weight yarn that is easy to handle and will create a well-defined stitch pattern. Pair it with appropriate knitting needles, depending on your personal knitting style and tension.
2. Use a color chart or pattern guide
When knitting the Welsh Dragon pattern, it is essential to have a color chart or pattern guide to follow. This will help you keep track of the different colors and stitches needed to create the intricate details of the dragon. Use a highlighter or sticky notes to mark your progress and avoid any confusion.
3. Pay attention to tension
Consistent tension is crucial when knitting any intricate pattern. Be mindful of your tension throughout the project, ensuring that your stitches are neither too loose nor too tight. This will help maintain the overall shape and detail of the dragon.
4. Use stitch markers to keep track
Stitch markers can be incredibly helpful in keeping track of specific sections or stitches within the pattern. Use different colored markers to indicate the start of a new row or the placement of key stitches. This will make it easier to spot any mistakes and correct them before they become too noticeable.
5. Take breaks and rest your hands
Knitting the Welsh Dragon can be a time-consuming project, so it’s important to take regular breaks to rest your hands and prevent any strain or discomfort. Stretch your fingers and wrists, and keep a hand cream nearby to keep your hands moisturized and supple.
By following these tips and tricks, you’ll be well on your way to creating a stunning Welsh Dragon knitting pattern. Remember to enjoy the process and have fun experimenting with different colors and techniques.
Things to Consider Before Starting Your Dragon Project
Creating a Welsh dragon knitting project can be an exciting and rewarding endeavor. However, before you dive into the world of dragon knitting patterns, there are a few things to consider to ensure that your project turns out as desired.
1. Skill Level:
Be honest with yourself about your knitting skills before starting a dragon project. Some dragon patterns may require advanced techniques, intricate stitch work, or complex shaping. If you’re a beginner, it may be helpful to start with simpler knitting patterns to build your skills and confidence before tackling a dragon project.
2. Yarn Choice:
Selecting the right yarn is crucial for your dragon project. Consider the weight and texture of the yarn, as well as its color. A sturdy yarn with good stitch definition will help bring out the details in the dragon’s scales and features. Additionally, choosing yarn in vibrant shades of red or green can make your dragon stand out and capture the essence of the Welsh dragon.
3. Pattern Selection:
Not all dragon knitting patterns are created equal. Take the time to research and find a pattern that aligns with your vision for your dragon project. Look for patterns that provide clear instructions, detailed stitch charts, and helpful tips. Reading pattern reviews and checking the reputation of the designer can also give you an idea of the pattern’s complexity and reliability.
4. Sizing and Proportions:
Consider the size and proportions you want your dragon to have. Some patterns may allow for customization in terms of size, while others may have fixed dimensions. Think about how you plan to use or display your finished dragon and make adjustments accordingly. Making a gauge swatch and measuring your progress as you go can help ensure that your dragon turns out in the desired size and shape.
5. Time Commitment:
Be aware that knitting a dragon project can be time-consuming. Depending on the size and complexity of the pattern, it may take several weeks or even months to complete. Consider your schedule and commitments before starting the project to ensure that you have enough time and motivation to see it through to the end. Breaking the project into smaller, manageable sections can help prevent overwhelm and keep you motivated.
Taking these factors into account before starting your dragon project will help set you up for success and ensure that you enjoy the process of bringing your unique Welsh dragon to life through your knitting skills.
Troubleshooting Common Issues When Knitting the Dragon
Knitting the Welsh dragon can be a fun and rewarding project, but it’s not without its challenges. Here are some common issues that knitters may encounter and how to troubleshoot them:
Tangled Yarn
If you find yourself with a tangled mess of yarn, don’t panic! Take a deep breath and gently begin untangling the knots. Use your fingers or a small knitting needle to carefully separate the strands of yarn. It may take some time and patience, but with perseverance, you can untangle the yarn and continue knitting.
Inconsistent Gauge
It’s important to check your gauge before starting the project to ensure that your dragon will turn out the right size. If you find that your gauge is off, try changing your needle size. If your gauge is too large, switch to a smaller needle; if it’s too small, switch to a larger needle. Remember to check your gauge again after making the adjustment.
Incorrect Stitch Count
If you notice that your stitch count is off, it’s likely that you’ve accidentally skipped or added stitches. Carefully review the pattern and compare it to your knitting to identify where the mistake was made. You may need to gently unravel a few rows to correct the stitch count. Take your time, and double-check your work as you go to avoid making further mistakes.
Twisted Stitches
If you find that your stitches are twisted, it’s important to catch this early on. Twisted stitches can affect the overall appearance of the dragon’s scales. To fix twisted stitches, carefully drop the affected stitch off the needle and unravel it down to the mistake. Then, insert the needle correctly through the stitch and knit or purl as indicated in the pattern. Pay careful attention to your knitting to prevent twisted stitches from happening in the first place.
Final Thoughts
Knitting the Welsh dragon may come with its challenges, but don’t let that deter you! With a little troubleshooting and patience, you’ll be able to overcome any issues that come your way. Remember to take breaks when needed, seek help from fellow knitters or online communities, and enjoy the process. Soon enough, you’ll have a beautiful knitted dragon that you can be proud of!