
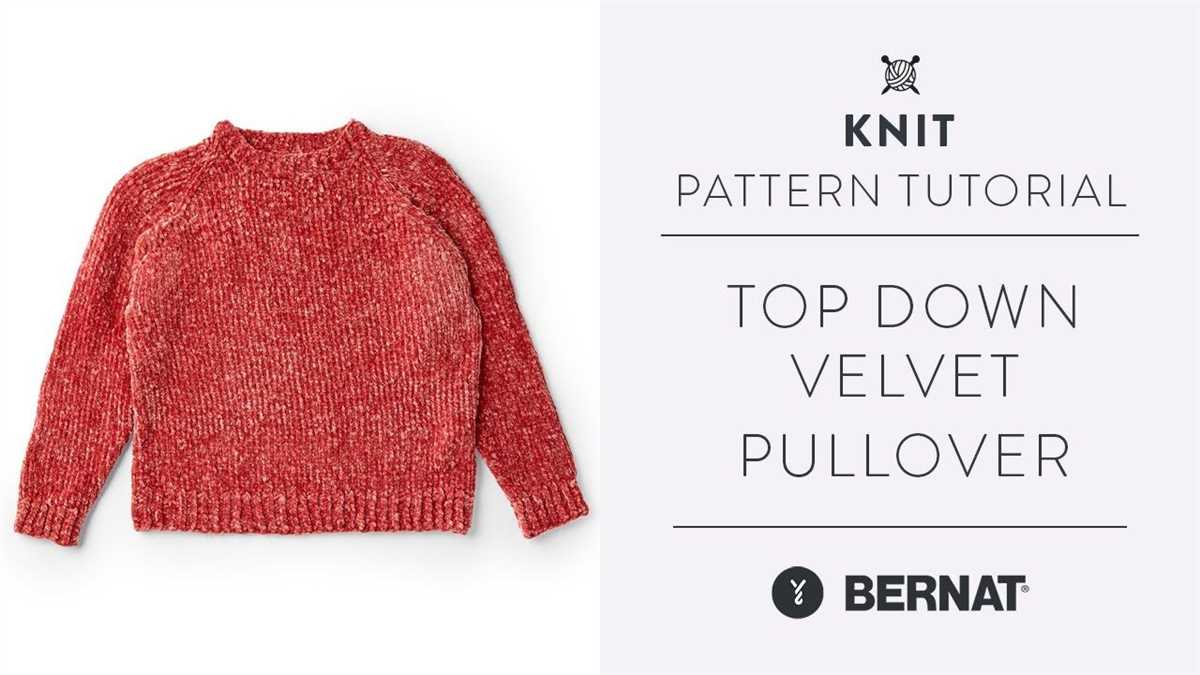
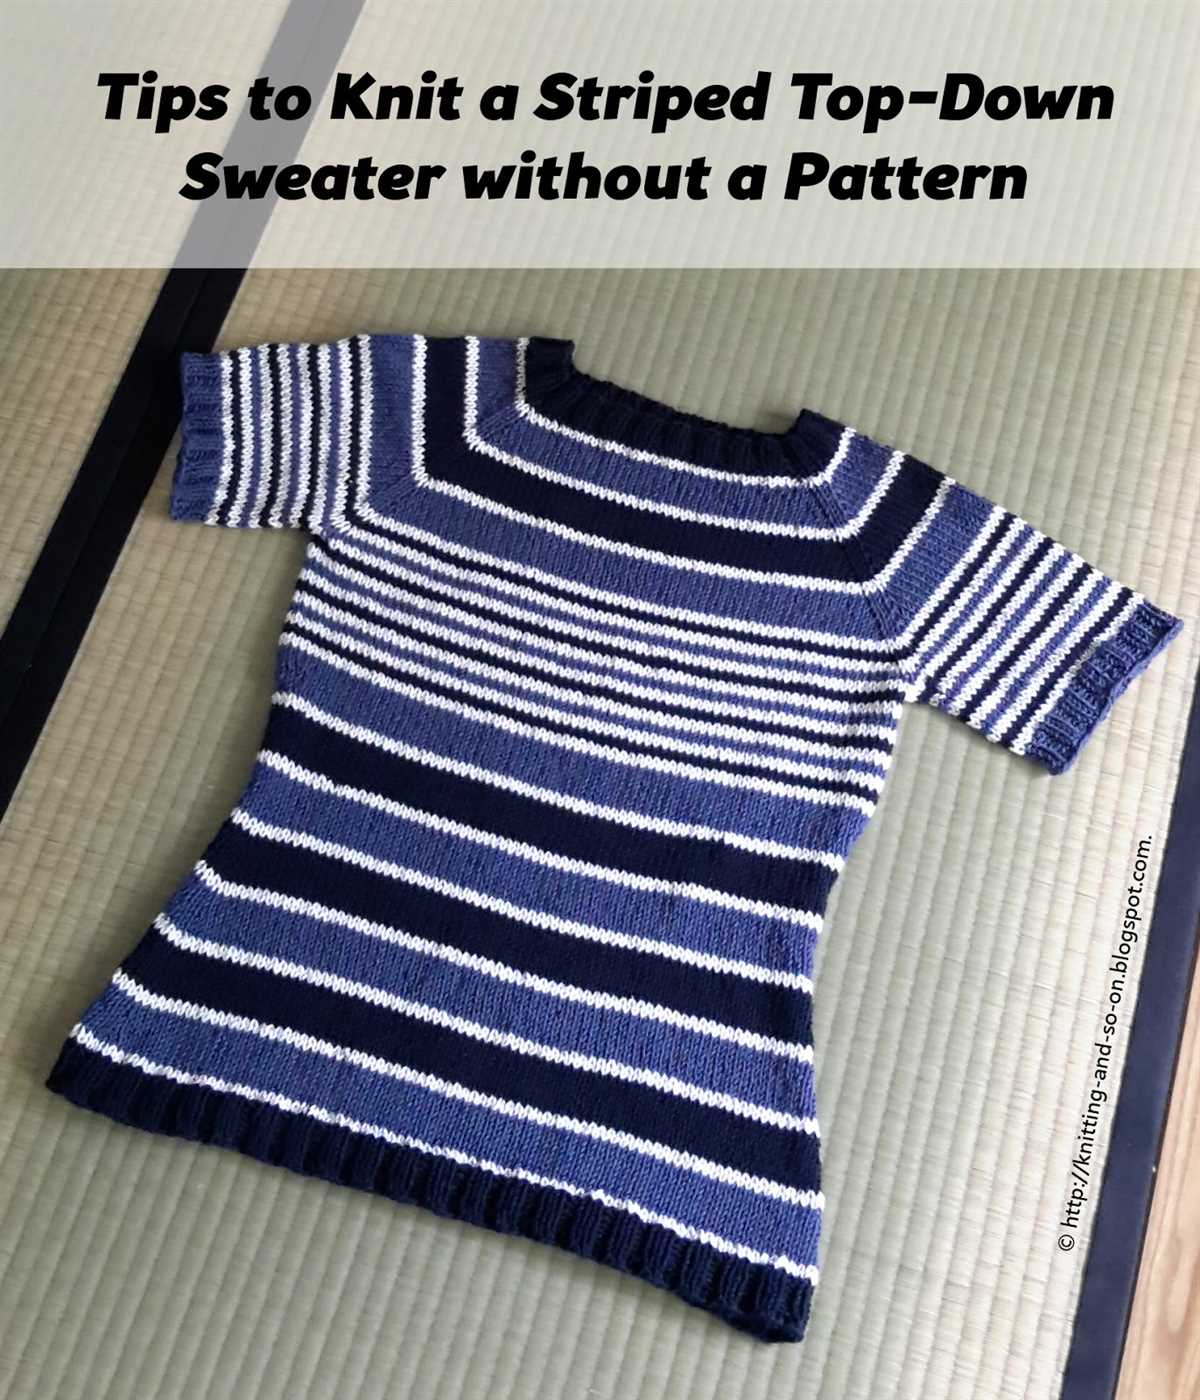
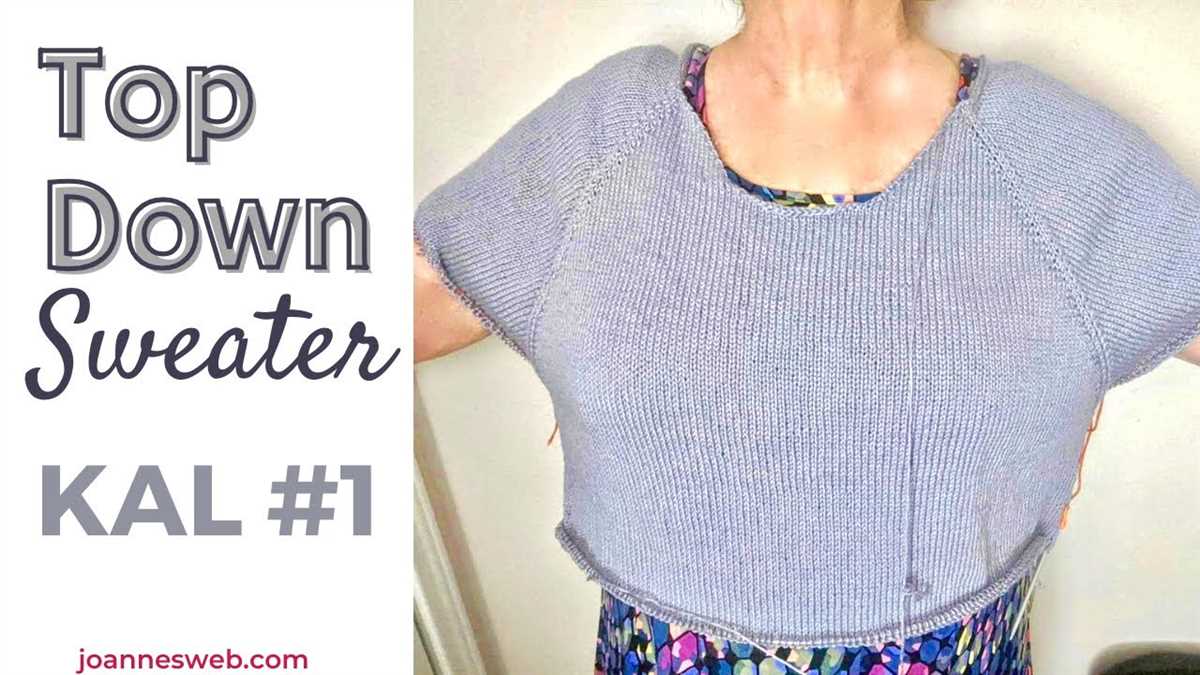
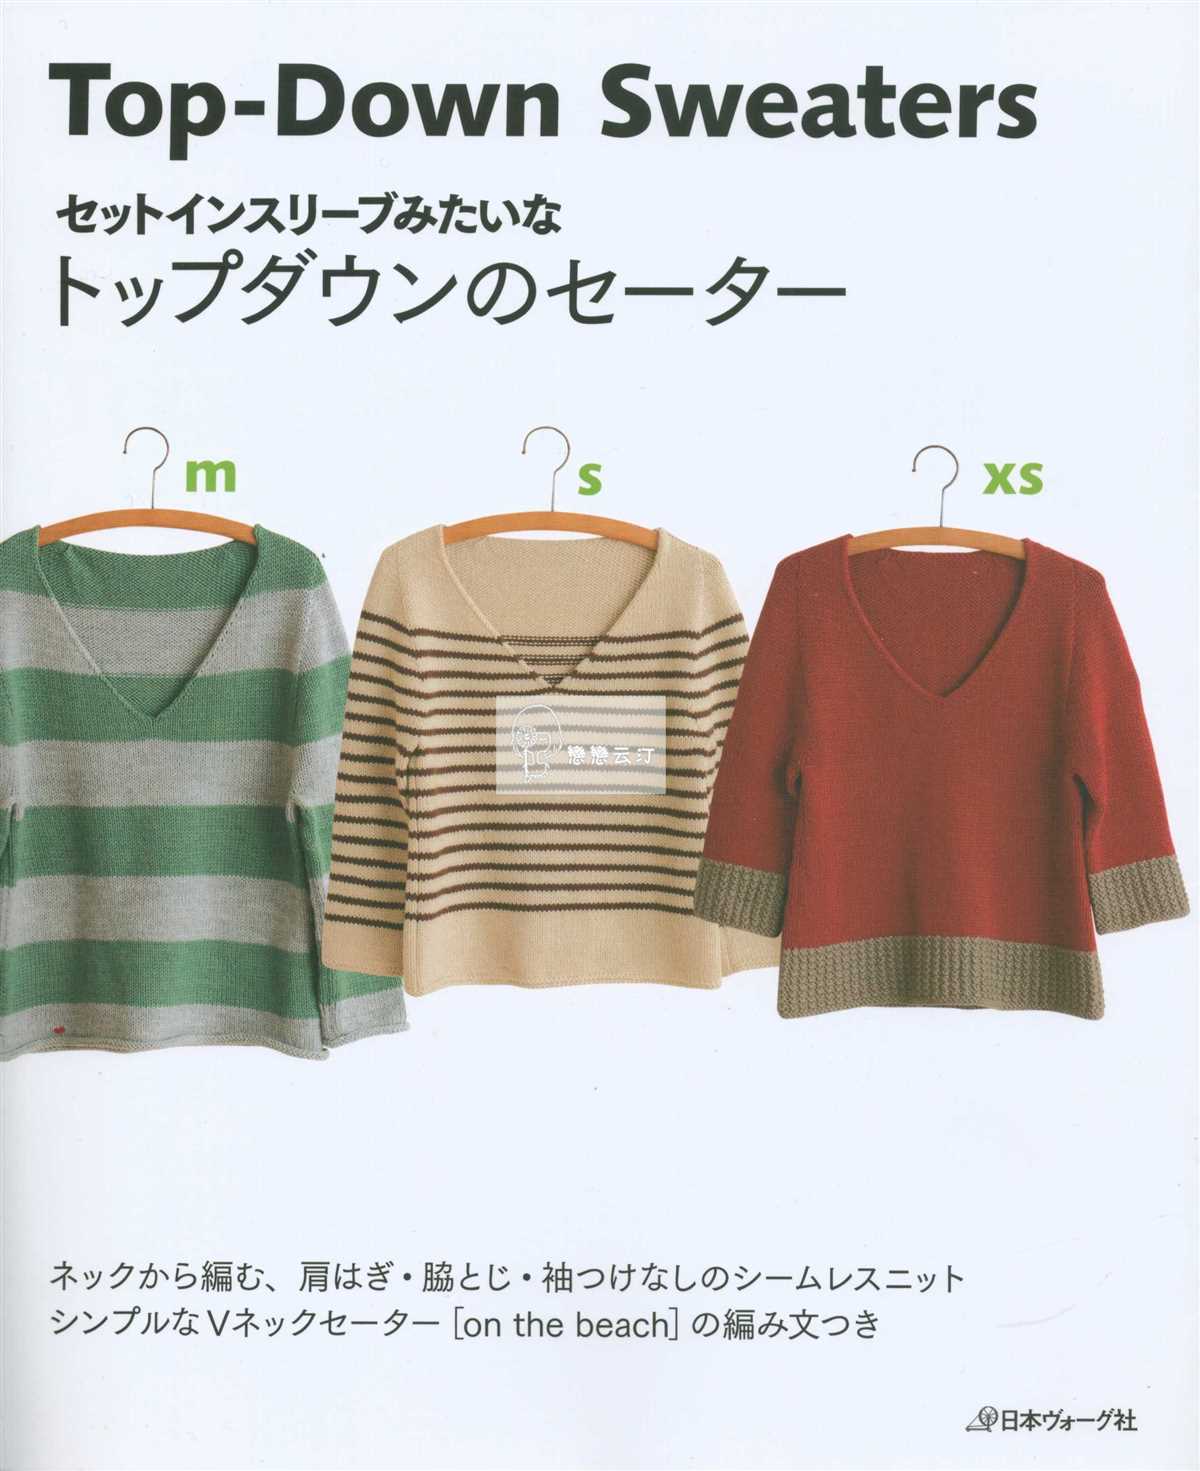
If you enjoy knitting and want to try your hand at making a cozy sweater, a top-down pattern might be just what you’re looking for. Top-down knitting is a popular technique where you start knitting from the collar or shoulders and work your way down to the hem. This approach allows you to try on the sweater as you go, making it easier to adjust the fit and customize the design to your preferences.
A top-down knit sweater pattern is a great option for both beginner and experienced knitters. For beginners, this technique allows you to practice basic knitting stitches and techniques in a relatively simple project. More experienced knitters can experiment with different stitch patterns, colorwork, and shaping techniques to create a unique and personalized sweater.
One of the benefits of a top-down knit sweater pattern is that it eliminates the need for sewing or seaming after you’ve finished knitting. Since you’re knitting the sweater in one continuous piece, there are no separate pieces to sew together. This makes the finishing process quicker and easier, leaving you with a beautiful finished sweater that you can wear with pride.
What is a top down knit sweater pattern?
A top down knit sweater pattern refers to a knitting pattern that is worked from the top of the sweater down to the bottom. This means that you start by knitting the neckline and shoulder area, then gradually add stitches to create the body and sleeves of the sweater. The advantage of knitting a sweater from the top down is that you can try it on as you go, making it easier to customize the fit and make adjustments if needed.
One common method for creating a top down knit sweater pattern is using a circular or double-pointed needles. You can start by casting on stitches for the neckline, then work in rounds or rows to increase stitches along the raglan or yoke area. Once you have reached the desired width for the body and sleeves, you can continue knitting in the round or work back and forth to shape the garment. This technique allows for seamless construction, as there is no need to sew or seam different pieces together.
A top down knit sweater pattern can be versatile and adaptable. You can easily adjust the length of the sleeves and body, as well as the neckline shape and depth. It is also possible to incorporate different stitch patterns or colorwork into the design. Many knitters find top down knitting to be an enjoyable and rewarding way to create a sweater, as it allows for greater control over the final product and a more personalized fit.
Why choose a top down knit sweater pattern?

When it comes to knitting a sweater, there are many options available in terms of patterns. One popular choice is the top-down knit sweater pattern. This pattern offers several advantages, making it a great option for knitters of all skill levels.
One of the main advantages of a top-down knit sweater pattern is that it allows for easy customization. Since you start knitting from the neckline and work your way down, you have the flexibility to adjust the length, fit, and style of the sweater as you go. This makes it easier to create a garment that is tailored to your specific preferences, ensuring a perfect fit.
Another benefit of the top-down approach is that it eliminates the need for sewing or seaming. With traditional sweater patterns, you often have to knit separate pieces and then sew them together, which can be time-consuming and sometimes frustrating. However, with a top-down pattern, you knit the entire sweater in one piece, minimizing the amount of finishing work required. This results in a seamless and professional-looking finished garment.
The top-down knit sweater pattern is also a great choice for beginners, as it allows you to practice basic knitting techniques in a controlled and manageable way. Since you can try on the sweater as you go, it’s easier to fix any mistakes or make adjustments before moving on to the next section. This pattern also typically uses simple stitches and construction methods, making it a great introduction to sweater knitting.
In summary, a top-down knit sweater pattern offers the advantages of customization, seamless construction, and beginner-friendly knitting. Whether you’re an experienced knitter looking for a new challenge or a beginner wanting to try your hand at sweater knitting, this pattern is a versatile and rewarding choice.
Getting started with a top down knit sweater pattern
Knitting a top down sweater is a great project for knitters of all skill levels. It allows you to easily try on the sweater as you go and make any necessary adjustments, ensuring that it fits perfectly. Here are the steps to get started with a top down knit sweater pattern:
1. Choose the right yarn and needles
Before starting your sweater, it’s important to select the right yarn and needles that will give you the desired gauge. The pattern will provide guidance on the recommended yarn weight and needle size, so make sure to follow it closely.
2. Begin with the neckline

The top down sweater is worked from the neckline downwards. Start by casting on the required number of stitches for the neckline using a stretchy cast-on method, such as the long-tail cast-on. You can also use a smaller needle size for the neckline to ensure that it is snug.
3. Knit the yoke
Once the neckline is complete, you will start knitting the yoke of the sweater. This is where the shaping for the shoulders and sleeves will be done. Follow the pattern instructions for increasing the stitches evenly across the rows to create the yoke shape. It’s important to keep track of your stitch count and markers to make sure you’re on track.
4. Separate for the sleeves
After completing the yoke, you will need to separate the stitches for the sleeves. This will create the body of the sweater. Place the sleeve stitches on holders or waste yarn, and continue knitting the body stitches in the desired pattern, such as stockinette stitch or a textured pattern.
5. Knit the sleeves
Once the body of the sweater is at the desired length, it’s time to knit the sleeves. Transfer the held stitches for the sleeves back onto the needles, and follow the pattern instructions to knit the sleeves in the same pattern as the body. You may need to decrease stitches as you approach the cuff for a tapered fit.
Continue knitting the sleeves until they reach the desired length, and bind off the stitches. Finally, finish the sweater by weaving in any loose ends and blocking it to give it a professional and polished look.
Choosing the right yarn for your top down sweater
When knitting a top down sweater, one of the most important decisions you’ll make is choosing the right yarn. The yarn you choose will not only affect the final look and feel of your sweater, but also its fit and durability. Here are some factors to consider when selecting yarn for your top down knit sweater:
1. Fiber Content
First and foremost, consider the fiber content of the yarn. Different fibers have different properties, which can impact the drape, warmth, and breathability of your sweater. Wool is a popular choice for sweaters as it is warm, breathable, and retains its shape well. It also has natural moisture-wicking properties, making it suitable for all seasons. Other popular fibers for sweaters include cotton, alpaca, and cashmere, each with their own unique characteristics.
2. Weight
The weight of the yarn, also referred to as the yarn thickness or gauge, is another important factor to consider. The weight of the yarn will determine the overall look and feel of your sweater. Bulky or chunky weight yarn will produce a thicker, heavier sweater, while fingering or lace weight yarn will result in a lighter, more delicate garment. Consider the desired level of warmth and drape when choosing the weight of your yarn.
3. Yardage
It’s important to consider the yardage or length of the yarn skein when planning your top down sweater. Depending on the size of your sweater and the stitch pattern you’ll be using, you’ll need a certain amount of yarn to complete your project. Make sure to check the recommended yardage for the pattern you’re using as a guide. Having enough yarn of the same dye lot is crucial to ensure consistency in color throughout your sweater.
4. Color and Texture
Finally, consider the color and texture of the yarn. The color of your yarn can greatly impact the overall look and style of your sweater. Choose a color that complements your skin tone and matches your personal style. The texture of the yarn, such as smooth, tweedy, or variegated, can also add visual interest and dimension to your top down knit sweater.
By carefully considering the fiber content, weight, yardage, color, and texture of your yarn, you can ensure that your top down sweater will not only look amazing but also fit well and be a cozy addition to your wardrobe.
Selecting the Appropriate Needle Size
Choosing the correct needle size is crucial when knitting a top-down sweater. The needle size affects the gauge, or the number of stitches and rows per inch, which ultimately determines the size and fit of the finished garment.
First, you need to refer to the pattern’s gauge information to determine the recommended needle size. The pattern will typically indicate the gauge in stockinette stitch using a specific needle size. It’s important to match this gauge closely to ensure that your sweater comes out the correct size.
However, everyone’s knitting tension is different, so it’s a good idea to make a gauge swatch before starting the sweater. This involves knitting a small sample using the recommended needle size and measuring the gauge. If your gauge doesn’t match the pattern’s gauge, you may need to adjust the needle size accordingly.
If your gauge is too loose, meaning you have more stitches and rows per inch than the pattern’s gauge, you’ll need to use a smaller needle size. Conversely, if your gauge is too tight, meaning you have fewer stitches and rows per inch, you’ll need to use a larger needle size. Make swatches with different needle sizes to find the one that matches the pattern’s gauge.
It’s also important to consider the type of yarn you’re using. Different yarns have different characteristics and may require a different needle size to achieve the desired gauge. For example, a thinner yarn may require a smaller needle size, while a thicker yarn may require a larger needle size.
Ultimately, selecting the appropriate needle size requires some experimentation and trial and error. By making gauge swatches and adjusting the needle size as needed, you can ensure that your top-down knit sweater will fit perfectly.
Taking accurate measurements for a perfect fit
Taking accurate measurements is essential when knitting a top-down sweater pattern to ensure a perfect fit. By measuring your body correctly, you can customize the sweater to suit your unique shape. Here are some guidelines to help you get accurate measurements:
1. Bust
To measure your bust, wrap the measuring tape around the fullest part of your chest, typically across the nipple line. Make sure the tape is snug but not too tight, and take note of the measurement in inches or centimeters.
2. Waist
Find your natural waistline by bending to one side and noting where your body creases. This is where you should measure your waist. Wrap the tape around this point, making sure it is parallel to the floor. Again, take note of the measurement.
3. Hips
Measure the fullest part of your hips by wrapping the tape around your buttocks, keeping it parallel to the floor. Make sure the tape is snug but not too tight, and record the measurement.
4. Arm Length
To measure your arm length, extend your arm out to the side and bend your elbow slightly. Measure from the outside edge of your shoulder down to the wrist bone. This measurement will help determine the sleeve length of your sweater.
5. Back Length
To measure the back length, start at the base of your neck and measure down to the desired length of the sweater. This will vary depending on the style and preference.
By taking accurate measurements, you can ensure that your top-down knit sweater fits perfectly and flatters your body shape. These measurements will serve as the foundation for choosing the appropriate size and making any necessary adjustments during the knitting process. Once you have your measurements, refer to the pattern instructions to determine the size and shaping options that will best suit your measurements.
Basic Stitch Patterns for a Top Down Knit Sweater

When knitting a top down sweater, it’s important to choose stitch patterns that will not only look great, but also allow for easy construction and fitting. Here are some basic stitch patterns that work well for this type of sweater:
1. Stockinette Stitch
Stockinette stitch is one of the most common stitch patterns used in knitting. It is created by alternating rows of knit stitches and purl stitches. This stitch pattern creates a smooth, even fabric that is perfect for the body of a top down sweater. It’s also a great choice if you want to showcase a textured or patterned yoke.
2. Garter Stitch
Garter stitch is another simple yet versatile stitch pattern that can be used for the body or cuffs of a top down sweater. It is created by knitting every row, resulting in a fabric with ridges. Garter stitch provides a cozy and stretchy texture, making it a popular choice for sweaters.
3. Ribbing
Ribbing is a stitch pattern that alternates between knit and purl stitches in the same row. It creates a stretchy fabric that is perfect for cuffs, hemlines, and necklines of a top down sweater. Ribbing is not only functional, but it also adds a nice detail to the overall design.
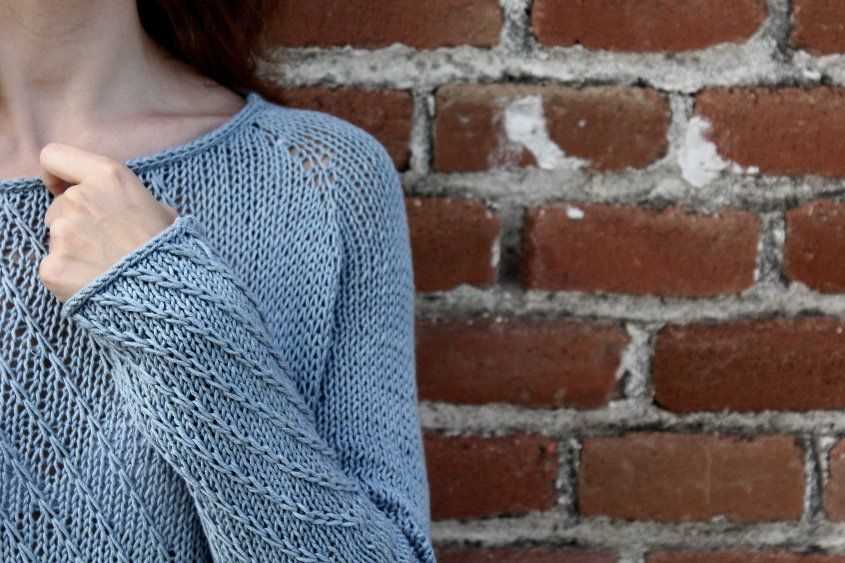
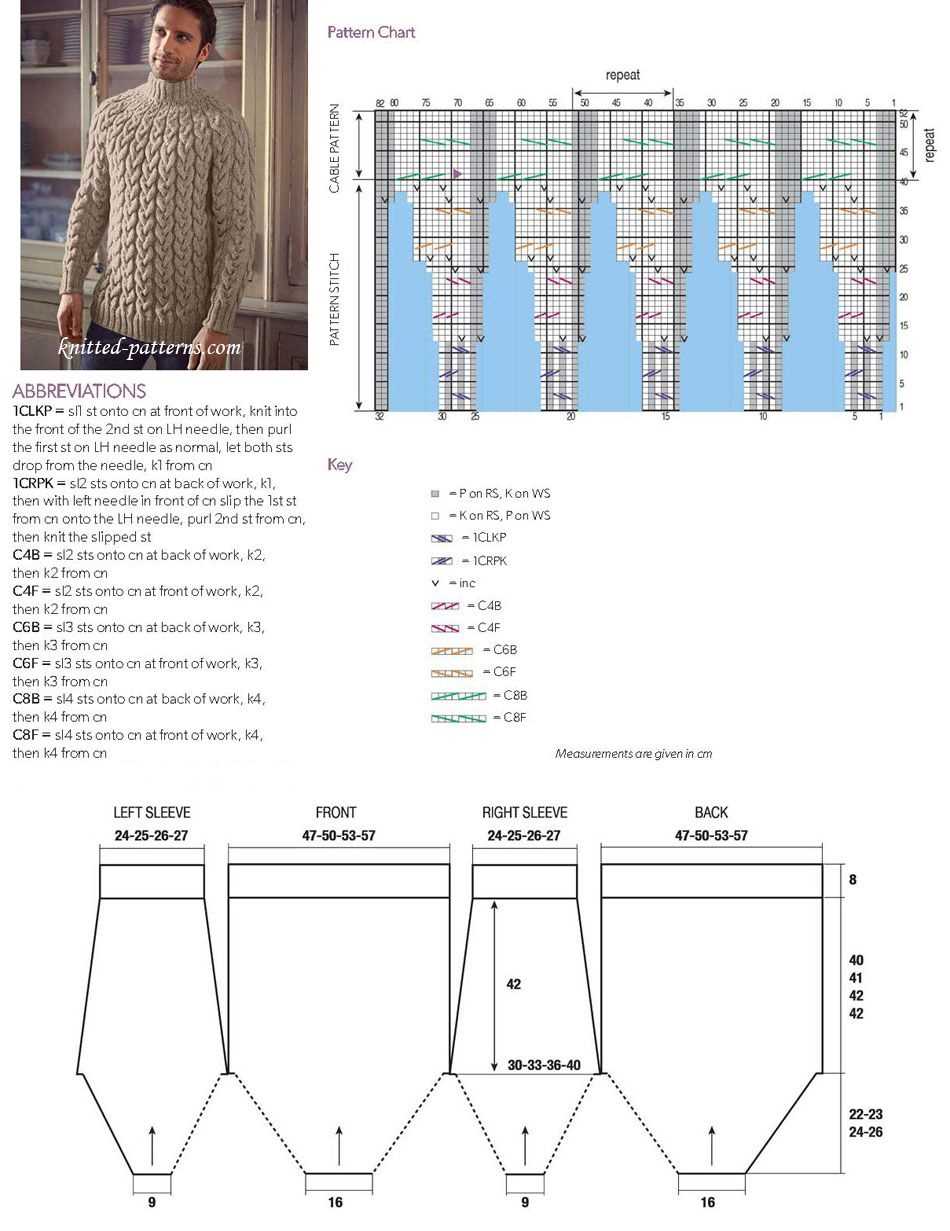
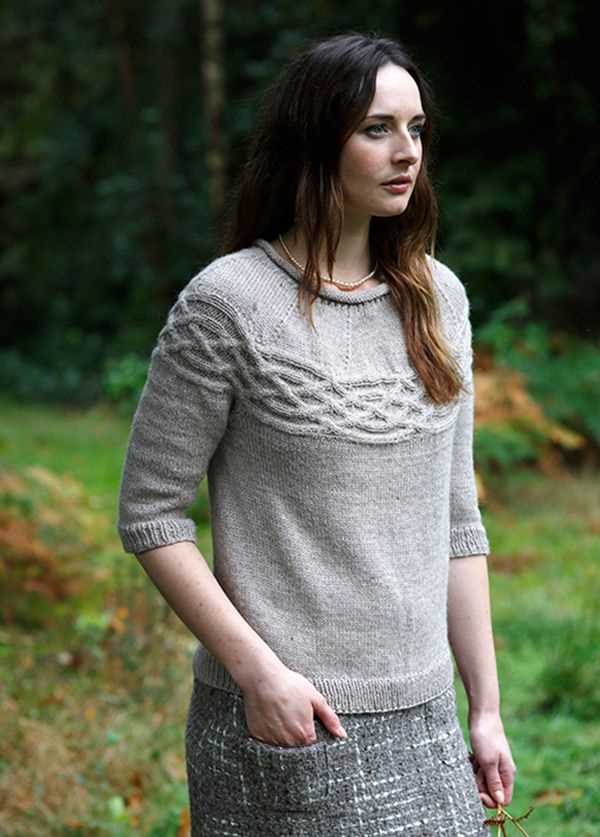
4. Cable Stitch
Cable stitch is a popular choice for adding texture and interest to a top down sweater. It involves crossing stitches over each other to create a twisted cable-like effect. Cable stitch patterns can be simple or complex, depending on the desired look. They are often used for yokes, cuffs, or as a central design element in the front or back of the sweater.
5. Lace Stitch
Lace stitch patterns are great for adding a delicate and feminine touch to a top down sweater. They involve creating decorative holes and intricate designs by strategically increasing and decreasing stitches. Lace stitch patterns can be used for the yoke, sleeves, or even as an overall pattern for the entire sweater.
6. Seed Stitch
Seed stitch is a textured stitch pattern created by alternating knit and purl stitches within the same row. It creates a bumpy, raised fabric that adds dimension and interest to a top down sweater. Seed stitch is often used for cuffs, hems, or as an accent pattern in combination with other stitch patterns.
These are just a few examples of basic stitch patterns that can be used for a top down knit sweater. Experiment with different combinations and variations to create a unique and personalized design that suits your style and knitting skills.
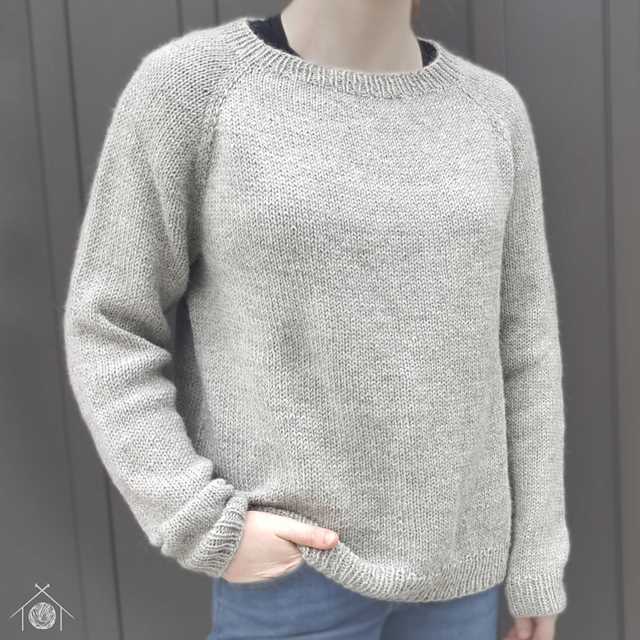
Shaping the top down knit sweater
The shaping process is a crucial step in creating a top down knit sweater. It involves adjusting the number of stitches in each section to achieve the desired fit and silhouette. This can be done through increasing or decreasing stitches, as well as adding or removing sections of the sweater.
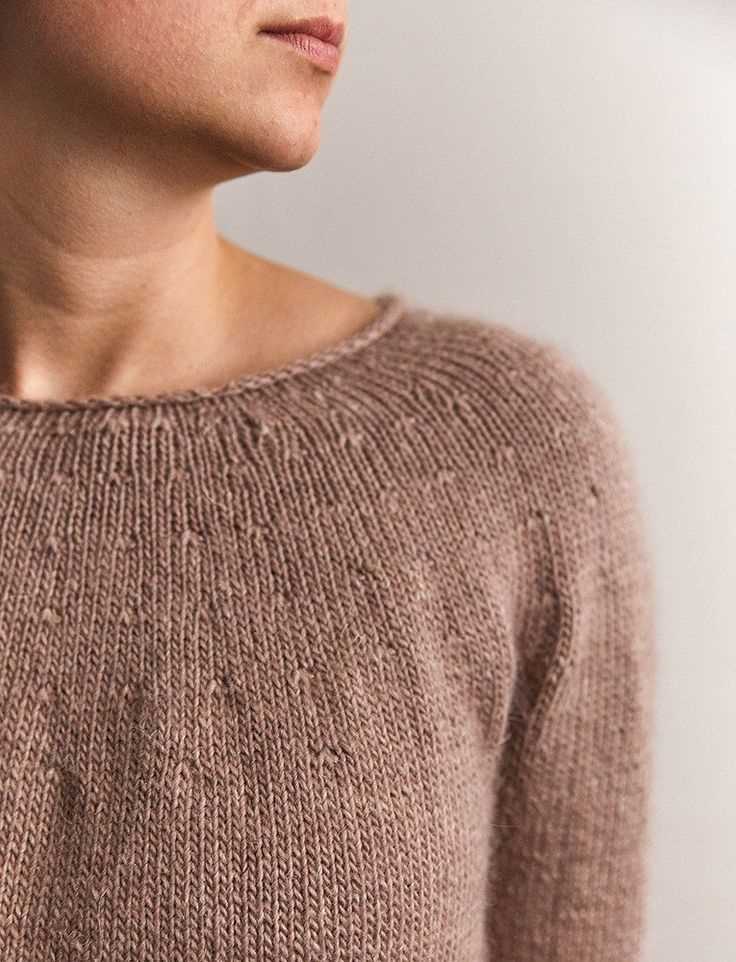
One of the first areas to consider when shaping a top down knit sweater is the neckline. This is often done by gradually decreasing stitches along the neck edge to create a more fitted and flattering look. This can be achieved through techniques such as knitting two stitches together or slipping stitches to create decreases. The number of decreases and their placement can vary depending on the desired neckline style and size of the sweater.
The next area to focus on is the shoulder shaping. This is typically done through short rows, which involve knitting a partial row before turning the work and continuing in the opposite direction. Short rows help create a sloping shoulder line and provide a better fit around the shoulders. They can be worked on both the front and back of the sweater, depending on the desired shape.
Once the neckline and shoulder shaping are complete, attention can be turned to the body of the sweater. This is where the overall fit and shaping of the garment is determined. Increases and decreases can be used to shape the waist, hips, and bust areas, creating a more tailored silhouette. Adjustments can also be made to the length of the sweater, by adding or subtracting rows as needed.
Lastly, the sleeves of the top down knit sweater can be shaped to fit the arms. This is typically done by gradually decreasing stitches along the armhole edge to create a tapered sleeve. The number of decreases and their placement will depend on the desired sleeve style and size of the sweater. Once the desired number of decreases is reached, the remaining stitches can be worked in the desired pattern until the desired sleeve length is achieved.
In conclusion, shaping a top down knit sweater involves adjusting the number of stitches in each section to achieve the desired fit and silhouette. This can be done through techniques such as decreasing stitches along the neckline, using short rows for shoulder shaping, and increasing or decreasing stitches for the waist, hips, bust, and sleeves. By carefully shaping the different sections of the sweater, a more tailored and flattering fit can be achieved.
Adding darts or waist shaping
When it comes to creating a top-down knit sweater pattern, adding darts or waist shaping can help to create a more flattering and fitted silhouette. Waist shaping refers to the technique of adding decreases or increases at the waistline to create a more defined waist. This can be achieved by evenly distributing the shaping decreases or increases across a few rows or by creating darts that are concentrated at the sides of the sweater.
Adding waist shaping can be done in several ways. One common method is to incorporate shaping decreases or increases on either side of the marker that indicates the waistline. For example, you could work a series of decreases on either side of the marker to create a more fitted waist. Alternatively, you could work a series of increases on either side of the marker to create a slightly flared shape at the waist. These shaping techniques can help to create a sweater that hugs the waistline and enhances your natural curves.
When adding darts or waist shaping to a top-down knit sweater pattern, it is important to consider the overall design and fit of the garment. The placement and intensity of the shaping can be adjusted based on your preference and body shape. For example, if you have a more pronounced waistline, you may want to add more shaping decreases or increases to enhance the hourglass shape. On the other hand, if you have a straighter figure, you may opt for less intense shaping to maintain a more relaxed fit.
Ultimately, adding darts or waist shaping to a top-down knit sweater pattern allows you to customize the fit and silhouette of the garment to suit your body shape and preferences. By strategically placing decreases or increases, you can create a sweater that flatters your figure and showcases your personal style.
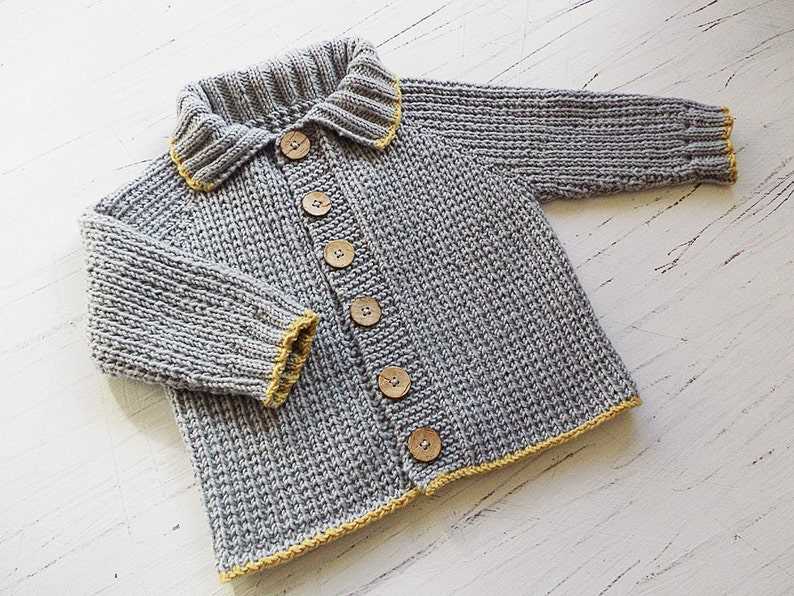
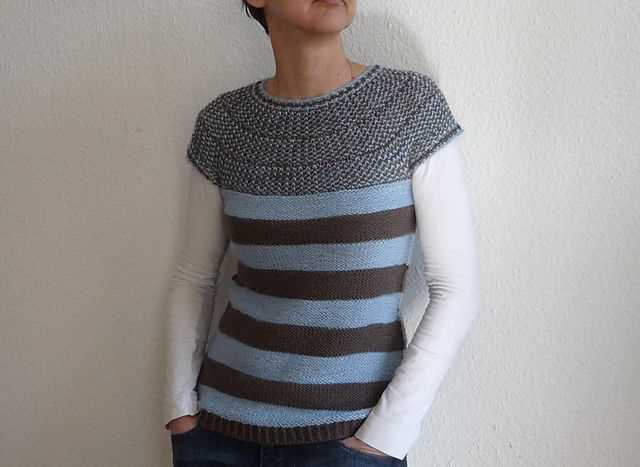
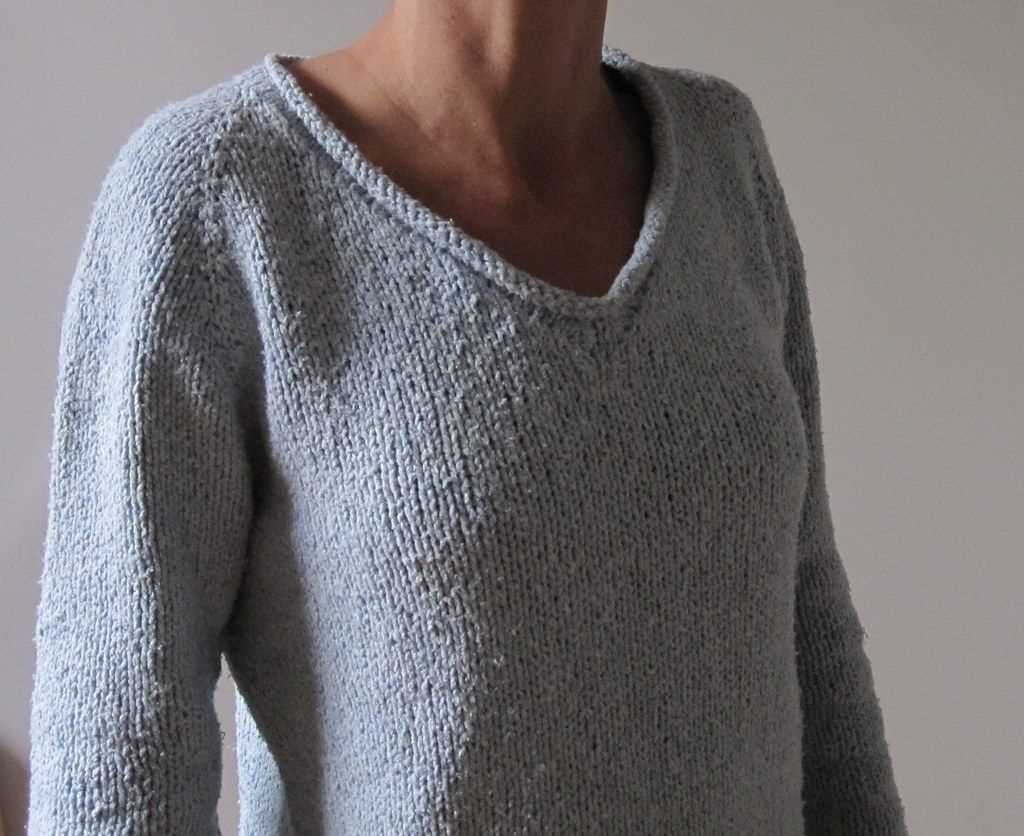
Creating Neckline Variations
The neckline is an important and eye-catching feature of any top-down knit sweater pattern. It can greatly impact the overall look and style of the garment. There are several different options for creating neckline variations, allowing you to customize your sweater to fit your personal style and preferences.
1. Crew Neck: The crew neck is a classic and timeless neckline option. It sits high on the neck and is great for keeping warm in cooler weather. To create a crew neck, simply continue knitting in the round without any shaping or decreases until you reach the desired height for the neckline.
2. V-Neck: The v-neck is a flattering and versatile neckline option. It adds a touch of elegance and can help create a more elongated silhouette. To create a v-neck, you will need to shape the neckline by working decreases at the center front. You can choose how deep or shallow you want the v-neck to be by adjusting the number of decreases and their placement.
- For a shallow v-neck, work a few decreases every few rows until you achieve the desired depth.
- For a deeper v-neck, work more frequent decreases or make them closer together.
3. Boat Neck: The boat neck is a wide and horizontal neckline that sits just off the shoulders. It is a chic and feminine option that can create a more open and airy feel. To create a boat neck, you will need to work increases at the center front and back. The number and frequency of increases will depend on the desired width of the neckline.
4. Scoop Neck: The scoop neck is a curved and rounded neckline that can add a touch of femininity and playfulness to your knit sweater. To create a scoop neck, you will need to shape the neckline by working increases at the center front and back. The number and frequency of increases will determine the depth and width of the scoop.
These are just a few examples of the neckline variations that you can create when knitting a top-down sweater pattern. Experiment with different styles and shapes to find the one that suits you best. Whether you prefer a classic crew neck, a flattering v-neck, an elegant boat neck, or a playful scoop neck, there is a neckline variation out there that will perfectly complement your personal style.
Finishing touches for your top down knit sweater
Once you have completed knitting your top-down sweater, it’s time to add those finishing touches that will truly bring your garment to life. From blocking to adding buttons, here are some important steps to consider:
Blocking:

Before you can start adding any final touches, it’s essential to block your sweater. Blocking helps to even out the stitches, relax the fibers, and give your sweater a professional finish. Follow the instructions provided in your pattern for blocking, whether it be wet blocking or steam blocking. Pay attention to the measurements and shape you desire for your sweater and adjust during blocking if necessary.
Seaming:
If your pattern requires any seaming, now is the time to tackle this step. Use a tapestry needle and matching yarn to carefully sew the pieces together. Take your time and make sure your seams are neat and secure, ensuring the longevity and durability of your sweater.
Adding buttons:
If your sweater has a buttoned closure, select the appropriate buttons that complement your design. Make sure the size and style of the buttons match the overall aesthetic of your sweater. Use a knitting needle or crochet hook to create the buttonholes, making sure they are the right size to securely hold the buttons in place.
Finishing the neckline:
The neckline is also an important area to focus on when completing your top-down knit sweater. You may need to pick up stitches or add a ribbed or picot edge to finish the neckline. Follow the instructions in your pattern to achieve the desired look and ensure a comfortable fit.
Weaving in ends:
Lastly, don’t forget to weave in all the loose ends of yarn from your knitting and seaming. This step will give your sweater a polished appearance and prevent any potential unraveling. Use a tapestry needle to carefully weave the ends into the fabric, being mindful not to create any puckering or distortion.
By taking the time to complete these finishing touches, you can transform your top-down knit sweater from a simple project to a beautiful and wearable garment that you’ll be proud to show off!
Finishing the hem and cuffs
When it comes to finishing the hem and cuffs of your top-down knit sweater, there are several techniques you can use to achieve a polished and professional look. One popular option is to use a ribbed or garter stitch pattern to create a neat and stretchy edge. This not only adds a decorative element to your sweater but also helps it retain its shape over time.
Another option is to add a folded hem or cuff. This involves knitting a few rows or rounds in a contrasting color or stitch pattern before folding the fabric inward and stitching it in place. This technique creates a clean and finished edge, as well as adding a bit of visual interest to your sweater.
If you prefer a more minimalistic approach, you can simply bind off the hem and cuffs using a basic bind-off technique. This creates a clean and simple edge that complements the rest of your sweater without adding any additional bulk or decoration.
Regardless of the technique you choose, it’s important to take your time and pay attention to detail when finishing the hem and cuffs of your top-down knit sweater. This will ensure that your finished garment looks professional and well-made, and will make all the hard work you put into knitting it worthwhile.
Blocking and Seaming the Sweater
Once you have finished knitting the top-down sweater, it’s important to block it to ensure that it maintains its shape and the stitches are even. Blocking involves wetting the sweater, carefully stretching it to the desired measurements, and allowing it to dry in that shape. This step helps to even out any tension inconsistencies and gives the sweater a more polished and professional look.
After blocking, it’s time to seam the sweater together. Since the sweater was knit in one piece from the top down, there are only a few seams to sew. Start by sewing the shoulder seams together, matching the front and back pieces. Use a mattress stitch or your preferred seaming method for an invisible and sturdy seam.
Next, sew the sleeves to the body of the sweater. Place the sleeves into the armholes, aligning the underarm seams, and sew them together. Again, use a mattress stitch or your preferred seaming method to create a seamless join.
Finally, seam the sides of the sweater. Fold the sweater in half along the side seams and sew from the bottom edge to the underarm, matching the stitches and maintaining the desired ease. Repeat on the other side to complete the sweater.
Summary:
- Block the finished sweater to even out tension and shape.
- Seam the shoulder seams using a mattress stitch or preferred seaming method.
- Attach the sleeves to the body using a seamless join.
- Seam the sides of the sweater to complete the garment.
With the blocking and seaming finished, your top-down knit sweater is now complete and ready to be worn or gifted. Enjoy the satisfaction of creating your own hand-knit sweater, tailored to your measurements and style.