
Knitting stockings has been a beloved holiday tradition for centuries. These cozy accessories are not only a practical way to keep your feet warm during the winter months, but they also add a festive touch to any home decor. Whether you’re a beginner or a seasoned knitter, there are plenty of stocking knitting patterns to choose from to suit your skill level and personal style.
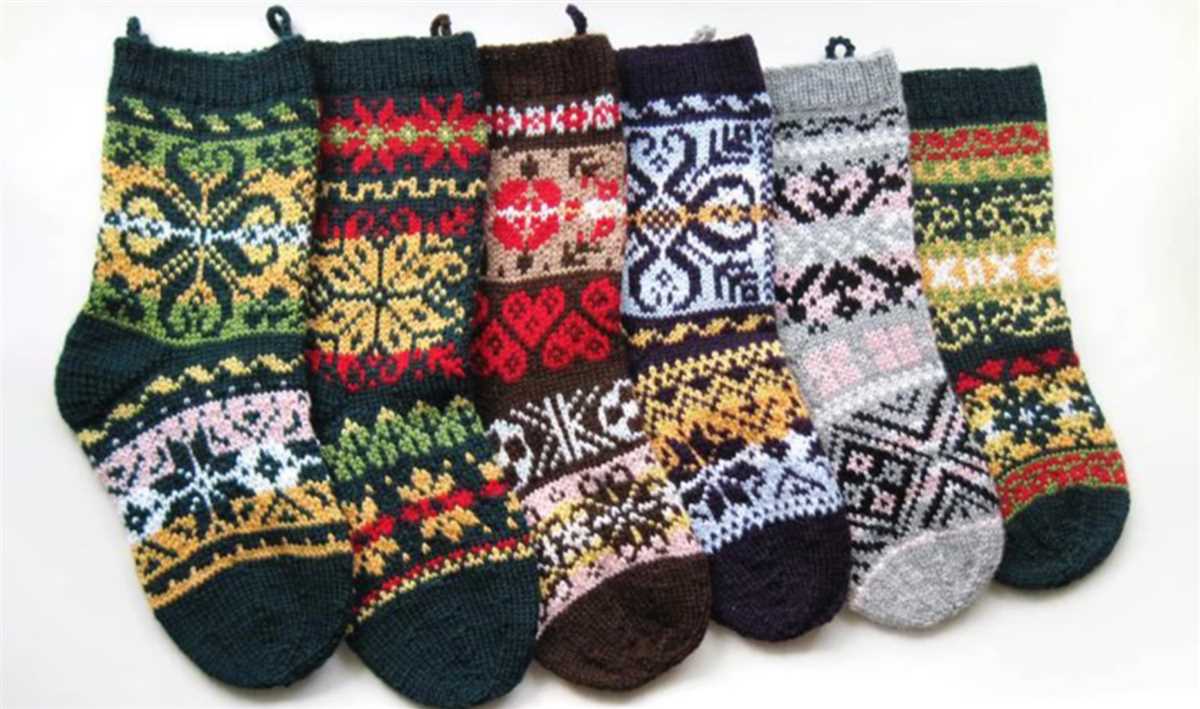
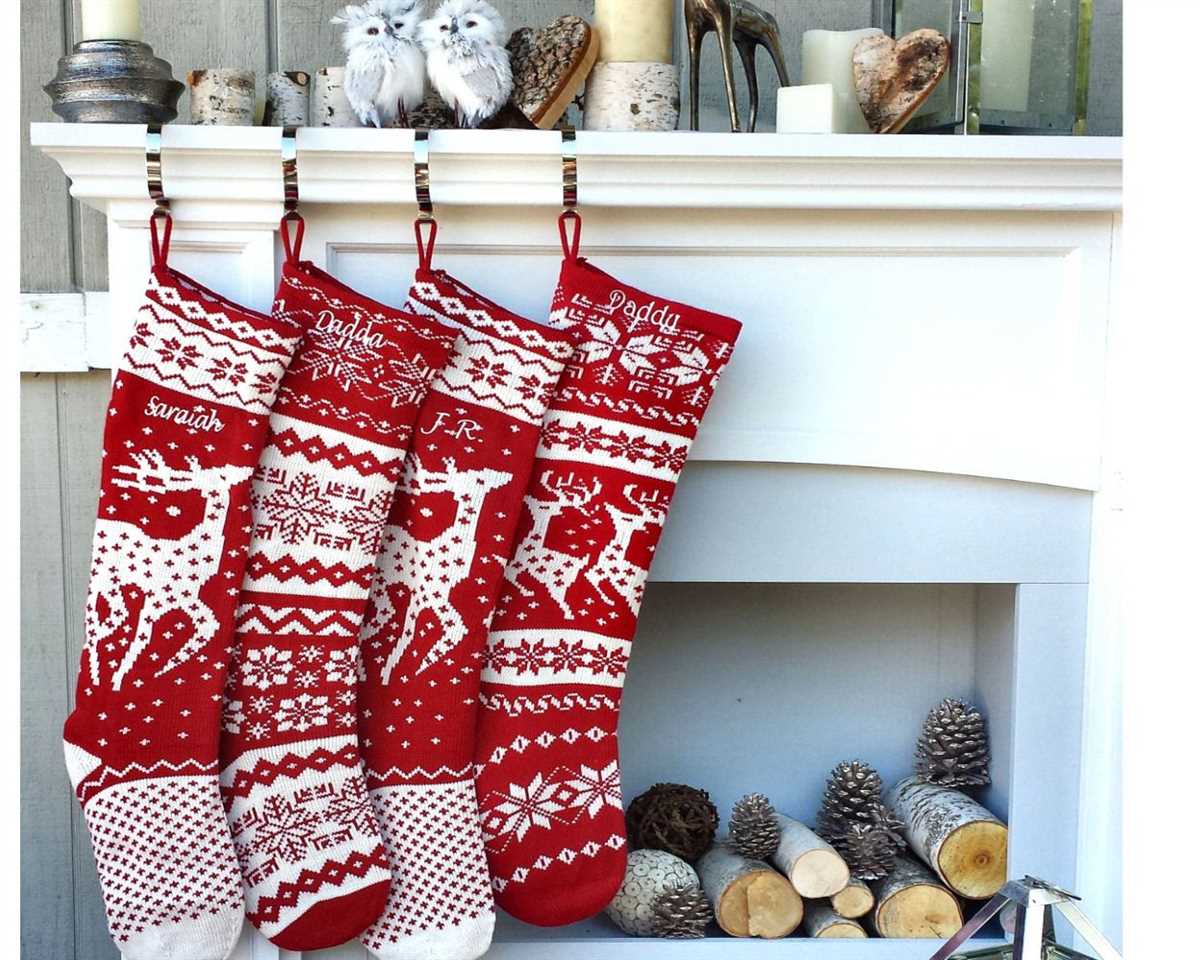
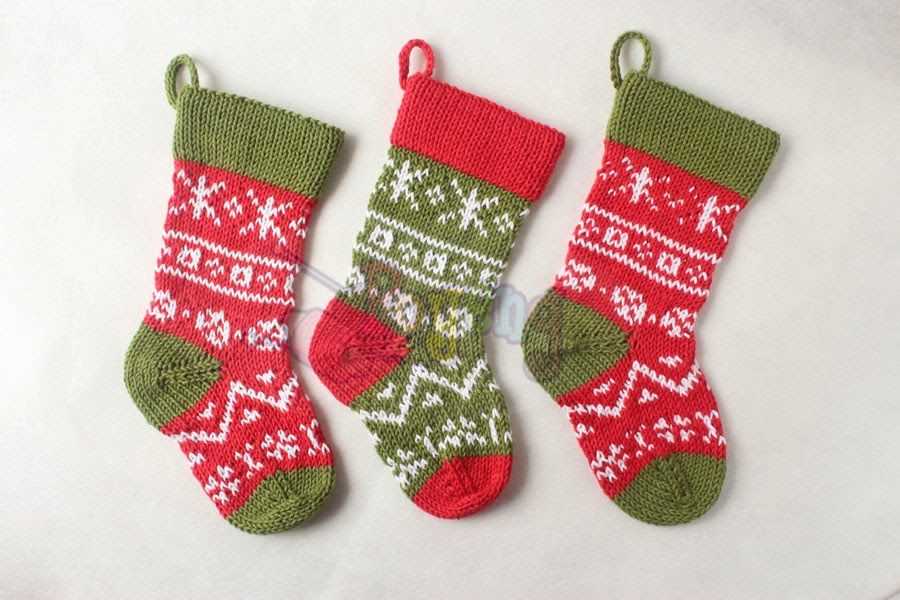
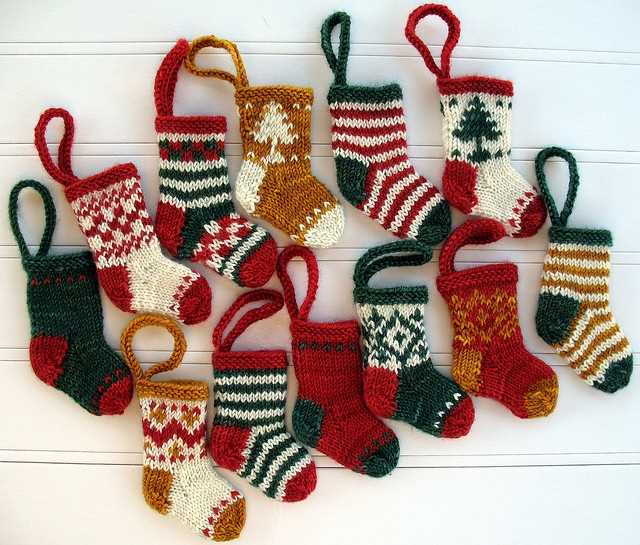
One of the most popular stocking knitting patterns is the classic Fair Isle design. This traditional technique originated in the Shetland Islands and is characterized by its use of multiple colors and intricate patterns. Fair Isle stockings are perfect for those who enjoy a challenge and want to create a truly unique and eye-catching stocking.
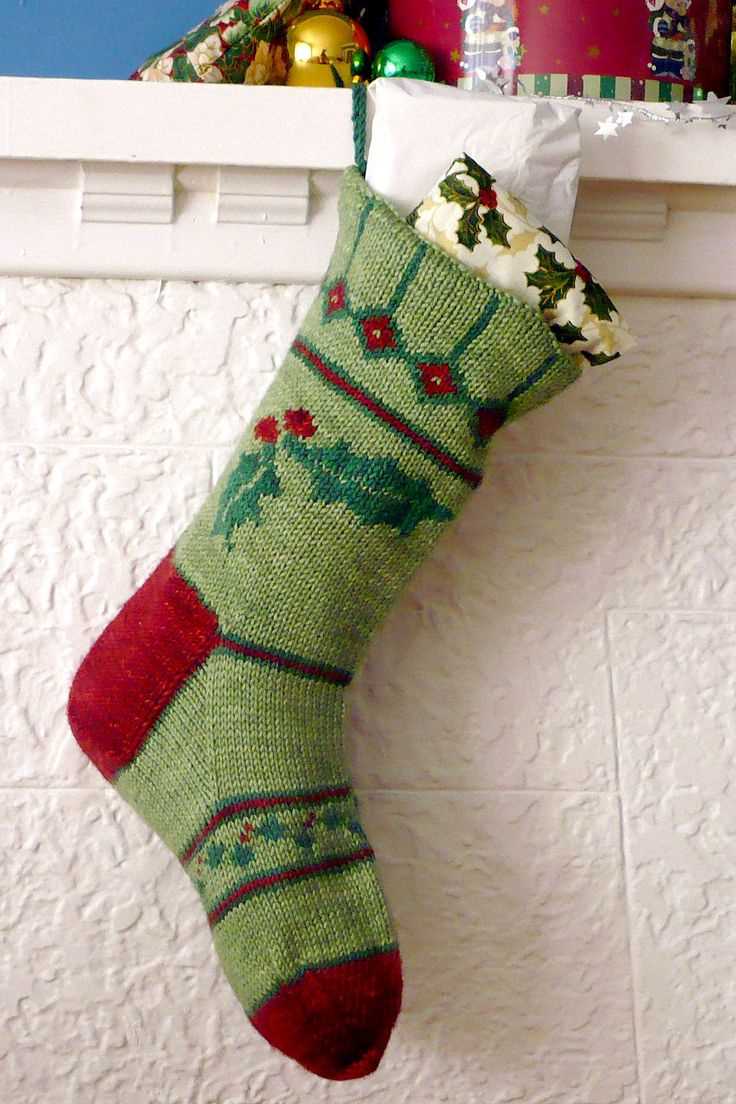
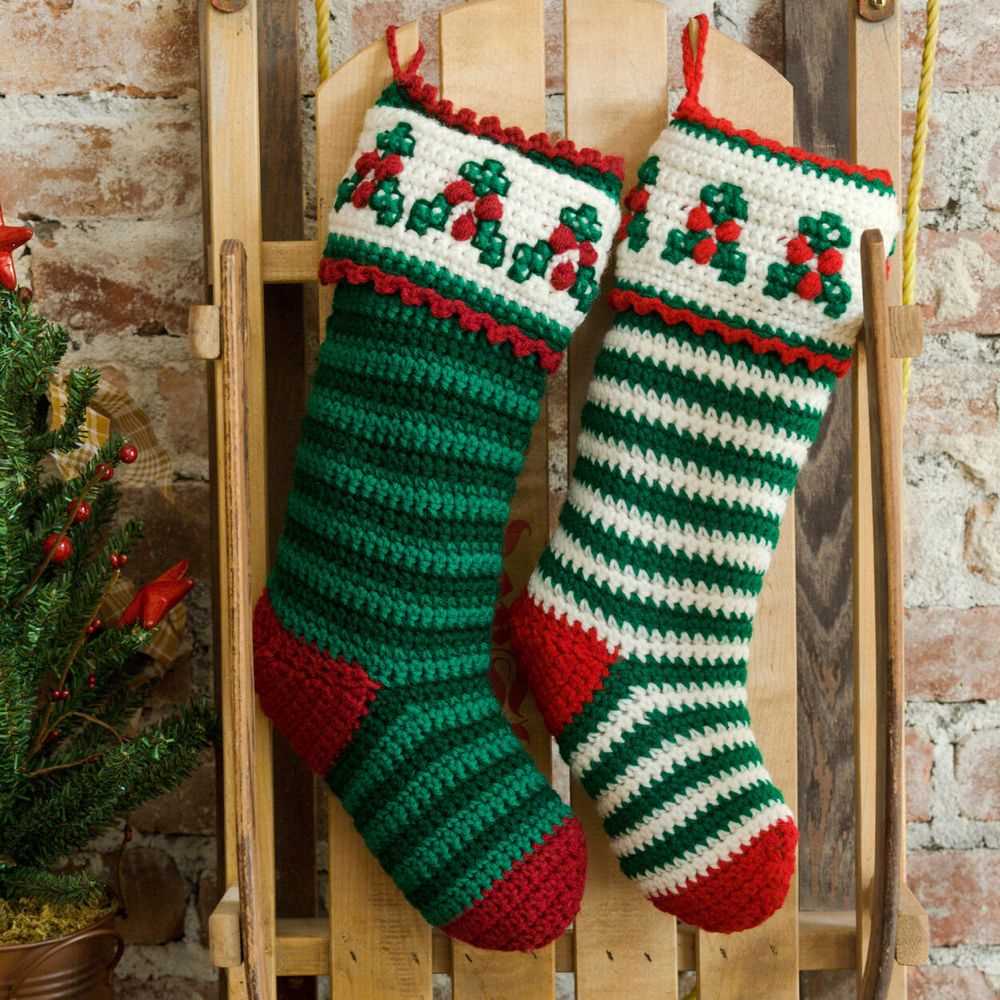
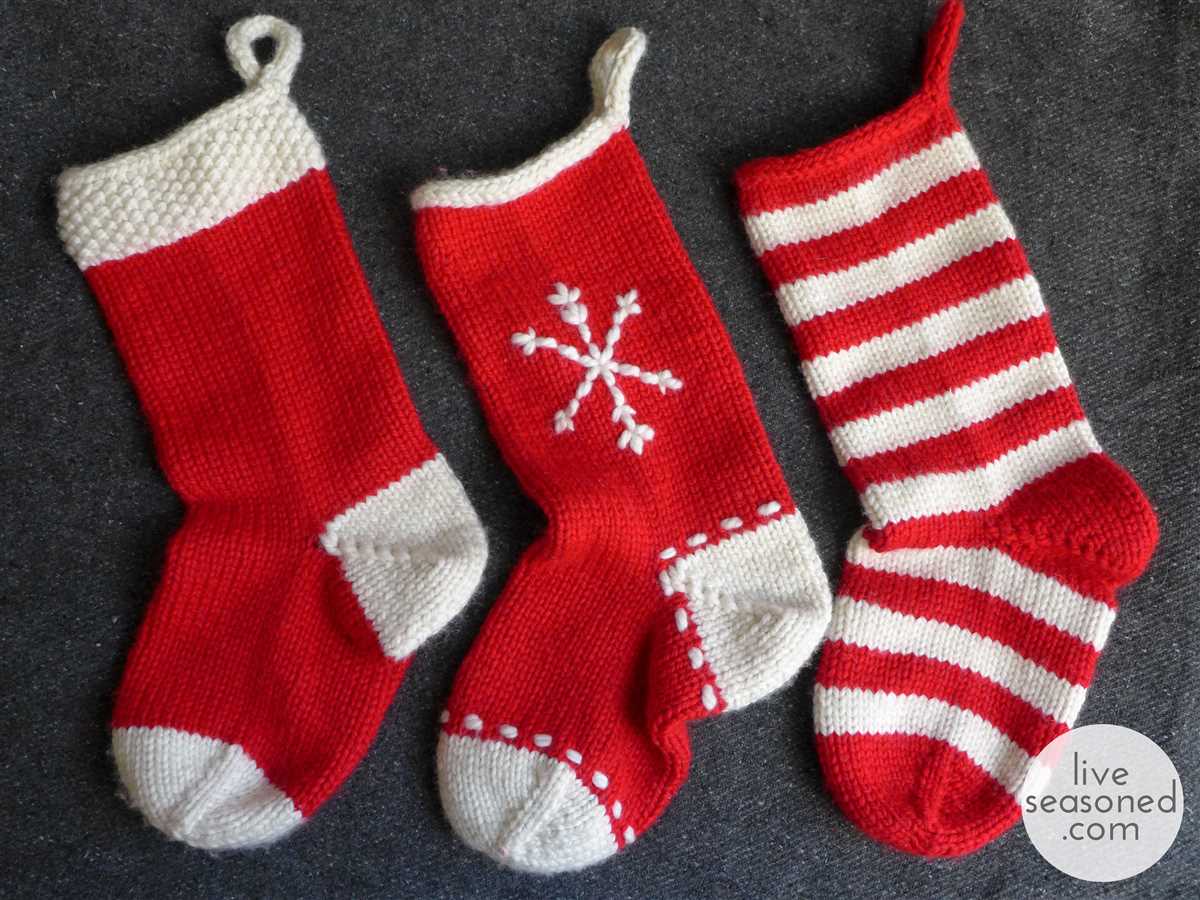
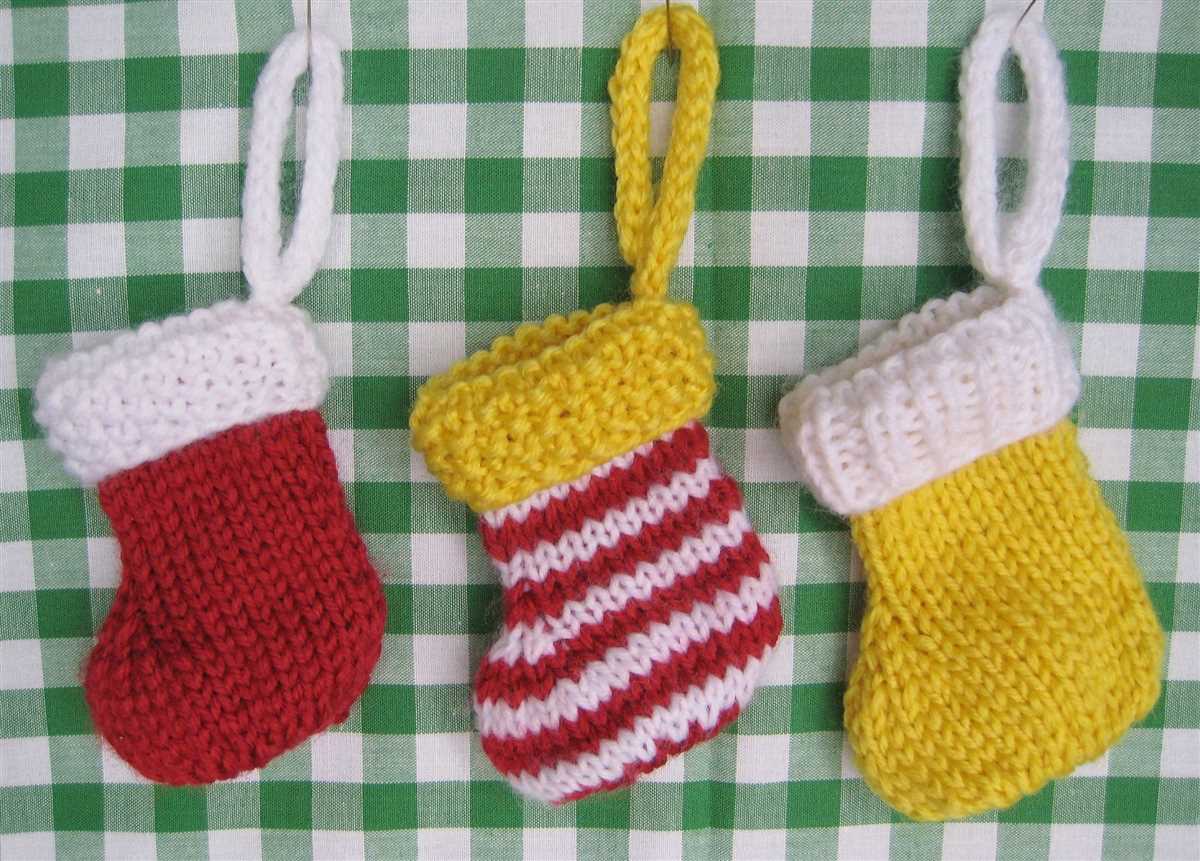
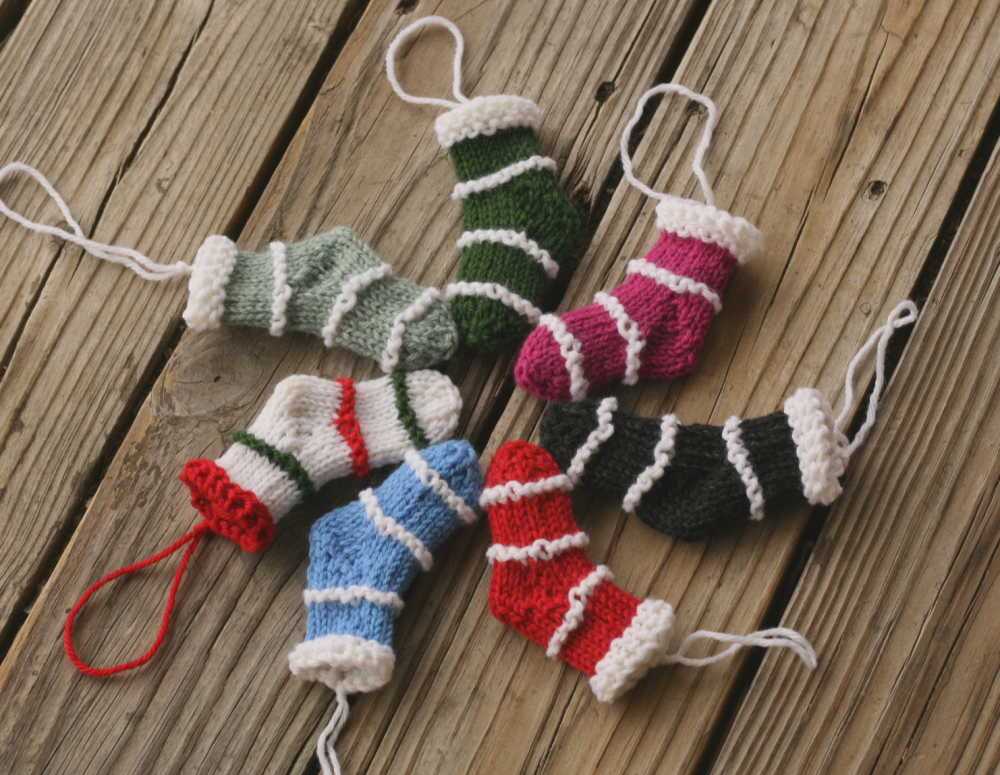
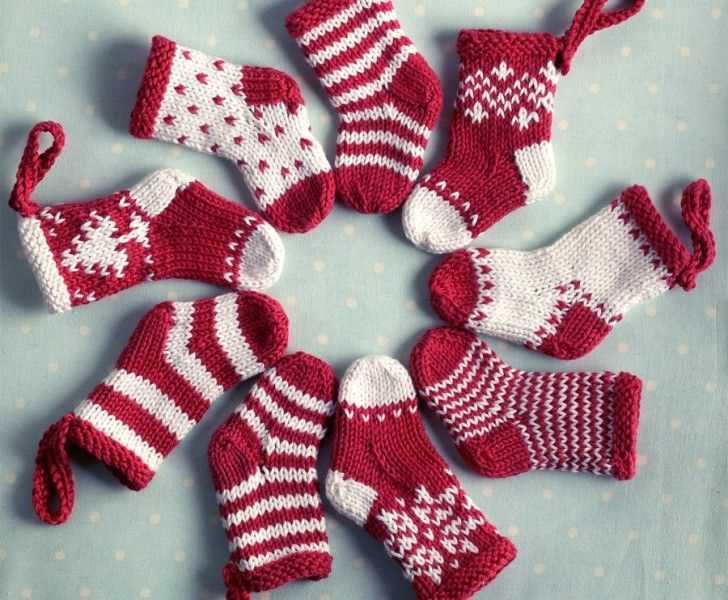
If you prefer a simpler design, there are also plenty of striped and textured stocking knitting patterns available. These patterns allow you to experiment with different stitch patterns and color combinations to create a stocking that matches your individual taste. Whether you opt for a traditional red and white striped stocking or a more modern and colorful design, the possibilities are endless.
When it comes to choosing the right stocking knitting pattern, it’s important to consider the yarn and needles you’ll be using. Thicker yarns and larger needles will create a chunkier stocking, while thinner yarns and smaller needles will result in a more delicate and lightweight stocking. Additionally, don’t forget to consider the size of the stocking – larger stockings will require more yarn and time to complete.
So, whether you’re knitting stockings as a gift for loved ones or simply want to add a personal touch to your holiday decorations, exploring different stocking knitting patterns is a fun and rewarding way to get into the festive spirit. Happy knitting!
Basic Supplies for Knitting a Stocking
Knitting a stocking can be a fun and rewarding project, whether you’re making it as a gift or for yourself. To get started, you’ll need a few basic supplies. Here are some essential items you’ll need:
1. Knitting Needles
Choose a pair of knitting needles that are suitable for the yarn you’ve chosen for your stocking. The size of the needles will affect the tension and size of the stitches, so make sure to check the recommended needle size for your chosen yarn.
2. Yarn
When selecting yarn for your stocking, consider the size and color you want. Wool or wool-blend yarns are popular choices for stockings, as they are warm and durable. You can also choose different colors to create stripes or patterns on your stocking.
3. Stitch Markers
Stitch markers are useful for marking specific points in your knitting, such as the beginning of a round or where you need to increase or decrease stitches. They come in various sizes and shapes, so choose ones that are easy to use and won’t snag on your yarn.
4. Tapestry Needle
A tapestry needle is a large, blunt needle used for weaving in ends and sewing pieces together. It’s helpful to have one on hand for finishing your stocking and tidying up any loose ends.
5. Scissors
A pair of sharp scissors is essential for cutting the yarn and trimming any stray ends. Choose a pair that is comfortable to hold and has a pointed tip for precision cutting.
These are the basic supplies you’ll need to get started on knitting a stocking. Once you have these items, you’ll be ready to cast on and start creating a cozy and festive stocking for yourself or a loved one.
Choosing the right yarn for your stocking
When it comes to knitting stockings, choosing the right yarn is essential to achieve the desired result. The type and quality of yarn can greatly affect the appearance, durability, and stretchiness of the finished stocking. Here are some factors to consider when selecting yarn for your project.
Type of yarn:
There are various types of yarn available, each with its own characteristics. Wool yarn is a popular choice as it is warm, soft, and has good stretch. Acrylic yarn is another option, which is affordable, comes in a wide range of colors, and is easy to care for. Cotton yarn can be a good choice for stockings that will be worn in warmer climates as it is breathable and lightweight. Experiment with different types of yarn to find the one that best suits your preferences and needs.
Weight of yarn:

The weight of the yarn refers to its thickness. Choosing the right weight is important as it affects the overall look and feel of the stocking. Bulky yarns are thicker and will create a chunkier, cozier stocking, while fingering or lace weight yarns will result in a more delicate and lightweight stocking. Consider the intended use and personal preference when selecting the weight of yarn for your stocking.
Color and pattern:
The color and pattern of the yarn can greatly impact the overall appearance of the stocking. Solid colors can create a classic and timeless look, while variegated or self-striping yarns can add visual interest and dimension. Consider the design and style of the stocking you want to create and choose a yarn color and pattern that complements it. It can be helpful to create a swatch using different yarn options to visualize how they will look and decide on the best choice.
By carefully considering the type, weight, color, and pattern of the yarn, you can ensure that your stocking turns out beautifully and meets your expectations. Take your time to explore various options and experiment with different combinations to create a unique and personalized stocking.
Selecting the appropriate knitting needles
When it comes to knitting, choosing the right knitting needles is crucial to achieving the desired results. The size and type of needles you use can greatly affect the final outcome of your project. Here are some factors to consider when selecting knitting needles.
Needle Size
The size of the needles you choose will depend on the gauge of your knitting pattern and the type of yarn you will be using. The needle size is typically given on the knitting pattern, and it is essential to match this size to ensure that your finished project will be the correct size. If you are unsure about the correct needle size, it is recommended to make a gauge swatch to determine the correct needle size for your particular project.
Needle Material
Knitting needles are available in various materials, each with its own characteristics. Some common materials include wood, metal, and plastic. Wood needles are lightweight and warm to the touch, providing a comfortable knitting experience. Metal needles are durable and provide excellent stitch control. Plastic needles are lightweight and flexible, making them suitable for those with arthritis or joint pain. Consider your personal preferences and knitting style when choosing the needle material.
Needle Type
There are different types of knitting needles, including straight needles, circular needles, and double-pointed needles. Straight needles are the most traditional and suitable for flat knitting projects such as scarves and blankets. Circular needles are versatile and can be used for both flat and circular knitting projects. They can accommodate a larger number of stitches and are ideal for knitting in the round or for projects with a large number of stitches. Double-pointed needles are used for projects requiring small circumference knitting, such as socks or sleeves. Consider the type of project you will be working on and choose the appropriate needle type accordingly.
Overall, selecting the right knitting needles is essential for achieving successful and enjoyable knitting projects. Take into account the needle size, material, and type to ensure a comfortable knitting experience and the best results for your project. Happy knitting!
Understanding Gauge and Tension
Knitting a pair of stockings requires not only choosing the right yarn and needles, but also understanding the importance of gauge and tension. Gauge refers to the number of stitches and rows that can be worked within a specific measurement. It is an essential factor in achieving the correct size and fit of your stockings. Tension, on the other hand, refers to how tight or loose you knit your stitches.
Why is gauge important?
Gauge is crucial because it determines the overall size and fit of your stockings. Each knitting pattern includes a specified gauge, which is typically given as a number of stitches and rows per inch. By matching the gauge recommended in the pattern, you can ensure that your stockings turn out the right size and fit correctly.
How to measure gauge?
To measure gauge, you need to knit a swatch using the yarn and needles specified in the pattern. The swatch should be large enough to include a section of at least 4 inches by 4 inches. Once you have knitted the swatch, use a ruler or a special gauge measuring tool to count the number of stitches and rows within the measured area. Compare these measurements to the gauge specified in the pattern instructions.
Understanding tension
Tension, or how tightly you knit your stitches, also plays a role in achieving the correct gauge. If you knit too tightly, your stitches will be smaller than the recommended gauge, resulting in smaller stockings. If you knit too loosely, your stitches will be larger, leading to bigger stockings. Therefore, it is important to practice maintaining a consistent tension throughout your knitting project.
Adjusting gauge and tension
If your gauge does not match the one specified in the pattern, you may need to adjust your needle size. If your stitches are too small, try using larger needles to achieve the correct gauge. Conversely, if your stitches are too big, switch to smaller needles. Additionally, if you struggle with maintaining consistent tension, practice knitting with different levels of tightness until you find a comfortable and consistent rhythm.
In conclusion, understanding gauge and tension is essential for knitting stockings that fit properly. By measuring gauge, adjusting needle size, and practicing consistent tension, you can ensure that your stockings turn out the right size and fit for your feet.
Casting on and Beginning Your Stocking
Knitting a stocking can be a fun and rewarding project, whether you’re making it for yourself or as a gift for someone else. Before you can get started, you’ll need to cast on your stitches. There are several methods you can use to cast on, but the long-tail cast on is one of the most common. To do this, you’ll need to estimate how much yarn you’ll need for the length of your stocking, and then measure out a length of yarn that is about four times this measurement. Make a slipknot at the end of the yarn, and then hold the end of the slipknot in your right hand, with the tail of the yarn extending over your left hand.
Next, you’ll need to position your knitting needles. Hold the needle with the slipknot in your right hand, and insert the point of the other needle into the slipknot from left to right. With your right thumb and index finger, grasp the yarn that is extending from the slipknot, and bring it up and over the point of the needle in your right hand. Then, with your right thumb and index finger, use the point of the needle to move the loop that you just created up and over the end of the needle. This will create your first cast on stitch. Repeat this process until you have the desired number of stitches on your needle, and then you’re ready to start knitting your stocking!
Materials Needed:
- Yarn
- Knitting needles
- Tape measure
- Scissors
Step 1: Estimate Yarn Length
Before you can cast on your stitches, you’ll need to estimate how much yarn you’ll need for the length of your stocking. Measure out a length of yarn that is about four times the length of your stocking, and then cut it. This will give you enough yarn to work with throughout your project.
Step 2: Make a Slipknot
Make a slipknot at one end of your yarn. To do this, hold the end of the yarn in your right hand, and then bring the tail of the yarn over your left hand. Insert your right hand into the loop that you have created, and pull the tail of the yarn through the loop to create a slipknot.
Step 3: Position Your Needles
Hold the needle with the slipknot in your right hand, and insert the point of the other needle into the slipknot from left to right. With your right thumb and index finger, grasp the yarn that is extending from the slipknot, and bring it up and over the point of the needle in your right hand. Then, with your right thumb and index finger, use the point of the needle to move the loop that you just created up and over the end of the needle. This will create your first cast on stitch. Repeat this process until you have the desired number of stitches on your needle, and then you’re ready to start knitting your stocking!
Knitting the body of the stocking
Once you have finished knitting the cuff of the stocking, it’s time to move on to the body. This is where the majority of the stocking will be knitted, so take your time and follow the pattern closely.
Begin by continuing the stitch pattern from the cuff onto the body. This will create a seamless transition between the two sections. You can either continue with the same stitch pattern as the cuff or switch to a different pattern for added interest.
- Use the stitch markers to keep track of your progress and count your stitches regularly to ensure accuracy.
- Continue knitting in the round, with the right side facing you at all times.
- If the pattern calls for any shaping, such as decreases or increases, make sure to follow the instructions carefully.
- Remember to place any decorative motifs or colorwork in this section of the stocking, if desired.
As you knit the body of the stocking, it’s important to maintain an even tension throughout. This will ensure that the stocking looks uniform and professional once it’s completed. Pay attention to your knitting technique and take breaks if your hands or wrists start to feel tired.
Once you reach the desired length for the body of the stocking, you can move on to shaping the toe and knitting the foot. But that’s a topic for another time!
Creating the heel and toe of the stocking
When knitting a stocking, the heel and toe are two crucial parts that require special attention and techniques. These areas need to be reinforced for durability and comfort, ensuring that the stocking can withstand regular wear.
Heel: The heel of the stocking is typically knitted using a method called “short rows.” This involves working a partial row and then turning the work before completing the full row. By doing this, you create extra fabric in the heel area, allowing it to curve comfortably around the back of the foot. This technique helps prevent wear and tear in this high-stress area.
To create the heel, you will work back and forth on only a portion of the stitches, leaving the rest of the stitches on hold. This creates a triangular shape that corresponds to the size of the heel. You will continue to work back and forth until the heel section is complete, then pick up the stitches held on hold to continue working on the rest of the stocking.
Toe: Knitting the toe of the stocking also requires a special technique to ensure a comfortable and smooth fit. This technique often includes decreasing stitches gradually to shape the toe area and create a rounded end.
One common method used for shaping the toe is the “decreases at regular intervals” technique. You will work decreases at the beginning and end of specific rows at regular intervals until the required number of stitches remain for closing the toe. This gradual decrease allows the fabric to conform to the shape of the foot, ensuring a snug and comfortable fit.
When knitting the heel and toe of a stocking, it’s crucial to follow the pattern instructions carefully to achieve the desired shape and fit. Taking the time to reinforce these areas will result in a durable and comfortable stocking that can be enjoyed for years to come.
Adding decorative patterns and designs
When knitting stockings, adding decorative patterns and designs can create unique and personalized pieces. There are various techniques and stitches that can be used to achieve different effects and textures.
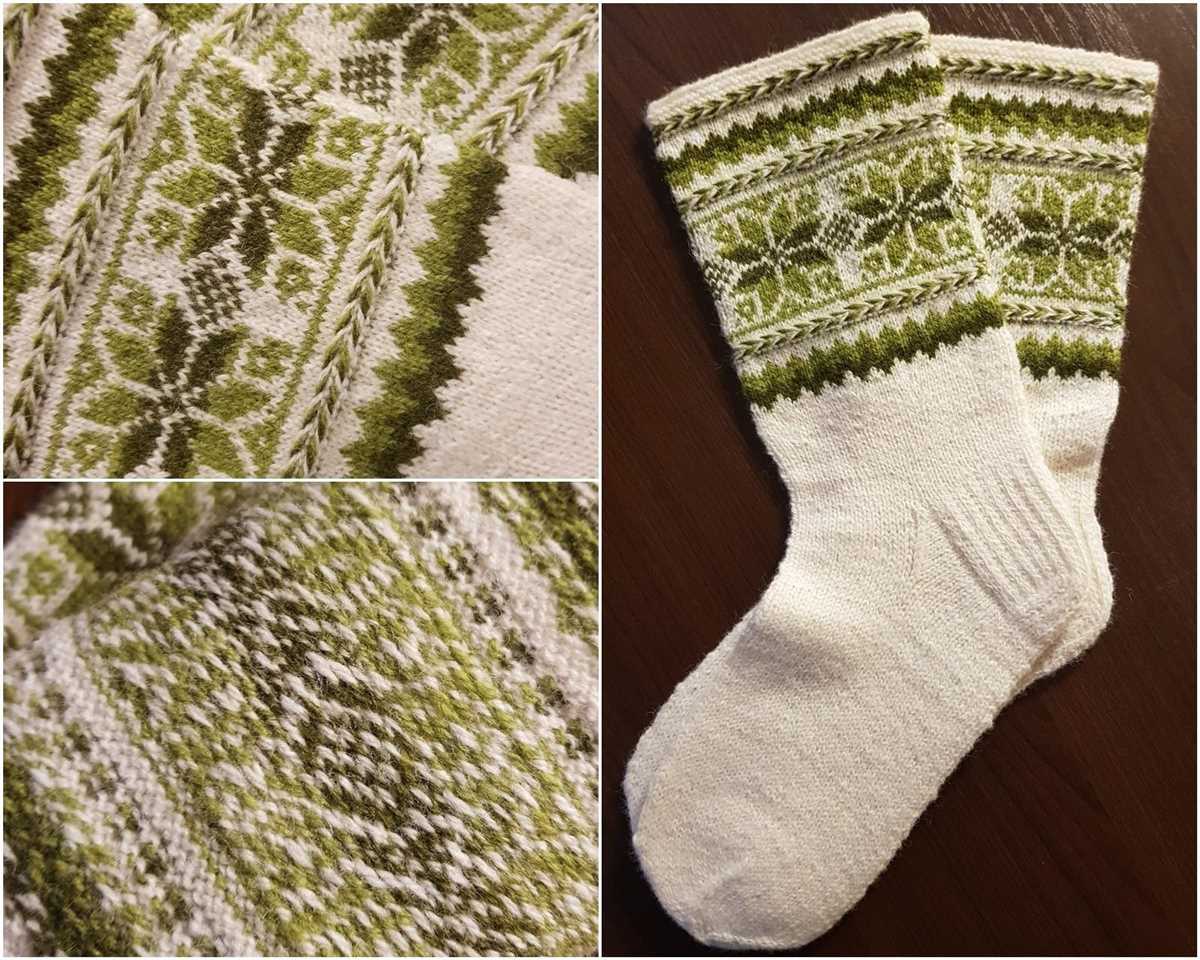
Fair Isle: This traditional technique involves knitting with two or more colors in a single row, creating intricate patterns and motifs. It is often used to create geometric designs or pictures of animals and flowers. Fair Isle patterns can be used sparingly as accents or cover the entire stocking for a bold and vibrant look.
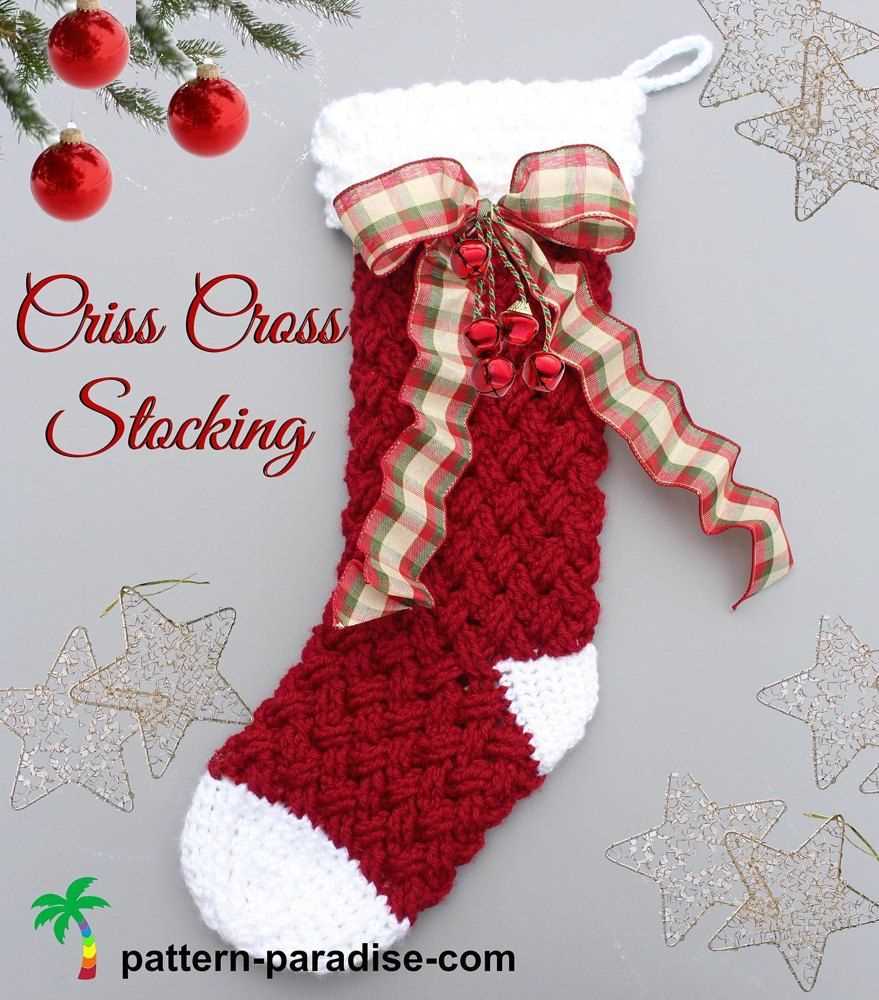
Cables: Adding cables to the stockings can create a classic and timeless design. Cables are created by crossing stitches over each other, resulting in raised and textured patterns. They can be used as borders, vertical panels, or all-over patterns, depending on the desired effect.
Lace: Lace patterns are delicate and feminine, perfect for adding a touch of elegance to stockings. There are numerous lace stitch patterns to choose from, ranging from simple eyelets to intricate lace motifs. Lace can be used as panels or as an all-over pattern, creating a delicate and airy look.
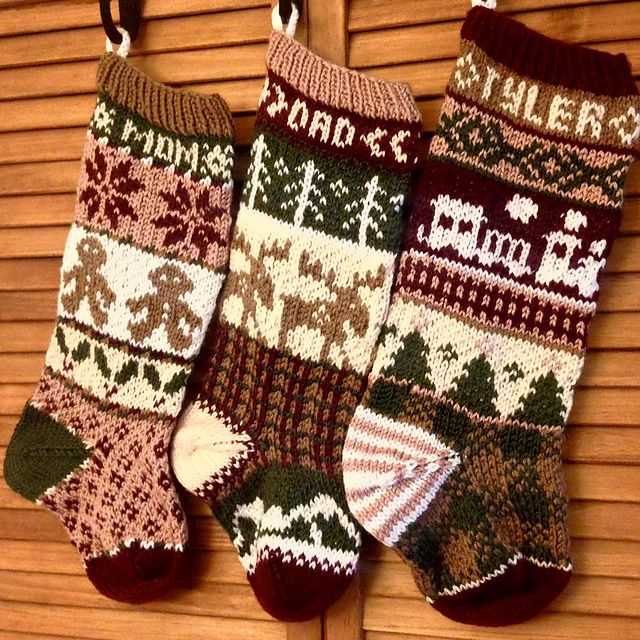
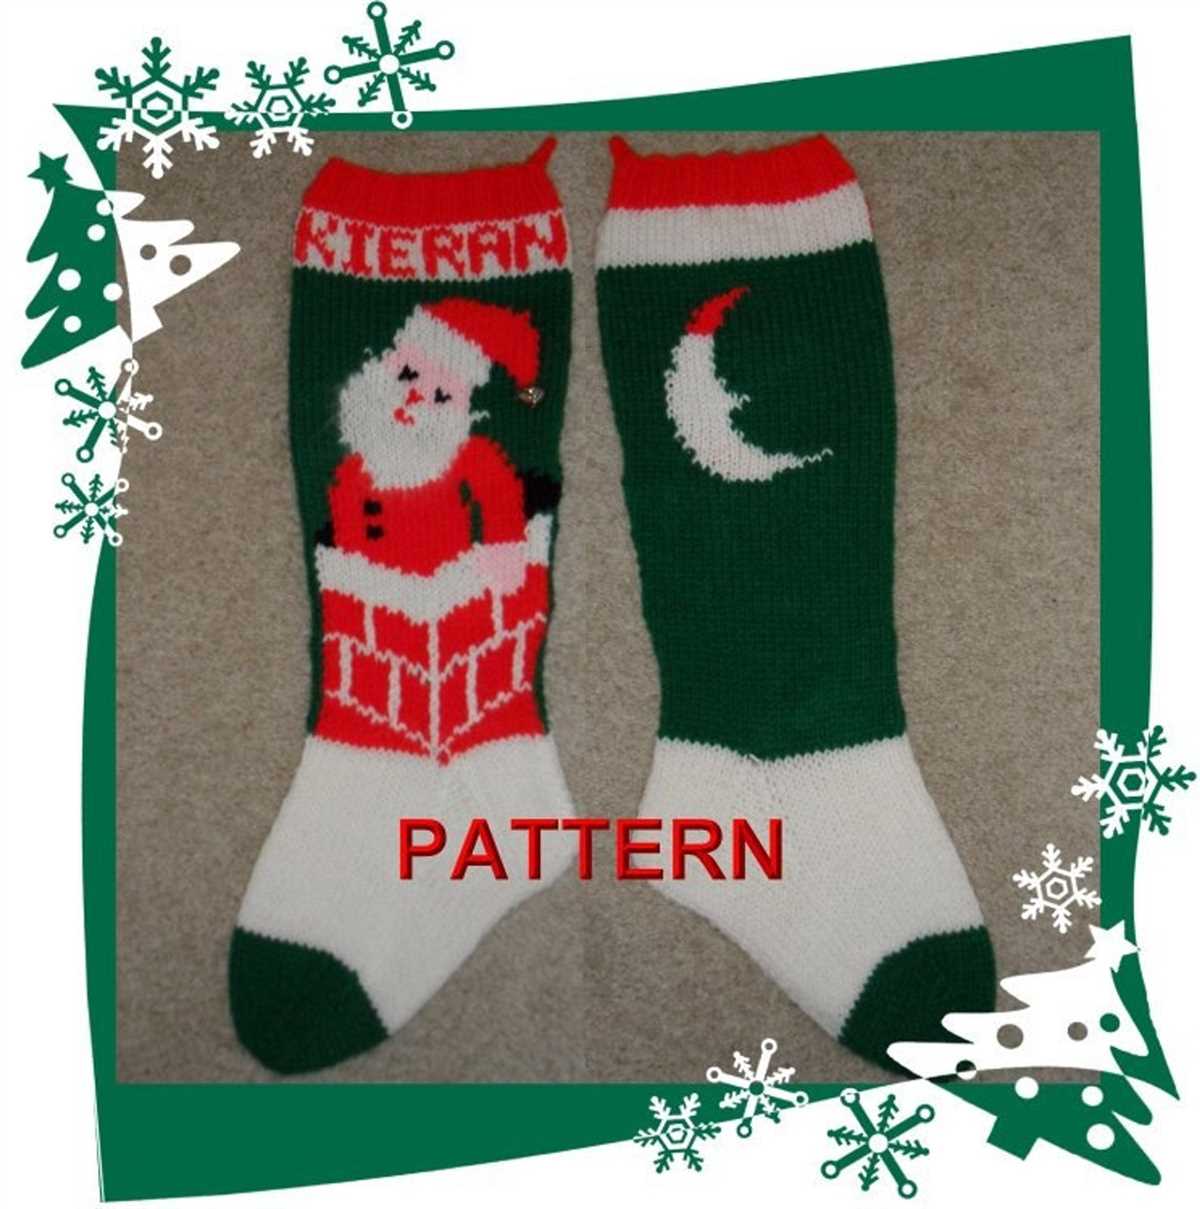
Intarsia: Intarsia is a technique used to create large blocks of color or pictures in a design. It involves using separate balls of yarn for each color section and twisting the yarn at the color changes. This technique can be used to create patterns or pictures of various objects, such as snowflakes, reindeer, or holiday symbols.
Embroidery: Adding embroidery to knitted stockings can add extra charm and detail. Embroidery can be done using different stitches, such as cross-stitch or chain stitch, and can be used to add small accents or larger designs. Embroidered motifs can include initials, holiday symbols, or personalized messages.
Whether using Fair Isle, cables, lace, intarsia, or embroidery, adding decorative patterns and designs to knitted stockings allows for endless creativity and customization. It is an opportunity to showcase individual style and create one-of-a-kind pieces for the holiday season or any special occasion.
Finishing touches: binding off and weaving in ends
When it comes to completing your knitting project, the finishing touches can make all the difference. Two important steps in finishing a stocking knitting pattern are binding off and weaving in ends. These techniques ensure that your work stays secure and neat, giving your stocking a professional look.
Binding off is the process of securing the stitches at the end of your knitting. To bind off, you will work the stitches as normal until you have two stitches on your right needle. Then, use your left needle to lift the first stitch over the second stitch and off the needle. Continue this process until you have only one stitch remaining, and then cut the yarn, leaving a tail for weaving in later.
Weaving in ends is the final step in completing your stocking. This technique involves using a tapestry needle to thread the loose ends of yarn through the stitches of your knitting, ensuring that they are hidden and secure. Start by threading your needle and then insert it through the stitches on the wrong side of your knitting. Weave the yarn back and forth, going in different directions to secure the end. Once you have woven in the end for a few inches, trim the excess yarn.
By taking the time to properly bind off and weave in ends, you can ensure that your stocking knitting pattern is finished with care and attention to detail. These simple steps can make a big difference in the overall appearance and longevity of your project. Don’t rush through these finishing touches – take the time to do them right and you’ll be rewarded with a beautiful, polished stocking.
Tips and Tricks for Successful Stocking Knitting
Knitting stockings can be a rewarding and enjoyable project, but it can also be challenging, especially for beginners. Here are some tips and tricks to help you have a successful stocking knitting experience:
- Choose the Right Yarn: Make sure to select a yarn that is suitable for sock knitting. Look for a blend that includes some nylon or other synthetic fiber for durability.
- Use the Correct Needle Size: Check the label of your chosen yarn for the recommended needle size and use it for your project. Using the wrong needle size can result in a stocking that is too tight or too loose.
- Swatch and Gauge: Knit a swatch using your chosen yarn and needles to determine your gauge. This will help ensure that your stocking will fit properly. Adjust your needle size if necessary.
- Follow the Pattern: Read the stocking knitting pattern carefully before starting and make sure you understand all the instructions. It’s important to follow the pattern closely to achieve the desired results.
- Keep Track of Rows and Stitches: Use stitch markers or a row counter to keep track of your rows and stitches. This will help you avoid mistakes and make it easier to follow the pattern.
- Take Breaks: Knitting for long periods of time can strain your hands and wrists. Take regular breaks to stretch and rest your hands to avoid injury and fatigue.
- Block Your Stocking: Once you have finished knitting your stocking, block it to give it a polished look and even out any irregularities. Follow the blocking instructions for your chosen yarn.
In conclusion, knitting stockings can be a challenging but fulfilling project. By choosing the right materials, following the pattern closely, and taking care of your hands, you can create beautiful and cozy stockings to enjoy or give as gifts. Happy knitting!