
Knitting shawls has long been a popular pastime for knitters of all skill levels. They are versatile accessories that can add a touch of elegance and warmth to any outfit. If you’re looking for a fun and quick knitting project, a small shawl might be just what you need. Whether you want to keep warm on chilly evenings, add a touch of style to your wardrobe, or give a unique gift to a loved one, a small shawl is the perfect option.
There are countless small shawl knitting patterns available, ranging from simple and beginner-friendly designs to more intricate and challenging patterns. If you’re new to knitting, choosing a pattern that uses basic stitches and techniques can help you build your skills while still creating a beautiful finished product. For more experienced knitters, there are patterns that incorporate more complex stitch patterns and techniques, allowing you to create a shawl that is truly unique and personalized.
One of the great things about knitting small shawls is that they can be made with just one or two skeins of yarn, making them an ideal project for using up leftover yarn from other projects. They also knit up quickly, so you can have a finished shawl in no time. Plus, they are portable and easy to take with you on the go, making them a great project for knitting while traveling or waiting for appointments.
If you’re ready to embark on a new knitting adventure, consider giving a small shawl pattern a try. With so many patterns to choose from and endless possibilities for customization, you’re sure to find a design that fits your style and skill level. Whether you’re a beginner or an experienced knitter, knitting a small shawl can be a rewarding and enjoyable project that allows you to showcase your creativity and add a touch of handmade beauty to your wardrobe.
Small Shawl Knitting Pattern
If you’re looking for a small shawl knitting pattern, you’ve come to the right place! Whether you’re a beginner or an experienced knitter, a small shawl can be a fun and rewarding project to work on. With its versatility and stylishness, a small shawl can be the perfect accessory to spice up any outfit or keep you warm on chilly evenings.
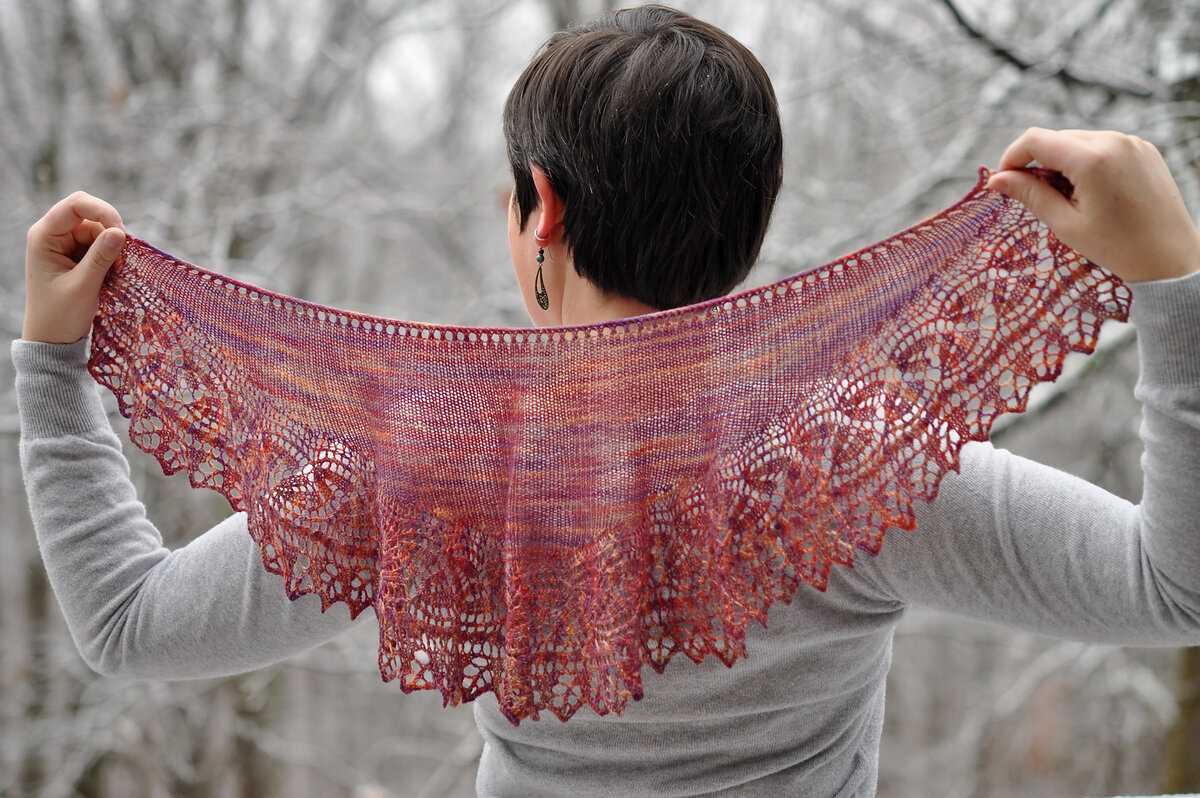
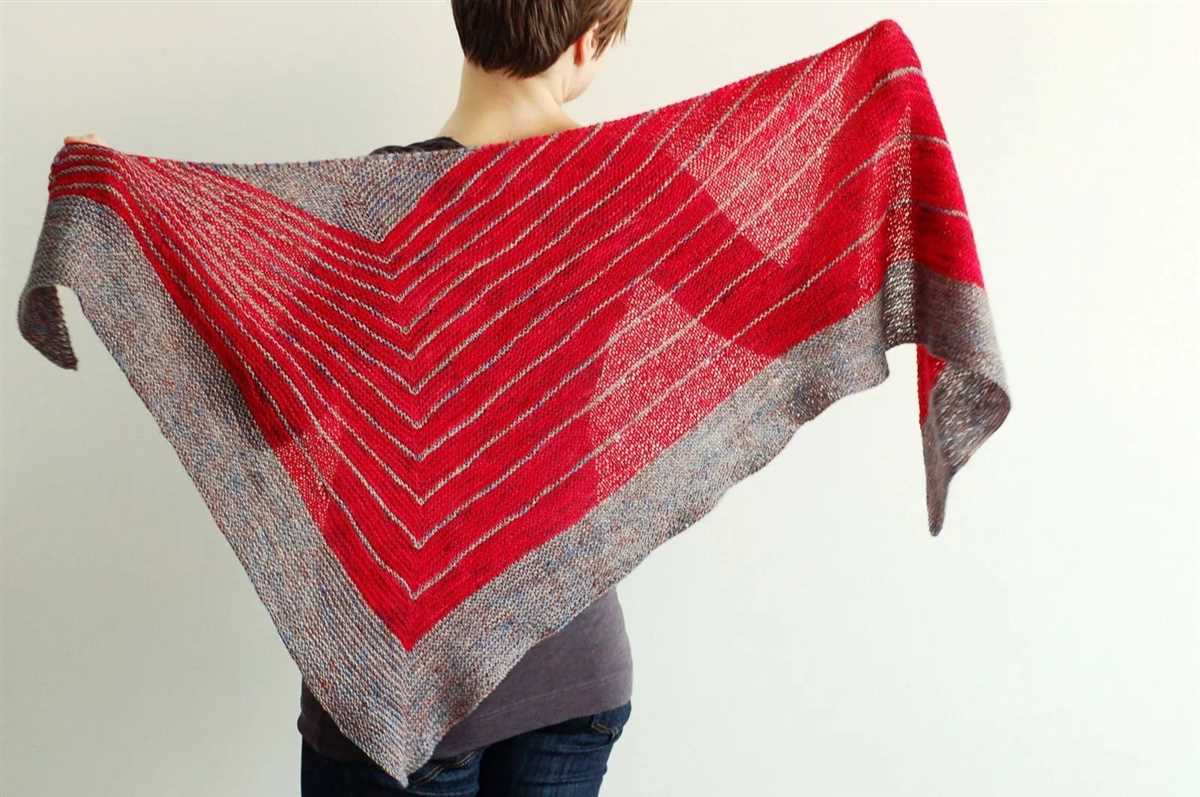
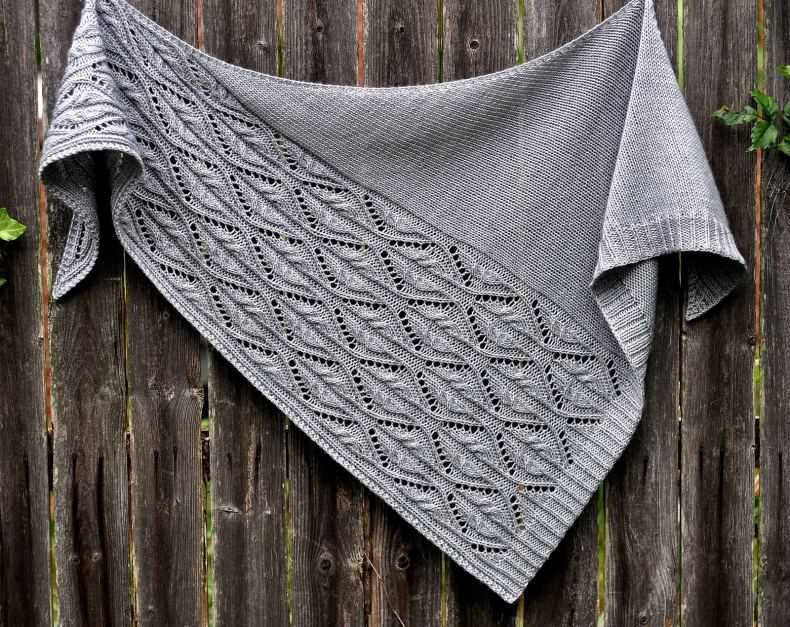
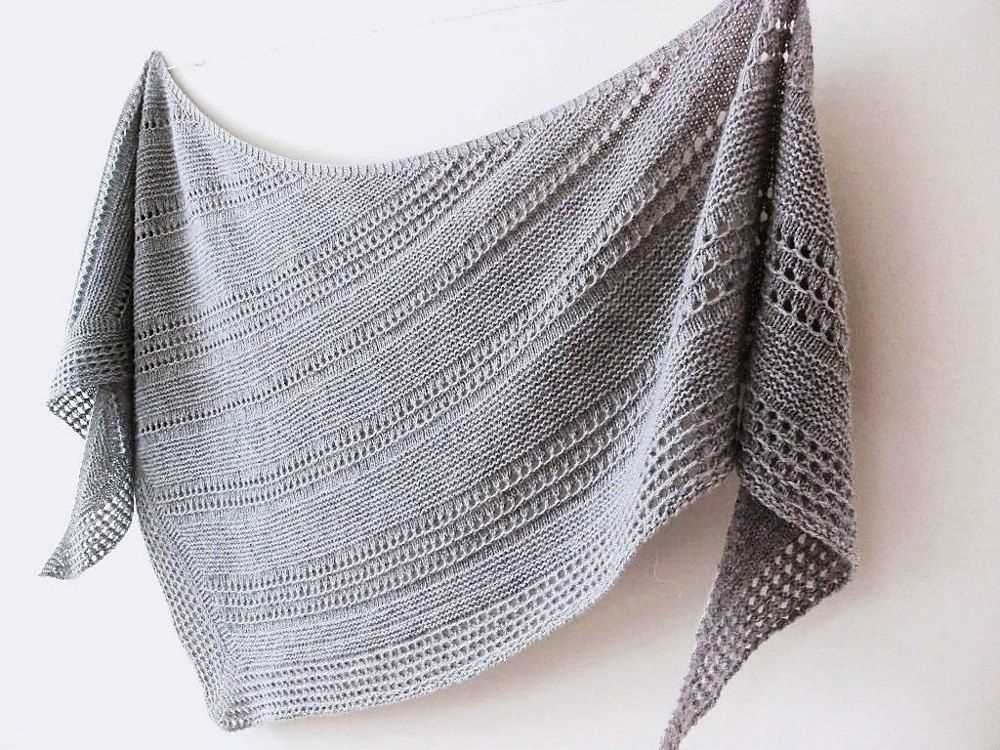
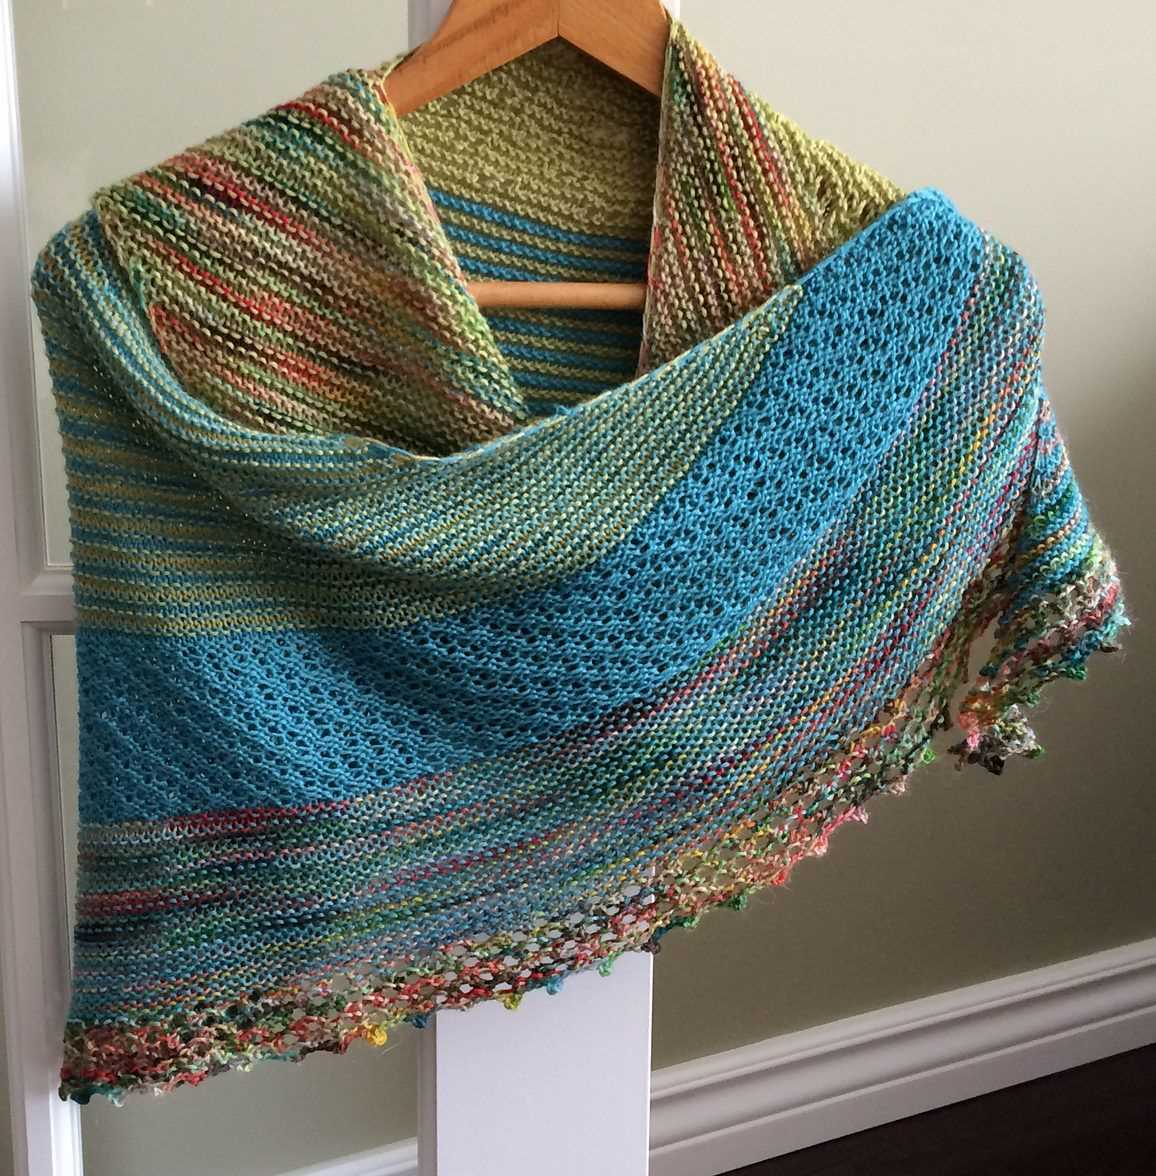
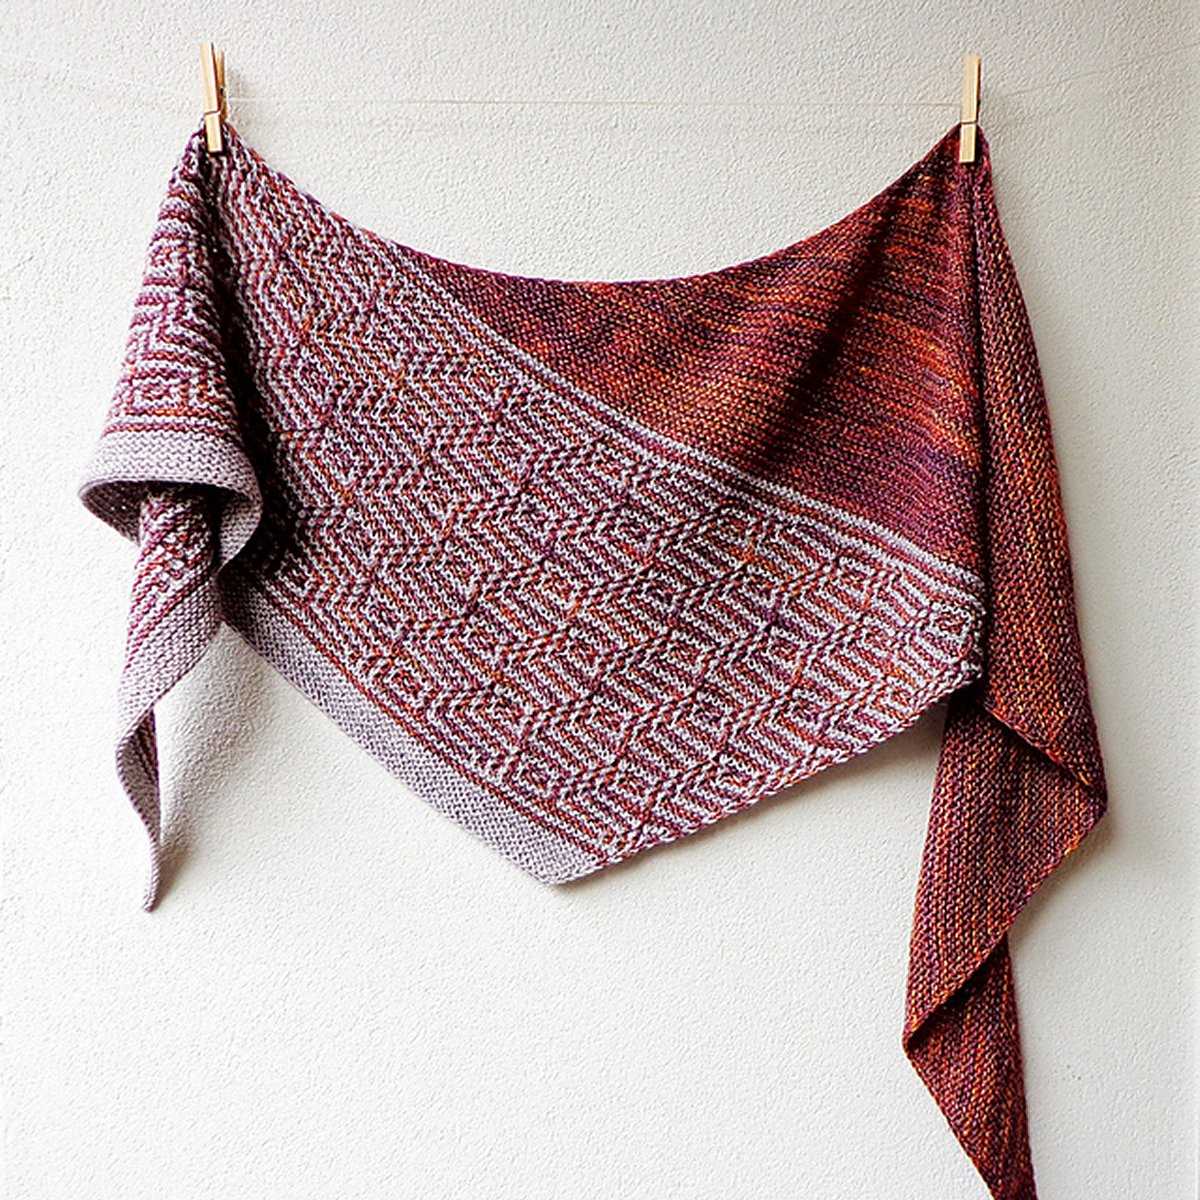
One popular small shawl knitting pattern is the triangular shawl. This pattern typically starts with just a few stitches at the center top and gradually increases in size as you knit. It can be worked in a variety of stitch patterns, from simple garter stitch to more intricate lace patterns. The possibilities for customization are endless, allowing you to create a unique shawl that reflects your personal style.
When choosing a small shawl knitting pattern, it’s important to consider the yarn and needle size you’ll be using. Thinner yarns and smaller needle sizes will result in a more delicate and lightweight shawl, while thicker yarns and larger needles will create a bulkier and more cozy shawl. You can also experiment with different colors and textures to add visual interest to your shawl.
Tips for Knitting a Small Shawl
- Start with a swatch to determine the gauge needed for your chosen pattern. This will ensure that your shawl turns out the right size.
- Use lifelines. Lifelines are pieces of waste yarn that you thread through your work at regular intervals. They allow you to easily rip back if you make a mistake without losing all your progress.
- Count your stitches regularly to ensure accuracy. This is especially important when working with lace patterns.
- Block your shawl before wearing or gifting it. Blocking helps to even out stitches and give your shawl a professional finish.
- Don’t be afraid to modify the pattern to suit your needs. Add or remove sections, change the stitch patterns, or experiment with different edgings. The beauty of knitting is that you can make it your own!
With these tips in mind, you’re ready to start knitting your small shawl. Grab your needles, choose your favorite yarn, and dive into the world of shawl knitting. Happy knitting!
Choosing the Right Yarn
When it comes to knitting a small shawl, choosing the right yarn is crucial. The type and weight of the yarn can greatly affect the final outcome of your project. It’s important to consider factors such as the fiber content, texture, and drape of the yarn.
Fiber Content: Different fibers have different properties, which can influence the overall look and feel of your shawl. For a lightweight and airy shawl, consider using a yarn with a high percentage of silk or bamboo. If you prefer a warmer and cozier shawl, opt for yarns with a higher content of wool or alpaca.
Texture: The texture of the yarn can add depth and interest to your small shawl. Smooth yarns will showcase lace and intricate stitch patterns beautifully, while yarns with more texture, such as boucle or mohair, can create a soft and fuzzy effect.
Drape: The drape of the yarn refers to how it hangs and flows when knitted up. For a shawl with a loose and flowing drape, choose a yarn with good drape, such as a silk or linen blend. Yarns with less drape, like cotton or acrylic, will result in a shawl with more structure and less movement.
Overall, it’s important to consider your personal preferences and the desired outcome of your small shawl when choosing the right yarn. Experimenting with different fibers, textures, and drapes can help you create a unique and beautiful shawl that is tailored to your taste.
Selecting the Appropriate Needles
When knitting a small shawl, selecting the appropriate needles is essential to ensure that the finished product turns out as desired. The right needles can help achieve the desired gauge, create even and consistent stitches, and make the knitting process more enjoyable and comfortable.
One important factor to consider when choosing needles for a small shawl project is the size. The pattern will usually specify the recommended needle size, which is determined by the weight of the yarn and the desired drape of the shawl. It’s important to use the recommended size to achieve the correct tension and ensure that the shawl has the desired shape and drape.
Another factor to consider is the material of the needles. Needle materials can range from metal to wood to plastic, and each material has its own unique properties. Metal needles, such as stainless steel or aluminum, are known for their durability and smoothness, making them a good choice for fast knitters or those who prefer a slick surface. Wooden needles, on the other hand, have a warmer feel and provide more grip, which can be beneficial for those who find their stitches slipping off easily. Plastic needles are often lightweight and affordable, making them an excellent choice for beginners or those on a budget.
Ultimately, the choice of needles for a small shawl knitting project comes down to personal preference. Experimenting with different needle sizes and materials can help determine which ones work best for achieving the desired results. It’s essential to have a variety of needles in your knitting toolbox so that you can choose the appropriate ones for each project. With the right needles, knitting a small shawl can be a rewarding and enjoyable experience.
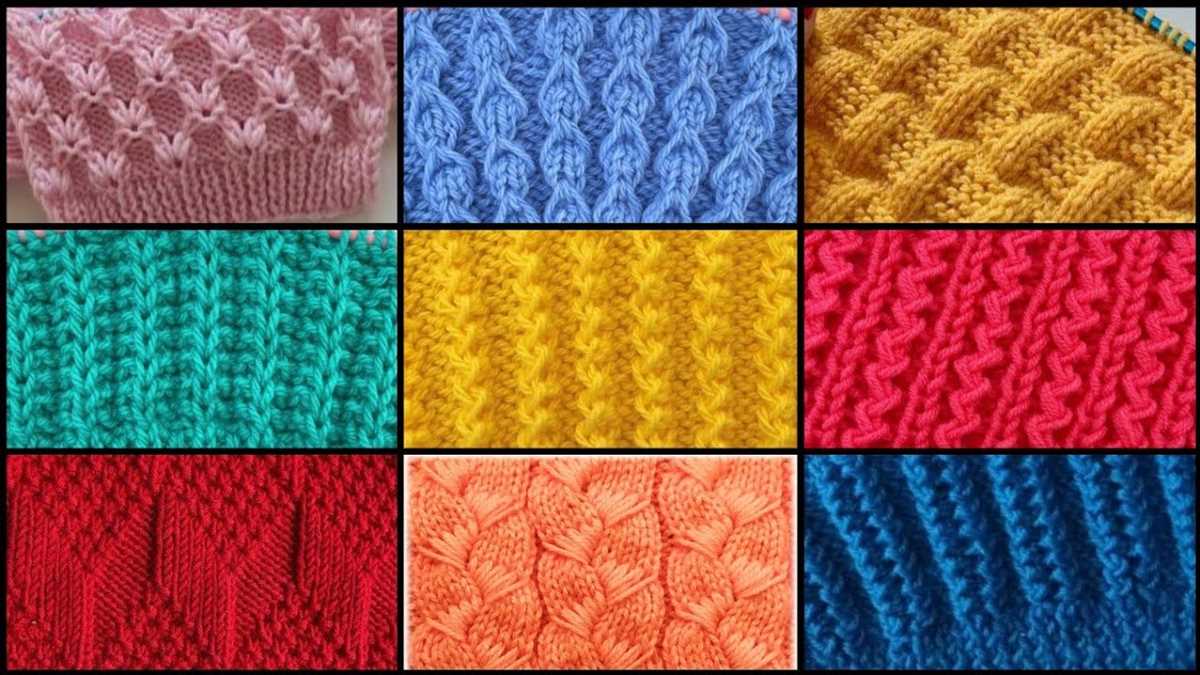
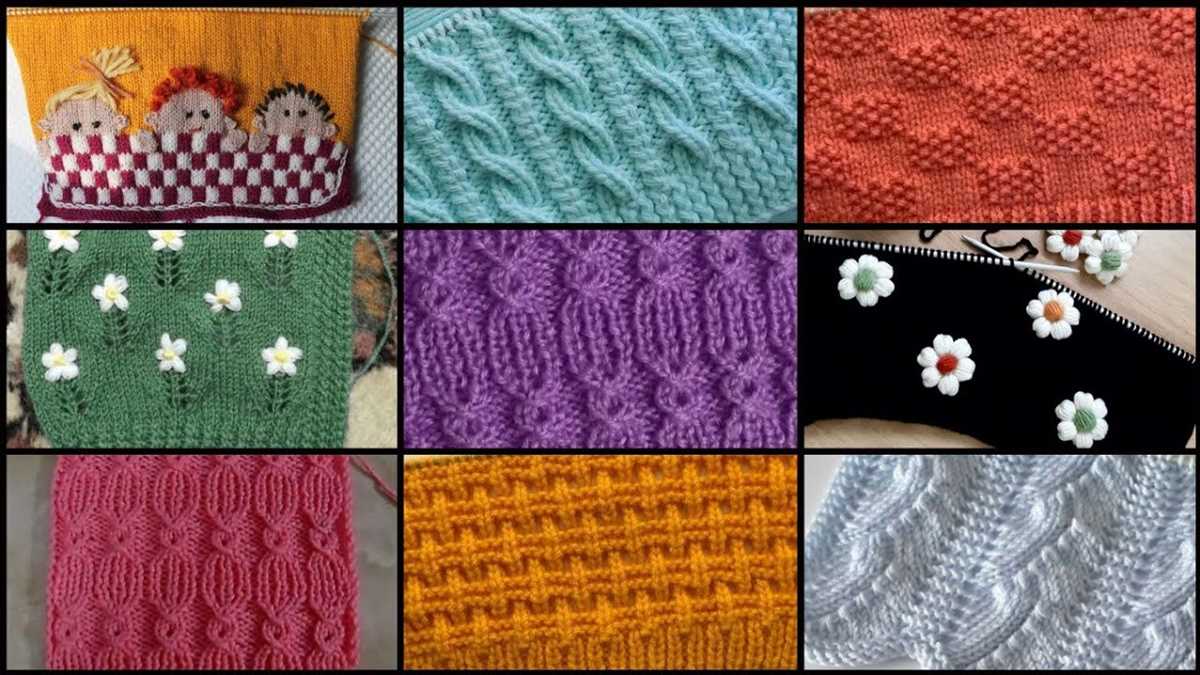
Understanding Basic Knitting Stitches
Knitting is a popular craft that allows you to create beautiful and functional fabric by using just two simple stitches: knit and purl. Once you understand these basic stitches, the possibilities for creating various patterns and designs are endless.
Knit stitch: The knit stitch, often abbreviated as “k,” is the most basic stitch in knitting. It is used to create the “V” shape seen in most knitted fabrics. To knit stitch, insert the right needle into the front of the first stitch on the left needle, from left to right. Wrap the yarn around the right needle counterclockwise, and pull the loop through the stitch, slipping the old stitch off the left needle. Repeat this process for each stitch until the row is complete.
Purl stitch: The purl stitch, frequently abbreviated as “p,” is the opposite of the knit stitch and creates a bumpy texture on the fabric. To purl stitch, insert the right needle into the front of the first stitch on the left needle, from right to left. Wrap the yarn around the right needle clockwise, and pull the loop through the stitch, slipping the old stitch off the left needle. Repeat this process for each stitch until the row is complete.
- Stockinette stitch: The stockinette stitch is created by alternating rows of knit and purl stitches. This creates a smooth, flat fabric on one side (the knit side) and a bumpy texture on the other side (the purl side).
- Garter stitch: The garter stitch is made by knitting every row or purling every row. This stitch pattern creates a ridged fabric that is reversible, meaning both sides look the same.
- Ribbing: Ribbing is a common stitch pattern used for cuffs, collars, and hems. It is created by alternating knit and purl stitches in a specific pattern, such as knit 2, purl 2 or knit 1, purl 1. Ribbing creates a stretchy and elastic fabric.
Understanding and mastering these basic knitting stitches will give you a solid foundation to explore more complex stitch patterns and create beautiful knitted projects. Whether you’re a beginner or an experienced knitter, these stitches are the building blocks for creating unique and personalized designs.
Getting Started with the Small Shawl
Are you ready to embark on a new knitting project and create a beautiful small shawl? Whether you’re an experienced knitter or just starting out, this pattern is perfect for you. With its simple yet elegant design, the small shawl is the ideal accessory to add a touch of style and warmth to any outfit.
Materials Needed:
- Approximately 400 yards of fingering weight yarn
- US size 4 (3.5mm) circular knitting needles
- Stitch markers
- Tapestry needle
Pattern Instructions:
- Start by casting on 3 stitches.
- Knit the first row.
- On the second row, increase 1 stitch by knitting into the front and back of the first stitch.
- Continue knitting the third row.
- Repeat rows 2 and 3 until you have reached the desired width for your shawl.
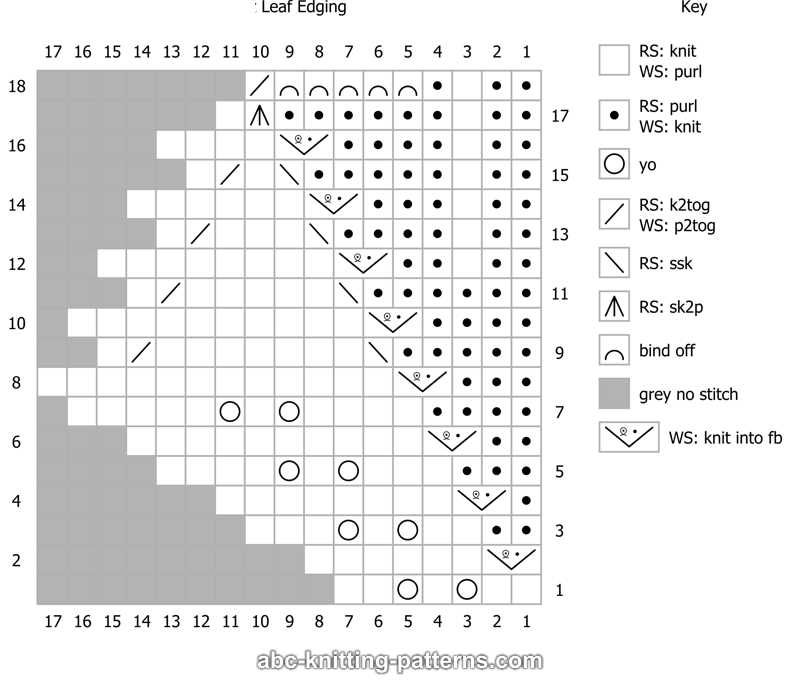
- Once the desired width is reached, begin the lace pattern by following the chart or written instructions provided in the pattern.
- Continue knitting the lace pattern until the shawl reaches the desired length.
- Finish off the shawl by binding off all stitches and weaving in any loose ends.
Final Thoughts:
Knitting a small shawl can be a rewarding and relaxing project. With this pattern, you can create a beautiful accessory that will not only keep you warm but also showcase your knitting skills. So gather your materials, follow the pattern instructions, and enjoy the process of creating your own small shawl.
Knitting the Main Body of the Shawl
Once you have cast on and completed the border of your small shawl, it’s time to move on to knitting the main body. Follow the instructions below to create a beautiful lace pattern that will make your shawl truly stand out.
1. Begin the Lace Pattern
Start by knitting a few plain rows in order to establish the foundation for the lace pattern. This will allow the lace to stand out and create a delicate and intricate look. Once you have completed the plain rows, it’s time to start knitting the lace.
Instructions:
- Row 1: Knit all stitches
- Row 2: Purl all stitches
- Row 3: Knit all stitches
2. Follow the Lace Stitch Pattern
Now that you have established the foundation, you can start working on the lace stitch pattern. This pattern will create a series of eyelets and intricate designs that will add visual interest to your shawl.
Lace Stitch Pattern:
| Row | Stitch Pattern |
|---|---|
| 4 | YO, K2tog (repeat until end of row) |
| 5 | K all stitches |
| 6 | K all stitches |
| 7 | YO, K2tog (repeat until end of row) |
| 8 | K all stitches |
Repeat rows 4-8 until you have reached the desired length for your shawl. Make sure to keep count of your stitches to ensure the pattern stays consistent throughout the main body.
With these instructions, you can now confidently knit the main body of your small shawl. Follow the lace stitch pattern and enjoy the process of seeing your shawl take shape with each row you complete.
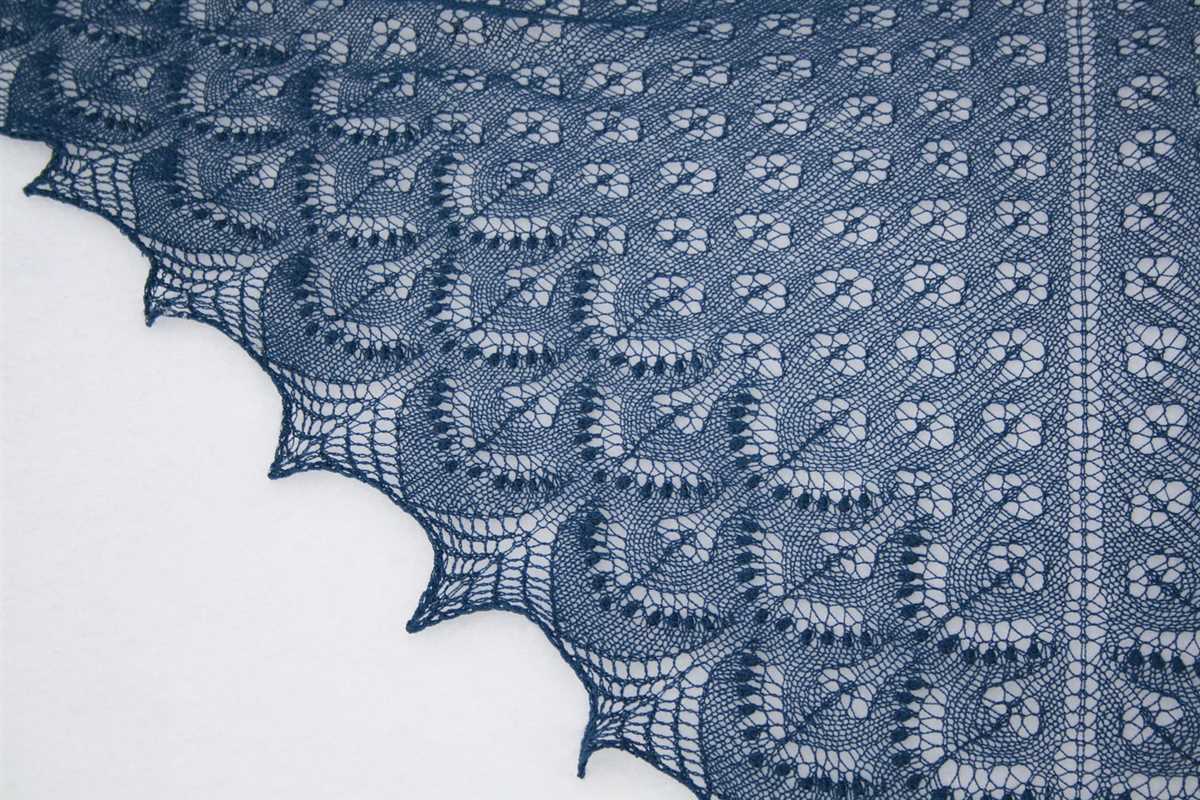
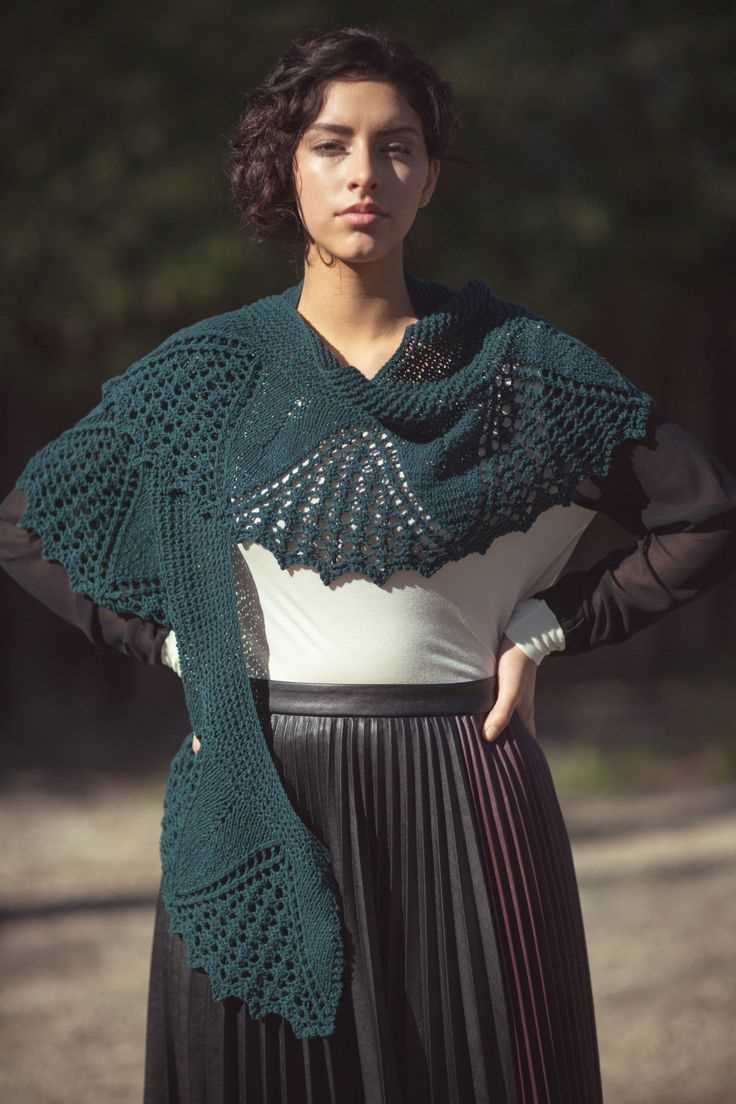
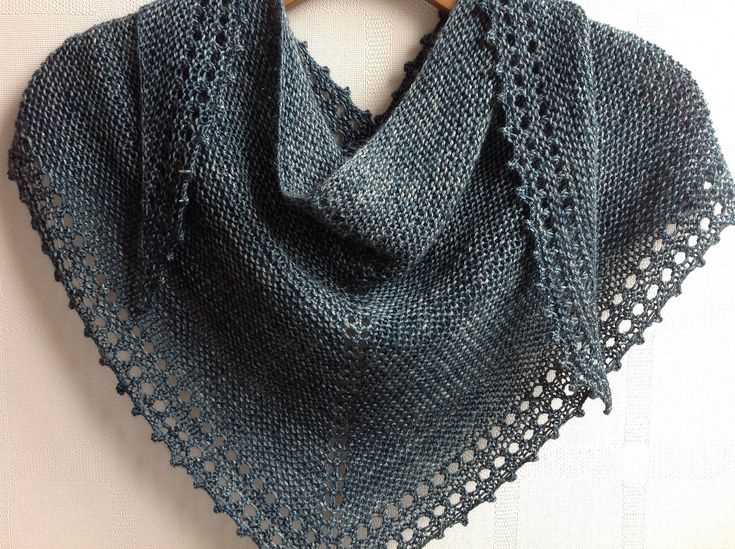
Adding Eyelets and Lace Panels
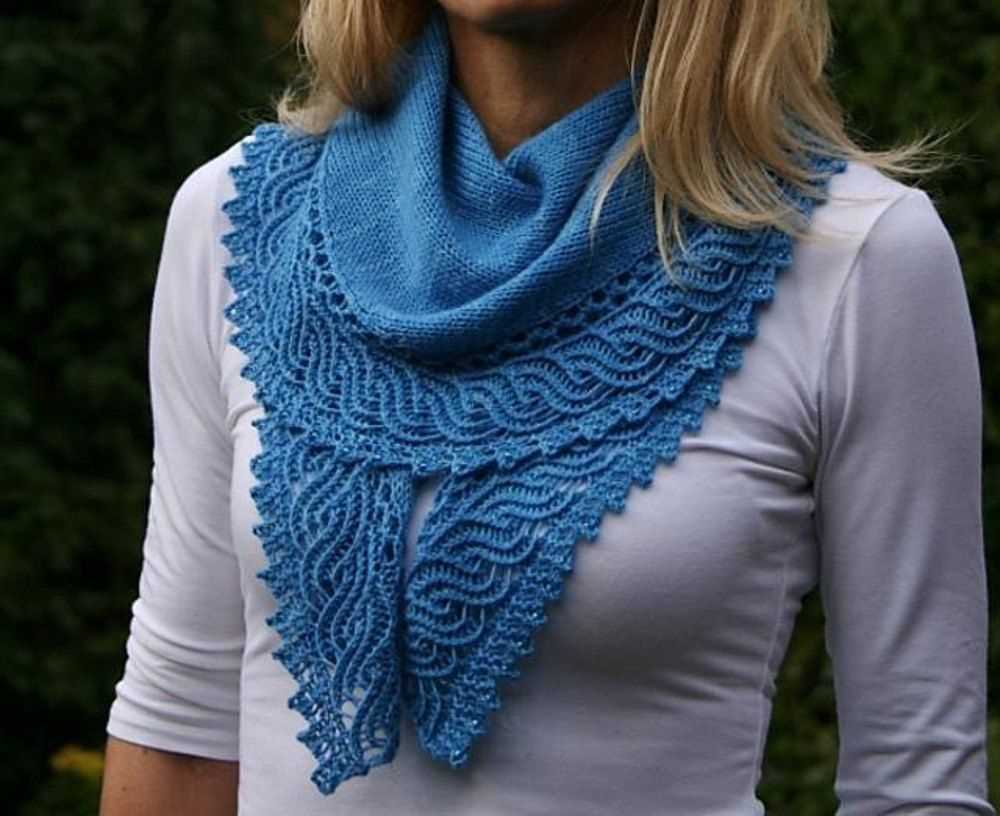
If you want to add some delicate and feminine details to your small shawl knitting pattern, incorporating eyelets and lace panels is a great option. Eyelets are small holes created by a series of yarn overs and decreases, while lace panels involve creating intricate lace patterns. These techniques can add visual interest and create a beautiful drape in your finished shawl.
To add eyelets, you can start by identifying the desired locations where you want to place them. This could be along the edge of the shawl or scattered throughout the body. You will then need to decide on the spacing and pattern of the eyelets. A common method is to create a yarn over followed by a knit two together decrease, but there are various eyelet patterns you can experiment with.
When it comes to lace panels, you can choose from a wide range of lace stitch patterns, such as leaf motifs, floral designs, or geometric shapes. Lace panels can be placed either symmetrically or asymmetrically in your shawl. Keep in mind that lace patterns require more attention and concentration, as they often involve complex stitch combinations and chart reading.
When incorporating eyelets and lace panels into your small shawl knitting pattern, it’s important to consider the overall design and balance. These decorative elements should complement the rest of the shawl and enhance its overall aesthetic. You can also play around with different yarn colors and textures to further highlight the eyelets and lace panels.
In summary, adding eyelets and lace panels can elevate a simple small shawl knitting pattern and create a stunning finished product. Whether you want to add delicate eyelet details or intricate lace patterns, these techniques offer endless possibilities to showcase your creativity and skills as a knitter.
Creating the Border
Once you have completed the main body of your small shawl, it’s time to move on to creating the border. The border is an important element of any shawl, as it adds a finishing touch and enhances the overall design. In this section, we will discuss different options for creating a border and provide step-by-step instructions to help you achieve the desired result.
1. Choosing a Border Pattern: The first step in creating the border is to choose a suitable border pattern. There are numerous options available, ranging from simple lace patterns to more intricate designs. Consider the overall style of your shawl and select a border pattern that complements the main body. Look for patterns that have a similar stitch count or that can be easily adapted to fit your stitch count.
2. Establishing the Border: Once you have chosen a border pattern, it’s time to establish the border stitches. Start by picking up stitches along the edge of your main body, ensuring an even distribution. You can either use a circular needle or double-pointed needles, depending on your preference. Knit a few rows in your chosen border pattern to create a foundation for the border.
3. Continuing the Border: After establishing the border, continue knitting in the chosen border pattern until the desired width is achieved. Pay attention to any stitch count changes or increases/decreases required by the pattern. Follow the instructions carefully to maintain the symmetry and balance of the border design.
4. Binding Off: Once the border is complete, it’s time to bind off your stitches. Use a stretchy bind off method to ensure a neat and flexible edge. You can choose from various bind off techniques, such as the Jeny’s Surprisingly Stretchy Bind Off or the Russian bind off method. Experiment with different options to find the one that works best for your specific shawl.
5. Blocking: The final step in creating the border is blocking your completed small shawl. Blocking helps to even out the stitches, open up lace patterns, and give the shawl its final shape. Wet blocking is a common method used for shawls, where the shawl is soaked in water, gently squeezed, and then pinned out on a blocking board or mat. Follow the blocking instructions provided with your chosen yarn to ensure the best results.
By following these steps and taking your time to create the border, you can enhance the beauty and elegance of your small shawl. Whether you choose a simple lace border or a more intricate design, the border will add the perfect finishing touch to your knitting project.
Blocking and Finishing the Shawl
Blocking is an essential step in finishing your small shawl knitting project. It helps to even out the stitches and open up the lace pattern, giving your shawl its final shape and drape. To block your shawl, you will need blocking wires or pins, a blocking board or surface, and a spray bottle with water.
Start by gently soaking your finished shawl in lukewarm water with a mild detergent or wool wash. Avoid agitating or rubbing the fabric to prevent any damage. After soaking for 15-20 minutes, gently squeeze out the excess water, but do not wring or twist the shawl.
Next, lay out your shawl on a blocking board or a clean, dry towel. Use blocking wires or pins to stretch and shape the shawl according to the pattern’s measurements. Pay extra attention to the edges and any lace motifs to ensure they are properly aligned and open. You can use a tape measure to check that the shawl is evenly blocked on all sides.
Once your shawl is in the desired shape, mist it with water from the spray bottle. This will help the fibers relax and set in place. Leave the shawl to dry completely, which usually takes 24-48 hours depending on the humidity in your area.
After the shawl is dry, gently remove the blocking wires or pins. You will notice that the shawl has transformed into a beautiful, delicate piece with enhanced stitch definition and lace patterns. Take a moment to admire your handiwork!
If desired, you can add any finishing touches, such as weaving in loose ends or attaching a decorative border. Once these final steps are complete, your small shawl is ready to be worn or gifted with pride!
Styling and Wearing the Small Shawl
Once you have completed knitting your small shawl, it’s time to style it and incorporate it into your wardrobe. Here are some tips on how to wear and accessorize your small shawl:
1. Draped over the shoulders: The traditional way to wear a shawl is to drape it over your shoulders, letting the ends hang down freely. This style is perfect for adding a touch of elegance and warmth to your outfit.
2. Tied around the neck: For a more modern and chic look, you can tie your small shawl around your neck like a scarf. This style works well with a simple blouse or dress and adds a pop of color and texture to your outfit.
3. Belting the shawl: If you want to add some structure to your small shawl, you can belt it around your waist. This style is great for creating a defined silhouette and can be worn with a dress or a tunic top.
4. As a headscarf: For a boho-inspired look, you can also wear your small shawl as a headscarf. Simply fold the shawl into a triangle, tie it around your head, and let the ends hang loose. This style is perfect for adding a touch of bohemian flair to your outfit.
5. Layering: Another stylish way to incorporate your small shawl into your outfit is by layering it over a jacket or coat. This style adds warmth and dimension to your look and can be worn with both casual and formal outfits.
Whatever way you choose to style and wear your small shawl, it’s important to have fun and experiment with different looks. Don’t be afraid to mix and match patterns, colors, and textures to create a unique and personalized style. The small shawl is a versatile accessory that can elevate any outfit and add a touch of sophistication and elegance.