
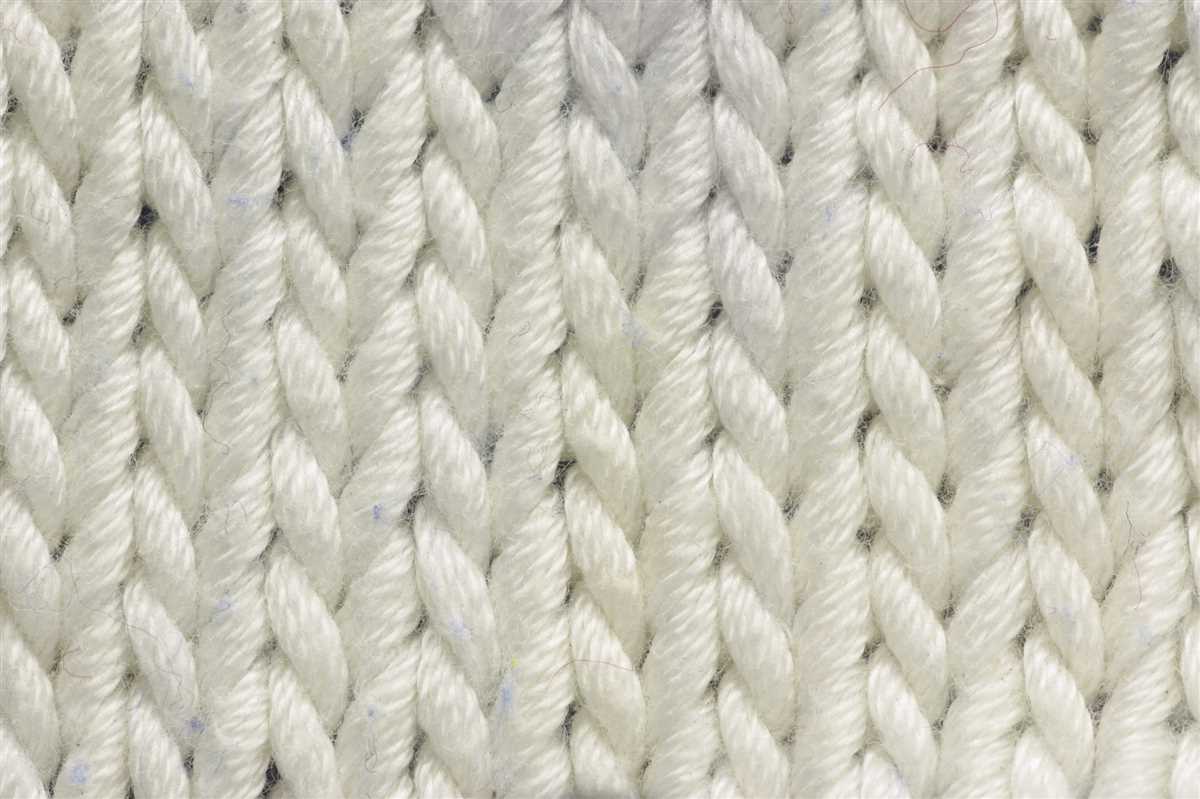
Knitting is a wonderful craft that allows you to create beautiful garments and accessories with just a few basic stitches. One of the most popular knitting techniques is cable knitting, which adds texture and interest to your projects. Whether you’re a seasoned knitter or just starting out, the small cable knit pattern is a great option to try.
The small cable knit pattern involves working a series of twists and turns to create a braided effect on your fabric. It adds depth and dimension to your knitted pieces, making them stand out from the crowd. This pattern is perfect for adding a touch of elegance to your hats, scarves, and sweaters.
To create the small cable knit pattern, you’ll need a set of cable needles or double-pointed needles, depending on the size of your project. The pattern typically consists of a repeating sequence of cable stitches, which are worked over a specified number of rows. Once you get the hang of it, you’ll be able to create intricate and detailed designs.
Whether you’re knitting for yourself or a loved one, the small cable knit pattern is sure to impress. With its timeless appeal and cozy feel, it’s the perfect way to add a touch of luxury to your winter wardrobe. So grab your needles and start knitting today!
Small Cable Knit Pattern
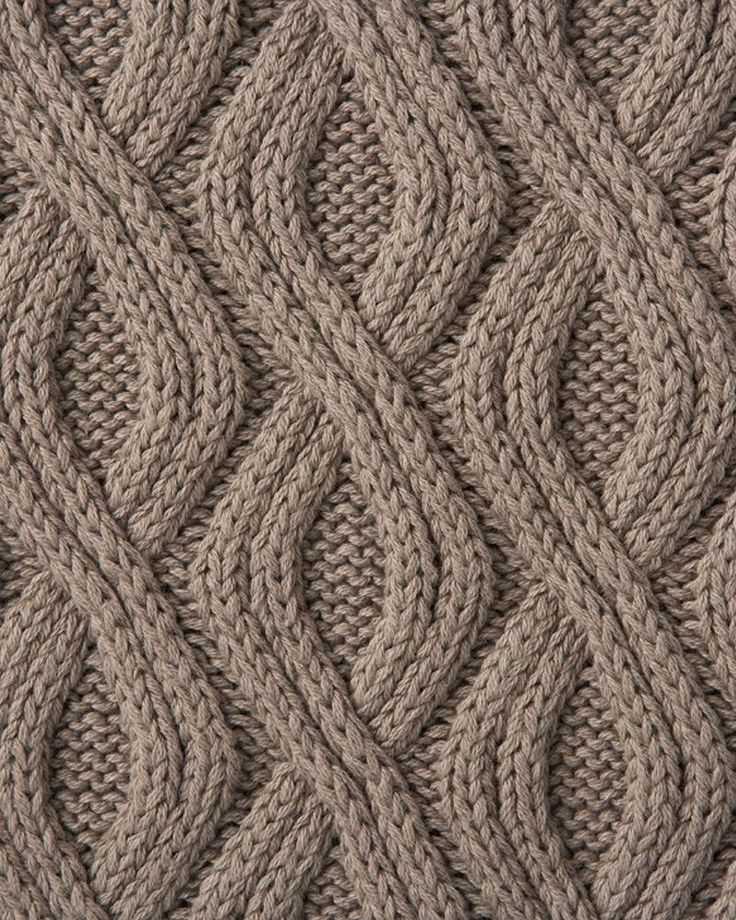
The small cable knit pattern is a classic and timeless design that adds depth and texture to any knitted piece. It is characterized by a series of intertwining cables that create a braided effect. This pattern is perfect for creating cozy sweaters, hats, scarves, and blankets.
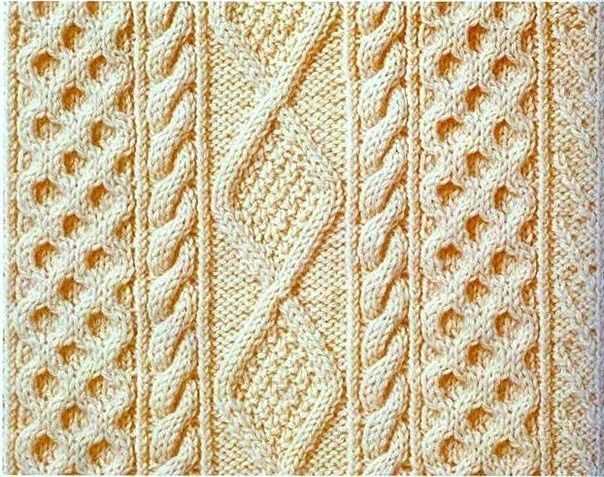
One of the key features of the small cable knit pattern is its versatility. It can be used to create intricate designs or simple patterns, depending on the number and arrangement of the cables. The pattern can also be easily customized by changing the size of the cables or adding different stitch patterns.
To create a small cable knit pattern, start by casting on an even number of stitches. Divide the stitches into groups, with each group containing an equal number of stitches. Begin the pattern by working a few rows in a basic knitting stitch, such as garter stitch or stockinette stitch.
Next, start the cable pattern by crossing stitches over each other. This is done by slipping a certain number of stitches onto a cable needle and holding it to the front or back of the work. Then, knit the next set of stitches and return to the stitches on the cable needle, knitting them to create the cable twist.
Continue repeating the cable pattern across the row, making sure to maintain the correct stitch count and cable sequence. Once the desired length is reached, finish the piece by binding off the stitches and weaving in any loose ends.
Overall, the small cable knit pattern is a beautiful and versatile design that can be used to create a wide range of knitted items. Its intricate texture and classic look make it a popular choice among knitters of all skill levels. So grab your knitting needles and give this pattern a try!
What is a Small Cable Knit Pattern?
A small cable knit pattern refers to a type of knitting technique that creates a textured, braided effect on a knitted garment. It is characterized by the use of cables, which are created by crossing stitches over each other in a specific pattern. The resulting fabric has a raised, three-dimensional appearance that adds visual interest and depth to the knitted item.
The small cable knit pattern is often used in the creation of sweaters, hats, scarves, and other cold-weather accessories. It is a popular choice among knitters for its timeless design and versatility. The pattern can be customized by varying the size and placement of the cables, allowing for endless design possibilities. Small cable knit patterns can be subtle and delicate or bold and intricate, depending on the knitter’s preferences and skill level.
How is a Small Cable Knit Pattern Created?
To create a small cable knit pattern, knitters typically start with a base of knit or purl stitches. The cables are then formed by rearranging the order of these stitches and crossing them over each other. This is usually done with the help of a cable needle, which is a short, double-pointed needle used to hold the stitches temporarily while other stitches are worked.
The specific pattern and size of the cables can vary depending on the desired design. Some common cable patterns include the braided cable, honeycomb cable, and horseshoe cable. Knitters can experiment with different stitches and combinations to create their own unique cable designs.
Tips for Knitting a Small Cable Knit Pattern
- Use a cable needle or other stitch holder to hold the stitches as you create the cables.
- Pay close attention to the pattern instructions and make sure to cross the stitches in the correct direction.
- Keep your tension consistent to ensure even and attractive cables.
- If you’re new to cable knitting, start with a simple pattern and gradually work your way up to more complex designs.
- Take your time and enjoy the process of creating a beautiful cable knit item.
Materials Needed for Small Cable Knit Pattern
In order to create a small cable knit pattern, you will need a few essential materials. These materials include:
- Yarn: Choose a high-quality yarn that is suitable for knitting cables. Look for a yarn that is soft and sturdy, such as a blend of wool and acrylic or cotton.
- Knitting Needles: Select a pair of knitting needles that are appropriate for the yarn you have chosen. The size of the needles will depend on the thickness of the yarn and the desired gauge.
- Cable Needle: A cable needle is a small double-pointed needle or hook used to hold stitches temporarily while you cross them over each other to create the cable pattern.
- Tapestry Needle: A tapestry needle is used for sewing in loose yarn ends and finishing the project.
- Stitch Markers: Stitch markers are helpful for keeping track of where certain pattern repeats or cable crossings occur.
- Scissors: A pair of scissors will be necessary for cutting the yarn at the end of your project or for any necessary trimming.
- Measuring Tape: A measuring tape or ruler will be useful for checking your gauge and measuring the size of your finished project.
Once you have gathered all of these materials, you will be ready to start your small cable knit pattern. Make sure to read through the pattern instructions thoroughly and have a clear understanding of the basic cable knitting techniques before you begin.
How to Read a Cable Knit Pattern Chart
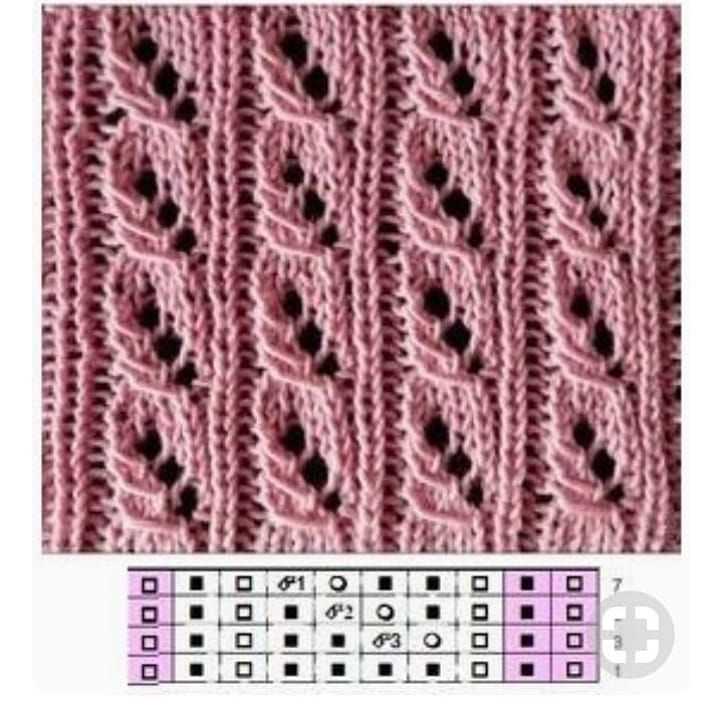
Reading a cable knit pattern chart can seem daunting at first, but with a little practice and understanding of the symbols used, it becomes much easier. Cable knit patterns are created by crossing stitches over each other, creating intricate and textured designs. The chart serves as a visual representation of the pattern, showing the order and direction of the crosses.
When reading a cable knit pattern chart, it is important to familiarize yourself with the symbols used. Common symbols include a diagonal line to represent a forward cable, a vertical line to represent a back cable, and an empty square to indicate a knit stitch. The direction of the diagonal or vertical line shows which direction the cable is crossing in. It is also helpful to reference any key or legend provided with the chart to ensure you understand each symbol and its corresponding stitch.
To follow a cable knit pattern chart, start at the bottom right corner and work your way across each row, following the symbols and their corresponding stitches. Pay close attention to any repeats indicated in the chart, as they may be denoted by brackets or a specific number of repeats written above the chart. This will help you keep track of the pattern and maintain consistency.
If you are new to cable knitting, it can be helpful to practice with a smaller, simpler pattern before tackling more complex designs. As you gain experience and confidence, you can gradually work your way up to more intricate cable patterns. Remember to take your time and refer back to the chart as needed to ensure accuracy.
In conclusion, reading a cable knit pattern chart may initially seem challenging, but with practice and understanding of the symbols used, it becomes easier to follow and create beautiful cable knit designs. Take your time, reference the key or legend, and enjoy the process of creating intricate and textured patterns with your knitting needles!
Step-by-Step Tutorial for Small Cable Knit Pattern
If you’re looking to add some texture and visual interest to your knitting project, a small cable knit pattern is a great choice. This classic technique creates beautiful twists and turns in your fabric, giving it a cozy and stylish look. In this step-by-step tutorial, we’ll walk you through the process of creating a small cable knit pattern.
Materials You’ll Need:
- Yarn in your desired color and weight
- Knitting needles in the appropriate size for your yarn
- Cable needle or double-pointed needle
- Tapestry needle
- Scissors
Step 1: Cast On
Start by casting on the desired number of stitches for your project. Make sure to leave a few extra stitches on each side for the cable twists.
Step 2: Knit the First Rows
Work a few rows in a basic knitting stitch pattern, such as garter stitch or stockinette stitch, to create a foundation for your cable pattern. This will help the cables stand out and provide a nice contrast.
Step 3: Create a Cable Twist
To create the cable twist, you’ll need to use a cable needle or double-pointed needle. Slip the first few stitches onto the cable needle and hold it to the front or back of your work, depending on the direction of the twist you want to create. Then, knit the next few stitches from the left-hand needle. Finally, knit the stitches from the cable needle, working them in the same order they were slipped onto the needle. Repeat this process for each cable twist in your pattern.
Step 4: Continue Knitting
After creating the cable twists, continue knitting in your chosen stitch pattern for the desired length. You can repeat the cable twists at regular intervals or create a more random pattern, depending on your preference.
Step 5: Bind Off
Once you’ve reached the desired length, it’s time to bind off your stitches. Follow your preferred method of binding off, making sure to keep an even tension to ensure a neat and finished edge.
With this step-by-step tutorial, you’ll be able to create a beautiful small cable knit pattern that adds a touch of elegance to any knitting project. Whether you’re making a cozy scarf, a warm hat, or a stylish sweater, the small cable knit pattern is sure to be a standout feature.
Tips for Perfecting Your Small Cable Knit Pattern
Knitting a small cable knit pattern can be a fun and rewarding project. The intricate design adds texture and visual interest to any garment or accessory. However, achieving a perfect cable knit can sometimes be challenging. Here are some tips to help you master this technique and create flawless small cable knit patterns.
1. Use the right tools
Having the right tools is essential for creating a well-executed small cable knit pattern. Make sure you have the appropriate cable needle or double-pointed needles, depending on your knitting style. A cable needle with a pointed tip and smooth surface will make the process easier and prevent stitches from slipping off.
2. Read the pattern carefully
Before you start knitting, thoroughly read the cable knit pattern instructions. Pay close attention to any special stitches or techniques required. Familiarize yourself with the cable symbols and chart, if provided. Understanding the pattern beforehand will help you avoid mistakes and ensure an accurate final result.
3. Practice your tension
Consistent tension is crucial for a neat and uniform small cable knit pattern. Practice maintaining an even tension by knitting swatches and measuring them against the pattern gauge. Adjust your needle size if necessary to achieve the correct gauge. Proper tension will result in a professional-looking cable knit.
4. Use markers to keep track
When working on a complex cable knit pattern, it’s easy to lose track of where you are. Use stitch markers to mark the beginning and end of the cable pattern, as well as any additional sections within the pattern. This will help you keep your place and ensure that your cables are correctly aligned.
5. Block your finished project
After completing your small cable knit project, block it to enhance the overall appearance. Wet blocking or steam blocking can help relax the stitches, even out the tension, and define the cable pattern. Follow the blocking instructions for the specific yarn you used to achieve the best results.
By following these tips, you’ll be on your way to perfecting your small cable knit pattern. With practice and patience, you’ll be able to create beautiful and intricate cable designs that will impress everyone with your knitting skills.
Choosing the Right Yarn for Small Cable Knit Patterns
Cabel knit patterns are a classic and beautiful way to add texture and interest to your knitting projects. When choosing the right yarn for small cable knit patterns, there are a few important factors to consider to ensure the best outcome for your project.
Fiber Content: The fiber content of the yarn will greatly impact the final look and feel of your cable knit pattern. Natural fibers like wool and alpaca are popular choices for cable knitting, as they provide excellent stitch definition and can create a warm and cozy finished garment. Other fibers like cotton and acrylic can also be used, but may result in less defined cables.
Yarn Weight: The weight of the yarn will determine the size of your cables and the overall look of your project. For small cable knit patterns, a medium weight yarn, such as worsted or aran, is generally a good choice. These yarns provide enough thickness to showcase the cables without overwhelming the design.
Texture: Consider the texture of the yarn when choosing for a small cable knit pattern. Yarns with a smooth texture will allow the cables to stand out more, while yarns with a more pronounced texture, such as boucle or tweed, can add an extra level of interest to your cables.
Color: The color of your yarn can also have an impact on the appearance of your cable knit pattern. Solid, neutral colors like gray, cream, or brown can highlight the texture of the cables and give a timeless look. On the other hand, vibrant or variegated yarns can add a modern and playful twist to your cable knits.
Ultimately, the right yarn for your small cable knit pattern will depend on your personal preference and the intended use of your finished project. Experiment with different yarns to find the perfect match and enjoy the process of creating beautiful cables with your knitting needles!
Adding Variation to Your Small Cable Knit Pattern
If you’re tired of knitting the same small cable knit pattern over and over again, it might be time to add some variation to your projects. There are several ways you can switch things up and create unique and interesting cable knit designs.
1. Play with cable sizes: Instead of sticking to the same cable size throughout your pattern, experiment with different sizes. You can mix small cables with larger ones to create a more textured and dynamic look. This will add visual interest to your project and make it stand out.
2. Introduce new cable stitches: While the traditional cable stitches are beautiful and classic, there are countless other cable stitches you can try. Challenge yourself by learning new stitches and incorporating them into your pattern. This will give your knitwear a fresh and innovative touch.
3. Incorporate different cable placements: Cable knit patterns don’t always have to follow a linear path. You can change things up by placing cables in different directions or creating more intricate and complex cable arrangements. This will create a more visually captivating pattern and showcase your knitting skills.
4. Add cables to unconventional items: Don’t limit yourself to scarves and blankets when it comes to cable knitting. Consider adding cables to unconventional items like hats, gloves, or even socks. This will give your projects a unique and unexpected twist.
5. Experiment with color: Adding color to your small cable knit pattern can completely transform the look of your project. Consider using different colored yarns or incorporating colorwork techniques like Fair Isle or intarsia. This will make your cables pop and create a stunning visual effect.
By incorporating these variations into your small cable knit pattern, you can create one-of-a-kind pieces that showcase your creativity and knitting skills. Don’t be afraid to experiment and try new things – the possibilities are endless!
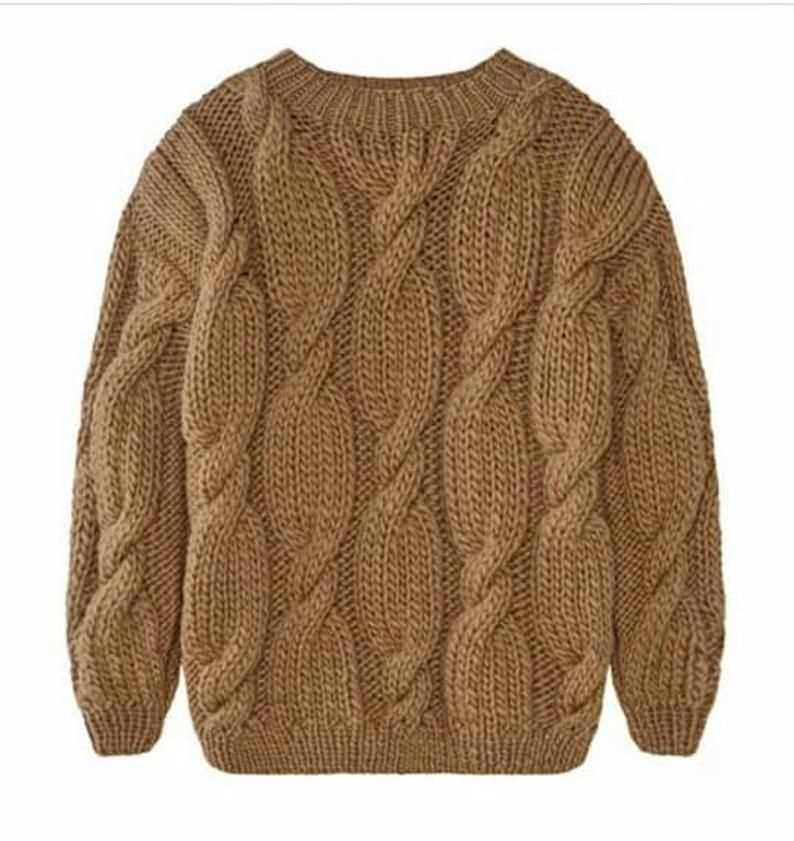
Small Cable Knit Pattern Ideas for Different Projects
Small cable knit patterns are a versatile and popular knitting technique that can be used in a variety of projects. Whether you’re looking to create cozy accessories or stylish garments, there are endless possibilities when it comes to incorporating small cable knit patterns into your knitting projects.
One popular project idea is to use small cable knit patterns to create a beautiful and textured scarf. The intricate cables add visual interest to the scarf and make it a statement piece that can be worn with any outfit. You can choose to knit the scarf in a solid color or use multiple colors to create a striped or ombre effect.
If you’re looking to add a touch of elegance to your home decor, small cable knit patterns are a great way to do so. You can use them to knit cozy and stylish cushion covers or blankets. The cables will add both texture and warmth to your living space, making it feel inviting and comfortable.
Another project idea is to incorporate small cable knit patterns into your winter accessories. Hats, gloves, and mittens with cable details not only look stylish but also provide extra warmth during the cold months. You can choose to knit them in a traditional cable pattern or get creative by incorporating different cable designs into each accessory.
Small cable knit patterns can also be used to create adorable baby clothes and accessories. From cozy cardigans to adorable booties, cables add a charming touch to any baby outfit. Whether you’re knitting for your own little one or as a gift, these small cable knit patterns are sure to be treasured.
- Don’t be afraid to experiment with different cable designs and combinations to create unique and personalized projects.
- Remember to choose the right yarn and needle size for your project to ensure that the cables stand out and the finished piece has the desired drape.
- Consider adding small cable knit patterns to your existing knitting projects, such as a simple sweater or cardigan, to instantly elevate the design and make it more interesting.
- Finally, have fun with your knitting and enjoy the process of creating beautiful and functional items with small cable knit patterns.
Common Mistakes to Avoid in Small Cable Knitting
Cable knitting is a popular technique that adds depth and texture to knitted garments. When working on small cable knitting patterns, it’s important to pay attention to detail and avoid common mistakes that can affect the overall appearance of the finished project.
1. Miscounting stitches: One of the most common mistakes in small cable knitting is miscounting stitches. This can lead to uneven cables or an incorrect pattern repeat. To avoid this, it’s important to carefully count the stitches before and after each cable twist to ensure accuracy.
2. Not using a cable needle: Another common mistake is not using a cable needle when working on small cable knitting patterns. This can result in dropped stitches or twisted cables. Using a cable needle helps to hold the stitches in place and ensures that the cable twists are done correctly.
It’s important to choose a cable needle that is the appropriate size for the yarn you are using. This will ensure that the needle holds the stitches securely without stretching them or causing them to slip off.
3. Incorrect cable crosses: Small cable knitting patterns often involve crossing stitches to create the cable twists. It’s important to pay attention to the pattern instructions and cross the stitches correctly. This can involve moving stitches to the front or back of the work and working them out of order.
- To avoid making mistakes in cable crosses, it can be helpful to use stitch markers to mark the cable sections. This can help you keep track of where each cable starts and ends, making it easier to cross the stitches correctly.
- It’s also important to knit the cable crosses with even tension. Pulling the stitches too tightly can distort the cable and make it difficult to see the pattern. On the other hand, knitting the stitches too loosely can result in a sloppy looking cable.
4. Lack of blocking: Blocking is an important step in finishing any knitting project, and small cable knitting is no exception. Blocking helps to even out the stitches, open up the cable twists, and give the finished project a polished look.
After completing your small cable knitting project, it’s important to block it according to the instructions provided in the pattern. This typically involves lightly wetting the project, shaping it to the desired dimensions, and allowing it to dry completely. Blocking will help enhance the detail and definition of the cable twists.
By avoiding these common mistakes and paying attention to detail, you can create beautiful small cable knitted garments or accessories that showcase your knitting skills and creativity.
Caring for and Washing Your Small Cable Knit Projects
Taking proper care of your small cable knit projects is essential to maintain their quality and lifespan. Follow these guidelines to ensure your knitted items stay in great condition:
- Wash your small cable knit projects by hand whenever possible. Fill a basin with lukewarm water and a mild detergent specifically designed for delicate fabrics. Gently submerge the item and swish it around, being careful not to stretch or pull the cables. Rinse the item thoroughly with cool water.
- Avoid using bleach or harsh detergents, as they can weaken the fibers and damage the knit structure.
- If you need to machine wash your small cable knit, use a gentle cycle with cold water. Place the item in a mesh laundry bag to protect it from snagging or tangling with other clothing.
- Avoid wringing or twisting the knitted item to remove excess water. Instead, gently press it against the side of the basin or roll it in a clean towel to absorb the moisture.
- Lay the small cable knit project flat on a clean, dry towel and reshape it to its original dimensions. Avoid hanging it to dry, as this can cause the item to stretch or lose its shape.
- Keep your small cable knit projects away from direct sunlight or heat sources, as prolonged exposure can cause fading or damage to the fibers.
- Store your knitted items in a cool, dry place to prevent moisture buildup and discourage moth infestation. Consider adding mothballs or cedar chips to your storage area to further protect your knits.
By following these care instructions, you can enjoy your small cable knit projects for years to come. Remember to handle them with care, avoid using harsh chemicals, and store them properly to maintain their beauty and functionality.