
Knitting is a wonderful craft that allows you to create beautiful and cozy items for yourself and your loved ones. One of the most popular and practical items to knit are slippers. Knitted slippers can be customized to fit any foot size and can be made in a variety of styles and patterns.
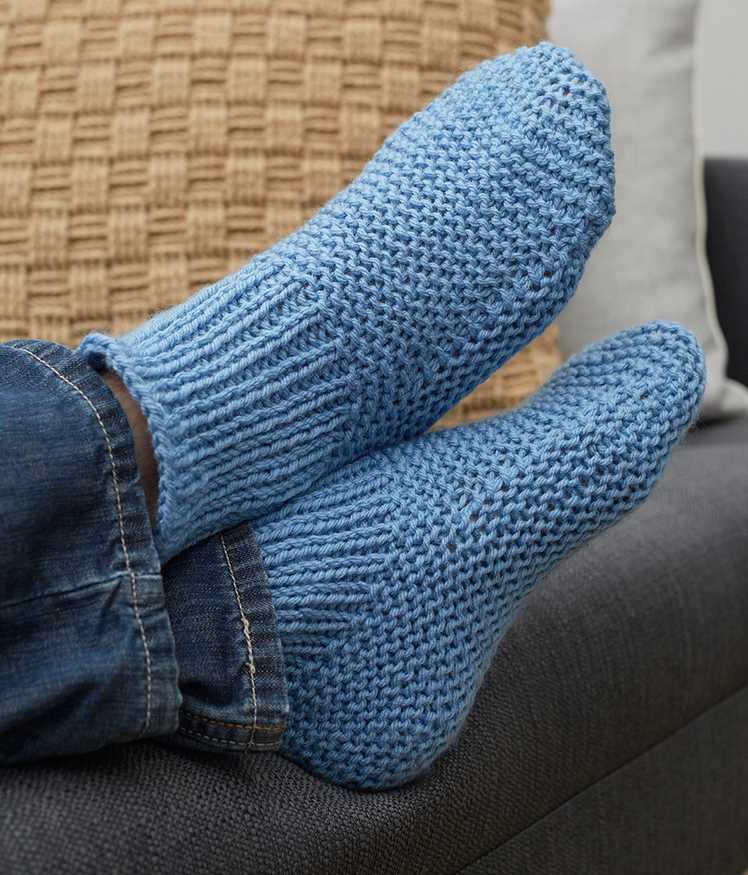
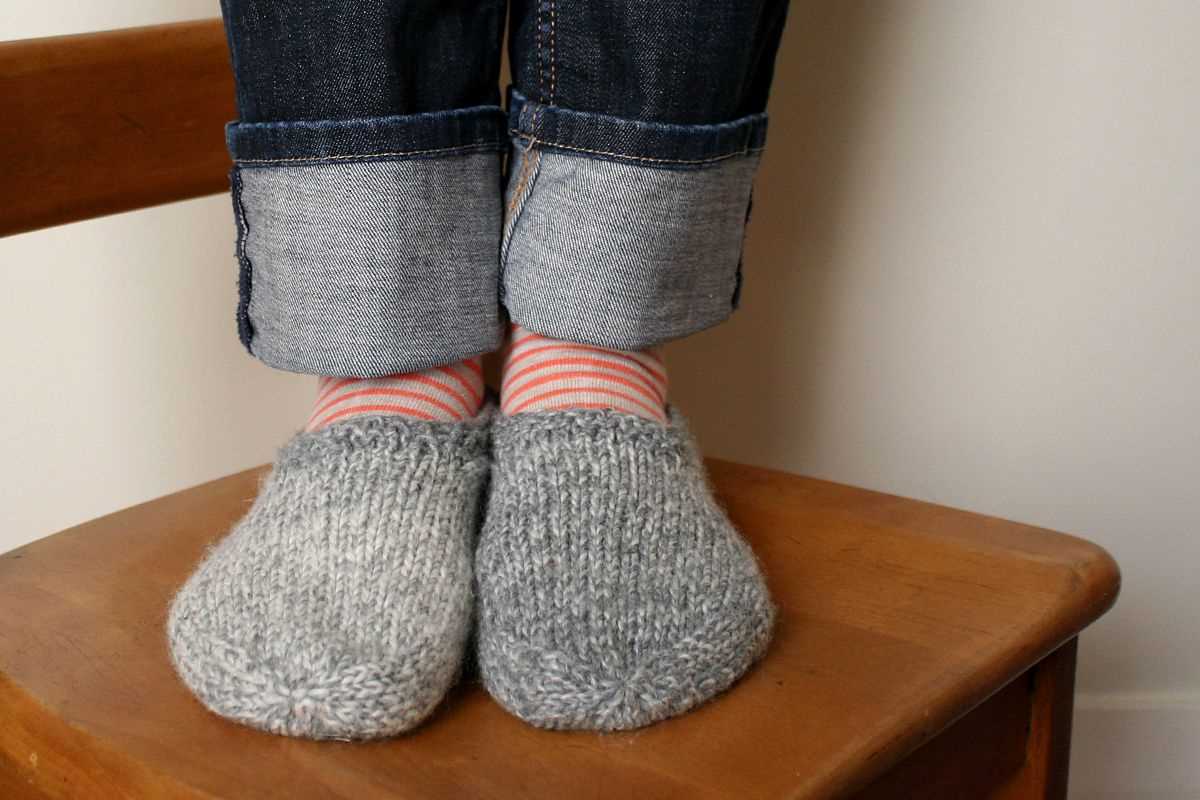
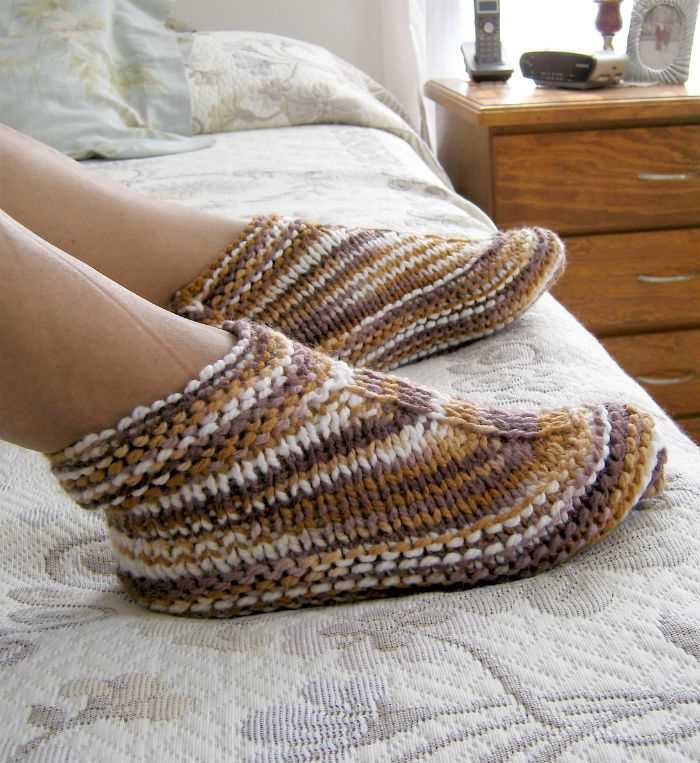
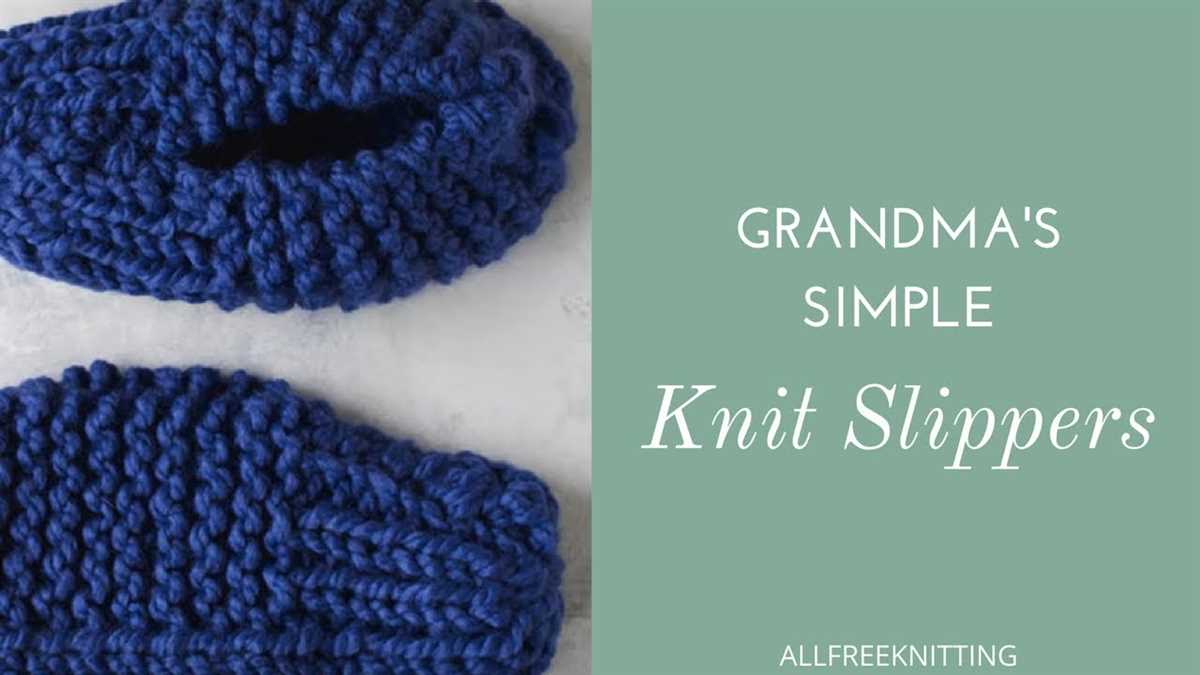
One of the most popular slipper knit patterns is the simple garter stitch slipper. This pattern is perfect for beginners as it only requires basic knitting skills. The garter stitch creates a dense and warm fabric, making these slippers perfect for keeping your feet warm during the colder months.
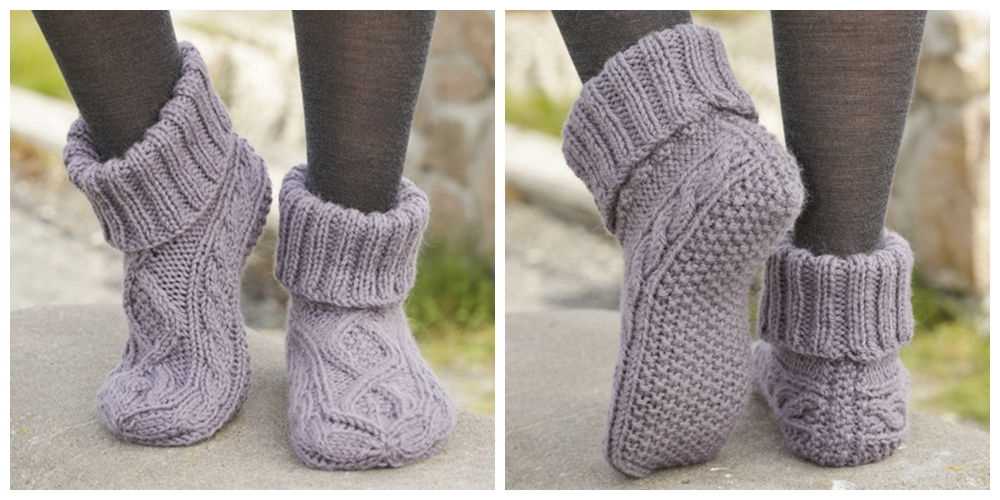
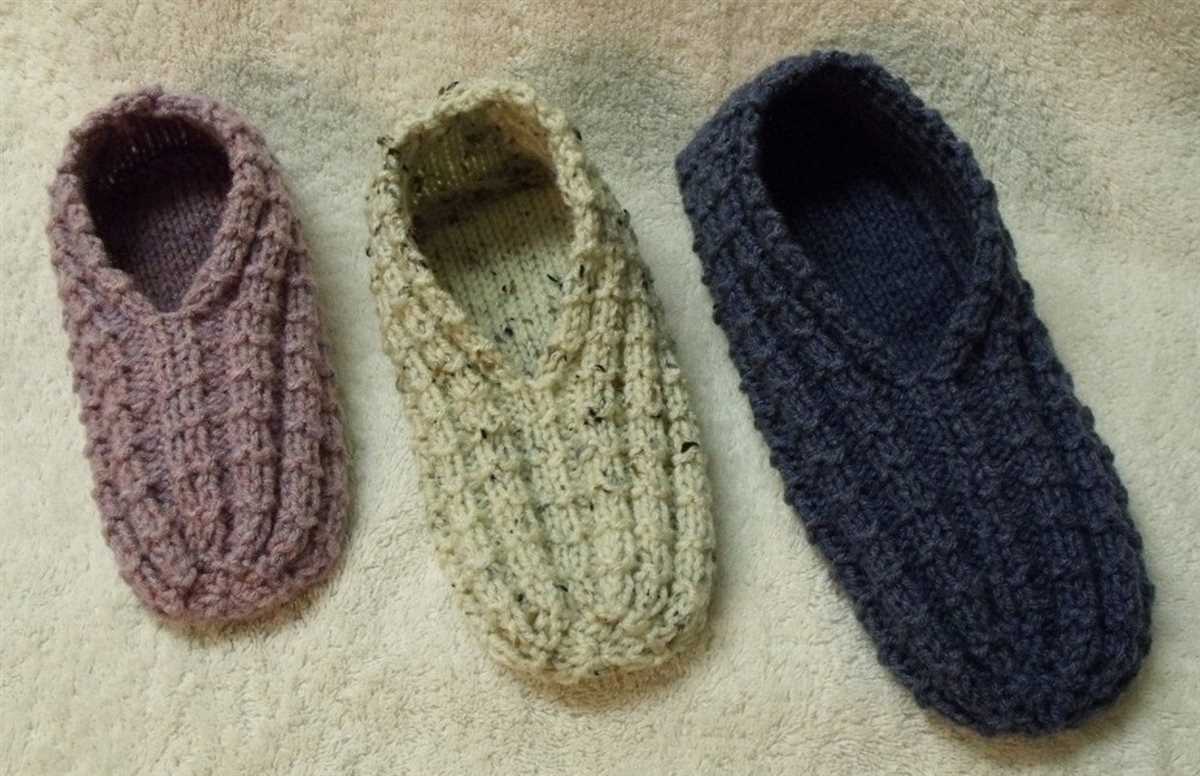
Another popular slipper knit pattern is the cable knit slipper. This pattern is slightly more advanced and involves working cables, which give the slippers a beautiful textured look. Cable knit slippers are perfect for those who are looking for a bit more of a challenge and want to create a stunning pair of slippers.
No matter what slipper knit pattern you choose, knitting slippers is a fun and rewarding project. Not only do you get to create something practical, but you also get to indulge your love of knitting and create something beautiful. So dust off your knitting needles and get started on your next slipper knitting project!
What is a Slipper Knit Pattern and Why Should You Try It?

If you enjoy knitting and want to try a new project, consider giving slipper knit patterns a try. Slipper knitting patterns are designs specifically created for making cozy and comfortable slippers to wear around the house. They typically involve using different knitting techniques to create a snug and warm fit for your feet.
Slipper knit patterns offer a variety of benefits and reasons to give them a try:
- Comfort: Slipper knit patterns are designed with both comfort and functionality in mind. They usually feature soft and sturdy yarns that keep your feet warm and protected, making them perfect for wearing during chilly weather or on cold floors.
- Customization: With slipper knit patterns, you have the opportunity to customize your slippers to your liking. You can choose different colors and yarn types to match your personal style and create a truly unique pair of slippers.
- Practicality: Slippers made from knit patterns can be incredibly practical. They are easy to slip on and off, making them convenient for wearing around the house. Additionally, they can be machine-washed, which makes them easy to clean and maintain.
- Gift-giving: Slipper knit patterns can also make for wonderful handmade gifts. By knitting a pair of slippers for someone you care about, you can show them your love and appreciation while also providing them with a cozy and stylish accessory.
Whether you are a beginner or an experienced knitter, slipper knit patterns provide an enjoyable and rewarding project. They allow you to create a practical and personalized item while honing your knitting skills. So why not give slipper knitting patterns a try and add a touch of warmth and comfort to your life?
Choosing the Right Slipper Knit Pattern for Your Skill Level
If you’re interested in knitting slippers, it’s important to choose a pattern that matches your skill level. Whether you’re a beginner or an advanced knitter, finding the right slipper pattern will ensure a successful and enjoyable project.
For beginners: If you’re new to knitting, it’s best to start with a simple slipper pattern that uses basic stitches and techniques. Look for patterns that have clear instructions and include helpful tips for beginners. These patterns often use thicker yarn and larger knitting needles, making them easier to handle. Some beginner-friendly slipper patterns may also include video tutorials or step-by-step photo guides to assist you in the learning process.
For intermediate knitters: If you have some experience with knitting and are ready to take on a slightly more challenging project, there are many intermediate-level slipper patterns available. These patterns may introduce new stitch patterns or incorporate slightly more complex shaping techniques. They often use thinner yarns and smaller knitting needles, resulting in a more detailed and intricate finished slipper.
For advanced knitters: Advanced knitters have the skills and knowledge to tackle more intricate and complex slipper patterns. These patterns may involve intricate lace or cable stitch patterns, as well as more advanced shaping and construction techniques. They often use finer yarns and smaller knitting needles, resulting in a more delicate and detailed finished slipper. Advanced knitters can also experiment with modifying patterns or creating their own unique designs.
In conclusion, choosing the right slipper knit pattern for your skill level is crucial to ensure a successful and enjoyable knitting project. Take the time to assess your skills and choose a pattern that matches your knitting abilities. Remember, practice makes perfect, and with each new slipper project, you’ll continue to hone your knitting skills and expand your repertoire of techniques.
Gather Your Materials: Knitting Needles and Yarn
Before you begin knitting your slipper pattern, it’s important to gather all the necessary materials. The two main items you’ll need for this project are knitting needles and yarn. These are essential tools for any knitting project and will be used to create the fabric of your slippers.
When it comes to knitting needles, there are many options to choose from. The size of the needle will depend on the type of yarn you’re using and the desired gauge for your slipper. It’s important to check the pattern or yarn label for the recommended needle size. You can use straight needles, circular needles, or double-pointed needles, depending on your preference and the construction of the slipper pattern.
Yarn
Choosing the right yarn is also crucial for the success of your slipper project. The pattern may specify a specific type, weight, or color of yarn, so be sure to check the instructions. You’ll want to select a yarn that is soft, warm, and durable, as slippers are meant to be comfortable and long-lasting.
- Type: There are various types of yarn available, such as acrylic, wool, cotton, and blends. Consider the season and climate in which you’ll be wearing your slippers, as this may affect your yarn choice. Wool is a great option for warmth, while cotton is more breathable for summer slipper projects.
- Weight: Yarn weight refers to the thickness of the yarn. It is usually indicated on the yarn label and can range from lace weight (the thinnest) to super bulky (the thickest). The slipper pattern may specify a certain weight of yarn to achieve the desired size and appearance.
- Color: The color of the yarn is a personal preference and can be chosen based on your style and taste. Some people prefer neutral colors for their slippers, while others opt for vibrant hues or patterns. Think about what will match your wardrobe or bring you joy.
Once you have your knitting needles and yarn ready, you’ll be all set to start knitting your slipper pattern. Remember to follow the instructions carefully and enjoy the process of creating your own cozy footwear!
Understanding Slipper Knit Pattern Abbreviations and Terms
If you’re new to knitting, understanding slipper patterns can be a bit confusing due to the various abbreviations and terms used. However, once you grasp the basic terminology, you’ll be able to follow slipper knit patterns with ease.
Abbreviations: Slipper knitting patterns often use abbreviations to save space and make the pattern easier to read. Some common abbreviations you may encounter include:
- K: Knit stitch
- P: Purl stitch
- YO: Yarn over
- K2tog: Knit two stitches together
- P2tog: Purl two stitches together
- St(s): Stitch(es)
- Rep: Repeat
Terms: In addition to abbreviations, slipper knit patterns may use specific terms to describe certain techniques or steps. It’s important to familiarize yourself with these terms to understand the instructions fully. Some common terms you may encounter include:
- Gauge: The number of stitches and rows per inch in a knitted swatch. It’s important to match the gauge specified in the pattern to ensure your slippers turn out the correct size.
- RS: Right side. This refers to the side of the fabric that will be visible when the slipper is worn.
- WS: Wrong side. This refers to the side of the fabric that will not be visible when the slipper is worn.
- Cast on: The initial process of adding stitches to the knitting needle before starting the pattern.
- Bind off: The process of finishing the edge of the project and removing the stitches from the needle.
- Seam: The process of joining two knitted pieces together using a yarn needle and the mattress stitch or other suitable method.
By familiarizing yourself with slipper knit pattern abbreviations and terms, you’ll be able to confidently tackle any slipper knitting project. With practice, you’ll become more comfortable with the terminology and find it easier to follow and execute slipper patterns.
Tips and Tricks for Creating a Perfect Fit
When knitting slipper patterns, achieving a perfect fit is essential for comfort and functionality. Here are some tips and tricks to help you create slippers that mold perfectly to your feet:
1. Measure Your Feet
Before starting your slipper project, take accurate measurements of your feet. This will help you determine the appropriate size to knit and ensure that the final product fits well. Measure the length and width of your foot, as well as the circumference of your ankle and instep.
2. Gauge Swatch
Knitting a gauge swatch is crucial for achieving the correct tension and getting the perfect fit. The pattern’s gauge will determine the number of stitches and rows needed to match the desired size. Use the recommended needle size and yarn weight stated in the slipper pattern, and measure your swatch after blocking to confirm the gauge.
3. Customizing the Pattern
If the slipper pattern doesn’t offer sizes or if you have measurements that don’t match any size in the pattern, you can customize it to fit your measurements. Use the stitch and row counts provided in the instructions as a guide, but make adjustments to accommodate your foot size. For example, you may need to add or subtract stitches to achieve the desired width or length.
4. Try-Ons
During the knitting process, it’s a good idea to try on the slipper as you go. This will allow you to make any necessary adjustments in real-time. If the slipper feels too loose or too tight in certain areas, you can add or decrease stitches or rows accordingly.
5. Elastic Bands or Cords
To ensure a snug fit, you can insert elastic bands or cords in strategic areas of the slipper. This will help keep them in place and prevent them from stretching out. For example, you can add an elastic band around the ankle or instep to provide extra support and prevent the slippers from slipping off.
By following these tips and tricks, you can create slipper knits that fit comfortably and perfectly match your feet. Remember to be patient and make adjustments as needed to achieve the best possible fit.
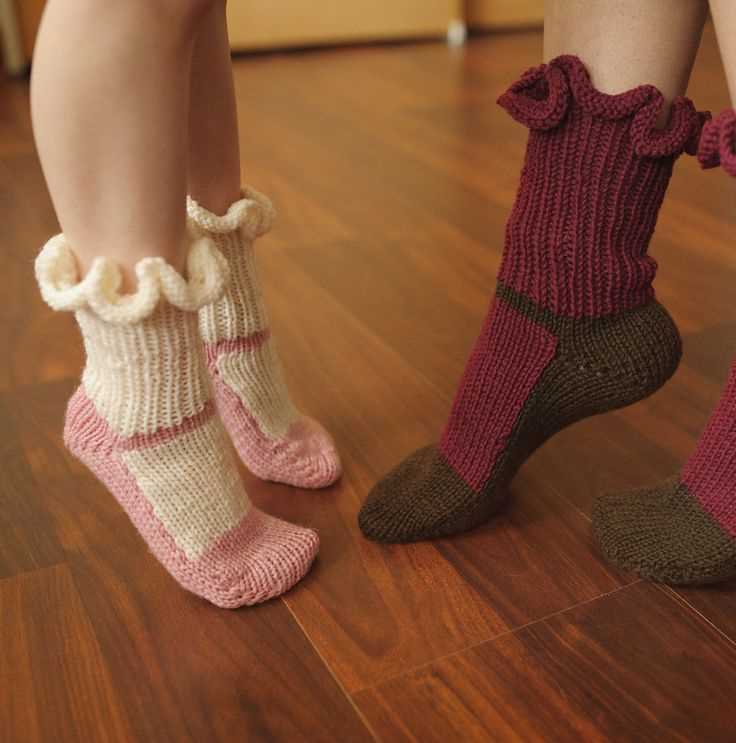
Adding Embellishments: Buttons, Bows, and More
Take your slipper knitting to the next level by adding embellishments such as buttons, bows, and more. These small details can instantly elevate the overall look of your knitted slippers and make them stand out.
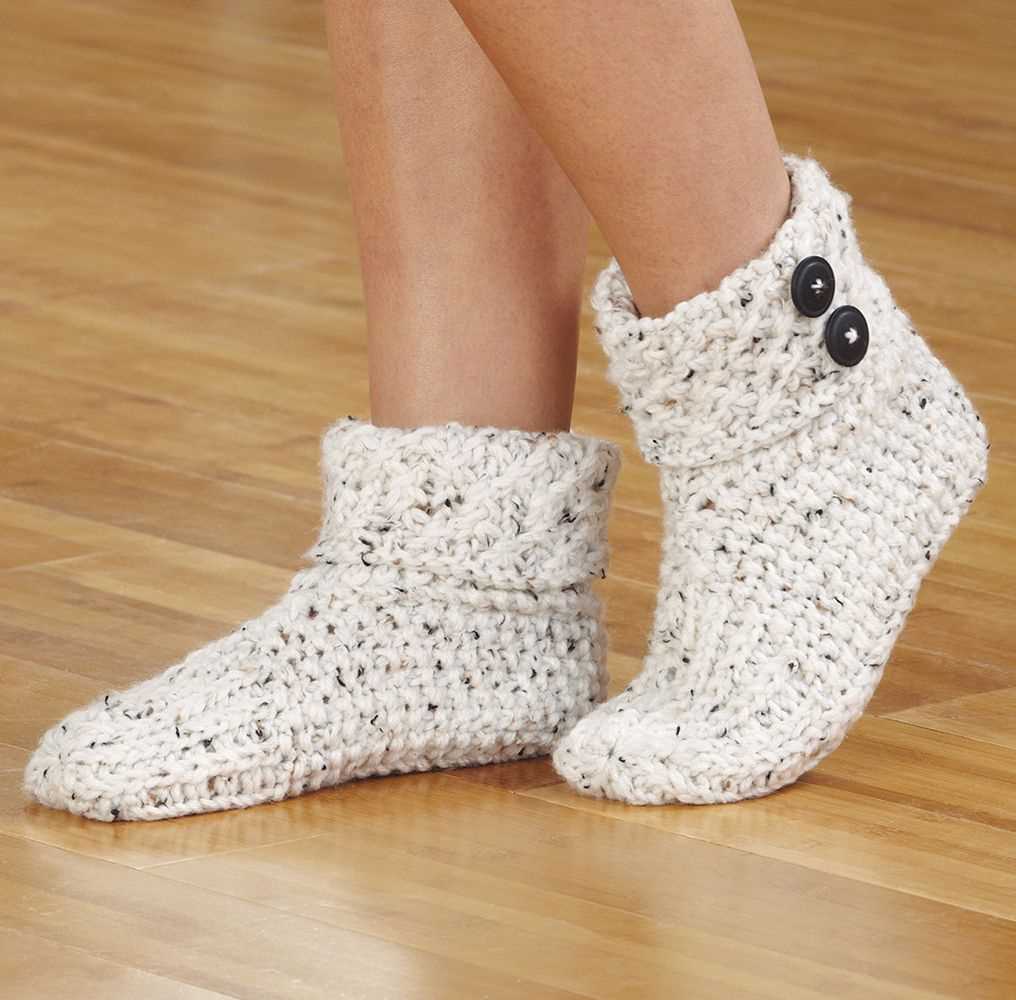
Buttons: Adding buttons to your knitted slippers not only adds visual interest but also serves as a functional element. You can choose buttons of different sizes, shapes, and colors to match your slipper design. Sewing buttons onto the side or front of the slipper can create a decorative closure, or you can sew them in a row along the cuff to give it a unique touch.
Bows: Bows are another popular embellishment option for knitted slippers. They can be knitted separately and attached to the slipper or made out of ribbon and sewn on. Bows can be placed on the toe, cuff, or any other desired location to add a feminine and whimsical touch to your slippers.
Embroidery: If you’re looking for a more intricate embellishment option, embroidery is a great choice. You can use embroidery thread to create beautiful patterns, flowers, or words on your slippers. This delicate and detailed work can make your slippers truly one-of-a-kind and showcase your knitting skills.
Pom-poms: Pom-poms are a fun and playful addition to knitted slippers. They can be easily made using yarn and a pom-pom maker or even by hand. Attach the pom-poms to the front or back of the slippers to give them a touch of texture and whimsy.
- Sequins and Beads: For a touch of glamour, consider adding sequins or beads to your slippers. These small embellishments can be sewn onto the slipper’s fabric or used to create intricate patterns and designs. They will instantly give your slippers a chic and fashionable look.
- Ribbons and Lace: Ribbons and lace can add a delicate and feminine touch to your knitted slippers. You can incorporate them into the design by knitting lace patterns or attaching lace trims to the edges of the slippers. These embellishments can make your slippers look elegant and refined.
- Fur or Faux Fur: For a cozy and luxurious feel, consider adding fur or faux fur trim to your slipper cuffs. This embellishment adds warmth and softness to your slippers and can also give them a stylish and trendy look.
When adding embellishments to your knitted slippers, make sure to choose materials that are durable and can withstand regular wear and tear. Additionally, consider the comfort and functionality of the embellishments to ensure they do not hinder the slipper’s purpose. With the right embellishments, you can transform your basic knitted slippers into statement pieces.
Exploring Different Slipper Knit Pattern Styles: Booties, Moccasins, and Slides
Slippers are a cozy and comfortable accessory that can keep your feet warm and comfortable during the colder months. If you enjoy knitting, making your own slipper patterns can be a rewarding and creative project. There are various styles of slipper knit patterns to choose from, including booties, moccasins, and slides, each with its own unique design and construction.
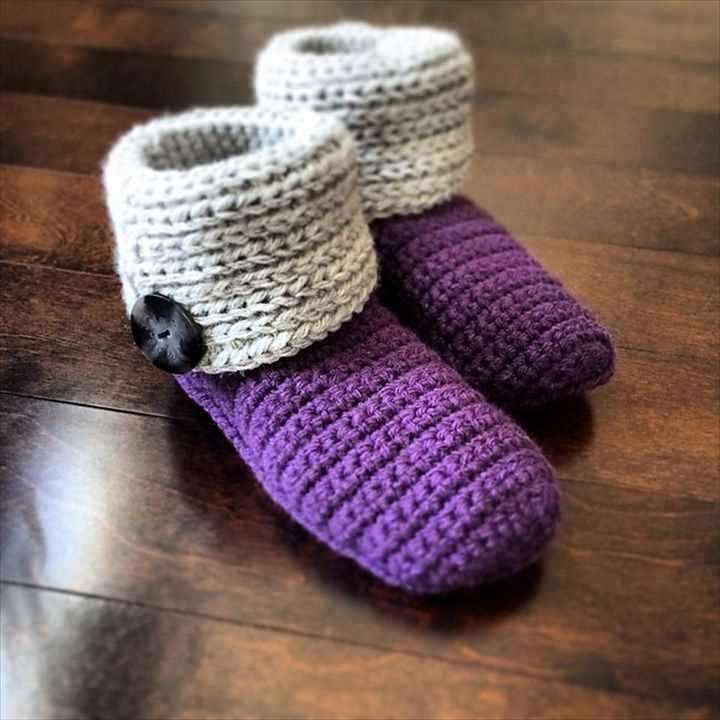
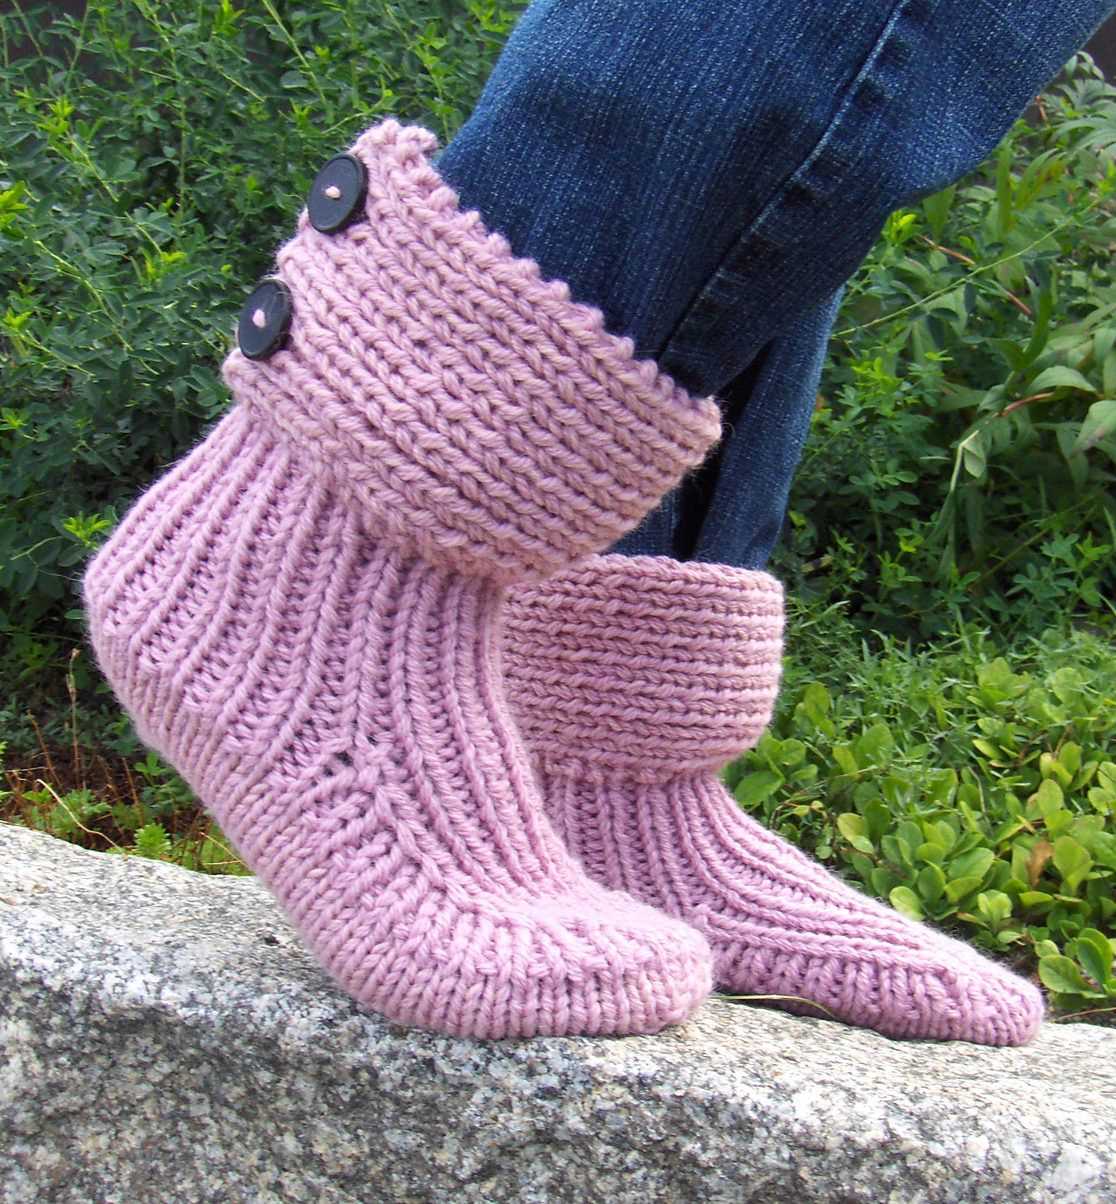
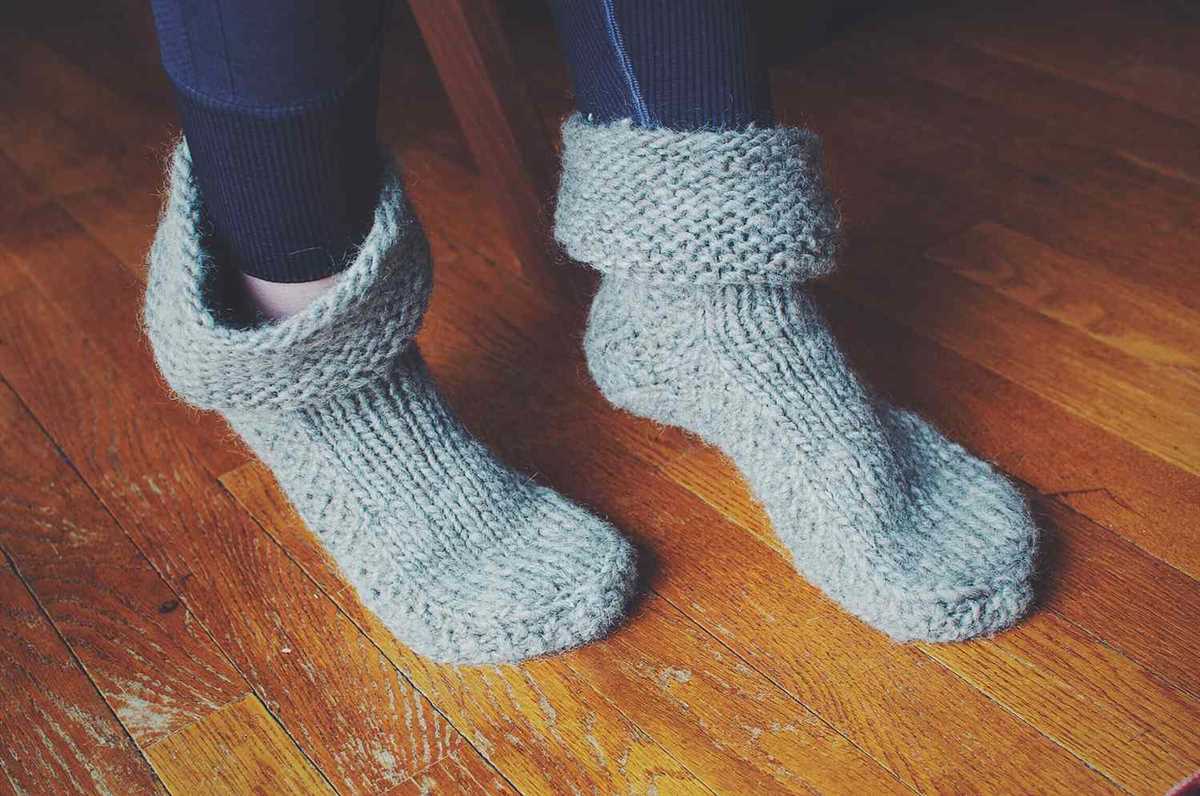
Booties:
Bootie-style slippers are a popular choice for those looking for full coverage and warmth. These slipper patterns typically feature a high ankle or leg, similar to a traditional winter boot. They are often knit using bulky or chunky yarn to provide extra insulation. Booties can be made with a variety of stitch patterns and can include details such as buttons, ribbons, or pom-poms for added style. The finished product is a comfortable and cozy slipper that wraps around the foot and leg for maximum warmth.
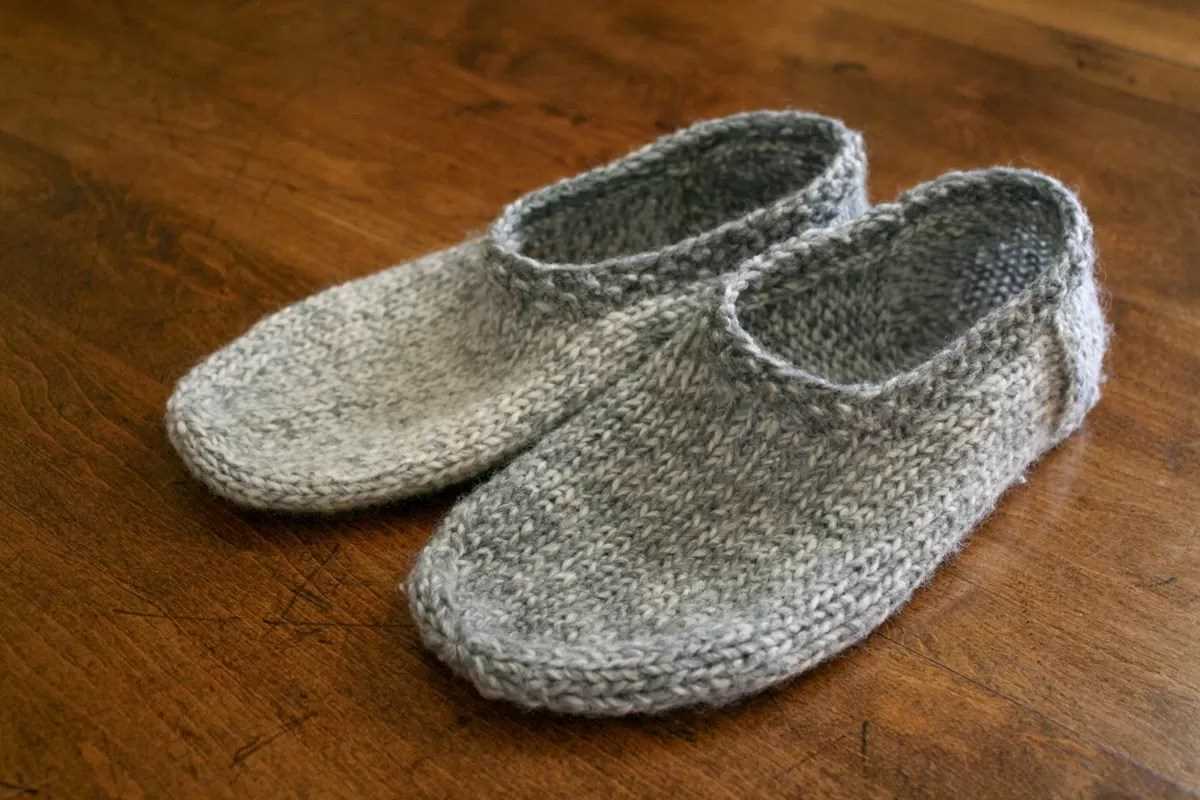
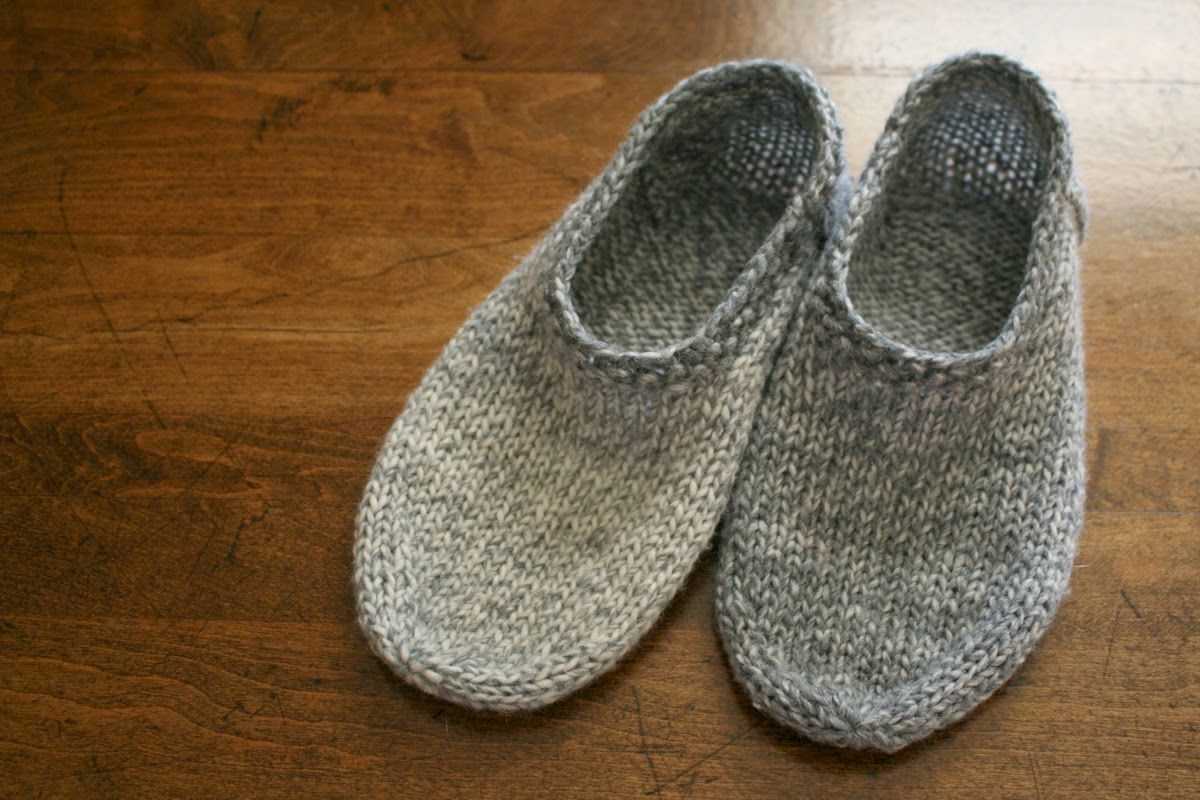
Moccasins:
Moccasin-style slippers are inspired by traditional Native American footwear and have a distinctive look. These slipper patterns typically have a soft sole and are often knit using soft, flexible yarns such as cotton or acrylic. The construction of moccasin slippers involves knitting the upper part of the slipper, which covers the foot, and then attaching a separate sole using a sewing or crochet technique. This style of slipper offers a comfortable and relaxed fit, perfect for lounging around the house.
Slides:
Slide-style slippers, also known as open-toe or sandal-style slippers, are a popular choice for those who prefer a less enclosed feel. These slipper patterns are characterized by their open-toe design, allowing the toes to be exposed. Slides are typically knit using lightweight yarn and can feature various stitch patterns or textures. They are a great option for warmer climates or for those who prefer a more breathable slipper option. The open-toe design also makes them easy to slip on and off.
Whether you prefer the full coverage of bootie-style slippers, the relaxed fit of moccasin-style slippers, or the breezy feel of slide-style slippers, there is a slipper knit pattern style to suit your preferences. Knitting your own slippers allows you to customize the design, color, and yarn choice to create a truly unique and personalized accessory. So grab your knitting needles and start exploring different slipper knit pattern styles to keep your feet cozy and stylish all year long.
Combining Slipper Knit Patterns with Other Techniques, Such as Cables or Lace
Slipper knitting patterns are a popular choice for crafting cozy and comfortable footwear. However, if you’re looking to take your slipper knitting to the next level, you can combine these patterns with other techniques, such as cables or lace, to create unique and beautiful designs.
One way to incorporate cables into your slipper knit pattern is by adding them to the cuff or the body of the slipper. Cables are created by crossing stitches over each other, resulting in a raised, textured pattern. By adding cables to your slipper design, you can create an interesting visual element that adds depth and complexity to the finished product.
If you prefer a more delicate and feminine look, you can incorporate lace into your slipper knit pattern. Lace patterns are created by strategically increasing and decreasing stitches to create an open, lacy fabric. By adding lace to your slipper design, you can create a dainty and intricate look that is both elegant and cozy.
Another option for combining slipper knit patterns with other techniques is to use colorwork. Colorwork involves knitting with multiple colors to create patterns and designs. By incorporating colorwork into your slipper design, you can create striking patterns and add visual interest to your finished slippers.
Whether you choose to add cables, lace, or colorwork to your slipper knit pattern, combining different techniques can elevate your knitting projects and allow you to create one-of-a-kind designs. Don’t be afraid to experiment and try new things – the possibilities are endless when it comes to combining slipper knit patterns with other techniques!
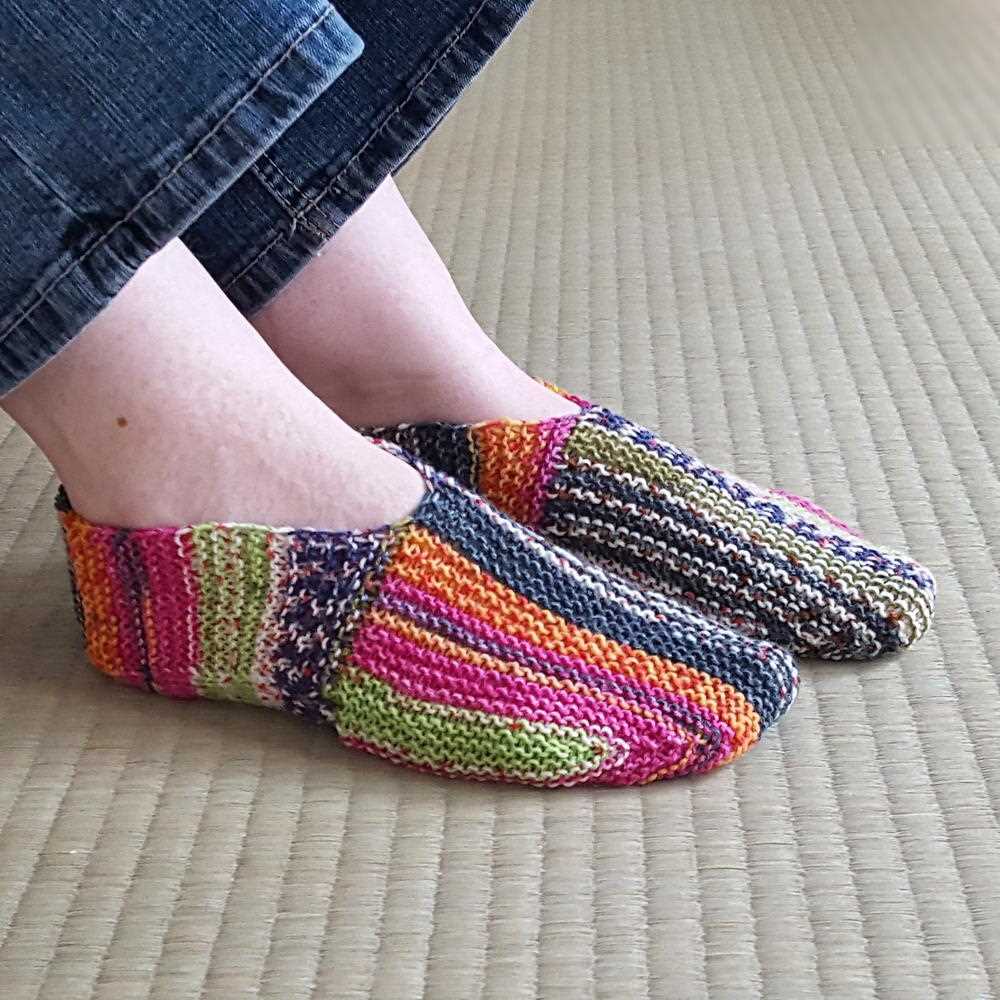
Customizing Your Slipper Knits with Colorwork and Stripes
If you’re tired of plain, solid-colored slippers, why not add some colorwork or stripes to your next knitting project? Customizing your slipper knits with colorwork and stripes not only adds visual interest but also allows you to show off your creativity and skill. Whether you’re a beginner or an advanced knitter, incorporating these techniques into your slipper designs is a great way to elevate your knitting game.
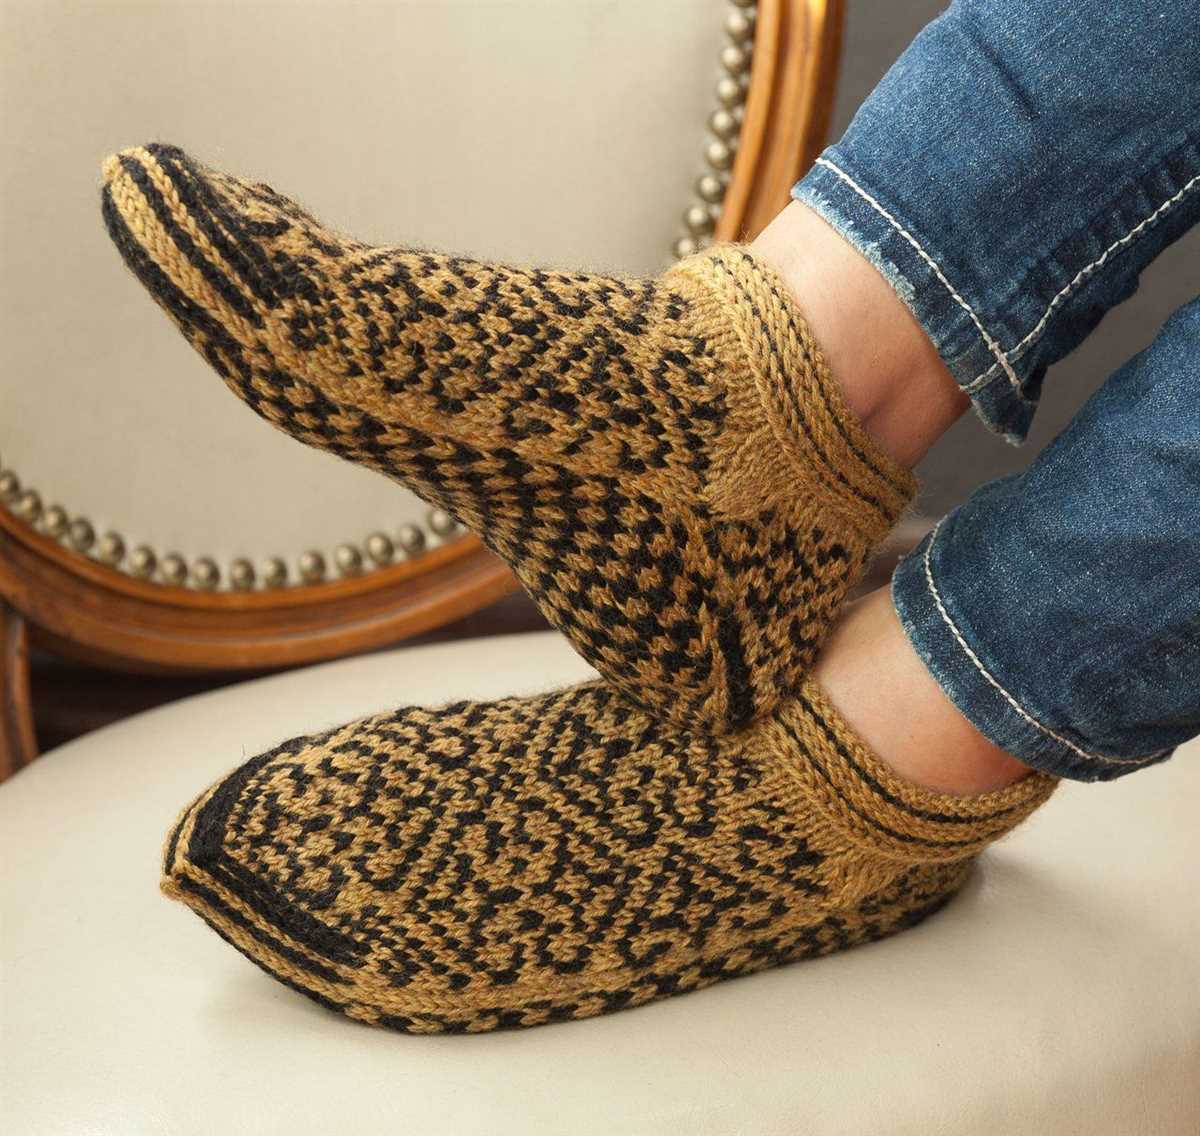
Colorwork: One way to add color to your slipper knits is through colorwork, which involves working with multiple yarn colors in a single row or round. There are several colorwork techniques you can try, such as fair isle, intarsia, or slip stitch patterns. Experiment with different color combinations to create beautiful motifs and patterns on your slippers. Remember to choose yarns that have good contrast to ensure that the colors pop.
Stripes: Another way to customize your slipper knits is by incorporating stripes. Stripes can be as simple as alternating between two colors or as complex as using multiple colors and varying stripe widths. You can choose to have horizontal or vertical stripes, depending on your preference. Stripes can add a playful or sophisticated touch to your slippers, depending on the color combinations and design choices you make.
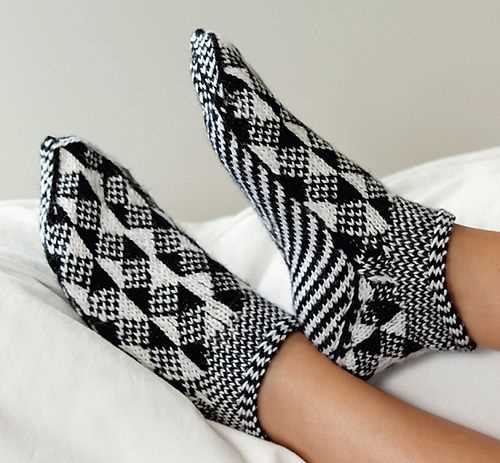
Combining Colorwork and Stripes: For a truly unique look, consider combining colorwork and stripes in your slipper knits. This allows you to showcase your creativity by creating intricate patterns and motifs with the added dimension of stripes. You can experiment with different techniques, such as incorporating stripes within colorwork sections or alternating colorwork and striped sections. The possibilities are endless, and you can truly make your slipper knits one-of-a-kind.
Customizing your slipper knits with colorwork and stripes is a fun and creative way to take your knitting to the next level. Whether you prefer bold and vibrant colors or subtle, tonal hues, there is a colorwork or stripe pattern that will suit your style. So go ahead and experiment with different techniques and color combinations to create beautiful, personalized slipper designs that you’ll be proud to wear or gift to others.
How to Care for and Wash Your Slipper Knits
Slipper knits are not just cozy and comfortable, they also require proper care to ensure their longevity and to keep them looking their best. Here are some tips on how to care for and wash your slipper knits:
1. Read the care instructions
Before you begin washing your slipper knits, it’s important to read the care instructions that come with the product. These instructions will provide specific guidelines on how to best care for your slipper knits, including the recommended washing temperature, drying method, and any other important details.
2. Hand wash or machine wash on gentle cycle
Most slipper knits can be hand washed or machine washed on a gentle cycle. However, to prevent any damage or stretching, it’s recommended to turn the slipper knits inside out before washing. This will help to protect the outer surface from any abrasion or snags that may occur during the washing process.
3. Use a mild detergent
When it comes to washing slipper knits, it’s best to use a mild detergent that is specifically designed for delicate fabrics. Harsh detergents can cause the fibers to become damaged or lose their softness. Follow the instructions on the detergent packaging to ensure you’re using the appropriate amount.
4. Avoid using fabric softener
While fabric softener can make other fabrics feel softer, it’s not recommended for slipper knits. The chemicals in fabric softener can leave a residue on the fibers, which can reduce their breathability and make them less effective at providing warmth and comfort.
5. Air dry or use a low-heat setting in the dryer
To prevent any shrinking or damage, it’s best to air dry slipper knits. Lay them flat on a clean towel or drying rack and allow them to dry naturally. If you’re in a hurry, you can also use a low-heat setting in the dryer, but be sure to remove them as soon as they’re dry to prevent any over-drying or shrinkage.
6. Store properly
When you’re not wearing your slipper knits, it’s important to store them properly to maintain their shape and quality. Avoid folding or crushing them, as this can cause creases and distortions. Instead, store them in a clean, dry place where they can lay flat or be gently rolled to maintain their shape.
By following these care and washing tips, you can ensure that your slipper knits will stay cozy, comfortable, and looking great for years to come.
Showcasing Your Finished Slipper Knit Projects: Sharing and Gifting Ideas
Now that you’ve completed your slipper knit projects, it’s time to showcase your hard work and creativity. Whether you want to proudly display your slippers in your own home or share them with others as thoughtful gifts, there are many ways to showcase your finished projects.
One simple way to showcase your slippers is to find a designated spot in your home where they can be prominently displayed. Consider placing them on a shelf or in a decorative basket near the entryway, so they can be easily admired by guests. You can also use them as cozy accents on a living room or bedroom chair, adding a touch of warmth and personal style to your home decor.
If you’re feeling generous and would like to share your slipper knits with others, consider giving them as gifts. Hand-knit slippers are not only practical and comfortable, but they also show that you’ve put time and effort into creating something special. You can give them to family members, friends, or even charity organizations. Consider making a few pairs in different sizes and colors, so you have a variety to choose from when it comes to gifting. Wrap them in pretty packaging or tie them with a ribbon to make them even more special.
Another way to showcase your slipper knit projects is to share them on social media. Take photos of your finished slippers and post them on platforms like Instagram or Pinterest. Use relevant hashtags and tag knitting or crafting communities to connect with others who share your passion. This can also be a great way to inspire and motivate fellow knitters and receive feedback on your work.
Lastly, consider participating in knitting or craft fairs where you can showcase and sell your slipper knits. This not only gives you an opportunity to share your work with a larger audience but also allows you to connect with other crafters and potentially turn your hobby into a small business. Display your slippers on a table or hang them on a decorative display rack to catch the attention of potential buyers. Don’t forget to have business cards or labels with your contact information in case someone wants to order more.
In conclusion, showcasing your slipper knit projects can be a rewarding experience. Whether you choose to display them in your own home, share them as gifts, or showcase them online or at craft fairs, there are plenty of ways to show off your hard work and creativity. Enjoy the process and be proud of the cozy and stylish slippers you’ve created!
Q&A:
What is a slipper knit pattern?
A slipper knit pattern is a set of instructions or a design for creating knitted slippers. It includes details on the required yarn, needle sizes, and stitches needed to create the slippers.
How do you knit slippers?
To knit slippers, you will need to follow a slipper knit pattern. First, choose a pattern that you like and gather the necessary materials. Then, follow the pattern’s instructions to cast on the required number of stitches and knit the slipper’s body and any necessary shaping. Finally, finish off the slipper by binding off and seaming any necessary edges.
Are slipper knit patterns difficult to follow?
The difficulty level of slipper knit patterns can vary depending on the individual’s knitting experience and the complexity of the pattern. Some slipper knit patterns may be beginner-friendly and easy to follow, while others may require more advanced knitting techniques and skills. It’s always best to choose a pattern that matches your skill level and to take your time when following the instructions.
Can slipper knit patterns be customized?
Yes, slipper knit patterns can be customized to fit your personal preferences. You can modify the size, color, or even add different stitch patterns or embellishments to make the slippers unique. However, it’s important to note that making modifications to a pattern may require adjustments to the stitch count or instructions, so it’s best to have a good understanding of knitting techniques before attempting any modifications.