
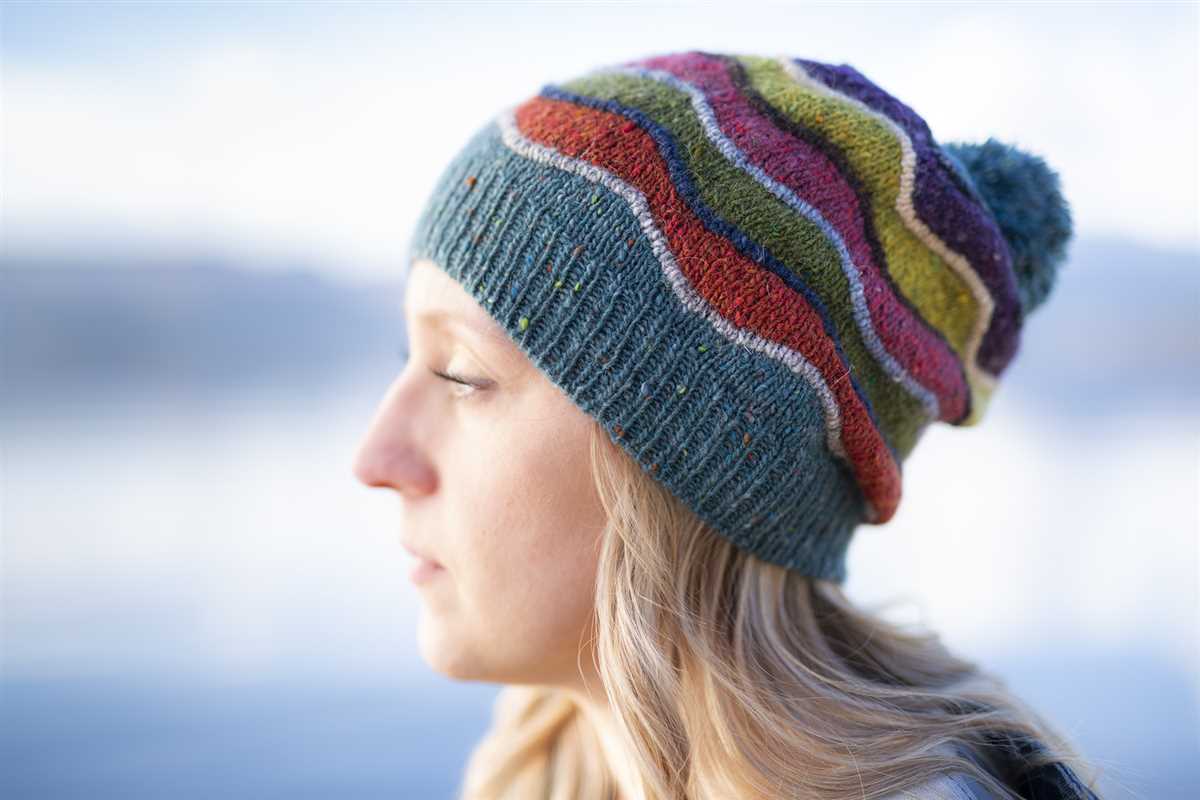
Beanies are one of the most popular accessories to knit, and with good reason. They are not only a practical way to keep your head warm in cool weather, but they also add a touch of style to any outfit. One of the great things about knitting beanies is that they are a relatively quick and easy project to complete, making them perfect for beginners and experienced knitters alike.
There are countless patterns available for knitting beanies, ranging from simple and classic designs to more intricate and unique styles. Whether you prefer a basic ribbed beanie, a cozy cable knit design, or a trendy slouchy beanie, there is a pattern out there to suit your taste.
When choosing a beanie pattern, consider the level of difficulty, the desired fit and style, and the type of yarn you want to use. Some patterns may require more advanced knitting techniques, while others are beginner-friendly. Additionally, the gauge of the pattern will dictate the size of the finished beanie, so make sure to check your gauge before starting.
Beanie Pattern Knitting: The Ultimate Guide to Creating Stylish Hats
Knitting a beanie is a rewarding and creative hobby that allows you to express your personal style while staying warm and cozy in the colder months. Whether you are a beginner or an experienced knitter, this ultimate guide will provide you with all the information you need to create stylish and unique hats.
Choosing the Right Yarn and Needles
Before starting your beanie project, it’s important to choose the right yarn and needles. The type and weight of yarn you select will determine the overall look and feel of your hat. If you want a lightweight and breathable beanie, opt for a fingering weight yarn. For a chunkier and warmer hat, choose a bulky weight yarn. Additionally, consider the color and texture of the yarn to match your personal style.
The size and type of needles you use will also impact the final result of your beanie. Circular needles are commonly used for knitting hats as they allow you to easily knit in the round. Make sure to choose a needle size that matches your yarn weight to achieve the desired gauge and size.
Understanding Beanie Patterns
Beanie patterns provide a step-by-step guide on how to create different styles and designs. It’s important to carefully read and understand the pattern before starting your project. Beanie patterns typically include information about the required yarn, needles, gauge, and stitch patterns. They also provide instructions on how to cast on, knit, purl, decrease, and finish your beanie.
There are countless beanie patterns available online and in knitting books, catering to all skill levels and design preferences. Whether you prefer a simple ribbed beanie or a more intricate fair isle pattern, there is a pattern out there for you. Don’t be afraid to experiment and customize your beanie to make it truly unique.
Tips and Tricks for Successful Beanie Knitting
Knitting a beanie requires patience and attention to detail. Here are some tips and tricks to help you achieve successful results:
- Always swatch and measure your gauge before starting your beanie to ensure the correct sizing.
- Use stitch markers to keep track of your rounds and decreases.
- Try different stitch patterns and techniques to add interest to your beanie.
- Consider adding pom-poms, buttons, or other embellishments to personalize your hat.
- Don’t be afraid to make mistakes! Knitting is a versatile craft, and even mistakes can turn into unique design elements.
By following this ultimate guide and incorporating your own creativity, you’ll be able to knit stylish and cozy beanies that are perfect for any occasion. Whether you’re knitting for yourself or as a thoughtful gift, the process of creating a beanie is as rewarding as the finished product.
Choose Your Yarn and Needles
When it comes to knitting a beanie, one of the most important decisions you’ll need to make is choosing the right yarn and needles. The yarn you choose will determine the warmth, texture, and overall look of your beanie, while the needles will affect the size and tension of your stitches.
Yarn: There are a wide variety of yarn options available for knitting beanies. Wool yarn is a popular choice, as it is warm and durable. It also has a natural elasticity, making it ideal for hats that need to stretch to fit. Acrylic yarn is another common choice, as it is affordable and easy to care for. It is also available in a wide range of colors and textures, allowing you to get creative with your beanie. Other yarn options to consider include alpaca, silk, and cotton, each with its own unique characteristics.
Needles: The size of needles you choose will depend on the yarn weight and the desired gauge for your beanie. Thicker yarns, such as bulky or super bulky, will require larger needles to create looser, more open stitches. For finer yarns, such as fingering or sport weight, smaller needles will give you tighter, more compact stitches. Additionally, the length and type of needles can also play a role in your knitting experience. Circular needles are popular for beanies, as they allow you to easily knit in the round without the need for seams.
In summary, selecting the right yarn and needles for your beanie project is crucial. Consider the warmth, texture, and look you want for your beanie when choosing yarn, and the yarn weight and desired gauge when selecting needles. Remember to also take into account personal preferences and knitting experience, as these can also influence your choices. With the right materials, you’ll be well on your way to creating a cozy and stylish beanie for yourself or a loved one.
Casting On: Getting Started with Your Beanie
Before you can start knitting your beanie, you’ll need to cast on your stitches. Casting on is the process of creating the foundation row of stitches that you’ll work with throughout your project. There are several methods you can use to cast on, so choose the one that you find most comfortable and that will give you the desired look for your beanie.
One popular method for casting on is the long-tail cast on. To do this, you’ll need to estimate the length of yarn you’ll need and leave a long tail. Then, make a slipknot and place it on your needle. Holding the needle with the slipknot in your right hand and the long tail in your left hand, wrap the long tail around your thumb and hold it with your index finger. Use the needle to go under the yarn on your thumb, then over the yarn on your index finger, and pull the loop through. Repeat this process until you have the desired number of stitches on your needle.
Another method you can use is the knitted cast on. To do this, make a slipknot and place it on your needle. Then, hold the needle with the slipknot in your right hand. Insert the tip of the right needle into the slipknot from left to right, going underneath the left-hand needle. Wrap the yarn around the right-hand needle counterclockwise, then use the right-hand needle to pull the loop through the slipknot. Repeat this process until you have the desired number of stitches on your needle.
Once you have cast on your stitches, you’re ready to start knitting your beanie. Follow the pattern instructions and continue knitting each row until your beanie reaches the desired length. Don’t forget to check your gauge and adjust your needle size if necessary, to ensure that your beanie turns out the right size.
To add some variety to your beanie, you can experiment with different stitch patterns, such as ribbing or cables. These techniques can add texture and visual interest to your beanie. Remember to always take your time and practice your knitting skills, as you gain more experience, you’ll be able to create more intricate and unique beanies.
The Ribbing: Creating a Stretchy Band
One of the most important parts of knitting a beanie is creating a ribbed band at the bottom. The ribbing not only adds a nice texture to the hat, but it also allows for a stretchy and snug fit. Knitting a ribbed band is relatively simple, and it can be done using basic knit and purl stitches.
To create the ribbing, you will need to cast on an even number of stitches. This will ensure that your ribbing has a nice, balanced look. Once you have cast on your stitches, you will begin alternating between knit and purl stitches. The most common ribbing pattern is the 1×1 rib, which means you will knit one stitch, then purl one stitch, and repeat this pattern across the row.
In addition to the 1×1 rib, there are other popular ribbing patterns you can use, such as the 2×2 rib and the 3×1 rib. The 2×2 rib involves knitting two stitches, then purling two stitches, and repeating this pattern across the row. The 3×1 rib, on the other hand, involves knitting three stitches, then purling one stitch, and repeating this pattern across the row.
When knitting the ribbing, it is important to keep your tension consistent. If your tension is too tight, the ribbing will be stiff and inflexible. If your tension is too loose, the ribbing will be loose and floppy. To achieve the right tension, make sure your stitches are not too tight or too loose on the needles. You may need to adjust your needle size to achieve the desired tension.
The ribbing is an essential part of creating a beanie, as it not only adds a professional finish to your hat but also ensures a comfortable and secure fit. By following a simple ribbing pattern and keeping your tension consistent, you can create a stretchy band that perfectly hugs the wearer’s head.
Transitioning to the Body: Knitting in the Round
Once you have finished working the ribbing or brim of your beanie, it’s time to transition to knitting in the round for the body of the hat. Knitting in the round eliminates the need for seams and creates a seamless and professional-looking finish.
To start knitting in the round, you will need to switch from straight knitting needles to either a set of double-pointed needles (DPNs) or a circular needle, depending on your preference. Double-pointed needles are shorter and have points on both ends, while a circular needle is longer and has flexible cables connecting the needle tips.
Using Double-Pointed Needles (DPNs)
If you choose to use DPNs, divide your stitches evenly onto three or four needles, depending on the number of stitches you have. Make sure to distribute the stitches evenly so there are no gaps or tight spots. Slip the first stitch of each needle onto the next needle to avoid creating a gap. Once all the stitches are divided, hold the needles in a triangle shape and start knitting with the fourth needle.
Using a Circular Needle
If you prefer to use a circular needle, simply transfer all of your stitches onto the circular needle. The circular needle will hold all of your stitches in a continuous loop, allowing you to knit in a seamless round. Make sure the stitches are spread evenly around the needle, and be careful not to twist the stitches before joining them in the round. To join the stitches, knit the first stitch of the round, being careful not to twist the stitches.
Once you have successfully transitioned to knitting in the round, you can continue working the body of your beanie using your chosen stitch pattern. The round knitting technique will allow you to work seamlessly and without interruption, creating a polished and professional-looking finished beanie.
Increasing Stitches for a Perfect Fit
When knitting a beanie, one of the most crucial aspects to consider is achieving the perfect fit. This can be achieved through careful planning and execution of increasing stitches. By increasing stitches in specific areas of the beanie, you can create a shape that molds to the head and provides a comfortable and snug fit.
Start with a well-fitting ribbing: The ribbing of a beanie, typically located at the brim, provides structure and elasticity. It is essential to ensure that the ribbing fits snugly around the head, as this will set the foundation for the rest of the beanie. By using a smaller needle size for the ribbing, you can achieve a tighter gauge and therefore a more secure fit.
Incorporate gradual increases: As you move away from the ribbing and into the main body of the beanie, it is crucial to incorporate gradual increases to accommodate the shape of the head. There are several techniques for increasing stitches, such as knit front and back (KFB), make one (M1), or yarn overs (YO). Choose the method that works best for your beanie pattern and ensure that the increases are evenly spaced to maintain symmetry.
Consider stitch patterns: If you are working with a stitch pattern that includes cables, lace, or other intricate designs, it is essential to plan your increases accordingly. Take into account how the stitch pattern will be affected by the increases and make adjustments as necessary to maintain the integrity of the pattern. This will ensure that your beanie not only fits well but also showcases the chosen stitch pattern beautifully.
Test for fit along the way: It is always a good idea to try on the beanie as you progress to ensure that it is fitting correctly. This allows you to make any necessary adjustments and avoid knitting too many or too few increases. Remember, the goal is to achieve a beanie that fits snugly without being too tight or loose.
Document and adapt: Once you have achieved the perfect fit for your beanie, take note of the number of increases used and the overall pattern. This will serve as a valuable reference for future projects and allow you to adapt the pattern for different sizes or yarn weights.
In summary, achieving a perfect fit for your beanie involves careful consideration of the ribbing, gradual increases, stitch patterns, regular fitting tests, and documentation. With these techniques in mind, you can create beanies that are not only stylish but also comfortable to wear.
Adding Patterns and Textures
When knitting a beanie, one way to add visual interest is by incorporating different patterns and textures into the design. These details can elevate a simple beanie into a unique and stylish accessory.
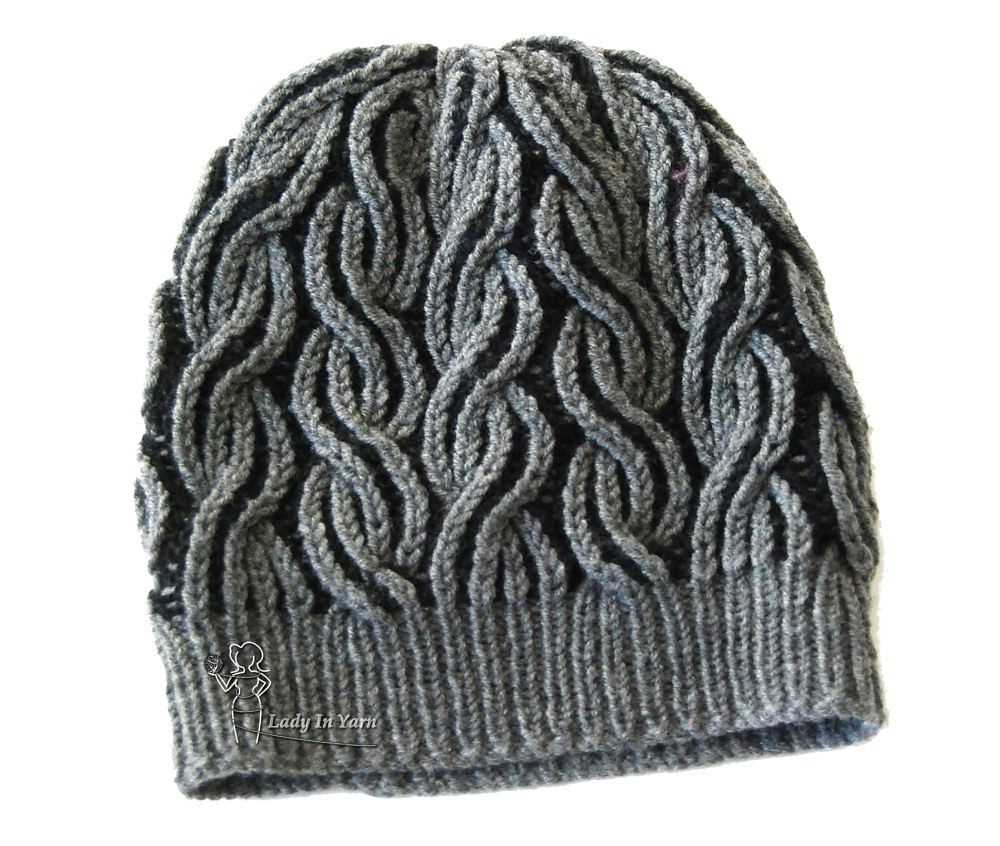
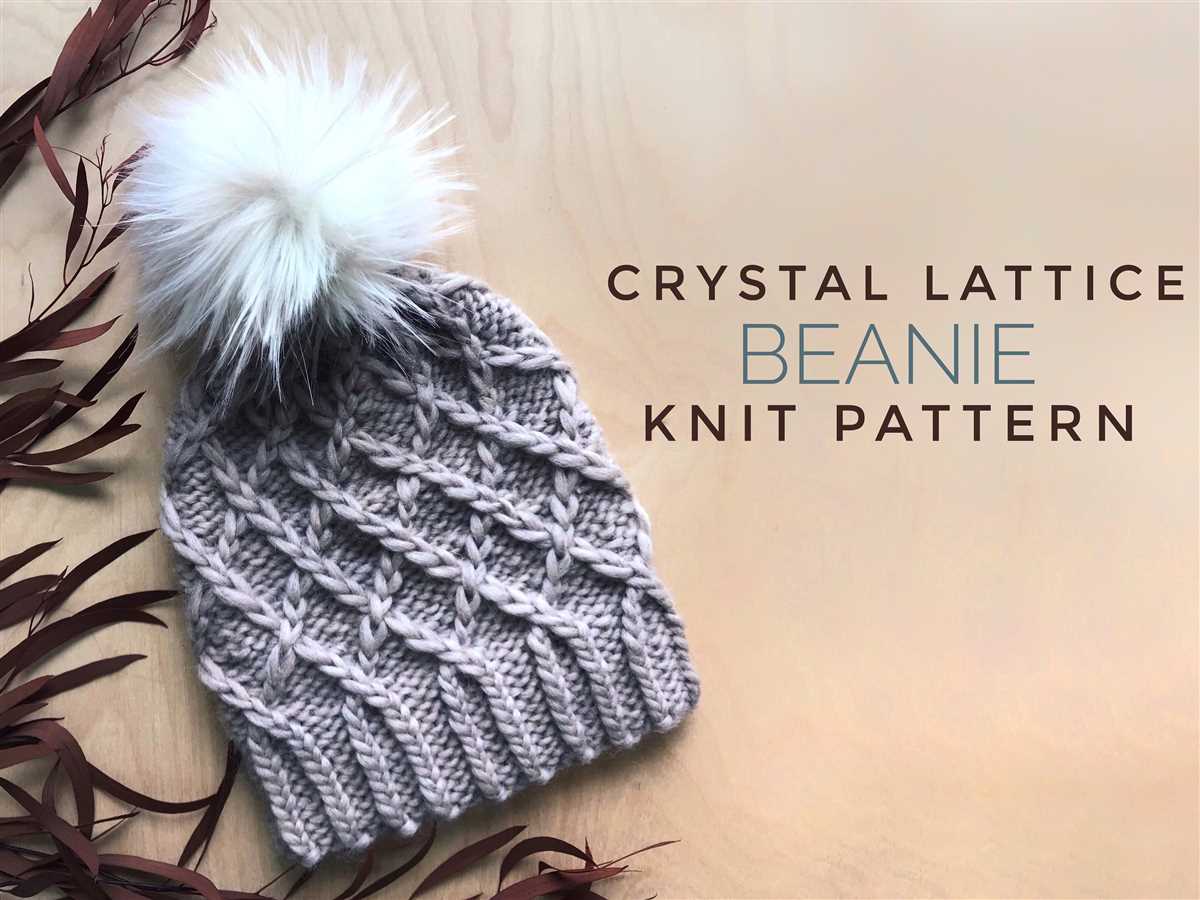
One popular pattern that can be added to a beanie is the cable stitch. Cable knitting creates beautiful interwoven designs that add depth and dimension to the fabric. By crossing stitches over each other, intricate braids and twists can be formed. This technique can create a cozy and timeless look, perfect for winter beanies.
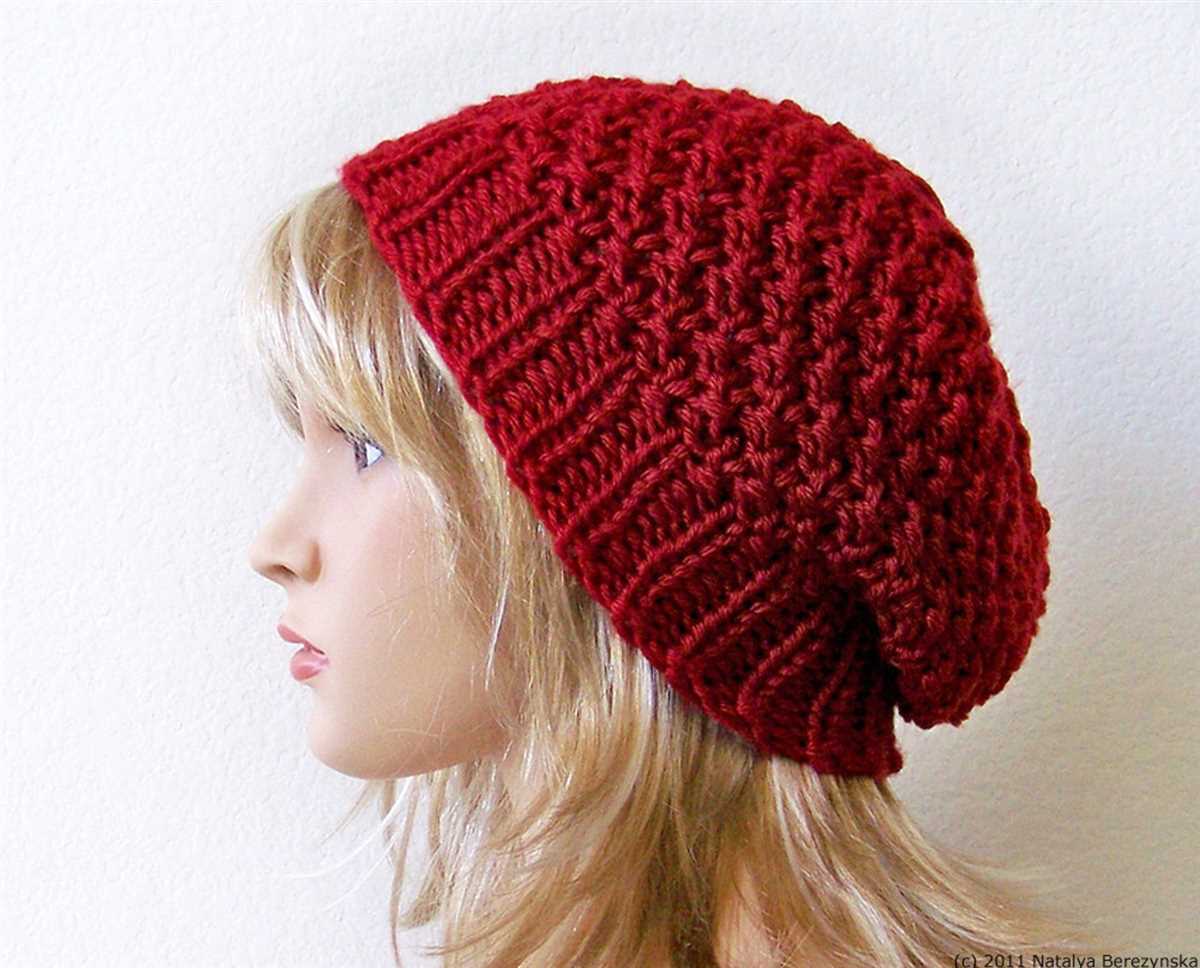
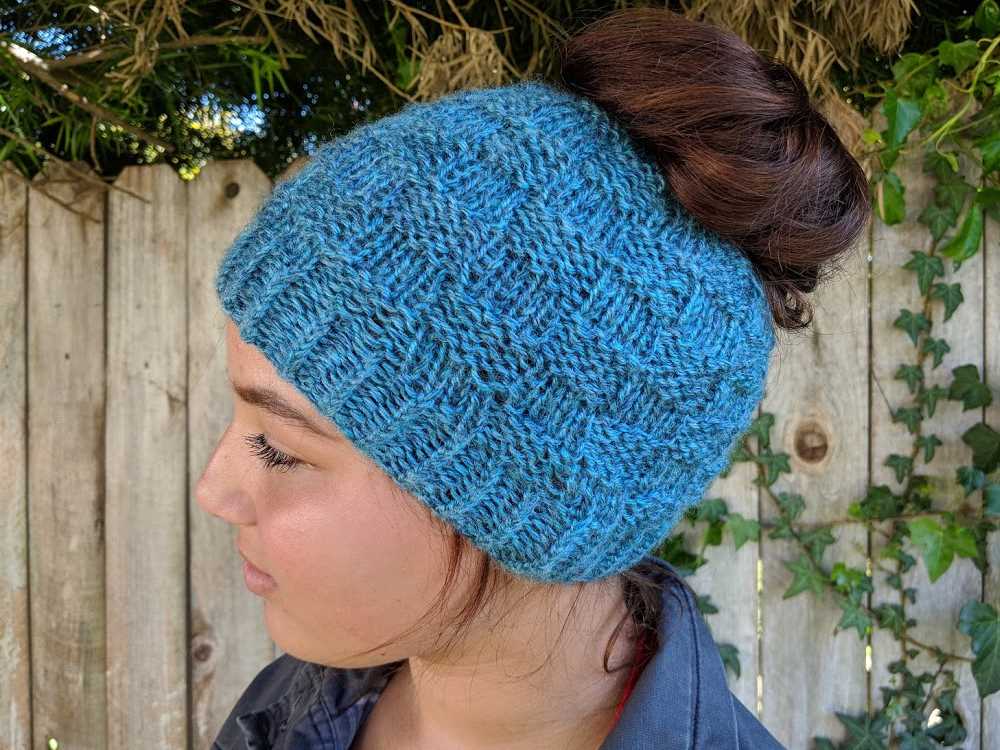
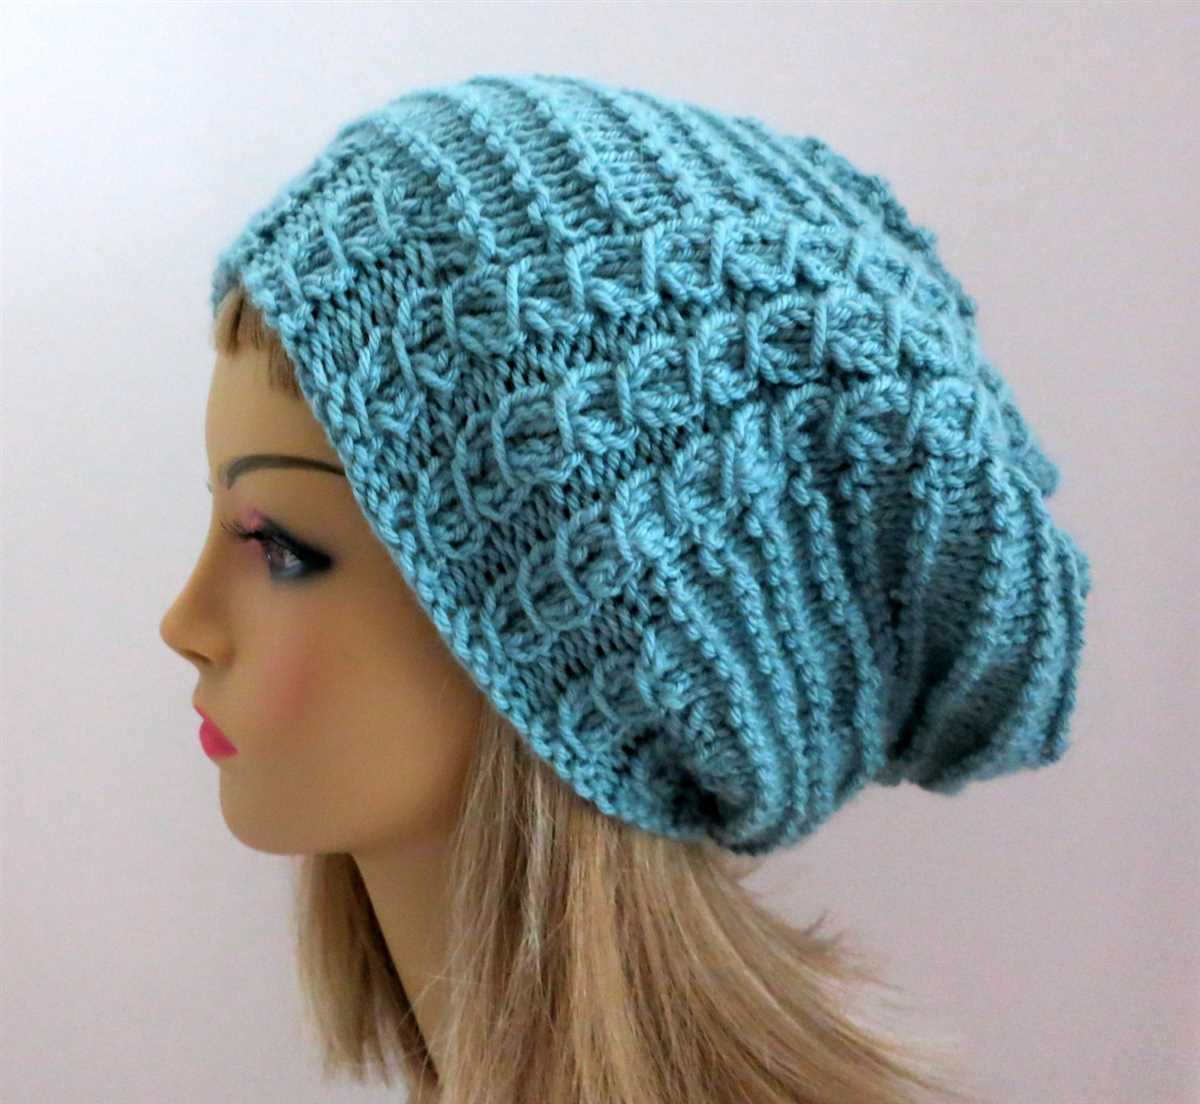
Another way to add texture to a beanie is by using different kinds of stitches. Ribbing, for example, is a common stitch pattern that adds elasticity to the fabric, making it fit snugly around the head. Seed stitch, on the other hand, has a bumpy texture and creates a dotted pattern. By combining different stitch patterns, you can create a beanie that is visually intriguing and unique.
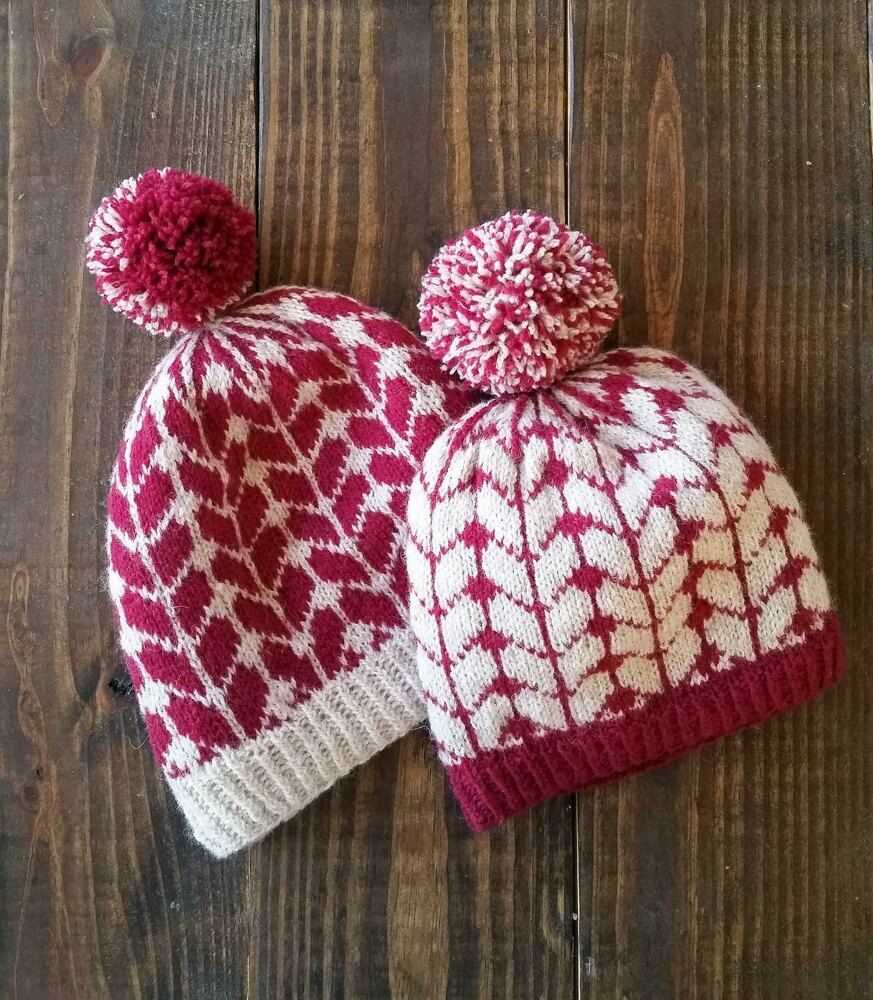
Colorwork is also an option when it comes to adding patterns to a beanie. Fair Isle knitting is a popular technique that involves stranding two or more colors of yarn across the row. This creates intricate patterns and motifs. By using contrasting or complementary colors, you can create visually striking designs that make a statement.
Overall, adding patterns and textures to a beanie can take it from basic to extraordinary. Whether using cable stitches, different stitch patterns, or colorwork techniques, these design elements can elevate the style and make the beanie a true standout accessory.
Shaping the Crown: Decreasing Stitches

In order to create the rounded shape of the crown of the beanie, it is necessary to decrease stitches gradually. This is typically done by knitting or purling two stitches together at regular intervals.
Common Decreasing Techniques
There are several common decreasing techniques that can be used when shaping the crown of a beanie:
- K2tog (Knit Two Together) – With the right needle, insert it into the next two stitches on the left needle as if to knit, and then knit them together. This decreases two stitches and creates a right-leaning decrease.
- P2tog (Purl Two Together) – With the right needle, insert it into the next two stitches on the left needle as if to purl, and then purl them together. This decreases two stitches and creates a right-leaning decrease on the purl side.
- SSK (Slip, Slip, Knit) – Slip the next two stitches knitwise, one at a time, onto the right needle. Then insert the left needle into the fronts of these two slipped stitches and knit them together. This creates a left-leaning decrease.
- SSP (Slip, Slip, Purl) – Slip the next two stitches knitwise, one at a time, onto the right needle. Then insert the left needle into the fronts of these two slipped stitches and purl them together. This creates a left-leaning decrease on the purl side.
Placement of Decreases
The placement of the decreases will depend on the desired shape of the crown. Decreases can be evenly spaced throughout the round, or they can be placed in a specific pattern to create a design element. It is important to follow the pattern instructions or use a stitch marker to keep track of the decrease placements.
Most often, decreases are made every other round, decreasing the stitch count by half each time. This helps create a smooth and gradual decrease in circumference as the crown is shaped. Once there are only a few stitches remaining, they can be cut and secured using a yarn needle.
The Final Rows: Binding Off and Weaving in Ends
As you near the end of your beanie knitting pattern, it’s time to start thinking about the final rows and finishing touches. The final rows typically involve binding off your stitches and weaving in any loose ends to ensure a polished and professional-looking finished product. These steps may seem small, but they can make a big difference in the overall appearance and durability of your beanie.
Binding Off
Binding off is the process of securing your stitches and creating a finished edge. To bind off, you will knit the first two stitches as normal, then use the left needle to pull the first stitch over the second stitch and off the right needle. Continue this process of knitting one stitch, passing the previous stitch over, until you have one stitch remaining. Cut the yarn, leaving a tail that is several inches long, and pull it through the final stitch to secure it.
It’s important to maintain an even tension while binding off to avoid a tight or loose edge. If your bind off edge is too tight, the beanie may not fit properly or be uncomfortable to wear. If it is too loose, the edge may stretch out over time. Practice binding off on a scrap piece of yarn to ensure you have the right tension before moving on to your actual beanie.
Weaving in Ends
After binding off, you will likely have several loose ends of yarn that need to be securely woven in to prevent unraveling. Thread each end onto a tapestry needle and weave it through the stitches on the wrong side of the beanie. Follow the path of the stitches, being careful not to pull too tight or distort the fabric. Weave in the ends for several inches to ensure they are secure, then trim any excess yarn.
Take the time to weave in all loose ends, even those from previous color changes or yarn joins. These ends can be distracting and may become loose over time if not properly secured. By weaving them in now, you can ensure that your beanie will look seamless and professional.
Blocking Your Beanie for a Polished Look
Blocking is an essential step in the knitting process that can greatly improve the finished look of your beanie. By using this technique, you can stretch and shape the knit fabric to achieve a more polished and professional appearance.
What is blocking?
Blocking involves wetting the beanie and then shaping it to the desired dimensions. This can be done using water or a special blocking spray. Once the beanie is damp, it is pinned down on a flat surface, such as a blocking mat or towel, and left to dry completely. This process allows the fibers to relax and settle into their final shape.
Why should you block your beanie?
Blocking not only improves the appearance of the beanie, but it also helps to even out the tension and stitches, making the beanie look more balanced and professional. Additionally, blocking can help to open up lace or textured stitches, enhancing their beauty and definition.
How to block your beanie?
To block your beanie, start by gently soaking it in lukewarm water or spraying it with a blocking spray until it is fully saturated. Once saturated, remove any excess water by squeezing or rolling it in a towel. Next, lay the beanie flat on a blocking mat or towel and use rust-proof T-pins or blocking wires to shape it to the desired dimensions. Be sure to stretch and shape the fabric evenly to avoid any distortion. Leave the beanie to dry completely, which may take a day or two, depending on the yarn and humidity level. Once dry, carefully remove the pins or wires, and your beanie is ready to wear!
- Soaking or spraying the beanie in water
- Removing excess water and squeezing dry
- Laying the beanie flat on a blocking mat or towel
- Using T-pins or blocking wires to shape the beanie
- Drying the beanie completely
- Removing the pins or wires
What to consider when blocking?
When blocking your beanie, it’s important to consider the fiber content of your yarn. Different fibers react differently. For example, wool tends to have more stretch and ability to hold its shape compared to acrylic. Additionally, be mindful of the dimensions you want your beanie to have. Measure your head circumference or use a measuring tape to determine the desired size and shape.
In conclusion, blocking your beanie can make a significant difference in the final appearance of your project. It helps to achieve a more polished look, even out stitches, and enhance the beauty of lace or textured stitches. By following the proper blocking techniques and considering the fiber content and desired dimensions, you can ensure that your beanie turns out beautifully.
Customizing Your Beanie: Embellishments and Decorations
If you want to personalize your beanie and make it truly unique, adding embellishments and decorations is a great way to do so. There are numerous options available, allowing you to create a beanie that reflects your personal style and tastes. Here are some ideas to get you started:
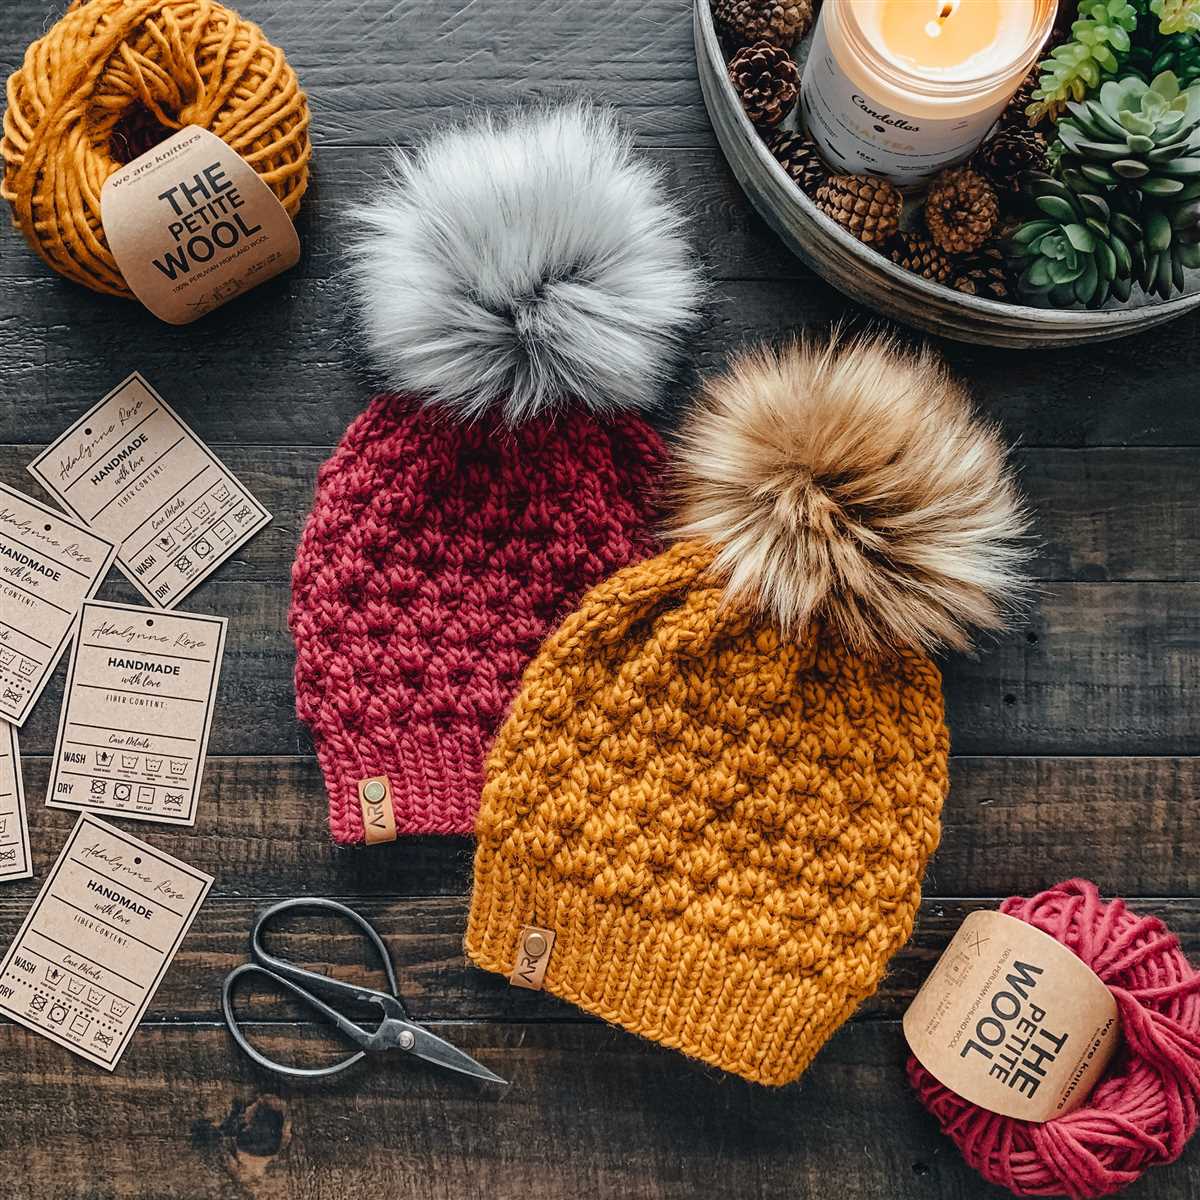
1. Pom-poms
Attach a fluffy pom-pom to the top of your beanie to add a fun and playful touch. Pom-poms can be made from yarn, faux fur, or even fabric. They come in different sizes, colors, and textures, making it easy to find one that complements your beanie.
2. Embroidery
Add intricate embroidery to your beanie to create a stunning visual effect. You can embroider your initials, a pattern, or even a small design that holds a special meaning to you. Use colorful threads or opt for metallic threads for a more eye-catching look.
3. Buttons
Sew buttons onto your beanie for a touch of elegance and charm. Buttons come in various shapes, sizes, and materials, allowing you to choose ones that match the style of your beanie. You can arrange them in a pattern or randomly place them for a more eclectic look.
4. Patches
If you have some favorite patches lying around, why not sew them onto your beanie? Patches can add personality and character to your beanie, making it stand out from the crowd. Whether you choose a patch with a logo, a cute design, or a meaningful symbol, it’s a great way to make your beanie truly one-of-a-kind.
5. Ribbons
Tie a ribbon around your beanie for a feminine and delicate touch. Ribbons come in various widths, colors, and patterns, allowing you to find one that complements your beanie perfectly. You can tie the ribbon into a bow or leave it as a simple knot for an understated look.
Remember, the options for embellishing and decorating your beanie are endless. Get creative and let your imagination run wild to create a beanie that is as unique as you are!
Beanie Styling: Different Ways to Wear Your Creation
Once you’ve finished knitting your beanie, it’s time to put it on and show it off! There are so many different ways to wear your beanie, depending on your personal style and the look you want to achieve. Here are some popular styling ideas to inspire you:
1. Classic Pull-On Style
The classic way to wear a beanie is to simply pull it down over your head, ensuring that it covers your entire forehead and fits snugly on your ears. This is a timeless and versatile look that goes well with any outfit, whether you’re dressing up or down.
2. Slouchy Cool
If you prefer a relaxed and casual vibe, try the slouchy cool style. Instead of pulling your beanie all the way down, leave some room at the top for a slouchy effect. This look adds a laid-back and effortless feel to your overall outfit.
3. Cuffed and Fitted
To create a more polished and tailored look, consider cuffing the bottom of your beanie once or twice. This adds a crisp edge and also helps to secure the beanie in place. The cuffed and fitted style works well for both men and women.
4. Pop of Color
Add a pop of color to your outfit by choosing a beanie in a vibrant hue. Whether it’s a bright red, electric blue, or neon green, a colorful beanie can instantly elevate your look and make a bold fashion statement.
5. Pattern Play
If you’re feeling adventurous, why not experiment with different patterns and textures? Opt for a beanie with a cable knit, a Fair Isle design, or a trendy chevron pattern. These intricate details will make your beanie stand out from the crowd and showcase your knitting skills.
Remember, the beauty of a beanie is that you can customize it to suit your style and personality. So, have fun experimenting with different ways to wear your creation and make it your own!