
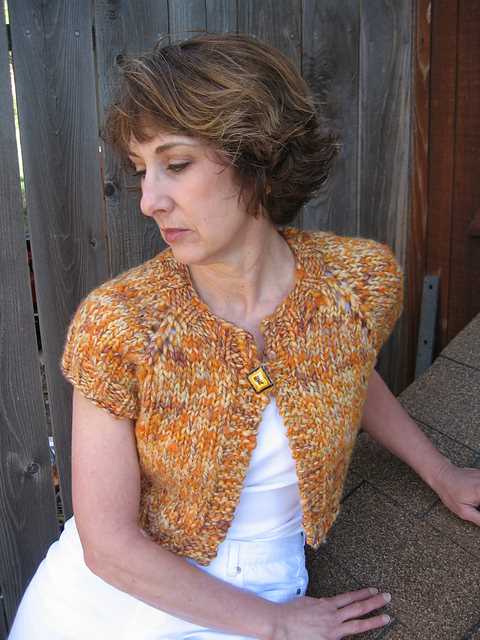
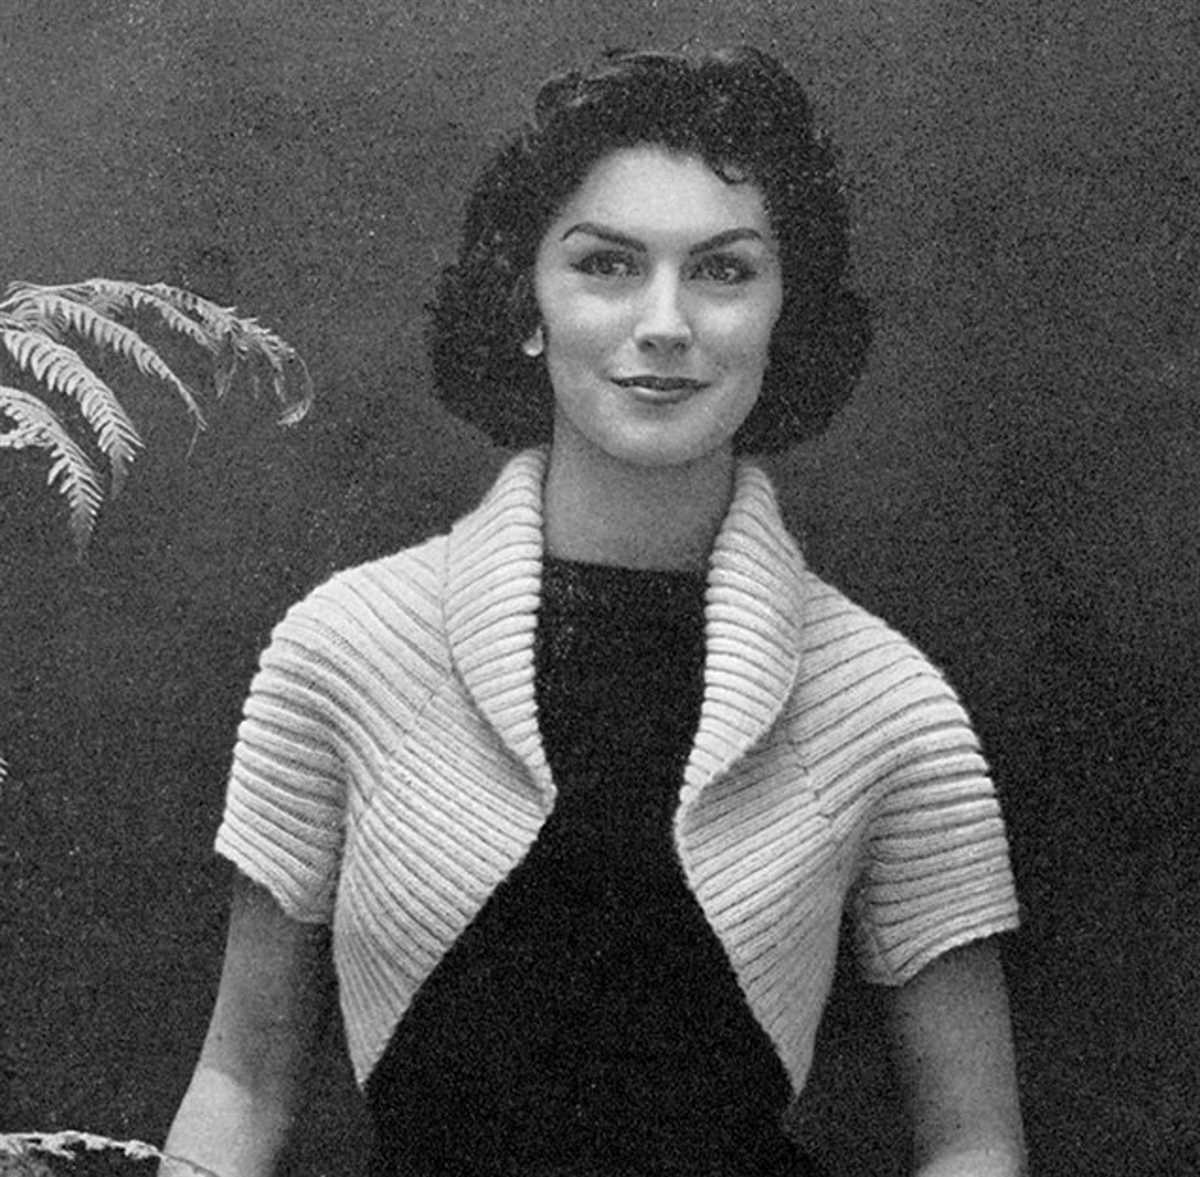
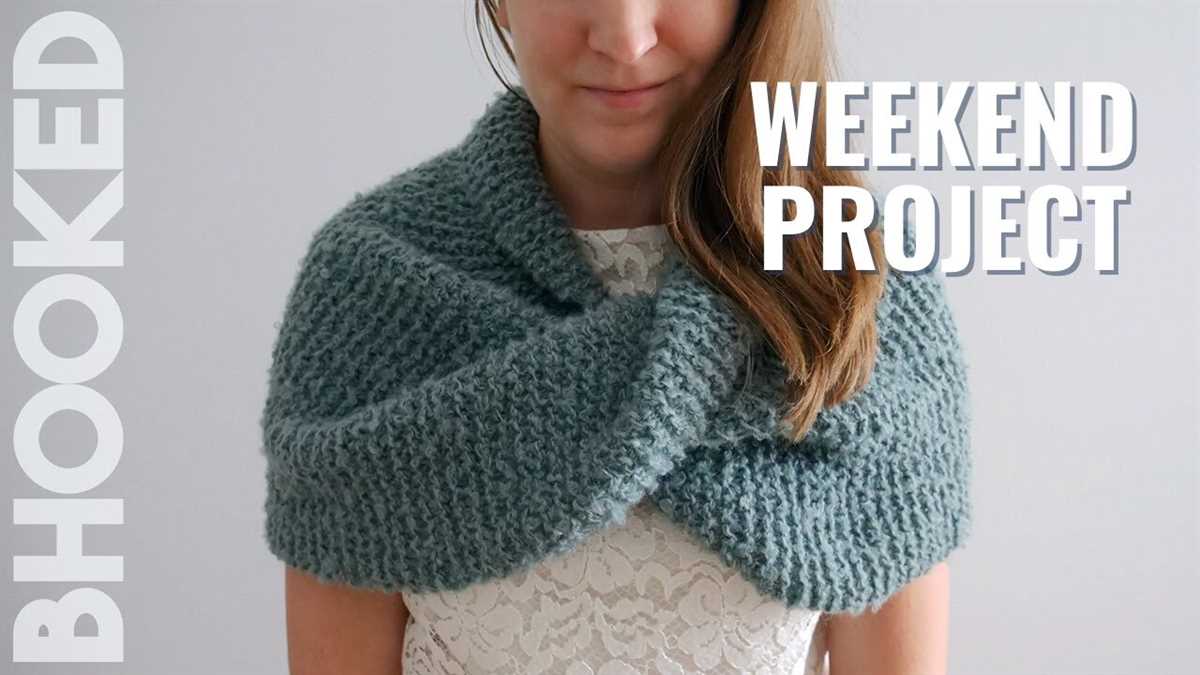
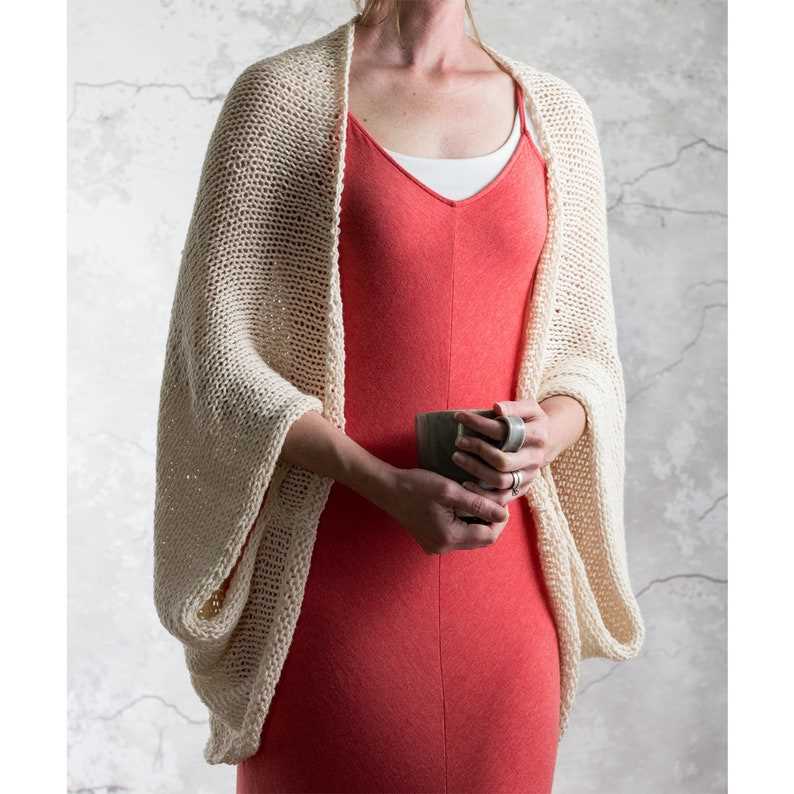
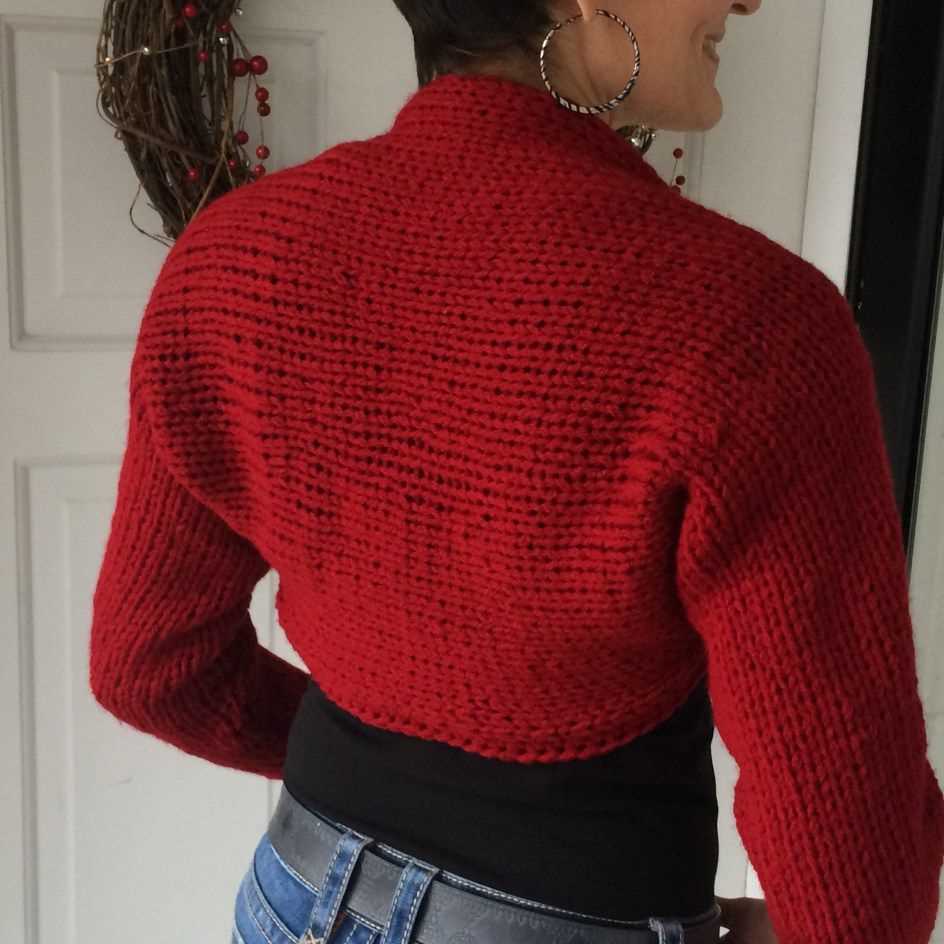
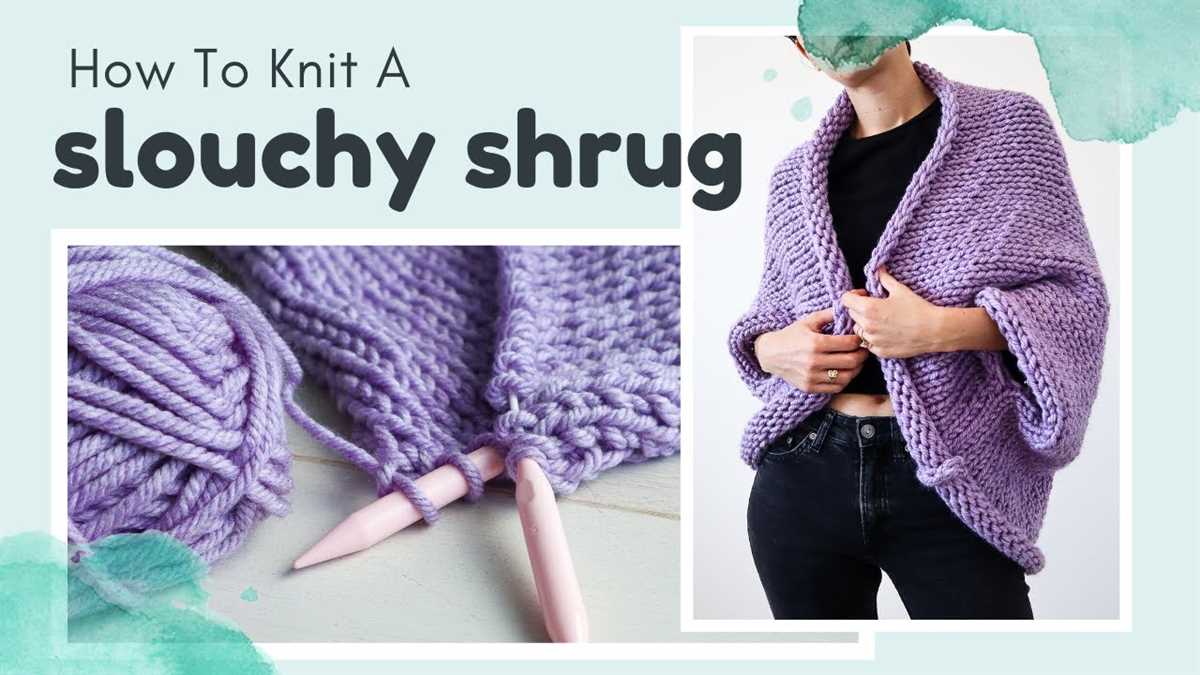
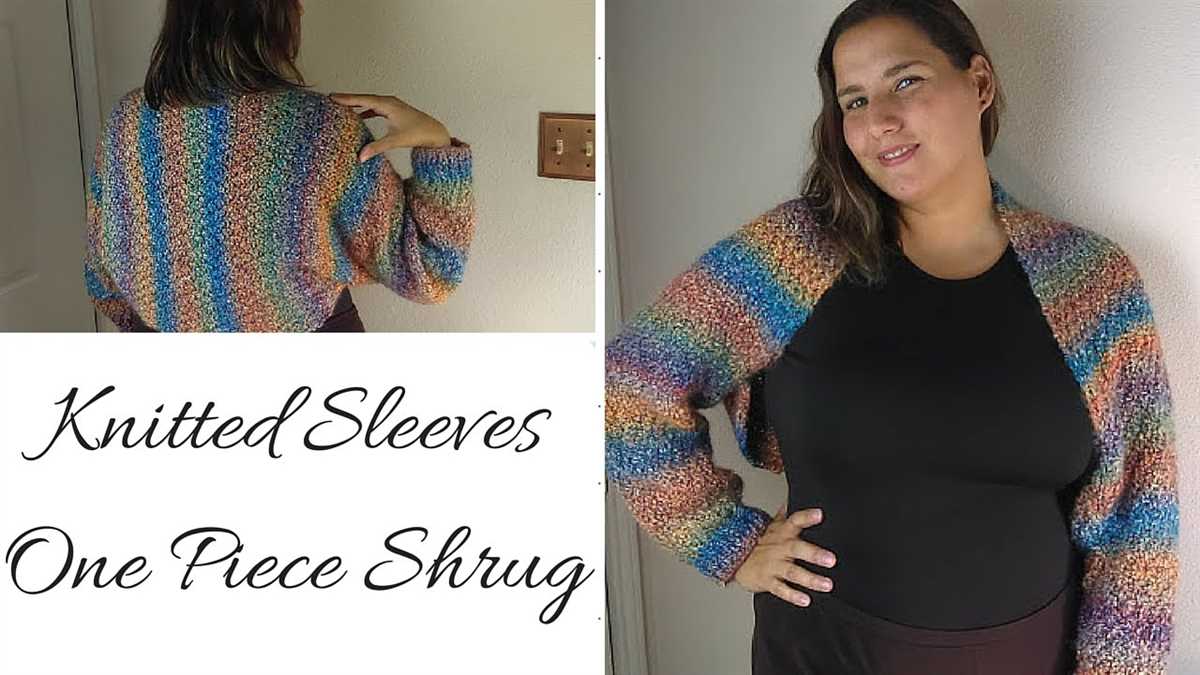
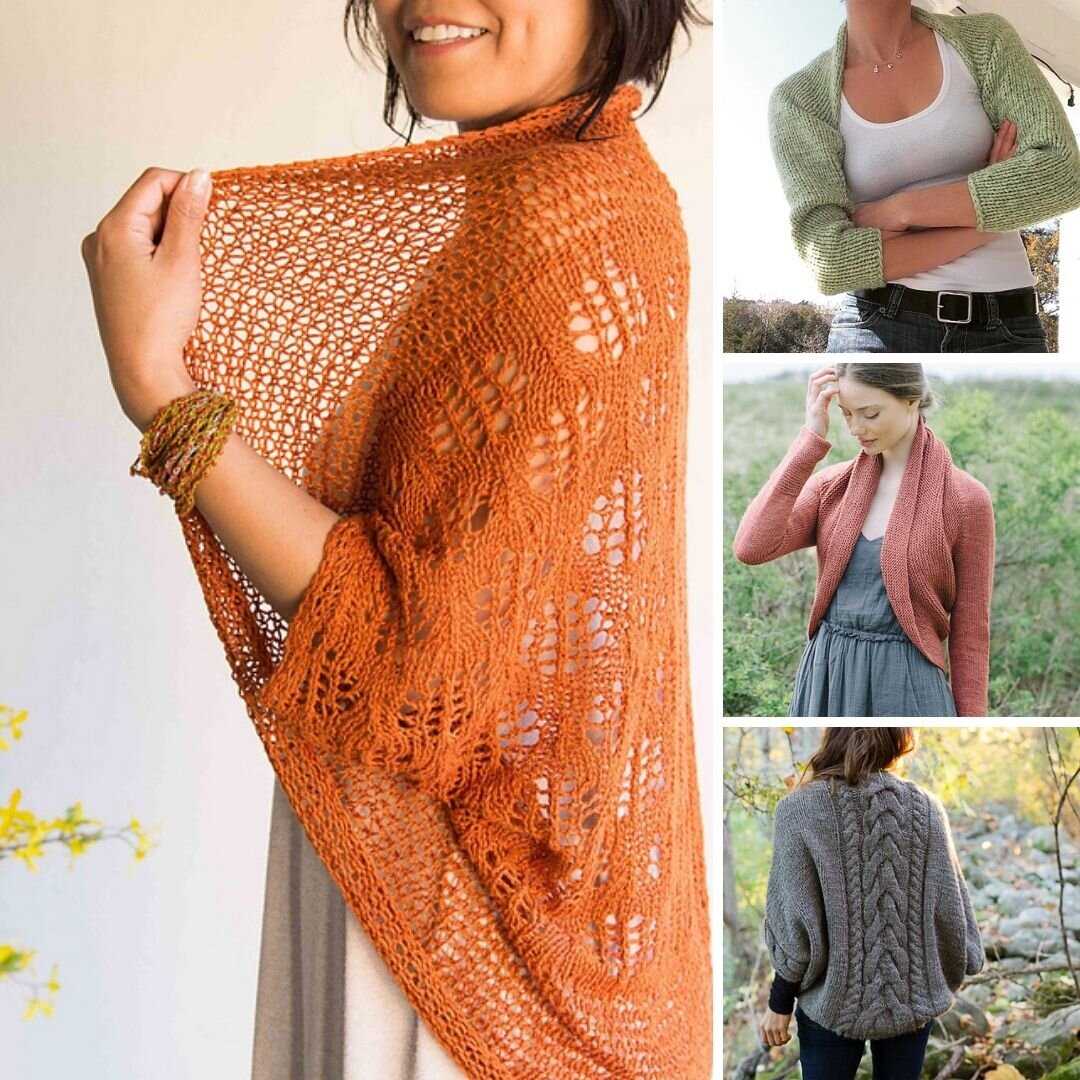
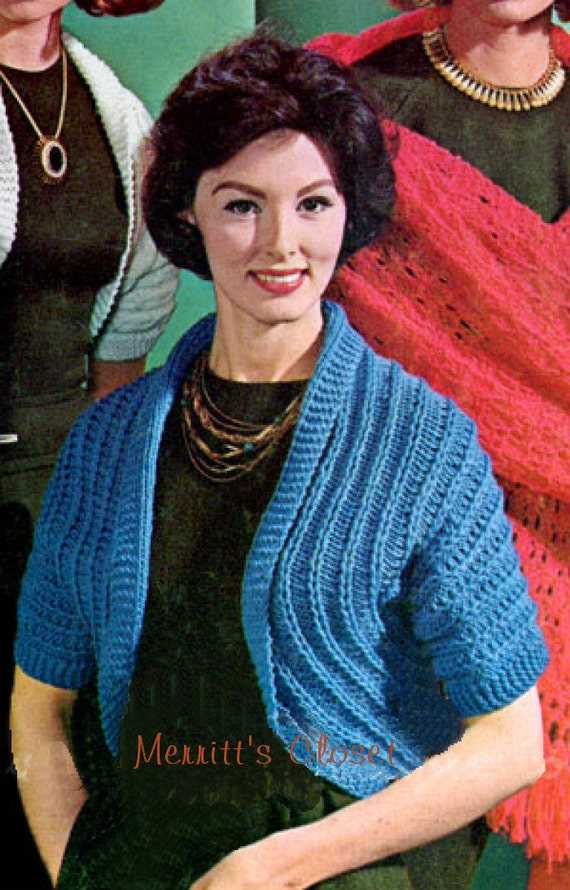
Looking for a quick and easy knitting project? This simple knit shrug pattern is perfect for beginners or anyone looking for a relaxing, yet stylish, project. A shrug is a versatile garment that can be worn with dresses, tank tops, or even as an extra layer over a t-shirt. It’s a great way to add some warmth and style to any outfit.
This pattern requires basic knitting skills and uses just two stitches: the knit stitch and the purl stitch. If you’re new to knitting, don’t worry! These stitches are easy to learn and there are plenty of tutorials available online to help you get started.
With this pattern, you’ll be able to create a cozy and comfortable shrug in no time. The design features a simple ribbed texture that gives the shrug a beautiful drape. The length and width can be easily adjusted to fit your personal preferences, and the pattern provides instructions for sizing from small to extra-large. Whether you’re knitting for yourself or as a gift for someone else, this knit shrug pattern is sure to impress.
Simple Knit Shrug Pattern: Create Your Perfect Winter Accessory
Winter is the perfect time to cozy up with a warm and stylish accessory, and what could be better than a knit shrug? With this simple knit shrug pattern, you can create the perfect winter accessory to add an extra layer of warmth and style to your outfit.
This pattern is perfect for beginners or experienced knitters looking for a quick and easy project. The simplicity of the design makes it a versatile piece that can be dressed up or down, depending on the occasion. Whether you’re heading out for a casual day of shopping or attending a glamorous winter event, this shrug will be the perfect finishing touch to your outfit.
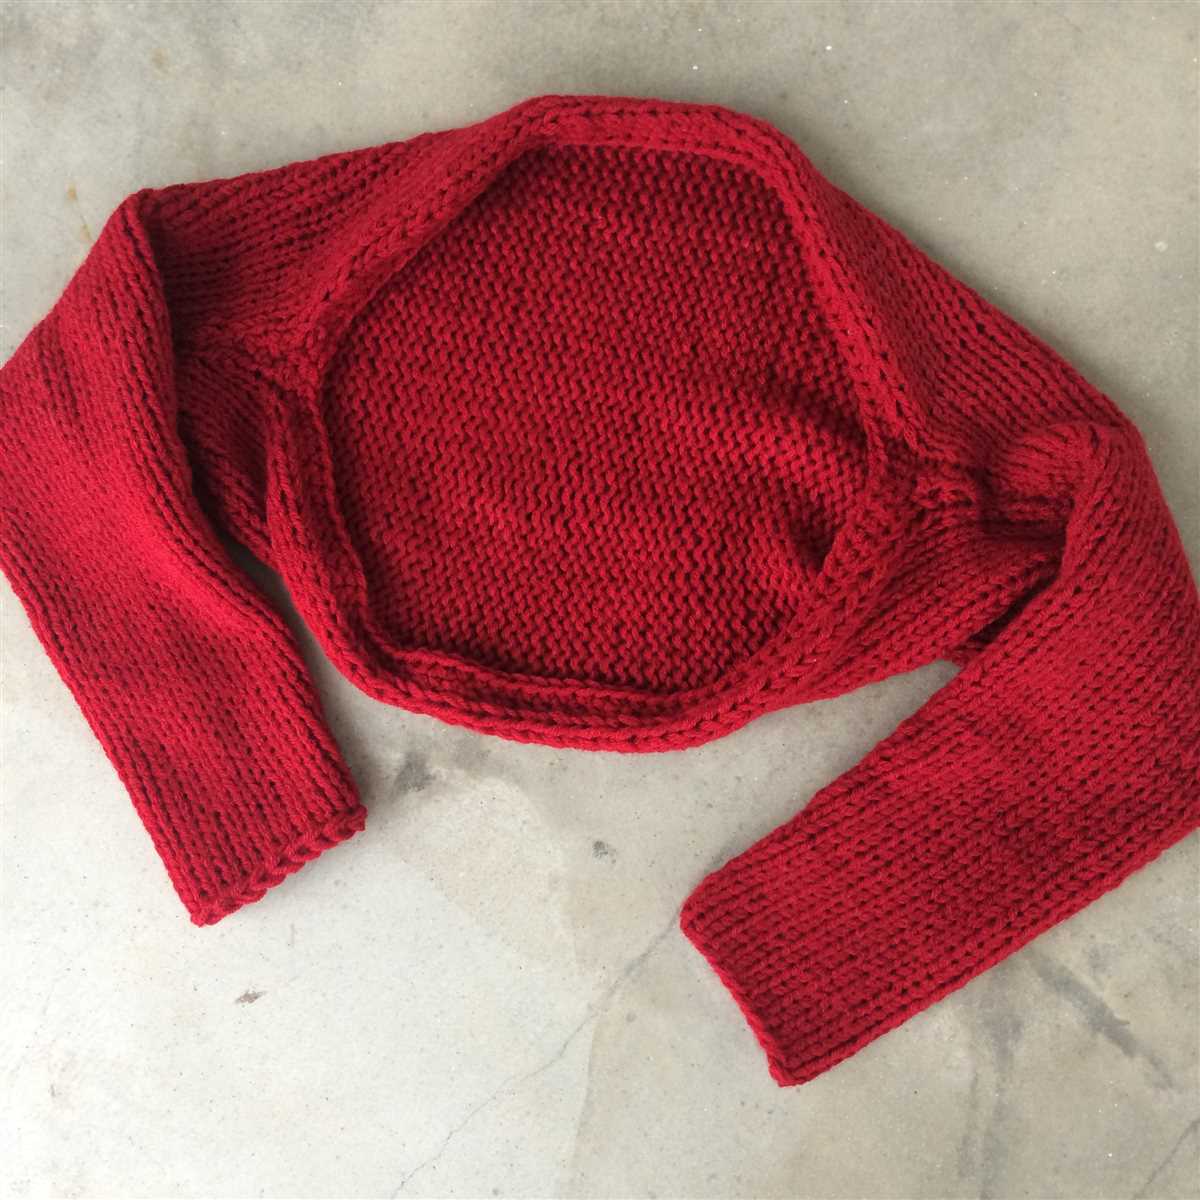
To start, you will need a pair of knitting needles and some soft and cozy yarn in the color of your choice. The pattern is worked in a simple garter stitch, which means you only need to know how to knit and purl. The construction is made up of two rectangular pieces that are then sewn together, making it both easy and fun to knit.
The shrug can be customized to fit your individual style and preferences. You can choose to make it shorter or longer, depending on how much coverage you want. You can also experiment with different stitch patterns or add some decorative elements like buttons or lace trim.
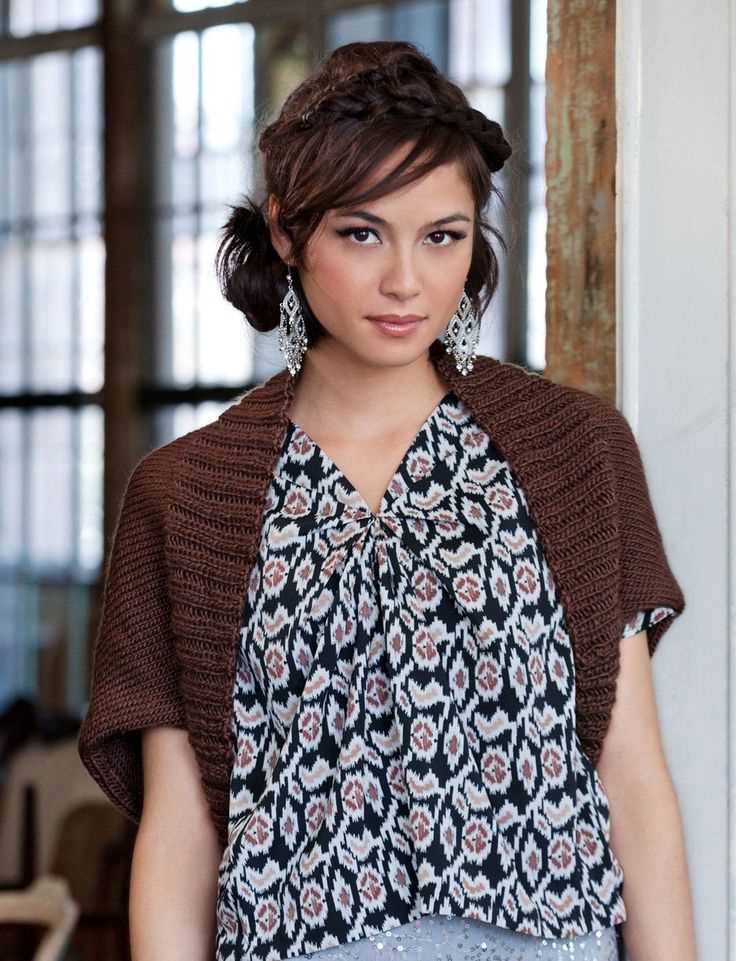
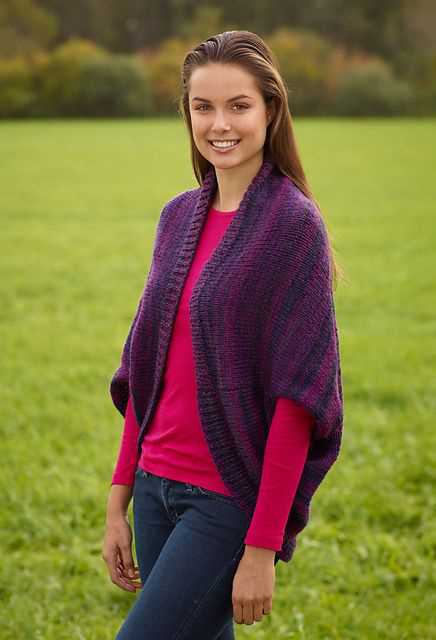
Once you’ve finished knitting your shrug, you’ll be amazed at how versatile and stylish it is. You can wear it over a dress or a blouse for an elegant and sophisticated look, or pair it with jeans and a t-shirt for a more casual and cozy vibe. No matter how you choose to wear it, this knit shrug will become your go-to winter accessory.
Choosing the Right Yarn for Your Project
Choosing the right yarn for your knitting project is essential to ensure that your finished product looks and feels the way you want it to. There are several factors to consider when selecting yarn, including fiber content, weight, and texture.
Fiber Content
The fiber content of the yarn you choose will greatly impact the characteristics of your finished project. Some common fiber options include wool, cotton, acrylic, and blends. Wool is known for its warmth and elasticity, while cotton is lightweight and breathable. Acrylic is a synthetic fiber that is often soft and easy to care for. Blends combine different fibers to create unique characteristics, such as durability or softness.
Weight
The weight of the yarn refers to its thickness and is typically categorized using a standard system, such as the Craft Yarn Council’s yarn weight categories. These categories range from lace weight (very thin) to super bulky (very thick). The weight of the yarn you choose should match the intended use of your project. For example, a lightweight yarn may be suitable for a summer shawl, while a bulky yarn would be better suited for a cozy winter sweater.
Texture
The texture of the yarn can greatly affect the overall appearance and feel of your finished project. Yarns can be smooth, textured, or even novelty yarns with added elements such as sequins or beads. Considering the texture can help you achieve the desired look and feel of your project. For example, a smooth yarn may be ideal for showcasing intricate stitch patterns, while a textured yarn can add depth and interest to a simple design.
When choosing yarn for your project, it’s also important to consider your own personal preferences. Some knitters prefer natural fibers, while others prefer synthetic options. Keep in mind the care instructions for the yarn you choose, as some fibers require special handling. By carefully considering the fiber content, weight, and texture of the yarn, you can ensure that your finished project is both beautiful and functional.
Gathering Your Knitting Supplies
Before you start knitting your simple shrug, it’s important to gather all the necessary supplies. This will ensure that you have everything you need to complete the project without any interruptions. Here are the essential knitting supplies that you’ll need:
Yarn:

Choose a soft and lightweight yarn that is suitable for the project. The yarn should be comfortable to wear and easy to work with. Consider the color and texture of the yarn to match your personal preferences and style.
Knitting Needles:
You will need a pair of knitting needles that are appropriate for the yarn you have chosen. The size of the needles will depend on the gauge of the pattern. Make sure to check the pattern instructions to determine the recommended needle size.
Tape Measure:
A tape measure is essential for taking accurate measurements of your body. This will help you determine the right size for your shrug and ensure a proper fit. Take measurements of your bust, waist, and arm length to assist you in choosing the correct size.
Stitch Markers:
Stitch markers are helpful for keeping track of your stitches and markers. They can be used to mark specific points in your pattern or indicate increases and decreases. Choose markers that are easily distinguishable from your knitting to avoid confusion.
Tapestry Needle:
A tapestry needle is used for weaving in loose yarn ends and finishing touches. It’s important to have a needle with a large enough eye to accommodate the yarn you are using. This will make it easier to sew up seams and secure any loose ends.
In addition to these basic supplies, you may also need other tools such as scissors, a stitch holder or waste yarn, and a row counter. Having all of these supplies in place before you start your simple shrug will ensure a smooth and enjoyable knitting experience.
Understanding the Basic Knitting Terminology
When starting out with knitting, it is important to familiarize yourself with the basic terminology used in knitting patterns. By understanding these terms, you will be able to follow instructions and create beautiful knitted pieces with ease.
1. Cast On: This is the first step in knitting where you create the foundation stitches. The cast on can be done using various methods such as the long tail cast on or the knitted cast on.
2. Knit Stitch: The knit stitch is the most basic and commonly used stitch in knitting. It is created by inserting the right-hand needle into the stitch on the left-hand needle, looping the yarn around the right-hand needle, and pulling it through to create a new stitch.
3. Purl Stitch: The purl stitch is the reverse of the knit stitch. It is created by inserting the right-hand needle into the stitch from the back, looping the yarn around the right-hand needle, and pulling it through to create a new stitch.
4. Row: A row refers to a series of stitches worked from one side of the knitting to the other. It is usually indicated in knitting patterns as “Row 1,” “Row 2,” and so on.
5. Repeat: When a pattern instructs you to repeat a set of stitches or a specific sequence, it means that you should repeat that set of stitches or sequence the specified number of times. For example, “Repeat Rows 1-4 two more times.”
6. Bind Off: Binding off is the process of securing the stitches and finishing the knitting. It is done by knitting two stitches, then passing the first stitch over the second stitch and off the needle. This process is repeated until all stitches have been bound off.
7. Gauge: Gauge refers to the number of stitches and rows per inch in your knitting. It is important to achieve the correct gauge in order for your finished piece to have the proper dimensions. To measure gauge, you can use a ruler or a gauge swatch.
In conclusion, familiarizing yourself with these basic knitting terms will make it easier for you to understand knitting patterns and successfully create beautiful knitted pieces. Practice and patience are key to mastering these techniques, and soon you will be able to tackle more complex knitting projects with confidence.
Casting On: Starting Your Shrug with Confidence
When starting a new knitting project, it’s important to begin with confidence. The casting on process sets the foundation for your entire shrug, so it’s crucial to get it right from the start. By following these simple steps and tips, you’ll be able to cast on your stitches confidently and embark on your knitting journey.
1. Choose the right method: There are a few different methods for casting on stitches, so it’s important to choose the one that you are most comfortable with. Some popular casting on methods include the long-tail cast on, the knitted cast on, and the cable cast on. Practice each method and choose the one that feels the most natural to you.
2. Use the appropriate needle size: The needle size you use for casting on will determine the tension and size of your stitches. Refer to the pattern instructions to determine the recommended needle size for your shrug. It’s important to use the correct size to ensure your stitches are even and consistent.
3. Count your stitches: Once you have cast on all your stitches, take the time to count them to ensure you have the correct number. This will save you from any mistakes later on in the pattern. It’s also a good idea to place a stitch marker after a certain number of stitches, such as every 10 stitches, to make it easier to count and keep track.
4. Knit a gauge swatch: Before diving into your shrug, it’s a good idea to knit a gauge swatch to ensure that your tension matches the pattern’s requirements. This will help you determine if you need to adjust your needle size or yarn choice to achieve the correct gauge.
5. Take your time: Casting on can sometimes be a tedious process, but it’s important to take your time and be patient. Rushing through the casting on process can lead to mistakes and uneven stitches. Remember, the time you invest in casting on properly will result in a beautifully finished shrug.
By following these tips and techniques, you can confidently cast on your stitches and start your simple knit shrug pattern. Remember to take your time, be patient, and trust in your knitting skills. Happy knitting!
Mastering the Essential Knitting Stitches
Knitting is a popular craft that allows you to create beautiful and functional garments and accessories. Whether you’re a beginner or an experienced knitter, mastering the essential knitting stitches is crucial for creating professional-looking projects. These stitches form the building blocks of knitting and can be combined in various ways to create different patterns and textures.
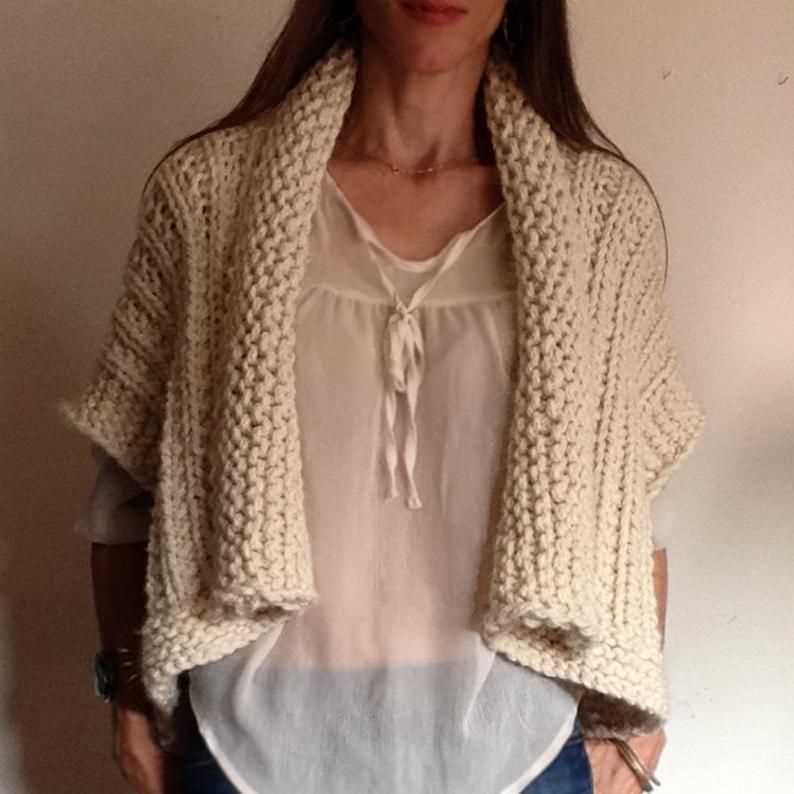
Garter stitch: One of the simplest stitches to learn, the garter stitch is created by knitting every row. This stitch creates ridges on both sides of the fabric and is commonly used for scarves, blankets, and other simple projects.
Stockinette stitch: The stockinette stitch is created by alternating knit stitches on one row and purl stitches on the next row. This stitch creates a smooth and flat fabric with a “v” pattern on one side and a purl pattern on the other side. It is commonly used for garments such as sweaters, hats, and mittens.
Ribbing: Ribbing is a stretchy stitch pattern that is commonly used for cuffs, hems, and necklines. It is created by alternating knit stitches and purl stitches in a regular pattern, such as knitting two stitches and purling two stitches. Ribbing adds texture and elasticity to a project.
Seed stitch: The seed stitch is created by alternating knit and purl stitches in a checkerboard pattern. This stitch creates a textured fabric with small bumps and is commonly used for scarves, hats, and blankets.
Cable stitch: The cable stitch is created by crossing stitches over each other to create a twisted pattern. This stitch is commonly used for creating intricate designs on garments such as sweaters and blankets.
By mastering these essential knitting stitches, you’ll be able to tackle a wide range of knitting projects and create beautiful, professional-looking garments and accessories. Practice these stitches regularly and experiment with combining them in different ways to create unique and personalized designs.
Knitting the Body of the Shrug: A Cozy Project for All Skill Levels

If you’re looking for a cozy and stylish addition to your wardrobe, knitting a simple shrug is the perfect project for you. Whether you’re a beginner or an experienced knitter, this pattern is suitable for all skill levels. With just a few basic stitches and techniques, you’ll be able to create a beautiful and functional garment that will keep you warm and stylish.
Start by casting on the required number of stitches, which will vary depending on the size you want to make. You can easily customize the pattern to fit your body by adjusting the number of stitches and rows. With this flexibility, you can create a shrug that fits you perfectly.
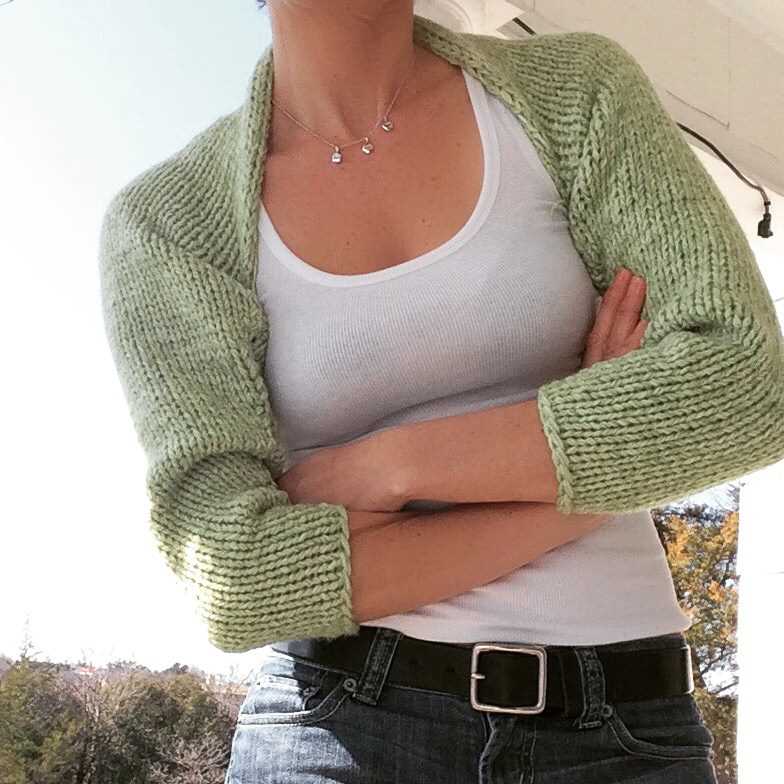
The body of the shrug is knitted in a simple stockinette stitch, alternating between knit and purl rows. This creates a smooth and even texture that is both comfortable and visually appealing. You can choose to add ribbing at the cuffs and hem of the shrug for a polished look, or leave it as is for a more relaxed and effortless style.
As you work on the body of the shrug, you’ll start to see it taking shape and the cozy fabric forming. It’s a project that is both relaxing and satisfying to knit, as you see your progress and the results of your efforts. This pattern is also a great opportunity to practice your knitting skills and techniques, such as increasing and decreasing stitches.
Once you’ve finished knitting the body of the shrug, you can seam the sides together using a whip stitch or mattress stitch. This creates a seamless and professional finish that adds to the overall look and durability of the garment. You can then block your shrug to help it retain its shape and drape beautifully on your shoulders.
With its simplicity and versatility, this simple knit shrug pattern is a wonderful project for knitters of all skill levels. Whether you’re a beginner looking for a quick and satisfying project or an experienced knitter wanting to add a cozy and stylish piece to your wardrobe, this pattern is sure to deliver. So grab your favorite yarn, knitting needles, and get ready to create a shrug that you’ll love wearing all year round.
Shaping the Sleeves: Adding a Flattering Touch
When it comes to creating a knit shrug, shaping the sleeves is an important step that can add a flattering touch to the finished garment. By incorporating decreases and increases strategically, you can create a sleeve shape that hugs the arm in all the right places.
One common technique for shaping the sleeves is to start with a certain number of stitches, then gradually decrease or increase the number of stitches as you work your way up. This can be achieved using simple knitting techniques such as knit two together (k2tog) or make one (M1) increases, depending on the desired effect.
For a more fitted sleeve, you can begin by decreasing a certain number of stitches evenly across a row. This can be done by working a k2tog decrease every few stitches, or using a different decrease method such as a slip, slip, knit (SSK) decrease. This will create a tapered effect, resulting in a sleeve that narrows towards the wrist.
If you prefer a looser, more relaxed sleeve, you can opt for increasing stitches instead. This can be achieved by working a make one (M1) increase at regular intervals across a row. By adding stitches gradually, you can create a sleeve shape that widens towards the wrist, providing a comfortable and flowing fit.
When shaping the sleeves, it’s important to pay attention to the overall design and aesthetics of the knit shrug. Consider the desired fit and style, and how the sleeve shape will complement the rest of the garment. Experiment with different shaping techniques and take the time to try on the shrug as you work, making any necessary adjustments to ensure a flattering and comfortable fit.
In conclusion, shaping the sleeves of a knit shrug is a crucial step in creating a garment that is not only stylish but also flattering. By incorporating strategic decreases or increases, you can achieve a sleeve shape that hugs or relaxes around the arm, depending on your preference. Take the time to experiment and try on the shrug as you work, making any necessary adjustments to achieve the perfect fit. With these techniques, you’ll be able to create a simple knit shrug with sleeves that add a beautiful and flattering touch.
Finishing Touches: Binding Off and Weaving in Ends
Now that you have completed knitting your shrug, it’s time for the finishing touches. Binding off is the final step in the knitting process that ensures your stitches do not unravel. To bind off, you will need to knit the first two stitches as usual, and then pass the first stitch over the second stitch and off the needle. Continue to knit one stitch, then pass the previous stitch over the newly knit stitch until you have reached the end of the row. Cut the yarn, leaving a long tail, and pull it through the last stitch, securing it tightly.
Weaving in the ends is an important step to give your shrug a polished look. Start by threading your yarn onto a tapestry needle. Take the end of the yarn and weave it through the stitches on the wrong side of the fabric, making sure to go in different directions to secure it. Trim any excess yarn, leaving a small tail.
Another option is to use a crochet hook to weave in the ends. Insert the hook through a stitch on the back side of the fabric, and catch the yarn with the hook. Pull the yarn through the stitch and continue to work in this manner, weaving the yarn in different directions for added security. Make sure to leave a small tail and trim any excess yarn.
If you prefer a neater appearance, you can also use a slip stitch to secure the ends. Insert your crochet hook into the stitch, catch the yarn with the hook, and pull it through the stitch and the loop on the hook. Repeat this process for each stitch, working in a zigzag pattern across the fabric. Trim any excess yarn and secure the end.
In summary, binding off is the final step in completing your shrug, ensuring that your stitches are secure. Weaving in the ends adds a polished look to your project, and there are different methods you can use to achieve this. Whether you choose to use a tapestry needle, a crochet hook, or a slip stitch, taking the time to properly finish your shrug will result in a beautiful and professional-looking garment.
Blocking Your Knit Shrug: Enhancing the Finished Look
Blocking is an essential step in achieving a polished and professional look for your knit shrug. It involves gently shaping and stretching the garment to the desired measurements and allowing it to dry in this shape. By blocking your knit shrug, you can improve its drape, even out any inconsistencies in the stitches, and create a more professional finish.
To begin the blocking process, you will need a blocking mat or surface, rust-proof pins, and a spray bottle filled with water. Start by laying your shrug flat on the mat and gently stretching it to the desired measurements. Pin the edges and corners of the shrug to the mat, being careful not to distort the stitch pattern. Mist the shrug with water until it is evenly damp, avoiding soaking it. Allow the shrug to dry completely in this stretched shape.
Blocking your knit shrug can make a significant difference in the overall appearance of the garment. It helps to even out any irregularities in tension and stitch size and enhances the drape and fit. The blocking process also helps to set the stitches, making the shrug look more polished and well-defined.
Remember to check the care instructions for your yarn before blocking, as some fibers may require special treatment. Once your shrug is dry, unpin it from the blocking mat and marvel at the enhanced finished look. Your knit shrug will be ready to wear with confidence, showcasing the beauty of your craftsmanship and attention to detail.
Adding Personalized Embellishments to Make Your Shrug Unique
Knitting a simple shrug is a great way to create a versatile and stylish accessory. However, if you want to take your shrug to the next level and make it truly unique, you can add personalized embellishments. These embellishments will not only enhance your shrug’s overall appearance but also showcase your individual style and creativity.
Here are some ideas on how to add personalized embellishments to your knit shrug:
- Embroidery: Embroidery can be a great way to add intricate designs or patterns to your shrug. You can use colorful threads to embroider flowers, birds, or any other motif that reflects your personal taste. Consider adding embroidered details around the cuffs, collar, or hemlines to create a statement piece.
- Beadwork: Adding beads to your shrug can instantly elevate its look. You can use different types of beads, such as glass, crystal, or seed beads, to create eye-catching patterns or borders. Whether you prefer a subtle shimmer or a bold statement, beadwork can enhance the elegance and sophistication of your shrug.
- Lace accents: If you want to add a touch of femininity to your shrug, consider incorporating lace accents. You can knit lace inserts and sew them onto the sleeve edges or the back of the shrug. Lace can give your shrug a delicate and romantic feel, making it perfect for special occasions or a chic evening out.
- Buttons and clasps: Choosing unique buttons or clasps can instantly transform the look of your shrug. Look for vintage buttons, decorative clasps, or even handmade buttons to add a personal touch. Pick buttons or clasps that complement the color and style of your shrug, and have fun mixing and matching different designs.
By adding personalized embellishments to your knit shrug, you can create a one-of-a-kind accessory that reflects your personal style and creativity. Whether you choose to embroider, add beads, incorporate lace accents, or experiment with buttons and clasps, the options are endless. Have fun exploring different embellishment techniques and let your imagination run wild to create a shrug that is uniquely yours.
Styling Tips: How to Wear and Pair Your Knit Shrug
When it comes to styling a knit shrug, there are plenty of options to create a stylish and fashionable look. Whether you’re dressing up for a special occasion or going for a casual everyday outfit, a knit shrug can be a versatile and chic addition to your wardrobe.
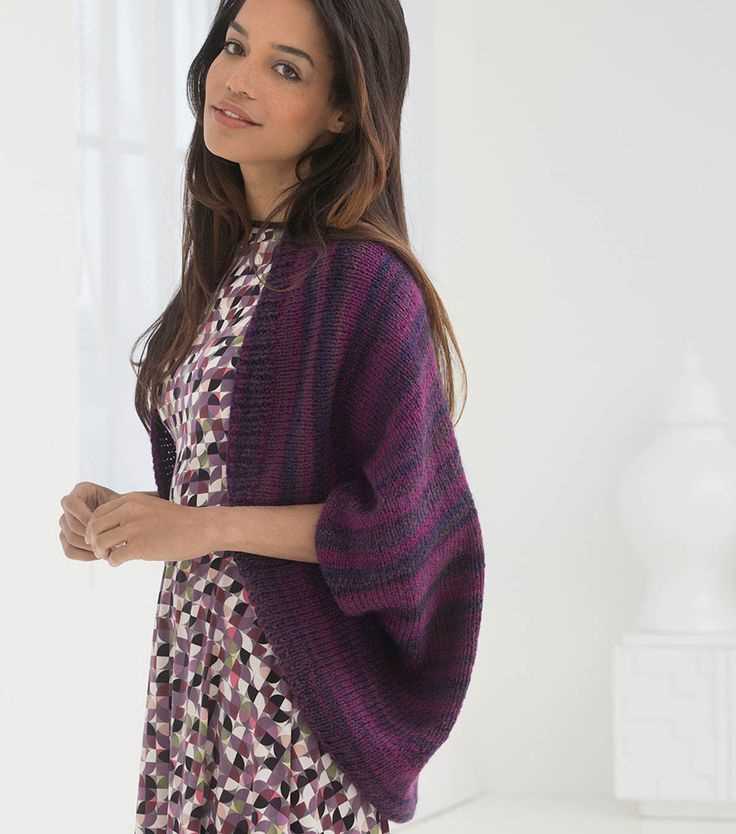
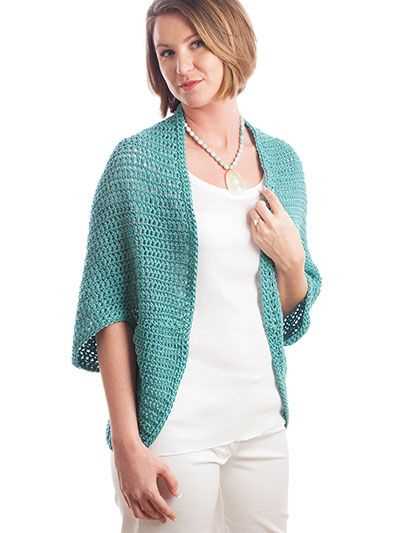
Pairing with Dresses: One of the most popular ways to wear a knit shrug is to pair it with a dress. Whether it’s a long maxi dress or a cute sundress, adding a knit shrug can instantly elevate the look. Opt for a shrug in a complementary color or pattern to add visual interest and create a cohesive outfit.
Layering with Tops: Another great way to wear a knit shrug is to use it as a layering piece over your favorite tops. For a casual and effortless look, pair it with a simple t-shirt or tank top. If you’re looking to dress up your outfit, layer the shrug over a blouse or a fitted top for a more polished and put-together look.
Adding to Jeans or Skirts: Don’t limit yourself to just dresses and tops – a knit shrug can also be a fabulous addition to your jeans or skirts. Pair it with your favorite skinny jeans or denim shorts for a casual and comfortable look. For a more feminine and flirty outfit, wear the shrug over a flowy skirt or a fitted pencil skirt for a flattering silhouette.
Accessorizing: When it comes to accessorizing with a knit shrug, the options are endless. Add a belt to cinch in your waist and create a more defined silhouette. Layer on some statement jewelry to add a touch of glamour and sparkle. Don’t forget to choose the right footwear to complete your look – pair your knit shrug with sandals, heels, or even boots depending on the occasion.
Additional Style Tips: Experiment with different colors, patterns, and textures when choosing your knit shrug. Try mixing and matching with different pieces in your wardrobe to create unique and personalized looks. Don’t be afraid to play with proportions – a longer shrug can create a more dramatic and elegant effect, while a shorter shrug can add a playful and fun touch to your outfit. Lastly, always wear your knit shrug with confidence – it’s a versatile and stylish piece that can instantly elevate your style and make you feel fabulous.
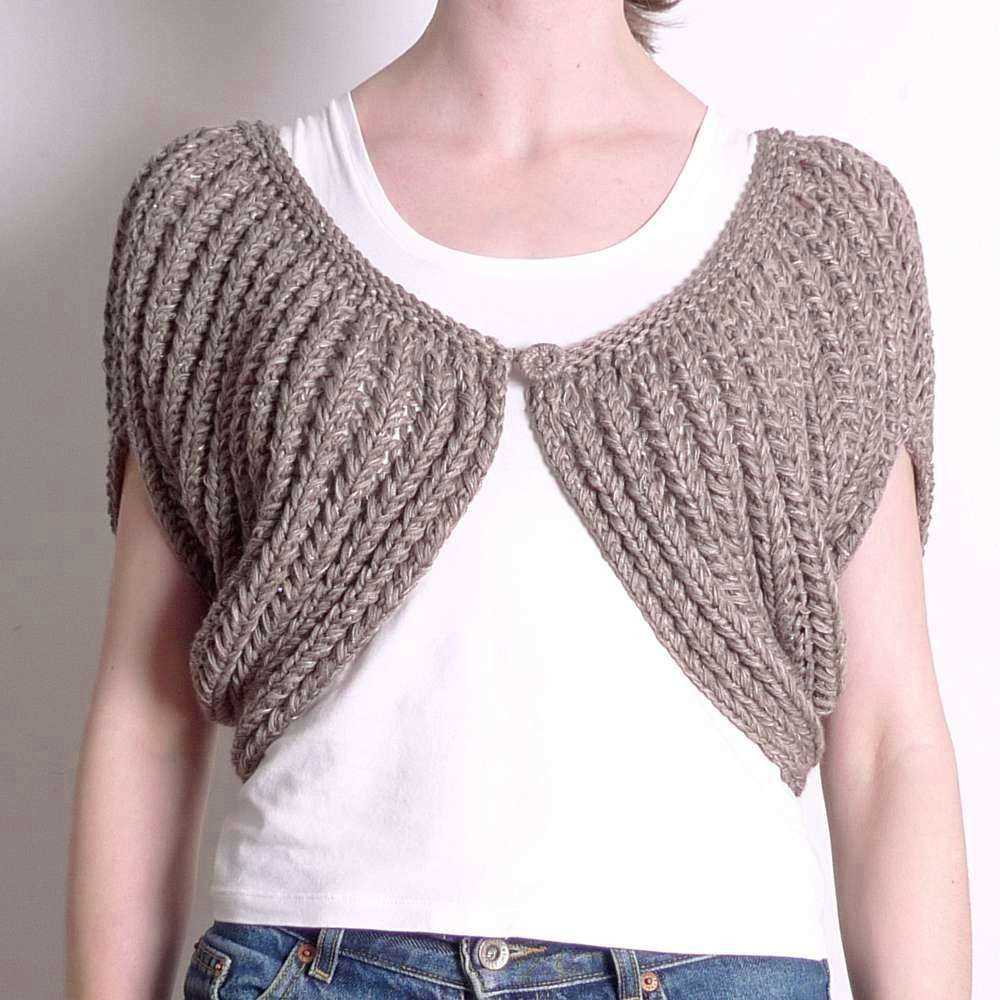
Exploring Variations: Customizing Your Knit Shrug Pattern
Once you’ve mastered the basic knit shrug pattern, it’s time to start exploring variations and customizing the design to make it your own. Here are a few ideas to get you started:
1. Changing the stitch pattern: Instead of sticking to the traditional stockinette stitch, experiment with different stitch patterns to add texture and visual interest to your shrug. Consider trying out ribbing, cables, lace, or even colorwork.
2. Adding embellishments: Personalize your shrug by adding embellishments such as buttons, beads, or embroidery. These small details can make a big impact and give your shrug a unique touch.
3. Varying the length and fit: Customize the length of your shrug by knitting it longer or shorter. You can also experiment with different sleeve lengths, from a cap sleeve to a full-length sleeve. Additionally, you can adjust the fit by adding waist shaping or making it more oversized for a cozy, relaxed look.
4. Playing with yarn choices: Don’t be afraid to try different types of yarn for your shrug. Experiment with different fibers, weights, and textures to achieve the desired look and feel. Keep in mind that different yarns may require adjustments to the pattern gauge and needle size.
5. Incorporating different colors: You can create interesting color effects by incorporating multiple colors into your knit shrug. Try stripes, color blocks, or even a gradient effect to make your shrug pop.
Remember, knitting is a versatile craft, and there are endless possibilities for customizing your knit shrug pattern. Have fun exploring and creating a shrug that is uniquely yours!
Q&A:
What is a shrug?
A shrug is a type of clothing that is worn over the shoulders and upper arms. It is typically short and does not have full sleeves.
What is a simple knit shrug pattern?
A simple knit shrug pattern is a set of instructions on how to knit a shrug using basic knitting techniques. It usually involves knitting a rectangle or square piece of fabric and then folding and sewing it to create the shrug shape.
What materials are needed for a simple knit shrug?
The materials needed for a simple knit shrug pattern typically include knitting needles, yarn, and a tapestry needle for sewing. The specific size of the needles and yarn will depend on the desired gauge and thickness of the shrug.
Are there different variations of simple knit shrug patterns?
Yes, there are many variations of simple knit shrug patterns available. Some may have different stitch patterns or shaping techniques, while others may have additional details such as ribbing or lacework.
Can beginners knit a simple knit shrug?
Yes, beginners can definitely knit a simple knit shrug. It is a great project for beginners to practice basic knitting skills such as casting on, knitting, and sewing seams. There are also many resources available online with step-by-step instructions and tutorials for beginners.
What is a simple knit shrug pattern?
A simple knit shrug pattern is a set of instructions that guides you in creating a shrug using knitting techniques. It typically includes details on yarn choice, needle size, stitch patterns, and step-by-step instructions to create the garment.