
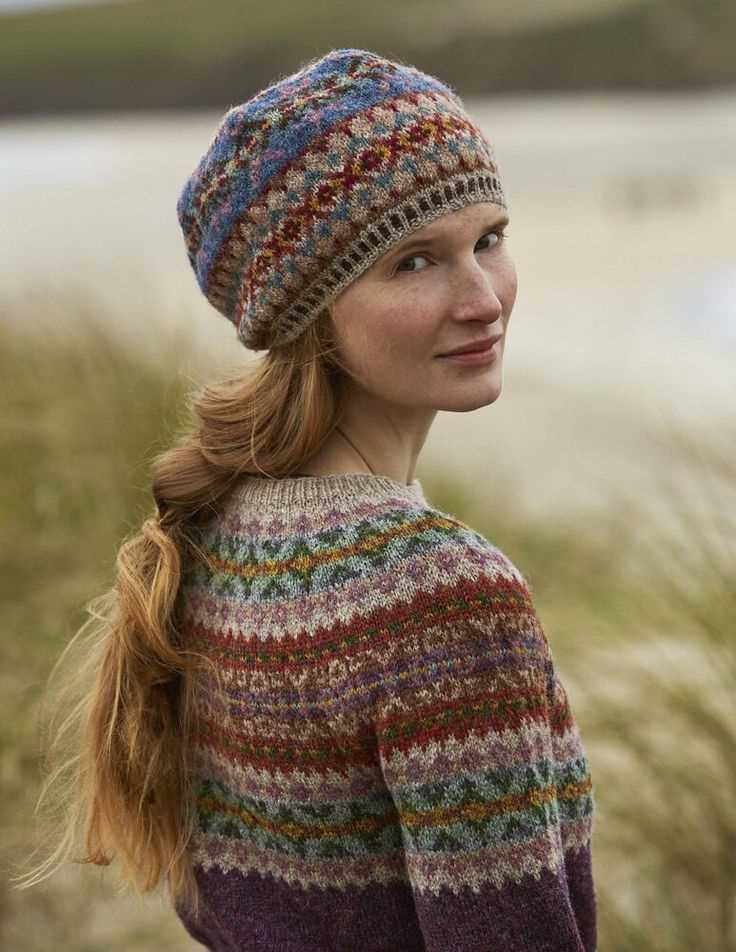
Knitting is a beloved craft that allows individuals to create beautiful and functional items with just two needles and some yarn. One popular project for knitters is a hat, which can be personalized and customized in a myriad of ways. If you’re looking for a new knitting challenge, why not try your hand at the Norwegian Star hat pattern?
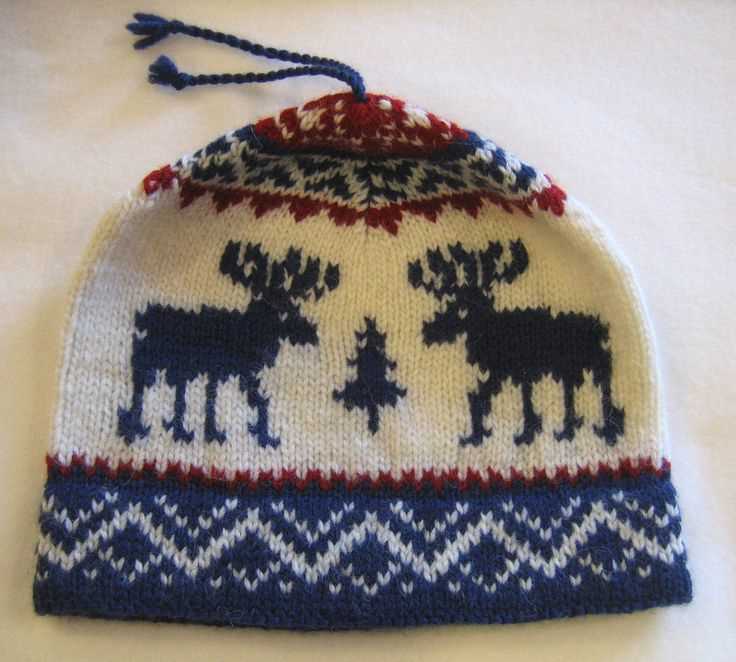
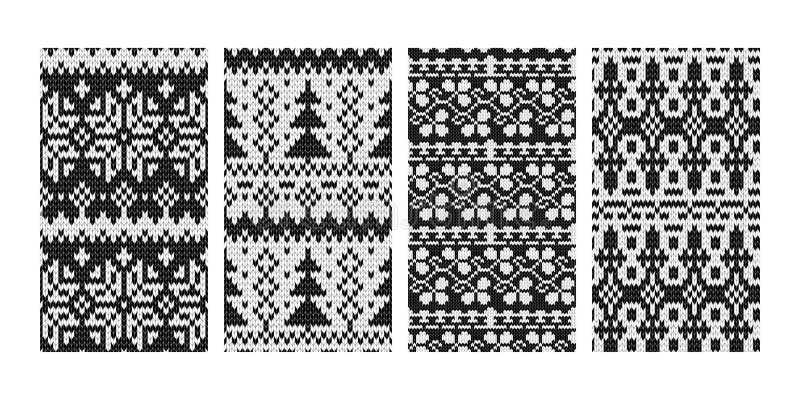
The Norwegian Star hat pattern is a traditional style of knitting that originated in Norway. It features a stunning star design that is typically knit in contrasting colors, creating a visually striking effect. The pattern is suitable for intermediate knitters who are comfortable with basic stitches and techniques, such as knit, purl, and decreases.
To create the Norwegian Star hat, you will need a set of double-pointed needles and two colors of worsted weight yarn. The pattern begins with a ribbed brim, transitions into the intricate star design, and finishes with a cozy crown. The combination of the unique design and warm wool yarn make the Norwegian Star hat a perfect accessory for chilly winter months.
What is a Norwegian Star Hat?
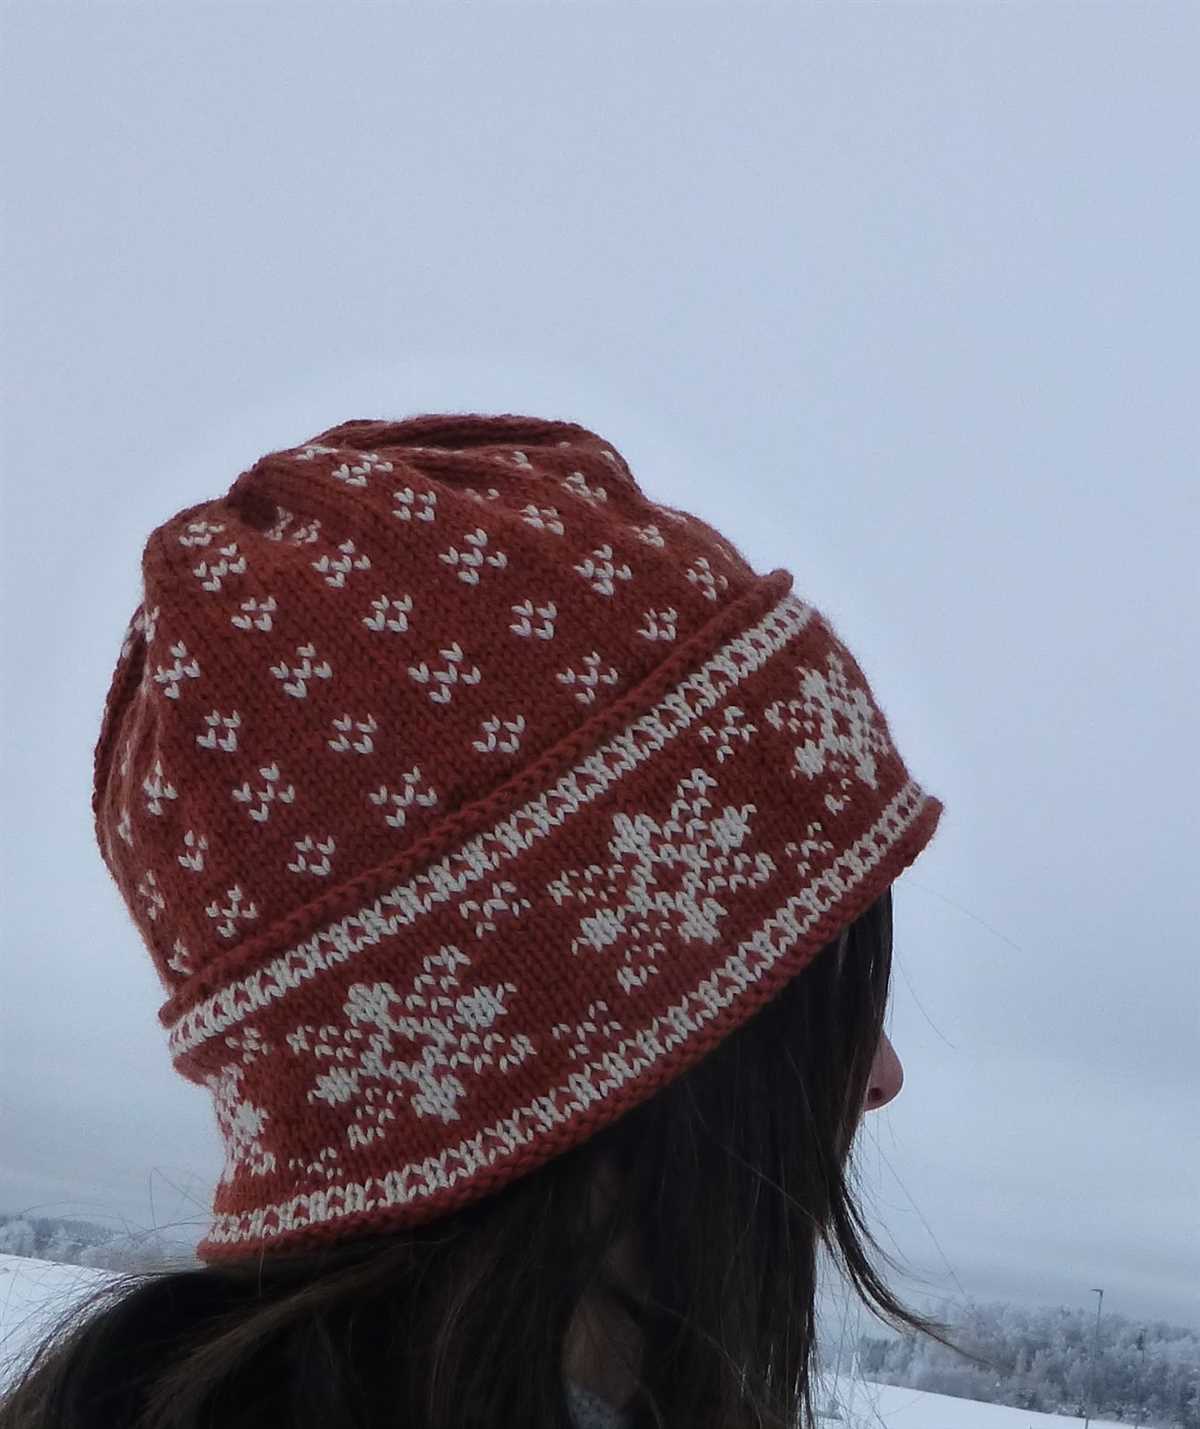
A Norwegian Star Hat, also known as a Nordic Star Hat or a Scandinavian Star Hat, is a traditional knitted hat that features a distinctive star pattern. This pattern is often associated with Norwegian knitting traditions and is popular among knitters who enjoy creating traditional Scandinavian designs.
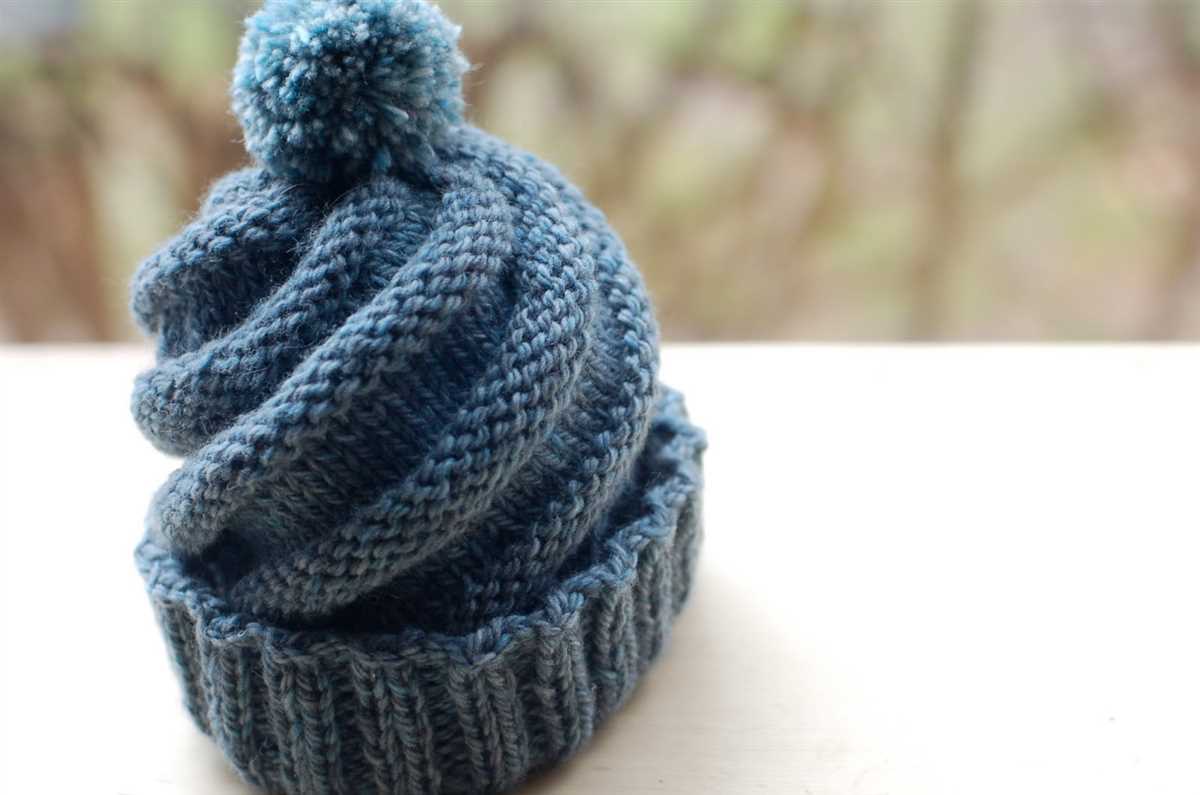
The Norwegian Star Hat typically has a folded brim and a slouchy or fitted style, depending on the knitter’s preference. The star pattern is created using a combination of knit and purl stitches to form intricate geometric shapes, resulting in a visually striking design.
Knitting a Norwegian Star Hat requires intermediate to advanced knitting skills, as it involves working with multiple colors and following a complex chart or pattern. However, with practice and patience, knitters of all skill levels can create their unique version of this beautiful hat.
Materials Needed for Knitting
When it comes to knitting, having the right materials is essential to ensure a successful project. Here is a list of the materials you will need to knit the Norwegian star hat:
Yarn
Main Color Yarn: For the main color of the hat, you will need approximately 200 yards of worsted weight yarn. Choose a color that complements your style and preferences.
Contrasting Color Yarn: To create the decorative Norwegian star pattern, you will need a small amount of contrasting color yarn. This can be a different shade or a completely different color, depending on your desired look.
Needles

Double-Pointed Needles (DPNs): You will need a set of size 7 (4.5mm) DPNs to knit the hat. Make sure the needles are the correct size to achieve the specified gauge.
Other Supplies
- Tapestry Needle: A tapestry needle is essential for weaving in the loose ends of the yarn and finishing the project.
- Stitch Markers: Stitch markers can be useful to mark the beginning of rounds or specific sections of the pattern.
- Scissors: A pair of scissors will come in handy for cutting the yarn and trimming any excess.
- Measuring Tape: A measuring tape is helpful for checking your gauge and ensuring the hat is the correct size.
With these materials in hand, you will be ready to start knitting your own Norwegian star hat. Remember to always read the pattern instructions and check your gauge to ensure the best results.
Step by Step Instructions
In order to create a Norwegian star hat, you will need the following materials: a set of double-pointed knitting needles, a yarn of your choice, and a tapestry needle. Once you have gathered all the necessary materials, you can follow these step-by-step instructions to knit your own Norwegian star hat.
1. Cast On
To begin, cast on the required number of stitches onto your double-pointed knitting needles. The number of stitches will depend on the size of hat you want to make. Make sure to evenly distribute the stitches across three needles.
2. Knit the Ribbing
Start knitting the ribbing for the brim of the hat. This can be done using a simple knit 1, purl 1 ribbing pattern or any other ribbing pattern you prefer. Repeat the pattern for a desired length, usually around 1-2 inches.
3. Knit the Body of the Hat

Once the ribbing is complete, continue knitting in the round using the stockinette stitch. This involves knitting every stitch in the round until your hat reaches the desired length. To create the Norwegian star pattern, you will need to follow a specific colorwork chart.
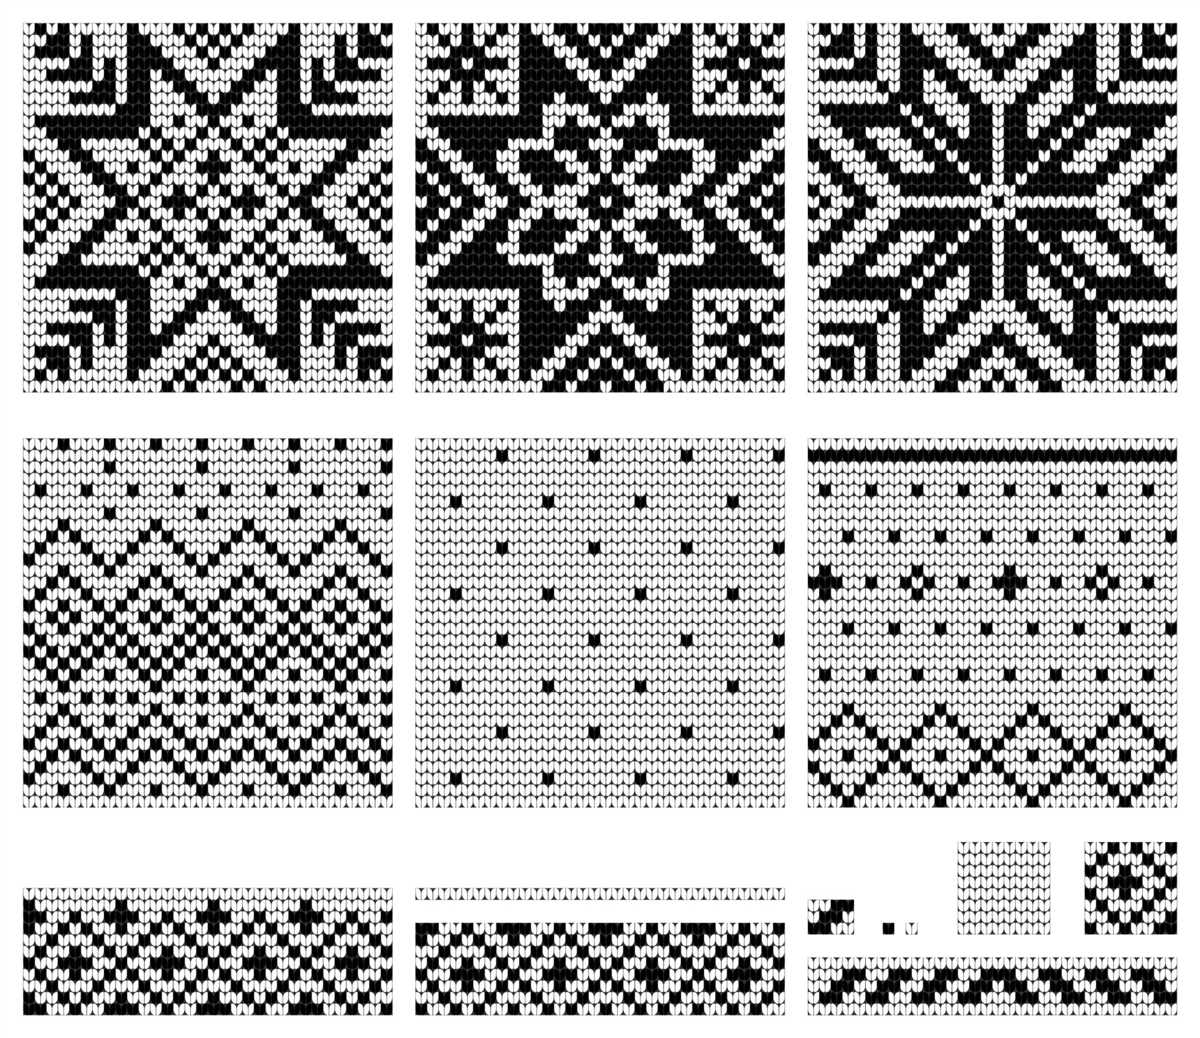
4. Follow the Norwegian Star Chart
Using the colorwork chart specific to the Norwegian star pattern, start incorporating the different colored yarns at the appropriate points in the chart. This chart will guide you in creating the star design on your hat. Remember to carry the unused yarn behind your work to avoid long floats.
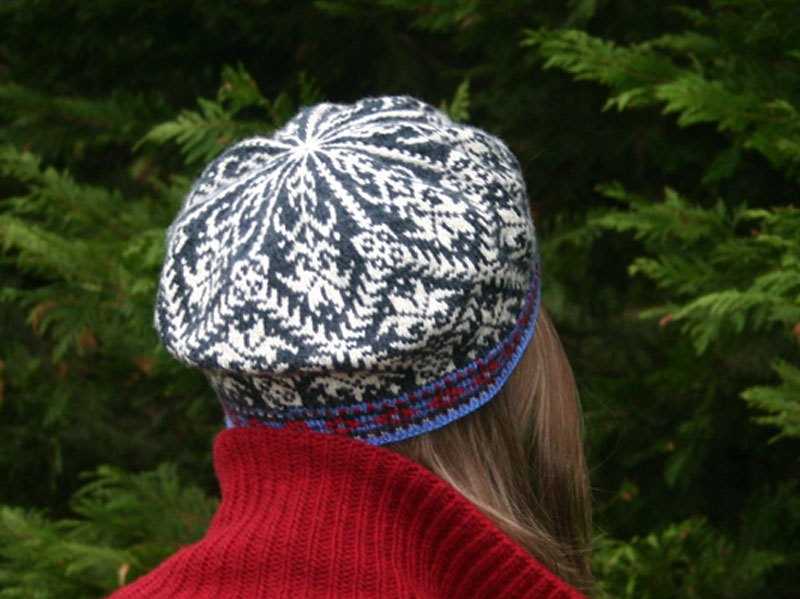
5. Decrease for the Crown
Once you have completed the star pattern and your hat has reached the desired length, it’s time to start decreasing for the crown. This will give your hat its tapered shape. Follow the instructions on the pattern to evenly decrease the stitches until only a few stitches remain.
6. Finishing
Finally, cut the yarn, leaving a long tail. Using a tapestry needle, carefully thread the tail through the remaining stitches and pull tight to close the top of the hat. Weave in any loose ends and block your hat if desired. Your Norwegian star hat is now complete and ready to be worn!
Cast On
When starting a knitting project, the first step is to cast on the stitches. This is the foundation of your knitting and will determine the width or circumference of your project. There are several methods for casting on, but the most common one is the long-tail cast on.
The long-tail cast on method involves creating a loop on the needle using both the working yarn and a “tail” of yarn. This method is versatile and provides a neat and even edge. To begin, measure out a length of yarn that is approximately three times the width of your project. Insert the needle into the loop of yarn, then bring the needle over and under the tail yarn to create a new loop. Repeat this process until you have cast on the desired number of stitches.
Other Casting On Methods
In addition to the long-tail cast on, there are several other methods you can use depending on your project and personal preference. The knitted cast on, for example, is a simple method that involves creating a loop of yarn on the needle and then knitting into that loop to create a new stitch. This method is often used for adding stitches in the middle of a project.
Another common method is the cable cast on, which creates a sturdy and decorative edge. This technique involves inserting the needle between two existing stitches and then creating a new stitch by wrapping the yarn around the needle and pulling it through. The cable cast on is particularly suitable for projects that require a firm edge, such as hats or cuffs.
Ultimately, the cast on method you choose will depend on your project and personal preference. It’s always a good idea to practice different casting on techniques and see which one works best for you. Once you have finished casting on, you are ready to begin knitting!
Ribbing
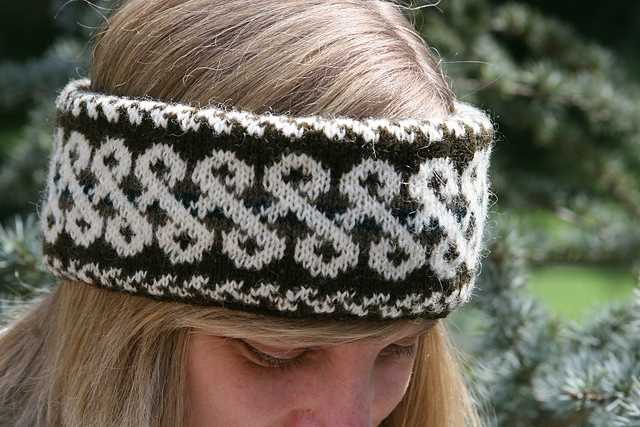
Ribbing is a common technique used in knitting patterns, including the Norwegian star hat knitting pattern. It is a decorative and functional element that creates a stretchy and flexible band at the edge of the knitted fabric. Ribbing is often used for cuffs, hems, and necklines.
The ribbing pattern typically alternates knit stitches and purl stitches, creating a raised and recessed effect. This alternating pattern makes the fabric more elastic and allows it to stretch, making it perfect for areas that need to fit snugly, such as the brim of a hat or the cuffs of a sweater.
In the Norwegian star hat knitting pattern, the ribbing is often knitted using a smaller needle size than the rest of the pattern. This helps to create a tighter and more secure edge, ensuring that the hat stays in place when worn. The ribbing is usually worked in a 1×1 or 2×2 rib, meaning one knit stitch followed by one purl stitch or two knit stitches followed by two purl stitches.
The ribbing section of the hat is typically worked for a certain number of rows or until the desired length is reached. Once the ribbing is complete, the main body of the hat can be worked in the chosen stitch pattern, such as the Norwegian star pattern. The ribbing provides a polished and professional finish to the hat, giving it a structured and tailored appearance.
Body of the Hat
Once you have completed the brim of the Norwegian star hat, it is time to start working on the body of the hat. In this section, we will focus on knitting the main part of the hat, which will give it its unique shape and style.
To begin, you will need to switch to a larger set of double-pointed needles or a circular needle, depending on your preference. This will allow you to comfortably work with the increasing number of stitches as you knit the body of the hat.
Start by knitting a round of plain knit stitches. This will provide a smooth transition from the brim to the body of the hat. Once the plain knit round is complete, you can begin working on the main pattern of the hat.
The main pattern of the Norwegian star hat is created by using a combination of knit and pearl stitches to form a repetitive star-like design. The pattern will be worked over a set number of stitches, which will vary depending on the size of the hat.
To follow the pattern, you will need to refer to the knitting chart provided. The chart will outline the specific stitches and their placement within each round. As you work each round, make sure to carefully follow the chart and adjust your knitting accordingly.
Continue knitting the body of the hat according to the chart until you have reached the desired height. This will typically be around 6-8 inches, depending on your personal preference and the length of your head. Once you have reached the desired height, you can start decreasing the stitches to shape the top of the hat.
In the next section, we will explore the decreasing process and how to finish off the hat with a smooth and seamless top.
Decrease Rounds
In the process of knitting the Norwegian star hat, there are several decrease rounds that need to be executed to shape the crown. These decrease rounds are crucial to create the desired tapered shape of the hat and make it fit snugly on the head.
One of the common decrease techniques used in knitting the Norwegian star hat is the knit two together (k2tog) decrease. This is done by inserting the right needle into the next two stitches on the left needle, and knitting them together as if they were one stitch. This technique helps reduce the number of stitches on the needle and creates a decrease in the fabric.
- On the first decrease round, start by knitting one stitch, then knit two stitches together. Repeat this pattern until the end of the round.
- On the subsequent decrease rounds, knit the stitches as they appear until two stitches before the previous decrease stitch. Then, knit those two stitches together, followed by knitting one stitch. Repeat this pattern until the end of the round.
- Continue to decrease in this manner, with the number of knit stitches between the decrease stitches decreasing by one in each decrease round, until there are only a few stitches left on the needle.
To create a decorative effect and add visual interest to the crown of the Norwegian star hat, you can also incorporate other decrease techniques such as the slip-slip-knit (ssk) decrease or the centered double decrease. These techniques create unique and intricate patterns when combined with the star motif of the hat.
Please note that the specific number of decrease rounds and the pattern of decreases may vary depending on the size of the hat and the desired fit. It is recommended to refer to the specific knitting pattern or instructions for accurate guidance on the decrease rounds for the Norwegian star hat.
Tips for Knitting the Norwegian Star Pattern
When knitting the Norwegian star hat pattern, there are a few tips to keep in mind to ensure successful results. This pattern features intricate colorwork and geometric designs that can be challenging but rewarding to create.
1. Choose the Right Yarn
When knitting the Norwegian star pattern, it’s important to select a yarn that is suitable for colorwork. Choose a yarn with good stitch definition and that is not too slippery, as this will help to showcase the intricate designs. Wool or wool-blend yarns are popular choices for this type of pattern.
2. Practice Tension Control
Tension control is crucial when working on colorwork patterns like the Norwegian star. Make sure to knit with a consistent tension throughout the project to maintain the desired gauge. This will ensure that your stitches and motifs are even and well-defined.
3. Use Stitch Markers
To keep track of the different sections and rounds in the Norwegian star pattern, it can be helpful to use stitch markers. Marking off sections can help prevent mistakes and make it easier to follow the charted pattern instructions. Place a stitch marker at the beginning of each section or whenever the pattern indicates a change.
4. Read and Understand the Chart
The Norwegian star pattern typically includes a chart to follow for the colorwork designs. Take the time to thoroughly read and understand the chart before starting. Familiarize yourself with the symbols used and any specific instructions provided. This will help you visualize the final outcome and make fewer mistakes along the way.
5. Take Breaks and Check Your Progress
Colorwork can be mentally and physically demanding, so it’s important to take breaks and check your progress regularly. Pause to examine the design and make sure that your stitches are aligned correctly. This will help to catch any mistakes early on and make any necessary adjustments.
By following these tips, you’ll be well-prepared to take on the challenge of knitting the Norwegian star pattern. Enjoy the process and watch as the intricate designs come to life in your finished hat!
Customizing Your Hat
Once you have completed the Norwegian star hat knitting pattern, you may want to customize your hat to give it a unique touch. There are several ways you can personalize your hat to make it stand out and reflect your personal style.
Choosing your yarn: One of the easiest ways to customize your hat is to select a different color or type of yarn than what is specified in the pattern. This can completely change the look and feel of your hat. Consider using a variegated yarn for a more colorful and playful hat, or a chunky yarn for a cozier and warmer feel.
- Adding pom-poms: Pom-poms are a fun and popular way to add some extra flair to your hat. You can either make your own pom-poms using yarn or purchase pre-made ones. Attach them to the top of your hat for a whimsical touch.
- Embroidery: Another way to customize your hat is through embroidery. You can add your initials, a small design, or even a simple phrase using colorful embroidery floss. This can add a personalized and handmade touch to your hat.
- Buttons and embellishments: Adding buttons or other embellishments can also give your hat a unique look. Sewing buttons along the brim or attaching a decorative patch can add visual interest and make your hat stand out.
Note: Make sure to consider the weight of any added embellishments, as they may affect the fit and drape of your hat.
Customizing your hat allows you to put your own personal stamp on the finished product. It’s a chance to experiment and have fun with your knitting while creating something that is truly one-of-a-kind. So let your creativity shine and make your Norwegian star hat reflect your own individual style!
Final Thoughts
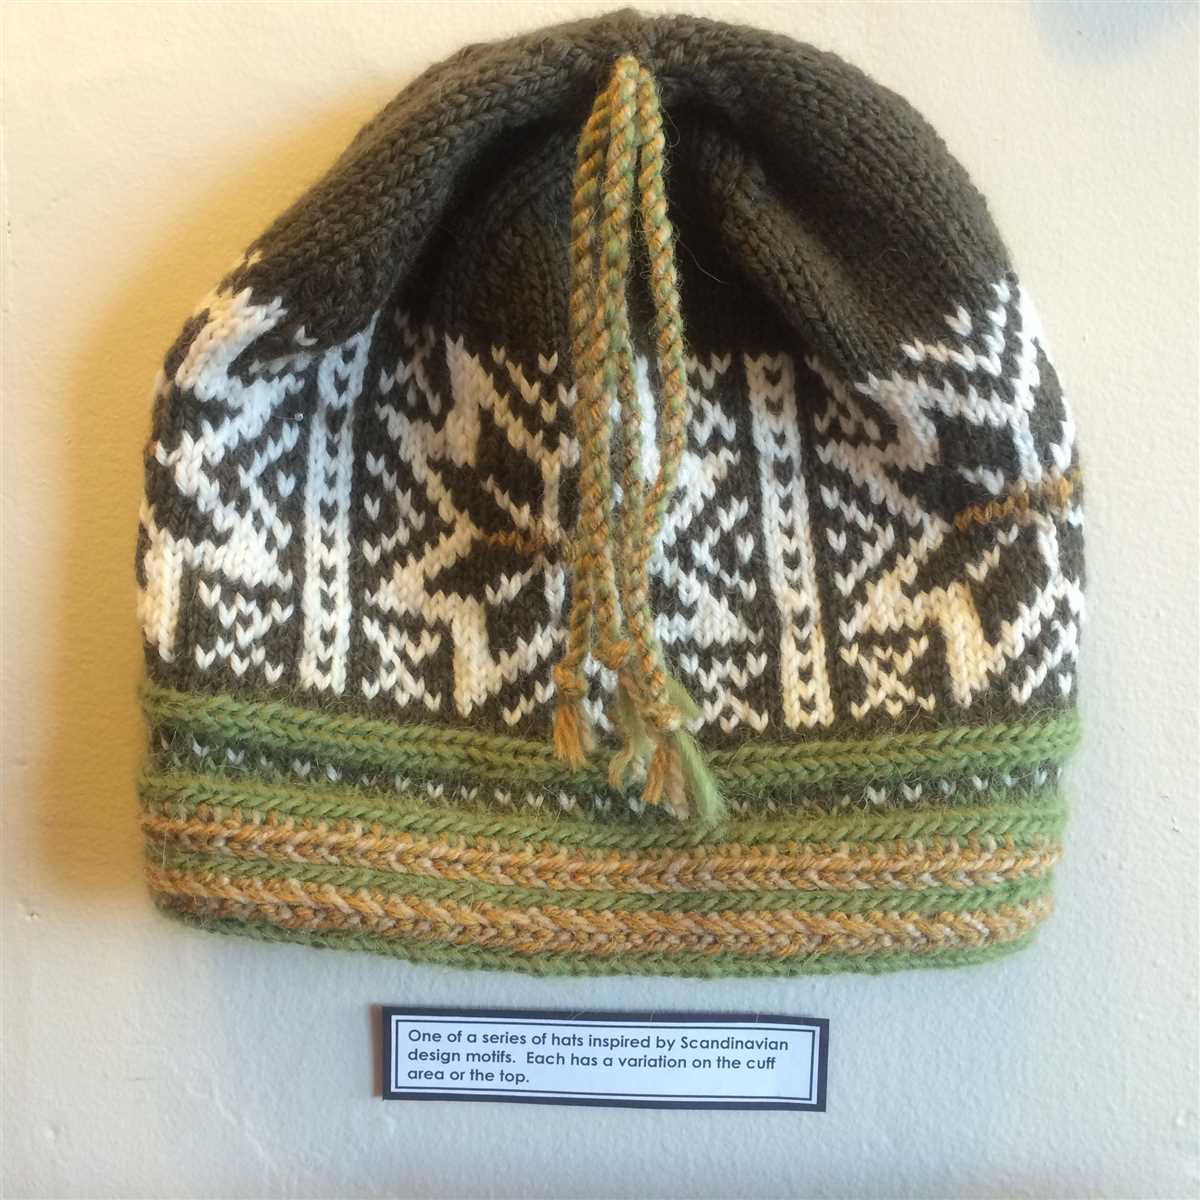
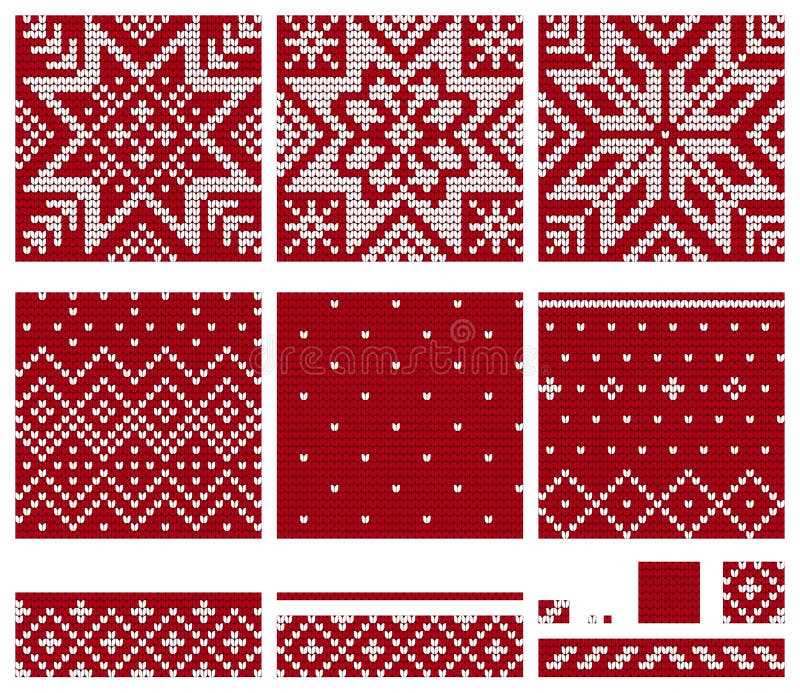
After exploring different types of Norwegian star hat knitting patterns, it is evident that these patterns offer a unique and beautiful design that captures the essence of Norwegian culture. The intricate geometric motifs and bold color combinations make these hats stand out and become a statement accessory.
The Norwegian star hat knitting patterns have their roots in traditional Fair Isle and stranded colorwork techniques, which have been passed down through generations. The complexity of these patterns may seem intimidating at first, but with practice and patience, anyone can master the art of creating these stunning hats.
- Versatility: One of the great things about Norwegian star hat knitting patterns is their versatility. They can be customized to fit any style or preference. Whether you prefer a bold and vibrant look or a more subtle and muted color scheme, there are endless possibilities to explore.
- Warmth: Norwegian star hats are not just fashionable, but they also provide warmth during the cold winter months. The double-layered construction and the use of wool or other warm yarns make these hats cozy and perfect for battling the chill.
- Cultural Heritage: Knitting a Norwegian star hat not only allows you to create a beautiful accessory but also connects you to the rich cultural heritage of Norway. This traditional knitting technique has been passed down through generations and offers a glimpse into the history and traditions of this Nordic country.
- Personal Satisfaction: Completing a Norwegian star hat knitting project can be incredibly satisfying. Seeing the intricate motifs come together and holding the finished hat in your hands is a rewarding experience. It allows you to showcase your knitting skills and create something that is not only functional but also a work of art.
Overall, Norwegian star hat knitting patterns are a wonderful way to explore the world of traditional knitting techniques and add a touch of Nordic charm to your wardrobe. Whether you are a beginner or an experienced knitter, trying out these patterns is a delightful journey that will leave you with a unique and beautiful hat.
Where to Find the Norwegian Star Hat Knitting Pattern
If you’re interested in creating your own Norwegian Star Hat, there are several places where you can find the knitting pattern. Whether you prefer online resources or physical books, there are options available for every knitter.
1. Online Knitting Communities and Websites:
Many online knitting communities and websites offer free knitting patterns, and the Norwegian Star Hat pattern may be available on these platforms. Websites like Ravelry, AllFreeKnitting, and LoveCrafts are popular choices for finding knitting patterns.
2. Knitting Blogs:
Knitting blogs are a great resource for finding unique and often free knitting patterns. Bloggers frequently share their own patterns, and it’s possible that someone has created and shared the Norwegian Star Hat pattern on their blog. A quick search on popular knitting blog directories or search engines may yield the pattern you’re looking for.
3. Craft Books:
Craft books, especially those focused on knitting, often include a variety of patterns for different types of hats. Local libraries, bookstores, and online retailers like Amazon may have books dedicated to Norwegian knitting patterns that include the Norwegian Star Hat pattern.
4. Knitting Stores:
Local knitting stores may sell pattern booklets or individual patterns that include the Norwegian Star Hat. These patterns may be created by local designers or feature traditional Norwegian patterns.
In conclusion, there are various resources available for finding the Norwegian Star Hat knitting pattern. Whether you prefer online communities, blogs, books, or local knitting stores, there’s likely a source that will meet your needs. With a little research and exploration, you’ll be on your way to creating your own beautiful Norwegian Star Hat.