
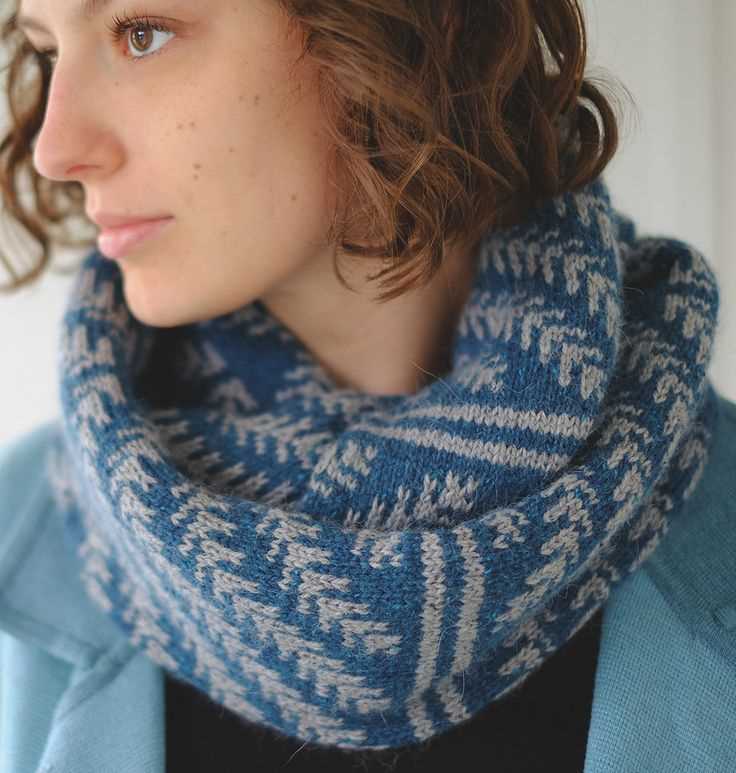
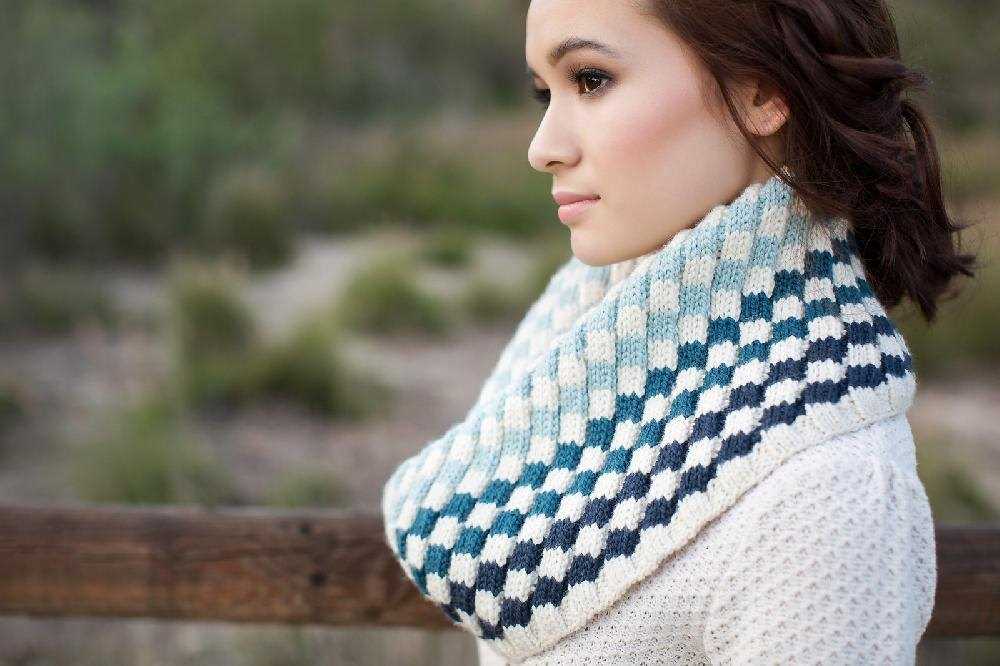
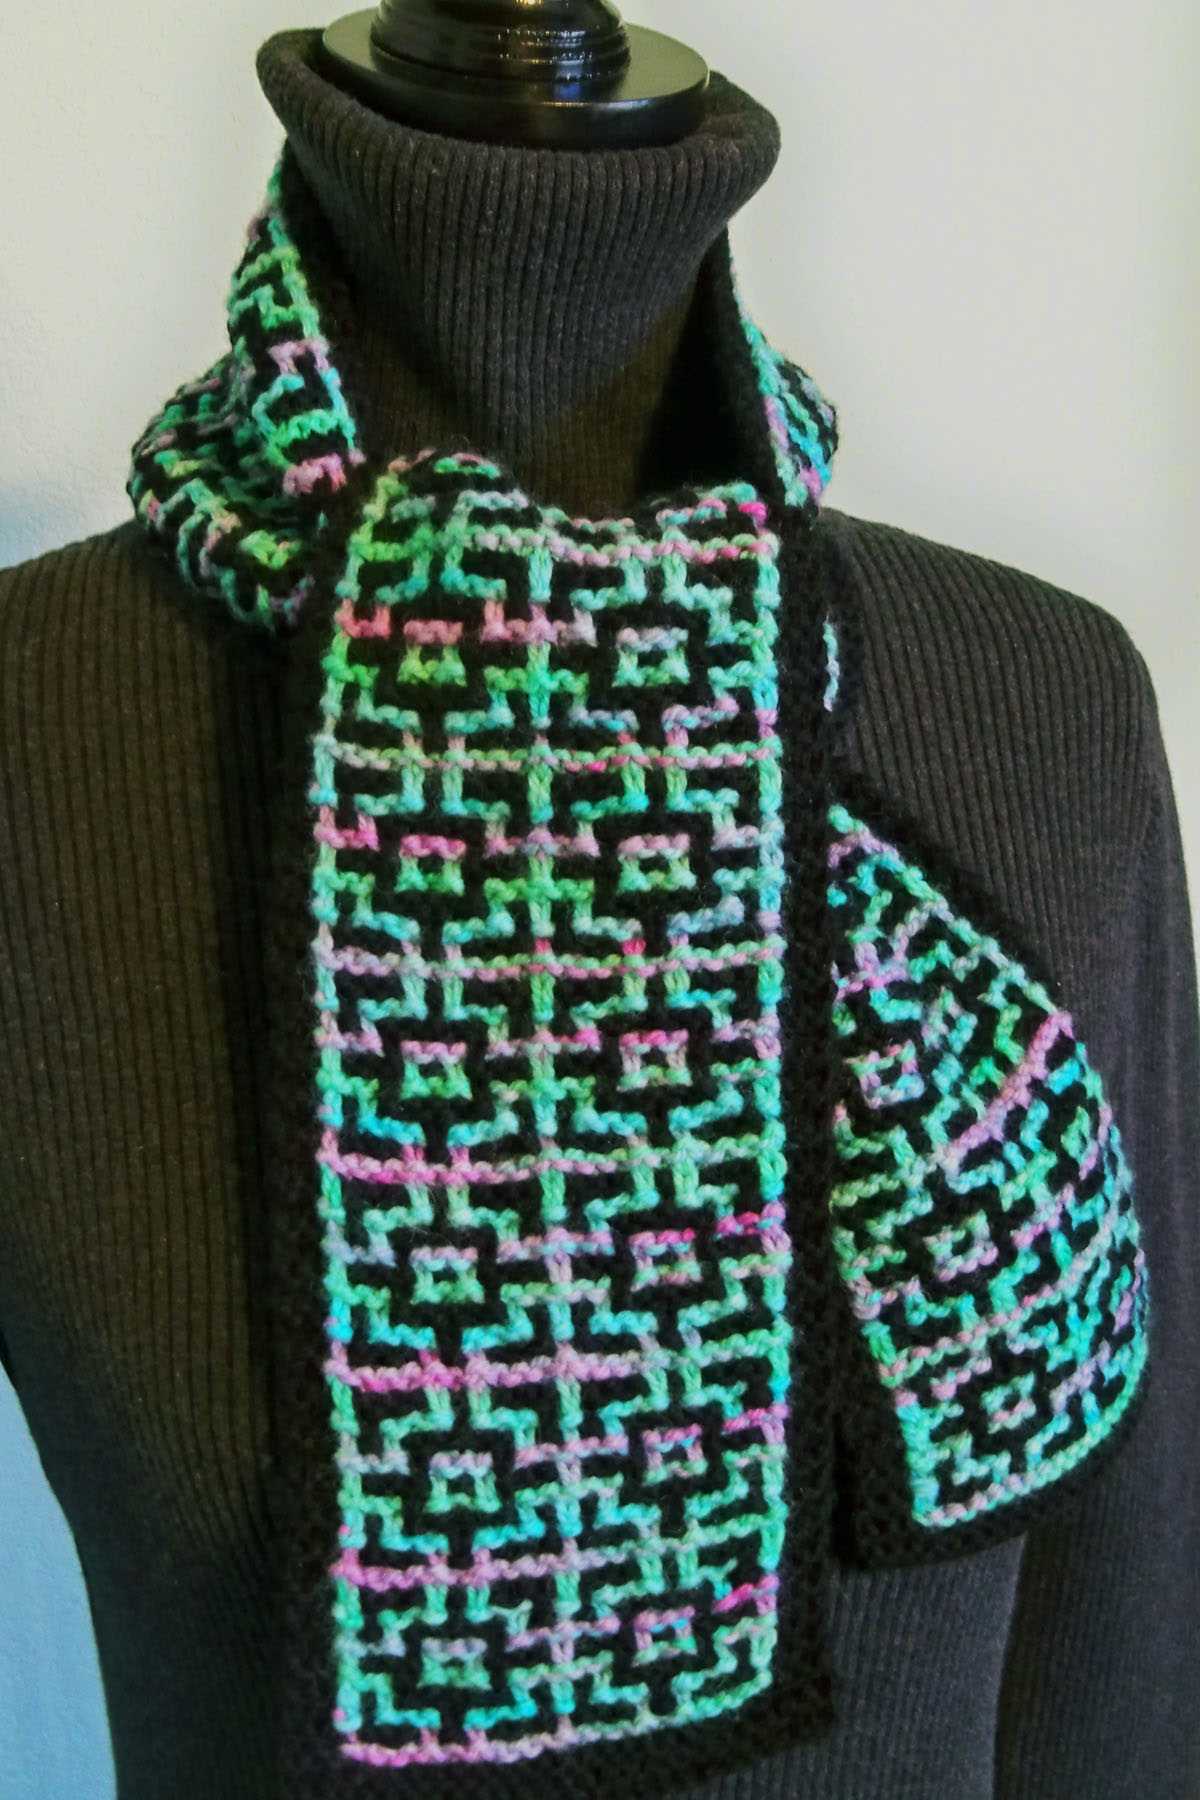
If you’re looking for a fun knitting project that combines simplicity with stunning results, look no further than the mosaic cowl. This technique uses two colors of yarn and basic knit and purl stitches to create a beautiful, intricate pattern that looks much more complicated than it actually is. Whether you’re a beginner knitter or a seasoned pro, this pattern is sure to impress.
The beauty of the mosaic cowl is in its simplicity. The pattern uses a technique called slip-stitch knitting, which means you only work with one color of yarn at a time, while the other color is slipped or skipped over. This creates a stunning mosaic-like effect, with blocks of color and texture that really pop. Plus, the pattern is reversible, so no matter how you wear it, you’ll always look stylish.
To create your own mosaic cowl, all you need are two colors of yarn and appropriately sized knitting needles. The pattern is worked in the round, so you’ll also need either a circular needle or double-pointed needles, whichever you prefer. The beauty of this pattern is that you can play around with different color combinations to create a cowl that suits your personal style. Whether you prefer bold, contrasting colors or subtle, tonal shades, the mosaic cowl pattern is versatile enough to accommodate.
Materials needed for knitting a mosaic cowl
Knitting a mosaic cowl requires a few specific materials to ensure a successful and beautiful finished product. Here is a list of the materials you will need:
- Yarn: Choose two contrasting colors of yarn, one for the main color (MC) and one for the contrasting color (CC). It is important that the yarn is suitable for knitting with the desired needle size and that the colors contrast well with each other.
- Needles: You will need a circular needle in the appropriate size for your chosen yarn. Make sure the needle length is suitable for comfortably knitting in the round.
- Stitch markers: These are helpful for marking the beginning of the round and any pattern repeats.
- Tapestry needle: This will be used for weaving in ends and finishing your cowl.
- Scissors: A pair of sharp scissors is essential for cutting the yarn and trimming any excess.
- Blocking materials: Depending on the yarn you are using, you may need blocking mats, pins, and/or a steam iron to block and shape your cowl.
Make sure you have all of these materials on hand before starting your mosaic cowl project. Having everything prepared will make the knitting process smoother and more enjoyable.
Understanding the mosaic knitting technique
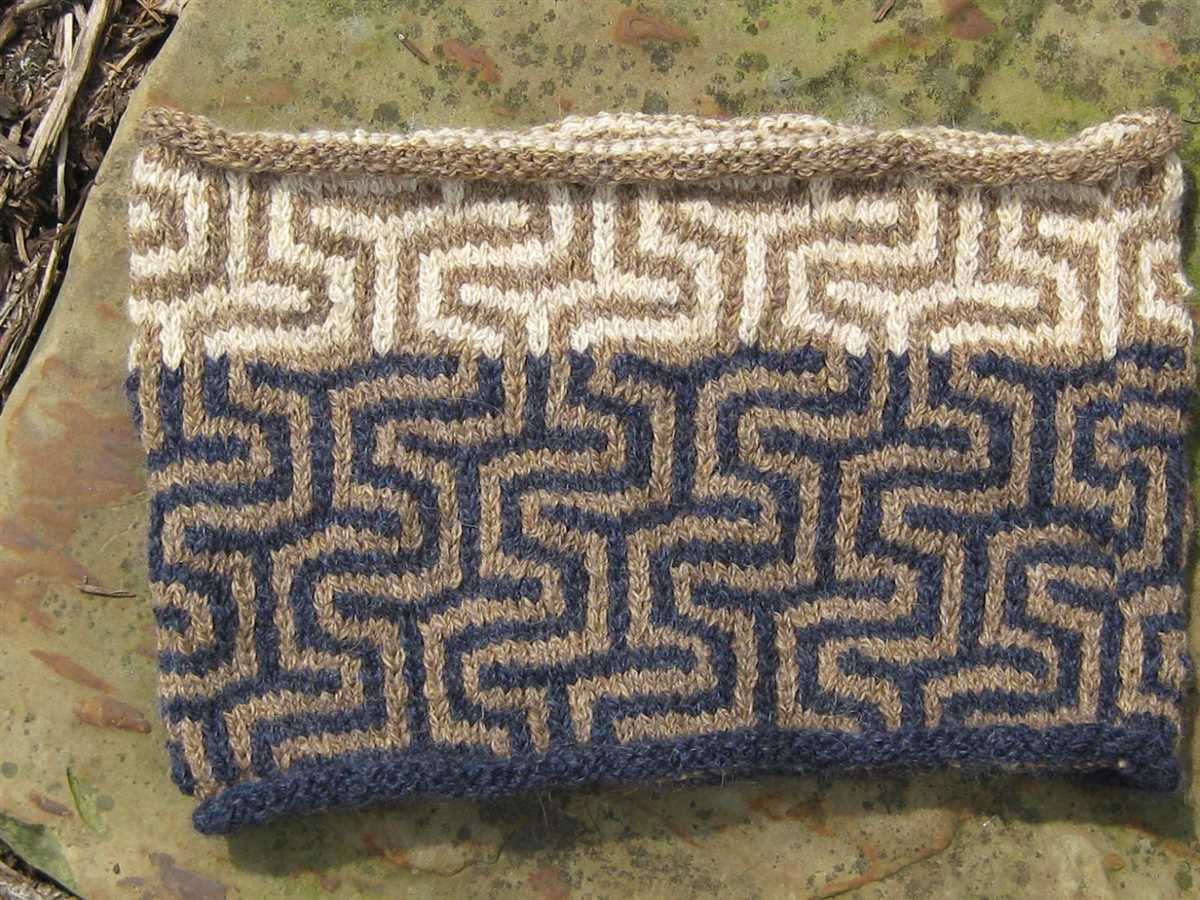
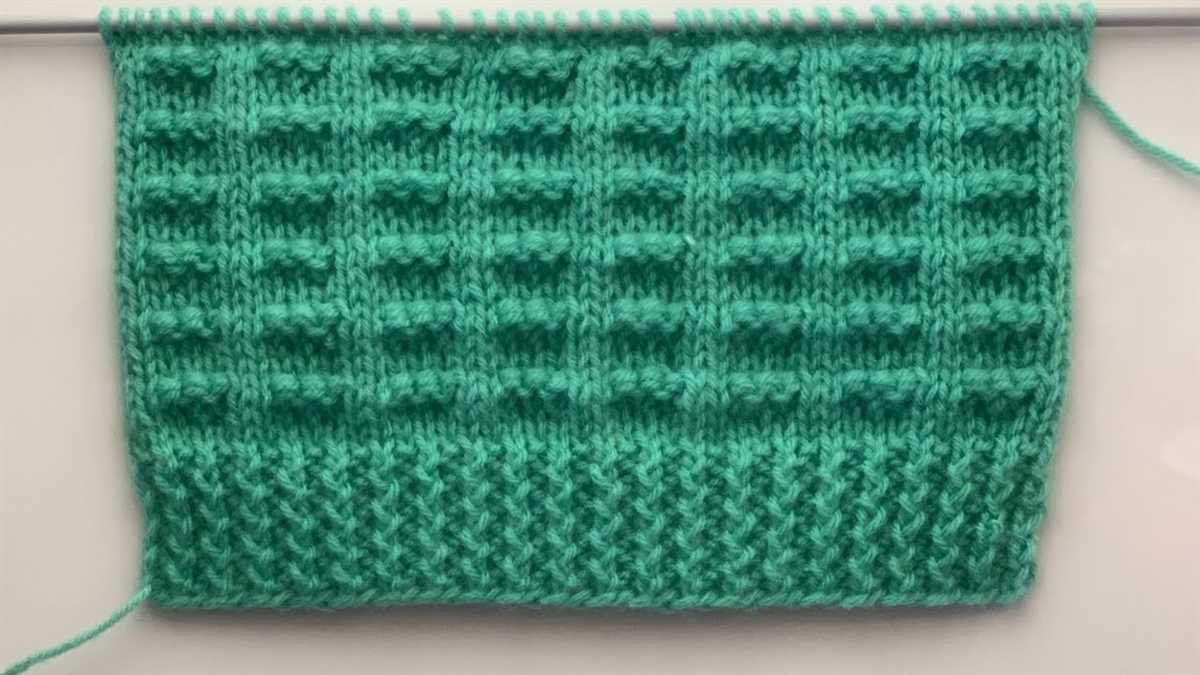
Mosaic knitting is a colorwork technique that creates beautiful patterns and designs using only one color at a time. It is a relatively simple technique that can produce stunning results. The key to mosaic knitting is the use of slip stitches to create the colorwork pattern. By slipping certain stitches from the previous row, the contrasting color is brought up to the current row, creating the illusion of two colors working together.
To create a mosaic knitting pattern, you will typically need a chart or a written pattern that outlines the specific colorwork design. The chart or pattern will indicate which stitches should be slipped and which stitches should be knit or purled. By following the chart or pattern, you will be able to create intricate geometric patterns, stripes, or other designs.
The mosaic knitting technique is often used to create cowls, like the popular mosaic cowl knitting pattern. Cowls are a great project for practicing mosaic knitting because they are small and quick to knit, and they allow you to experiment with different color combinations and patterns. The versatility of mosaic knitting also allows you to easily customize your cowl by choosing your own color palette and design.
With a basic understanding of mosaic knitting and a bit of practice, you can create stunning colorwork patterns and designs. Whether you’re a beginner knitter or an experienced one, mosaic knitting is a technique worth exploring. So grab your needles, choose your colors, and give mosaic knitting a try!
Choosing the right yarn for your mosaic cowl
When it comes to knitting a mosaic cowl, choosing the right yarn is essential to ensure that your finished project turns out just as you envisioned it. The yarn you choose will determine not only the look and feel of your cowl, but also its durability and ease of care.
One important factor to consider when selecting yarn for your mosaic cowl is the fiber content. Natural fibers such as wool, alpaca, and cashmere are popular choices due to their warmth and softness. These fibers also have good stitch definition, making them ideal for showcasing the mosaic knitting pattern. If you prefer a vegan or allergy-friendly option, there are also plenty of synthetic yarns available that mimic the feel and look of natural fibers.
Another consideration is the weight of the yarn. The weight will determine how warm and bulky your cowl will be. For a lightweight and breathable cowl, you may opt for a fingering or sport weight yarn. If you want a more substantial and cozy cowl, a worsted or bulky weight yarn would be a better choice. Keep in mind that the weight of the yarn will also affect the overall size and drape of your cowl.
Additionally, it’s important to take into account the color and pattern of the yarn. Mosaic knitting relies on contrasting colors to create the intricate designs, so choosing yarns with strong color contrast is key. Variegated or self-striping yarns can create interesting effects, adding depth and dimension to your cowl. However, if you prefer a more subtle and timeless look, solid or semi-solid colors will work well too. Ultimately, the choice of color and pattern will depend on your personal style and the look you want to achieve.
Lastly, don’t forget to check the yardage and recommended gauge of the yarn. The yardage will determine how much yarn you need for your project, while the recommended gauge will ensure that your stitches are the correct size. Be sure to swatch and check your gauge before starting your mosaic cowl to avoid any sizing issues.
Overall, choosing the right yarn for your mosaic cowl involves considering factors such as fiber content, weight, color and pattern, as well as yardage and gauge. By taking the time to carefully select the perfect yarn, you can create a mosaic cowl that not only looks beautiful but also feels great to wear.
Selecting the right knitting needles
Knitting needles are an essential tool for any knitter, and selecting the right needles can greatly impact your knitting experience. There are various factors to consider when choosing knitting needles, including the material, size, and shape.
Material: Knitting needles are typically made from different materials, such as wood, metal, bamboo, or plastic. Each material has its own advantages and disadvantages. Wooden needles are lightweight, warm to the touch, and provide a good grip. Metal needles are durable, smooth, and ideal for knitting with slippery yarns. Bamboo needles are lightweight like wood and also provide a good grip, making them great for beginners. Plastic needles are lightweight and inexpensive, but may not be as durable.
Size: Knitting needle sizes are measured in millimeters or US sizes. The size of the needle you choose will depend on the yarn weight and the desired tension or gauge of your project. Thicker yarns generally require larger needles, while thinner yarns require smaller needles. It’s essential to match the needle size to the recommended size on your knitting pattern to achieve the correct gauge.
Shape: Knitting needles come in various shapes, such as straight, circular, or double-pointed. Straight needles are commonly used for flat knitting projects, such as scarves or blankets. Circular needles have a flexible cable connecting two needle tips and are ideal for knitting in the round, such as for hats or sweaters. Double-pointed needles have points on both ends and are commonly used for projects with small circumferences, such as socks or gloves. The shape of the needle you choose will depend on the type of project you’re working on.
In summary, choosing the right knitting needles involves considering factors such as the material, size, and shape. The material should be chosen based on your preferences and the type of yarn you’re working with. The size of the needle should match the recommended size on your knitting pattern to achieve the desired gauge. Finally, the shape of the needle should be selected based on the type of project you’re working on, whether it’s flat knitting, knitting in the round, or working with small circumferences. By selecting the right knitting needles, you can enhance your knitting experience and create beautiful projects.
Casting on stitches for your mosaic cowl
When starting your mosaic cowl knitting project, the first step is to cast on the required number of stitches. This will determine the width of your cowl and can be adjusted based on your personal preferences. Different mosaic cowl patterns may have different stitch counts, so be sure to check the pattern instructions before beginning.
To cast on your stitches, you can use any cast-on method that you are comfortable with. Some popular options include the long-tail cast-on, the cable cast-on, or the knitted cast-on. The choice of cast-on method can depend on the desired stretchiness of your cowl and the type of yarn you are using.
Long-tail cast-on: This is a commonly used cast-on method that creates a neat and flexible edge. To do this cast-on, estimate the length of yarn needed for each stitch, leaving a long tail for the initial loop. Then, make a slipknot and place it on the needle. Hold the needle with the slipknot in your right hand and the working yarn in your left hand. Insert the right-hand needle into the slipknot from front to back, then wrap the working yarn around the needle counterclockwise. Bring the yarn back through the slipknot and pull it snugly. Repeat these steps for the desired number of stitches.
Cable cast-on: This cast-on method is useful when you want a firm edge for your cowl. To start, make a slipknot and place it on the needle. Hold the needle with the slipknot in your right hand and the working yarn in your left hand. Insert the right-hand needle between the first and second stitches from front to back. Wrap the working yarn around the needle counterclockwise and pull it through the gap, creating a new stitch on the right-hand needle. Repeat these steps for the desired number of stitches.
Once you have cast on the required number of stitches, you are ready to begin knitting your mosaic cowl pattern. Follow the pattern instructions for the mosaic colorwork and stitch patterns, and enjoy creating a beautiful and unique cowl.
Knitting the main body of the cowl
Once you have cast on the required number of stitches, you can begin knitting the main body of the cowl. The main body of the cowl is worked in a mosaic stitch pattern, which creates a beautiful and intricate design. The mosaic stitch pattern involves working with two different colors of yarn, and alternating between them to create the pattern.
To start knitting the main body of the cowl, you will need to follow the mosaic stitch pattern chart. The chart will show you the pattern of stitches you need to work for each row. Each square on the chart represents a stitch, and the color of the square indicates which color of yarn to use for that stitch.
When working the mosaic stitch pattern, you will need to carry the unused color of yarn up the side of your work. To do this, simply hold the yarn not in use loosely along the edge of your work, and make sure to catch it in the stitches every few rows to secure it in place.
Continue knitting the main body of the cowl following the mosaic stitch pattern chart until you reach the desired length. Make sure to check your gauge as you go to ensure that your cowl is the correct size. Once you have reached the desired length, you can move on to finishing your cowl, which involves binding off and adding any desired finishing touches.
Creating the mosaic pattern
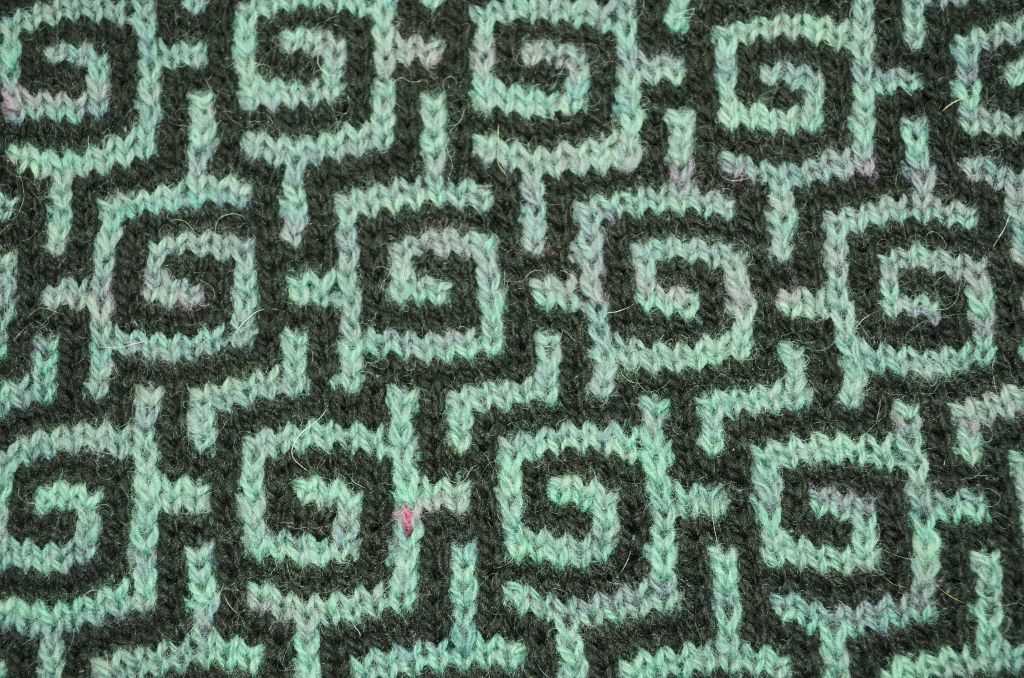
The mosaic pattern in the cowl is created using a combination of knit and purl stitches. This pattern is achieved by working two different colors of yarn in a specific sequence to create the desired design. The pattern can be created using a chart or written instructions.
To start creating the mosaic pattern, choose two contrasting colors of yarn that will show the design clearly. The main color will be used for the background, while the contrasting color will create the design. The pattern typically consists of blocks or motifs that are repeated throughout the cowl.
The first step in creating the mosaic pattern is to establish the stitch pattern for the background. This is usually a simple knit or purl stitch. The contrasting color is then introduced to create the design. The design is created by alternating between knitting and purling stitches in the contrasting color according to the chart or written instructions.
When working with the mosaic pattern, it’s important to pay attention to tension and gauge. The tension should be consistent throughout the cowl to ensure that the design is evenly formed. It’s also important to keep an eye on the chart or written instructions to maintain the correct stitch pattern.
Overall, creating the mosaic pattern in the cowl requires focus and attention to detail. By following the chart or written instructions and maintaining consistent tension, you can achieve a beautiful and intricate design in your knitting.
Tips for maintaining tension while knitting
Knitting is a craft that requires careful attention to tension in order to achieve a balanced and professional-looking finished product. Here are some tips for maintaining tension while knitting:
1. Use the correct needle size
Using the correct needle size for your yarn is crucial for maintaining an even tension. If your stitches are too loose, switch to a smaller needle size, and if they are too tight, switch to a larger needle size.
2. Practice consistent hand movement
Try to be consistent in your hand movements while knitting. Avoid pulling the yarn too tightly or letting it hang too loosely. Developing a steady rhythm and maintaining steady tension will help you achieve consistent stitch sizes.
3. Check your tension regularly
Periodically stop and check your tension by measuring a section of your knitting with a ruler or tape measure. If your tension is uneven, take the time to adjust it before continuing. This will ensure that your finished project has a consistent appearance.
4. Use stitch markers
Using stitch markers can help you keep track of your tension and ensure that your stitches are the correct size. Place a marker every few inches, and compare the stitch sizes between markers. If they vary significantly, you may need to adjust your tension.
5. Relax
Tension can often be influenced by stress and tension in your body. Take regular breaks, stretch your hands and wrists, and try to relax while you knit. A relaxed body and mind will help you maintain a more even tension.
By following these tips, you can improve your knitting tension and create beautiful and consistent projects.
Binding off stitches and finishing the edges
The final step in completing the mosaic cowl knitting pattern is binding off the stitches and finishing the edges. This step is crucial for achieving a clean and polished look for your finished cowl.
To bind off the stitches, you will need to cut the yarn, leaving a tail that is long enough to weave in later. Starting with the first stitch, insert the right needle into the first stitch on the left needle and lift it over the second stitch and off the needle. Repeat this process for each stitch until you have only one stitch remaining on the right needle. Cut the yarn, leaving a longer tail for weaving in.
After binding off all the stitches, you can then proceed to finish the edges of the cowl. This can be done in several different ways, depending on your personal preference and the desired look of your finished cowl. One popular option is to use a crochet hook to add a simple crochet edging along the top and bottom edges of the cowl. This can be done by inserting the crochet hook into each stitch along the edge and working a slip stitch or single crochet stitch to create a neat and finished edge.
If you prefer a more simple and minimalistic look, you can also choose to leave the edges of the cowl unfinished. This can create a more rustic and textured look, which can be perfect for certain knitting projects. However, it is important to keep in mind that leaving the edges unfinished may result in the cowl unraveling or fraying over time, so it is recommended to use this method only if you are confident in the stability and structure of your stitches.
Once the edges are finished to your liking, you can weave in any remaining yarn tails using a tapestry needle. This involves threading the yarn tail onto the needle and weaving it in and out of the nearby stitches to secure it in place. Be sure to weave in the tail securely and trim any excess yarn to achieve a clean and professional finish.
Blocking your completed mosaic cowl
Once you have finished knitting your mosaic cowl, the next step is to block it. Blocking is an important process that helps to even out the stitches, set the shape of the cowl, and give it a professional, finished look. Here are some steps to follow when blocking your completed mosaic cowl.
1. Prepare your blocking supplies
Before you begin blocking, make sure you have all the necessary supplies. You will need blocking mats or towels, rust-proof pins or blocking wires, a measuring tape, and a spray bottle filled with water. These tools will help you shape and stretch the cowl as desired.
2. Wet-blocking
Start by soaking your completed mosaic cowl in lukewarm water. Some knitters prefer to add a little bit of wool wash to the water to help soften the fibers. Gently squeeze out the excess water, being careful not to wring or twist the cowl. Lay it flat on the blocking mats or towels, and use rust-proof pins or blocking wires to secure the edges and shape of the cowl. Make sure to measure and adjust the dimensions of the cowl if necessary.
3. Let it dry
Allow the cowl to air dry completely. This process may take several hours or even overnight, depending on the thickness of the yarn and the humidity in the air. Avoid applying direct heat or using a hairdryer, as this can damage the fibers. Once the cowl is dry, gently remove the pins or blocking wires, and it is ready to be worn or gifted.
Blocking your completed mosaic cowl is an essential step that helps enhance the overall appearance and drape of the finished piece. By following these simple steps, you can ensure that your cowl looks its best and retains its shape for years to come.
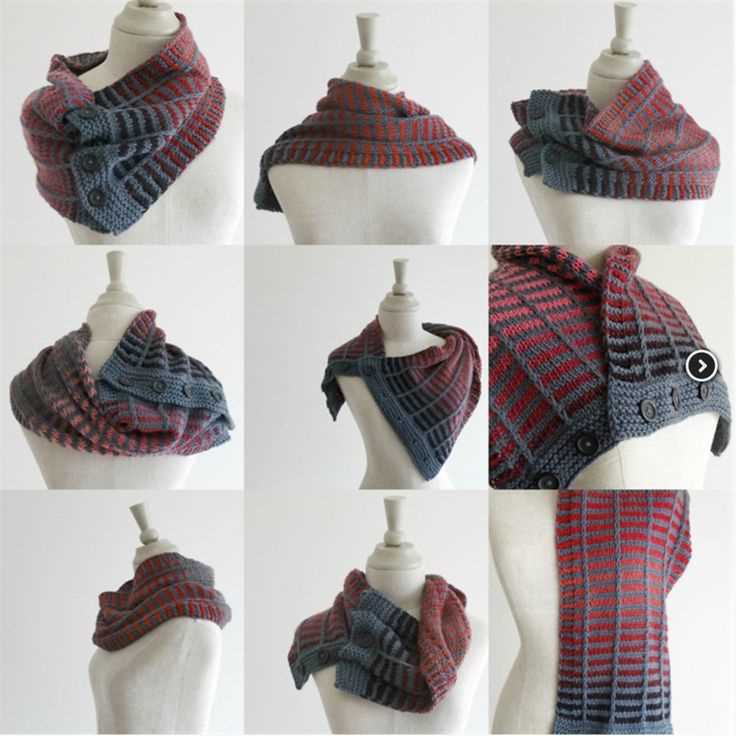
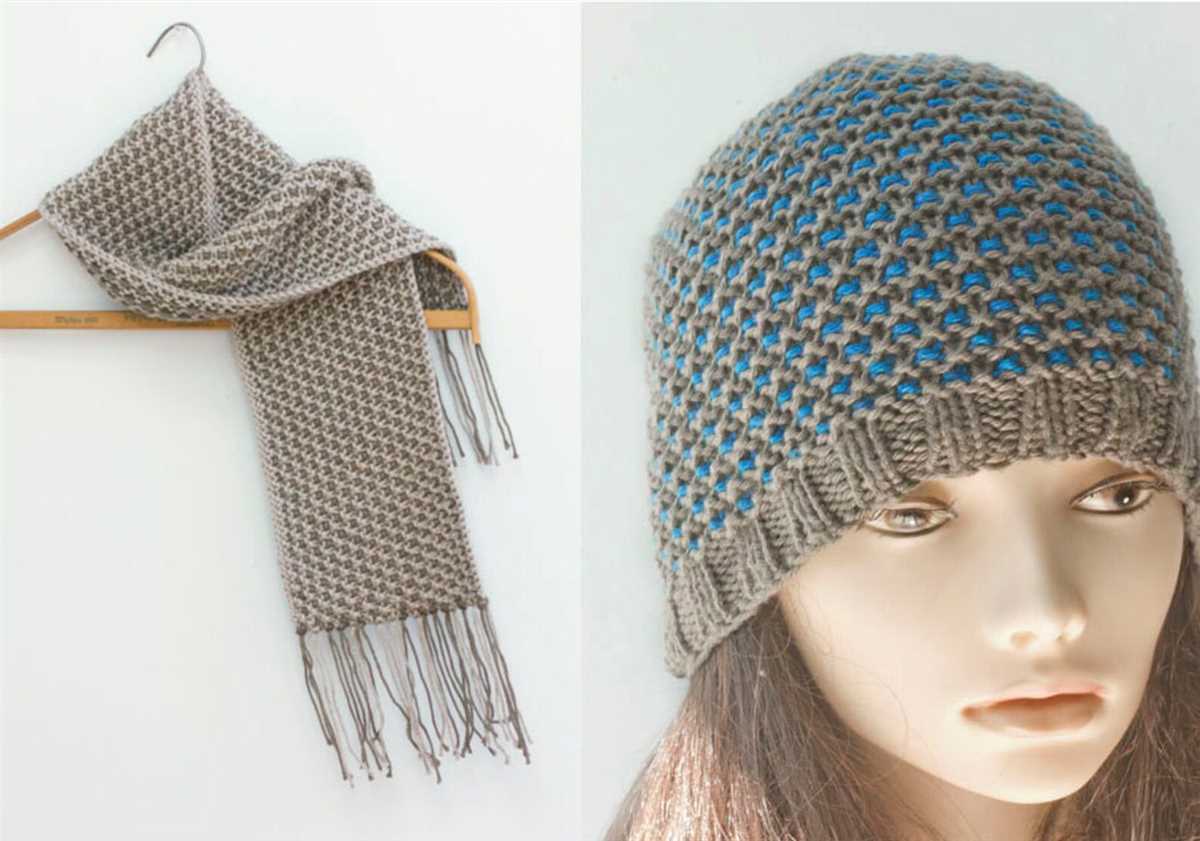
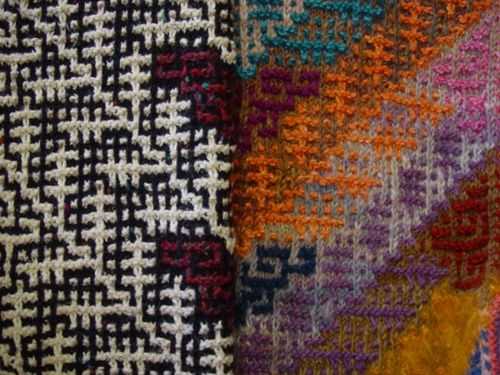
Inspiration for mosaic cowl designs and color combinations
Looking for inspiration for your next mosaic cowl project? Here are some ideas for unique designs and color combinations that will make your cowl truly stand out.
1. Nature-inspired designs: Take inspiration from the beautiful colors and patterns found in nature. Consider creating a mosaic cowl with motifs of flowers, leaves, or even animal prints. Use earthy tones and vibrant shades to mimic the beauty of the outdoors.
2. Geometric patterns: If you prefer a more contemporary look, opt for geometric designs. Mix and match squares, triangles, and diamond shapes to create a visually striking cowl. Experiment with contrasting colors to make the patterns pop.
3. Gradual color changes: Create a dynamic and visually appealing mosaic cowl by using yarns that gradually change color. Choose a yarn that transitions smoothly from one shade to another, and let the colors blend seamlessly in your design.
4. Monochromatic designs: For a sophisticated and elegant look, stick to a single color palette. Experiment with different shades and textures within that color family to create depth and interest in your mosaic cowl.
5. Contrasting colors: If you want to make a bold statement, choose contrasting colors for your mosaic cowl. Pair warm and cool tones, or go for high contrast combinations like black and white. The contrasting colors will make the mosaic patterns really pop.
In conclusion, there are endless possibilities when it comes to designing a mosaic cowl. Whether you prefer nature-inspired motifs, geometric patterns, or bold color combinations, let your creativity shine and create a unique cowl that reflects your personal style.