
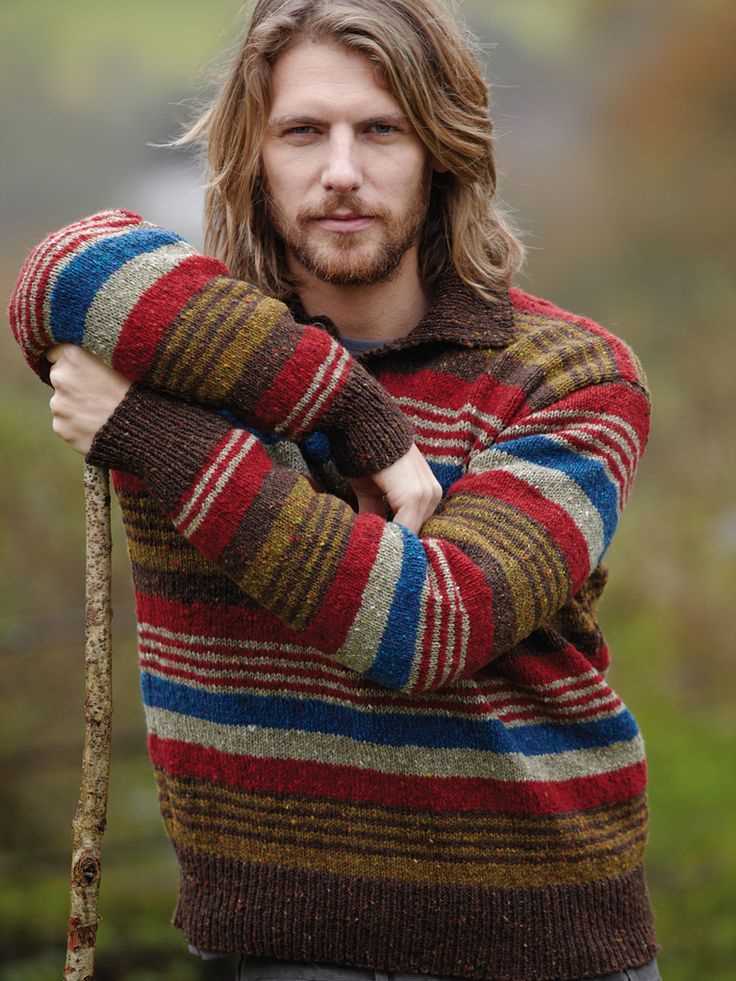
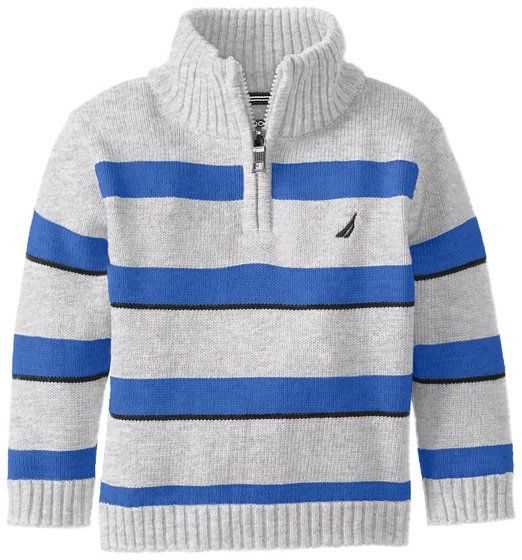
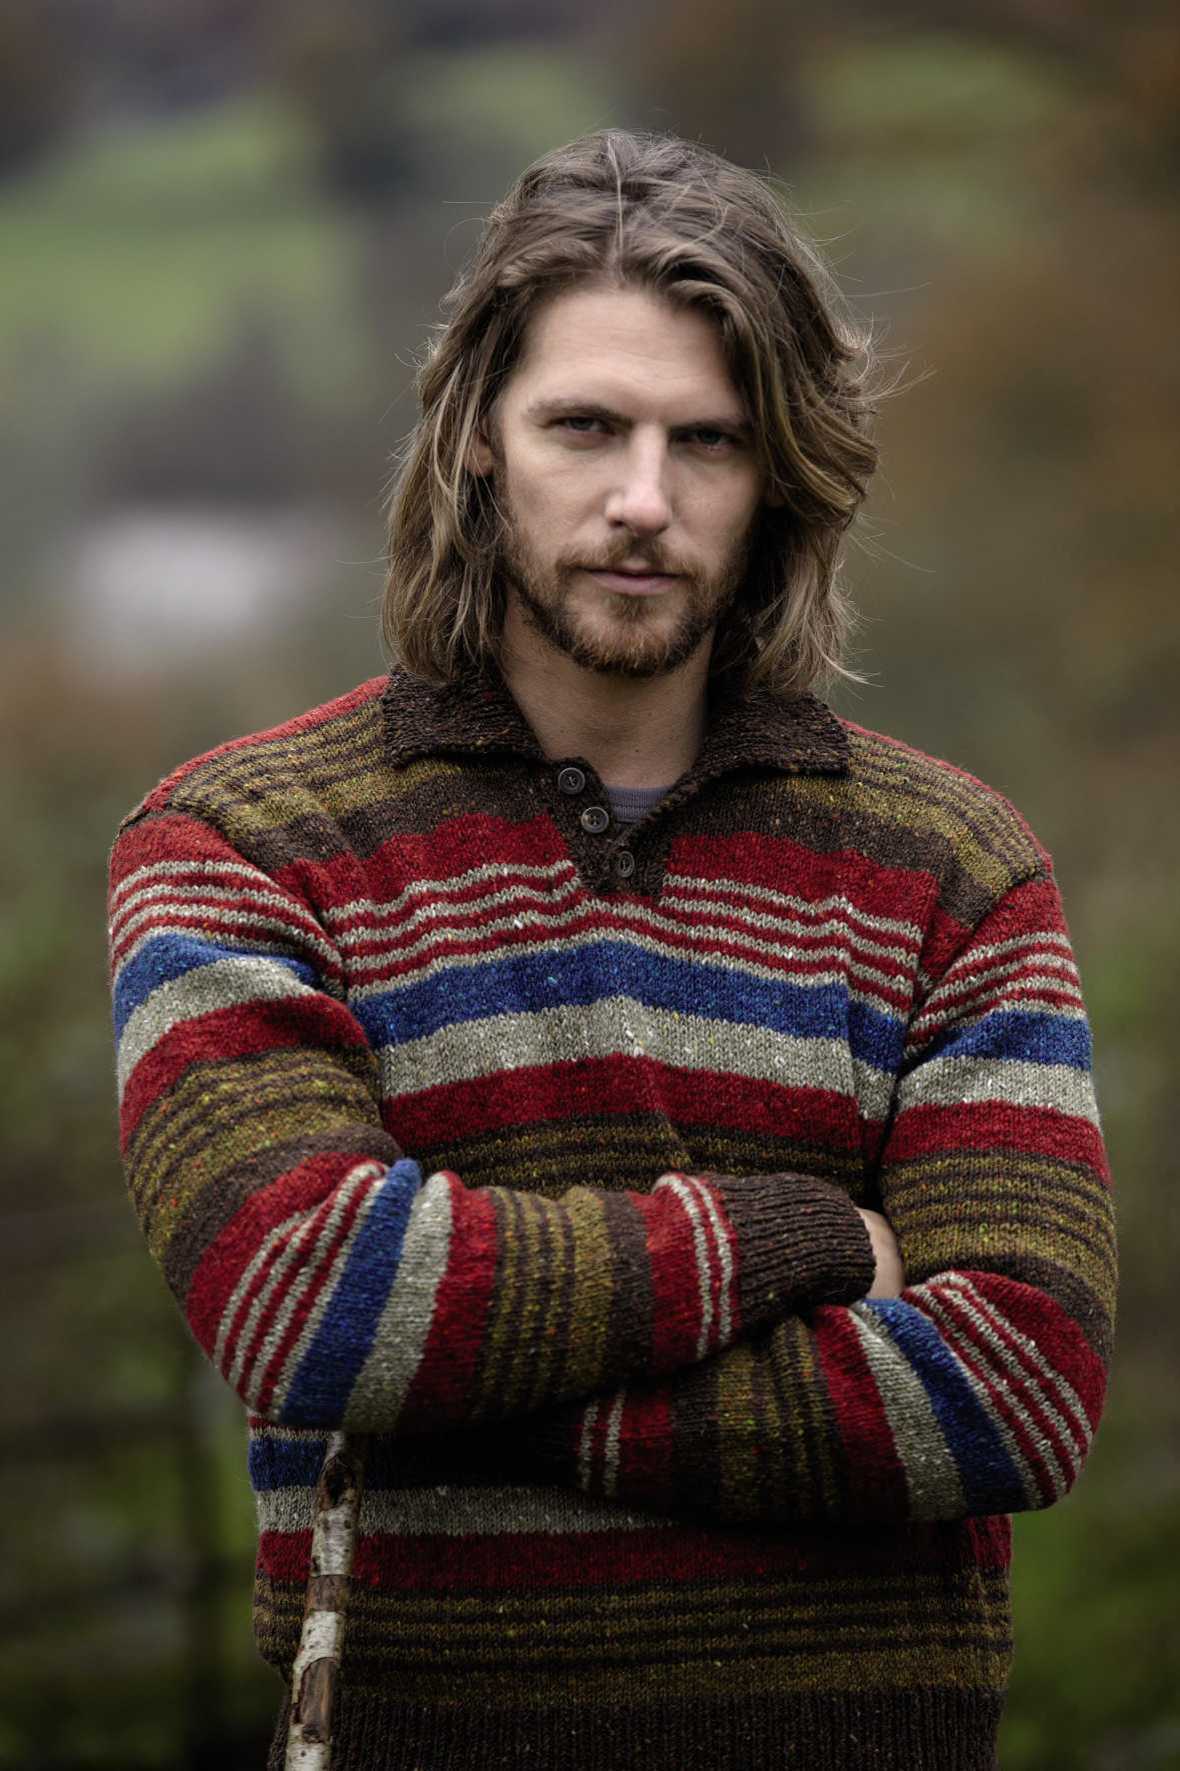
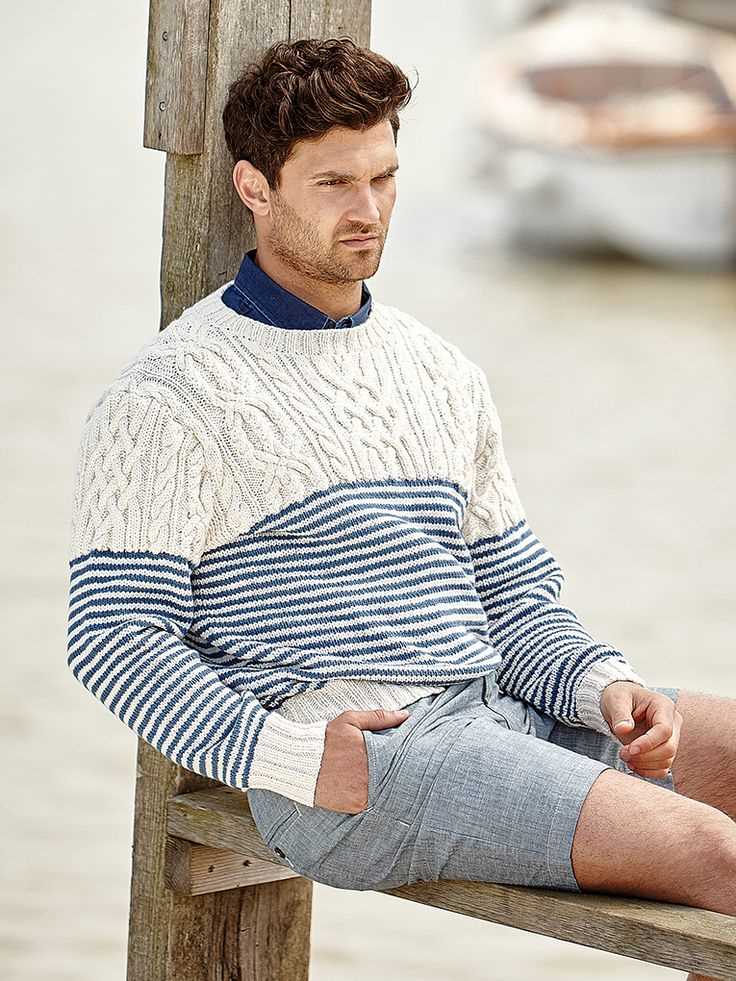
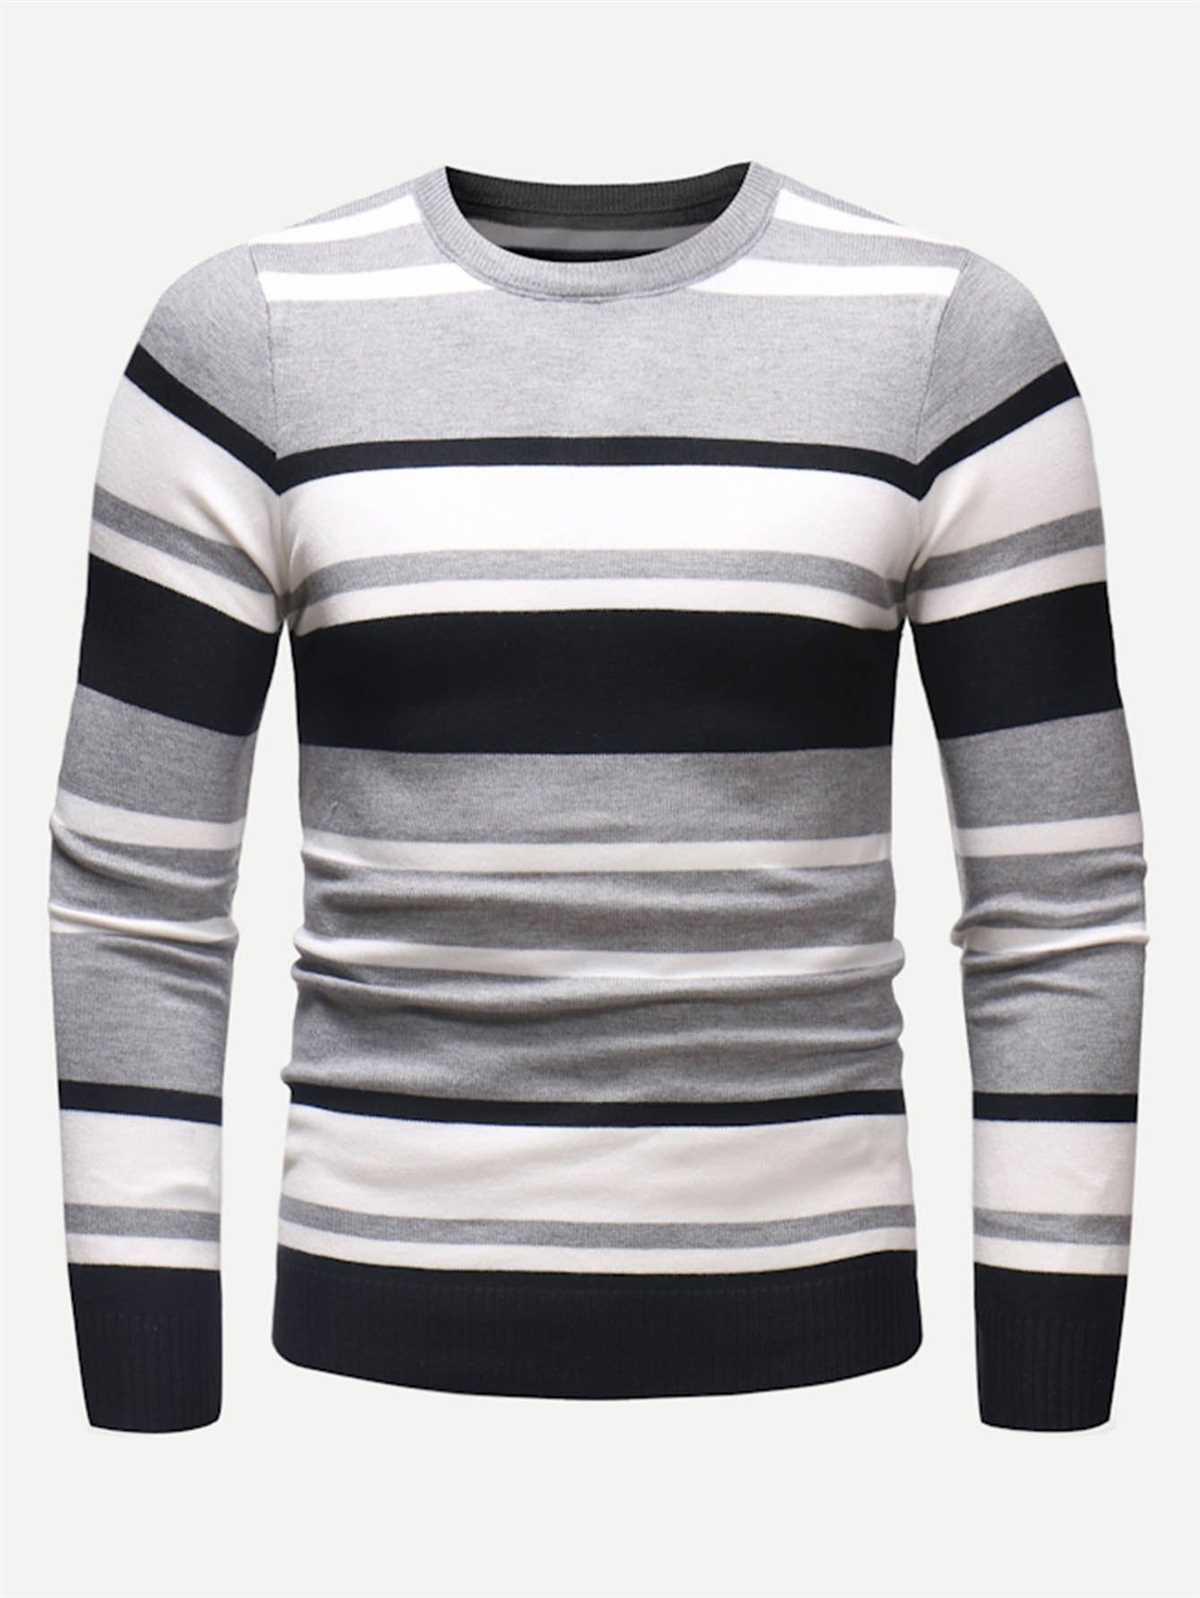
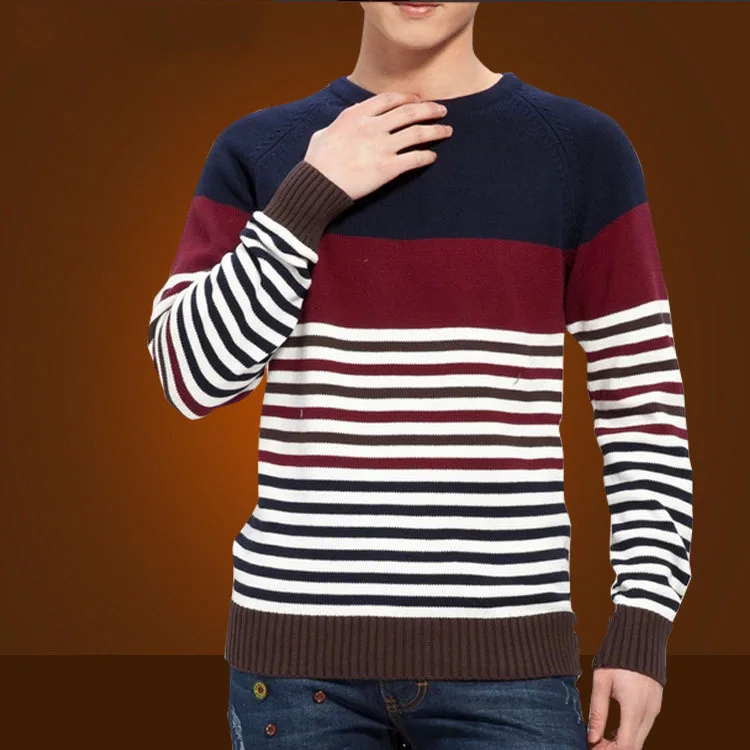
Knitting your own clothing can be a rewarding and fulfilling hobby, and creating a cozy sweater is a perfect project for both beginners and experienced knitters alike. If you’re looking to add a stylish and versatile item to your wardrobe, a men’s striped sweater is a great choice. The classic striped pattern adds visual interest to the garment, and the softness and warmth of the sweater make it a perfect choice for the colder months. In this article, we will guide you through the process of knitting your own men’s striped sweater.
Before you begin, it’s important to gather all the necessary materials. You will need a pair of knitting needles, yarn in the colors of your choice, and a tape measure. It’s also helpful to have a knitting gauge, which will ensure that your stitches are the correct size for the pattern. Once you have all your materials gathered, it’s time to select a pattern. There are countless striped sweater patterns available online and in knitting books, so you’ll have no trouble finding one that suits your style and skill level.
When choosing a pattern, consider the level of difficulty. If you’re a beginner, look for a pattern labeled as “easy” or “beginner-friendly.” These patterns will typically use basic stitches and have clear instructions, making them perfect for those who are new to knitting. If you’re more experienced, you may want to try a pattern with more complex stitches or construction techniques. Don’t be afraid to challenge yourself and learn new skills!
Once you’ve chosen a pattern, it’s time to start knitting. Begin by casting on the required number of stitches, and then follow the pattern instructions to create the body of the sweater. For a striped sweater, you’ll need to change yarn colors at regular intervals to create the desired striping effect. This can be as simple as alternating colors every few rows or as complex as following a specific stripe pattern. As you work through the pattern, be sure to check your gauge periodically to ensure that your stitches are the correct size.
Choosing the right yarn for your Mens striped sweater

When it comes to knitting a mens striped sweater, choosing the right yarn is crucial for the outcome and overall satisfaction with the finished product. The yarn you select will not only impact the look and feel of the sweater but also its durability and ease of care. Here are some key factors to consider when choosing the yarn for your project.
Fiber content:
The first thing to think about is the fiber content of the yarn. Natural fibers like wool, alpaca, and cotton are popular choices for sweaters as they offer warmth, breathability, and softness. Wool is particularly great for colder climates, while cotton is more suitable for warmer weather. Acrylic yarn, on the other hand, is a synthetic option that is often preferred for its affordability and resistance to stretching. Each fiber has its own unique qualities, so consider the climate, season, and personal preferences of the recipient when selecting the fiber content.
Weight:
The weight of the yarn will determine how thick or thin your sweater will be. It is crucial to choose a yarn weight that matches the desired look and feel of the sweater. For a thicker, chunkier sweater, opt for a bulky or super bulky weight yarn. For a lighter, more delicate sweater, go for a sport or fingering weight yarn. Consider the pattern you will be using and the desired drape and warmth of the sweater to determine the appropriate weight.
Color and pattern:
The color and pattern of the yarn will greatly impact the final look of the striped sweater. If you are following a specific knitting pattern, check the recommended yarn colors and determine if you want to stick with the suggested scheme or add your own twist. Consider the combination of colors in the stripes and how they will look together. The right color and pattern can make your sweater stand out and showcase your knitting skills.
Conclusion:
Choosing the right yarn for your mens striped sweater is an important step in the knitting process. Consider the fiber content, weight, color, and pattern to ensure the finished product meets your expectations. By carefully selecting the yarn, you can create a sweater that is not only stylish but also comfortable and durable for years to come.
Tips for selecting the perfect yarn
Choosing the right yarn is essential for creating a great knitting project. The type of yarn you use can greatly impact the overall look and feel of the finished garment. Here are some tips to help you select the perfect yarn for your knitting project:
- Fiber type: Consider the fiber content of the yarn. Different fibers have different properties, such as warmth, breathability, and durability. For a striped sweater, you may want to choose a wool or wool-blend yarn for its warmth and elasticity.
- Weight: Pay attention to the weight of the yarn, as it determines the thickness of the resulting fabric. For a sweater, you will typically want a medium-weight yarn like DK or worsted weight.
- Color: The color of the yarn is crucial for a striped sweater. Consider the color combinations you want to achieve and make sure the yarn colors you choose complement each other. Look for yarns with vibrant, contrasting colors to create bold and eye-catching stripes.
- Texture: The texture of the yarn can add depth and dimension to your sweater. For a striped sweater, you may want to choose yarns with different textures for each stripe, such as a smooth yarn for one stripe and a fluffy yarn for another.
- Gauge: Check the recommended gauge on the yarn label and compare it to your knitting pattern. Make sure the yarn you choose matches the gauge of the pattern, as this will ensure the correct fit and sizing of your sweater.
By considering these factors, you can select the perfect yarn for your mens striped sweater knitting project. Experiment with different yarns and combinations to create a unique and stylish garment that you’ll be proud to wear.
Getting started with the right needles
When it comes to knitting a striped sweater, choosing the right needles is an important first step. Different needle materials and sizes can greatly affect the outcome of your project, so it’s essential to consider a few key factors before getting started.
Material: The material of your knitting needles will determine how smoothly the yarn slides and how comfortable they feel in your hands. Common options include bamboo, metal, and plastic. Bamboo needles are known for their grip and warmth, making them an excellent choice for beginners. Metal needles are sleek and smooth, allowing for fast knitting, while plastic needles are lightweight and flexible.
Size: The size of your needles will determine the gauge, or tension, of your knitted fabric. For a striped sweater, it’s important to check the pattern for the recommended needle size. Typically, the pattern will specify a specific size range or a specific needle size that will result in the desired gauge. Using the wrong size needles can lead to a sweater that is either too tight or too loose.
Additionally, when knitting stripes, it’s crucial to consider how the colors will interact with the chosen needle size. A tighter gauge may cause the stripes to appear more compressed, while a looser gauge may result in wider stripes. It’s always a good idea to make a gauge swatch before starting your project to ensure the desired stripe pattern is achieved.
Length: The length of your needles will depend on the size of your project and your personal preference. Longer needles are ideal for larger, wider pieces, as they can accommodate more stitches. They are also useful for working on circular knitting projects. Shorter needles, on the other hand, are better suited for smaller, narrower pieces and are easier to handle when working on straight knitting projects.
Taking the time to choose the right needles for your striped sweater project can greatly enhance your knitting experience and ultimately result in a finished product that you are proud of. So, before diving into your knitting project, consider the material, size, and length of your needles to ensure a successful and enjoyable knitting journey.
How to Choose the Correct Needle Size
Choosing the correct needle size for your knitting project is crucial for achieving the desired outcome. Using the wrong size can result in a garment that is too tight or too loose, and may affect the overall look and fit. Here are some tips to help you choose the correct needle size for your knitting project.
Know the Gauge
Before you start knitting, it is important to know the gauge of the pattern. Gauge refers to the number of stitches and rows per inch in the pattern. This information is usually provided in the pattern instructions. To determine the gauge, you can knit a swatch using the recommended yarn and needle size. Measure the swatch after blocking and compare it to the gauge given in the pattern. If your swatch does not match the gauge, you may need to adjust your needle size.
Consider the Yarn Weight
The weight or thickness of the yarn should also be taken into consideration when choosing the needle size. Thicker yarns generally require larger needles to create a looser fabric, while thinner yarns need smaller needles to create a tighter fabric. The yarn label usually provides recommendations for the ideal needle size range, so make sure to check that and select a needle size within the recommended range.
Experiment and Test
Every knitter’s tension and personal preference can affect the choice of needle size. It is always a good idea to experiment and test different needle sizes before committing to a project. You can try knitting a small swatch with different needle sizes and see which one gives you the desired fabric and gauge. This helps you find the perfect needle size that works best for you.
By following these tips and considering the pattern gauge, yarn weight, and your personal tension, you can choose the correct needle size for your knitting project and create a garment that fits well and looks beautiful.
Understanding the basic knitting stitches
Knitting is a popular craft that allows individuals to create beautiful and functional garments and accessories. Whether you are a beginner or an experienced knitter, understanding the basic stitches is crucial for creating various patterns and designs. In this article, we will explore some of the fundamental knitting stitches that are widely used in different projects.
1. Knit stitch: The knit stitch, also known as the stockinette stitch, is the most basic and commonly used knitting stitch. It creates a smooth and flat surface on one side of the fabric, which is often referred to as the right side. To knit, simply insert the right needle into the first loop on the left needle from left to right, wrap the yarn around the right needle counterclockwise, and pull it through the loop.
2. Purl stitch: The purl stitch is the reverse of the knit stitch and creates a bumpy texture on one side of the fabric, which is often referred to as the wrong side. To purl, insert the right needle into the first loop on the left needle from right to left, wrap the yarn around the right needle clockwise, and pull it through the loop.
These two basic stitches can be combined in various ways to create different patterns and textures. For example, the stockinette stitch is created by knitting one row and purling the next row, resulting in a smooth surface on one side and a bumpy surface on the other side. The garter stitch is created by knitting every row, resulting in a textured pattern on both sides.
Other important knitting stitches include the rib stitch, seed stitch, and cable stitch, which add texture and interest to knitted projects. By mastering these basic stitches and experimenting with different combinations, knitters can create unique and personalized garments and accessories. So grab your yarn and needles and start practicing these essential knitting stitches to unleash your creativity!
A guide to essential knitting techniques

Knitting is a versatile craft that allows you to create beautiful and functional garments and accessories. Whether you’re a beginner or an experienced knitter, it’s important to have a good understanding of the essential knitting techniques. These techniques will help you create clean and professional-looking stitches, as well as fix any mistakes along the way. In this guide, we’ll cover some of the key techniques that every knitter should know.
1. Casting on
One of the first steps in any knitting project is casting on, which is the process of creating the foundation row of stitches on your needle. There are several different casting on methods, including the long-tail cast on, the knitted cast on, and the cable cast on. Each method creates a slightly different edge, so it’s worth experimenting to find the one that suits your project best.
2. Knit stitch
The knit stitch is the most basic and commonly used stitch in knitting. It’s used to create the smooth, v-shaped fabric that is characteristic of knitted items. To knit a stitch, insert the right-hand needle into the front of the stitch on the left-hand needle, wrap the yarn around the needle, and pull the new loop through the old one. Repeat this process for each stitch across the row.
3. Purl stitch
The purl stitch is the opposite of the knit stitch and is used to create a bumpy, textured fabric. To purl a stitch, insert the right-hand needle from right to left into the front of the stitch on the left-hand needle, wrap the yarn around the needle, and pull the new loop through the old one. Repeat this process for each stitch across the row.
4. Increasing and decreasing

Increasing and decreasing stitches are essential techniques for shaping your knitting. The most common way to increase stitches is by knitting or purling into the front and back of a single stitch. To decrease stitches, you can either knit or purl two stitches together, or slip one stitch, knit or purl the next stitch, and pass the slipped stitch over.
5. Fixing mistakes
Even the most experienced knitters make mistakes from time to time, but the good news is that most mistakes can be easily fixed. If you make a mistake in your knitting, you can unravel the stitches back to the mistake and rework them correctly. You can also use a crochet hook to pick up dropped stitches or correct any other errors.
Conclusion
By mastering these essential knitting techniques, you’ll be well-equipped to tackle a wide range of knitting projects. Whether you’re knitting a cozy sweater or a delicate lace shawl, these techniques will help you create beautiful and professional-looking results. Don’t be afraid to practice and experiment with different stitches and techniques to expand your knitting skills even further. Happy knitting!
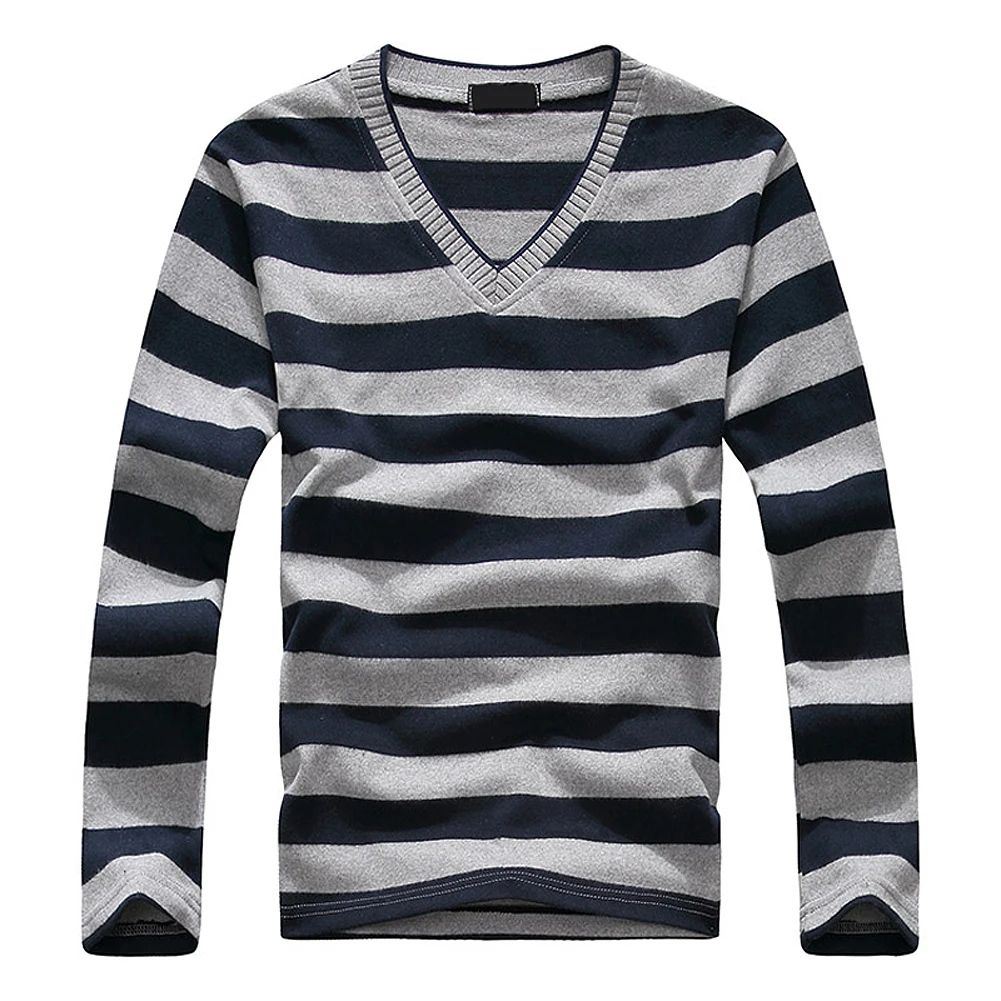
Creating the striped pattern for your sweater
Knitting a striped sweater can be a fun and rewarding project. The striped pattern adds visual interest and can make your sweater stand out. Here are some tips on how to create the striped pattern for your sweater.
Choose your colors: Before you start knitting, decide on the colors you want to use for your stripes. Consider contrasting colors that will create a bold and eye-catching pattern. You can also choose colors that complement each other for a more subtle effect.
Decide on the stripe width: Next, determine the width of your stripes. You can create thin stripes for a more intricate pattern or opt for wider stripes for a bolder look. Keep in mind that the thickness of your yarn and the size of your needles will also impact the appearance of the stripes.
Plan your stripe sequence: Once you have chosen your colors and stripe width, plan the sequence in which you will alternate the colors. You can create a repeating pattern, such as two rows of one color followed by two rows of another color, or you can create a random sequence for a more unique look.
Keep track of your rows: To ensure that your stripes are evenly spaced and consistent, it is important to keep track of your rows. You can use stitch markers or make a note in your pattern to mark the beginning of each stripe. This will help you stay organized and avoid any mistakes.
Try different knitting techniques: There are several techniques you can use to create stripes in your knitting. You can knit with one color, drop it, and pick up the next color, or you can carry the yarn up the side of your work to avoid cutting it. Experiment with different techniques to find the one that works best for you.
Finish off your sweater: Once you have completed the striped pattern, finish off your sweater by binding off and weaving in any loose ends. Block your sweater to give it a polished look and ensure that the stripes are well-defined. With a little bit of patience and creativity, you can create a beautiful striped sweater that you can proudly wear.
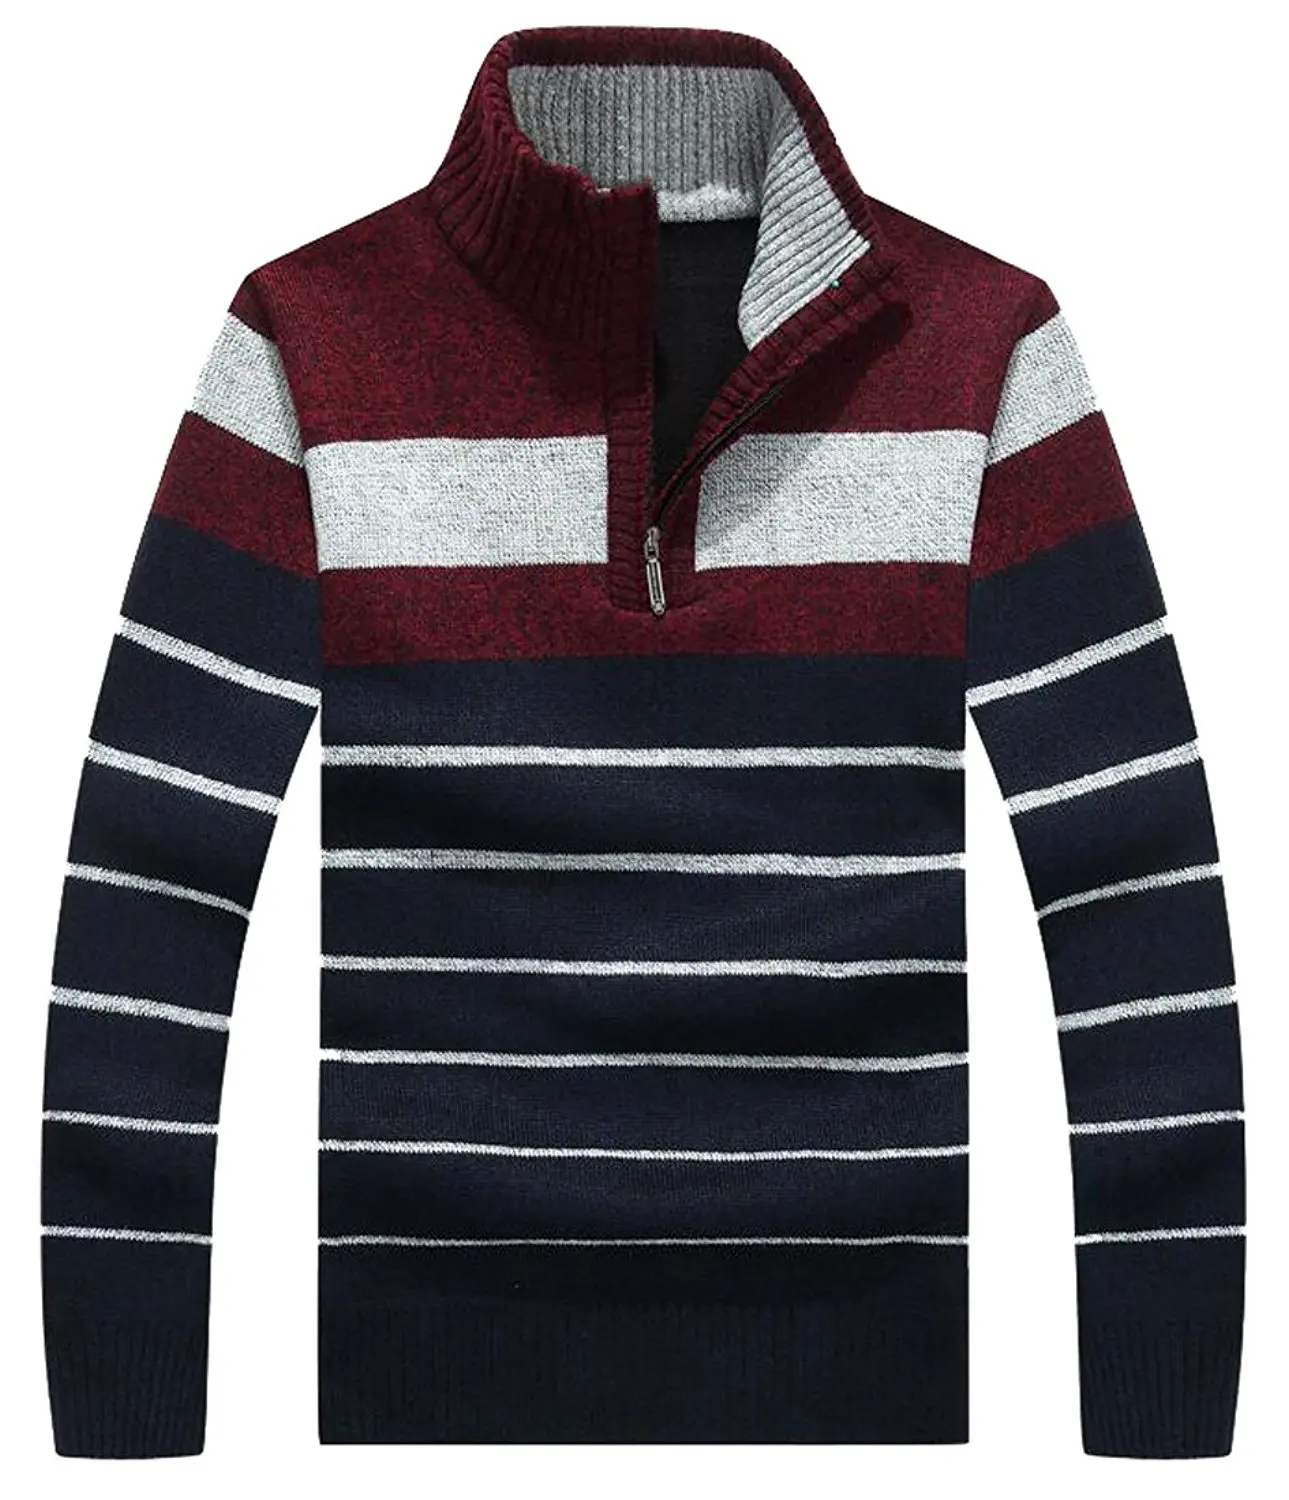
How to Achieve a Clean and Stylish Striped Design
When it comes to knitting a mens striped sweater, achieving a clean and stylish design can make all the difference. Here are a few tips to help you create a striped sweater that looks polished and sophisticated:
Choose the Right Colors
The colors you choose for your striped design can greatly impact the overall look of the sweater. Opt for colors that complement each other and create a harmonious contrast. Consider using shades of the same color or contrasting colors that create a bold statement. It’s also important to choose colors that suit the wearer’s skin tone and personal style.
Select Evenly-Sized Stripes
One key aspect of achieving a clean striped design is to ensure that the stripes are evenly sized. This can be done by carefully counting the number of stitches for each stripe and distributing the colors accordingly. Using stitch markers can also help you keep track of the different sections and ensure that the stripes are consistent throughout the sweater.
Pay Attention to Gauge
Gauge is crucial in any knitting project, and it becomes even more important when working with stripes. Make sure you knit a gauge swatch before starting the sweater to ensure that your tension and stitch size are consistent. This will help maintain a clean and uniform look for your stripes.
Use Clean Techniques for Color Changes
When changing colors for the stripes, it’s essential to use clean techniques to avoid loose or messy threads. One popular method is to carry the unused color along the edge of the work, twisting the two colors together to create a neater appearance. Another option is to cut the yarn at each color change and weave in the loose ends later. Whichever method you choose, make sure to secure the yarn tightly to prevent any unraveling.
By following these tips, you can achieve a clean and stylish striped design for your mens sweater. Remember to experiment with color combinations, keep the stripes even, pay attention to gauge, and use clean techniques for color changes. With a little patience and attention to detail, you’ll have a striped sweater that stands out in style.
Knitting the Body of the Sweater
After completing the ribbing for the hem, it is time to knit the body of the sweater. Repeat the established stripe pattern, using the required colors and following the specified number of rows for each stripe. Remember to maintain tension throughout the knitting process to ensure a uniform and tidy final result.
Begin by knitting the first row of the main color, following the pattern instructions for the size chosen. This will typically involve knitting a certain number of stitches, and then purling a certain number of stitches to create the desired stripe effect. Repeat this pattern until the desired length is reached.
Once the body of the sweater is completed, it is important to check the measurements and gauge to ensure an accurate fit. Use a tape measure to measure the width and length of the knitted piece, comparing it to the specified measurements in the pattern. Adjust the tension if necessary to achieve the correct dimensions.
To finish the body of the sweater, bind off the stitches in the chosen method, following the pattern instructions. This will typically involve knitting two stitches, and then passing the first stitch over the second stitch to create a neat edge. Cut the yarn, leaving a tail for weaving in later.
Tip: As you knit the body of the sweater, periodically try it on to ensure the fit is comfortable. This will allow you to make any necessary adjustments to the length or width before proceeding to the next steps.
Materials:
- Yarn in the specified colors and quantities
- Knitting needles in the recommended size
- Tape measure
- Yarn needle
- Scissors
A Step-by-Step Guide to Knitting the Main Section
Knitting a striped sweater is a fun and rewarding project that allows you to create a stylish and unique garment. In this step-by-step guide, we will walk you through the process of knitting the main section of the sweater. Follow these instructions to knit your own striped sweater and showcase your knitting skills.
Materials:
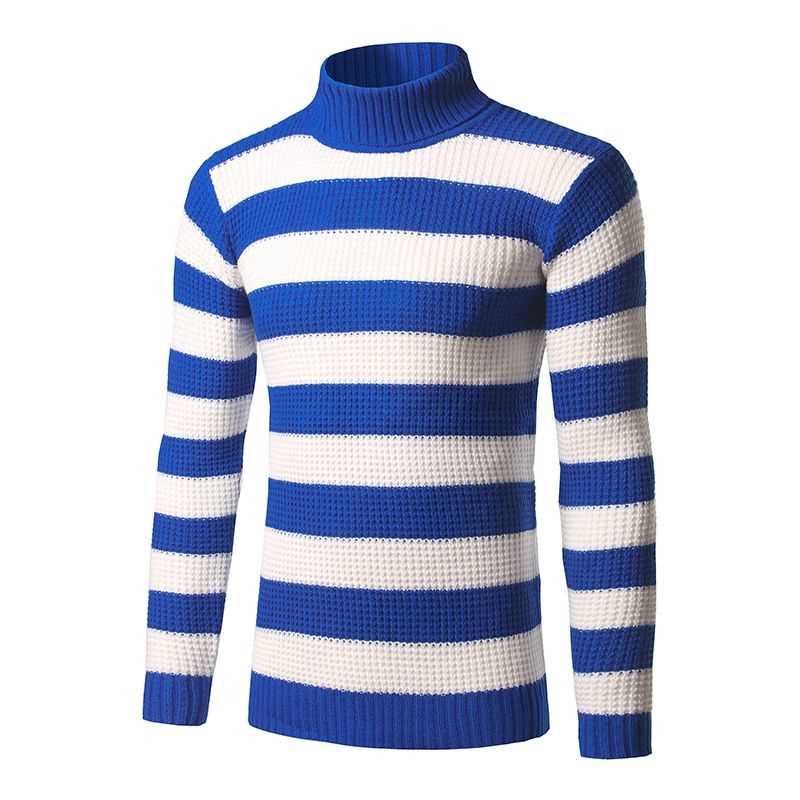
- Weight: Worsted
- Color A: Navy Blue
- Color B: Off-White
- Knitting needles: US size 8 (5mm)
- Tapestry needle
- Scissors
Instructions:
- Cast on: Using Color A, cast on the desired number of stitches for the sweater’s main section. Make sure the number of stitches is divisible by the width of the stripe you want to create.
- Knit the first row: Knit across the first row using Color A.
- Create the stripes: To create the stripes, switch to Color B. Knit across the row with Color B for the desired number of rows, then switch back to Color A and repeat the process. Alternate between the two colors, following the stripe pattern you have chosen.
- Continue knitting: Repeat step 3 until the main section measures the desired length for your sweater. Remember to keep track of the number of rows in each color to maintain a consistent stripe pattern.
- Bind off: Once the main section is the desired length, bind off all stitches using Color A. Cut the yarn, leaving a long tail for sewing up the sides later.
By following this step-by-step guide, you will be able to knit the main section of your striped sweater. With your creativity and knitting skills, you can customize the colors and stripe pattern to create a sweater that reflects your personal style. Enjoy the process and have fun knitting your own unique striped sweater!
Adding sleeves to your sweater
When it comes to knitting a striped sweater, adding sleeves is an important step in completing the garment and giving it a finished look. Here are a few tips and techniques to help you successfully add sleeves to your sweater.
1. Measuring and planning:

Before you start knitting the sleeves, it is crucial to measure the armhole opening on your sweater body. This will help you determine the number of stitches you need to cast on for the sleeves. Make sure to take accurate measurements, as any discrepancies can affect the fit of the sleeves.
2. Choosing the right pattern:
When knitting the sleeves, you have the option to follow the same stripe pattern as the body of the sweater or create a different design. Consider the overall look you want to achieve and choose a pattern that complements the body of the sweater. You can also experiment with different stitch patterns or color combinations for a unique and personalized touch.
3. Knitting in the round:
To create the sleeves, it is common to use double-pointed needles or a circular needle for knitting in the round. This technique avoids the need for seaming later and creates a seamless and professional finish. Make sure to divide the stitches evenly on the needles and mark the beginning of each round to keep track of your progress.
4. Sleeve length and shaping:
Consider the desired length of your sleeves and any shaping you want to incorporate. Common shaping techniques include decreasing stitches gradually for a tapered or fitted sleeve or creating a bell or flared shape by increasing stitches. Follow the pattern instructions or use your own calculations to achieve the desired shape and length.
5. Finishing touches:
Once you have completed the sleeves, it is essential to weave in any loose ends and block the garment. Blocking helps smooth out the stitches and shape the sleeves, giving them a more polished look. Follow the blocking instructions for your specific yarn and stitch pattern to ensure the best results.
By following these guidelines and paying attention to the details, you can confidently add sleeves to your striped sweater and create a stylish and comfortable garment that you will be proud to wear.
Techniques for seamless sleeve construction
When knitting a striped sweater, it is important to have a seamless sleeve construction to ensure a clean and polished finish. There are several techniques that can be used to achieve this seamless look.
One technique is called the “magic loop method.” This involves using a long circular needle to knit the sleeve in the round. The magic loop method allows you to knit a small circumference without the need for double-pointed needles. It is ideal for knitting sleeves as it eliminates any seams and creates a smooth finish.
Another technique that can be used is the “short row shaping.” This technique involves knitting short rows to shape the sleeve cap. By knitting a series of short rows, you can create a rounded sleeve cap without the need for any seams. This technique is often used in top-down sweaters and can add an interesting design element to your striped sweater.
If you prefer a more traditional approach, you can use the “set-in sleeve method.” This method involves knitting the sleeve separately and then sewing it into the armhole. While this technique does require some seaming, it provides a clean and tailored look to your sweater. You can easily align the stripes on the sleeve with the body of the sweater during the seaming process for a cohesive design.
Ultimately, the technique you choose for seamless sleeve construction will depend on your knitting preferences and the design of your striped sweater. Whether you decide to use the magic loop method, short row shaping, or the set-in sleeve method, the important thing is to ensure that your sleeves are seamlessly integrated into your sweater for a professional finish.
Shaping the neckline
Once you have completed the body of the sweater, it’s time to shape the neckline. This step is crucial for achieving a comfortable and flattering fit.
To begin shaping the neckline, you will divide the stitches on the front of the sweater into three sections: the left shoulder, the center front, and the right shoulder. You will then work each section separately to create the desired neckline shape.
First, you will bind off a certain number of stitches at the center front to create the neckline opening. The exact number of stitches to bind off will depend on the size of your sweater and the desired width of the neckline.
Next, you will continue working on the left shoulder, decreasing stitches gradually to create a curved shape. This will be done by working decreases at the beginning and end of each row until you reach the desired width for the shoulder. Repeat the same process for the right shoulder.
Once you have shaped the neckline on both shoulders, you can finish the edges by picking up stitches along the neckline and working ribbing or other desired edge treatment.
Remember to consult the sweater pattern for specific instructions on how to shape the neckline, as the number of stitches to bind off and decrease may vary depending on the pattern.
Shaping the neckline is an important step in the construction of a striped sweater. It not only adds a professional finish to your project but also ensures a comfortable and flattering fit. Take your time with this step and follow the pattern instructions carefully to achieve the best results.