
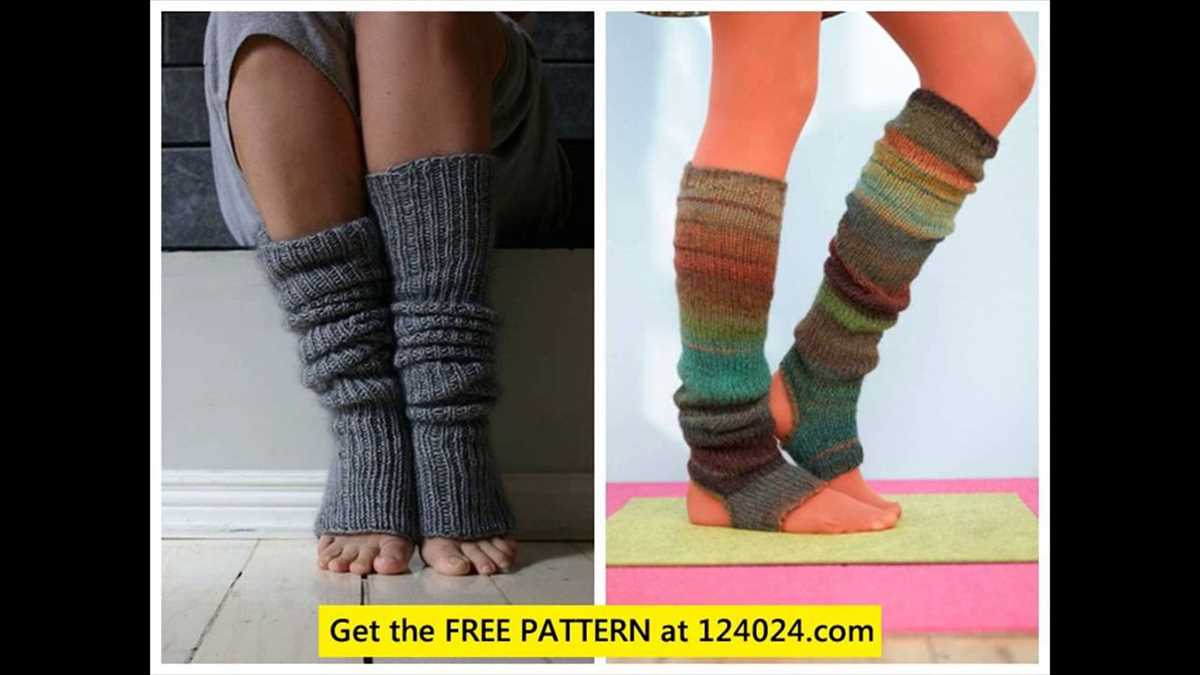
If you’re a fan of knitting, chances are you’ve tried your hand at making scarves, hats, and even socks. But have you ever considered knitting your own leg warmers? Leg warmers are a versatile accessory that can be worn for warmth or as a fashionable touch to any outfit. And with a loom knit leg warmer pattern, you can easily create a stylish pair of leg warmers in no time.
Loom knitting is a unique technique that uses a round or rectangular loom instead of traditional knitting needles. This makes it easier for beginners to learn and creates a unique texture that is perfect for projects like leg warmers. Whether you’re new to loom knitting or an experienced knitter looking for a new project, this loom knit leg warmer pattern is a great option.
With this pattern, you’ll be able to create leg warmers that are customized to your size and preferred style. You can choose to use a variety of yarn weights and colors to create a unique design that matches your personal style. Plus, loom knitting allows you to easily adjust the length and width of your leg warmers, ensuring a perfect fit every time.
Loom Knit Leg Warmer Pattern
Leg warmers are a stylish and practical accessory that can keep your legs warm and cozy during the colder months. If you enjoy loom knitting, making your own leg warmers can be a fun and rewarding project. Here is a simple loom knit leg warmer pattern to get you started.
Materials Needed:
- Loom knitting loom
- Loom knitting hook
- Yarn in your chosen color
- Yarn needle
- Scissors
Instructions:
- 1. Start by casting on stitches on your loom. The number of stitches will depend on the desired width of your leg warmers. Generally, around 30-40 stitches should be sufficient.
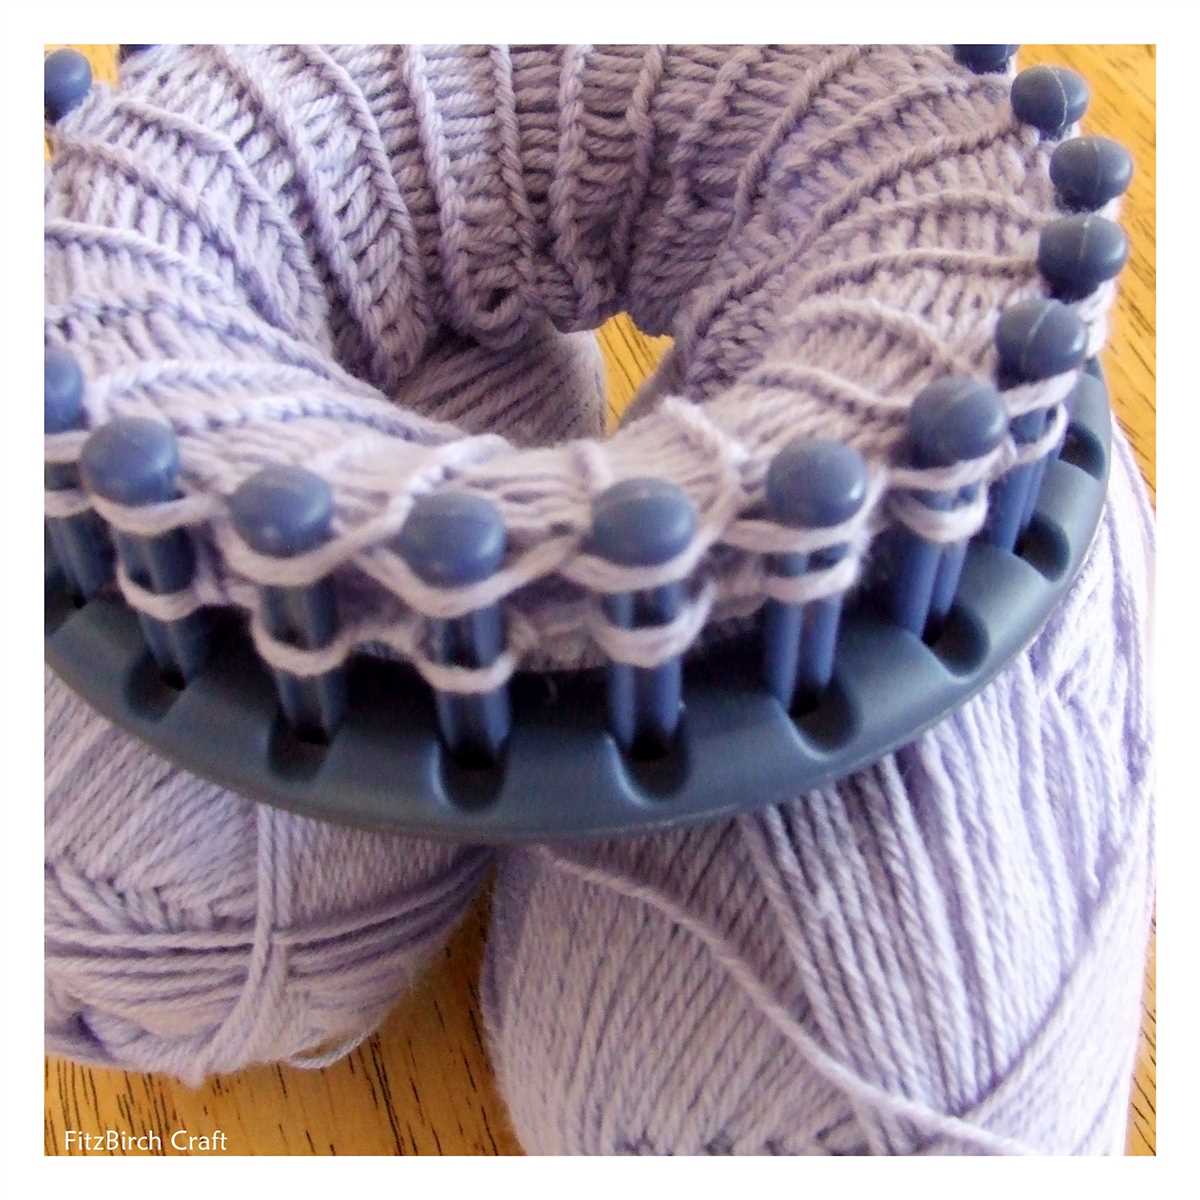
- 2. Once you have casted on, start knitting in the round. This can be done by using the e-wrap method, where you wrap the yarn around each peg in a clockwise direction.
- 3. Continue knitting in the round until your leg warmers reach the desired length. You can measure this by trying them on as you go.
- 4. Once you have reached the desired length, bind off your stitches by taking each loop off the peg and passing it over the next loop.
- 5. Cut the yarn, leaving a long tail. Thread the yarn through a yarn needle and weave it through the loops to secure the stitches.
- 6. Repeat the above steps to make a second leg warmer.
Optional: If you want to add some decorative details to your leg warmers, you can experiment with different stitch patterns or add ribbing at the top and bottom. You can also use a different color yarn for a contrasting effect.
Once you have finished knitting your leg warmers, give them a gentle stretch to ensure they fit comfortably around your legs. Now you’re ready to rock your handmade loom knit leg warmers and stay warm in style!
Materials
Before you start knitting your leg warmers, make sure you have all the necessary materials. Here is a list of what you will need:
- Loom: Choose a loom that is suitable for leg warmers. You can use a round or rectangular loom, depending on your preference. Make sure the loom has enough pegs to accommodate the width of the leg warmers.
- Yarn: Select a yarn that is appropriate for leg warmers. You can use any type of yarn, such as acrylic, wool, or cotton, depending on the desired warmth and comfort. Consider the color and texture of the yarn to match your style.
- Knitting tool: A knitting tool, also known as a hook or pick, is used to lift the loops over the pegs while knitting. Make sure you have a tool that is compatible with your loom size.
- Scissors: You will need scissors to cut the yarn at the end of the project or to fix any mistakes along the way.
- Tape measure: A tape measure will come in handy to measure the length and width of your leg warmers. This will help you achieve the desired fit.
- Yarn needle: A yarn needle is used to weave in any loose ends of yarn and to sew the leg warmers together, if desired.
Once you have gathered all the materials, you are ready to start knitting your leg warmers using a loom. Make sure you have a comfortable and well-lit workspace to work in, and refer to the instructions or pattern you are following for specific techniques and stitches.
Getting Started
Welcome to our loom knit leg warmer pattern! This simple and fun project is perfect for beginners and experienced knitters alike. Whether you’re looking to stay warm and cozy or want to add a stylish accessory to your outfit, these leg warmers are a great choice.
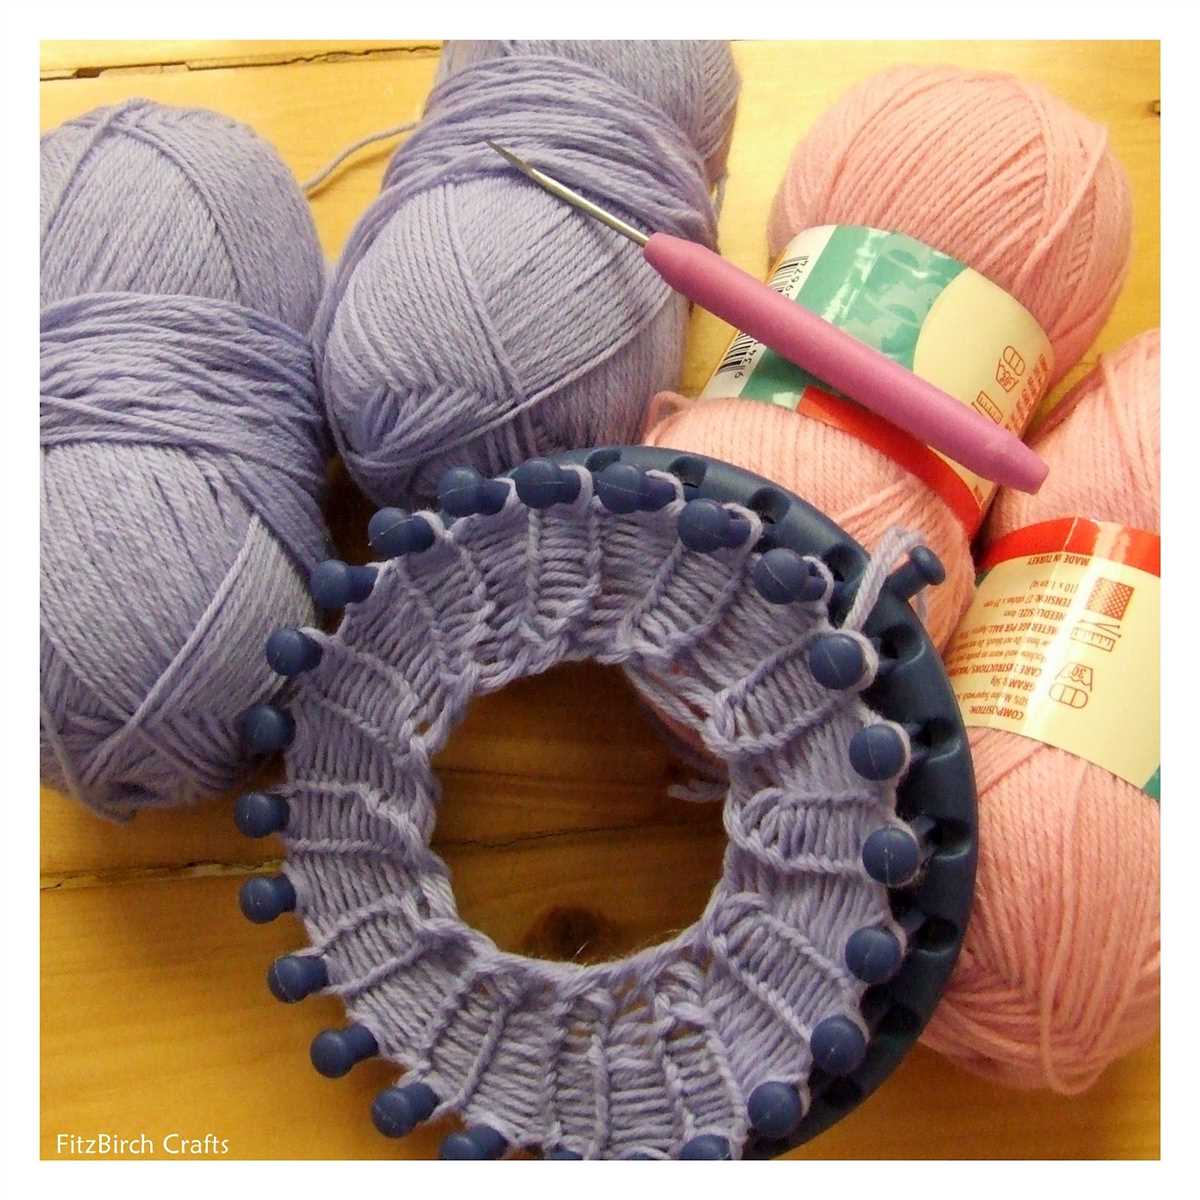
To get started, you’ll need a few supplies. You’ll need a knitting loom, also known as a knitting board or loom, a loom hook, and a yarn needle. You’ll also need a soft and warm yarn in your preferred color. You can choose a solid color or mix it up with a variegated or self-striping yarn for a fun look.
Step 1: Casting On
To begin, cast on your stitches using the e-wrap method. This is done by wrapping the yarn around each peg on the loom, creating a simple loop over each peg. This will be the foundation for your leg warmers.
Step 2: Loom Knitting
Once you’ve cast on, it’s time to start knitting! Using your loom hook, lift the bottom loop over the top loop on each peg. This will create a new loop on top of each peg. Continue this process, working your way around the loom, until you’ve completed the desired number of rows.
Step 3: Binding Off
When you’ve reached the desired length for your leg warmers, it’s time to bind off. To do this, take the loop from the first peg and move it to the second peg. Lift the bottom loop over the top loop on the second peg. Continue this process, moving the loop to the next peg and lifting the bottom loop over the top loop, until you’ve reached the last peg. Cut the yarn, leaving a long tail, and thread it through the yarn needle. Run the needle through the loops on each peg, removing them from the loom. Pull tight to secure the stitches.
And there you have it – your very own loom knit leg warmers! Feel free to customize your leg warmers with additional stitches, patterns, or embellishments to make them uniquely yours. Stay warm and stylish all winter long with this easy and enjoyable knitting project!
Introduction to Casting On
When starting a loom knitting project, the first step is to cast on. Casting on is the process of creating the initial row of stitches on the loom. It is important to cast on properly to ensure that the stitches are secure and the project starts off on the right foot.
Types of Casting On
There are several different methods of casting on in loom knitting, each with its own unique advantages and uses. The most common methods include the e-wrap cast on, the double e-wrap cast on, and the long tail cast on.
E-Wrap Cast On
The e-wrap cast on is a simple and versatile method that is great for beginners. To perform the e-wrap cast on, simply wrap the working yarn around each peg on the loom, creating a loop on each peg. This method creates a stretchy and flexible cast on edge, making it ideal for projects such as leg warmers that need to fit snugly.
Double E-Wrap Cast On
The double e-wrap cast on is similar to the e-wrap cast on, but it creates a thicker and tighter cast on edge. To perform the double e-wrap cast on, wrap the working yarn around each peg twice, creating two loops on each peg. This method is commonly used for projects that require a more solid and sturdy cast on edge, such as hats or blankets.
Long Tail Cast On
The long tail cast on is a popular method in traditional knitting, but it can also be used in loom knitting. To perform the long tail cast on, create a slip knot on the anchor peg and place it on the first peg. Then, using the working yarn and the tail end of the yarn, wrap the yarn around each peg in a specific pattern. This method creates a neat and firm cast on edge, and it is suitable for a wide range of projects.
Conclusion
Casting on is an essential step in loom knitting, as it determines how the project will begin. By using the appropriate cast on method for the specific project, loom knitters can ensure that their stitches are secure and that their projects have a professional finished look.
Knitting the Leg Warmers
Leg warmers are a stylish and practical accessory that can be easily knit using a loom. Loom knitting is a great technique for beginners or those who prefer not to use needles. With a few simple steps, you can create your own cozy leg warmers to keep you warm during the colder months.
Before you begin knitting the leg warmers, you will need to gather your materials. This includes a loom, yarn, a loom hook, and a pair of scissors. The size of the loom will determine the width of the leg warmers, so choose a loom that matches your desired size. Once you have your materials ready, you can start knitting!
- Start by casting on the desired number of stitches onto your loom. This will depend on the width of your leg warmers and the size of your loom. Refer to your loom’s instructions for the appropriate cast-on method.
- Next, begin knitting in the round. Use the loom hook to lift the bottom loop over the top loop, creating a new stitch. Continue this process until you have completed the desired length of your leg warmers. Remember to keep the tension even as you knit.
- Once you have reached the desired length, you can cast off your stitches. This will secure the stitches and prevent them from unraveling. Refer to your loom’s instructions for the appropriate cast-off method.
- After casting off, trim the yarn, leaving a tail. Use the tail to weave through the stitches and secure them in place. You can then cut off any excess yarn.
Once you have finished knitting the leg warmers, you can try them on and adjust the length if needed. Leg warmers can be worn on their own or paired with boots or leggings for added style. They make great gifts and can be customized with different yarn colors or stitch patterns. With a little practice, you’ll be able to knit a pair of leg warmers in no time!
Adding Ribbing
When it comes to loom knitting leg warmers, adding ribbing can be a great way to add texture and elasticity to your project. Ribbing creates a stretchy band that hugs the leg and helps keep the leg warmers in place.
To add ribbing to your leg warmers, you will need to use a different stitch pattern than the one you used for the main body of the leg warmers. One popular stitch pattern for ribbing is the 1×1 rib stitch. This stitch pattern alternates knit and purl stitches, creating a stretchy ribbed fabric.
Instructions for Adding 1×1 Ribbing
- Start by casting on your desired number of stitches using the main color of yarn.
- Work the first row in a *knit 1, purl 1* pattern across the entire row.
- Continue working in the *knit 1, purl 1* pattern for the desired length of ribbing.
- When you’re ready to transition back to the main stitch pattern, simply switch back to the original stitch pattern and continue knitting.
Remember to adjust your loom knitting tool as needed to accommodate the smaller stitches of the ribbing. You may also need to use a smaller gauge loom or different size yarn to achieve the desired ribbed effect.
Adding ribbing to your loom knit leg warmers can take your project to the next level, adding both style and functionality. Experiment with different stitch patterns and yarn combinations to create unique and personalized leg warmers that will keep you warm and stylish all winter long.
The Heel
Creating the heel is an essential step in knitting leg warmers, as it provides a comfortable and secure fit around the ankle. There are several methods you can use to create the heel, depending on your personal preference and skill level.
One common method is the “Short Row Heel” technique. To begin, you will need to divide your stitches evenly onto two loom needles, with half of the stitches on each needle. Start by knitting the first row, then turn the loom and slip the first stitch without knitting it. Wrap the next stitch and knit it, then turn the loom again and slip the first stitch. Continue this pattern until you have worked all the stitches on both loom needles.
Short Row Heel Method:
- Divide stitches onto two loom needles
- Knit the first row
- Turn the loom and slip the first stitch
- Wrap and knit the next stitch
- Turn the loom and slip the first stitch
- Continue until all stitches are worked
Another technique you can try is the “Fish Lips Kiss heel” method. This method involves using a heel template to create a custom fit heel. The template provides measurements and instructions on how to shape the heel using short rows. By following the template, you can create a heel that fits the individual wearer perfectly.
Whichever method you choose, make sure to carefully follow the instructions and take your time to create a well-fitting and comfortable heel for your leg warmers. Once the heel is complete, you can continue knitting the rest of the leg warmer pattern according to your desired length.
Knitting the Foot
After finishing the leg portion of the leg warmer, it’s time to move on to knitting the foot. This section of the leg warmer pattern involves shaping the heel and creating the toe. Follow the instructions carefully to ensure a comfortable and well-fitting leg warmer.
Shaping the Heel
To begin shaping the heel, you will need to divide the stitches on your loom into three sections. Place one-third of the stitches on each side peg and leave the center pegs empty. The side pegs will be used for decreasing and shaping the heel flap.
Next, begin working the heel flap by knitting back and forth in rows, using the e-wrap stitch. Continue knitting until the heel flap measures the desired length, usually around 2 inches. The heel flap should cover the back of the ankle and provide extra cushioning and warmth.
After completing the heel flap, it’s time to turn the heel. Start by knitting across the first row, picking up a stitch from the edge of the heel flap. Then, turn the loom and knit the next row, decreasing the number of stitches by one in the center. Repeat these two rows until all the stitches are used up and you have a triangular-shaped heel.
Creating the Toe
Once the heel is shaped, it’s time to move on to creating the toe. First, distribute the stitches evenly across all of the pegs on the loom. This will ensure a smooth and even toe section. You can use a stitch marker to mark the beginning of the round.
To create the toe, use the decrease stitch technique, which involves knitting two stitches together on each peg. Continue this decrease pattern until there are only a few stitches left on the loom. Cut the yarn, leaving a tail, and use a crochet hook to thread the tail through the remaining stitches, securing them tightly. Finally, weave in any loose ends to finish off the leg warmer.
Shaping the Toe
When knitting leg warmers, shaping the toe is an important step to ensure a comfortable fit. By decreasing stitches gradually, you can create a tapered shape that contours to the foot. Here is a step-by-step guide on how to shape the toe of your loom-knit leg warmers.
1. Determine the number of stitches to decrease
Start by measuring the circumference of the leg warmers at the point where the toe shaping will begin. Divide this measurement by 2 to determine the number of stitches to decrease on each side. If you have an odd number of stitches, you may need to adjust slightly to achieve an even number of decreases on each side.
2. Begin decreasing stitches
To decrease stitches, work two stitches together by knitting or purling them as one stitch. You can choose between different decrease methods, such as the basic knit two together (k2tog) or the slip slip knit (ssk) decrease. Follow a decrease pattern that evenly distributes the decreases on each side until you reach the desired number of stitches.
3. Create a tapered shape
As you continue to decrease stitches, the leg warmers will gradually taper towards the toe. Keep track of your decrease rows to maintain an even decrease pattern. You can use stitch markers to mark the beginning and end of each decrease section.
4. Try on as you go
It’s important to try on the leg warmers periodically as you shape the toe. This will help you ensure a comfortable fit and make any necessary adjustments. Make sure the leg warmers are snug without being too tight, as they will stretch slightly when worn.
- Continue decreasing stitches until you have reached the desired toe length.
- Bind off the remaining stitches using a stretchy bind-off method, such as the gathered bind off, to ensure a flexible and comfortable edge.
- Weave in any loose ends and trim excess yarn.
- Repeat the shaping process for the second leg warmer.
By following these steps, you can shape the toe of your loom-knit leg warmers for a customized fit that is both comfortable and stylish.
Finishing Touches
Once you have completed knitting your leg warmers using the loom knit pattern, it’s time to add the finishing touches to make them look polished and professional. There are several steps you can follow to achieve a neat and well-finished end result.
Weaving in Ends
Start by weaving in any loose ends from your yarn. Using a yarn needle, thread the end through the stitches on the inside of your leg warmers, making sure to hide the end within the stitches. Trim any excess yarn, leaving a small tail to prevent unraveling.
Blocking
Blocking is an important step to give your leg warmers a neat and even appearance. To block your leg warmers, soak them in lukewarm water and gently squeeze out any excess water. Lay the leg warmers flat on a clean towel and arrange them into shape. Use pins to secure the edges and any desired design features. Allow the leg warmers to dry completely before removing the pins.
Adding Ribbed Cuffs
To add a ribbed cuff to your leg warmers, you can use the same loom and yarn or switch to a smaller loom and contrasting yarn for a decorative effect. Simply knit a few rounds of rib stitch (knit 2, purl 2) at the top or bottom of your leg warmers. This will give your leg warmers a professional and snug fit.
Embellishments
If desired, you can add embellishments to your leg warmers to personalize them and make them unique. You can use buttons, beads, or even crochet flowers to add a touch of style. Sew or glue the embellishments onto the leg warmers, making sure they are securely attached.
By following these finishing touches, you can transform your loom knit leg warmers into stylish accessories that will keep you warm and cozy all winter long.
Alternative Patterns and Variations
If you’re looking for more options for loom knit leg warmers, there are several alternative patterns and variations you can try. These patterns offer different stitch styles, sizes, and design details to suit your preferences.
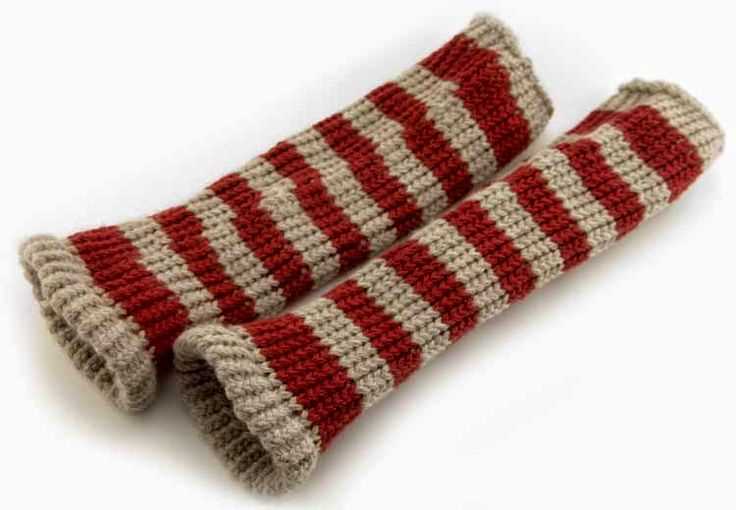
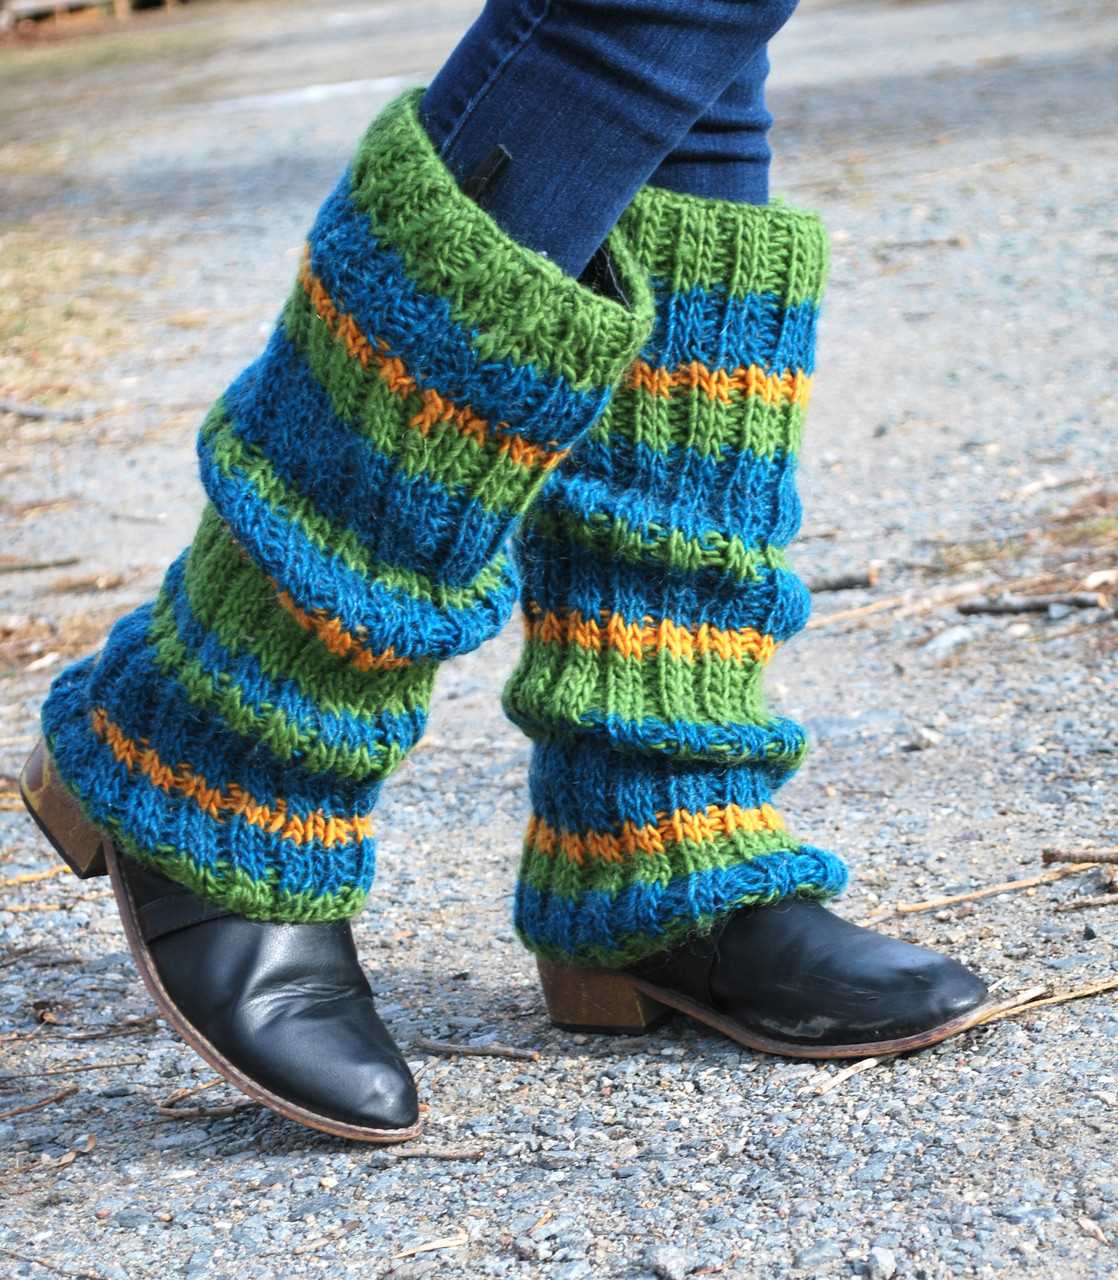
Striped Leg Warmers
Add a pop of color to your leg warmers by incorporating stripes into your knitting. You can choose two or more colors and alternate between them to create a fun and vibrant look. Striped leg warmers are a great way to use up leftover yarn and experiment with different color combinations.
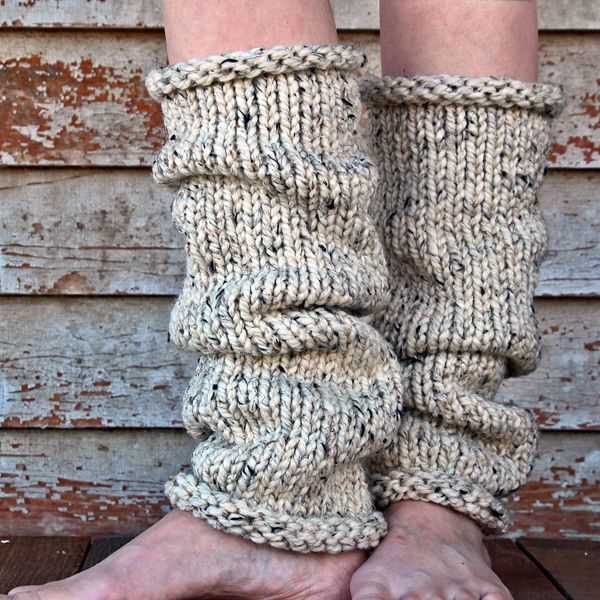
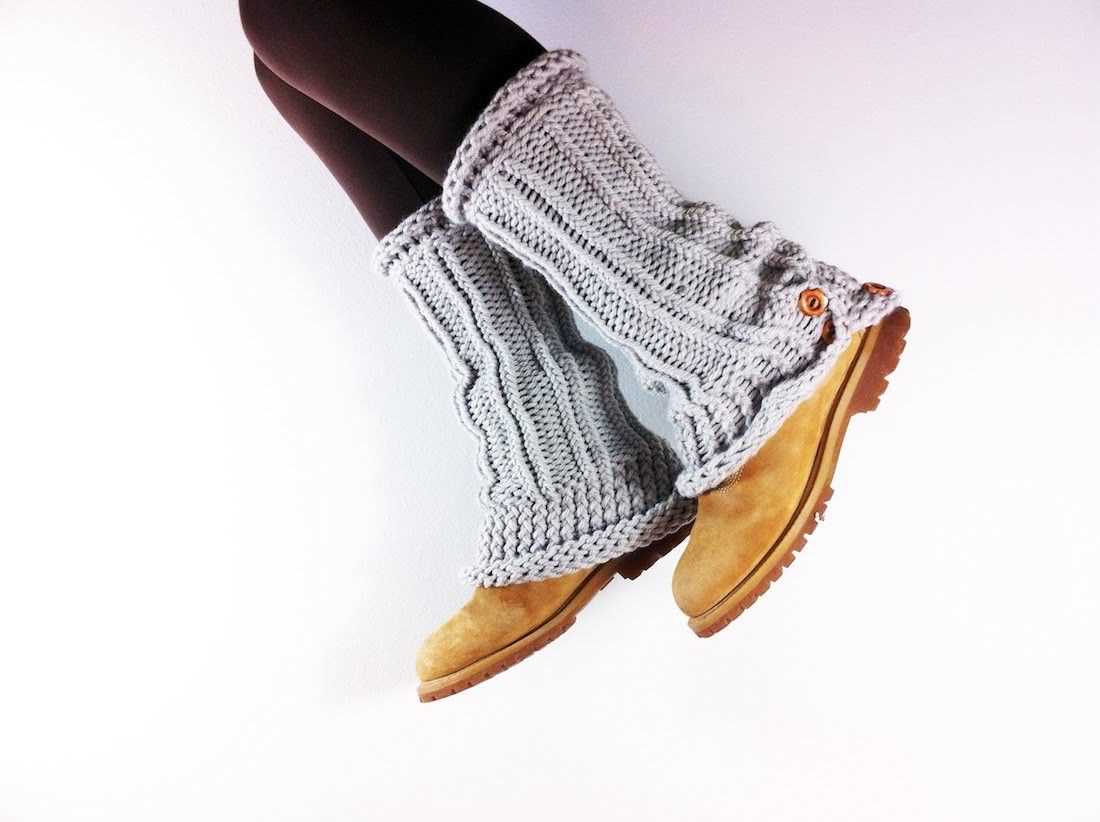
Ribbed Leg Warmers
To add texture and stretch to your leg warmers, try knitting them in a rib stitch pattern. Ribbing creates a stretchy and snug fit, making these leg warmers perfect for layering over leggings or tights. You can choose between 1×1 ribbing (alternating knit and purl stitches) or 2×2 ribbing for a thicker texture.
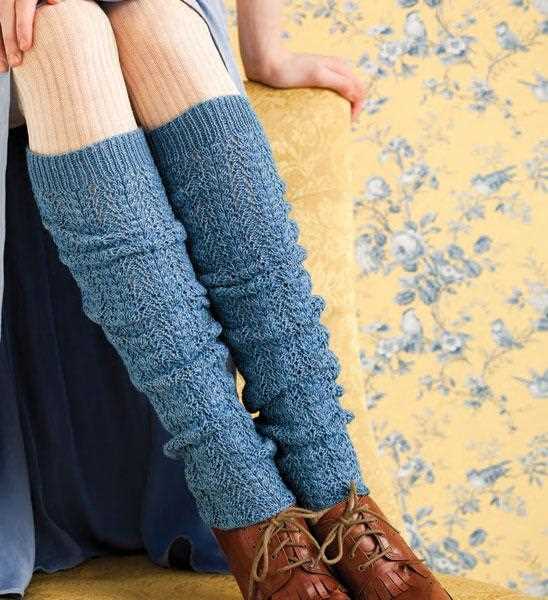
Lace Leg Warmers
If you prefer a more delicate and feminine look, consider knitting lace leg warmers. Lace patterns add an elegant touch to your outfit and can be achieved by using yarn overs and decreases in your knitting. You can find various lace stitch patterns online or in knitting pattern books to create a unique and intricate design.
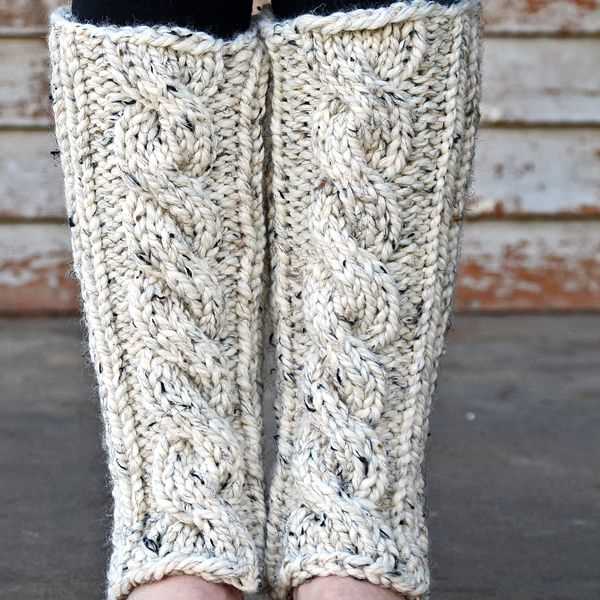
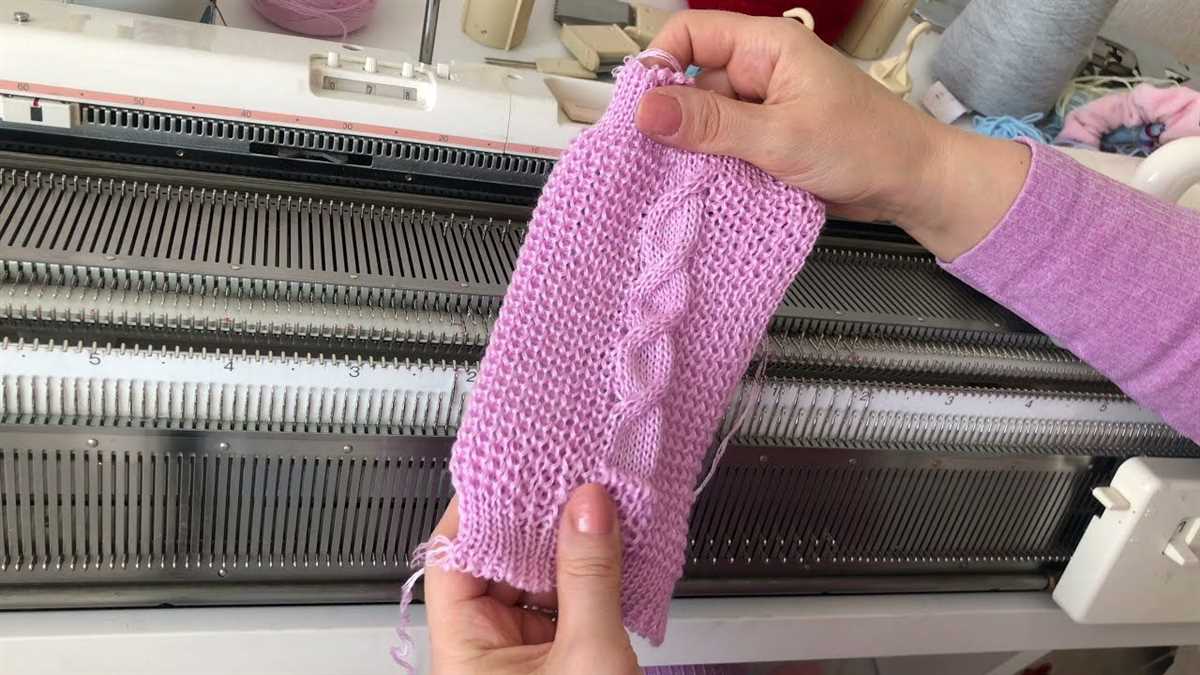
Cabled Leg Warmers
For a more intricate and detailed look, try knitting cabled leg warmers. Cables create a braided or twisted effect and add a touch of sophistication to your leg warmers. You can choose from simple cable patterns for beginners or more complex designs for advanced knitters. Cabled leg warmers are perfect for those who want a statement piece.
Overall, loom knitting leg warmers offers a wide range of possibilities for customization. Whether you prefer simple stripes or intricate lace patterns, you can find a loom knit leg warmer pattern that suits your skill level and stylistic preferences. So grab your loom and yarn, and get started on creating your own cozy leg warmers!