
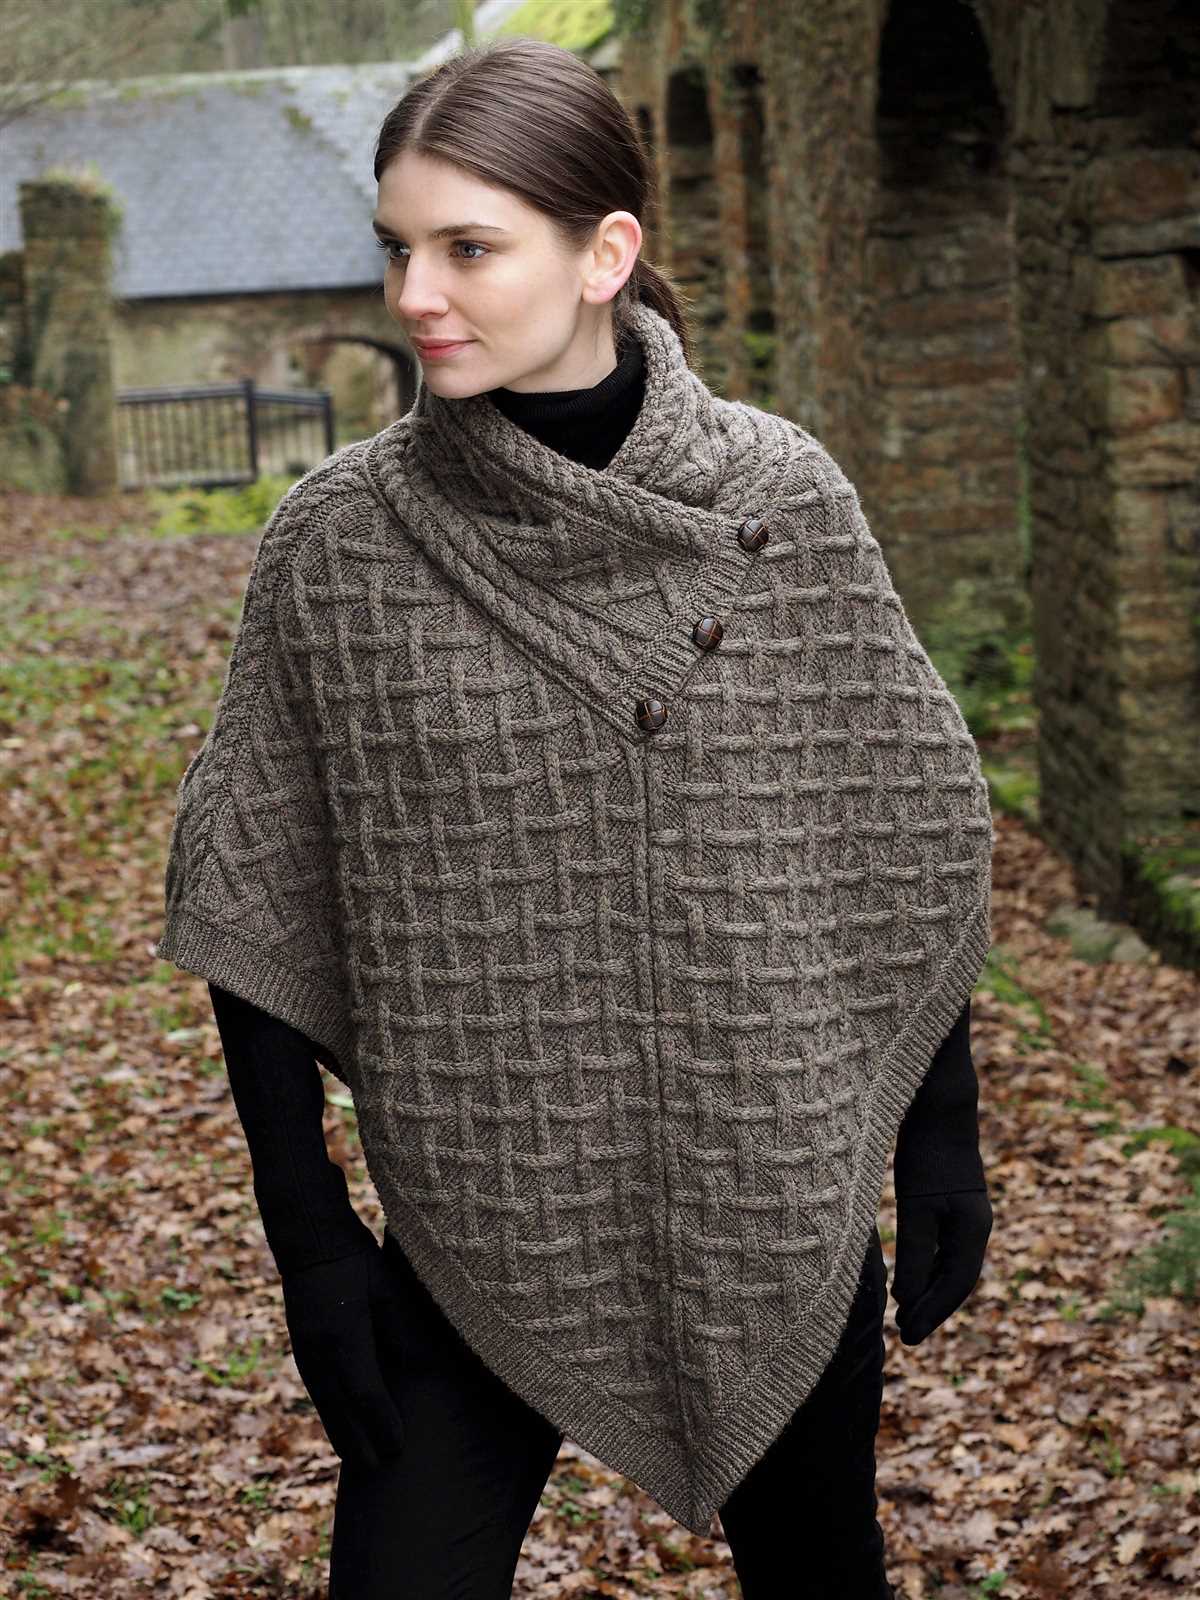
If you’re a fan of classic, elegant style, then a knitted cape is a perfect addition to your wardrobe. A ladies cape is a versatile garment that can be worn in any season and easily layered with other clothing. It adds a touch of sophistication and timeless charm to any outfit.
This knitting pattern is designed with simplicity in mind, making it suitable for both beginners and experienced knitters. Whether you’re new to knitting or looking for a quick and rewarding project, this ladies cape pattern is guaranteed to keep you cozy and stylish.
The pattern provides step-by-step instructions and includes options for different sizes, so you can easily customize it to suit your needs. Plus, it allows you to choose your preferred yarn and color, giving you the opportunity to create a unique and personalized cape that reflects your style.
Ladies Cape Knitting Pattern
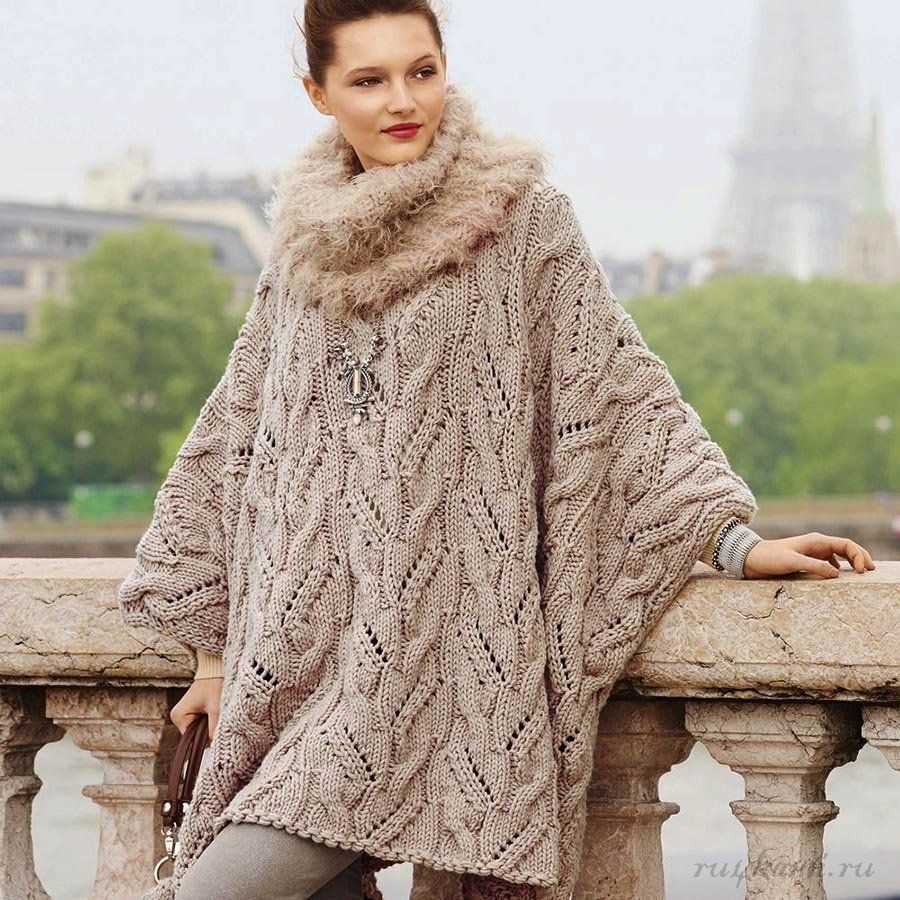
The ladies cape knitting pattern is a stylish and versatile garment that can be worn in a variety of ways. Whether you’re looking to add a fashionable layer to your outfit or protect yourself from the cold, a cape is a great choice. With this knitting pattern, you’ll be able to create a beautiful cape that is both cozy and chic.
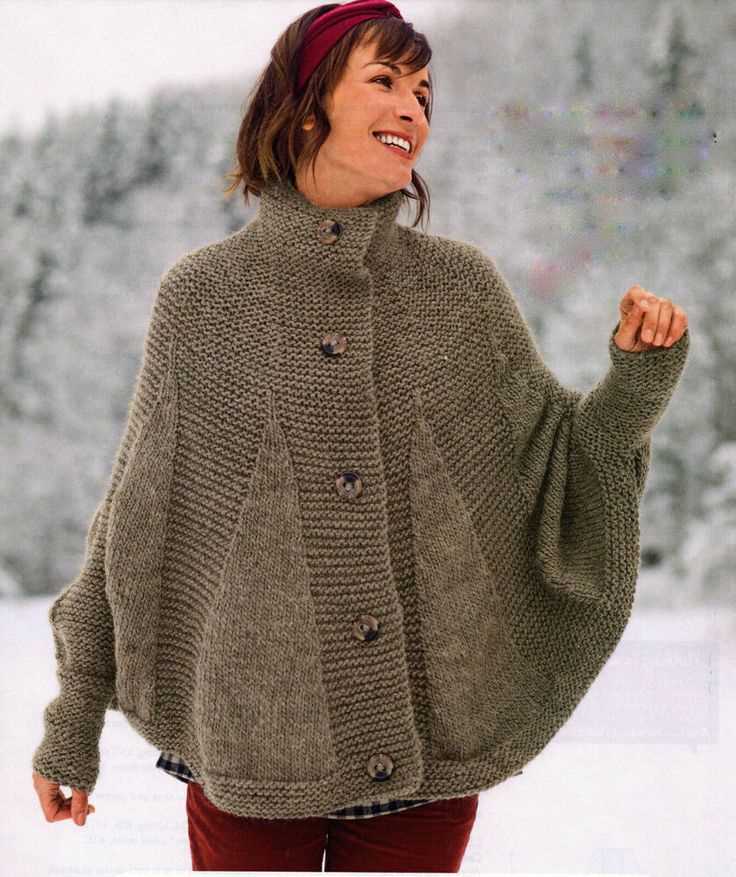
This pattern features a classic design with a modern twist. The cape has a loose, flowing silhouette that drapes elegantly over the shoulders. It can be knitted in a variety of yarns, allowing you to customize the look and feel of your cape. The pattern also includes several different stitch options, so you can experiment with different textures and patterns. Whether you prefer a simple garter stitch or a more intricate cable design, this pattern has you covered.
To get started, you’ll need a set of knitting needles and the appropriate yarn for your chosen pattern. The pattern includes detailed instructions and a helpful stitch guide, making it suitable for knitters of all skill levels. Whether you’re a beginner or an experienced knitter, you’ll be able to create a beautiful cape that you can be proud of.
Materials:
- Yarn of your choice
- Knitting needles
- Tape measure
- Scissors
- Stitch markers
Instructions:
- Cast on the required number of stitches, as specified in the pattern.
- Follow the pattern instructions for the desired stitch pattern, knitting the required number of rows.
- Continue to follow the pattern instructions to shape the cape and add any desired details, such as a collar or buttons.
- Once you have completed the pattern, bind off your stitches and weave in any loose ends.
- Try on your completed cape and make any necessary adjustments to the fit.
- Enjoy wearing your new cape!
With this ladies cape knitting pattern, you’ll be able to create a beautiful and stylish garment that is sure to become a favorite in your wardrobe. Whether you choose to wear it with jeans and a t-shirt or dress it up for a special occasion, your cape will add a touch of elegance to any outfit. So grab your needles and get started on this fun and rewarding knitting project today!
Choosing the Perfect Yarn for Your Cape
When it comes to knitting a beautiful cape, one of the most important decisions you’ll make is choosing the right yarn. The yarn you select will not only determine the look and feel of your finished project, but it will also affect how warm and comfortable your cape is to wear. With so many options to choose from, it can be overwhelming to find the perfect yarn for your needs.
Consider the season: One of the first factors to consider when selecting yarn for your cape is the season in which you plan to wear it. For colder months, opt for a thicker, bulkier yarn that will provide warmth and insulation. If you’re knitting a cape for warmer weather, choose a lighter, breathable yarn that won’t cause you to overheat.
Choose the right fiber: The fiber of your yarn is another important aspect to consider. Popular options for cape knitting include wool, acrylic, alpaca, and blends of different fibers. Each fiber has its own unique properties, such as warmth, softness, and durability. Consider what characteristics are most important to you and choose a yarn that aligns with your preferences.
- Wool: Wool is known for its warmth and natural insulation properties. It is a versatile fiber that can be found in various weights, making it suitable for both winter and transitional weather.
- Acrylic: Acrylic yarn is a budget-friendly option that is often soft and easy to care for. It may not provide the same level of warmth as wool, but it comes in a wide range of colors and is a great choice for beginners.
- Alpaca: Alpaca yarn is known for its luxurious softness and warmth. It is hypoallergenic and comes in various natural shades. However, it can be more expensive than other fibers.
- Blends: Yarn blends combine different fibers to create unique properties. For example, a wool-acrylic blend would provide the warmth of wool with the easy care of acrylic. Consider blends if you want to combine the benefits of multiple fibers.
Consider the pattern: Finally, take into account the pattern you’ll be using for your cape. Some patterns may specify the recommended yarn weight and fiber type, which can help narrow down your options. Additionally, consider the stitch pattern and design elements of the pattern, as certain yarns may highlight these features better than others.
By taking the time to choose the right yarn for your cape, you’ll ensure that your finished project is not only visually stunning but also practical and comfortable to wear. Consider the season, fiber type, and pattern requirements to find the yarn that best suits your needs and preferences.
Essential Tools for Knitting a Cape
When embarking on a knitting project, having the right tools is essential to ensure success and a smooth knitting process. Knitting a cape is no exception, and there are several tools that every knitter should have at their disposal for this particular project.
1. Knitting Needles
The first and most obvious tool is a set of knitting needles. When knitting a cape, it is important to choose the correct needle size to achieve the desired gauge and ensure that the stitches are not too tight or too loose. Circular needles are often preferred for knitting capes, as they allow for a larger number of stitches and provide a more comfortable grip.
2. Stitch Markers
Stitch markers are an essential tool for keeping track of specific sections or stitch patterns within a knitting project. In the case of a cape, stitch markers can be used to mark the beginning and end of each section or to indicate pattern repeats. This helps prevent mistakes and ensures that the cape is knit consistently throughout.
3. Yarn Needle
A yarn needle, also known as a tapestry needle, is used for weaving in loose ends and finishing the knitting project. When knitting a cape, there may be several yarn ends that need to be secured and hidden, and a yarn needle is the perfect tool for this task. It is also useful for sewing pieces of the cape together, such as attaching a collar or adding embellishments.
4. Row Counter
A row counter is a handy tool for keeping track of the number of rows knitted in a project. For a cape, where the length is important, a row counter can help ensure that the desired length is achieved and that both sides are knit evenly. It eliminates the need to try and count rows manually, which can be challenging and prone to mistakes.
5. Stitch Holders or Waste Yarn
Stitch holders or waste yarn can be used to hold stitches when shaping the cape, such as for armholes or neckline. They keep the stitches secure and prevent them from unraveling while working on other sections. Stitch holders are typically used for larger sections, while waste yarn can be easily threaded through the stitches and removed when needed.
With these essential tools at your disposal, knitting a cape can be an enjoyable and rewarding project. They will help you stay organized, achieve the desired fit and length, and add those finishing touches that make a knitted cape truly beautiful.
Getting Started: Casting on and Making the First Rows
When starting your ladies cape knitting project, the first step is to cast on the required number of stitches. The type of cast-on method you choose may depend on the pattern or your personal preference. One common cast-on method is the long-tail cast-on, which creates a neat foundation row of stitches. It is important to ensure that you leave a long enough tail to allow for the desired number of stitches. Another option is the knitted cast-on, which is easy to learn and creates a flexible edge.
Once you have cast on, you can start making the first rows of your ladies cape. The pattern instructions will specify the stitches and rows you need to work to create the desired shape and texture. Pay close attention to the pattern and make sure to follow the instructions carefully. It may be helpful to use stitch markers to keep track of different sections or repeat patterns.
Working the First Rows
To begin knitting the first rows of your ladies cape, start by working the stitches according to the pattern. Use the specified needles and yarn to achieve the correct gauge and tension. As you knit, make sure to maintain an even tension throughout your work to ensure that the finished piece has a consistent appearance.
You may encounter different stitches or techniques in the pattern, such as increasing or decreasing stitches, creating textured patterns, or working with cable stitches. Take your time and practice any new techniques before incorporating them into your ladies cape. It is also a good idea to check your gauge periodically to ensure that you are on track and the cape will fit properly.
As you progress with the first rows, you will start to see the shape of the ladies cape emerging. It is exciting to see your project take shape and begin to resemble the finished garment. Remember to take breaks and stretch your hands and arms to prevent any strain from prolonged knitting sessions.
Continue following the pattern instructions and working the first rows until you reach the desired length or the next stage of the pattern. With each row, you will be one step closer to completing your beautiful ladies cape.
Creating the Main Body of the Cape
Once you have chosen your knitting pattern and gathered all the necessary materials, you can begin creating the main body of the cape. This is where the bulk of the knitting will take place, and it will determine the overall shape and size of the final garment.
Start by casting on the required number of stitches as specified in your pattern. Make sure to use the recommended size of knitting needles to achieve the desired gauge. It is also helpful to place stitch markers at regular intervals to keep track of your progress and make it easier to count stitches.
Follow the pattern instructions to knit the main body of the cape. This may involve working in different stitch patterns, shaping the neckline or armholes, and adding any desired embellishments such as cables or lace. Be sure to read the pattern carefully and refer to any stitch diagrams or charts provided.
As you work, periodically check your gauge to ensure that your knitting is on track. If necessary, make adjustments by changing needle size or tension. This will help ensure that the cape fits properly when finished.
Once you have completed the required number of rows or rounds according to the pattern, it’s time to finish the main body of the cape. This will typically involve binding off stitches and weaving in any loose ends. Take care to create a neat and secure finish.
Optional: Adding a Border
If you wish to add a border to your cape, now is the time to do so. This can be done by picking up stitches along the edges of the main body and knitting additional rows or rounds in a desired stitch pattern or color. Be sure to choose a border that complements the overall design of the cape.
Once the border is complete, bind off stitches and weave in any loose ends. Your main body is now finished and ready for the next steps in the knitting process.
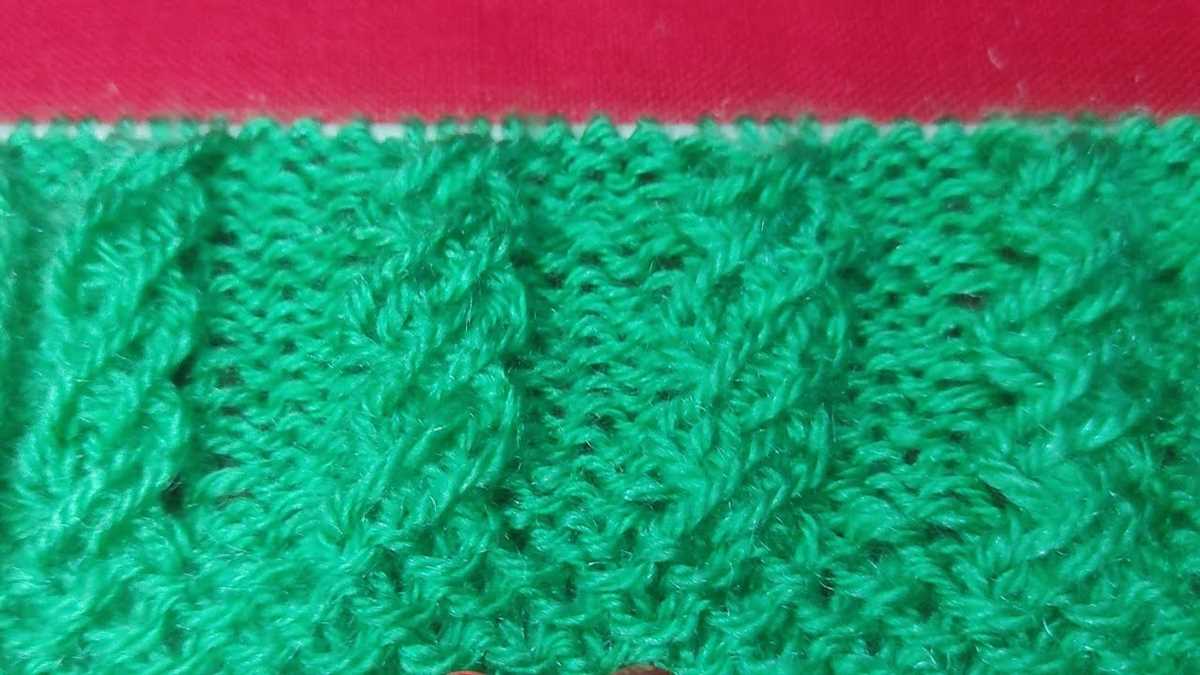
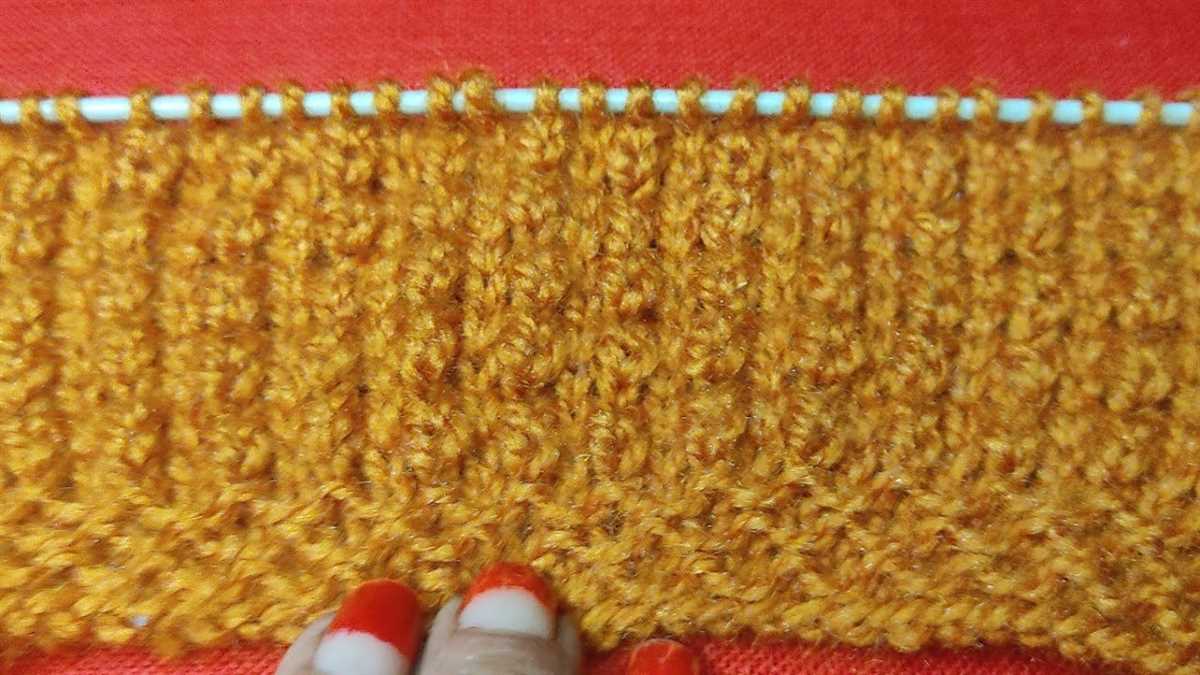
Add Some Texture: Adding Patterns and Stitches
When it comes to knitting a ladies cape, adding interesting patterns and stitches can really elevate the design and create a unique and textured look. These patterns and stitches can be used to create intricate details, beautiful textures, and eye-catching designs.
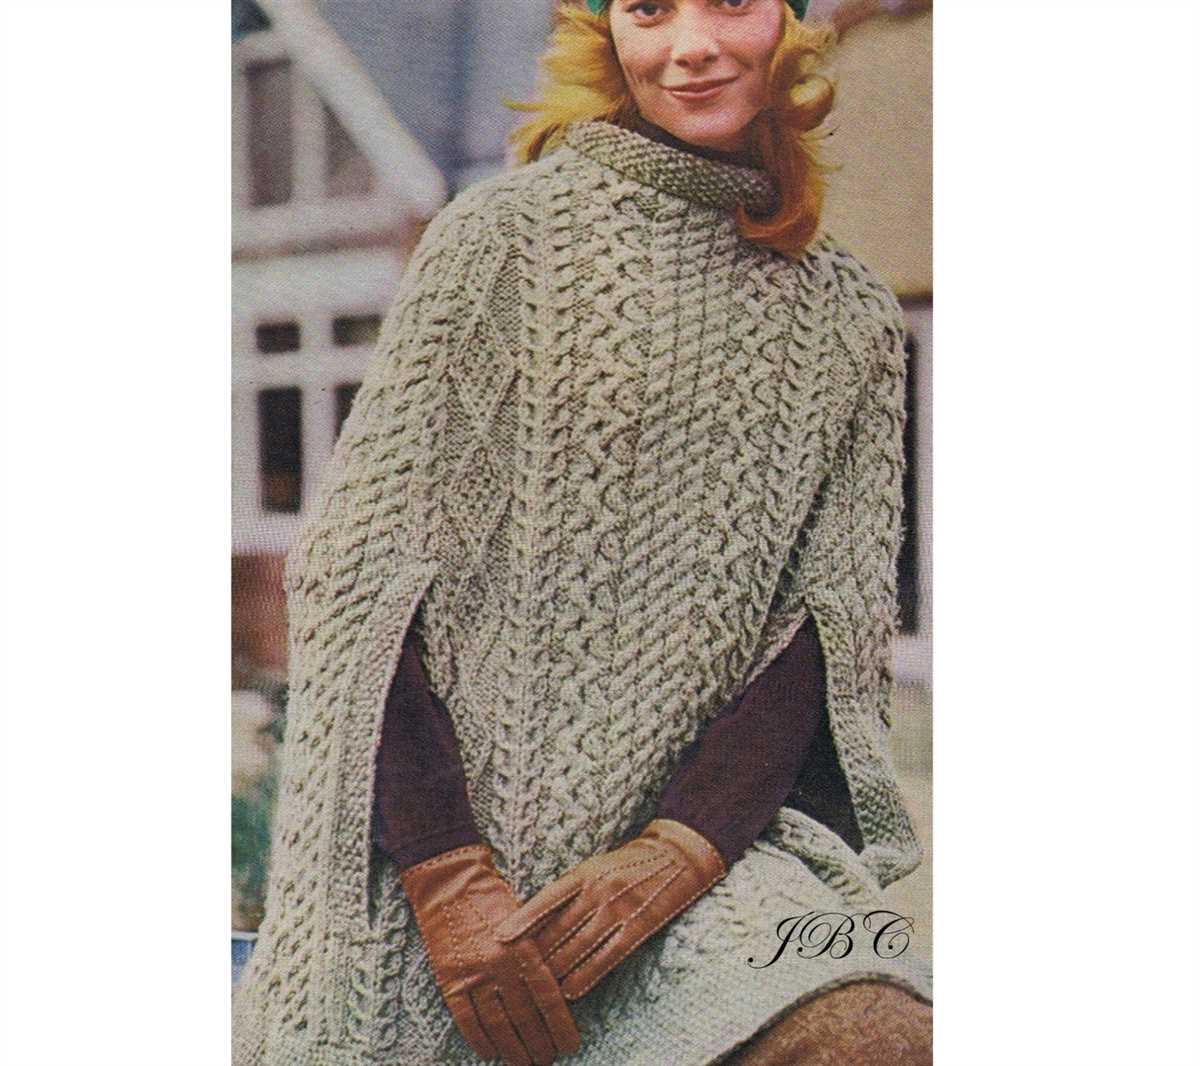
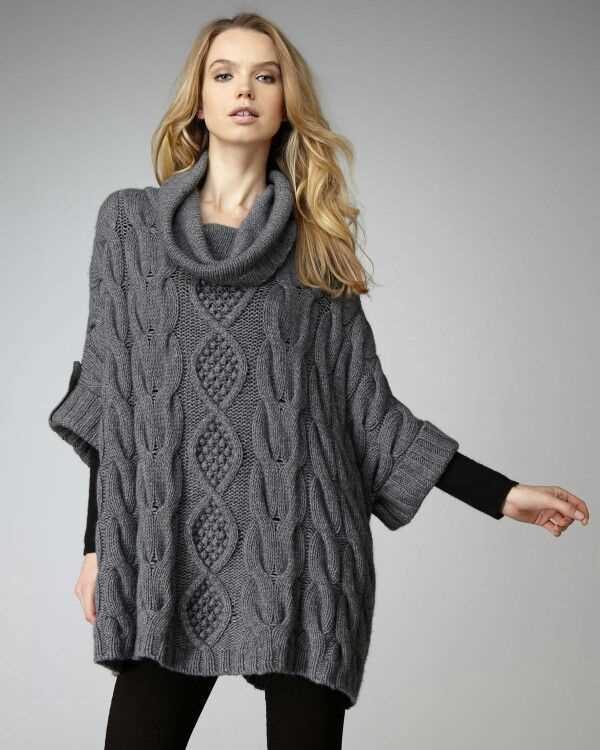
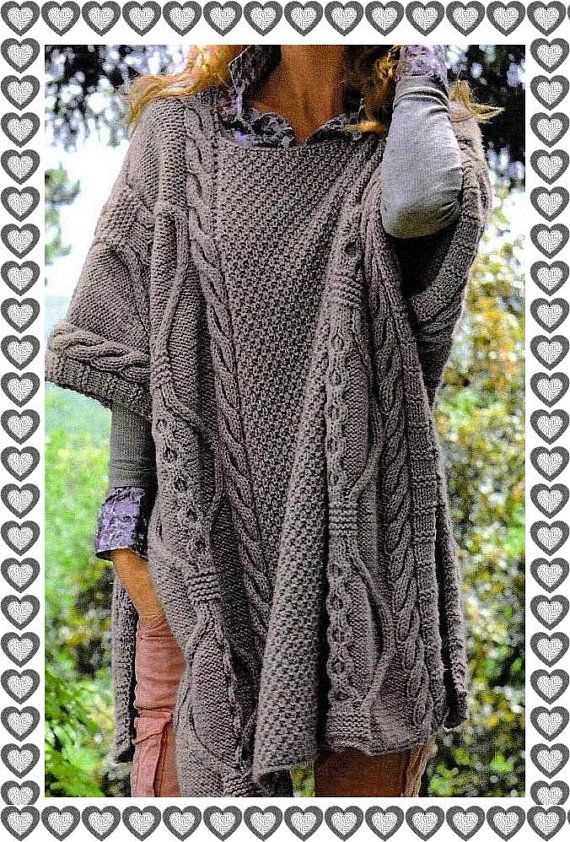
One popular stitch pattern that can be incorporated into a ladies cape is the cable stitch. This stitch creates a twisted, rope-like effect that adds depth and dimension to the fabric. By working the cable stitch in different directions and sizes, you can create a variety of designs and patterns. Whether it’s a simple cable running down the center of the cape or a complex cable pattern covering the entire garment, the cable stitch can add a touch of elegance and sophistication.
Another way to add texture to a ladies cape is by incorporating lace patterns. Lace stitches create openwork designs that are delicate and airy. By incorporating lace panels or borders into the cape, you can create a feminine and romantic look. Lace patterns can range from simple and repetitive motifs to intricate and intricate lace designs.
For those who prefer a more geometric look, adding colorwork patterns can be a great option. Colorwork involves working with multiple colors of yarn to create patterns and designs. Whether it’s using stranded colorwork, intarsia, or fair isle techniques, incorporating colorwork into the ladies cape can result in bold and eye-catching designs.
Overall, adding patterns and stitches to a ladies cape can transform a simple garment into a work of art. Whether you choose to incorporate cable stitches, lace patterns, or colorwork designs, these techniques can add texture, interest, and visual appeal to the cape, making it a standout piece in any wardrobe.
Shaping the Cape: Decreasing and Increasing Stitches
When knitting a ladies cape, it is important to shape the garment to create a flattering fit. This is done by increasing and decreasing the number of stitches in specific sections of the pattern. By strategically adding or removing stitches, you can create curves and angles that follow the contours of the body, resulting in a well-fitted cape.
To decrease stitches, you can use various methods such as knitting two stitches together (k2tog), passing a slipped stitch over (psso), or working a double decrease. These techniques help reduce the number of stitches in a row, creating narrower sections and shaping the cape. It is important to follow the pattern instructions carefully to ensure the decrease stitches are placed correctly and evenly throughout the project.
The process of increasing stitches involves adding new stitches to the fabric, creating wider sections and shaping the cape. Common methods for increasing stitches include knitting into the front and back of a stitch (kfb), making a yarn over (yo), or working a make one (m1) increase. Just like with decreasing stitches, it is crucial to follow the pattern instructions to ensure the increases are placed correctly and evenly.
When shaping the cape, it is important to consider the overall design and desired fit. Increases and decreases can be used to create specific features such as a flared hem, tailored waist, or fitted shoulders. By understanding the purpose and effect of each stitch manipulation technique, you can confidently shape your ladies cape to achieve the desired look and fit.
Adding Sleeves to your Cape
If you want to make your cape more versatile and suitable for colder weather, adding sleeves is a great option. Sleeves not only provide extra warmth, but they also allow for easier movement and make the cape look more like a traditional coat. Here are some instructions on how to add sleeves to your cape knitting pattern.
1. Choosing the Right Sleeve Style
The first step is to decide on the sleeve style you want to add to your cape. You can choose from different options such as raglan sleeves, set-in sleeves, or kimono sleeves. Consider the overall design and shape of your cape to determine which sleeve style will complement it best.
2. Measuring and Calculating Sleeve Length
Before knitting the sleeves, take accurate measurements of your arms and calculate the desired sleeve length. Measure from your shoulder down to where you want the sleeves to end, and add a few extra inches for ease of movement. Make sure to account for any desired cuff length as well.
3. Picking up Stitches

Once you have your measurements, you can start by picking up stitches along the armhole edge of your cape. Use a circular needle or double-pointed needles to pick up the stitches evenly and make sure the number of stitches matches the pattern you have chosen.
4. Knitting the Sleeves
Follow the sleeve pattern you have chosen to knit the sleeves. You may need to adjust the stitch count or increase/decrease the number of stitches to fit the armhole opening properly. Pay attention to any shaping instructions for the sleeves, such as increasing or decreasing stitches for a snug fit.
5. Finishing and Seam
Once you have completed knitting the sleeves, finish them off by binding off the stitches. Make sure to sew the seam of the sleeves using a mattress stitch or any other preferred method to close the armhole opening neatly. Try on the cape to ensure the sleeves fit properly and make any necessary adjustments if needed.
By following these steps, you can easily add sleeves to your cape and create a stylish and functional garment for colder days. Enjoy the process of personalizing your cape knitting pattern and embrace the added warmth and versatility that sleeves bring.
Adding Finishing Touches: Neckline and Buttonholes
When it comes to putting the finishing touches on your knitted ladies cape, one important detail to consider is the neckline. The neckline can greatly impact the overall look and fit of the cape, so it’s essential to get it just right. There are several options for creating a neckline, depending on the style you want to achieve.
If you prefer a simple and clean look, you can opt for a crew neck or a basic round neckline. To create this type of neckline, you can simply bind off a certain number of stitches in the center front, allowing for a comfortable fit around the neck. Alternatively, you can create a V-neckline by gradually decreasing stitches on each side of the center front. This creates a flattering and elegant shape that adds visual interest to your cape.
Another important detail to consider is the buttonholes. Buttonholes not only serve a functional purpose by allowing you to fasten your cape securely, but they can also add a decorative element to your design. There are various techniques for creating buttonholes, depending on your knitting level and preference.
One option is to create simple yarn-over buttonholes, which involve making a yarn-over (YO) on one row and then knitting or purling it together with the next stitch on the following row. This creates a small, stretchy buttonhole that is easy to do and blends well with the overall fabric. Another option is to use the slip-stitch method, where you slip stitches onto a spare needle or stitch holder to create a buttonhole slit. This method results in a neat and sturdy buttonhole.
Regardless of the technique you choose, it’s important to place your buttonholes evenly and ensure they align with the buttons you plan to use. Taking the time to carefully plan and execute your buttonholes will result in a polished and professional-looking finish to your knitted ladies cape.
Blocking and Finishing Your Knitted Cape
Blocking your knitted cape is an important step to achieve a professional and polished finish. It helps to even out the stitches, relaxes the fibers, and improves the overall drape of your garment. To start the blocking process, you will need a flat surface, such as a blocking mat or towel, and some rust-proof T-pins.
Begin by gently soaking your knitted cape in lukewarm water with a few drops of wool wash or mild detergent. Avoid agitating the garment to prevent felting. After soaking for about 20 minutes, remove the cape from the water and gently squeeze out excess moisture, being careful not to wring or twist the fabric. Lay the cape flat on the blocking mat and gently stretch it to the desired dimensions, pinning it in place with the T-pins.
Finishing touches:
- Weave in loose ends: Take the time to carefully weave in any loose ends to ensure a neat and clean finish.
- Seam or attach buttons: If your cape has seams or requires buttons, carefully stitch them into place using a yarn needle and matching thread.
- Consider a decorative edge: You can add a decorative edge to your cape, such as a picot or scalloped edge, using a crochet hook. This can provide a beautiful finishing touch.
Once you have completed blocking and finishing your knitted cape, allow it to dry completely before wearing or storing it. This will help to set the shape and ensure that all the details you have worked so hard on are highlighted to their fullest potential. Enjoy your new, stylish cape!
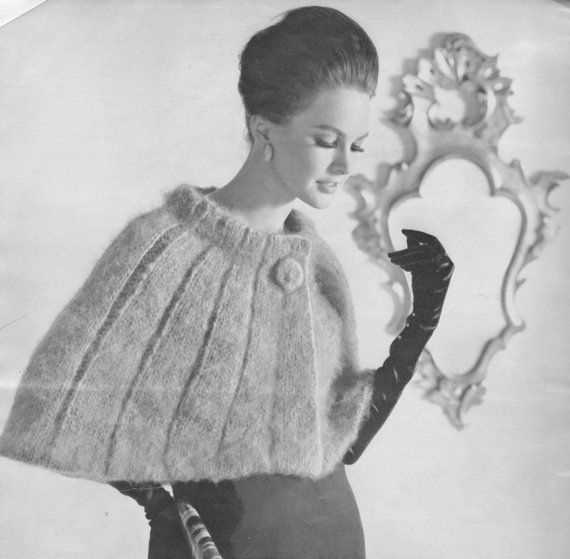
How to Style and Wear Your Knitted Cape
Knitted capes are not only cozy and warm, but also versatile and stylish. Whether you’re dressing up for a special occasion or running errands in town, here are some tips on how to style and wear your knitted cape.
1. Pair it with a dress or skirt
For a feminine and elegant look, pair your knitted cape with a dress or skirt. Opt for a cape with a longer length that falls just below the hemline of your dress or skirt. This combination creates a beautiful silhouette and adds an extra layer of warmth on those chilly days. Complete the look with a pair of boots or heels, and you’re ready to go!
2. Layer it over a sweater and jeans
For a casual and comfortable outfit, layer your knitted cape over a cozy sweater and jeans. This combination is perfect for running errands, grabbing coffee with friends, or simply lounging around. Choose a cape with a shorter length that rests at the hip, and opt for neutral colors like gray or camel to keep the look versatile. Finish off with ankle boots or sneakers for a relaxed and stylish look.
3. Belt it for a more defined silhouette
If you want to add some shape and definition to your knitted cape, try belting it at the waist. This creates a more tailored and polished look while also showcasing your figure. Choose a wide belt in a contrasting color to add some visual interest, or opt for a matching belt to keep the look cohesive. This styling trick works well with both dresses and pants, and is perfect for a more dressed-up occasion.
4. Accessorize with a hat and gloves
To complete your knitted cape look, accessorize with a matching hat and gloves. Not only do these accessories add an extra layer of warmth, but they also elevate your overall outfit. Choose a hat and gloves in the same color or pattern as your cape to create a coordinated look. This is especially great for winter outings or holiday gatherings, as it adds a touch of elegance and charm to your ensemble.
With these tips in mind, you can confidently style and wear your knitted cape for any occasion. Experiment with different combinations and have fun expressing your personal style!
Common Mistakes to Avoid While Knitting a Cape
Knitting a cape can be a fun and rewarding project, but it’s important to avoid common mistakes that can ruin the final result. Here are some mistakes to watch out for:
1. Not checking gauge
One of the most common mistakes knitters make is not checking their gauge before starting a project. Gauge refers to the number of stitches and rows per inch in a knitted fabric. Not matching the gauge specified in the pattern can result in a cape that is too big or too small. Always take the time to knit a gauge swatch and measure it accurately before starting your project.
2. Choosing the wrong yarn
The choice of yarn can greatly affect the drape and appearance of your cape. It’s important to choose a yarn that is appropriate for the pattern and that will give you the desired result. For example, if the pattern calls for a bulky weight yarn, using a lace weight yarn will result in a completely different look. Take the time to consider the yarn weight and fiber content before making your selection.
3. Not following the pattern instructions
Knitting patterns are designed with specific instructions to achieve a certain look and fit. It’s important to carefully read and follow the pattern instructions, including any charts or diagrams provided. Skipping or misinterpreting instructions can result in a cape that doesn’t fit properly or doesn’t look as intended. Take the time to understand the pattern before starting and refer back to it regularly as you knit.
4. Not blocking the finished cape

Blocking is the process of shaping and stretching your knitted fabric to give it an even appearance. Many knitters skip this step, but it can make a huge difference in the final result. Blocking helps to even out stitches, open up lace patterns, and give your cape a finished look. Don’t skip this important step in the knitting process.
Avoiding these common mistakes will help you have a successful knitting experience and result in a beautifully finished cape. Happy knitting!
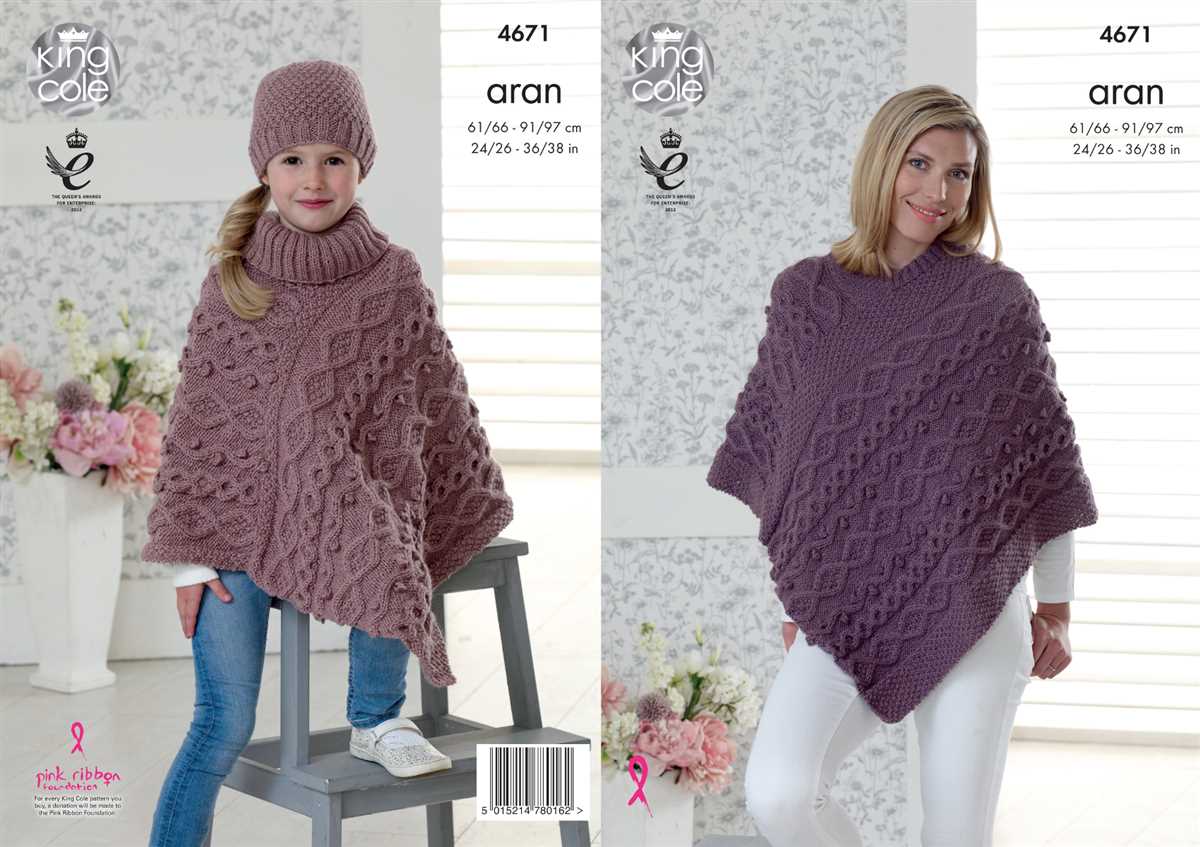
Exploring Variation: Different Cape Designs and Patterns
In this article, we have discussed the basics of knitting a ladies cape, as well as provided a detailed step-by-step knitting pattern. However, there are endless possibilities when it comes to cape designs and patterns. Here, we will explore some variations that you can try to create unique and personalized capes.
1. Color Variations: One of the simplest ways to add variation to your cape is by playing with different colors. You can create a striped pattern by alternating between two or more colors, or you can use different shades of the same color for a gradient effect. Get creative and experiment with color combinations to make your cape truly one-of-a-kind.
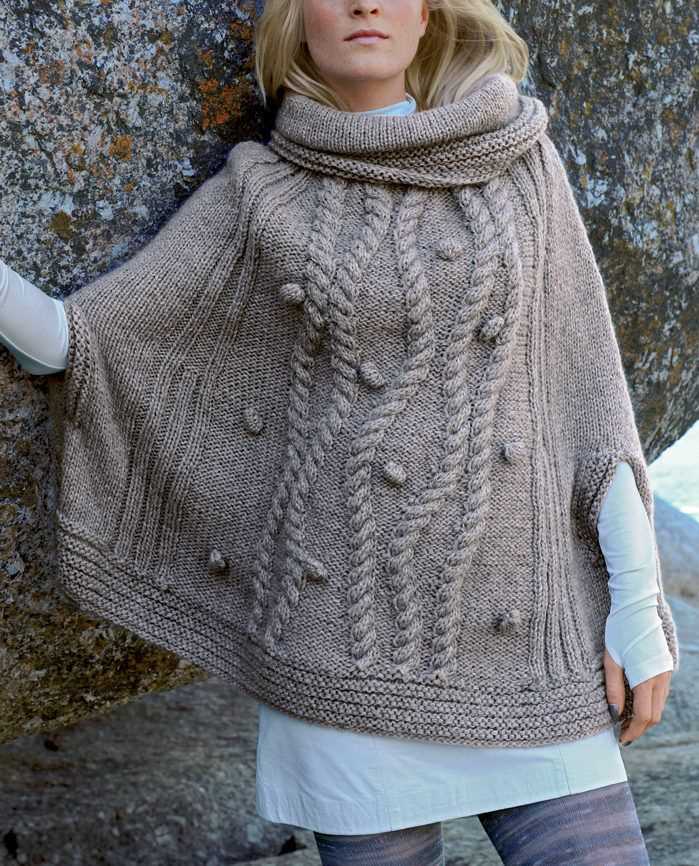
2. Stitch Variations: Another way to customize your cape is by using different types of stitches. For example, you can incorporate cable stitches for a textured look, or try lace stitches for a delicate and feminine design. Different stitch patterns will give your cape a unique texture and visual interest.
3. Embellishments: Add some extra flair to your cape by incorporating embellishments such as buttons, pom poms, or tassels. You can sew buttons along the front opening of the cape or add them as decorative accents. Pom poms and tassels can be attached to the corners or edges of the cape to create a playful and fun look.
4. Length and Shape: Don’t be afraid to experiment with the length and shape of your cape. While the traditional ladies cape is usually a short and loose-fitting garment, you can try making a longer version that reaches the knees or even the ankles. You can also play with the shape by adding a hood or creating a cape with a flared hem.
5. Patterned Designs: Instead of a solid color, you can try knitting your cape with patterned designs. Fair Isle knitting, for example, creates intricate patterns using multiple colors. You can also experiment with intarsia knitting, which allows you to create detailed pictures or motifs on your cape.
By exploring these different cape designs and patterns, you can create a unique and personalized garment that reflects your style and creativity. Whether you prefer a classic and elegant cape or a bold and colorful one, the possibilities are endless. Have fun knitting and experimenting!