
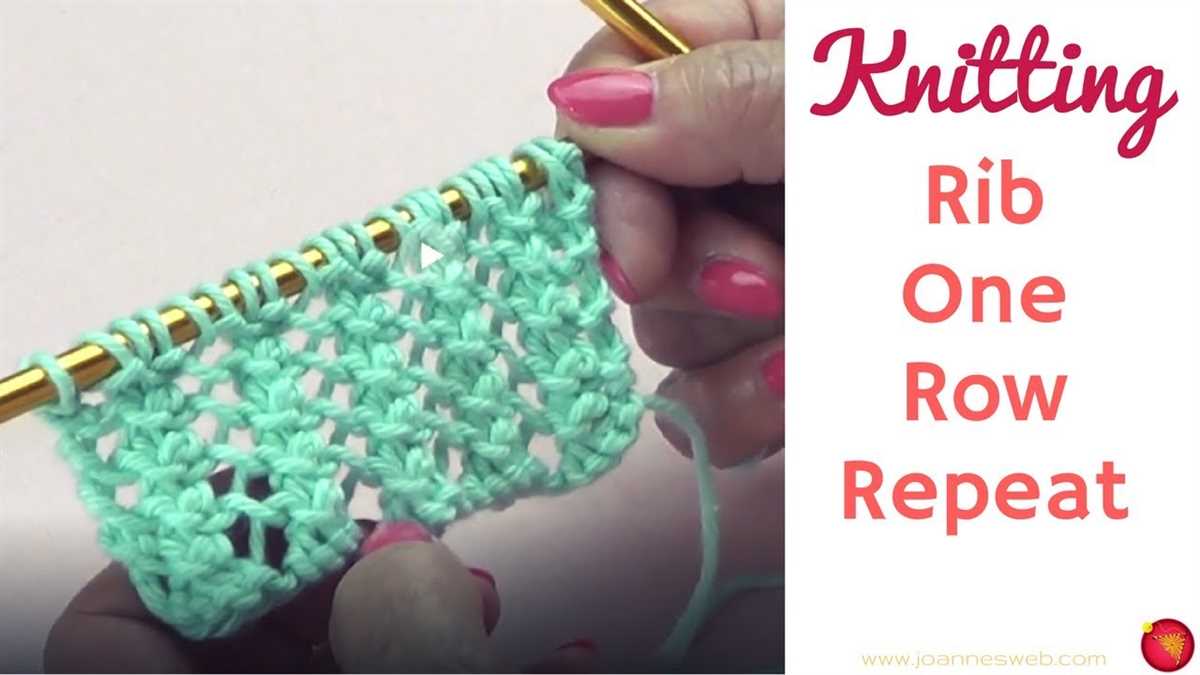
When it comes to knitting, one of the most versatile and commonly used stitch patterns is ribbing. Ribbing creates a stretchy and flexible fabric that is perfect for cuffs, hems, and necklines on all types of knitwear. Whether you’re a beginner or an experienced knitter, ribbing stitch patterns are easy to learn and can add a professional touch to your garments.
Ribbing is typically created by alternating knit and purl stitches in a specific pattern. The most common ribbing pattern is the 1×1 rib, which alternates one knit stitch and one purl stitch. Other popular ribbing patterns include the 2×2 rib, which alternates two knit stitches and two purl stitches, and the fisherman’s rib, which creates a textured and cozy fabric.
One of the reasons why ribbing is so popular is its ability to provide a garment with structure and elasticity. This makes it an ideal choice for cuffs and hems, as it helps them to retain their shape and stay in place. Ribbing is also commonly used on necklines, as it allows for a snug and comfortable fit. Additionally, ribbed fabrics have a tendency to lay flat, making it easier to seam pieces together and create a polished finished product.
Knitting ribbing stitch patterns is relatively simple and can be done using basic knitting techniques. By mastering ribbing, you’ll have a valuable skill in your knitting repertoire that can be used for a wide range of projects. Whether you’re knitting a cozy sweater, a pair of warm mittens, or a stylish hat, incorporating ribbing stitch patterns will add a professional and polished finish to your knits.
Knitting Ribbing Stitch Patterns
Ribbing stitch patterns are commonly used in knitting to create stretchy and elastic fabric, making them ideal for cuffs, collars, and hems. They consist of alternating columns of knit and purl stitches that create a textured and flexible fabric.
One popular ribbing stitch pattern is the 1×1 ribbing, which is created by knitting one stitch and purling one stitch alternately across the row. This pattern is often used for cuffs and can be found in many sweater designs. It creates a tight and neat ribbing effect that stretches well.
Examples of Knitting Ribbing Stitch Patterns:
- 2×2 Ribbing: This ribbing pattern is created by knitting two stitches and purling two stitches alternately across the row. It is commonly used for sweaters, hats, and scarves.
- Seed Stitch Ribbing: This ribbing pattern combines ribbing with seed stitch, which is created by alternating knit and purl stitches within a row. It creates a textured and visually interesting ribbing effect.
- Ribbed Cable Stitch: This ribbing pattern incorporates cables into the ribbing design, creating a more intricate and decorative effect. It is often used for sweaters and blankets.
When knitting ribbing stitch patterns, it is important to maintain tension and even stitches to achieve a consistent ribbing effect. Using the appropriate size needles and yarn can also make a difference in the final outcome of the ribbing. Experimenting with different ribbing stitch patterns can add variety and interest to your knitting projects.
What is Ribbing in Knitting?
In knitting, ribbing is a technique used to create a stretchy and textured fabric that is commonly found at the cuffs, necklines, and hems of garments. It is created by alternating columns of knits and purls stitches, which create raised ridges that give the fabric its elasticity. Ribbing is often used in knitting projects to provide structure and provide a snug fit.
Ribbing is typically created by working a series of knit and purl stitches in a repeating pattern. The most common ribbing patterns are 1×1 ribbing and 2×2 ribbing. In 1×1 ribbing, one knit stitch is followed by one purl stitch, and this pattern is repeated across the row. In 2×2 ribbing, two knit stitches are followed by two purl stitches, and this pattern is repeated across the row.
The Benefits of Ribbing:
- Elasticity: Ribbing creates a stretchy fabric that can help garments fit snugly and comfortably.
- Structure: Ribbing provides structure to garments, helping them maintain their shape, especially at the cuffs, necklines, and hems.
- Visual Appeal: The alternating knit and purl stitches in ribbing create a textured pattern that adds visual interest to knitted items.
- Versatility: Ribbing can be used in a variety of knitting projects, from sweaters and hats to socks and scarves.
Ribbing is a fundamental technique in knitting and is often one of the first stitch patterns that beginner knitters learn. Once mastered, it can be easily customized and incorporated into various knitting projects to add both functional and aesthetic elements.
The Importance of Ribbing in Knitting Projects
Knitting ribbing is an essential technique that adds both functionality and visual interest to knitting projects. Ribbing is commonly used at the edges of garments, such as cuffs, hems, and collars, as well as in hats and socks. It is characterized by a series of vertical columns of knit and purl stitches, creating a stretchy and flexible fabric that hugs the body and helps the item retain its shape.
One of the key benefits of ribbing is its ability to provide elasticity to knitted pieces. By alternating knit and purl stitches, ribbing creates a fabric that can easily stretch to accommodate different body shapes and sizes. This is particularly important for items like sweaters, where a snug fit is desired, or for accessories like socks, where the ribbing helps keep them in place.
Ribbing stitch patterns, such as 1×1, 2×2, or 3×3 ribbing, are also versatile and can be used to create different textures and visual effects in knitting projects. They add depth and dimension to plain stockinette stitch fabric, making the overall piece more visually appealing. By playing with the width and pattern of the ribbing, knitters can create unique designs that showcase their creativity.
Additionally, ribbing can also serve a practical purpose in knitting projects. By providing structure and stability, ribbing helps prevent garments from stretching out over time. It helps maintain the shape of the garment, ensuring that it looks and fits properly even after repeated wear and washing. Ribbing can also be used as a decorative element, adding a touch of elegance or flair to an otherwise simple design.
In conclusion, ribbing is an essential technique in knitting projects. It provides elasticity, adds texture and visual interest, and helps maintain the shape and structure of garments. Whether you’re a beginner or an experienced knitter, mastering ribbing stitch patterns will greatly enhance your knitting skills and open up endless possibilities for your projects.
Tips for Knitting Ribbing Stitch
Ribbing stitch is a popular pattern in knitting that creates a stretchy and textured fabric, making it ideal for cuffs, hems, and collars. Here are some tips to help you master the ribbing stitch.
1. Choose the right yarn and needles
When knitting ribbing stitch, it’s important to choose a yarn that has good elasticity, such as a wool or wool-blend yarn. This will help the ribbing retain its shape and stretchiness. Similarly, using smaller needles can help create a tighter ribbing, while larger needles will result in a looser ribbing.
2. Understand the ribbing stitch pattern
Ribbing stitch is created by alternating knit and purl stitches in a specific pattern. The most common ribbing patterns are 1×1 (alternating knit and purl stitches), 2×2 (two knit stitches followed by two purl stitches), and 3×1 (three knit stitches followed by one purl stitch). Make sure to read and understand the pattern before you begin knitting.
3. Maintain tension and consistency
To achieve an even and professional-looking ribbing stitch, it’s important to maintain consistent tension throughout your knitting. Avoid pulling the yarn too tightly or letting it become too loose. Keeping an even tension will ensure that your stitches are uniform in size and appearance.
4. Use stitch markers
If you’re knitting ribbing stitch in the round, using stitch markers can be helpful to keep track of the pattern. Place a stitch marker at the beginning and end of each ribbing repeat to easily identify where to switch between knit and purl stitches.
5. Practice and experiment
Like any knitting technique, mastering ribbing stitch takes practice. Start with a small project, such as a hat or a wristband, to get familiar with the pattern. Once you feel comfortable, don’t be afraid to experiment with different ribbing stitch patterns and combinations to create unique and interesting designs.
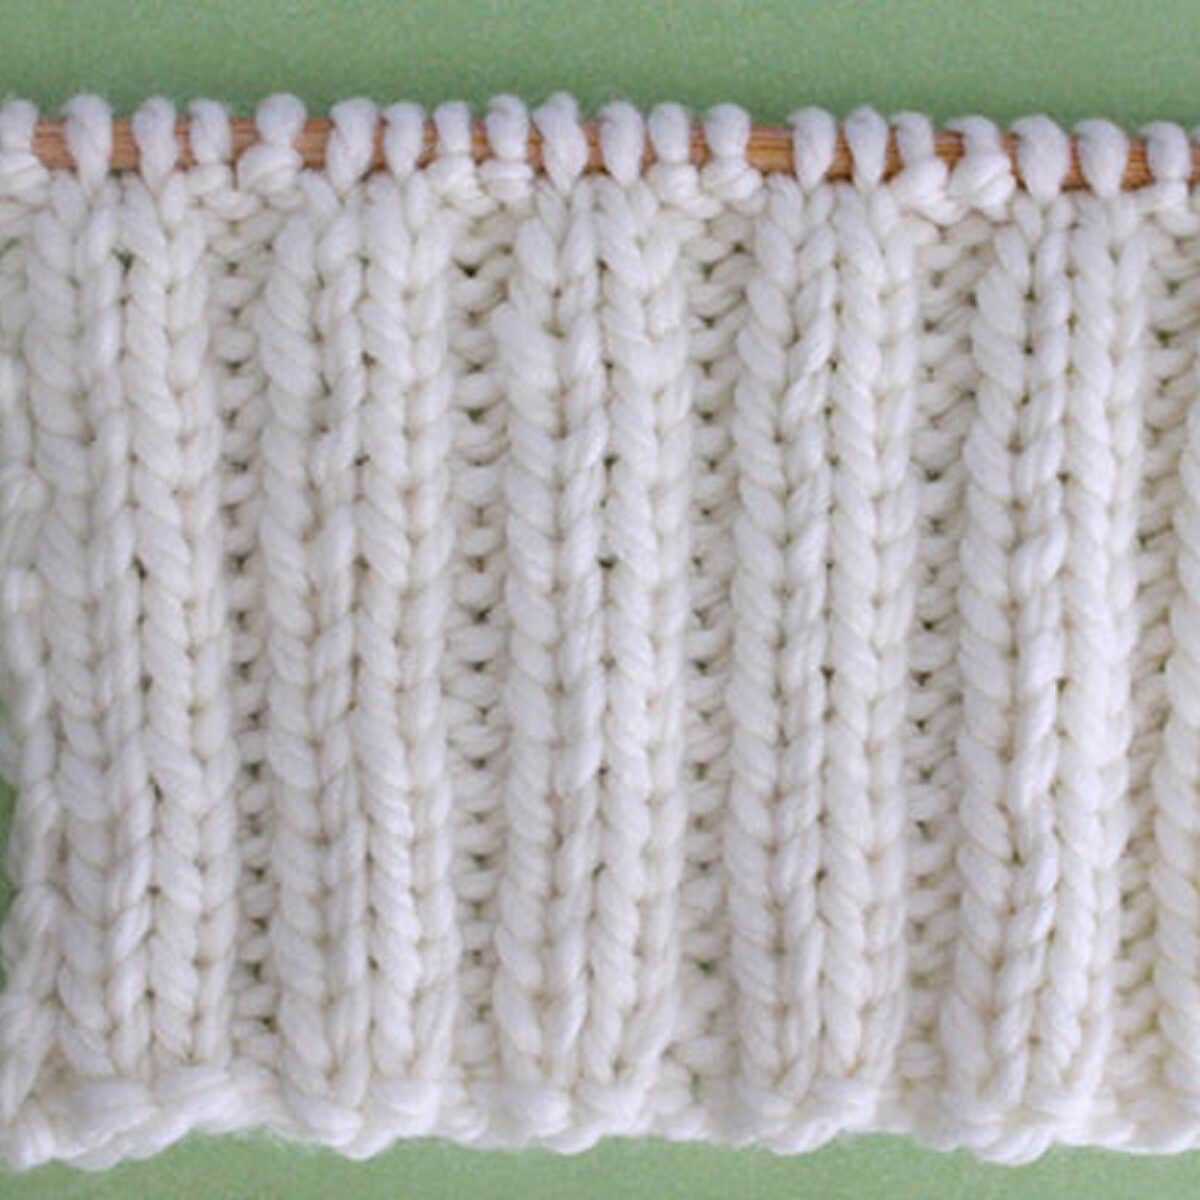
x1 Ribbing Stitch Pattern
Ribbing stitch patterns are a popular choice for creating texture and elasticity in knitted garments. The x1 ribbing stitch pattern is a simple yet versatile pattern that is commonly used for cuffs, hems, and collars. It consists of alternating knit and purl stitches in a 1×1 ratio, creating a stretchy fabric that is ideal for creating fitted garments.
To work the x1 ribbing stitch pattern, you will need to be familiar with basic knitting techniques such as knit and purl stitches. Begin by casting on an even number of stitches. For the first row, knit one stitch and purl one stitch, repeating this pattern until the end of the row. Continue alternating knit and purl stitches in subsequent rows, always working the opposite stitch to the one below. This will result in a ribbed texture.
The x1 ribbing stitch pattern is particularly effective when used with a stretchy yarn, such as wool or a wool blend. It is also a great choice for creating reversible fabrics, as it looks the same on both sides. The elasticity of the stitch pattern makes it perfect for creating fitted garments that need to stretch and hold their shape, such as hats, socks, and gloves.
To add variation to the x1 ribbing stitch pattern, you can experiment with different stitch combinations. For example, you could create a 2×2 ribbing pattern by alternating two knit stitches with two purl stitches. This would result in a wider ribbed texture. You can also play with the number of rows for each stitch to create different effects, such as a longer or shorter ribbing.
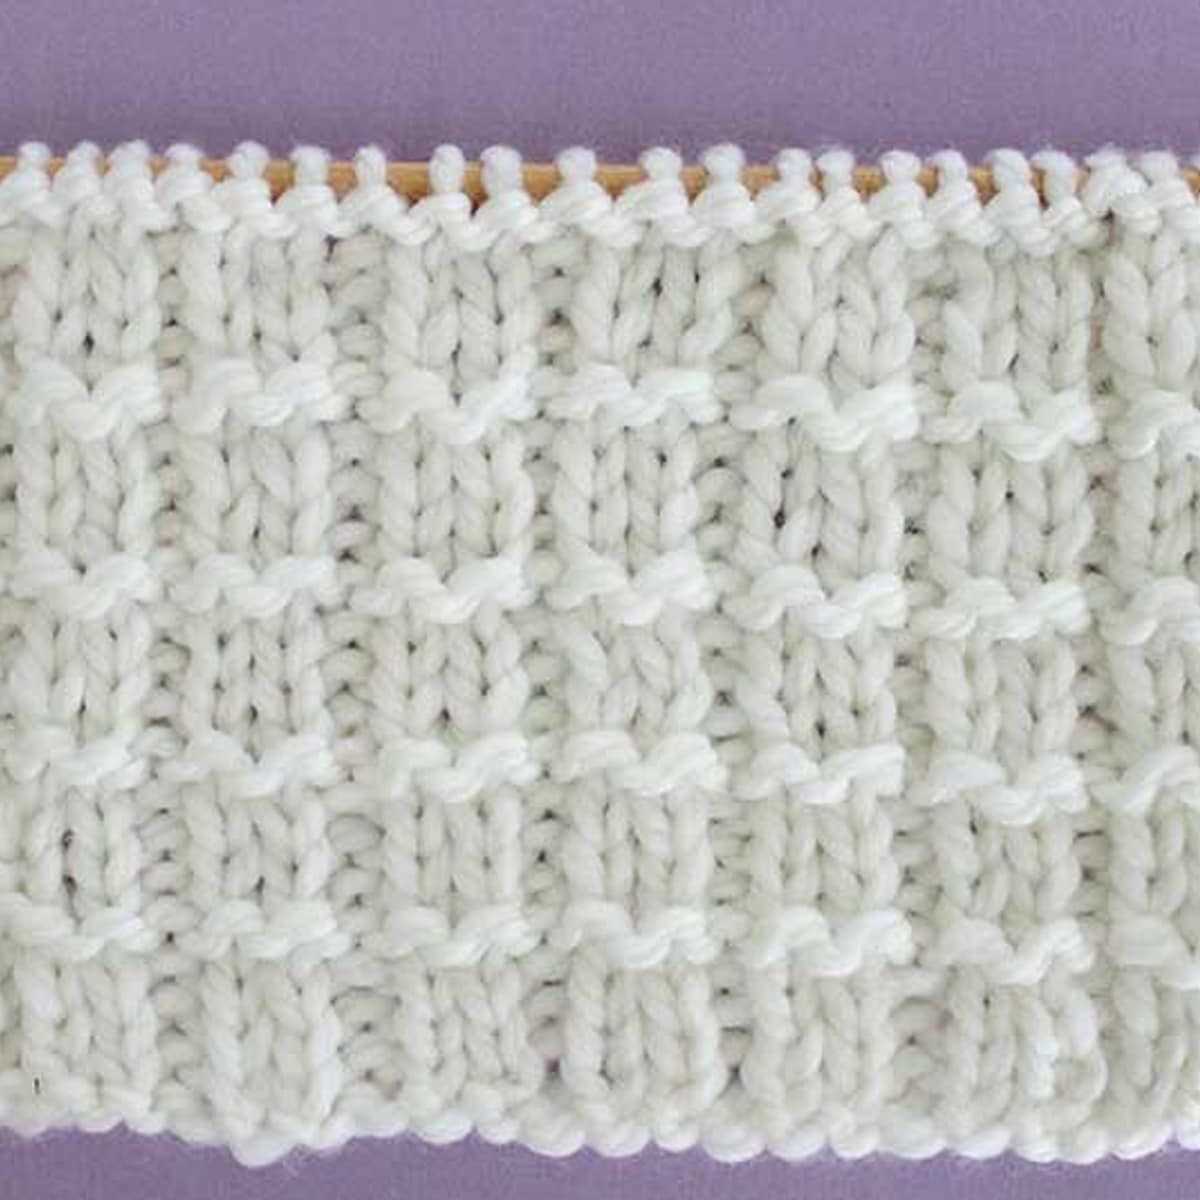
x2 Ribbing Stitch Pattern
The x2 ribbing stitch pattern is a versatile pattern that adds texture and elasticity to knitting projects. It is created by alternating knit and purl stitches in a specific pattern. The resulting fabric has a ribbed appearance and is commonly used for cuffs, hems, and collars.
To create the x2 ribbing stitch pattern, simply follow these steps:
- Cast on a multiple of 2 stitches.
- Row 1: *K2, p2* repeat to the end of the row.
- Row 2: *P2, k2* repeat to the end of the row.
- Repeat rows 1 and 2 for the desired length.
The x2 ribbing stitch pattern can be used in a variety of knitting projects, such as scarves, hats, and sweaters. It creates a stretchy and flexible fabric that is great for garments that need to fit snugly. Additionally, this pattern can be easily modified by adjusting the number of knit and purl stitches in each row, allowing for endless variations and design possibilities.
Overall, the x2 ribbing stitch pattern is a fantastic choice for adding depth and texture to your knitting projects. Whether you’re a beginner or an experienced knitter, this pattern is easy to follow and produces beautiful results. Give it a try and see how it can enhance your next knitting project!
Alternating Ribbing Stitch Pattern
The alternating ribbing stitch pattern is a versatile knitting pattern that creates a textured fabric with alternating columns of knit and purl stitches. It is commonly used for cuffs, hems, and borders on knitted garments, as well as for scarves and blankets.
To create the alternating ribbing stitch pattern, you will need to know how to knit and purl stitches. The pattern is worked over an even number of stitches and consists of repeating rows of knit and purl stitches.
Instructions:
- Row 1: *Knit 2, purl 2* repeat to the end of the row.
- Row 2: *Purl 2, knit 2* repeat to the end of the row.
- Repeat Rows 1 and 2 for the desired length.
By alternating between knit and purl stitches, the alternating ribbing stitch pattern creates a fabric that has both stretch and elasticity, making it an excellent choice for ribbed garments. The combination of knit and purl stitches also adds visual interest and texture to the fabric.
The alternating ribbing stitch pattern can be easily customized by changing the number of knit and purl stitches in each row. For example, you can create a 1×1 ribbing by repeating *knit 1, purl 1* instead of *knit 2, purl 2*. You can also experiment with different yarn weights and needle sizes to achieve different looks and textures.
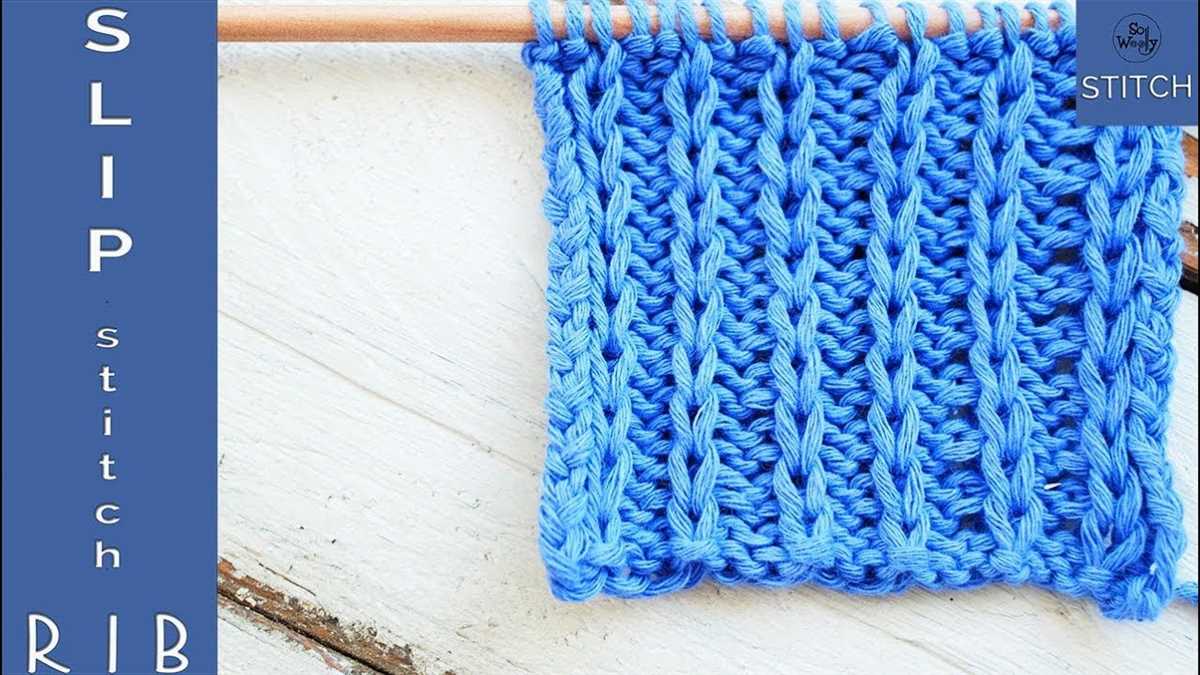
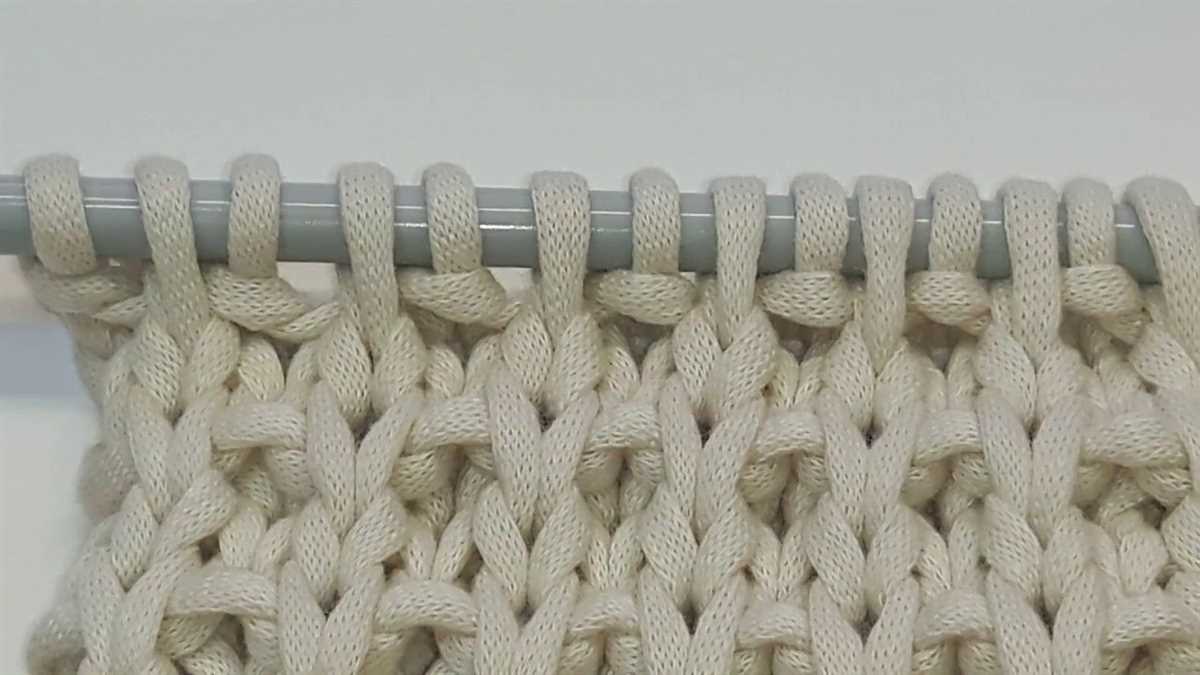
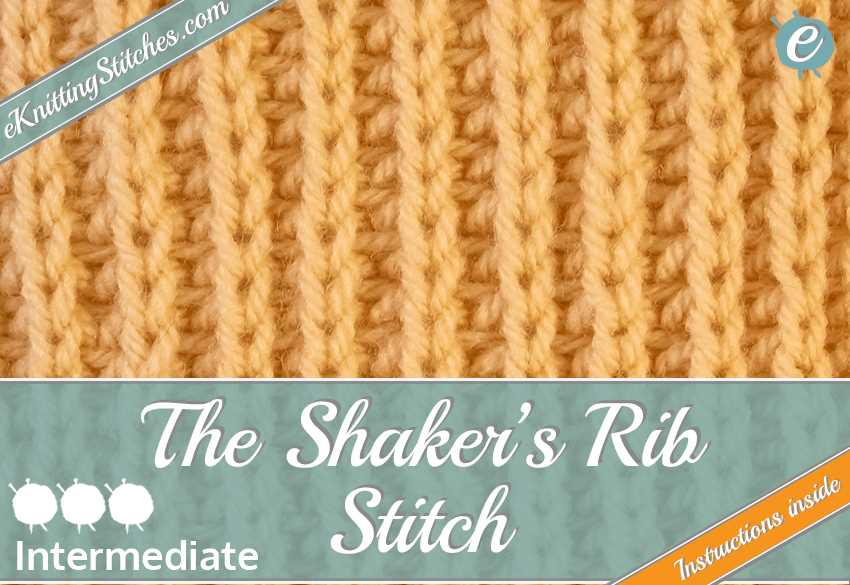
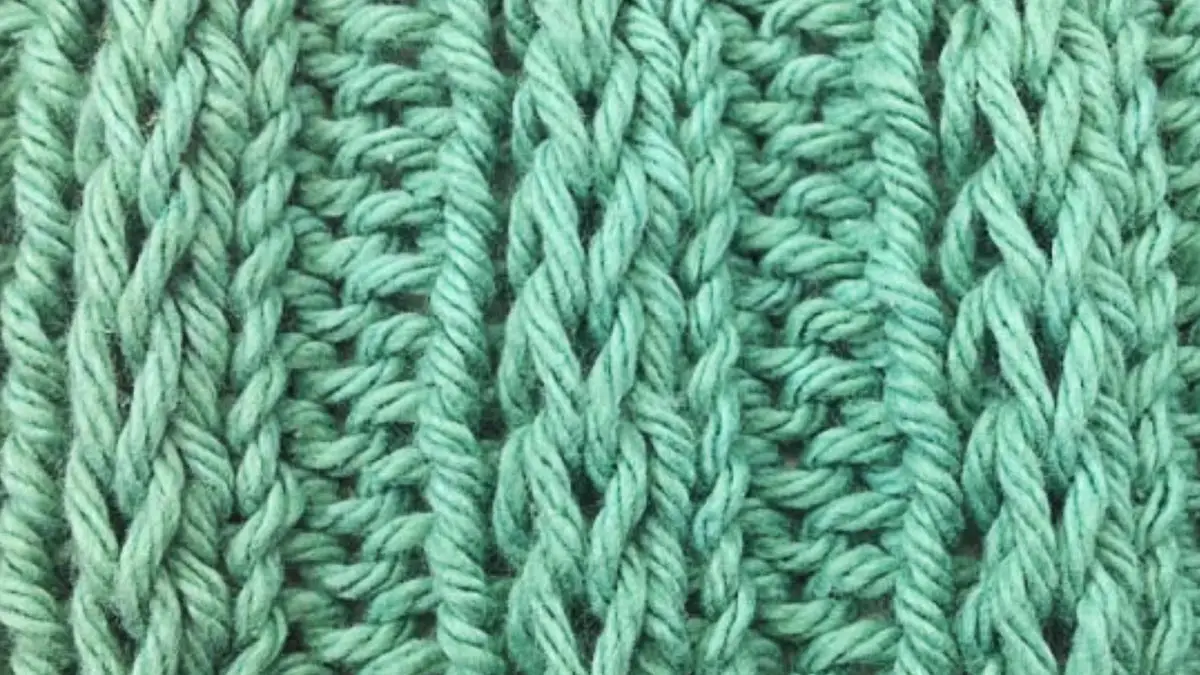
Fisherman’s Rib Stitch Pattern
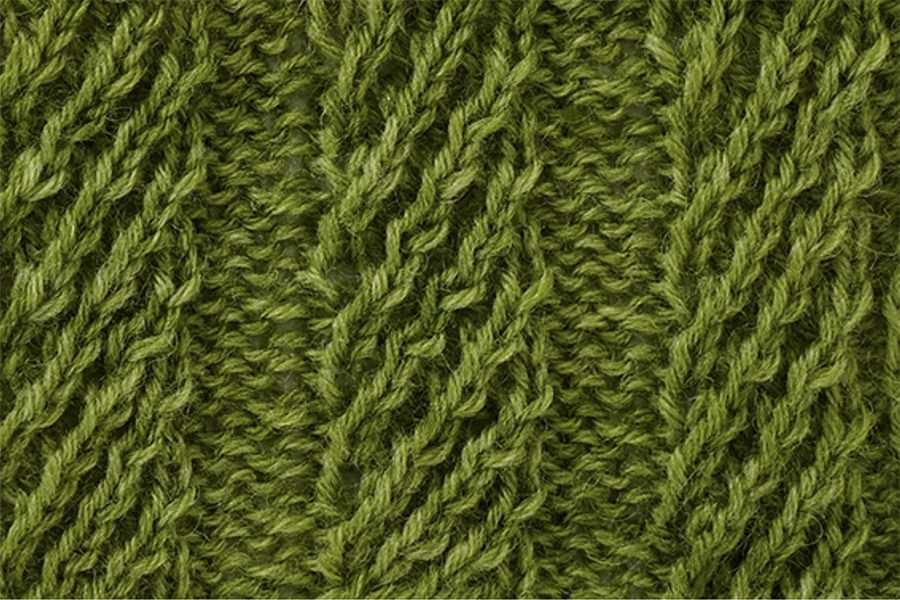
The Fisherman’s Rib stitch pattern is a variation of the basic 1×1 ribbing pattern with a more prominent and textured look. It is often used in knitting projects to add depth and dimension to garments and accessories. This stitch pattern is characterized by its dense and squishy texture, making it ideal for creating cozy and warm knitwear.
To create the Fisherman’s Rib stitch pattern, you will need to alternate between knit and purl stitches, just like in the basic ribbing pattern. However, in Fisherman’s Rib, you work the knit stitches into the purl stitches from the previous row, and vice versa. This creates a raised and elongated stitch that gives the pattern its unique look.
To knit the Fisherman’s Rib stitch pattern, you can use any type of yarn and appropriate-sized needles. It is recommended to use a smooth and pliable yarn to enhance the stitch definition. This stitch pattern is reversible, so it looks the same on both sides, making it suitable for scarves, cowls, and blankets that will be seen from both sides.
When working with the Fisherman’s Rib stitch pattern, it is important to note that it tends to be more time-consuming and requires concentration. The stitches are more involved, and the pattern may require additional rows to achieve the desired length compared to regular ribbing. However, the end result is worth the effort, as the Fisherman’s Rib creates a beautifully textured fabric that will keep you warm and stylish.
- Key tips for working with the Fisherman’s Rib stitch pattern:
- Use smooth and pliable yarn for better stitch definition
- Pay close attention to your knitting, as the stitch pattern requires more involvement
- Consider using markers to keep track of the knit and purl stitches
- Experiment with different needle sizes to achieve the desired texture and gauge
- Enjoy the process and embrace the cozy and squishy texture of the Fisherman’s Rib stitch pattern!
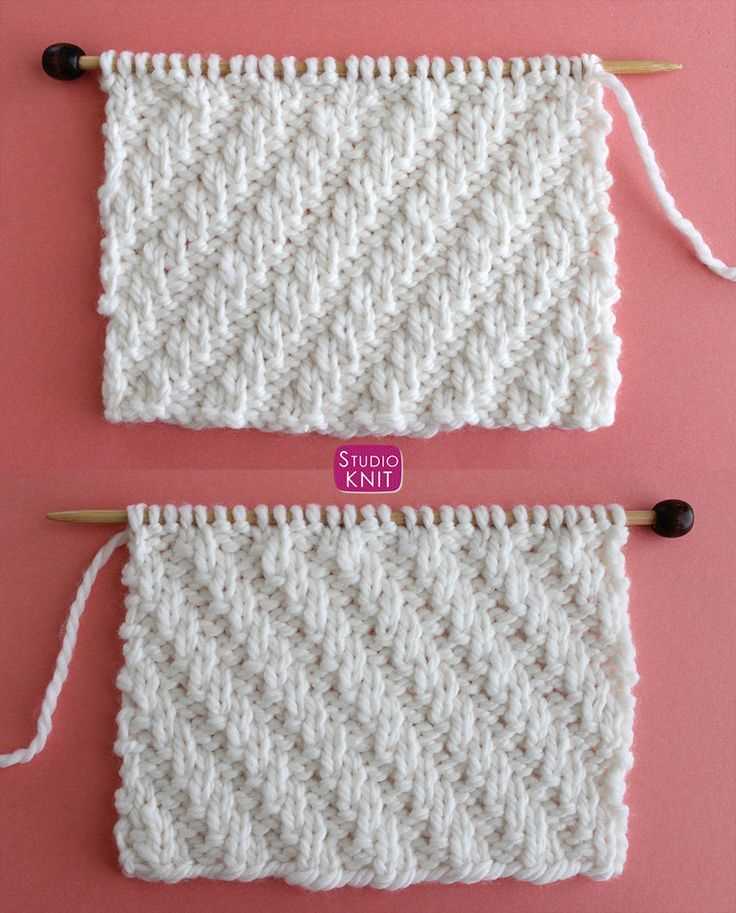
Broken Ribbing Stitch Pattern
The broken ribbing stitch pattern is a versatile and attractive design that adds texture and depth to knitted projects. It is an alternative to traditional ribbing and creates a unique look. This pattern combines alternating rows of knit and purl stitches to create a ribbed effect, but with a twist.
The broken ribbing pattern is created by varying the number of knit and purl stitches in each row. Unlike traditional ribbing that typically has equal numbers of knit and purl stitches, the broken ribbing pattern creates an uneven distribution of stitches, resulting in an interesting and visually appealing texture.
To create the broken ribbing stitch pattern, you will need to understand basic knitting techniques such as knit and purl stitches. Start by casting on an even number of stitches. The pattern can be customized to your desired width by increasing or decreasing the number of stitches.
A typical broken ribbing pattern may consist of two rows: Row 1 – *knit 1, purl 3*; Row 2 – *knit 2, purl 2*. Repeat these two rows until you reach the desired length. This creates an alternating pattern of knit and purl stitches that creates the broken ribbing effect.
One of the advantages of the broken ribbing stitch pattern is its versatility. It can be used in various projects including scarves, hats, sweaters, and blankets. The texture created by the broken ribbing stitch pattern adds interest and dimension to any knitted piece.
Overall, the broken ribbing stitch pattern is an excellent choice for knitters looking to add texture and visual appeal to their projects. With its unique alternating pattern of knit and purl stitches, this stitch pattern offers a fresh twist on traditional ribbing and allows for limitless customization and creativity.
Mock Ribbing Stitch Pattern
Ribbing is a popular knitting technique used to create a stretchy and textured fabric, commonly used for cuffs, hems, and other edges of garments. Mock ribbing stitch pattern is a variation of traditional ribbing that mimics the look of ribbing but is easier to knit.
In mock ribbing, the illusion of ribbing is achieved by alternating knit and purl stitches, creating columns of raised and recessed stitches. However, unlike traditional ribbing, which typically requires a multiple of 2 or 3 stitches, mock ribbing can be worked over any number of stitches.
To create the mock ribbing stitch pattern, you will alternate between knitting and purling stitches across each row. Start by knitting the first stitch, then purl the second stitch. Repeat this pattern until the end of the row. On the following row, you will purl the first stitch and knit the second stitch, continuing this alternating pattern across the row.
Mock ribbing stitch pattern is versatile and can be used in various projects, including scarves, hats, sweaters, and blankets. Its stretchiness makes it an excellent choice for cuffs and neckbands, providing a comfortable fit. The texture created by the alternating knit and purl stitches adds visual interest to any knitted fabric.
Whether you are a beginner or an experienced knitter, the mock ribbing stitch pattern is a great option to add depth and texture to your knitting projects without the complexity of traditional ribbing. Experiment with different yarns and needle sizes to create various effects and explore the versatility of this stitch pattern in your knitting.
How to Customize Ribbing in Your Knitting Projects
In this article, we have explored various ribbing stitch patterns that you can use to add texture and elasticity to your knitting projects. From traditional 1×1 and 2×2 ribbing to more intricate patterns like fisherman’s rib and brioche rib, there are endless options to choose from.
But what if you want to make your ribbing more unique? Here are some tips on how to customize ribbing in your knitting projects:
- Change the stitch pattern: Experiment with different ribbing stitch patterns to create a distinct look. Mix and match different combinations of knit and purl stitches to create your own unique ribbing design.
- Vary the width: Instead of sticking to the traditional 1×1 or 2×2 ribbing, try changing the width of your ribbing. You can create wider ribs by adding more stitches or narrower ribs by decreasing the number of stitches.
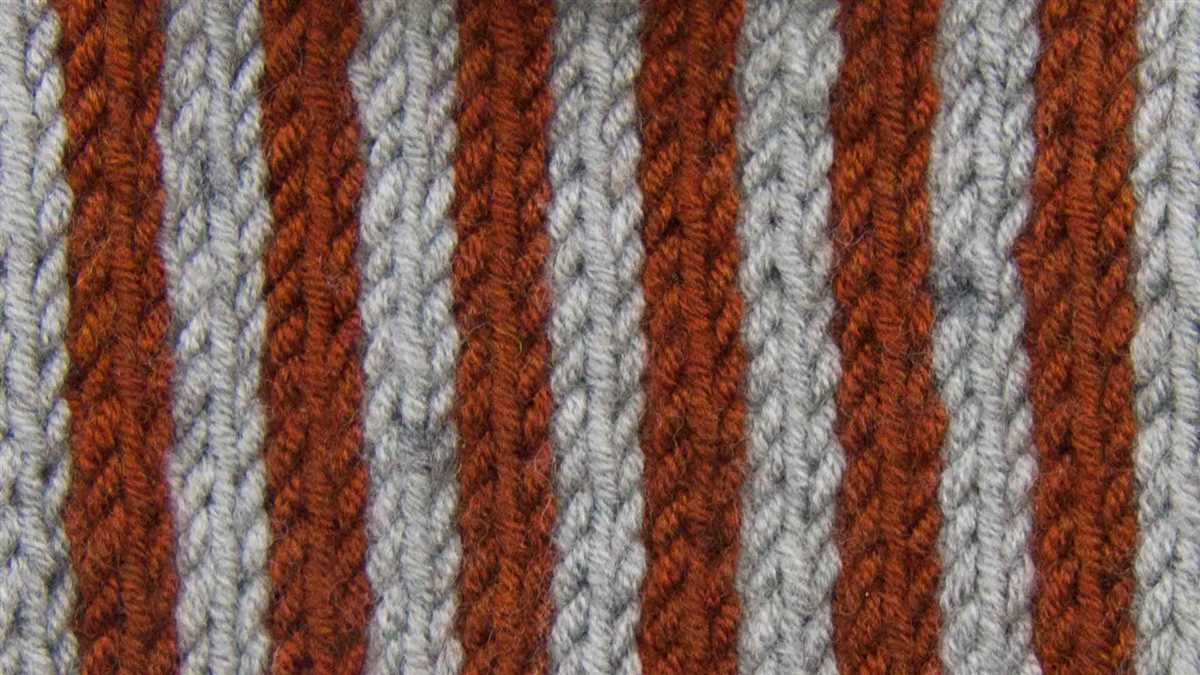
- Add color: Incorporate color into your ribbing by using multiple strands of yarn or by alternating different colored yarns. This can add visual interest and make your ribbing stand out.
- Experiment with yarn weight: Knitting ribbing with a different yarn weight can result in a completely different look and feel. Try using a thicker or thinner yarn than what is recommended for the pattern to see how it affects the ribbing.
- Combine ribbing with other stitch patterns: Mix ribbing with other stitch patterns, such as cables or lace, to create unique textures and designs.
Remember, the key to customizing ribbing is to have fun and let your creativity guide you. Don’t be afraid to try new techniques and experiment with different variations until you find the perfect ribbing for your project!
With these tips in mind, you can take your knitting projects to the next level by adding customized ribbing that reflects your personal style. Happy knitting!