
A waistcoat is a versatile and stylish addition to any wardrobe. It can be worn as a standalone piece or layered over a shirt or sweater, making it suitable for any season. Knitting your own waistcoat allows you to customize the fit, color, and pattern to suit your personal style.
Creating a waistcoat from a knitting pattern provides an opportunity to showcase your knitting skills and create a unique garment. The pattern typically includes instructions for sizes ranging from small to extra-large, ensuring a perfect fit for any body shape or size.
Knitting a waistcoat requires intermediate knitting skills, including knowledge of basic stitches such as knit, purl, increase, decrease, and picking up stitches. The pattern will guide you through step-by-step instructions, making it suitable for those with some experience in knitting.
Not only is knitting a waistcoat a rewarding project, but it also allows for creativity in selecting materials. The pattern may suggest using a specific type of yarn, but you can experiment with different textures, colors, and yarn weights to achieve the desired effect. Whether you prefer a lightweight cotton waistcoat for the summer or a cozy wool waistcoat for the winter, the possibilities are endless.
What is a waistcoat?
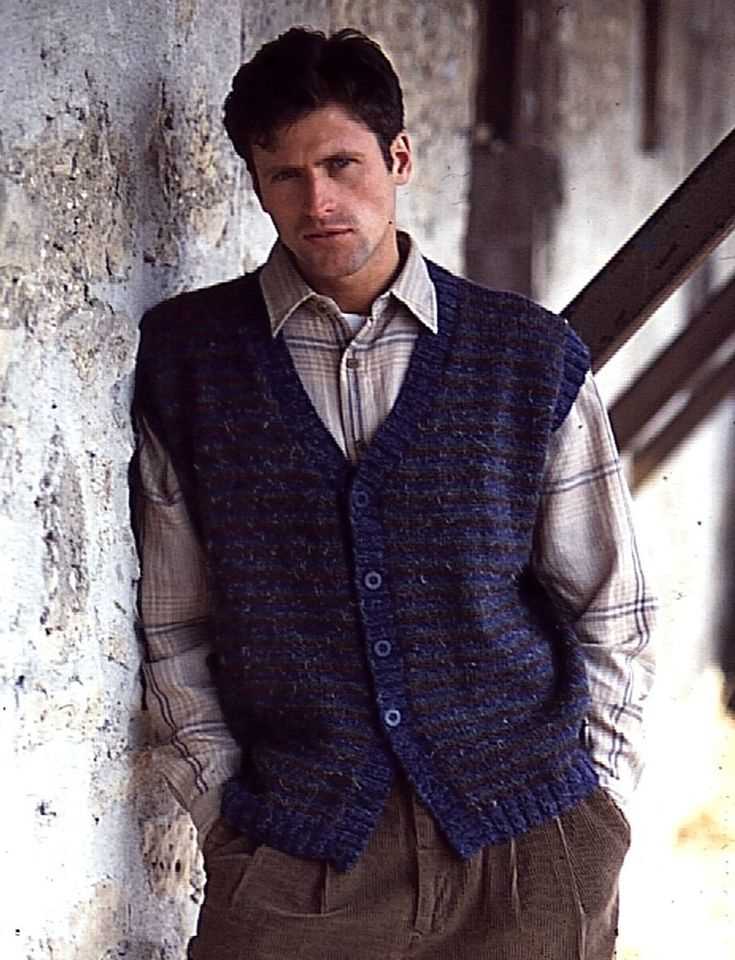
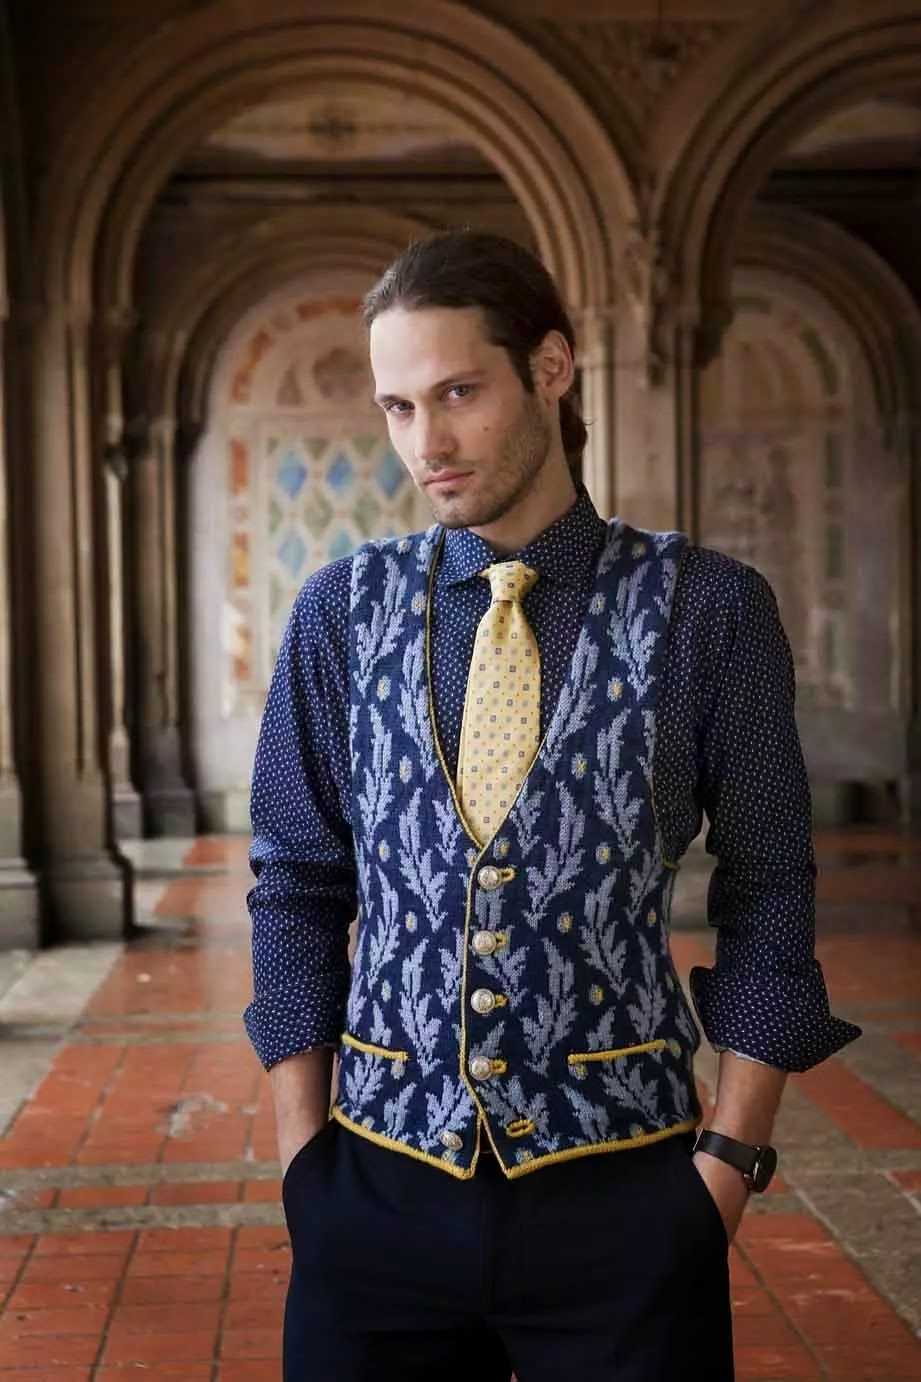
A waistcoat, also known as a vest, is a sleeveless garment that is worn over a shirt and under a jacket. It is typically made of a woven fabric and is designed to cover the upper body, extending to the waistline. Waistcoats have been popular for both men and women throughout history and are often worn as part of formal or business attire.
Waistcoats are typically characterized by their tailored fit and buttoned front. They often feature a V-neckline and are designed to be worn with the top button or two left undone. The waistcoat is an essential part of a three-piece suit, which also includes a jacket and trousers.
Traditionally, waistcoats were made from high-quality fabrics such as wool, silk, or linen. However, modern waistcoats can be made from a variety of materials, including polyester and synthetic blends. Different styles and patterns are also available, allowing individuals to personalize their look.
Aside from their fashionable appeal, waistcoats also have practical purposes. They provide an extra layer of warmth in colder weather and can help to smooth out the lines of a shirt or jacket, giving a more polished appearance. Waistcoats can also be worn on their own as a stylish and versatile option for more casual occasions.
History of waistcoats
A waistcoat is a garment that is worn under a jacket or coat and is typically sleeveless. It is also known as a vest in American English. The history of waistcoats can be traced back to the late 17th century when they were initially designed as an undergarment for men. They were typically made of silk or linen and were worn as an extra layer of clothing to provide warmth and added protection to the body.
During the 18th century, waistcoats started to become more fashionable and were no longer solely worn as an undergarment. They became an integral part of men’s formal and semi-formal attire, especially during the Georgian and Victorian eras. Waistcoats were often made of rich fabrics such as brocade, velvet, and damask, and were adorned with intricate embroidery and embellishments. They were considered a symbol of status and wealth.
One notable style of waistcoat that emerged during this period was the embroidered waistcoat. These waistcoats were meticulously hand-stitched with intricate patterns and designs, often featuring floral motifs or geometric patterns. They were highly prized possessions and were often passed down as heirlooms within families.
As the 19th century progressed, waistcoats underwent some changes in terms of style and design. The introduction of mass production techniques made waistcoats more accessible to a wider range of people. Waistcoats became less ornate and more streamlined in design, with simpler patterns and fewer embellishments. They were also made of more affordable fabrics such as wool or cotton.
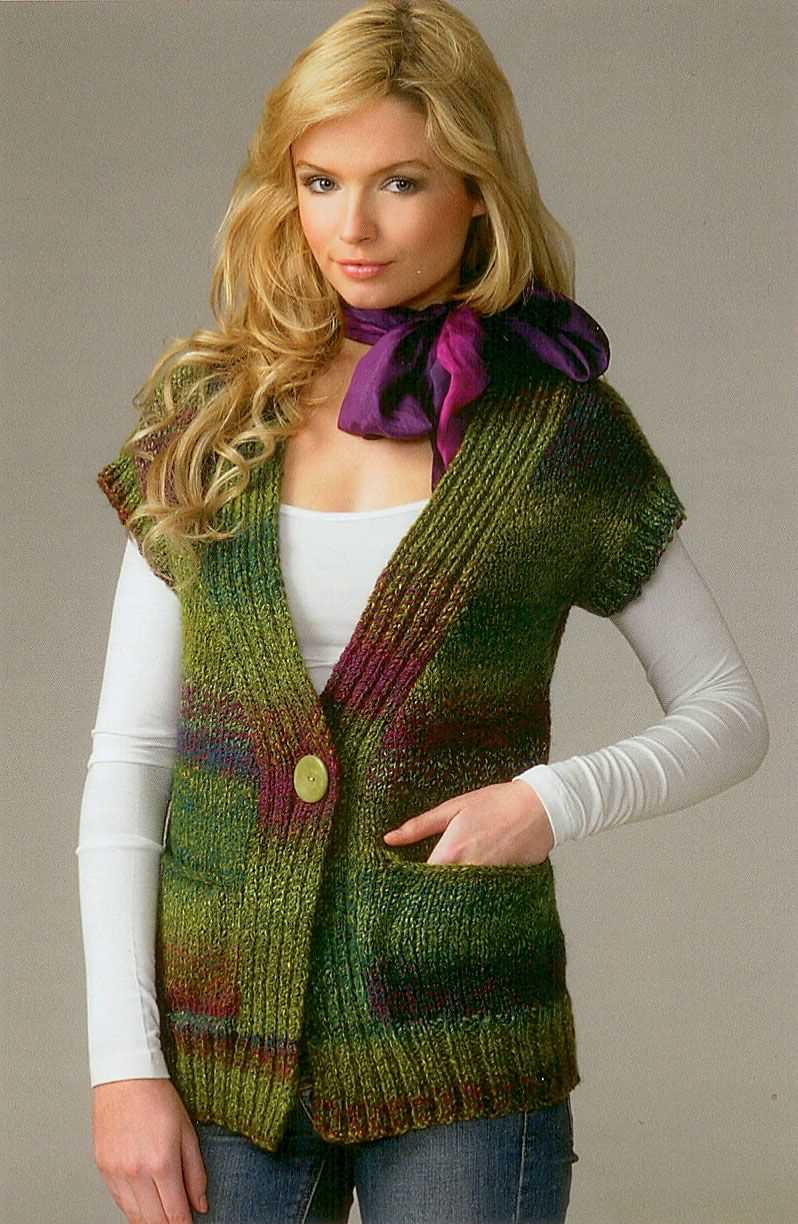
Today, waistcoats continue to be worn as a fashion statement and are available in a variety of styles, fabrics, and colors. They are no longer limited to men’s fashion and have become popular among women as well. Waistcoats are often paired with formal or casual attire and can add a touch of sophistication to any outfit.
Benefits of wearing waistcoats
A waistcoat is a versatile and stylish garment that can be worn for various occasions. Whether you are dressing up for a formal event or adding a touch of elegance to your everyday outfit, wearing a waistcoat can provide several benefits.
Enhances your overall appearance
Wearing a waistcoat instantly elevates your overall appearance and adds a layer of sophistication to your outfit. It creates a more polished and put-together look, making you stand out from the crowd. The structured silhouette of a waistcoat helps to accentuate your waistline and create a more tailored and slimming effect.
Provides extra warmth and layering
Waistcoats are not only fashionable but also functional. They provide an extra layer of warmth, making them perfect for colder weather or when you are in an air-conditioned environment. You can easily layer a waistcoat over a shirt or sweater for added insulation without sacrificing style.
Offers versatility in styling
One of the great advantages of wearing a waistcoat is its versatility in styling. You can pair it with different types of bottoms such as trousers, skirts, or jeans to create various looks. It can be worn both professionally and casually, depending on the occasion. You can also experiment with different colors, patterns, and fabrics to express your personal style.
Provides additional storage
Many waistcoats feature pockets, which provide additional storage for small items such as keys, wallets, or mobile phones. This can be particularly convenient when you don’t want to carry a bag or need quick access to essential items. The pockets are discreetly placed, maintaining the clean and streamlined appearance of the waistcoat.
Completes a three-piece suit
A waistcoat is an integral part of a three-piece suit, adding a finishing touch to the ensemble. When worn with a matching jacket and trousers, it creates a cohesive and stylish look. The three-piece suit is commonly associated with formal occasions like weddings, business meetings, or special events, and wearing a waistcoat completes the traditional and sophisticated outfit.
Overall, wearing a waistcoat offers a range of benefits, from enhancing your appearance and providing extra warmth to adding versatility to your wardrobe. Invest in a well-fitted and high-quality waistcoat, and you will have a timeless and versatile piece that can be styled in numerous ways for various occasions.
Choosing the right yarn for your waistcoat
When it comes to knitting a waistcoat, selecting the right yarn is essential to ensure a successful and satisfying project. The right yarn can greatly influence the overall look and feel of the finished waistcoat, as well as its durability and functionality.
Consider the weight: The weight of the yarn will determine the thickness and warmth of your waistcoat. If you’re knitting for colder weather or want a chunkier, cozy feel, consider using a thicker, bulkier yarn. For a lighter and more breathable waistcoat, opt for a finer weight yarn.
Look for appropriate fiber content: The fiber content of the yarn will affect not only the appearance but also the care instructions and comfort of the waistcoat. Natural fibers like wool, alpaca, or cotton are excellent choices for their warmth, breathability, and durability. Synthetic fibers like acrylic or nylon can offer added durability and colorfastness.
Consider the color and texture: The color and texture of the yarn should complement the design and style of your waistcoat. Consider whether you want a solid color or a variegated yarn with different shades or patterns. Additionally, think about the texture you want to achieve. Smooth yarns can create a more polished and classy look, while textured yarns can add depth and interest to your waistcoat.
Check your gauge: Before starting your waistcoat, it’s essential to check your gauge to match the recommended gauge of the knitting pattern. Choosing a yarn that matches the pattern gauge will ensure that your waistcoat turns out the correct size and fit.
Consider the care instructions: Finally, consider the care instructions of the yarn you choose. Some yarns may require special care, such as hand washing or laying flat to dry, while others may be machine washable. Choosing a yarn that aligns with your preferred care routine will make maintenance and cleaning of your waistcoat easier in the long run.
Essential knitting tools for waistcoat pattern
If you’re planning to knit a waistcoat, there are a few essential tools that you’ll need to have on hand. These tools can help make the knitting process easier and more enjoyable, ensuring that your finished waistcoat turns out beautifully.
1. Knitting needles: The first and most important tool you’ll need is a pair of knitting needles. The size of needles you choose will depend on the yarn weight and the tension you want for your waistcoat. It’s essential to have the right size needles to achieve the correct gauge of your pattern. Circular needles may also be useful for knitting the larger sections of the waistcoat.
2. Yarn: Selecting the right yarn is crucial for the overall look and feel of your waistcoat. Choose a yarn that is suitable for your pattern and provides the desired texture and drape. It’s a good idea to swatch with different yarns to see how they behave with the needle size and stitch pattern you plan to use for your waistcoat.
3. Stitch markers: Stitch markers are handy tools that help you keep track of your progress and mark specific stitches or sections in your pattern. They can be particularly useful when knitting a waistcoat with intricate stitch patterns or shaping details. These markers can be simple plastic rings or decorative charms that slide onto the needle.
4. Tape measure: A tape measure is an essential tool for checking your gauge and ensuring that your waistcoat will fit properly. Use it to measure your knitting tension and compare it to the gauge specified in the pattern. This will help you adjust your needle size if necessary to achieve the correct fit.
5. Row counter: A row counter is a useful tool for keeping track of the number of rows you have knitted. It’s easy to lose count, especially when working on complex stitch patterns. Using a row counter will ensure that you stay on track with your pattern and can easily pick up where you left off.
6. Darning needle: After completing your waistcoat, you’ll need a darning needle to weave in any loose ends and finish off your project. A darning needle with a blunt tip is ideal for this task as it won’t split your yarn and can easily slide through the stitches.
Having these essential knitting tools on hand will help you confidently tackle your waistcoat pattern and create a beautiful garment that you can be proud of.
Understanding and choosing a waistcoat pattern
Introduction
When it comes to knitting a waistcoat, understanding and choosing the right pattern is essential. A waistcoat, also known as a vest, is a versatile and stylish garment that can be worn in various settings and for different occasions. It can add a touch of elegance to both casual and formal outfits, making it a popular choice for knitters.
Factors to consider
When choosing a waistcoat pattern, there are several factors to consider. Firstly, you need to determine the level of difficulty that you are comfortable with. Some patterns are designed for beginners and use basic stitches, while others may require more advanced techniques. It’s important to select a pattern that matches your skill level to ensure a successful knitting experience.
- The style of the waistcoat is another important factor to consider. Waistcoats can come in various styles, such as fitted, cropped, or longline. Think about your personal style and the purpose of the garment to choose a pattern that best suits your needs.
- Additionally, pay attention to the sizing options provided in the pattern. Waistcoats can be knit in multiple sizes, so make sure to choose a pattern that includes your desired size or can be easily adjusted to fit your measurements.
- The yarn choice is also crucial when knitting a waistcoat. Consider the season and the desired drape and texture of the finished garment. Opt for yarns that are lightweight and have good stitch definition to showcase the pattern details.
Pattern sources
There are various sources where you can find waistcoat knitting patterns. Online knitting communities and websites offer a wide range of free and paid patterns that cater to different skill levels and styles. Knitting magazines and books are also excellent resources for finding waistcoat patterns, often featuring both classic and contemporary designs.
When choosing a pattern, take the time to read reviews and look at finished projects to get an idea of how the final garment will look. Many patterns also include helpful notes and tips from other knitters, which can be valuable when making your decision.
With a bit of research and consideration, you can find a waistcoat pattern that suits your skill level, style, and desired fit. Whether you’re a beginner or an experienced knitter, there is a pattern out there that will help you create a beautiful waistcoat to add to your wardrobe.
Tips and tricks for knitting a waistcoat
Knitting a waistcoat can be a fun and rewarding project. Whether you’re making one for yourself or as a gift, here are some tips and tricks to help you along the way.
1. Choose the right yarn
When knitting a waistcoat, it’s important to choose the right yarn for the project. Consider the weight and texture of the yarn, as well as the color and pattern you want to achieve. A lightweight yarn with good stitch definition is ideal for showcasing intricate patterns, while a thicker, more textured yarn can add warmth and dimension.
2. Gauge matters
Before you start knitting your waistcoat, it’s crucial to check your gauge. This means knitting a small swatch and measuring how many stitches and rows you have per inch. Adjust your needle size if necessary to achieve the specified gauge in the pattern. This step is essential for ensuring that your waistcoat fits correctly.
3. Use stitch markers
Stitch markers are a helpful tool when knitting a waistcoat, especially if the pattern has complex stitch patterns or shaping. They can help you keep track of various sections or easily mark the beginning of a round. Place them strategically to make your knitting process smoother and more organized.
4. Pay attention to shaping
When knitting a waistcoat, pay close attention to shaping details such as increases, decreases, and armhole shaping. These details are important for creating a well-fitted garment. Follow the pattern instructions carefully and use stitch markers to clearly mark the shaping points. Take your time and double-check your work to ensure accuracy.
5. Block your finished waistcoat
After you’ve completed knitting your waistcoat, it’s essential to block the finished garment. Blocking helps to even out the stitches, relax the fabric, and give the waistcoat a professional finish. Follow the blocking instructions provided with your yarn or consult a blocking guide for general techniques.
With these tips and tricks in mind, you’ll be well-equipped to knit a beautiful and stylish waistcoat. Happy knitting!
How to measure for a perfect fit
When knitting a waistcoat, it is important to take accurate measurements in order to ensure a perfect fit. By following these steps, you can ensure that your waistcoat will be the right size and shape:
- Bust measurement: Start by measuring around the fullest part of your bust. Make sure the measuring tape is parallel to the floor and snug but not too tight. Record this measurement.
- Waist measurement: Measure around the smallest part of your waist, usually about an inch above your belly button. Again, make sure the tape is parallel to the floor and not too tight. Write down this measurement too.
- Hip measurement: Measure around the widest part of your hips, usually around the fullest part of your buttocks. Keep the tape parallel to the floor and snug but not constricting. This measurement will help determine the shaping of the waistcoat.
- Length measurement: Decide how long you want your waistcoat to be and measure from the nape of your neck down to that desired length. This will help you determine the number of rows or inches to knit.
- Armhole measurement: Measure around your upper arm at the widest point to determine the circumference for the armhole opening. This measurement will also help determine the shaping and size of the armholes.
By taking accurate measurements and following the waistcoat pattern closely, you can ensure that your project will fit perfectly and flatter your body shape. Remember to measure yourself while wearing the same undergarments or clothing that you plan to wear with the waistcoat, as this can affect the fit. Happy knitting!
Step-by-step instructions for knitting a waistcoat
Knitting a waistcoat can be a fun and rewarding project for knitters of all skill levels. Whether you’re a beginner or an experienced knitter, follow these step-by-step instructions to create a stylish and cozy waistcoat.
Materials you will need:
- Knitting needles (size will depend on the yarn weight you choose)
- Yarn in your desired color and weight
- Tape measure
- Sewing needle
- Scissors
1. Choose a pattern and yarn:
Select a knitting pattern for a waistcoat that you like. Consider the level of difficulty and the size options available. Once you’ve chosen a pattern, select yarn in your desired color and weight. Make sure to check the gauge specified in the pattern and adjust your needle size if necessary.
2. Take measurements:
Use a tape measure to take your chest circumference and length from your shoulders to your desired waistcoat length. This will help you choose the correct size and make any necessary adjustments to the pattern.
3. Cast on and knit the back:
Using the specified needle size, cast on the required number of stitches for the back of the waistcoat. Follow the pattern instructions to knit the back piece, working any stitch patterns or shaping as indicated. Once you’ve completed the required length, bind off the stitches.
4. Knit the front pieces:
Using the same needle size, cast on the required number of stitches for the front of the waistcoat. Follow the pattern instructions to knit the front pieces, working any stitch patterns or shaping as indicated. Be sure to create any necessary openings for buttons or a zipper if desired. Once you’ve completed the required length, bind off the stitches.
5. Assemble the waistcoat:
Using a sewing needle and yarn, begin by sewing the shoulder seams together. Then, sew the side seams from the bottom hem to the armhole, leaving an opening for the arm. If your pattern includes a collar or neckband, follow the instructions to attach it. Finally, sew on any buttons or add a zipper if desired.
6. Finishing touches:

Once the waistcoat is assembled, weave in any loose ends and trim any excess yarn. Give the waistcoat a gentle steam blocking to even out any stitches and help the garment hold its shape.
With these step-by-step instructions, you’ll be able to knit a beautiful waistcoat to add to your wardrobe. Enjoy the process and don’t be afraid to customize the pattern to make it your own!
Finishing techniques for a professional look
When it comes to knitting a waistcoat, the finishing techniques used can make all the difference in achieving a professional look. Here are some key tips and techniques to consider:
Seaming:
Proper seaming is essential for creating a polished finish on a knitted waistcoat. Whether you are sewing the sides together or joining the shoulder seams, taking the time to carefully align the stitches and use an invisible seaming method will result in a seamless look that appears as if the garment was knit in one piece.
Edging:
Adding a clean and neat edge to your waistcoat can elevate its overall appearance. Options for edging include ribbing, garter stitch, or a decorative crochet trim. Carefully selecting the right edging technique and ensuring it is applied evenly throughout the garment will give it a professional and polished finish.
Blocking:
Blocking is an essential step in achieving a professional finish for any knitted garment, and a waistcoat is no exception. After completing the knitting, blocking the garment will even out the stitches, open up any lacework or cables, and help the waistcoat to drape nicely on the body. This step can greatly enhance the overall look of the finished waistcoat.
Buttons and buttonholes:
The final finishing touch for a knitted waistcoat is the addition of buttons and buttonholes. Carefully placed and evenly spaced buttons, along with well-constructed and properly aligned buttonholes, can give the waistcoat a polished and professional look. Using matching or complementary buttons that suit the style of the waistcoat will also enhance its overall aesthetic appeal.
By paying attention to these finishing techniques and taking the time to execute them with precision, you can achieve a professional look for your knitted waistcoat that will make it appear as though it was store-bought. These details are what set hand-knitted garments apart and showcase the skill and craftsmanship of the knitter.
Customizing your waistcoat with different stitches and patterns
When it comes to knitting a waistcoat, there are endless possibilities for customizing it with different stitches and patterns. By incorporating various stitch patterns, you can create a unique and personalized waistcoat that reflects your individual style.
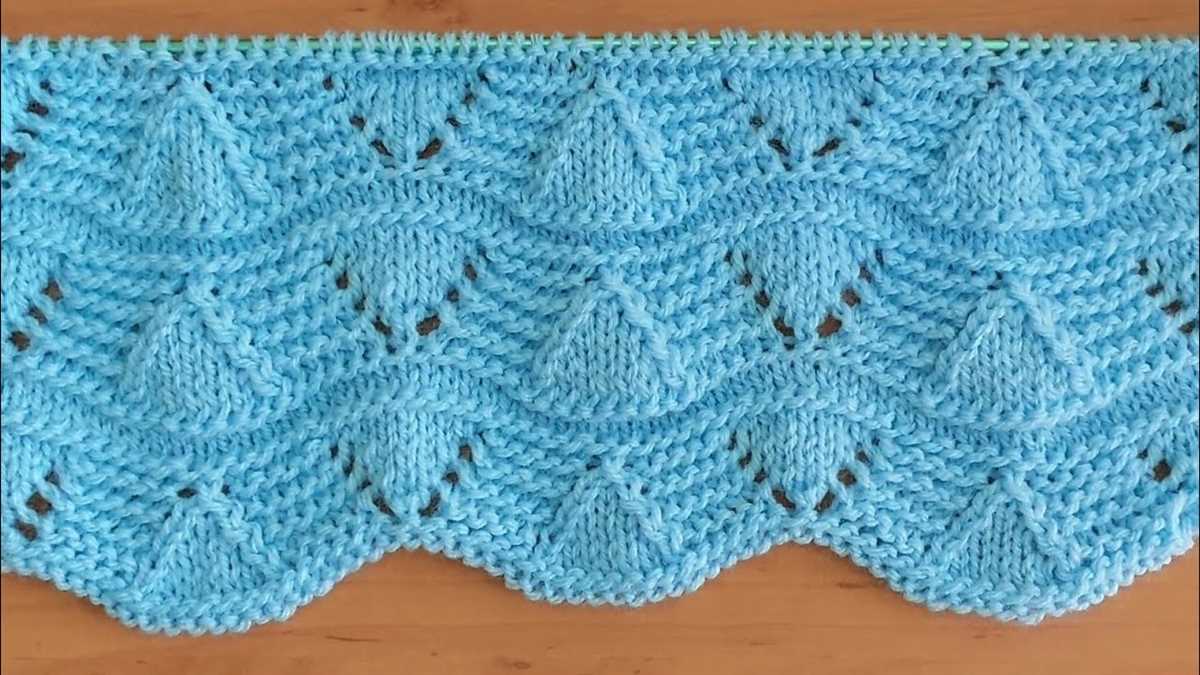
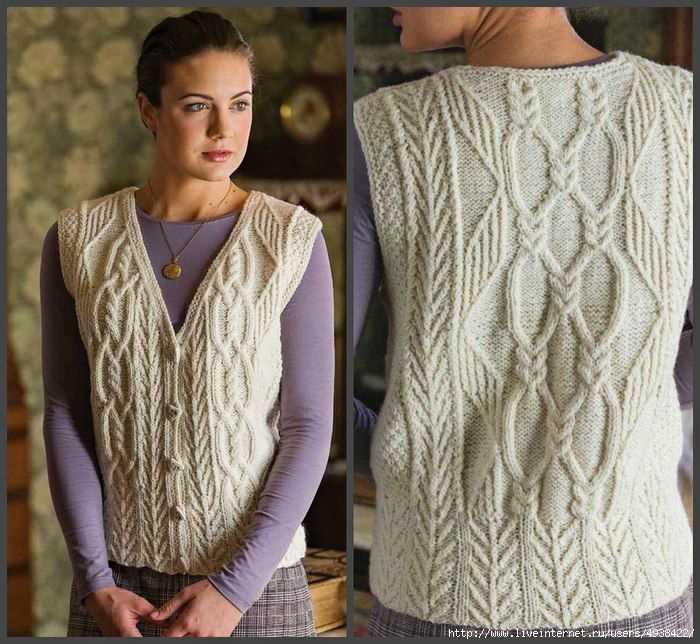
One way to customize your waistcoat is by using different types of stitches. For example, you can use ribbing stitches for the waistband and collar, which will give your waistcoat a classic and polished look. Alternatively, you can experiment with more intricate stitches, such as cables or lace, to add texture and visual interest to your garment.
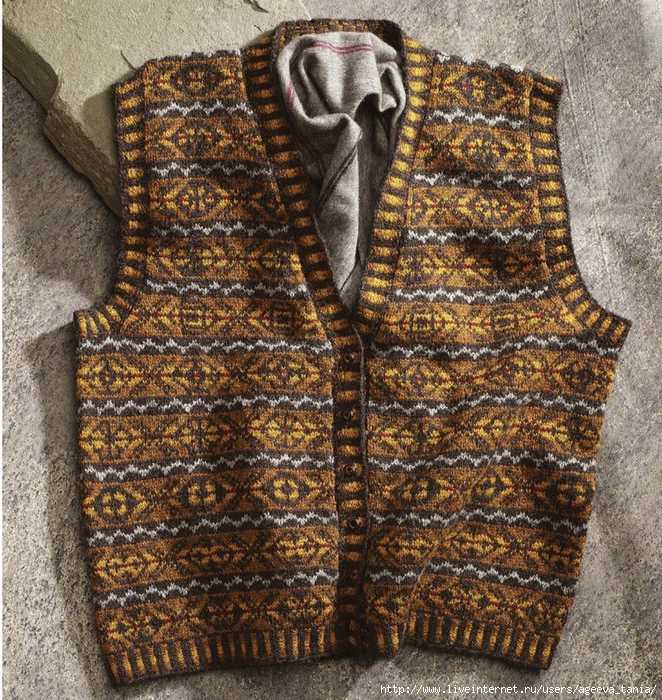
Adding different patterns is another way to customize your waistcoat. You can create a striped waistcoat by alternating two different colors of yarn or try a fair isle pattern for a more traditional and colorful look. If you prefer a more subtle pattern, you can incorporate a simple stitch pattern, such as a seed stitch or basketweave, that will add dimension to your waistcoat without overpowering the design.
By combining different stitches and patterns, you can truly make your waistcoat one-of-a-kind. This allows you to express your creativity and showcase your knitting skills. Whether you choose a bold and vibrant design or a more understated and elegant pattern, customizing your waistcoat will result in a garment that is not only stylish but also unique to you.
Styling and accessorizing your waistcoat
Once you have completed your knitting pattern waistcoat, it’s time to style and accessorize it to create a fashionable and personalized look. Here are some tips and ideas to help you make the most of your waistcoat:
1. Layer it with different garments
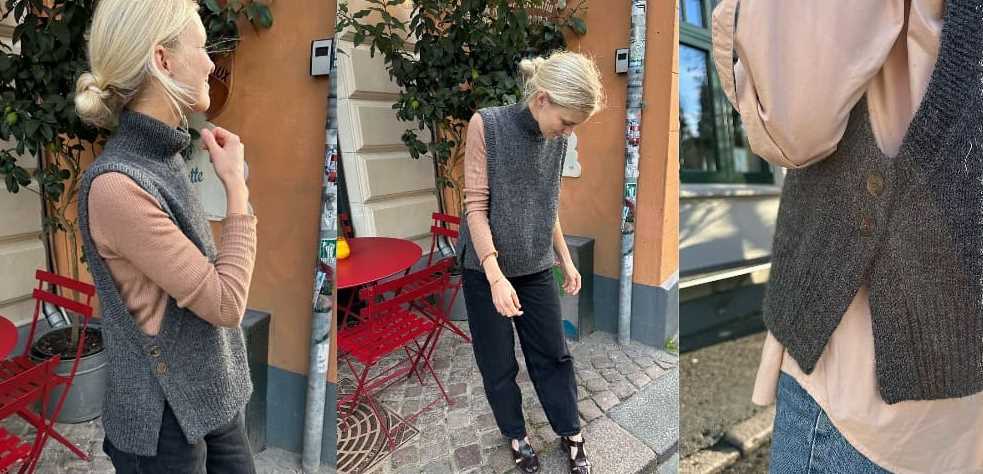
One of the great things about waistcoats is their versatility. They can be layered with various garments to create different looks. For a casual and relaxed outfit, layer your waistcoat over a plain t-shirt or a lightweight blouse. If you’re going for a more formal or professional look, wear it over a crisp button-up shirt. You can also experiment by layering it over a dress or a sweater for a unique and stylish ensemble.
2. Choose the right bottoms
Pair your waistcoat with the right bottoms to complete your outfit. For a classic and sophisticated look, team it up with tailored trousers or a pencil skirt. If you want to achieve a more casual and laid-back style, opt for jeans or shorts. The choice of bottoms will depend on the occasion and your personal style.
3. Accessorize with statement pieces
Add some statement accessories to enhance your waistcoat and elevate your outfit. A chunky belt can cinch in your waist and create a more defined silhouette. Layered necklaces, scarves, or brooches can add a touch of personality and make your waistcoat stand out. Don’t be afraid to experiment with different accessories and have fun with your styling.
4. Consider color and pattern coordination
When choosing accessories to go with your waistcoat, consider the colors and patterns in your garment. If your waistcoat has a bold pattern or color, opt for more neutral or complementary accessories to avoid overwhelming the look. Conversely, if your waistcoat is in a neutral shade, you can choose accessories with more vibrant colors or patterns to create a focal point.
In summary, styling and accessorizing your waistcoat allows you to personalize your look and create a style that reflects your personality. By layering it with different garments, choosing the right bottoms, accessorizing with statement pieces, and considering color and pattern coordination, you can create a stylish and fashionable outfit that stands out.