
If you’ve never tried knitting before, a vest is a great project to start with. Knitting a vest is an enjoyable and rewarding experience that allows you to create a fashionable and cozy piece of clothing. Whether you’re knitting for yourself or making a gift for a loved one, a vest is a versatile garment that can be worn in any season.
When it comes to knitting patterns, there are countless options available for vests. From simple and classic designs to more intricate and colorful patterns, there is something for every skill level and personal style. You can choose to knit a vest using lightweight yarn for a more delicate and breathable garment, or you can opt for bulky yarn to create a warm and cozy winter vest.
One of the great things about knitting a vest is that it allows for a lot of creativity and customization. You can experiment with different stitch patterns, add cables or lace details, or even incorporate different colors to create a unique and personalized design. With so many possibilities, knitting a vest is a great way to express your creativity and create a one-of-a-kind piece of clothing that reflects your own style.
How to Make a Knitting Pattern Vest for Beginners
If you’re a beginner knitter looking to tackle a new project, making a knitting pattern vest is a great choice. A knitting pattern vest can add style and warmth to any outfit, and it’s a versatile piece that can be worn in any season. With just a few basic knitting skills, you’ll be able to create a beautiful vest that you can be proud of.
Gather Your Materials
Before you start knitting your vest, you’ll need to gather all the necessary materials. This includes your chosen yarn, knitting needles, and any additional tools or notions that you may need. Make sure to choose a yarn that is suitable for the vest pattern you’ve chosen, and select needles that are the right size for the yarn. It’s also a good idea to have a tape measure, stitch markers, and a yarn needle on hand.
Select a Knitting Pattern
Once you have your materials ready, it’s time to select a knitting pattern for your vest. Look for a pattern that is labeled as suitable for beginners, as this will ensure that the instructions are easy to follow. You can find free patterns online or in knitting books and magazines. Take your time to read through the pattern and make sure you understand all the instructions before you begin.
Start Knitting
With your materials and pattern ready, it’s time to start knitting your vest. Begin by casting on the required number of stitches, following the instructions in the pattern. As a beginner, it’s a good idea to place stitch markers at the beginning and end of each repeat section, to help you keep track of your progress. Follow the pattern instructions for each row, working the specified stitches and decreasing or increasing as required.
Finish and Block
Once you’ve completed all the required rows and reached the desired length for your vest, it’s time to finish off your knitting. Follow the pattern instructions for binding off the stitches. Then, use a yarn needle to weave in any loose ends to create a neat finish. Finally, block your vest by wetting it gently and laying it flat to dry, reshaping it if necessary. Blocking will help to even out your stitches and give your vest a professional look.
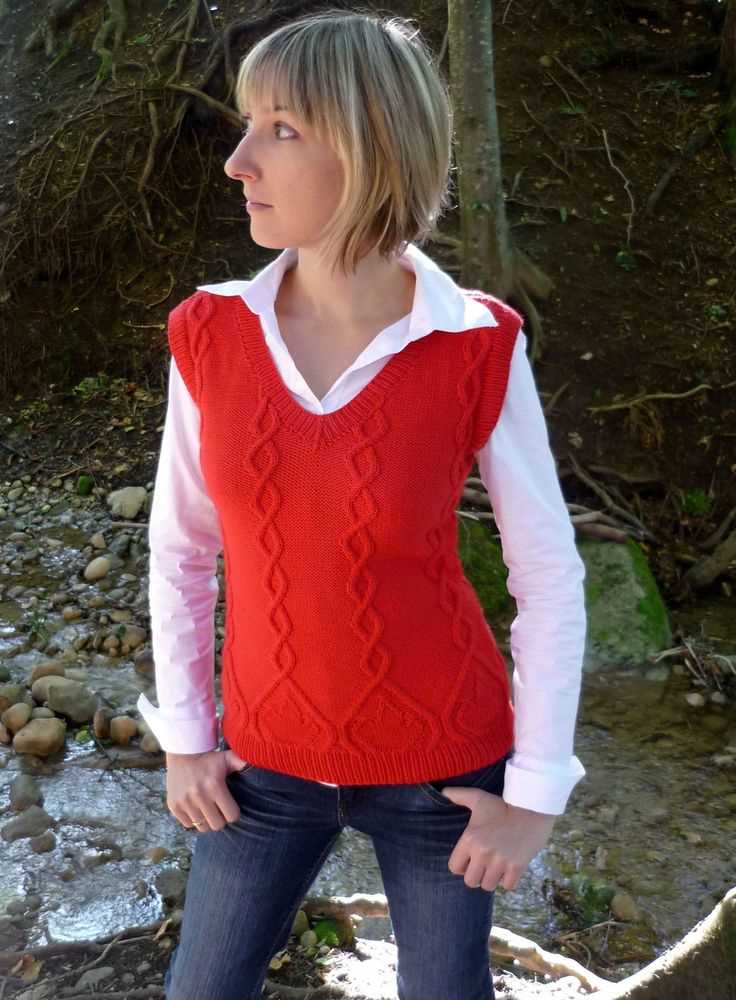
Enjoy Your Handmade Vest
Now that your knitting pattern vest is complete, it’s time to enjoy wearing it! Pair it with your favorite jeans or a skirt, and accessorize with a cozy scarf or statement necklace. Your handmade vest will not only keep you warm but will also be a unique and stylish addition to your wardrobe. Take pride in your beginner knitting skills and wear your vest with confidence!
Materials Needed for Knitting a Pattern Vest
In order to knit a pattern vest, there are several materials that you will need to gather beforehand. These materials are essential for completing the project and achieving the desired outcome.
1. Yarn: Choose a yarn that is suitable for the pattern vest you are planning to knit. The yarn weight and fiber content should match the requirements of the pattern. Consider the color and texture of the yarn as well, as it will determine the overall look of the vest.
2. Knitting Needles: Depending on the gauge of the pattern, you will need a specific size of knitting needles. Check the pattern instructions to determine the correct size. Circular or straight needles can be used, depending on personal preference.
3. Stitch Markers: These are useful tools for marking important points in the pattern, such as the beginning of a round or specific stitch counts. Stitch markers come in various shapes and sizes, so choose ones that are suitable for your needs.
4. Tape Measure: A tape measure is essential for taking accurate measurements of your body and ensuring that the vest will fit properly. Measure your bust, waist, and hips to determine the appropriate size to knit.
5. Scissors: You will need a pair of scissors to cut the yarn after completing each section or when weaving in ends. Make sure they are sharp enough to cut through the yarn cleanly.
6. Yarn Needle: A yarn needle, also known as a tapestry needle, is used for weaving in ends and sewing any necessary seams. Choose a needle with a large eye that can accommodate the yarn thickness.
7. Pattern: Lastly, you will need the knitting pattern for the vest you wish to make. Make sure to read through the instructions carefully before starting and keep the pattern accessible during the knitting process.
By gathering all of these materials before starting your knitting project, you can ensure a smooth and enjoyable knitting experience. Having everything you need at hand will help you stay organized and focused on creating a beautiful pattern vest.
Step-by-Step Guide to Knit a Pattern Vest
Knitting a pattern vest is a fun and rewarding project that allows you to showcase your knitting skills while creating a stylish and versatile wardrobe piece. Whether you’re a beginner knitter or have some experience, this step-by-step guide will help you successfully complete your pattern vest.
Gather Your Materials
Before you begin knitting your pattern vest, make sure you have all the necessary materials. You will need a pair of knitting needles in the appropriate size for your chosen yarn, the specified amount of yarn in your desired color, stitch markers, a tapestry needle, and scissors. Having everything ready before you start will help you stay organized and prevent any delays.
Read and Understand the Pattern
Before you start knitting, take the time to read through the pattern instructions carefully. Familiarize yourself with any abbreviations or special stitches used in the pattern. Make sure you understand the required gauge and size measurements. It’s also helpful to make any necessary size adjustments or modifications to the pattern before you begin.
Cast On and Start Knitting
Once you have gathered your materials and understand the pattern, it’s time to cast on and start knitting. Follow the pattern instructions to cast on the required number of stitches using your preferred method. Begin working the pattern stitch according to the instructions. Be sure to place stitch markers as indicated to keep track of any shaping or stitch pattern changes.
Continue Knitting and Adjusting
As you progress through the pattern, continue knitting according to the instructions. Pay attention to any shaping instructions, such as armhole or neckline decreases, and make adjustments accordingly. Remember to periodically check your gauge to ensure your vest is coming out the correct size. If necessary, make any necessary modifications to achieve the desired fit.
Finish and Block
Once you have completed all the required sections of the pattern and are satisfied with the overall fit and appearance of your vest, it’s time to finish and block it. Follow the pattern instructions for any finishing steps, such as binding off stitches and sewing seams. After finishing, give your vest a gentle blocking to even out any stitches and enhance the drape of the fabric. Allow it to dry completely before wearing or storing.
By following this step-by-step guide, you can confidently knit a pattern vest and create a beautiful and functional garment that will be a valuable addition to your wardrobe. Enjoy the process and don’t be afraid to make it your own by adding personal touches or modifications along the way. Happy knitting!
Choosing the Right Yarn for Your Knitting Pattern Vest
When it comes to knitting a vest using a specific pattern, one of the most important factors to consider is the choice of yarn. The yarn you select will not only determine the overall look and feel of your finished vest, but it can also affect the fit, drape, and durability of the garment. With so many different types and weights of yarn available, it’s essential to take the time to choose the right one for your project.
Consider the Fiber: The first thing to consider when selecting yarn for your knitting pattern vest is the fiber content. Different fibers have different properties, and choosing the right one can greatly impact the final result. For example, wool is known for its warmth and elasticity, making it a good choice for a cozy vest. Cotton, on the other hand, is lightweight and breathable, making it suitable for warmer weather.
Choose the Right Weight: The weight of the yarn is another crucial factor to consider. The weight, which is usually indicated on the yarn label, determines the thickness of the yarn and the size of the knitting needles needed. For a vest, it’s important to select a yarn weight that will create a fabric with the desired drape and structure. Bulky yarns will produce a thick, heavy fabric, while laceweight yarns will create a delicate, lightweight fabric. Consider the pattern’s gauge and intended fit when choosing the weight of your yarn.
When choosing the yarn for your knitting pattern vest, it’s also important to consider the care requirements of the yarn. Some yarns may require special care, such as hand washing or dry cleaning, which could impact the practicality of the finished vest. Additionally, consider the color and texture of the yarn, as these factors can greatly influence the aesthetic appeal of your garment. Taking the time to choose the right yarn for your project will ensure that you create a vest that not only looks great but also fits well and stands the test of time.
Different Types of Yarn Suitable for Vest Patterns
When it comes to knitting a vest, choosing the right type of yarn is crucial for achieving the desired results. The yarn you select will determine the overall look, drape, and warmth of the finished garment. There is a wide range of yarns available in the market, each with its own unique characteristics and properties. Here are some popular types of yarn that are well-suited for knitting vest patterns:
- Worsted Weight Yarn: Worsted weight yarn is a versatile option that is commonly used for knitting vests. It is medium weight, providing good stitch definition and warmth. This type of yarn is suitable for creating structured and textured patterns.
- Sport Weight Yarn: Sport weight yarn is a lightweight option that is ideal for knitting lightweight and breathable vests. It offers a delicate drape and is perfect for creating intricate lace patterns.
- Bulky Yarn: Bulky yarn is a thick and cozy option that is perfect for knitting warm and chunky vests. It knits up quickly and creates a soft and plush fabric, ideal for winter wear.
- Fingering Weight Yarn: Fingering weight yarn is a fine and lightweight option that is often used for knitting delicate and lightweight vests. It is great for creating intricate details and patterns.
- Alpaca Yarn: Alpaca yarn is known for its softness, warmth, and luxurious feel. It is a great choice for knitting vests, as it provides excellent insulation and a beautiful drape.
When choosing the yarn for your vest pattern, it is important to consider the yarn’s fiber content, texture, and the desired level of warmth and drape. By selecting the right type of yarn, you can ensure that your knitted vest turns out just the way you envisioned it.
Factors to Consider When Selecting Yarn for Your Vest
When choosing the yarn for your knitting pattern vest, it’s important to consider several factors that will affect the final outcome of your project. The yarn you choose will not only determine the appearance and texture of your vest, but also its durability and ease of care.
Fiber type: One of the first decisions you’ll need to make is the type of fiber you want to use for your vest. Common options include wool, cotton, acrylic, and blends. Wool yarns are known for their warmth and elasticity, while cotton yarns are breathable and lightweight. Acrylic yarns, on the other hand, offer affordability and easy care. Consider the characteristics you value the most in your finished vest and choose a fiber that aligns with your preferences.
Weight: The weight of the yarn refers to its thickness and will determine the drape and warmth of your vest. Generally, lightweight yarns such as fingering or sport weight are ideal for delicate and lightweight vests. Heavier weights like worsted or bulky yarns create bulkier and warmer vests. Keep in mind the season and climate you plan to wear your vest in, as well as the desired aesthetic, when selecting the weight of your yarn.
Another important factor to consider is the yardage and quantity of yarn needed for your project. Begin by calculating the approximate number of skeins or balls required based on the yardage suggested in your knitting pattern. It’s always a good idea to buy an extra skein or two to account for any discrepancies in gauge or for weaving in ends and making adjustments during the knitting process. Additionally, consider the cost and availability of the chosen yarn to ensure you have access to the amount needed to complete your vest.
If you’re unsure about the best yarn choice for your vest, consult with experienced knitters or a knowledgeable yarn store staff who can provide guidance based on your specific project requirements and preferences. Remember that the yarn you choose will greatly impact the overall look and feel of your vest, so take your time in considering these factors to ensure you create a garment that you’ll be proud to wear.
Knitting Techniques and Stitches Used in Vest Patterns
Knitting a vest can be a fun and rewarding project, and there are various techniques and stitches that are commonly used in vest patterns. Understanding these techniques can help you create a beautiful and well-fitting vest.
Casting On: Every knitting project starts with casting on, and vest patterns are no exception. The cast-on method used will depend on the specific pattern, but common methods include long-tail cast-on, cable cast-on, and provisional cast-on.
Knit and Purl Stitches: Knitting and purling are the building blocks of most knitting patterns, including vests. Knit stitches create a smooth V-shaped stitch, while purl stitches create a bump or ridged stitch. By combining these two basic stitches in different patterns, you can create various textures and designs on your vest.
Ribbing: Ribbing is commonly used in vest patterns to create a stretchy and snug edge. This technique is achieved by alternating knit and purl stitches in a specific pattern, such as 1×1 ribbing (alternating one knit stitch and one purl stitch) or 2×2 ribbing (alternating two knit stitches and two purl stitches).
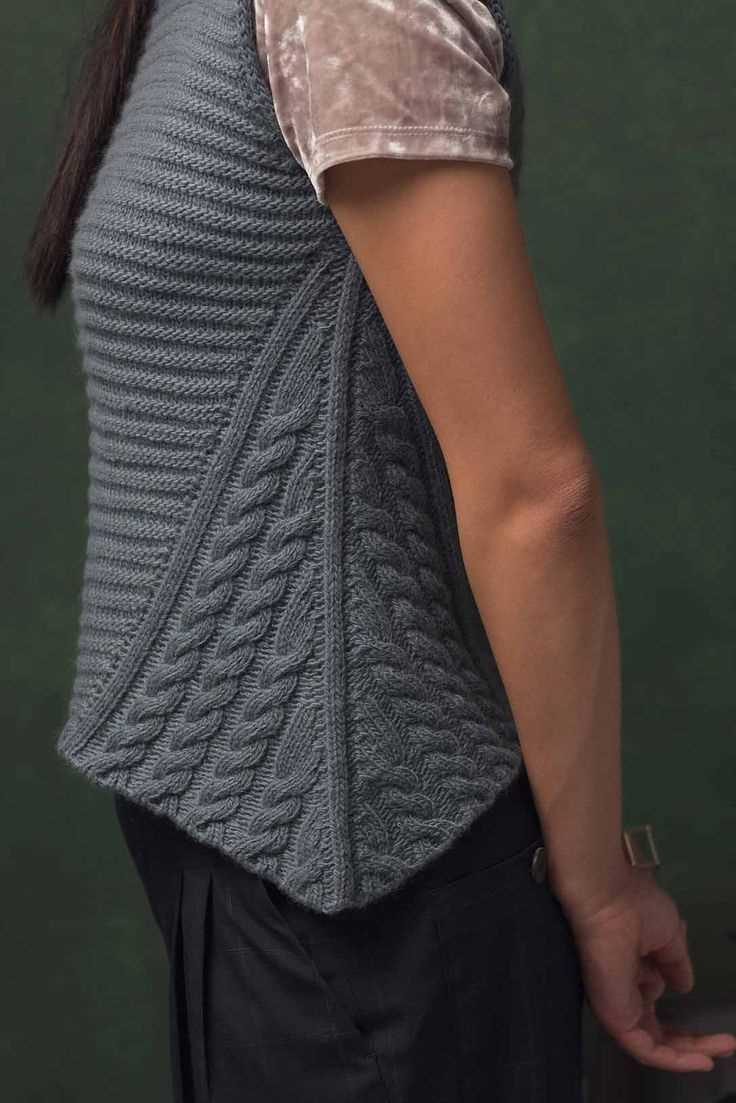
Cables: Cables are a popular decorative element in many vest patterns. They create a twisted, rope-like design by crossing stitches over each other. Cable stitches can range from simple twists to more intricate designs, adding visual interest and texture to your vest.
Decreases and Increases: Decreases and increases are used to shape the vest and create armholes, necklines, and other design elements. Common decrease stitches include knit two together (k2tog) and slip, slip, knit (ssk), while common increase stitches include yarn over (yo) and make one (m1).
Finishing Techniques: Once you have completed the main body of your vest, you will need to finish it off. This may involve weaving in loose ends, sewing seams together, adding buttons or other closures, and blocking the finished garment to ensure it lays flat and has a polished appearance.
By familiarizing yourself with these common knitting techniques and stitches used in vest patterns, you can confidently tackle your next knitting project. Remember to carefully read and follow your chosen pattern, and don’t be afraid to experiment and add your own personal touch to create a truly unique vest.
Basic Knitting Stitches for Vest Patterns
If you’re planning to knit a vest, it’s important to have a good understanding of basic knitting stitches. These stitches are essential for creating the various patterns and designs that you’ll find in vest patterns. Whether you’re a beginner or an experienced knitter, mastering these stitches will give you the confidence to tackle any vest pattern.
1. Knit Stitch: The knit stitch is the most basic stitch in knitting. It involves inserting the needle into the stitch on the left needle, wrapping the yarn around the right needle, and pulling it through to create a new stitch on the right needle. This stitch creates a smooth, V-shaped texture on the right side of the fabric.
2. Purl Stitch: The purl stitch is the reverse of the knit stitch. Instead of inserting the needle from left to right, you insert it from right to left, bringing it out towards you. This stitch creates a bumpy texture on the right side of the fabric and is often used to create ribbing and other textured patterns.
3. Stockinette Stitch: The stockinette stitch is one of the most commonly used stitches in knitting. It is created by alternating rows of knit stitches and purl stitches. By knitting one row and purling the next, you create a smooth, flat fabric on the right side and a bumpy texture on the wrong side. This stitch is often used for the main body of a vest.
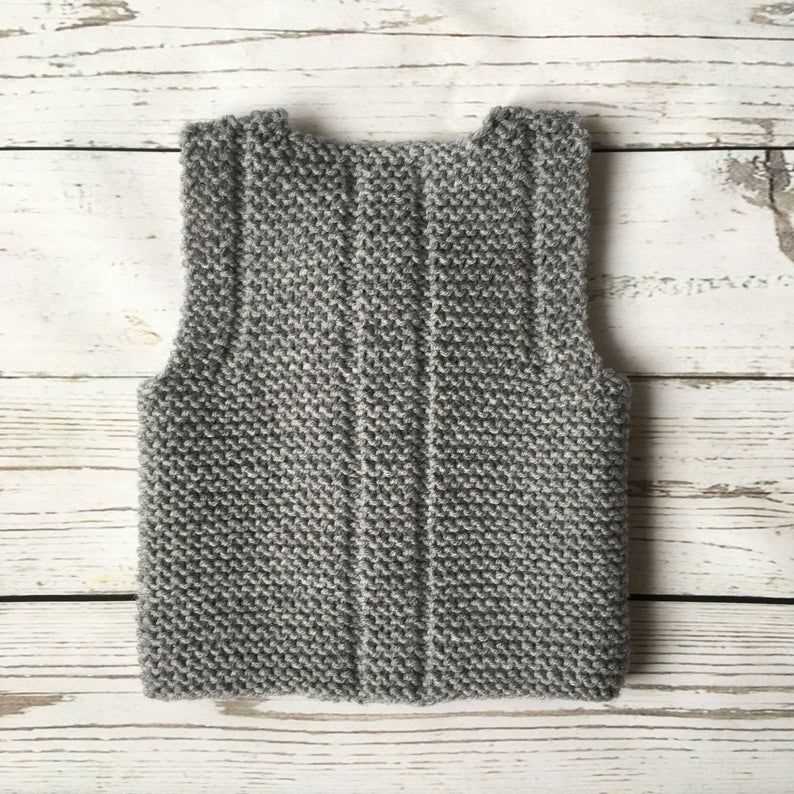
4. Garter Stitch: The garter stitch is another basic stitch that is frequently used in vest patterns. It is created by knitting every row, resulting in a fabric with ridges on both sides. The garter stitch is reversible, making it ideal for projects where both sides of the fabric will be visible, such as scarves or vests with open fronts.
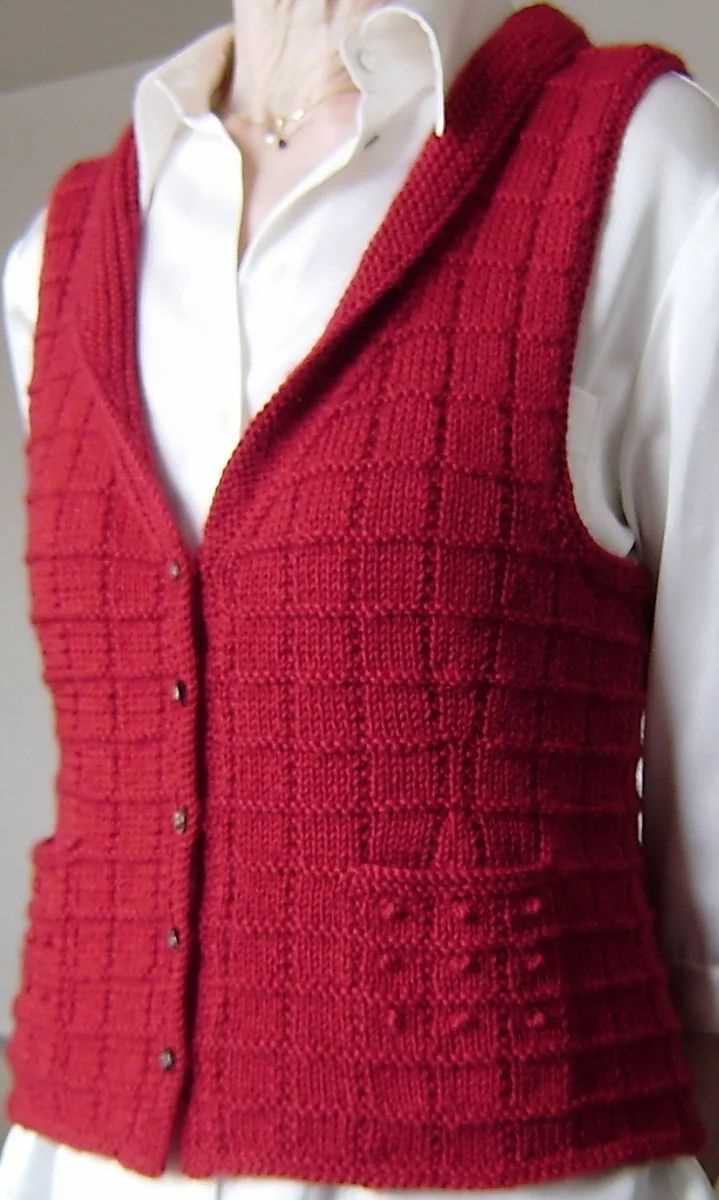
5. Seed Stitch: The seed stitch is a textured stitch pattern that is created by alternating knit and purl stitches within each row. This stitch creates a granular texture that resembles seeds, hence the name. The seed stitch is often used for borders, cuffs, and collars in vest patterns to add visual interest and a touch of texture.
In addition to these basic stitches, there are many other advanced stitches that you can explore and incorporate into your vest patterns. By mastering the basic stitches, you’ll have a solid foundation to experiment and create unique designs!
Advanced Knitting Techniques to Elevate Your Vest Design
When it comes to knitting vests, there are endless possibilities to enhance your design through advanced knitting techniques. Whether you’re an experienced knitter or looking to challenge yourself, these techniques will take your vest to the next level.
1. Cables and Twists
Add intrigue and texture to your vest by incorporating cables and twists. These advanced knitting techniques involve crossing stitches over one another to create beautiful, intertwined patterns. By strategically placing these cables and twists, you can add dimension and visual interest to your vest design.
2. Lacework
For an elegant and delicate touch, consider incorporating lacework into your vest. Lace knitting involves creating intricate patterns using yarnovers and decreases, resulting in a lightweight and airy fabric. By skillfully incorporating lacework motifs into your vest design, you can create a stunning and feminine garment.
3. Colorwork
Experiment with color and patterns by incorporating colorwork techniques into your vest design. Fair Isle and intarsia are two popular colorwork techniques that allow you to create intricate designs and patterns using multiple colors. By combining different shades and motifs, you can create a unique and eye-catching vest.
4. Provisional Cast-On
For a seamless and professional-looking finish, consider using a provisional cast-on technique when starting your vest. This technique allows you to easily remove the cast-on edge later, making it ideal for creating a seamless and symmetrical garment. Whether you’re working with a ribbed or textured pattern, a provisional cast-on can greatly enhance the overall appearance of your vest.
5. Short Rows
Add shaping and interest to your vest design by incorporating short rows. Short rows are used to create curves, darts, or asymmetrical elements in your knitting. By strategically placing these short rows, you can achieve a flattering and tailored fit for your vest. This technique is particularly useful when creating a vest with a V-neck or asymmetric hemline.
With these advanced knitting techniques in your repertoire, you can elevate your vest design to new heights. Whether you choose to incorporate cables, lacework, colorwork, or explore different cast-on and shaping methods, the possibilities for creating a unique and stylish vest are endless.
Customizing Your Knitting Pattern Vest: Size and Fit
If you are working on a knitting pattern vest, one of the most important things to consider is the size and fit. Achieving the perfect fit can make all the difference in how your vest looks and feels. Luckily, with a few adjustments, you can customize your knitting pattern to suit your specific measurements and preferences.
1. Taking Accurate Measurements
The first step in customizing your knitting pattern vest is to take accurate measurements of your body. This will help you determine the right size to knit and ensure that the finished vest fits you perfectly. Measure your bust, waist, hip, and desired length to determine the appropriate size.
To take accurate measurements, use a soft measuring tape and measure around the fullest part of your bust, the narrowest part of your waist, and the fullest part of your hips. For length, measure from your shoulder to the desired length of the vest.
2. Adjusting the Pattern
Once you have your measurements, you can adjust the knitting pattern to fit your body. If the pattern provides multiple size options, choose the size closest to your measurements. If the pattern only provides one size, you can resize it by increasing or decreasing the number of stitches and rows.
If you need to add or subtract stitches, divide the total number of stitches by the gauge to determine how many stitches to add or subtract. Similarly, if you need to adjust the length of the vest, calculate the number of rows you need to add or subtract based on the gauge.
3. Trying on the Vest
Once you have made the necessary adjustments to the knitting pattern, it’s a good idea to try on the vest as you go. This will allow you to check the fit and make any additional adjustments if needed. If the vest feels too tight or loose, you can easily add or subtract stitches in the next row or round until you achieve the desired fit.
Remember to check your gauge throughout the knitting process to ensure that your adjustments are accurate and consistent with the pattern instructions.
By customizing the size and fit of your knitting pattern vest, you can create a garment that suits your body perfectly. Taking accurate measurements, adjusting the pattern, and trying on the vest as you go will help you achieve the desired fit and ensure that you are satisfied with the finished result.
Adjusting the Pattern for Your Measurements
When knitting a vest, it is important to ensure that it fits well and flatters your body shape. One way to achieve this is by adjusting the pattern to your measurements. By taking accurate measurements of your bust, waist, and hip, you can modify the pattern to fit you perfectly.
Start by comparing your measurements to the size chart provided in the knitting pattern. If your measurements fall into different sizes, you may need to make adjustments to achieve a consistent fit. For example, if your bust measurement falls into a larger size while your waist measurement falls into a smaller size, you can knit the larger size for the bust and gradually decrease the stitches to the smaller size for the waist.
Here are some steps to help you adjust the pattern for your measurements:
- Measurements: Take accurate measurements of your bust, waist, and hip. Measure around the fullest part of each area to ensure accuracy.
- Size Chart: Refer to the size chart provided in the knitting pattern and determine which size corresponds to each of your measurements.
- Adjustments: If your measurements fall into different sizes, you may need to make adjustments. For example, if your bust measurement is larger than your waist measurement, you can knit the larger size for the bust and gradually decrease stitches to the smaller size for the waist.
- Calculations: Calculate the number of stitches you need to add or subtract based on your adjustments. Divide the difference in measurements by the specified gauge to determine the number of stitches to add or subtract per inch.
- Modifications: Use your calculations to modify the pattern accordingly. For example, if you need to add stitches, increase the number of cast-on stitches or increase in the first row. If you need to decrease stitches, follow the instructions for decreasing stitches as specified in the pattern.
Remember to always double-check your measurements and adjustments before starting your knitting project. This will help ensure that your vest fits well and looks great on you.
Tips for Achieving the Perfect Fit
When knitting a vest using a pattern, achieving the perfect fit is essential to creating a garment that looks and feels great. Here are some tips to help you ensure that your finished vest fits you perfectly:
1. Take accurate measurements
Before starting your project, take accurate measurements of your body. This includes measuring your bust, waist, and hip circumference, as well as the length from your shoulders to your desired hemline. These measurements will help you choose the correct size and make adjustments if necessary.
2. Use the correct yarn weight and gauge
Make sure to use the same yarn weight and gauge as specified in the pattern. Pay attention to the suggested needle size to achieve the correct tension. Using different yarn weight or gauge can significantly alter the finished size of your vest.
3. Make a swatch
Always make a swatch before starting your project to check your tension. This will give you an idea of how the yarn behaves and how many stitches and rows you need to get the desired size. Adjust your needle size if needed to obtain the correct gauge.
4. Measure as you go
As you work on your vest, periodically try it on or measure it against your body to ensure it’s coming out the right size. This will allow you to make any necessary adjustments before you finish the entire garment.
5. Customize the fit
If you find that the vest is not fitting perfectly as you knit, don’t be afraid to make adjustments. You can easily add or subtract stitches to alter the width, or add or subtract rows to adjust the length. Just make sure to make these changes symmetrically to maintain the overall balance of the garment.
By following these tips, you can ensure that your knitted vest fits you perfectly and becomes a beloved addition to your wardrobe.
Finishing Touches: Adding Details to Your Knitting Pattern Vest
Once you have completed knitting your pattern vest, it’s time to add those finishing touches that will make your project truly unique. Adding details can elevate your vest from a basic garment to a stylish and personalized piece. Here are some ideas to consider:
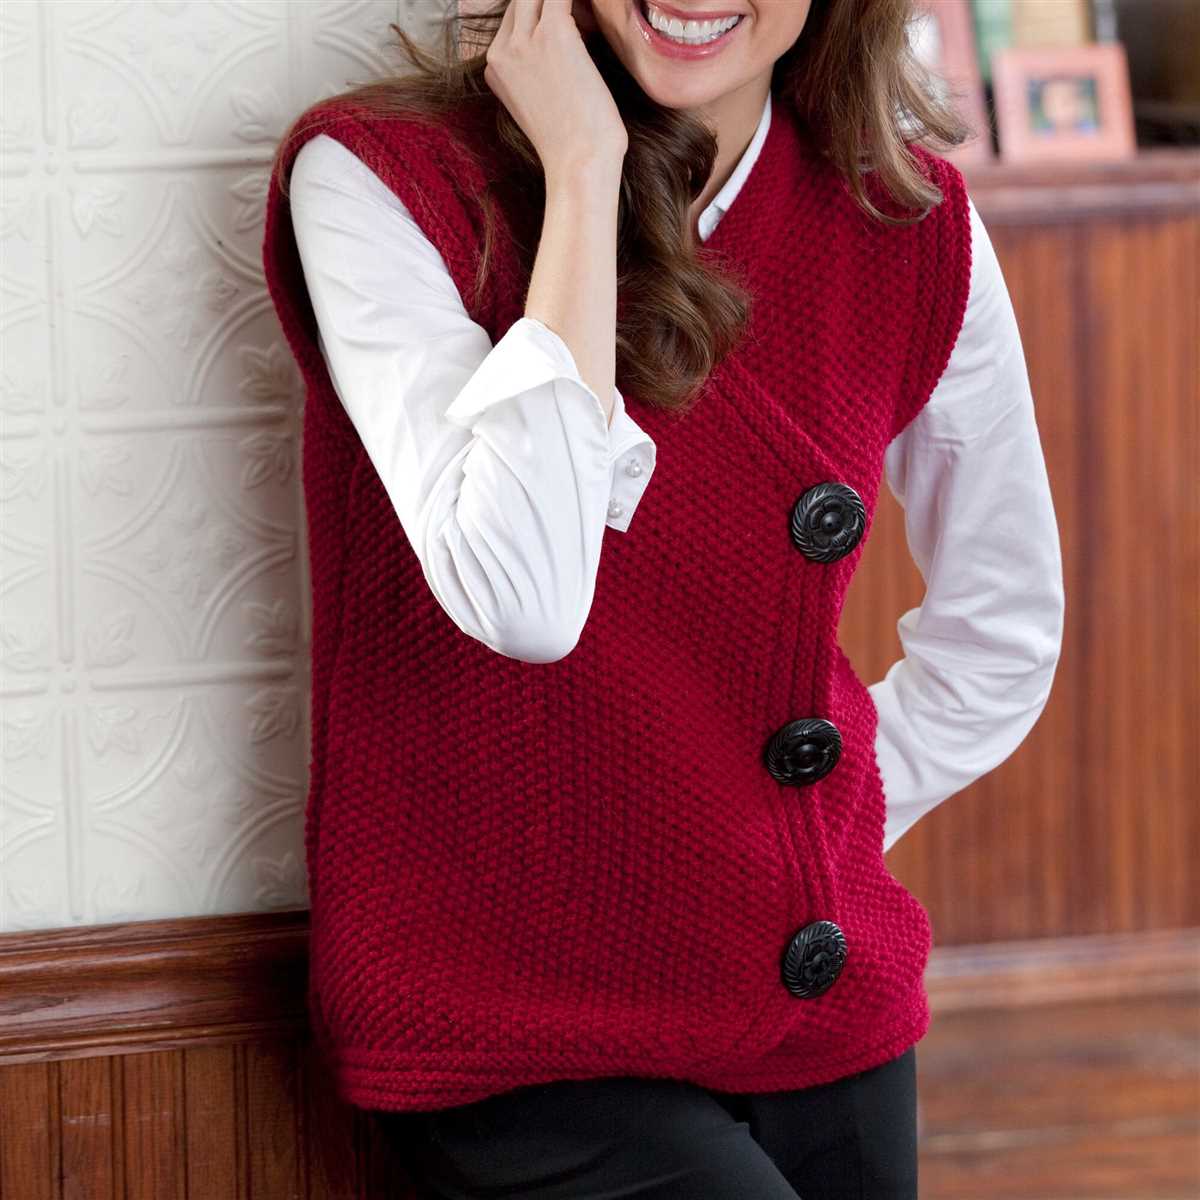
1. Buttons and Fasteners
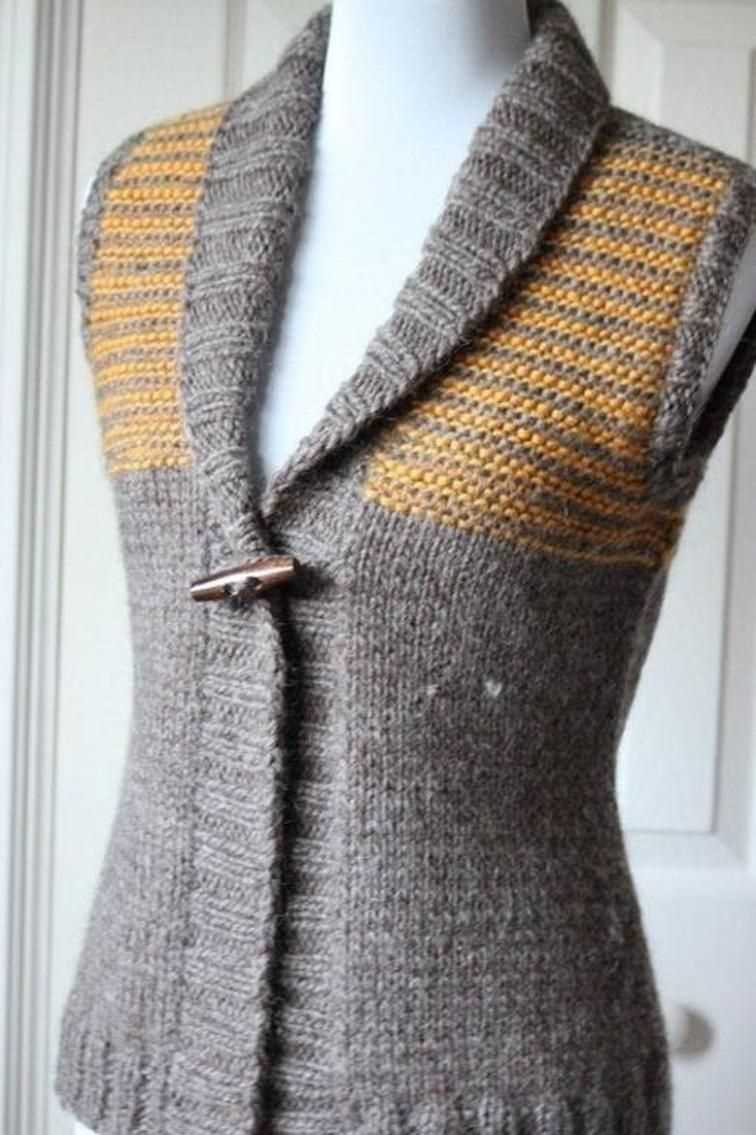
Choosing the right buttons or fasteners can make a big difference in the overall look and functionality of your vest. Consider using buttons that complement the yarn colors or add a pop of contrast. You can also experiment with different types of closures, such as toggles, snaps, or even a zipper.
2. Embellishments
Enhance the aesthetic appeal of your vest by adding embellishments. You can sew on decorative patches, appliques, or fabric flowers. Embroidery or beadwork can also be used to create intricate designs or add a touch of sparkle.
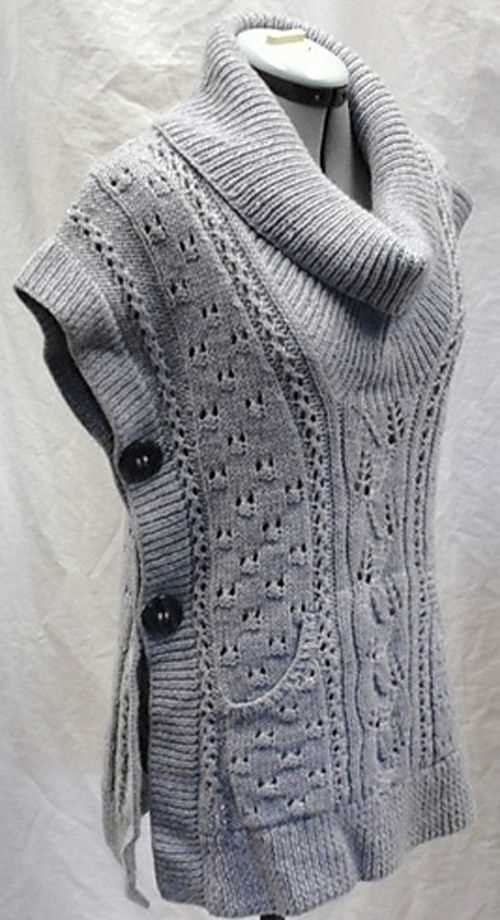
3. Pockets
Add functionality to your vest by incorporating pockets. You can choose to knit in-seam pockets or attach patch pockets. Pockets not only provide a place to store small items but also add visual interest to your design.
4. Lining
If you’re looking to create a more polished and professional finish, consider adding a lining to your vest. A fabric lining can provide extra warmth, hide any loose ends or stitches inside, and give your vest a luxurious feel.
5. Trims and Edgings

Give your vest a polished look by adding trims and edgings. You can knit or crochet a decorative trim to attach to the neckline, armholes, or hem. This can be done in a contrasting color or yarn texture for added visual interest.
6. Blocking and Finishing
Before you wear or showcase your vest, it’s essential to block and finish it properly. Blocking helps to shape and even out the stitches, while finishing involves weaving in any loose ends or securing seams. Take the time to give your vest a professional finish.
By adding these finishing touches to your knitting pattern vest, you can create a one-of-a-kind garment that showcases your creativity and style. Have fun experimenting with different details and make your vest truly unique.