
If you’re a fan of the adorable pink Pokémon species known as Jigglypuff, then you’re in luck! We have a fun and easy knitting pattern that allows you to create your very own Jigglypuff plushie. Whether you’re a seasoned knitter or just starting out, this pattern is perfect for all skill levels.
The Jigglypuff knitting pattern uses basic knitting techniques such as knit, purl, and increase stitches, making it a great project for beginners. The finished plushie measures about 10 inches in height, making it the perfect size for cuddling or displaying on a shelf.
With this pattern, you’ll be able to create a Jigglypuff plushie that captures all the charm and cuteness of the beloved Pokémon character. The pattern includes step-by-step instructions and helpful tips to ensure your knitting project is a success.
So gather your knitting needles and yarn, and get ready to bring Jigglypuff to life with this fun and adorable knitting pattern!
Jigglypuff Knitting Pattern
If you’re a fan of Pokemon and love to knit, then this Jigglypuff knitting pattern is perfect for you! Jigglypuff is a cute and lovable Pokemon known for its singing ability, and now you can create your own Jigglypuff plush toy with this pattern.
To get started, you’ll need some basic knitting supplies such as knitting needles and yarn in pink and white colors. The pattern requires both knitting and purling techniques, so make sure you’re comfortable with these stitches before starting.
To knit Jigglypuff’s body, you’ll begin by casting on the required number of stitches using the pink yarn. Then, you’ll work in stockinette stitch for a few rows to create the smooth texture. After that, you’ll switch to the white yarn to create the feathery tufts on Jigglypuff’s head and arms.
To create Jigglypuff’s eyes, you’ll use the intarsia technique and knit the white parts separately. The mouth can be embroidered using black yarn or thread. Don’t forget to stuff the body with polyester fiberfill to give it a soft and squishy feel!
Once you finish knitting all the pieces, you’ll sew them together to assemble the Jigglypuff plush toy. Be careful to align the features correctly to give your Jigglypuff its signature cute and sleepy expression. Finally, add any additional touches, such as a ribbon or bow, to personalize your Jigglypuff plush.
With this Jigglypuff knitting pattern, you can create a unique and adorable toy that will be cherished by Pokemon fans of all ages. So grab your knitting needles and get started on this fun and exciting project!
Knitting as a Hobby
Knitting has been a beloved pastime for centuries, and it continues to bring joy and relaxation to many people today. Whether you’re a beginner or an experienced knitter, picking up your needles and yarn can provide a sense of accomplishment and creativity.
One of the great things about knitting is that it can be done anywhere, making it a portable hobby. Whether you’re waiting for a doctor’s appointment or sitting on a long train ride, you can easily bring your knitting along and make progress on your latest project. It’s a great way to pass the time and keep your hands busy.
Getting started with knitting is relatively easy, and there are many resources available to help you learn. Online tutorials, books, and local knitting groups can provide guidance and support as you embark on your knitting journey. You’ll quickly learn the basic stitches and techniques, and before you know it, you’ll be creating beautiful items with your own hands.
Knitting can also be a therapeutic hobby, providing stress relief and promoting mindfulness. The repetitive motion of knitting can have a calming effect on the mind, allowing you to focus on the present moment and quiet your thoughts. Many knitters find that it helps them relax and unwind after a long day.
Another great aspect of knitting is the opportunity to give handmade gifts to your loved ones. Whether it’s a cozy scarf or a pair of warm mittens, knitted items are always appreciated and treasured. They show that you’ve put time, effort, and love into creating something unique and special.
In conclusion, knitting is a versatile and rewarding hobby. Whether you’re looking for a productive way to relax, a chance to unleash your creativity, or a way to make thoughtful gifts, knitting has something for everyone.
Why Knit Jigglypuff?
If you’re a fan of Pokémon and love knitting, then creating a Jigglypuff knitting pattern might be the perfect project for you. Jigglypuff is a beloved and iconic Pokémon character known for its round, pink shape and ability to lull others to sleep with its soothing singing voice. Knitting Jigglypuff allows you to bring this adorable character to life in a soft and cuddly form.
Creating a Jigglypuff knitting pattern allows you to combine your passion for knitting with your love for Pokémon. It can be a fun and creative way to express your fandom and show off your knitting skills. Not only will you have a unique and handmade Jigglypuff plushie, but you will also have a tangible reminder of your favorite Pokémon.
Knitting Jigglypuff can also be a great project for beginners or those looking to improve their knitting skills. The simple shape and soft curves of Jigglypuff make it an ideal pattern for practicing basic knitting techniques such as increasing, decreasing, and shaping. You can experiment with different yarn types and colors to customize your Jigglypuff plushie to your liking.
- Knitting Jigglypuff can be a fun and creative way to express your love for Pokémon.
- You can show off your knitting skills and have a unique handmade Jigglypuff plushie.
- It’s a great project for beginners or those looking to improve their knitting skills.
- You can customize your Jigglypuff plushie by experimenting with different yarn types and colors.
Overall, knitting Jigglypuff can be a rewarding and enjoyable project for Pokémon fans and knitting enthusiasts alike. Whether you want to showcase your love for Pokémon, improve your knitting skills, or simply have a cute and cuddly Jigglypuff plushie, creating a Jigglypuff knitting pattern can be a fun and fulfilling experience.
Materials Needed
In order to knit your own Jigglypuff, you will need the following materials:
- Yarn: Choose a pink or light pink yarn for the main body of Jigglypuff. You will also need small amounts of yarn in white, black, and peach for the facial features. Make sure the yarn is soft and suitable for knitting.
- Knitting Needles: Use a pair of size US 4 (3.5mm) straight knitting needles. These will help you create the tight stitches needed for the plush toy.
- Scissors: Have a pair of scissors on hand to help cut the yarn and trim any excess.
- Tapestry Needle: A tapestry needle, also known as a yarn needle, will be used to sew the pieces of Jigglypuff together and weave in any loose ends.
- Stuffing: To give your Jigglypuff its plush and huggable shape, you will need polyester fiberfill stuffing. Make sure to have enough to fill the entire toy.
- Stitch Markers: It’s helpful to have stitch markers to keep track of your progress and mark important points in the pattern.
- Safety Eyes and Nose: If you want to add an extra touch of cuteness to your Jigglypuff, consider using safety eyes (around 9mm) and a small safety nose. These can be found in craft stores or online.
- Embroidery Thread: You will need a small amount of embroidery thread in black and white to embroider the mouth and other details onto Jigglypuff’s face.
With these materials, you’ll be ready to start knitting your very own Jigglypuff plush toy. Gather everything you need and get ready to create an adorable addition to your Pokemon collection or a special gift for a Pokemon fan.
Choosing the Right Yarn
When it comes to knitting, choosing the right yarn is crucial for the success of your project. The type of yarn you select can make a significant difference in the final outcome, including the drape, texture, and overall appearance of your finished piece. Here are some factors to consider when choosing the perfect yarn for your Jigglypuff knitting pattern.
Fiber Content
The fiber content of the yarn is one of the most important aspects to consider. Different fibers have different properties, which can affect the feel and durability of your knitted item. For example, natural fibers such as wool, alpaca, and cotton offer warmth, softness, and breathability. On the other hand, synthetic fibers like acrylic and nylon are often more affordable and easier to care for.
For your Jigglypuff knitting pattern, you might want to consider a yarn that incorporates natural fibers to achieve the softness and cozy feel of the character. A blend of wool and acrylic could be a good option, as it combines the warmth and durability of wool with the easy care and affordability of acrylic.
Weight and Gauge
The weight and gauge of the yarn are essential factors to consider when knitting any pattern, including the Jigglypuff design. The pattern will recommend a specific weight and gauge to achieve the desired size and tension. It is crucial to choose a yarn that matches these recommendations to ensure your finished Jigglypuff turns out the right size and shape.
For the Jigglypuff knitting pattern, you may want to look for a medium-weight yarn (worsted or aran) with a gauge that matches the pattern’s instructions. This will help you achieve the correct dimensions and keep the stitches and fabric of your Jigglypuff plush consistent.
Color and Texture
The color and texture of the yarn can greatly impact the appearance of your project. The right color choice can enhance the character and bring your Jigglypuff to life, while the texture can add depth and interest to the design.
For your Jigglypuff knitting pattern, you may want to consider a yarn that comes in soft pastel colors, such as pink or cream, to match the character’s iconic look. Additionally, a yarn with a slight fuzz or halo effect can add a fluffy and whimsical texture, perfect for capturing Jigglypuff’s bubbly personality.
- Consider the fiber content when choosing a yarn for your Jigglypuff knitting pattern.
- Match the weight and gauge recommendations to ensure the correct size and tension.
- Choose colors and textures that enhance the character and bring your Jigglypuff to life.
Tools and Techniques
When it comes to creating a Jigglypuff knitting pattern, having the right tools and knowing the proper techniques can make all the difference. Here are some essential tools and techniques to help you bring your Jigglypuff to life.
Knitting Needles
To start your Jigglypuff knitting project, you’ll need a pair of knitting needles. The size and type of needles you choose will depend on the thickness of yarn you’re using and your personal preference. Generally, for a Jigglypuff pattern, it’s recommended to use medium to large size needles, around size US 7 (4.5mm) to US 10 (6mm), to achieve a nice, plush texture.
Yarn
Choosing the right yarn is crucial for creating a soft and squishy Jigglypuff toy. Opt for a yarn that is lightweight and has a fluffy or fuzzy texture to mimic Jigglypuff’s fluffy appearance. Acrylic or cotton blend yarns are popular choices for this type of project. Consider selecting yarn in pink or white shades to match Jigglypuff’s color scheme.
Knitting Techniques
To create the Jigglypuff knitting pattern, you’ll need to be familiar with some basic knitting techniques. These include casting on, knitting, purling, increasing, decreasing, and binding off. You might also need to know how to knit in the round, especially if you’re planning to create a seamless Jigglypuff toy. The circular knitting technique allows you to knit in a continuous, tube-like shape, which is perfect for making Jigglypuff’s round body.
Pattern Reading
It’s important to learn how to read and follow knitting patterns, as they provide the step-by-step instructions for creating your Jigglypuff toy. Understand the abbreviations and symbols used in the pattern, such as K (knit), P (purl), inc (increase), dec (decrease), and BO (bind off). Take your time to read the pattern thoroughly before starting, and refer to it as you work to ensure accurate results.
Additional Tools
In addition to knitting needles and yarn, you may need some additional tools to complete your Jigglypuff knitting project. These can include a tapestry needle for sewing pieces together, stitch markers to keep track of your stitches, and stuffing or toy filling to give your Jigglypuff its soft and huggable shape. Be sure to have these tools on hand before you start your project to avoid any delays or frustration.
With the right tools and techniques, you’ll be able to create an adorable Jigglypuff toy that you can cherish or gift to a Pokemon fan. Enjoy the process of knitting and watching your Jigglypuff take shape, stitch by stitch!
Basic Knitting Stitches
Knitting is a craft that allows you to create beautiful and cozy garments and accessories using just two basic stitches: knit and purl. These stitches form the foundation for all knitting patterns and can be combined in various ways to create different textures and patterns.
The knit stitch is the most basic and commonly used stitch in knitting. To knit, you insert the right needle into the stitch on the left needle, wrap the yarn around the right needle, and pull it through the stitch. This creates a new stitch on the right needle while the old stitch is slipped off the left needle. Knit stitches create a smooth and bumpy texture depending on the type of yarn and needle size used.
Knit Stitch
- Insert the right needle into the stitch on the left needle, from front to back.
- Wrap the yarn around the right needle, moving from back to front.
- Pull the right needle through the stitch, creating a new stitch on the right needle.
- Slip the old stitch off the left needle.
The purl stitch is the reverse of the knit stitch and creates a bumpy texture. To purl, you insert the right needle into the stitch on the left needle from back to front, wrap the yarn around the right needle, and pull it through the stitch. This creates a new stitch on the right needle, while the old stitch is slipped off the left needle. Purl stitches are often used in ribbing or to create a different texture on the fabric.
Purl Stitch
- Insert the right needle into the stitch on the left needle, from back to front.
- Wrap the yarn around the right needle, moving from front to back.
- Pull the right needle through the stitch, creating a new stitch on the right needle.
- Slip the old stitch off the left needle.
With these two basic stitches, you can create a wide variety of patterns and textures in your knitting projects. By combining knits and purls in different sequences and rows, you can create ribbing, cables, lace, and many other intricate designs. Mastering these stitches opens up a world of possibilities in your knitting journey.
Getting Started: Casting On
Before you can begin knitting your very own Jigglypuff using this knitting pattern, you’ll need to cast on your stitches. Casting on is the process of creating the first row of stitches on your knitting needle. In this section, we’ll go over a few different casting on methods you can use.
1. Long-Tail Cast On: The long-tail cast on is a versatile and commonly used method. To begin, measure a length of yarn that is approximately three times the width of your finished piece. Make a slip knot at the end and place it on your needle. Hold the needle with the slip knot in your right hand, and the tail end of the yarn in your left hand. Insert the needle into the slip knot from left to right, and then wrap the yarn around your thumb and index finger. Now, bring the needle down and under the yarn on your thumb, and then up and under the yarn on your index finger. Finally, bring the needle through the loop from left to right, and tighten the stitch on the needle. Repeat this process until you have the desired number of stitches on your needle.
2. Knitted Cast On: The knitted cast on method is a simple and easy way to add stitches to your needle. To begin, make a slipknot and place it on your needle. Hold the needle with the slip knot in your right hand, and the tail end of the yarn in your left hand. Insert the right needle into the slip knot from left to right, as if you were going to knit a stitch. Wrap the yarn around the right needle in a counter-clockwise direction, and then slide the right needle down and under the left needle. Pull the loop of yarn through the stitch, and place the new stitch onto the left needle. Repeat this process until you have the desired number of stitches on your needle.
These are just two examples of casting on methods you can use to start your Jigglypuff knitting project. Feel free to explore other casting on techniques and find the method that works best for you. Once you have cast on your stitches, you’ll be ready to start knitting Jigglypuff!
Knitting Jigglypuff’s Body
To create Jigglypuff’s body, you will need a set of knitting needles and a soft, fluffy yarn in the desired color. It’s best to choose a yarn that is easy to work with and has a good amount of stretch, as this will help achieve the rounded shape of Jigglypuff’s body.
Begin by casting on the required number of stitches, which will depend on the size of the Jigglypuff you want to create. You can refer to a pattern or use your own measurements to determine the size. It’s important to keep in mind that Jigglypuff’s body should have a slightly oval shape, so you will need to increase or decrease stitches accordingly.
Once you have cast on the stitches, you can begin knitting in the round. This means that you will be knitting in a continuous spiral, without turning your work. This technique will eliminate the need for sewing seams later on and will give a seamless appearance to Jigglypuff’s body.
To create the rounded shape, you will need to gradually decrease stitches towards the top of the body. This can be done by knitting two stitches together at regular intervals. It’s important to follow the pattern or your measurements to ensure the right shape and proportions.
Continue knitting in the round until you reach the desired length for Jigglypuff’s body. Remember to stuff the body as you go, using small amounts of stuffing to maintain an even shape. When you reach the top, bind off the stitches and secure the yarn, leaving a long tail for sewing.
Finally, using a tapestry needle, carefully sew closed the opening at the bottom of Jigglypuff’s body. This will prevent the stuffing from coming out and give a clean finish to your knitting. Take your time and make sure the stitches are secure and hidden for a polished result.
Shaping and Embellishing Jigglypuff
When knitting a Jigglypuff, it’s important to pay attention to the shaping and embellishments to capture the character’s cute and round appearance. Here are a few tips to help you achieve the perfect Jigglypuff:
Shaping:
To create Jigglypuff’s round body, you’ll want to use increases and decreases strategically. Start by casting on a certain number of stitches, and then gradually increase the number of stitches in each row to form the body’s round shape. Pay attention to the pattern instructions for the specific number of increases and decreases needed.
For the head, you’ll want to create a more spherical shape. Begin with a smaller number of stitches and shape the head by gradually increasing the number of stitches until you reach the desired size. Once you’ve completed the required number of rows, gradually decrease the number of stitches to close the head and form the top.
Embellishments:
Jigglypuff is known for its signature tuft of hair on its forehead. To create this feature, you can embroider or sew a small snippet of yarn onto the head of your Jigglypuff. Use a contrasting color to make it stand out.
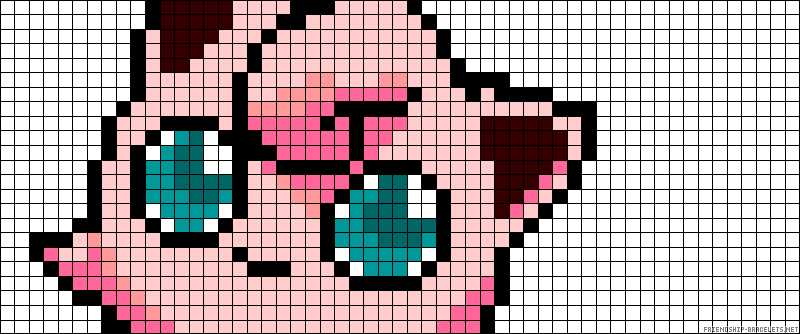
For the eyes and mouth, you can either embroider them using black yarn or use safety eyes and a small felt mouth. If using safety eyes, make sure to attach them securely to the head to prevent any choking hazards. The size of the eyes and mouth can vary depending on the desired expression you want for your Jigglypuff.
Lastly, don’t forget about Jigglypuff’s pink color! Choose a soft pink yarn to match the character’s color palette. You can also consider using a slightly darker shade for the ears and feet to add some dimension and contrast to your finished Jigglypuff.
Finishing Touches and Assembly
Once you have completed knitting all the pieces for your Jigglypuff, it’s time to add the finishing touches and assemble the toy.
First, weave in any loose ends of yarn on each of the knitted pieces. This will give your toy a neater and more polished look.
Next, sew the pieces together using a yarn needle and the matching yarn color. Start by sewing the head to the body, making sure to align the pieces correctly. Then, attach the arms and legs to the body, and finally, sew the ears to the head.
If you want to add some extra details to your Jigglypuff, you can embroider the eyes using black yarn or sew on small black buttons. You can also use pink yarn to create a smile on the face of your Jigglypuff.
Once you are satisfied with the placement and finishing details, your Jigglypuff is ready to be enjoyed! Give it a good fluff and play with it, or gift it to a Pokemon-loving friend.
Remember, practice makes perfect, so don’t be discouraged if your first Jigglypuff doesn’t turn out exactly as you envisioned. With time and experience, you will become an expert at knitting adorable Pokemon toys!