
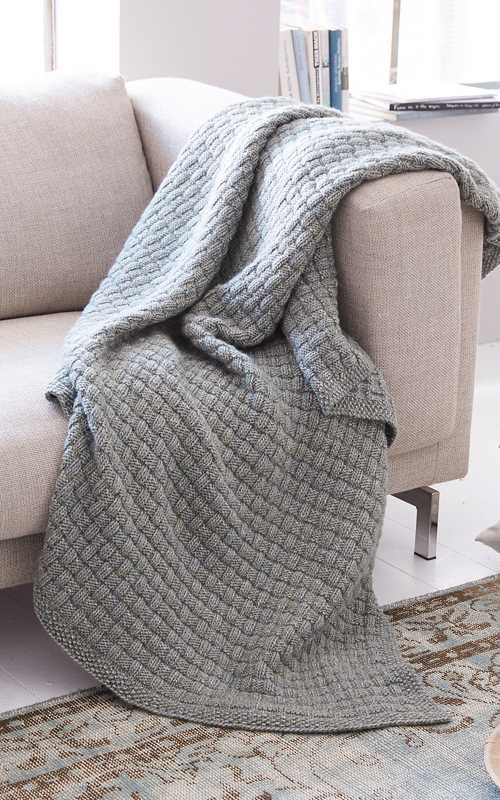
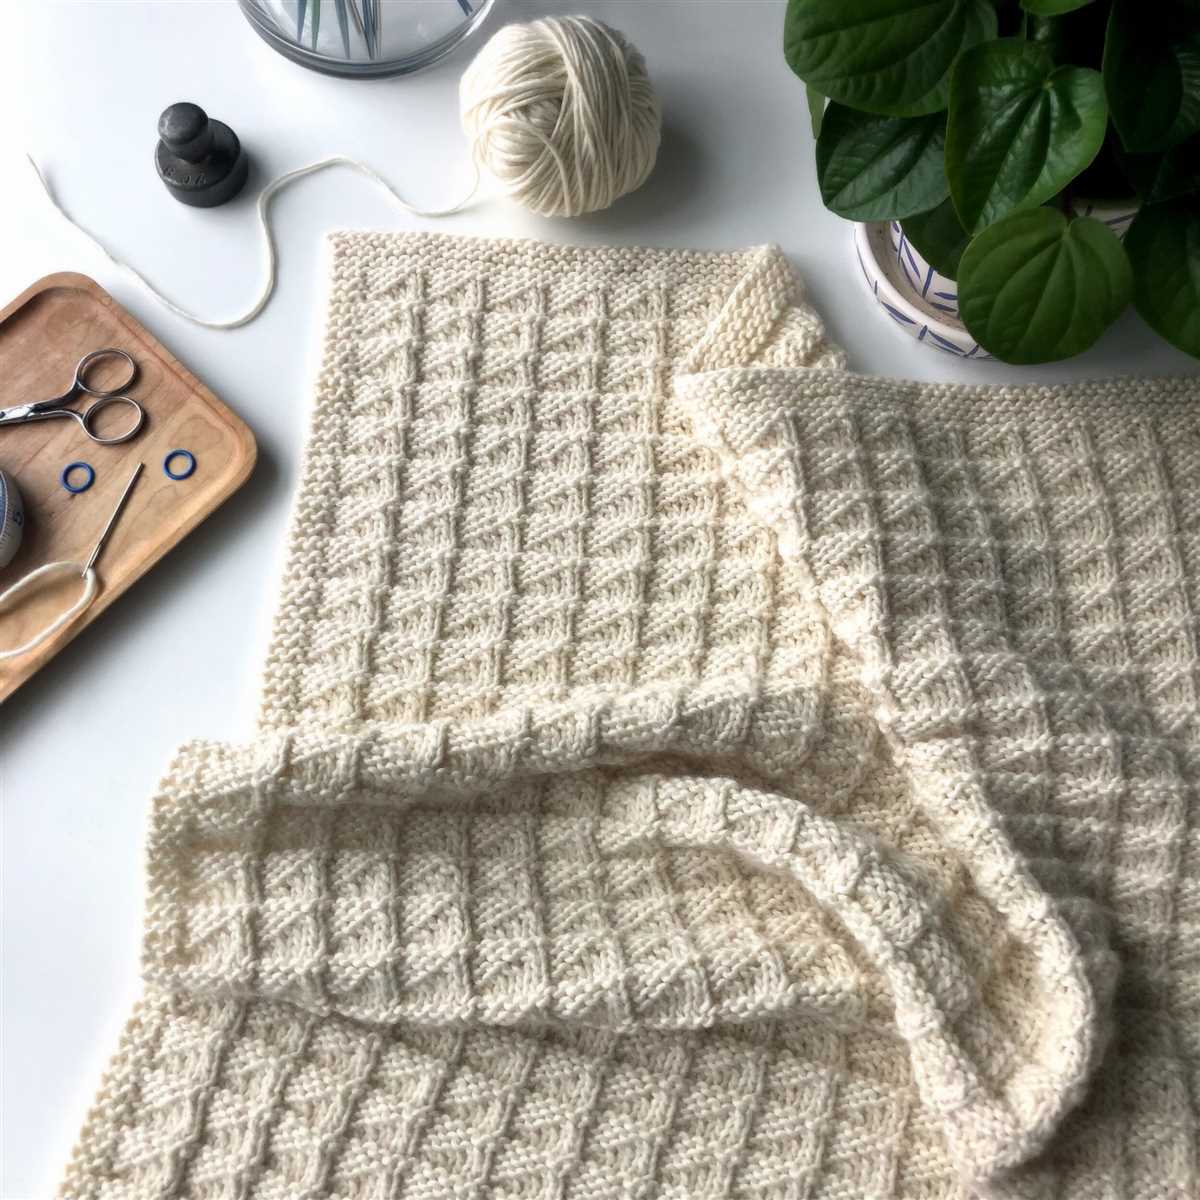
Knitting is a popular craft that has been practiced for centuries. It is not only a creative and enjoyable hobby, but also a great way to relax and unwind. One of the most popular knitting projects is making a lap blanket. A lap blanket is a small, cozy blanket that is perfect for keeping your legs warm on chilly evenings or for cuddling up with on the couch.
Creating your own lap blanket is a rewarding experience that allows you to showcase your creativity and personalize your knitting project. With a variety of knitting stitches and patterns to choose from, you can design a lap blanket that suits your style and preferences. Whether you prefer a simple and classic design or a more intricate pattern, there is a knitting pattern for everyone.
When selecting a knitting pattern for a lap blanket, it is important to consider the level of difficulty and the type of yarn you want to use. Some patterns may require advanced knitting techniques, while others are more suitable for beginners. Additionally, the type of yarn you choose will affect the texture and warmth of your lap blanket. From soft and fluffy yarns to durable and warm wool, there are endless options to choose from.
Choosing the right yarn
When it comes to knitting a lap blanket, choosing the right yarn is crucial. The right yarn not only determines the overall appearance and feel of the finished blanket but also affects its durability and ability to keep you warm and cozy. Here are some factors to consider when selecting yarn for your lap blanket:
1. Fiber Type
The first decision to make is the type of fiber you want for your lap blanket. Common yarn fibers include wool, acrylic, cotton, and blends. Each type has its own unique properties. Wool is known for its warmth and insulation, while acrylic is often more affordable and easy to care for. Cotton is breathable and great for warmer climates, while blends can combine the best qualities of different fibers.
2. Weight
Yarn weight refers to the thickness of the yarn strand. Different projects require different weights, and for a lap blanket, you’ll want a yarn that is not too heavy or too light. Medium or bulky weight yarn is typically a good choice for lap blankets as it provides the right balance of warmth and drape.
3. Softness and Texture
Consider how soft and textured you want your lap blanket to be. Some yarns have a smooth, silky texture, while others have a more textured or fuzzy appearance. Think about the intended use of the blanket and your personal preferences for touch and feel. Keep in mind that softer yarn may be more prone to pilling over time.
4. Color and Pattern
The color and pattern options for yarn are virtually endless. Consider the color palette and design scheme you want for your lap blanket. Whether you prefer solid colors, variegated yarns, or intricate patterns, choose a yarn that will help you achieve the desired aesthetic for your blanket.
Ultimately, the right yarn for your lap blanket will depend on your personal preferences, budget, and the intended use of the blanket. Carefully considering these factors will help you select a yarn that will result in a lap blanket that is not only beautiful but also functional and enjoyable to use.
Selecting the appropriate knitting needles
When it comes to knitting, selecting the appropriate needles can make a big difference in the outcome of your project. The size and material of the needles can affect the tension and drape of the knitted fabric.
Size: The size of the needles determines the size of the stitches and the overall gauge of the finished piece. For a lap blanket, you will typically want to use larger needles to create a looser and more open fabric. A size 10 or 11 needle is a good choice for a lap blanket.
Material: Knitting needles come in a variety of materials, including metal, wood, and plastic. Each material has its own unique qualities that can affect your knitting experience. Metal needles are smooth and slippery, making them ideal for fast knitters. Wood needles, on the other hand, have more grip and can help control tension. Plastic needles are lightweight and are a good option for knitters with arthritis or joint pain.
It’s important to consider your personal preference and knitting style when selecting needles. If you enjoy knitting quickly and have a loose tension, metal needles may be the best choice for you. If you prefer a slower pace and tighter tension, wood or plastic needles may be more suitable.
Length: The length of the needles can also impact your knitting experience. For a lap blanket, you will likely want to use longer needles, such as 14 or 16 inches, to accommodate the width of the project and prevent stitches from falling off the ends.
Ultimately, the most important thing is to choose needles that are comfortable and enjoyable to work with. Remember to swatch before starting your lap blanket to ensure that you have the correct gauge and adjust your needle size if necessary. Happy knitting!
Understanding the basic stitches

When it comes to knitting, understanding the basic stitches is essential. These stitches are the building blocks for any knitting pattern, including lap blankets. By mastering the basic stitches, you will be able to create various textures and patterns, allowing you to customize your lap blanket to your liking.
One of the most common stitches in knitting is the knit stitch. This stitch involves inserting the needle into the loop on the left needle and pulling the yarn through to create a new stitch. The knit stitch creates a smooth and flat surface, perfect for creating the main body of your lap blanket.
To add some variety to your lap blanket, you can also learn the purl stitch. The purl stitch is similar to the knit stitch, but instead of inserting the needle from left to right, you insert it from right to left. This creates a bumpy texture and is often used to create ribbing or to add contrast to a knitted piece.
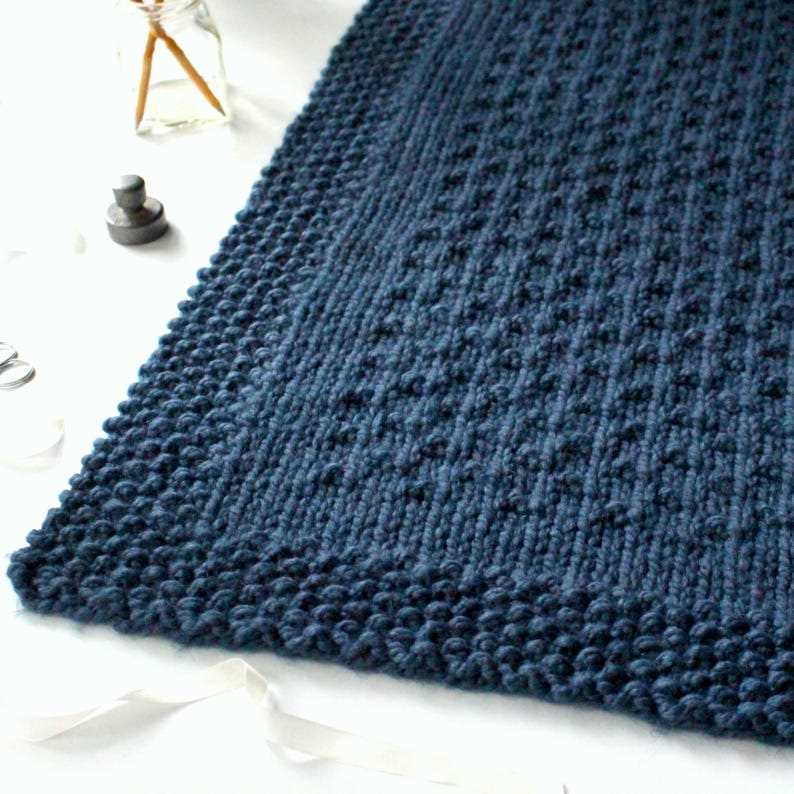
Once you have mastered the knit and purl stitches, you can experiment with different combinations and patterns to add more complexity to your lap blanket. For example, you can create a seed stitch pattern by alternating between knit and purl stitches in each row. This creates a textured and reversible fabric that is perfect for a cozy lap blanket.
Casting on and starting your lap blanket
Before you can start knitting your lap blanket, you’ll need to cast on your stitches. This is the process of creating the foundation row of stitches that you’ll be working with. The number of stitches you cast on will depend on the size of your blanket and the yarn and needle size you’re using. Refer to the knitting pattern to determine the cast on number.
To cast on, you can use various methods such as the long-tail cast on or the knitted cast on. The long-tail cast on is a popular method that creates a stretchy edge, while the knitted cast on is simpler and provides a firmer edge. Choose the method that you’re most comfortable with.Example of the long-tail cast on:
- Hold the yarn in your right hand and create a slipknot by making a loop with the yarn.
- Insert the needle through the loop and pull it tight, creating a stitch on your needle.
- Hold the needle with the stitch in your right hand and use your left hand to hold the tail of the yarn and the working yarn.
- With your left hand, bring the tail of the yarn over the needle to create a new loop.
- Use your right hand to pull the needle through the loop, creating another stitch on your needle.
- Repeat steps 4 and 5 until you have cast on the required number of stitches.
Once you have cast on your stitches, you can start working on the first row of your lap blanket. Follow the pattern instructions to determine the specific stitches and techniques you need to use. Typically, the first row involves knitting all the stitches, but this may vary depending on the pattern.
Example of the first row in stockinette stitch:
- Hold the needle with the cast on stitches in your left hand and the empty needle in your right hand.
- Insert the right needle into the first stitch on the left needle, from left to right.
- Wrap the working yarn around the right needle, moving from back to front.
- Use the right needle to pull the loop of yarn through the stitch, dropping the old stitch off the left needle.
- Repeat steps 2-4 until you have worked all the stitches on the left needle.
- At the end of the row, the stitches will be on the right needle, and you can turn your work to begin the next row.
Continue following the pattern instructions, repeating the necessary rows or stitch patterns until your lap blanket reaches the desired length. Remember to check your tension and adjust your needle size if necessary to achieve the correct gauge.
Creating the main body of the lap blanket
Now that you have cast on your stitches and completed the border, it is time to start creating the main body of your lap blanket. This is where the bulk of the pattern will be repeated to create the cozy and warm blanket.
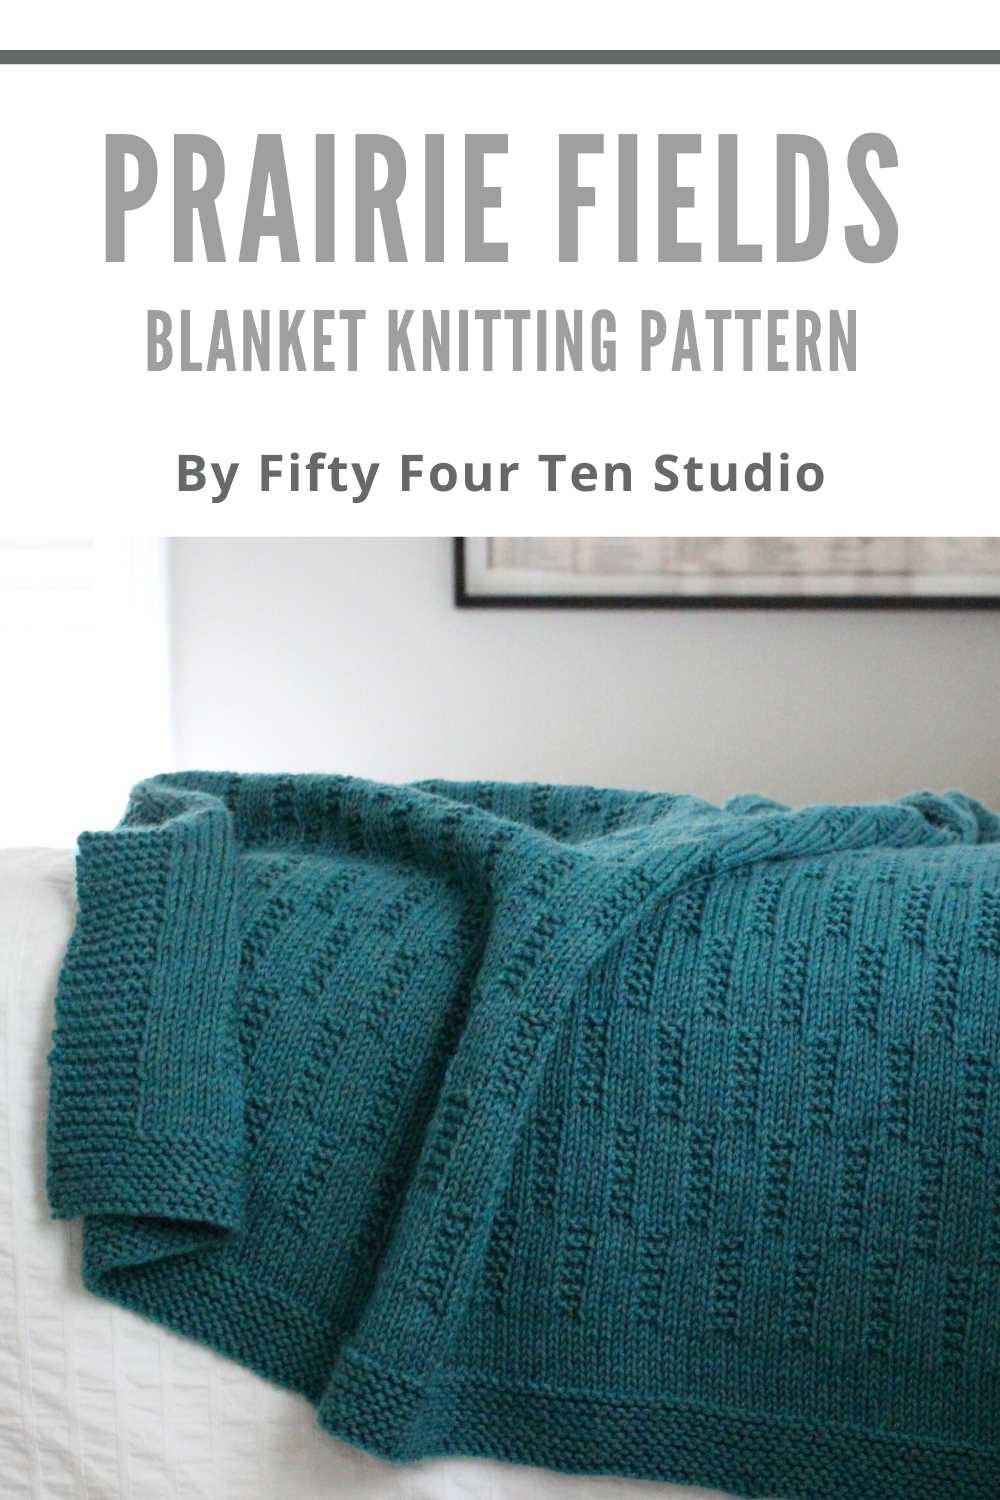
To begin, you will need to follow the provided stitch pattern. This pattern will typically include a combination of knit and purl stitches, which will create the desired texture for your lap blanket. Make sure to carefully read and understand the pattern before starting to ensure that you are following it correctly.
Once you have familiarized yourself with the stitch pattern, you can start working on the main body of the lap blanket. This typically involves repeating a set number of rows and stitches as specified in the pattern. You will continue to knit or purl each row according to the stitch pattern until you have reached the desired length for your lap blanket.
It is important to pay attention to your tension and gauge as you work on the main body. You want your stitches to be consistent in size and tension throughout the entire blanket. This will ensure a uniform appearance and a comfortable feel.
If the pattern includes any instructions for color changes or additional stitch variations, make sure to follow them accordingly. These details can add visual interest and personality to your lap blanket.
As you work on the main body of the lap blanket, it is helpful to use stitch markers to keep track of your progress. These can be placed at specific intervals to mark the beginning and end of pattern repeats or rows.
Continue following the stitch pattern and repeating the necessary rows until you have reached the desired length for your lap blanket. Once you have completed the main body, you can move on to finishing touches such as binding off and blocking the blanket to ensure it lays flat and looks its best.
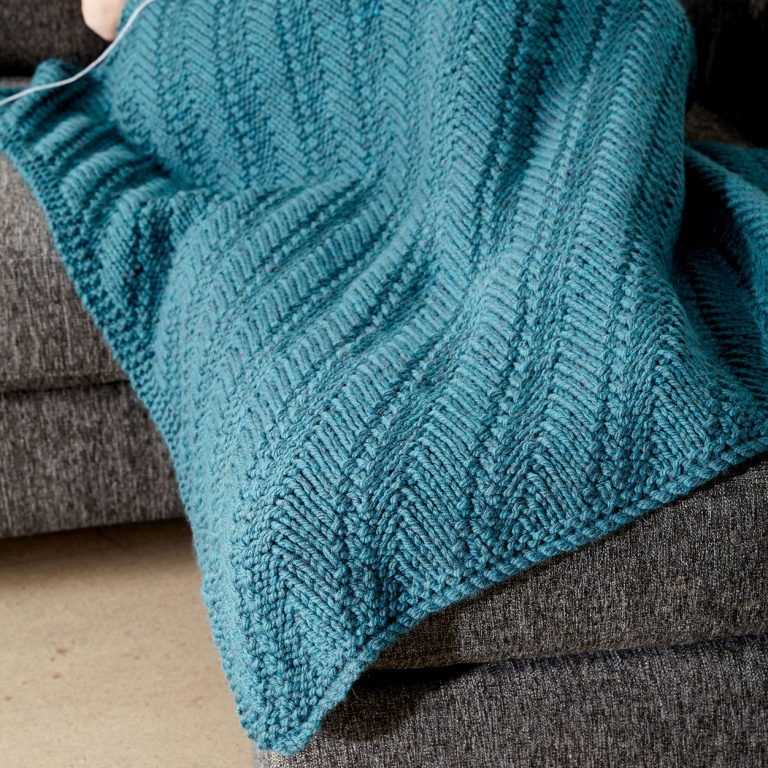
Adding Texture with Different Knitting Patterns
Knitting is not only a way to create warmth and comfort, but also a creative outlet that allows you to experiment with various patterns and textures. By incorporating different knitting patterns into your lap blanket, you can add visual interest and depth to your project.
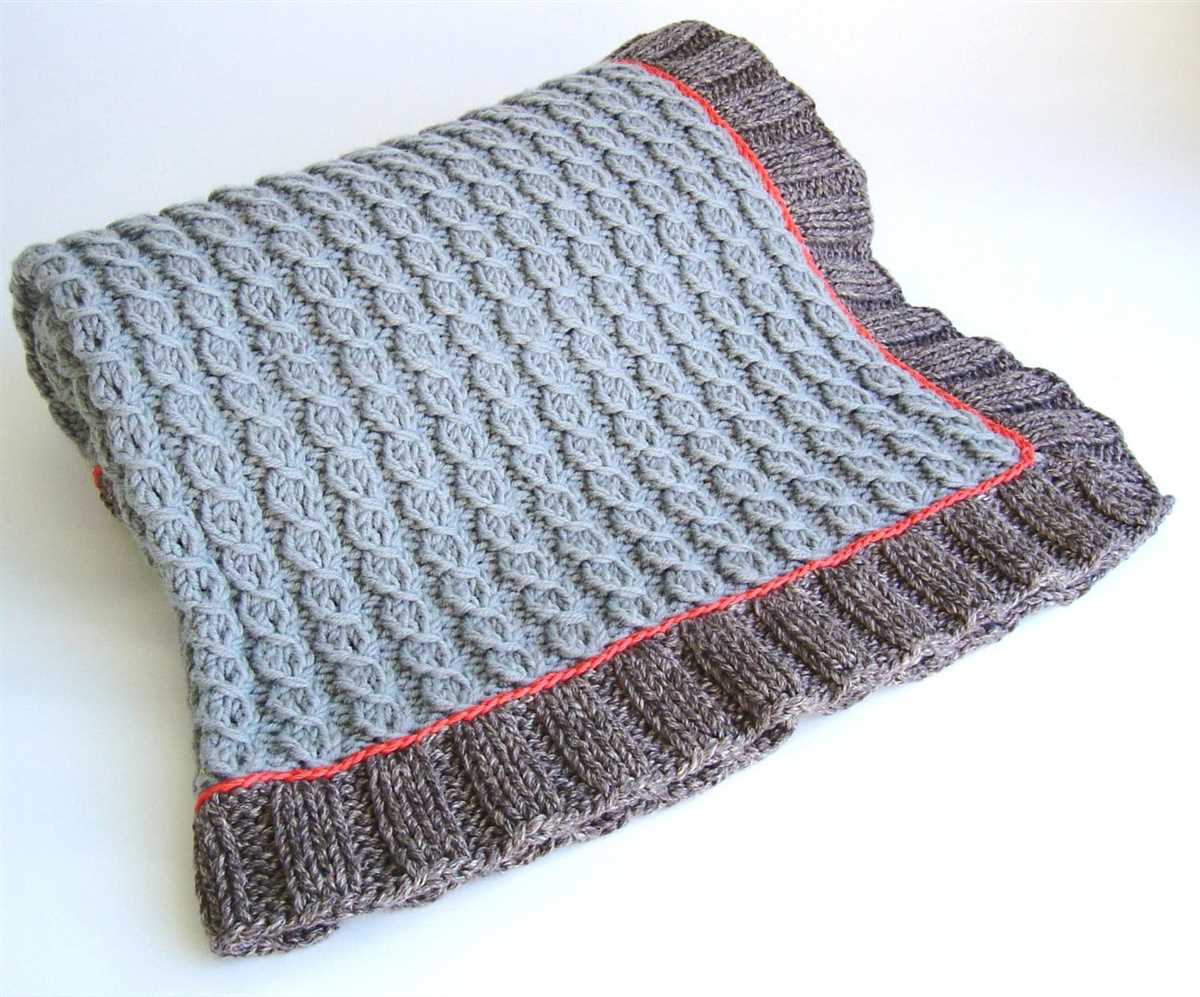
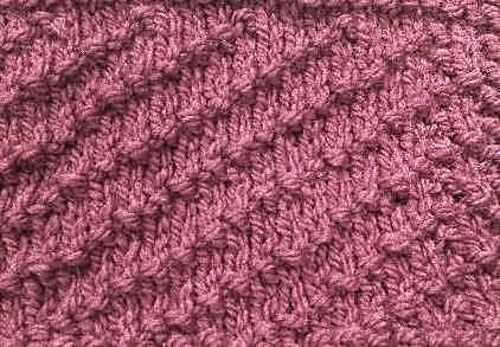
One way to add texture is by using the seed stitch pattern. This simple yet effective pattern alternates between knit and purl stitches in a checkerboard-like design. The result is a bumpy texture that adds dimension and tactile appeal to your lap blanket.
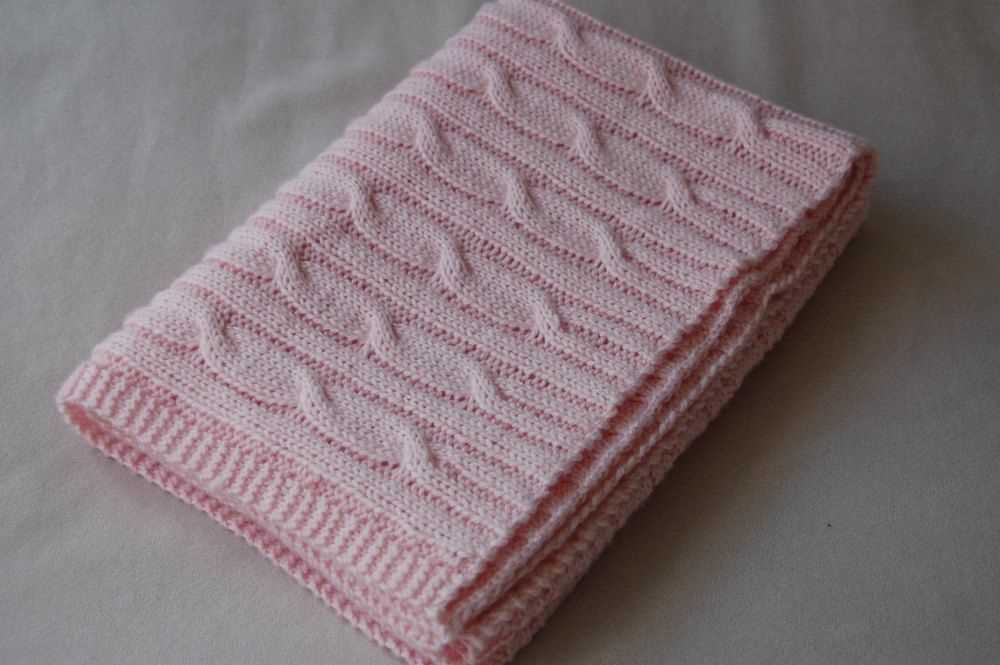
Another option is the cable stitch pattern. Cables are created by crossing a set of stitches over one another. This technique creates an intricate braided effect that is both elegant and cozy. By adding cable stitches to your lap blanket, you can create a luxurious texture that is sure to impress.
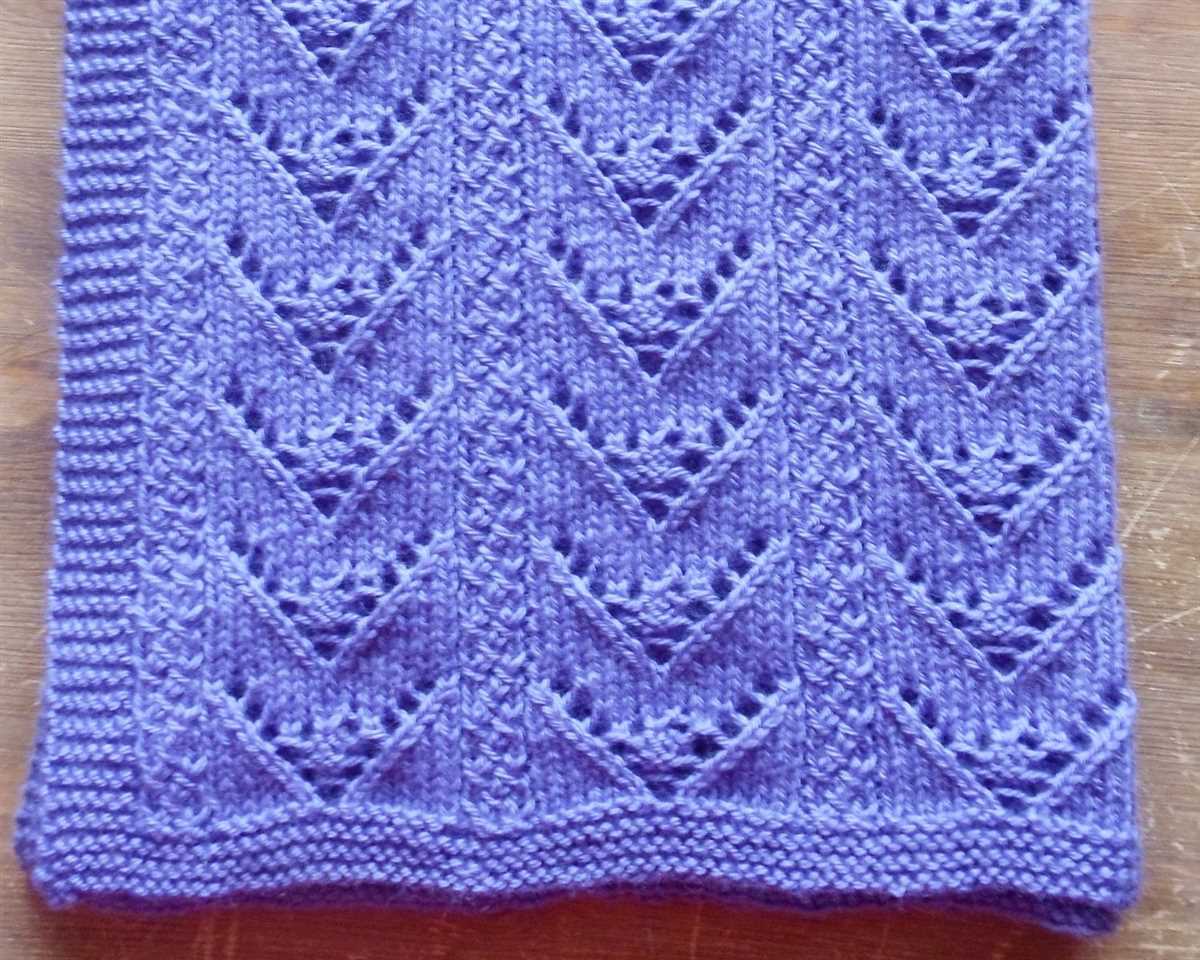
If you prefer a more open and airy texture, consider incorporating lace patterns into your lap blanket. Lace stitches are created by strategically increasing and decreasing stitches to form intricate and delicate patterns. This creates a light and feminine texture that is perfect for warmer weather or for adding a touch of elegance to any room.
- Seed stitch: creates a bumpy texture with alternating knit and purl stitches.
- Cable stitch: creates an intricate braided effect by crossing stitches over one another.
- Lace patterns: create delicate and intricate textures through strategic increases and decreases.
Incorporating different knitting patterns into your lap blanket allows you to personalize your project and create a unique piece that is both functional and visually appealing. Whether you choose to utilize the seed stitch, cable stitch, or lace patterns, adding texture to your lap blanket will elevate it from a simple accessory to a work of art.
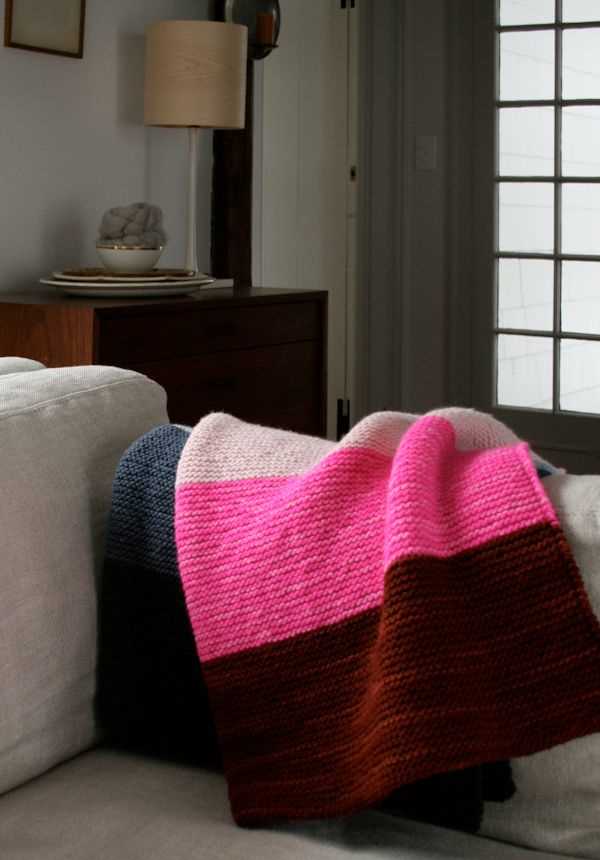
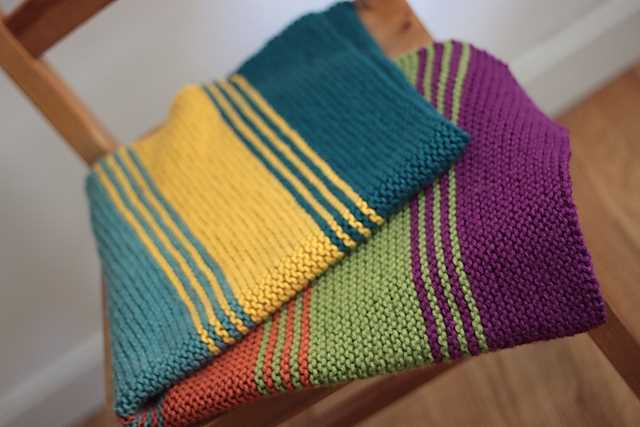
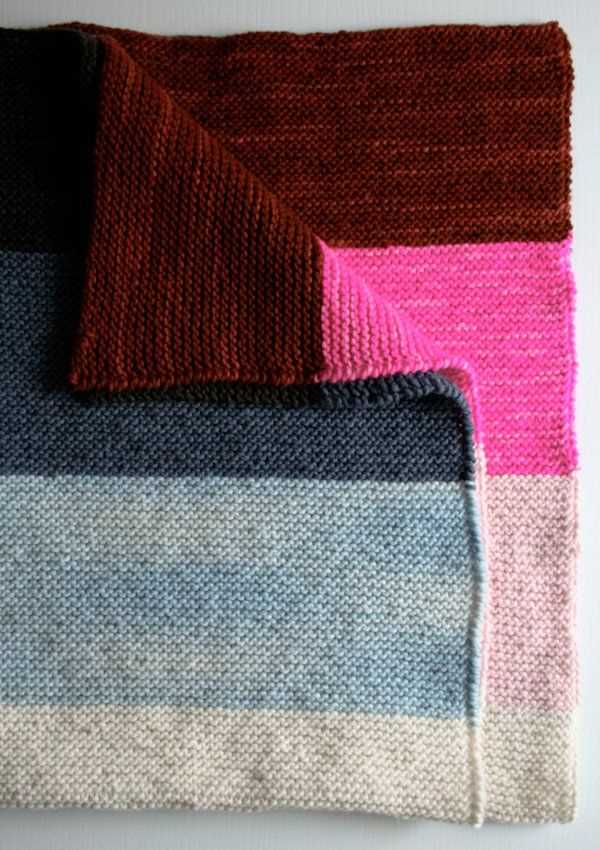
Changing colors and creating stripes
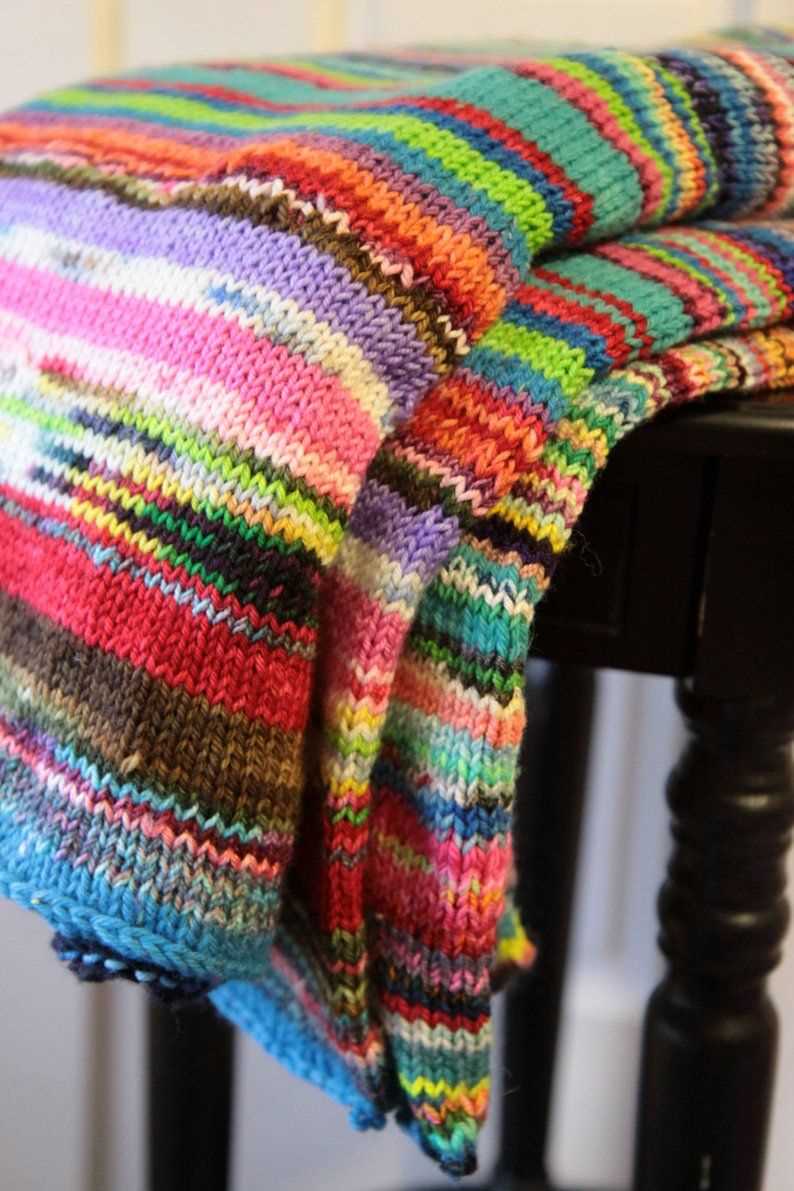
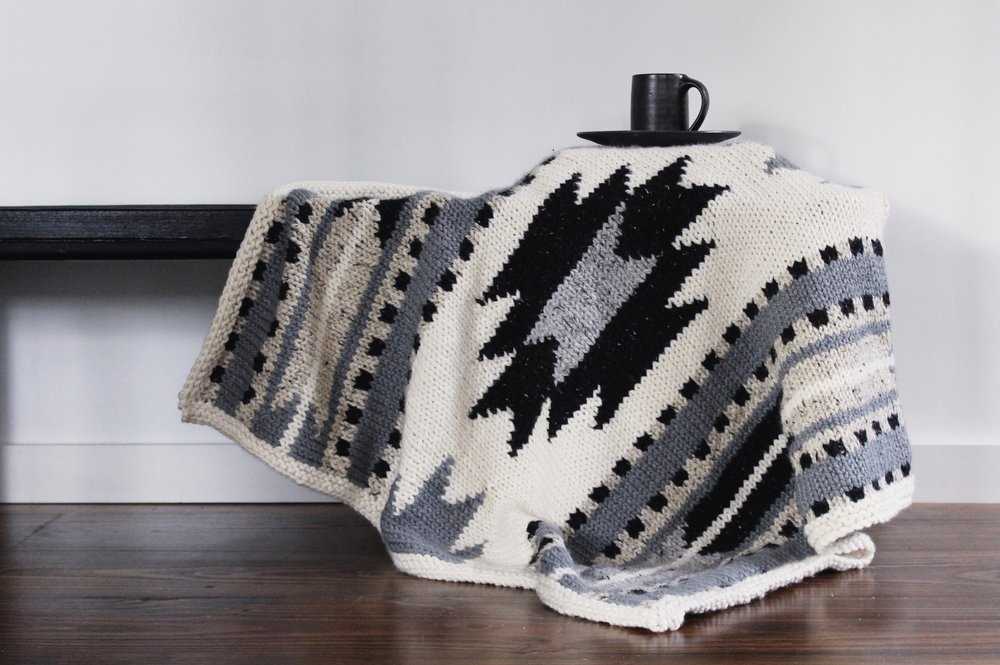
When it comes to knitting a lap blanket, adding different colors and creating stripes can greatly enhance the overall design and make it more visually appealing. Whether you want to create a bold and vibrant blanket or a more subtle and elegant look, changing colors can help achieve the desired effect.
One popular technique for adding stripes is to use the intarsia method. This involves knitting with different colors using separate balls or bobbins of yarn for each section. By following a color chart or pattern, you can easily switch between colors to create distinct stripes or patterns. Intarsia is particularly useful when you want to incorporate intricate designs or images into your lap blanket.
Another method for creating stripes is the stranded knitting technique, also known as Fair Isle knitting. This technique involves carrying two or more colors of yarn along the back of your work while knitting with one color at a time. By carefully managing the tension of the unused yarn, you can create beautiful, multicolored stripes. Fair Isle knitting is often used to create traditional patterns or geometric designs.
If you prefer a more random or organic look, you can also experiment with using variegated yarns. Variegated yarns are typically dyed with multiple colors, creating a self-striping effect as you knit. By using different variegated yarns or combining them with solid colors, you can achieve a unique and eye-catching pattern for your lap blanket.
Shaping the lap blanket with increases and decreases
When knitting a lap blanket, it is important to consider the overall shape and size of the finished piece. By incorporating increases and decreases into the knitting pattern, you can create a blanket that fits comfortably over the lap while providing ample coverage.
Increases: To add width to the blanket, increases can be made by working additional stitches into a row. Common types of increases include yarn overs, knit front and back (kfb), or make one (M1) stitches. These increases can be evenly distributed across the row to create a straight-edge or placed strategically to shape the blanket.
Decreases: Similarly, decreases are used to shape the blanket by reducing the number of stitches in a row. Popular decreases include knit two together (k2tog), slip slip knit (ssk), and slip slip slip knit (sssk). These decreases are often used on the edges of the blanket to create a tapered or curved shape.
When shaping the lap blanket, it is important to keep track of the number of stitches added or decreased in each row to ensure symmetry and balance. A stitch marker can be placed at the center point of the blanket to help guide the increases and decreases. Additionally, a stitch pattern that complements the shaping can be selected, such as a lace or cable pattern, to enhance the overall design of the blanket.
It is recommended to consult a knitting pattern that includes specific instructions for shaping a lap blanket, as the exact increases and decreases may vary depending on the desired outcome and the yarn weight being used.
Finishing off your lap blanket
Once you have completed knitting your lap blanket, there are a few steps you can take to give it a finished look and ensure its durability. Here are some tips to help you finish off your lap blanket:
Blocking:
Blocking is an essential step to give your lap blanket a professional finish and even out any uneven stitches. To block your lap blanket, soak it in lukewarm water and gently squeeze out the excess water. Lay the blanket flat on a clean towel and reshape it to the desired dimensions. Use rust-proof pins to secure the edges, and let it dry completely. This will help the blanket retain its shape and improve its overall appearance.
Weaving in ends:
Before you can consider your lap blanket complete, you need to weave in any loose ends of yarn. To do this, thread a tapestry needle with the loose end and weave it through the surrounding stitches, going back and forth a few times to secure it in place. Be sure to trim any excess yarn to give your blanket a neat and professional finish.
Finishing touches:
For an extra touch of elegance, you can add a decorative border to your lap blanket. This can be a simple garter stitch border or a more intricate pattern of your choice. Alternatively, you could attach a pom-pom trim or a crocheted edging. The choice is yours, and it can be a fun way to personalize your lap blanket and make it truly unique.
By following these steps, you can ensure that your lap blanket is finished to a high standard and will provide you with warmth and comfort for years to come.
Blocking and Washing Your Finished Lap Blanket
Once you have completed knitting your lap blanket, there are a few important steps to take to ensure that it looks its best. One of these steps is blocking the blanket. Blocking is the process of shaping and sizing your knitted piece by gently stretching and pinning it into place. This helps to even out any uneven stitches and gives the blanket a more polished appearance.
Blocking the Lap Blanket

To block your lap blanket, you will need a flat surface such as a table or a blocking board, along with rust-proof T-pins. Start by laying your blanket flat on the surface, making sure that it is smooth and free of any wrinkles. Gently stretch the blanket to the desired size, being careful not to pull too hard, as this can distort the stitches. Then, use the T-pins to secure the edges of the blanket, making sure that it stays in place. Allow the blanket to dry completely before unpinning it.
Note: Blocking is especially important if your lap blanket is made from a yarn that has a lot of bounce or memory, as it helps to relax the stitches and prevent them from bunching up.
Washing the Lap Blanket
After blocking, it is important to wash your lap blanket to remove any dirt or oils that may be on the fibers. Fill a sink or basin with lukewarm water and add a mild detergent specifically designed for delicate fabrics or wool. Gently agitate the water to create suds, then place the blanket in the water and press it down to fully submerge it. Let it soak for about 10 minutes, then drain the water and refill the sink with clean, lukewarm water to rinse the blanket. Repeat the rinsing process until the water runs clear.
Tip: Avoid wringing or twisting the blanket, as this can damage the fibers. Instead, gently squeeze out excess water and roll the blanket in a clean towel to remove remaining moisture.
Finally, lay the washed blanket flat on a clean, dry towel or on a blocking board to dry. Reshape the blanket if necessary, and allow it to air dry completely before using or storing it.
Adding a Decorative Border
Once you have completed knitting the main body of your lap blanket, you may want to add a decorative border to give it a finished look. There are several different types of borders you can choose from, depending on your skill level and the desired outcome.
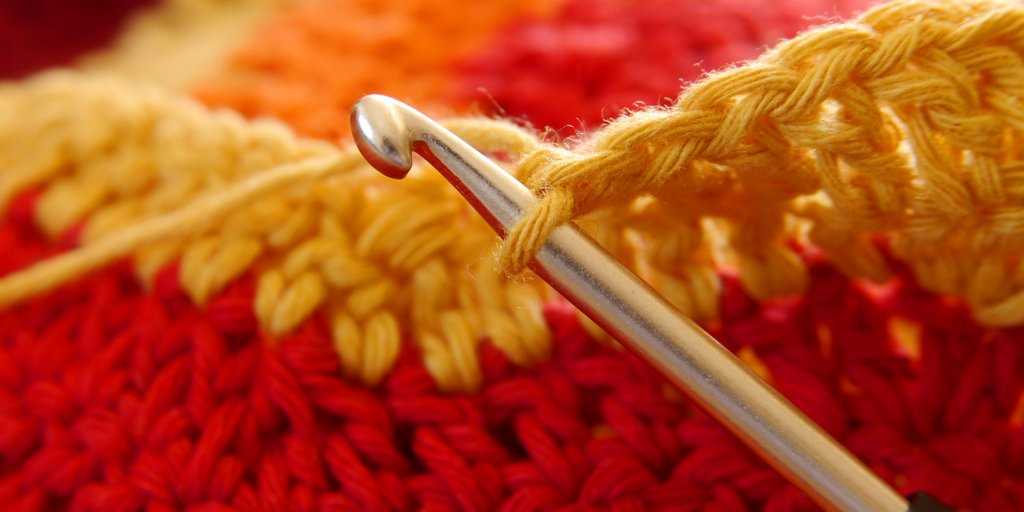
Crocheted Border: If you are comfortable with crochet, you can add a crocheted border to your lap blanket. This can be done using a simple single crochet stitch or a more intricate stitch pattern. You can choose a contrasting color to make the border stand out or use the same yarn as the main body for a cohesive look.
Knitted Ribbing: Another option for adding a decorative border is to knit ribbing. Ribbing adds texture and stretch to the edge of the blanket. You can choose a basic ribbing pattern, such as k2, p2, or get creative with different combinations of knit and purl stitches. Ribbing can be done in a contrasting color or the same color as the main body of the blanket.
Embroidered Border: For a more intricate and personalized touch, you can add an embroidered border to your lap blanket. This can be done using embroidery floss or yarn in different colors. You can create patterns, flowers, or any other design of your choice using various embroidery stitches. This option requires more time and skill, but the result can be truly unique and beautiful.
Whatever type of decorative border you choose, make sure to leave enough yarn at the end of your knitting to complete the border. You can also block the blanket before adding the border to ensure that it lays flat and the stitches are even. Finally, don’t forget to weave in any loose ends and give your lap blanket a final gentle wash and block before using or gifting it.
Final touches and customization options
After completing your lap blanket knitting pattern, there are a few final touches you can add to personalize and enhance the overall aesthetic. Consider exploring the following options:
Add decorative borders
One way to elevate the look of your lap blanket is to add a decorative border. You can choose a contrasting or complementary color of yarn and use simple stitch patterns, such as seed stitch or garter stitch, to create a visually appealing edge. Experiment with different border widths and textures to find the perfect style for your blanket.
Embroider or appliqué designs
If you want to add a unique touch to your lap blanket, consider embroidering or appliquéing designs onto the fabric. This can be done using a variety of techniques, such as cross-stitch, surface embroidery, or fabric cutouts. You can personalize the blanket by adding initials, names, or other meaningful symbols. Make sure to use embroidery floss or fabric that complements the colors of your blanket.
Add fringe or tassels
Another way to add texture and visual interest to your lap blanket is to attach fringe or tassels to the edges. This can be done using additional yarn or ribbon. Fringe can be made by tying individual strands of yarn to the edge of the blanket, while tassels can be created by wrapping yarn around a piece of cardboard or your fingers and securing it at one end.
Create a personalized label
To give your lap blanket a professional finish, consider attaching a personalized label. You can create a fabric label using a fabric marker or embroidery. Include your name, the date, and any other details you’d like to add. Attaching the label adds a special touch and makes your lap blanket feel like a unique, handmade item.
Summary
In conclusion, with these final touches and customization options, you can truly make your lap blanket your own. Whether it’s adding a decorative border, embroidering designs, attaching fringe or tassels, or adding a personalized label, these details can elevate the look and personal connection to your blanket. Take the time to explore different options and experiment with your creativity to create a lap blanket that is both functional and visually appealing. Happy knitting!