
A draft stopper is an essential tool for maintaining a warm and cozy home during the winter months. It can help to prevent cold drafts from seeping into your home through gaps under doors and windows. While there are many draft stoppers available for purchase, knitting your own can be a fun and rewarding project.
Knitting a draft stopper allows you to customize the size, color, and design to match your home decor. Plus, it’s a great way to use up leftover yarn from other projects. Whether you’re a beginner or an experienced knitter, this knitting pattern is simple and easy to follow.
To create your own draft stopper, you’ll need a few basic knitting supplies, including knitting needles, yarn, and a tapestry needle. The pattern consists of knitting a long, narrow tube that can be filled with materials such as rice or sand to provide weight and insulation. Once you’ve completed the knitting portion, simply sew up the ends and fill it with your chosen filling material.
Not only will knitting a draft stopper help to keep your home warm and energy-efficient, but it’s also a practical and stylish addition to your home decor. So grab your knitting needles and get started on this cozy project today!
Draft Stopper Knitting Pattern – Keep Your Home Cozy and Energy-Efficient
If you’re looking for a way to keep your home cozy and energy-efficient, a draft stopper is a great solution. Draft stoppers are long, narrow tubes filled with stuffing or weighted beads that are placed along the bottoms of doors and windows to block out drafts and keep heat or cool air from escaping. One of the best things about draft stoppers is that you can easily knit them yourself using a simple pattern.
To start knitting your own draft stopper, you’ll need a few basic supplies. These include knitting needles, a tape measure, yarn, and a filling material such as polyester stuffing or weighted beads. You can choose any color and type of yarn to match your home decor and personal preference. Once you have your supplies, you’re ready to begin knitting your draft stopper!
Step 1: Start by casting on the desired number of stitches on your knitting needles. The number of stitches will depend on the width you want for your draft stopper. A typical width is around 4 inches, so you may want to cast on around 10-12 stitches.
Step 2: Once you have cast on your stitches, begin knitting in your desired pattern. You can use a simple knit stitch throughout, or get creative and try different stitch patterns such as ribbing or seed stitch. Knit until your draft stopper reaches the desired length, typically around 30-36 inches.
Step 3: Once you have finished knitting, bind off your stitches. Cut the yarn, leaving a long tail for sewing the ends together. Fold your knitted piece in half, wrong sides together, and sew the ends together using a tapestry needle and the long tail of yarn.
Step 4: Fill your knitted tube with your chosen filling material. If you prefer a lighter draft stopper, use polyester stuffing. If you want a more weighted draft stopper, use weighted beads or a combination of stuffing and beads. Fill the tube until it is firm but still able to bend and conform to the shape of the door or window.
Step 5: Finally, sew up the open end of the draft stopper using the same method as before. Make sure to secure the stitches tightly to prevent the filling from escaping. Trim any excess yarn, and your draft stopper is ready to use!
By knitting your own draft stopper, you not only have a functional and effective way to keep your home cozy and energy-efficient, but you also have the opportunity to customize it to your liking. Whether you want a bright and colorful draft stopper or a subtle and neutral one, the possibilities are endless. So grab your knitting needles and start creating your very own draft stopper today!
Understanding the Importance of Draft Stoppers
When it comes to keeping our homes comfortable, it’s important to consider all the factors that can affect the temperature and energy efficiency. One often overlooked aspect is the presence of drafts, which can let in cold air during the winter months and warm air during the summer months. Draft stoppers are a simple but effective solution to this problem, helping to prevent drafts and maintain a more comfortable indoor environment.
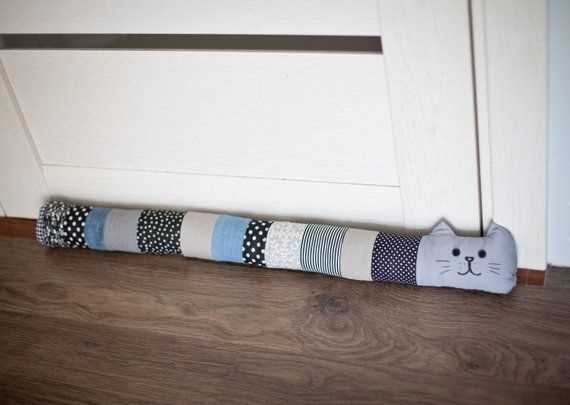
Draft stoppers, also known as door snakes or draft excluders, are long tubes made of fabric that are placed along the bottom of doors or windows where drafts commonly occur. They are typically filled with materials such as rice, beans, or polyester fiberfill to provide weight and insulation. By creating a barrier between the indoor and outdoor environments, draft stoppers help to prevent the flow of air and maintain a consistent temperature inside the home.
One of the main benefits of using draft stoppers is energy savings. When there are drafts in a home, the heating and cooling systems have to work harder to maintain a comfortable temperature, which can lead to increased energy consumption and higher utility bills. By using draft stoppers to seal off these drafts, homeowners can reduce their energy usage and save money in the long run.
Additionally, draft stoppers can also contribute to improved indoor air quality. When drafts are present, they can bring in dust, pollen, and other outdoor pollutants, which can negatively impact the health and well-being of the residents. By preventing drafts, draft stoppers help to keep the indoor air cleaner and healthier.
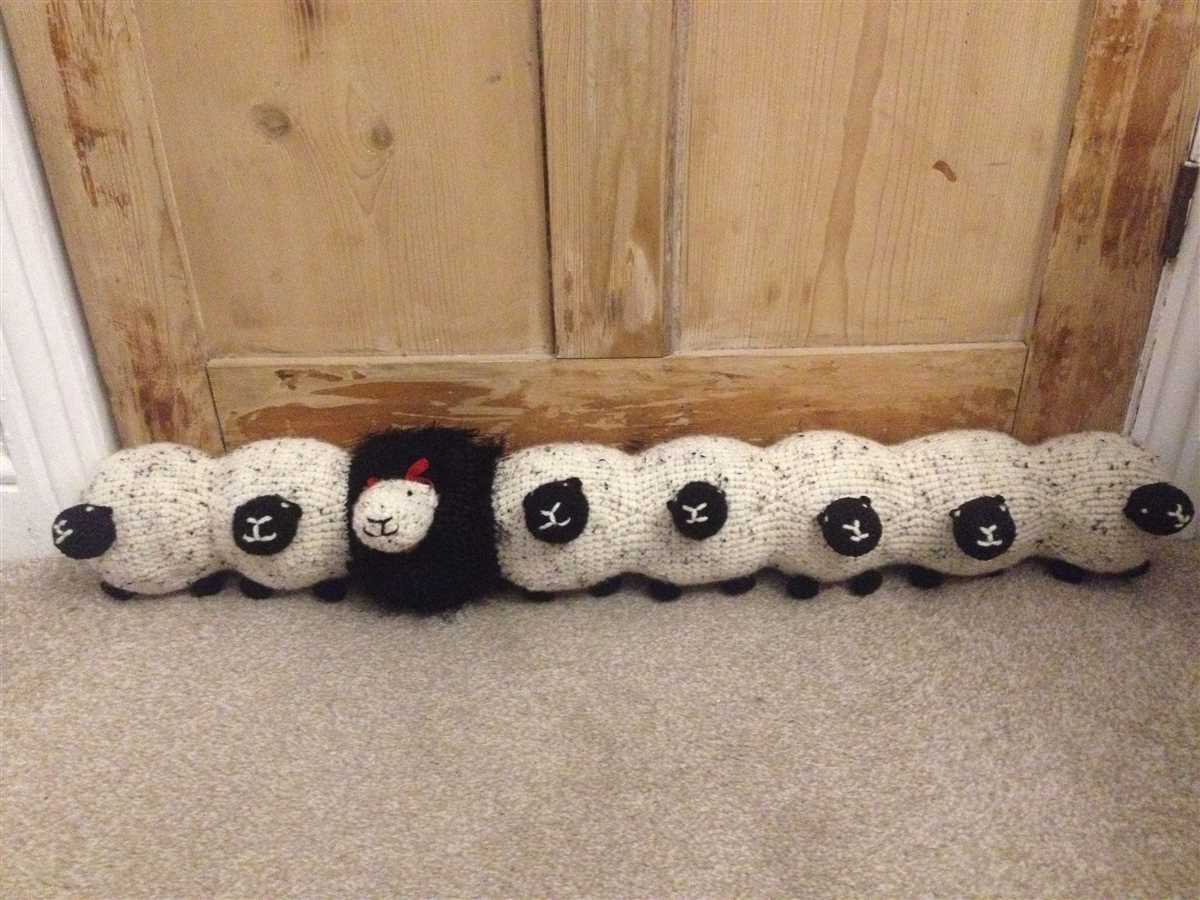
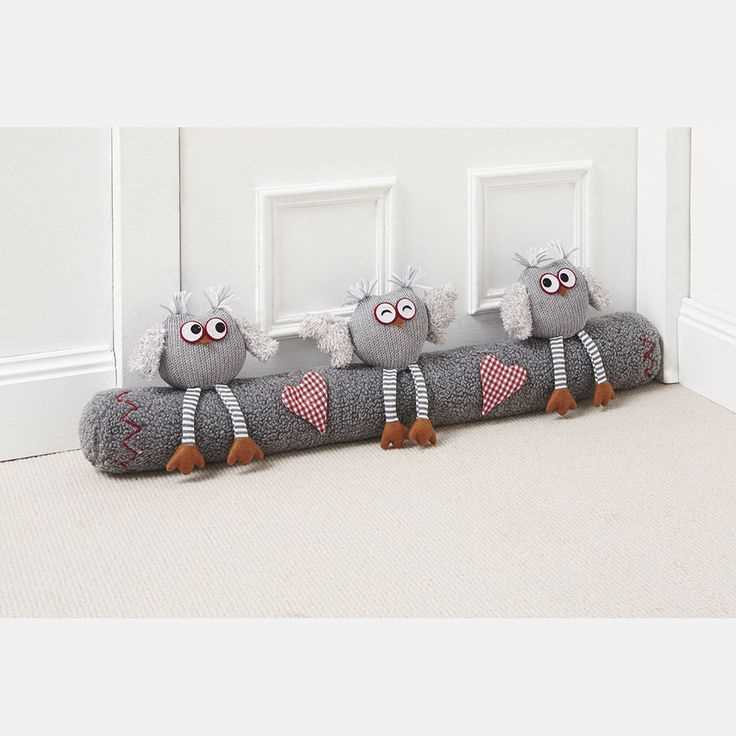
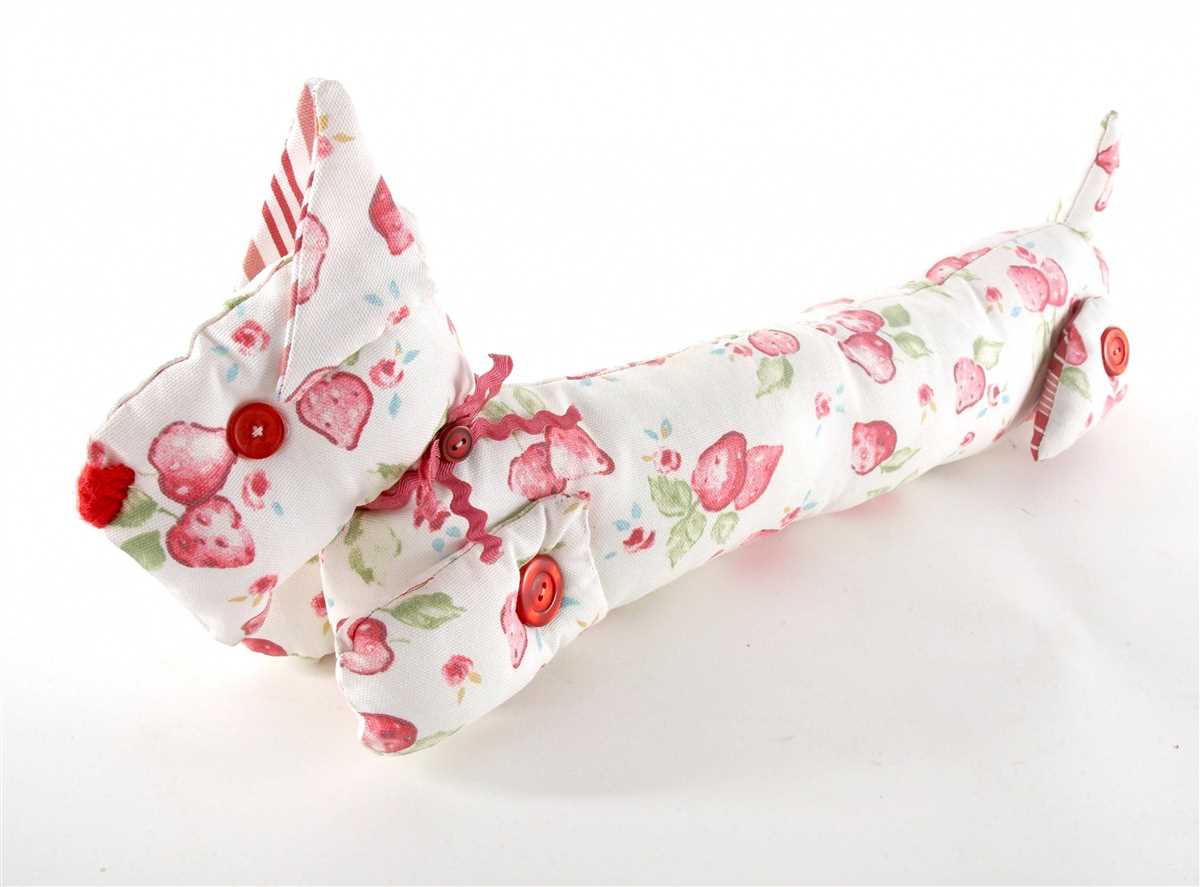
Not only are draft stoppers functional, but they can also be a stylish addition to the home. With a wide range of fabrics, colors, and patterns available, homeowners can choose a draft stopper that complements their interior decor. Whether it’s a knitted draft stopper with a cozy texture or a decorative fabric one that adds a pop of color, there are options to suit every style and preference.
In conclusion, draft stoppers are an important accessory for maintaining a comfortable, energy-efficient, and healthy home. With their ability to prevent drafts, save energy, improve indoor air quality, and add a touch of style, they are a practical and versatile solution that every homeowner should consider.
Choosing the Right Yarn for Your Draft Stopper Knitting Project
When it comes to knitting a draft stopper, choosing the right yarn is essential to ensure longevity, effectiveness, and aesthetics of the final product. There are several important factors to consider before selecting the yarn for your project.
Type of Yarn: The type of yarn you choose will greatly affect the characteristics of your draft stopper. It is recommended to use a sturdy and durable yarn that can withstand the wear and tear of being placed near doors or windows. Wool or acrylic yarns are popular choices due to their durability and insulating properties.
Weight of Yarn: The weight of the yarn will determine the thickness and heaviness of the draft stopper. Bulky or super bulky weight yarns are often preferred for this type of project as they provide a thicker barrier against drafts. However, if you are aiming for a more lightweight and flexible draft stopper, you can opt for a worsted or sport weight yarn.
Color and Aesthetics: While the function of a draft stopper is its main purpose, considering the color and aesthetics of the yarn is also important. You may want to choose a yarn color that complements the interior of your home or matches your existing decor. Additionally, variegated or textured yarns can add a unique and visually appealing touch to your draft stopper.
Yardage and Quantity: Before starting your project, it is essential to calculate the required yardage and quantity of yarn. This will depend on the length and circumference of your draft stopper. It is advisable to have extra yarn on hand to avoid running out mid-project and to ensure consistent tension throughout.
Price and Availability: Price and availability are also factors to consider when selecting yarn for your draft stopper. You may want to compare prices and check the availability of the yarn in your local stores or online. It is important to choose a yarn that fits within your budget while still meeting the other criteria mentioned above.
Overall, choosing the right yarn for your draft stopper knitting project is crucial for achieving the desired results. By considering the type, weight, color, yardage, and availability, you can ensure that your draft stopper is not only functional but also visually pleasing and long-lasting.
Essential Knitting Tools and Supplies
Knitting can be a relaxing and fulfilling hobby that allows you to create beautiful and functional items with just a pair of needles and some yarn. To get started, you will need a few essential knitting tools and supplies.
1. Knitting Needles:
The most important tool in knitting is, of course, the knitting needles. There are several types of knitting needles available, including straight needles, circular needles, and double-pointed needles. The type of needles you choose will depend on the project you are working on and your personal knitting preferences. It’s always a good idea to have a variety of needle sizes on hand to accommodate different yarn weights and stitch patterns.
2. Yarn:
Yarn is another essential supply for knitting. There are countless types of yarn available, made from different fibers and in various colors and textures. When choosing yarn for your project, consider the desired outcome and the recommended yarn weight for the pattern you’re knitting. It’s also important to ensure that you have enough yarn to complete your project, as running out in the middle can be frustrating.
3. Stitch Markers:
Stitch markers are small, removable rings or clips that help you keep track of your stitches and pattern repeats. They are particularly useful when working on complex stitch patterns, cables, or lace designs. Stitch markers can be placed on the needle or directly on your knitting to mark specific points or sections. It’s helpful to have a variety of stitch markers in different sizes and colors to accommodate different stitch sizes and to easily identify different markers in your work.
4. Scissors:
Having a pair of sharp scissors or thread cutters is essential for knitting. You’ll need them to cut your yarn when starting a new project, weaving in loose ends, or correcting mistakes. It’s best to have a dedicated pair of scissors for your knitting to avoid using dull or dirty scissors that could damage your yarn.
5. Tapestry Needle:
A tapestry needle, also known as a yarn needle or darning needle, is used for finishing and sewing pieces together. It has a large eye that can accommodate yarn, making it easy to weave in loose ends or sew seams. A tapestry needle with a blunt tip is recommended to prevent accidental piercing of your knitting.
These are just a few of the essential knitting tools and supplies that every knitter should have. As you continue knitting, you may find that you’ll need additional tools and accessories to enhance your knitting experience. Experiment with different tools and find what works best for you as you embark on your knitting journey. Happy knitting!
Getting Started: Step-by-Step Instructions for Casting On
Before you can start knitting your draft stopper, you’ll need to cast on your stitches. Casting on is the process of creating the first row of stitches on your knitting needle. This is an essential step that will determine the size and shape of your project, so it’s important to do it correctly.
To cast on, you’ll first need to select the appropriate size of knitting needles for your project. For a draft stopper, a medium-sized needle, such as a US size 8 (5mm), is usually a good choice. Make sure the needle is long enough to hold all of your stitches comfortably.
Once you have your needles ready, you can begin casting on. There are several different methods of casting on, but the long-tail cast on is a popular choice for many knitters. To do the long-tail cast on, start by leaving a long tail of yarn, approximately three times the width of your finished project. Hold the yarn in your right hand, and place the needle in your left hand behind the yarn, with the point of the needle facing towards you.
Next, bring the needle under the yarn, from front to back, and then over the yarn, creating a loop on the needle. Repeat this process, bringing the needle under and over the yarn, until you have cast on the desired number of stitches. The number of stitches you need will depend on the width of your draft stopper.
Once you have cast on all of your stitches, you can continue with the next step of your knitting pattern. Casting on is a skill that may take some practice to master, so don’t be discouraged if it doesn’t come easily at first. Keep trying, and soon you’ll be ready to begin knitting your draft stopper!
Knitting Techniques for Creating a Sturdy Draft Stopper
When it comes to creating a sturdy draft stopper, there are several knitting techniques that you can utilize to ensure its durability and effectiveness. By following these techniques, you can create a draft stopper that not only keeps cold air out but also adds a decorative touch to your home.
1. Choosing the Right Yarn: The first step in creating a sturdy draft stopper is selecting the right yarn. Opt for a thick and sturdy yarn that can withstand wear and tear, such as a bulky weight or super bulky weight yarn. This will help ensure that your draft stopper holds its shape and provides a strong barrier against drafts.
2. Using a Tight Gauge: Knitting your draft stopper with a tight gauge is essential for creating a sturdy and dense fabric. A tighter gauge will make the draft stopper more durable and resistant to stretching. Be sure to choose knitting needles that are appropriate for your yarn weight to achieve the desired gauge.
3. Incorporating Reinforcement: Adding reinforcement to your draft stopper can also enhance its sturdiness. You can achieve this by knitting a double layer or by inserting a pipe insulation or foam core inside. These additional layers will provide extra insulation and structural support.
4. Seaming and Finishing: Proper seaming and finishing techniques are crucial for ensuring the longevity of your draft stopper. Use a strong and durable yarn for seaming, such as a cotton or nylon thread, to ensure that the seams hold up well over time. Additionally, securely weave in all loose ends to prevent unraveling.
5. Embellishing and Personalizing: Finally, don’t forget to add your personal touch to your draft stopper! You can incorporate decorative elements such as buttons, embroidery, or pompoms to make it more visually appealing. Just make sure these embellishments are securely attached to maintain the integrity of the draft stopper.
By utilizing these knitting techniques, you can create a draft stopper that not only serves its purpose of keeping drafts at bay but also withstands daily use. Whether you’re a beginner knitter or an experienced one, these techniques can help you create a sturdy and reliable draft stopper for your home.
Adding Decorative Elements: Embellishing Your Draft Stopper
1. Knitted Patterns: One way to add some visual interest to your draft stopper is to incorporate different knitting patterns. You can experiment with different types of stitches, such as cables, bobbles, or lace, to create a textured and decorative design. These patterns can be incorporated throughout the entire length of the draft stopper or used as accents in specific sections.
2. Tassels and Pom Poms: Another way to enhance the appearance of your draft stopper is to add tassels or pom poms. These playful and decorative elements can be knitted separately and then attached to the ends of the draft stopper. You can choose yarns in contrasting colors or opt for a monochromatic look depending on your personal style and the overall aesthetic of your home.
3. Buttons and Beads: Buttons and beads can be used to add a touch of elegance and charm to your draft stopper. Simply sew them onto the knitted fabric in a pattern or arrangement of your choice. Be creative with your choices – use buttons in different shapes, sizes, and colors to create a unique and personalized design.
4. Embroidery: Embroidery is another option for embellishing your draft stopper. You can use embroidery floss or yarn to add decorative stitches, patterns, or even personalized monograms. This technique allows you to showcase your creativity and add a personal touch to your draft stopper.
5. Personalized Labels: For a truly unique and custom touch, consider adding personalized labels to your draft stopper. You can create labels with your initials, family name, or any other design or text that holds meaning to you. Sew or attach the labels onto the fabric to make your draft stopper even more special and personalized.
Remember, the key to embellishing your draft stopper is to let your creativity shine. Explore different materials, colors, and techniques to create a unique and decorative piece that not only keeps the drafts out but also complements your home decor. Have fun with the process and enjoy the satisfaction of creating something beautiful with your knitting skills.
Design Inspiration: Different Patterns and Styles
Knitting a draft stopper can not only be a functional way to keep out cold air, but also a chance to showcase your creativity and personal style. There are countless patterns and styles to choose from, allowing you to create a draft stopper that perfectly complements your home decor.
One popular design inspiration for a draft stopper is the classic cable knit pattern. This pattern creates a beautiful texture and adds a touch of elegance to any room. The interwoven cables give the draft stopper a sophisticated look, making it an eye-catching piece even when not in use.
Another design option is the Fair Isle pattern. This pattern is characterized by colorful geometric motifs and intricate patterns. The combination of different colors and patterns creates a visually appealing design that can add a pop of color and personality to your space.
If you prefer a more minimalist look, you can opt for a simple ribbed pattern. The ribbed texture adds visual interest to the draft stopper without being too busy or overpowering. This pattern is versatile and can easily blend in with a variety of interior styles.
If you’re feeling adventurous and want to showcase your artistic side, you can try incorporating different stitches and techniques into your draft stopper. For example, you can experiment with lace knitting to create an intricate, delicate design. Alternatively, you can combine different stitch patterns, such as seed stitch or basketweave, to create a unique and textured look.
- When designing your draft stopper, consider the overall aesthetic of your space.
- Think about the color scheme and choose yarn colors that complement your existing decor.
- Take into account the size of the door or window where the draft stopper will be placed, and adjust the pattern accordingly.
- Don’t be afraid to get creative and experiment with different patterns and stitches.
- Remember to consider the functionality of the draft stopper as well. Make sure it is thick enough to effectively block drafts and keep out cold air.
By exploring different patterns and styles, you can create a draft stopper that not only serves its purpose but also adds a touch of warmth and personal style to your home.
Troubleshooting Common Knitting Issues
Knitting is a craft that can be both relaxing and frustrating. While the repetitive motions can help to soothe the mind, there are times when things don’t go as planned. Whether you’re a beginner or an experienced knitter, it’s important to know how to troubleshoot common knitting issues to avoid frustration and achieve the desired results.
1. Tension Problems
One of the most common knitting issues is tension problems. Tension refers to the evenness and consistency of your knitting stitches. If your tension is too tight, your fabric may be stiff and difficult to work with. On the other hand, if your tension is too loose, your fabric may be floppy and lack structure. To troubleshoot this issue, try adjusting the way you hold your knitting needles and the tension of your yarn. Practice can also help improve your tension over time.
2. Dropped Stitches
Dropped stitches can be a frustrating and common problem, especially for beginners. When a stitch drops, it can cause a hole or unravel the fabric if not fixed promptly. To fix a dropped stitch, carefully insert a crochet hook or knitting needle into the dropped stitch from the front or back, depending on the stitch orientation. Then, gently lift the dropped stitch and place it back onto the needle in the correct orientation. Make sure to tighten the stitch to prevent any gaps in your fabric.
3. Uneven Gauge
Gauge refers to the number of stitches and rows per inch in your knitting. An uneven gauge can cause your finished project to be too small or too large, even if you followed the pattern correctly. To troubleshoot this issue, it’s important to check your gauge before starting a project and make adjustments if necessary. Use the recommended needle size and yarn weight to achieve the correct gauge. If you’re struggling to match the gauge, try changing to a different needle size or adjusting your tension.
4. Twisted Stitches
Twisted stitches can occur when knitting in the round or when working certain stitch patterns. They can create an uneven or distorted look in your fabric. To fix twisted stitches, carefully unravel the affected stitches to the mistake and re-knit them correctly. It can be helpful to use a crochet hook to pick up the stitches and place them back on the correct needle position. Pay close attention to the way the stitches are crossed or twisted to avoid making the same mistake again.
5. Yarn Tangles
Yarn tangles can slow down your knitting progress and be a source of frustration. They can occur when working with multiple strands of yarn or when using yarn that easily splits. To prevent yarn tangles, make sure to unwind and separate your yarn strands before starting your project. If a tangle occurs, gently untangle the yarn by pulling it apart, being careful not to create more knots. It can also be helpful to use a yarn bowl or yarn guide to keep your yarn organized and prevent tangling.
By familiarizing yourself with these common knitting issues and their solutions, you’ll be better equipped to troubleshoot and fix problems that may arise during your knitting projects. Remember, practice and patience are key to becoming a skilled knitter. Happy knitting!
Customizing Your Draft Stopper to Fit Different Door Sizes
A draft stopper is a useful accessory to have in your home, as it helps to keep cold drafts from coming in under your doors. While there are many draft stoppers available for purchase, you can easily customize your own to fit different door sizes by following a knitting pattern.
When choosing a knitting pattern for your draft stopper, look for one that includes instructions for adjusting the length to fit your specific door. This will ensure that your draft stopper is the perfect size and will effectively block any drafts from entering your home.
To customize your draft stopper for different door sizes, you will need to determine the length of the door you are making it for. Measure the bottom of the door and add a few inches to account for any gaps. This will give you the length you need for your draft stopper.
Once you have the length, you can adjust the pattern to fit. If the pattern calls for a specific number of stitches, you can increase or decrease the number of stitches to match the width of your door. Similarly, if the pattern calls for a specific number of rows, you can adjust the number of rows to match the length of your door.
By customizing your draft stopper, you can ensure that it fits perfectly and provides maximum draft protection. Plus, knitting your own draft stopper allows you to choose the colors and yarn types that best match your home decor. So grab your knitting needles and get ready to create a draft stopper that is as functional as it is stylish!
Practical Tips for Maintaining Your Knitted Draft Stopper
Knitted draft stoppers are a great way to keep the cold air out and the warm air in during the winter months. However, like any other knitted item, they require some care and maintenance to ensure their longevity. Here are some practical tips to help you keep your draft stopper in good condition:
1. Regularly wash your draft stopper
Draft stoppers can accumulate dust, dirt, and pet hair over time. To keep them clean and fresh, it’s important to wash them regularly. Follow the care instructions for the specific yarn you used and make sure to use a gentle cycle and mild detergent. Avoid wringing or twisting the draft stopper to prevent stretching or misshaping.
2. Repair any loose stitches
With use, it’s common for some stitches to become loose or even unravel. To prevent further unraveling, it’s important to repair any loose stitches as soon as you notice them. Use a crochet hook or a tapestry needle to carefully secure the loose stitch back in place. This will help maintain the integrity of your draft stopper and ensure it continues to function effectively.
3. Store your draft stopper properly
When not in use, it’s important to store your draft stopper in a safe and clean place. Avoid storing it in a damp or humid environment, as this can promote mold and mildew growth. It’s also a good idea to keep it away from direct sunlight to prevent fading or discoloration. Fold or roll your draft stopper neatly and store it in a sealed bag or container to protect it from dust and insects.
4. Rotate your draft stopper
Over time, the weight of your draft stopper can cause it to flatten or lose its shape. To prevent this, it’s a good idea to periodically rotate your draft stopper. Simply flip it over or rotate it 180 degrees to distribute the weight more evenly. This will help maintain its effectiveness in blocking drafts and keep it looking nice and even.
By following these practical tips, you can ensure that your knitted draft stopper remains in good condition for years to come. With proper care and maintenance, it will continue to serve its purpose and keep your home cozy and insulated during the colder months.
Creative Ways to Repurpose and Upcycle Materials for Draft Stoppers
When it comes to draft stoppers, there are numerous creative ways to repurpose and upcycle materials to create unique and functional items. Instead of buying a generic draft stopper, why not take advantage of unused or old materials lying around your home? By repurposing these materials, you can create draft stoppers that not only keep your home warm but also add a touch of personality to your space.
Old Sweaters: One of the best materials to repurpose for draft stoppers is old sweaters. Cut off the sleeves and sew the ends shut to create long tubes. You can fill these tubes with rice, dried beans, or even sand to provide weight and help block out drafts. The softness of the sweater material also adds an extra layer of insulation.
Leftover Fabrics: If you have leftover fabrics from previous sewing projects, they can be transformed into draft stoppers. Cut the fabric into long strips, fold them in half, and sew them together, leaving one end open. Fill the fabric tubes with a filling material like dried beans, lentils, or rice, and then sew the open end shut. You can experiment with different patterns and colors to create a unique and visually appealing draft stopper.
Plastic Bags: Plastic bags can also be repurposed into draft stoppers. Collect a bunch of plastic bags and stuff them inside an old pillowcase or fabric tube. The flexibility of the plastic bags allows them to conform to different door or window sizes, effectively blocking out drafts. This method is simple, cost-effective, and helps to reduce waste by reusing plastic bags.
Denim Jeans: Old denim jeans that are no longer wearable can find a new life as draft stoppers. Cut off the legs and sew one end closed. Fill the denim tube with a filling material of your choice, such as dried beans, rice, or kitty litter. Sew the other end shut, and you have a sturdy and durable draft stopper that can be used for many years.
Recycled Vinyl: If you have any old vinyl banners or signs lying around, they can be repurposed into draft stoppers. Cut the vinyl into long strips, sew them together, and fill them with a filling material like sand or rice. The waterproof nature of vinyl makes it ideal for draft stoppers placed near entryways or windows that may be exposed to moisture.
By repurposing and upcycling materials, you can create unique and eco-friendly draft stoppers that not only serve a practical purpose but also add character to your home. Get creative with your materials and experiment with different designs and patterns to make a personalized draft stopper that fits your style and keeps your space cozy.
Sharing Your Finished Projects: Showcasing Your Knitting Skills
After completing your draft stopper knitting project, you may be excited to share your finished creation with others. Showcasing your knitting skills not only allows you to exhibit your talent and dedication, but it also inspires and motivates others who are interested in the craft. Here are a few ways you can share your finished projects:
Social Media Platforms
With the widespread presence of social media platforms, sharing your knitting projects has become easier than ever. You can create posts on Instagram, Facebook, or Twitter to display photos of your finished draft stopper. Don’t forget to use relevant hashtags, such as #knitting, #handmade, or #crafts, to reach a wider audience and connect with fellow knitters.
You can also join knitting-related groups or communities on social media platforms, where you can showcase your knitting skills, receive feedback, and engage in discussions with like-minded individuals. These groups often provide a supportive and encouraging environment to share your achievements.
Personal Blog or Website
If you enjoy writing about your knitting journey, consider starting a personal blog or website. This platform allows you to document your projects, share knitting patterns, and provide tutorials or tips for others who want to learn. You can include high-quality photos of your finished draft stopper and provide detailed information about the pattern, materials used, and any modifications you made.
Gifts and Donations
Another way to showcase your knitting skills is by gifting your finished projects to friends, family, or charitable organizations. Your loved ones will appreciate the handcrafted item, and it serves as a conversation starter to discuss your knitting hobby. Donating your knitted items to organizations in need can also make a positive impact on the community and help those who are less fortunate.
Remember, sharing your finished knitting projects is about celebrating your achievements, connecting with others, and inspiring fellow knitters. It’s an opportunity to showcase your creativity and passion for the craft. So, don’t be shy and share your beautiful draft stopper with the world!