
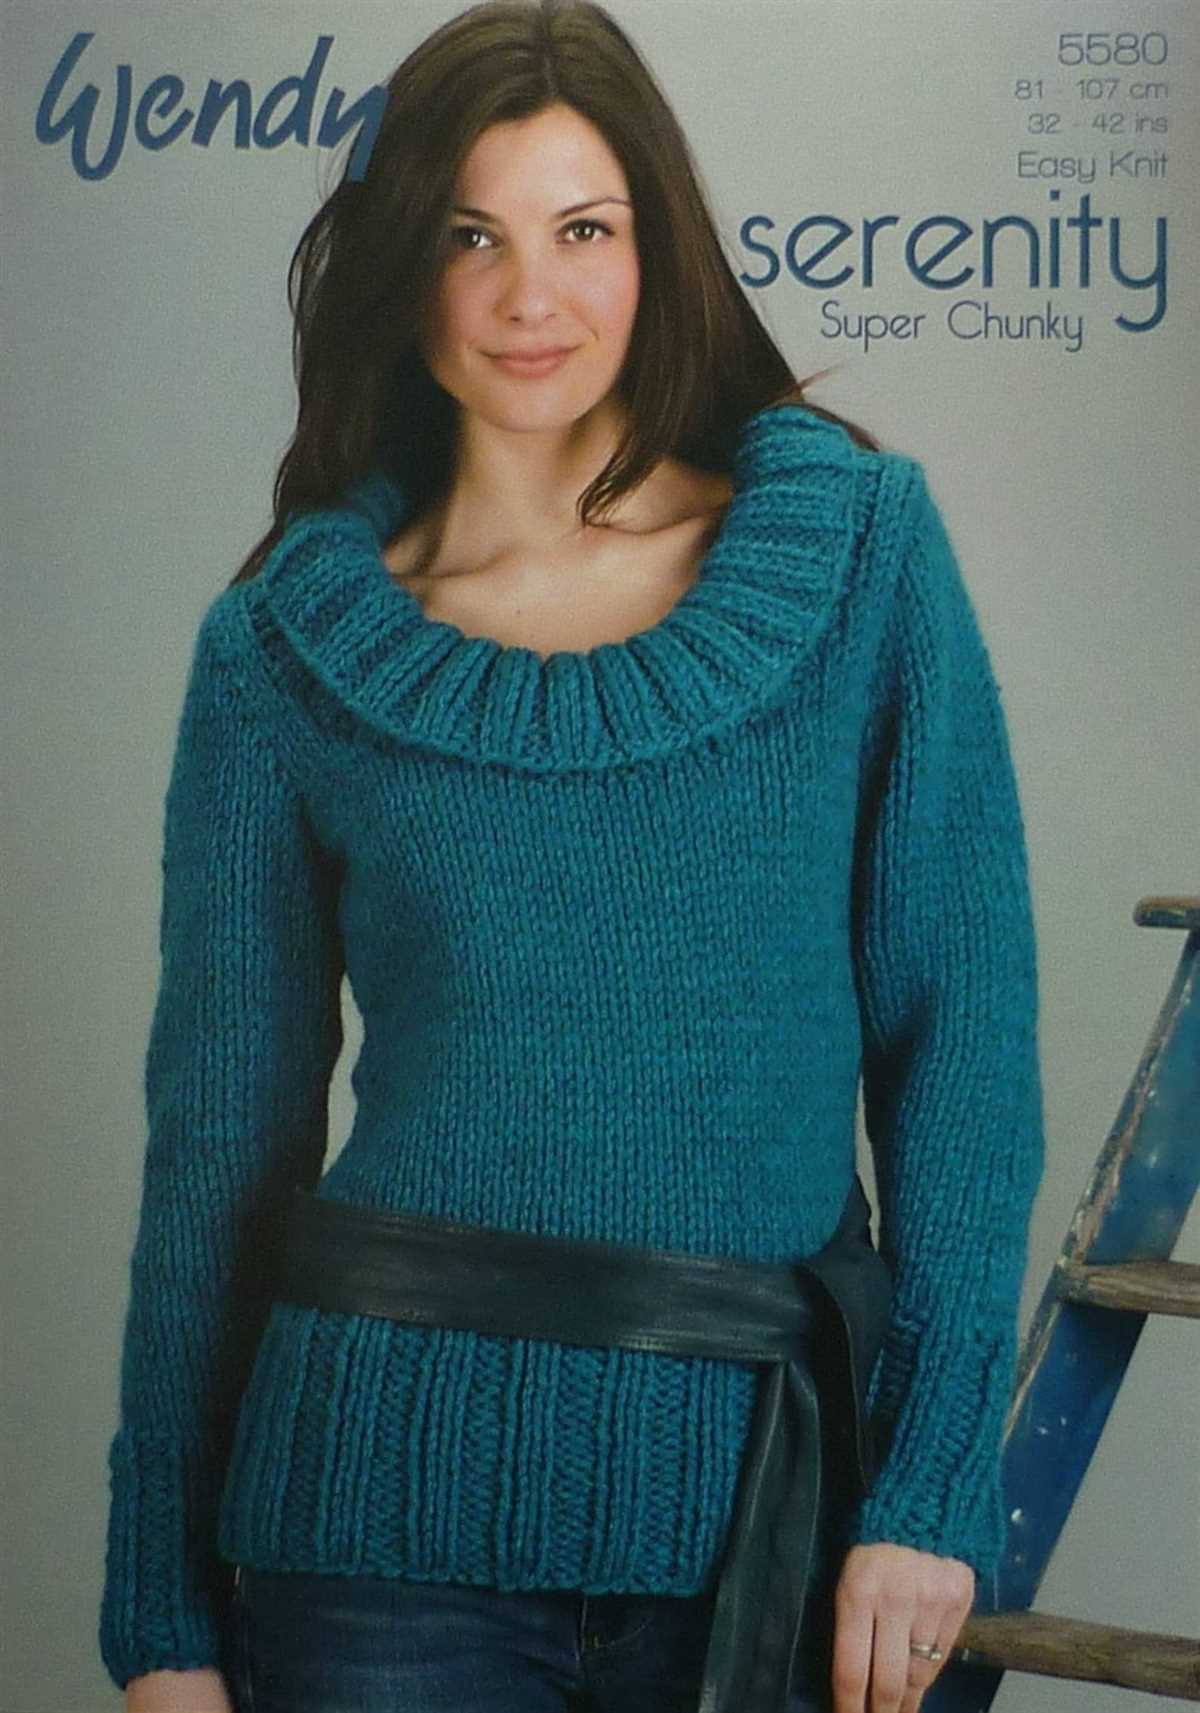
A cowl neck sweater is a timeless and versatile wardrobe staple that every knitter should have in their collection. This cozy and stylish garment is perfect for chilly weather and can be dressed up or down for any occasion. Whether you’re a beginner or an experienced knitter, this knitting pattern will guide you through the process of creating your own beautiful cowl neck sweater.
The cowl neck sweater features a unique and trendy neckline that adds a touch of elegance to any outfit. It is designed with a loose and relaxed fit, making it super comfortable to wear. The pattern includes instructions for various sizes, so you can create the perfect fit for yourself or someone else.
Knitting your own cowl neck sweater allows you to customize it to your liking. You can choose your favorite yarn colors and textures, creating a truly one-of-a-kind piece. The pattern also allows for customization in terms of sleeve length and overall length, so you can make it exactly how you want it.
Whether you’re a knitting enthusiast looking for your next project or someone who wants to try their hand at knitting for the first time, this knitting pattern cowl neck sweater is a great choice. Get your knitting needles ready and start creating your own cozy and stylish cowl neck sweater today!
Choosing the right yarn and needles

When it comes to knitting a cowl neck sweater, choosing the right yarn and needles is essential to ensure a successful and satisfying knitting experience. The type of yarn you select will greatly influence the final look and feel of the sweater, while the size of the needles will determine the gauge and overall fit of the garment.
Yarn: When choosing yarn for a cowl neck sweater, consider the desired texture, warmth, and drape of the finished garment. Different fibers, such as wool, cotton, or acrylic, will result in different qualities. For a cozy and warm sweater, opt for a thick wool yarn. If you prefer a lighter and breathable option, cotton or a blend of fibers might be a better choice. It’s also important to consider the color and pattern of the yarn, as they can greatly enhance the overall design of your sweater.
Needles: The size of the needles you use will depend on the gauge specified in the knitting pattern and the desired fit of your sweater. Most cowl neck sweaters are knit with circular needles to accommodate the large number of stitches required. The length of the circular needles should be long enough to hold all the stitches comfortably. You may also need double-pointed needles or a set of interchangeable needles for knitting the sleeves or other smaller sections of the sweater. Make sure to check the recommended needle size in the pattern and use a needle gauge to ensure you are achieving the correct gauge and tension.
In conclusion, selecting the right yarn and needles for your cowl neck sweater project is crucial for achieving the desired texture, fit, and overall aesthetic. Consider the properties of different yarn fibers and choose a color or pattern that complements the design. Pay attention to the recommended needle size and use the appropriate type of needles for each section of the sweater. By carefully choosing your materials, you can create a beautiful and comfortable cowl neck sweater that you will love to wear.
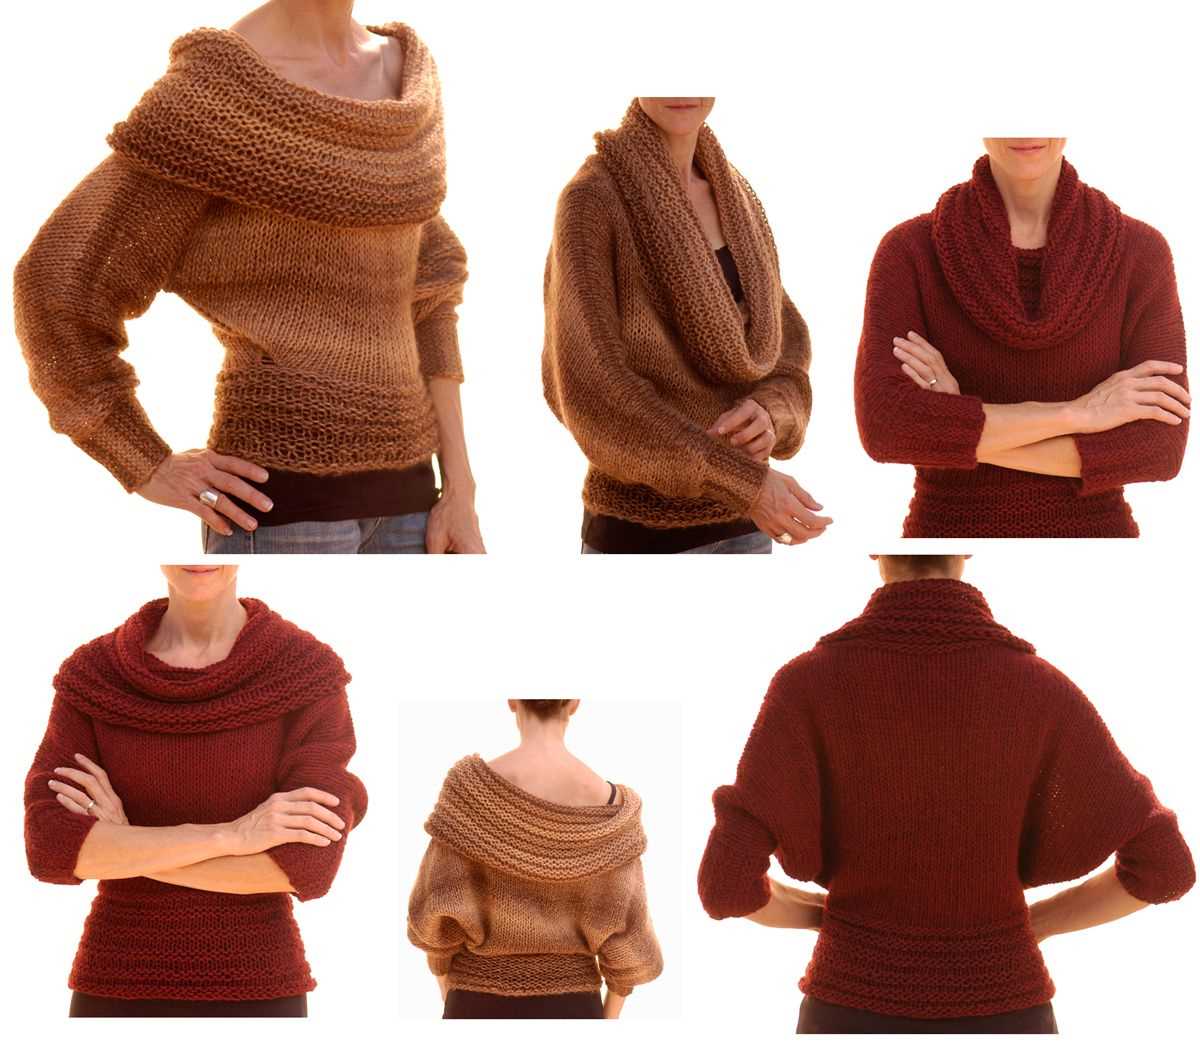
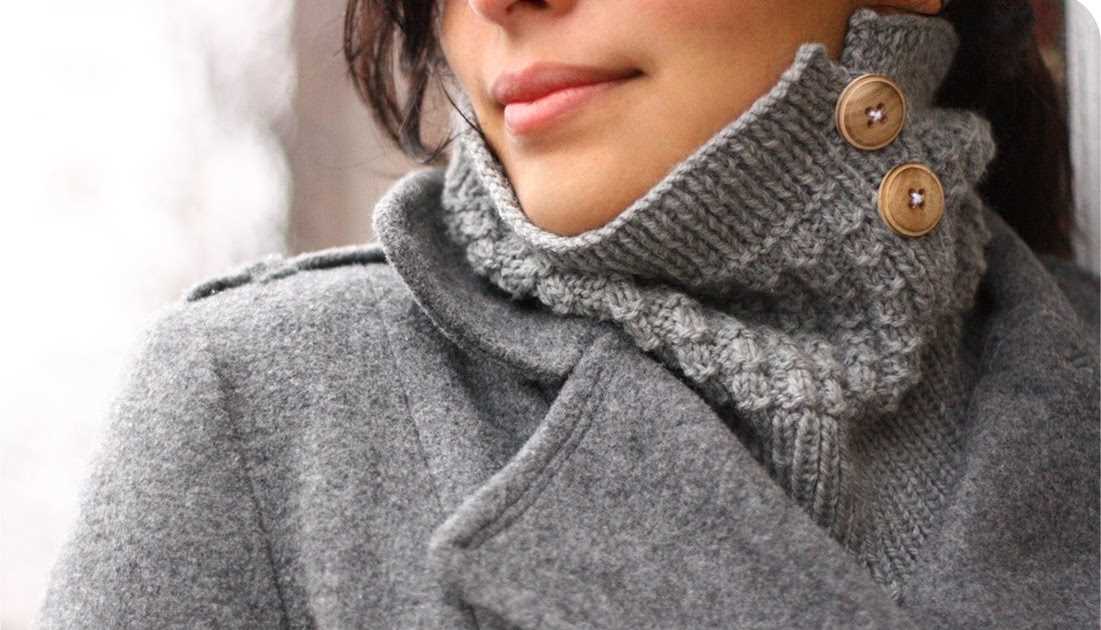
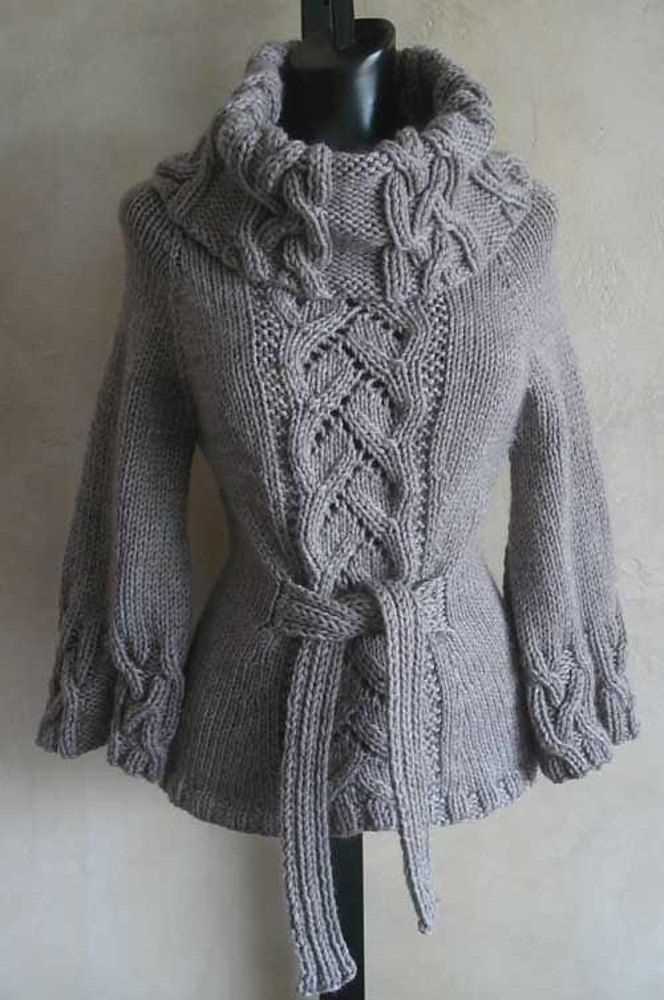
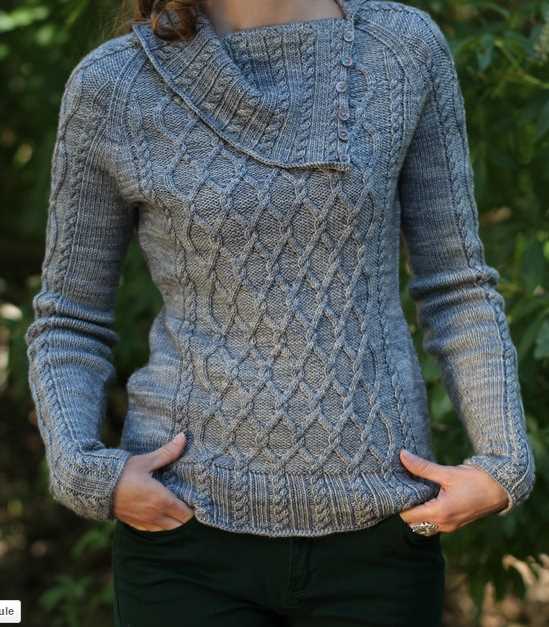
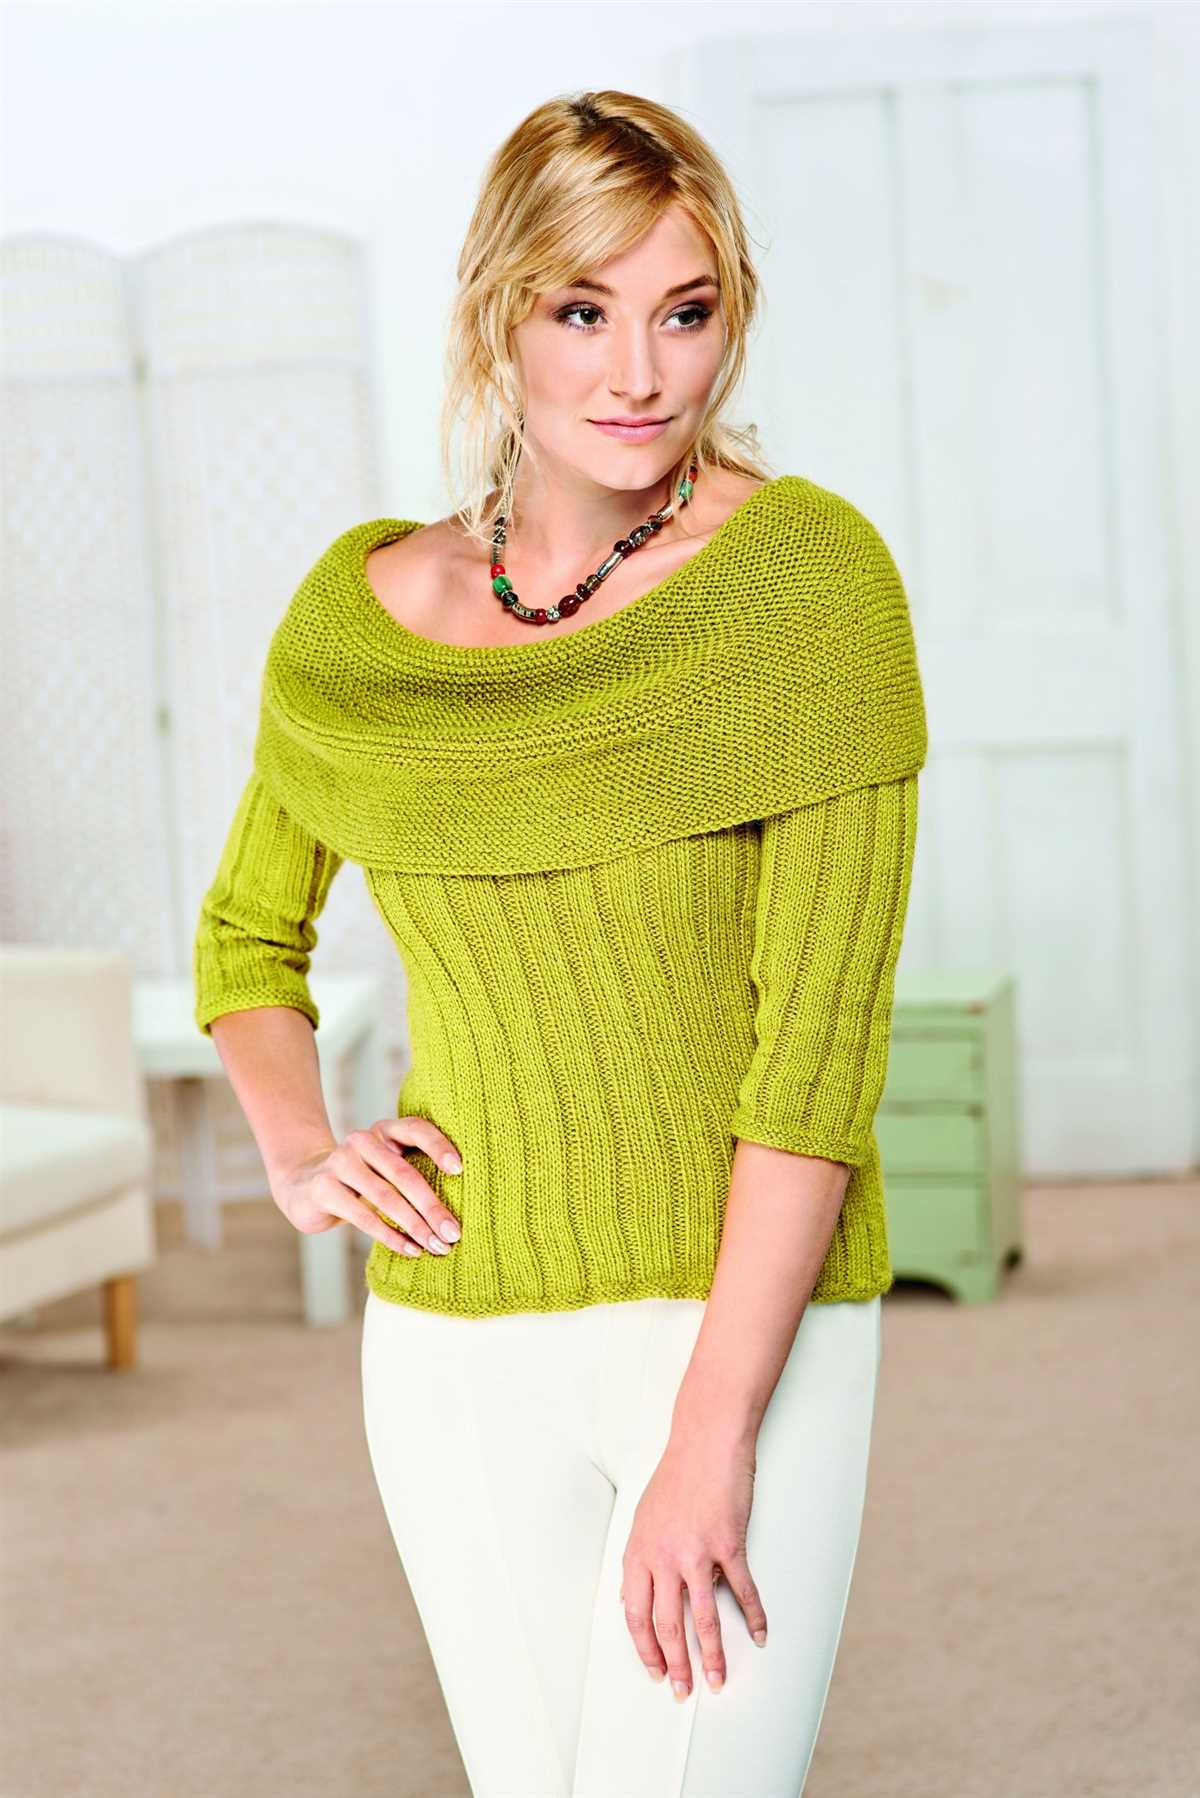
Understanding the cowl neck design
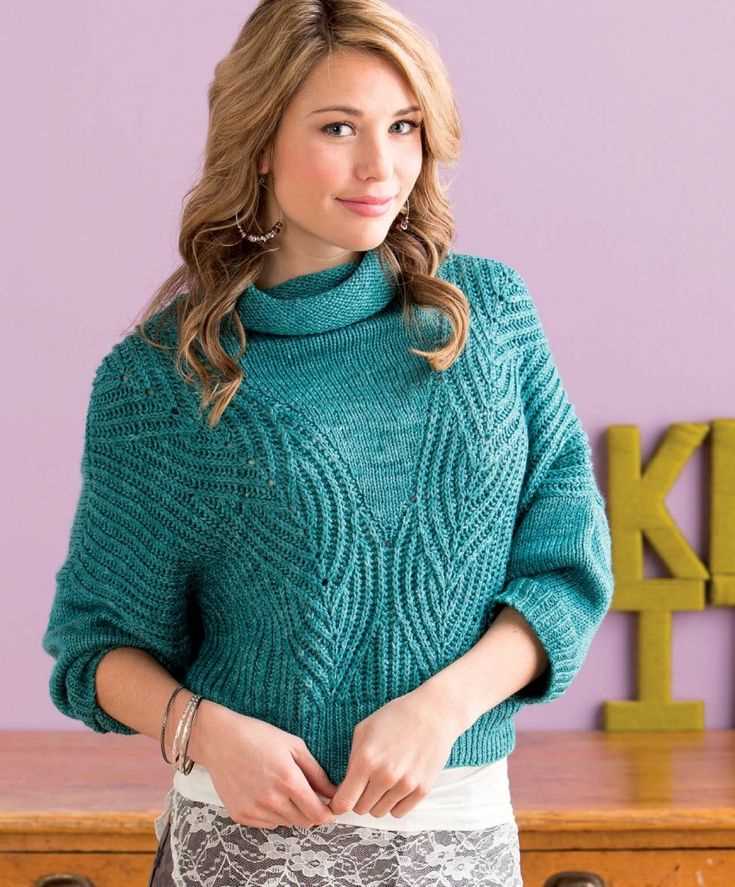
The cowl neck design is a popular choice for sweaters and tops, as it adds an element of sophistication and style to any outfit. The cowl neck is characterized by its loose, draped fabric that creates a relaxed and cozy look. It is often seen as an alternative to a traditional turtleneck, offering a more modern and feminine twist.
The cowl neck design is versatile and can be worn in various ways. It can be worn loose and flowy, creating a casual and effortless look. Alternatively, it can be styled more fitted and structured, adding a touch of elegance to an ensemble. The cowl neck can be adjusted and positioned to suit personal preference, allowing for different levels of coverage and drape.
One of the benefits of the cowl neck design is its ability to flatter different body shapes. The drape of the fabric can create the illusion of a longer neck and a slimmer silhouette. Additionally, the cowl neck can provide extra warmth and comfort during colder months, making it an ideal choice for sweaters and winter wear.
When choosing a knitting pattern for a cowl neck sweater, it’s important to consider the desired fit and style. Some patterns may feature a loose and oversized cowl neck, perfect for a cozy and relaxed look. Others may have a more fitted and structured cowl neck, offering a sleek and sophisticated aesthetic.
Getting started with the pattern
Knitting a cowl neck sweater can be a fun and rewarding project for any knitting enthusiast. With the right pattern and materials, you can create a cozy and stylish garment to keep you warm during the colder months. Before you begin, it’s important to gather all the necessary supplies and familiarize yourself with the pattern instructions.
Materials:
- Yarn: Choose a soft and warm yarn suitable for sweaters. The pattern may specify a specific brand or weight, so make sure to check for any recommendations.
- Knitting Needles: Use the size of needles indicated in the pattern. This will ensure that your gauge matches the measurements provided and that the finished sweater will fit properly.
- Stitch Markers: These will help you keep track of any stitch patterns or shaping instructions in the pattern.
- Tapestry Needle: You’ll need this for weaving in any loose ends and finishing touches.
- Scissors: A good pair of scissors is essential for cutting yarn and trimming any excess.
- Measuring Tape: You’ll need this to check your gauge and measure the length of the sweater.
Pattern Instructions:
Once you have all your supplies ready, carefully read through the pattern instructions. Pay close attention to any abbreviations or special stitches that may be used. It’s a good idea to highlight or make notes for any sections that you might find confusing or need further clarification. Understanding the pattern before you start will make the knitting process much smoother.
Before you cast on, take the time to check your gauge. This involves knitting a swatch using the recommended needles and yarn, and measuring the number of stitches and rows per inch. Adjust your needle size if necessary to match the gauge specified in the pattern. This step is crucial for ensuring that your finished sweater will have the correct measurements.
Once you’re confident in your gauge, you can start casting on and knitting according to the pattern instructions. Remember to place stitch markers as needed and keep track of any shaping or stitch pattern changes. Take your time and enjoy the process of creating your very own cowl neck sweater!
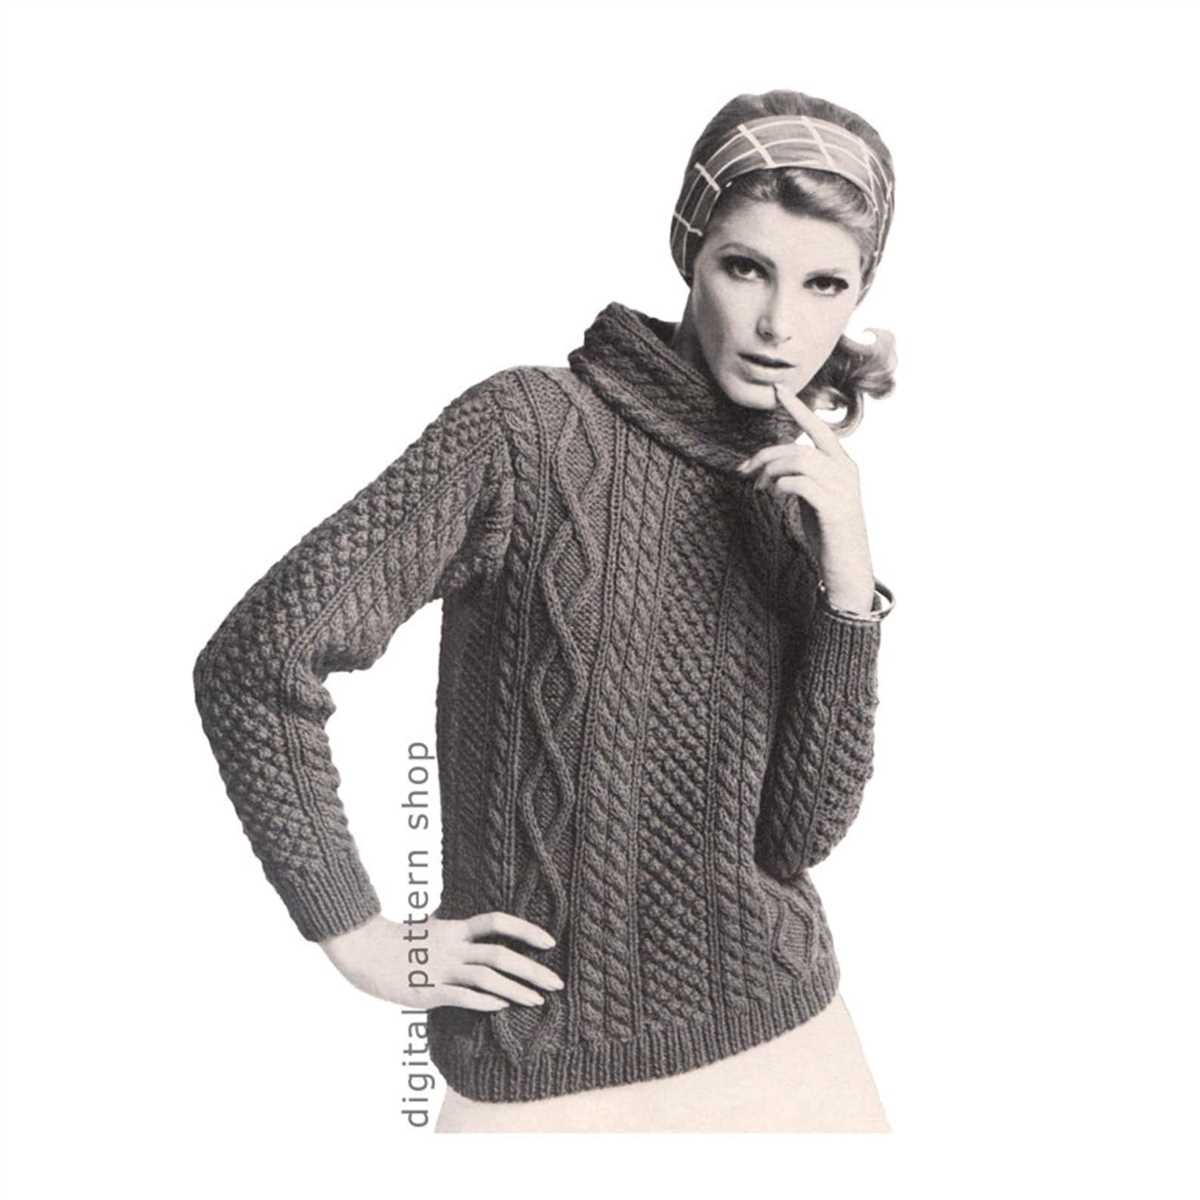
Working the ribbing
Once you have cast on the required number of stitches for your cowl neck sweater, it is time to start working the ribbing. The ribbing creates a stretchy and decorative edging for the sweater, typically found at the hem, cuffs, and neckline. The most common ribbing pattern is the knit 1, purl 1 (K1, P1) rib.
To work the K1, P1 rib, you will need to alternate between knitting and purling stitches. On the right side (RS) of the work, begin by knitting the first stitch. Then, bring the yarn to the front of the work and purl the next stitch. Continue this pattern of knitting and purling stitches until you reach the end of the row.
On the wrong side (WS) of the work, you will need to work the stitches as they appear. This means that if you see a knit stitch, you will knit it, and if you see a purl stitch, you will purl it. By working the stitches as they appear on the WS, you will maintain the ribbing pattern and create a consistent texture throughout the sweater.
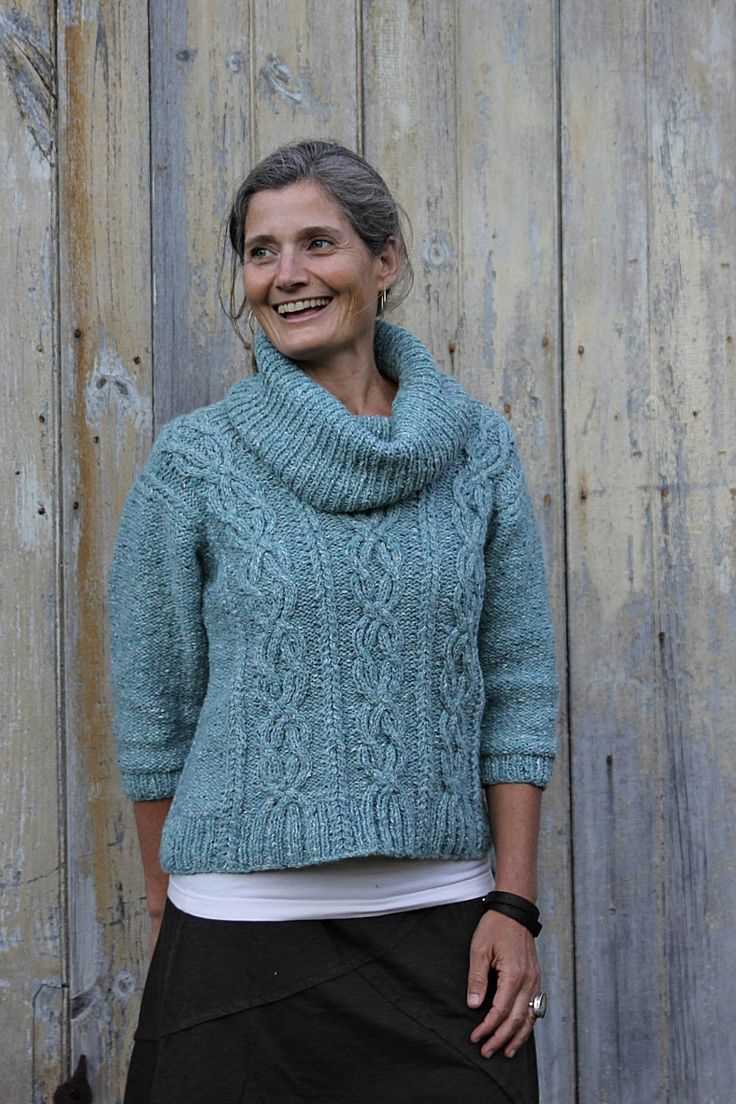
Creating the cowl neck
When it comes to knitting the cowl neck on your sweater, there are a few steps to follow to ensure a cozy and comfortable fit. First, you’ll need to gather your materials, including the knitting pattern, the specified yarn, and the appropriate knitting needles. Make sure to check the gauge listed in the pattern to ensure your cowl neck will have the right size and shape.
Once you have your materials ready, you can begin casting on the required number of stitches for the cowl neck. Follow the instructions in the pattern to create the desired width for your cowl. This may involve using a multiple of stitches or repeating specific stitch patterns. Pay attention to any increasing or decreasing instructions to shape the cowl neck properly.
After casting on, you will then continue knitting in the specified stitch pattern until you reach the desired length for the cowl neck. This may involve repeating a set number of rows or following a specific stitch pattern. Make sure to keep track of your stitch count and row count to ensure accuracy and consistency.
Once your knitting is complete, you can then bind off the stitches to finish the cowl neck. Follow the pattern instructions for the appropriate bind off method, which may involve knitting or purling stitches together or using a specific decorative bind off technique. After binding off, you can weave in any loose ends and block the cowl neck to give it a polished and professional finish.
Knitting the body of the sweater
Once you have completed knitting the ribbing for the cowl neck of the sweater, it’s time to start working on the body. To begin, you will need to cast on the required number of stitches for your chosen size. This will typically be determined by the knitting pattern you are following.
Next, you will continue knitting in the main stitch pattern specified in the pattern instructions. This may involve using a combination of knit and purl stitches, or other textured stitches, to create the desired look. Repeat the stitch pattern for the specified number of rows, usually indicated in the knitting pattern.
It is important to keep track of your progress by counting your rows as you go. This will help ensure that your sweater is the correct length and that you are following the pattern correctly. You may find it helpful to use stitch markers or place markers at regular intervals to mark certain sections or increases/decreases that need to be made.
As you knit the body of the sweater, periodically try it on to ensure that it is fitting well and to make any necessary adjustments. It is better to catch any fit issues early on rather than discovering them after you have finished the entire sweater. Remember to reference the pattern for any shaping instructions or modifications that may be necessary.
Continue knitting the body of the sweater according to the pattern until you reach the desired length. This will typically be indicated in the pattern instructions. Once you have reached the desired length, you may need to cast off or bind off the stitches to finish the body of the sweater before moving on to the next section, such as the sleeves or collar.
As you knit the body of the sweater, take your time and enjoy the process. Knitting a sweater is a labor of love, and the finished result will be a cozy and stylish addition to your wardrobe.
Shaping the Shoulders and Neckline
When knitting a cowl neck sweater, it is important to properly shape the shoulders and neckline to ensure the perfect fit. This is achieved through a series of decreases and bind-offs that create the desired curves and contours.
Shoulder Shaping: To shape the shoulders, you will need to work decreases at each side of the neckline. This can be done by knitting two stitches together, commonly referred to as “k2tog,” or slipping a stitch knitwise, knitting the next stitch, and passing the slipped stitch over, known as “ssk.” These decreases are typically worked on every other row until the desired width of the shoulders is achieved.
Neckline Shaping: The neckline of a cowl neck sweater can be shaped in various ways, depending on the desired style. One common approach is to work short rows, which involves knitting or purling a certain number of stitches and then turning the work before reaching the end of the row. This creates a gentle slope or dip in the neckline. Another method is to bind off a certain number of stitches at the center of the neckline to create a V-shape.
It is important to follow the specific instructions provided in the knitting pattern for shaping the shoulders and neckline of a cowl neck sweater. These instructions will outline the exact number of decreases or bind-offs needed and the specific placement of these shaping techniques.
With careful attention to detail and precise execution of the shaping techniques, you can create a beautifully fitted cowl neck sweater that flatters the wearer’s shoulders and neckline. Remember to always check your gauge and make any necessary adjustments to ensure the finished garment fits as intended.
Adding the sleeves
After completing the body of the cowl neck sweater, it’s time to move on to adding the sleeves. The sleeves will be worked separately and then attached to the body of the sweater.
Step 1: To start, cast on the required number of stitches for the sleeve, following the instructions provided in the knitting pattern. It’s important to ensure that you have the correct number of stitches to match the size and style of the sweater.
Knitting the sleeves
- Step 2: Next, begin knitting the sleeves in the specified stitch pattern, following the instructions in the pattern. This may involve working in a specific stitch pattern or using different techniques, such as ribbing or increases/decreases.
- Step 3: Continue knitting the sleeves until you reach the desired length, again following the pattern instructions. This length may vary depending on your personal preference and the specific design of the sweater.
- Step 4: Once the sleeve is the desired length, you will need to bind off the stitches. This is typically done by knitting two stitches together, then passing the first stitch over the second stitch and off the needle. Repeat this process until all stitches are bound off.
Repeat these steps to complete the second sleeve for the cowl neck sweater. Once both sleeves are finished, you can then sew them onto the body of the sweater using a yarn needle and matching yarn. Follow the pattern instructions for the specific placement and method of attaching the sleeves to ensure a proper fit and seamless finish.
Finishing touches: cuffs and hem
When it comes to finishing a knitted cowl neck sweater, paying attention to the cuffs and hem is crucial. These details can make all the difference in the final look and fit of the garment. With the right techniques and attention to detail, you can achieve professional-looking results.
First, let’s talk about the cuffs. They should be snug enough to stay in place but not too tight to restrict movement. To achieve this, you can use ribbing or other stretchy stitch patterns. You could opt for a basic 1×1 or 2×2 rib, or try out different patterns like twisted rib or seed stitch. Remember to measure the circumference of the wearer’s wrists and adjust the number of stitches accordingly. When working on the cuffs, you can use smaller needles than the ones used for the body of the sweater to ensure a snug fit.
Next, let’s move on to the hem. The hem of the sweater should be nice and clean, with no loose or dangling threads. You can achieve this by using a technique called tubular bind off. This creates a stretchy and seamless edge that gives the sweater a polished look. Another option is to use a regular bind off, but make sure to do it loosely so that the hem stays flexible and doesn’t tug on the body of the sweater.
When finishing the cuffs and hem, it’s also important to consider the overall aesthetic of the sweater. You can add decorative elements like contrasting colors, cables, or lace patterns to make these areas stand out. Alternatively, you can keep it simple and match the cuffs and hem with the rest of the sweater for a more cohesive look.
In conclusion, paying attention to the cuffs and hem of a knitted cowl neck sweater is essential for achieving a professional-looking finish. Take the time to select the right stitch patterns, ensure a snug fit, and use appropriate bind off techniques. With these finishing touches, your cowl neck sweater will be ready to impress!
Blocking and Seaming the Sweater
After completing all the knitting and adding any desired patterns or designs, it’s time to block and seam the sweater to give it a polished and professional finish. Blocking helps to shape the garment and even out the stitches, while seaming allows you to join the different pieces of the sweater together to create a cohesive and wearable garment.
To block the sweater, you will need to wet it slightly and then gently stretch it to the desired measurements. This will help the sweater to take its proper shape and size, as well as allow the stitches to settle and smooth out. Make sure to carefully follow any blocking instructions provided in the knitting pattern or consult general blocking techniques for sweaters.
Next, it’s time to seam the sweater to join the various pieces together. You can use a variety of seaming techniques, such as mattress stitch, to create smooth and nearly invisible seams. Take the time to carefully match up the edges of the sweater pieces and use a tapestry needle to sew them together using the chosen seaming method.
Once all the seaming is complete, give the sweater a final blocking to help the seams settle and to ensure a polished finish. Lay the sweater flat and gently shape it to the desired measurements, making sure the seams lie flat and the sweater retains its shape. Allow the sweater to dry completely before wearing or storing.
In conclusion, blocking and seaming are essential steps in completing a cowl neck sweater. These processes help to shape the garment, even out stitches, and join the various pieces together to create a finished and wearable sweater. Taking the time to properly block and seam the sweater will result in a professional-looking and well-fitted garment that you can enjoy for years to come.