
Knitting edging patterns are a fantastic way to add a touch of elegance and sophistication to your projects. Whether you’re knitting a blanket, shawl, or garment, edging patterns can help create a polished and finished look.
There are a wide variety of knitting edging patterns to choose from, depending on the style and effect you want to achieve. From intricate lace patterns to simple ribbing, you can find an edging pattern that suits your needs and enhances the overall aesthetic of your project.
Knitting edging patterns can also be a great opportunity to experiment with different techniques and stitches. For example, you can try your hand at cable knitting, colorwork, or even beading. These embellishments can elevate your project and make it truly unique.
Whether you’re a beginner knitter looking to add a special touch to your first project or an experienced knitter wanting to try something new, knitting edging patterns are a versatile and fun way to enhance your creations. In this article, we’ll explore different edging patterns, offer tips and tricks for incorporating them into your projects, and provide resources for finding and customizing your own edging patterns.
Knitting Edging Patterns
Knitting edging patterns are a great way to add a beautiful and decorative touch to any knitted item. Whether you are making a sweater, scarf, or blanket, adding an edging can elevate your project and give it a polished finished look.
There are many different types of knitting edging patterns to choose from, ranging from simple and subtle to intricate and eye-catching. Some popular edging patterns include lace, cables, and ribbing. Lace edgings feature delicate and lacy designs, perfect for adding a feminine touch to your knitted items. Cables, on the other hand, create a more textured and structured look, adding depth and interest. Ribbing edgings are a classic choice that provide a stretchy and snug finish.
Lace Edging Patterns
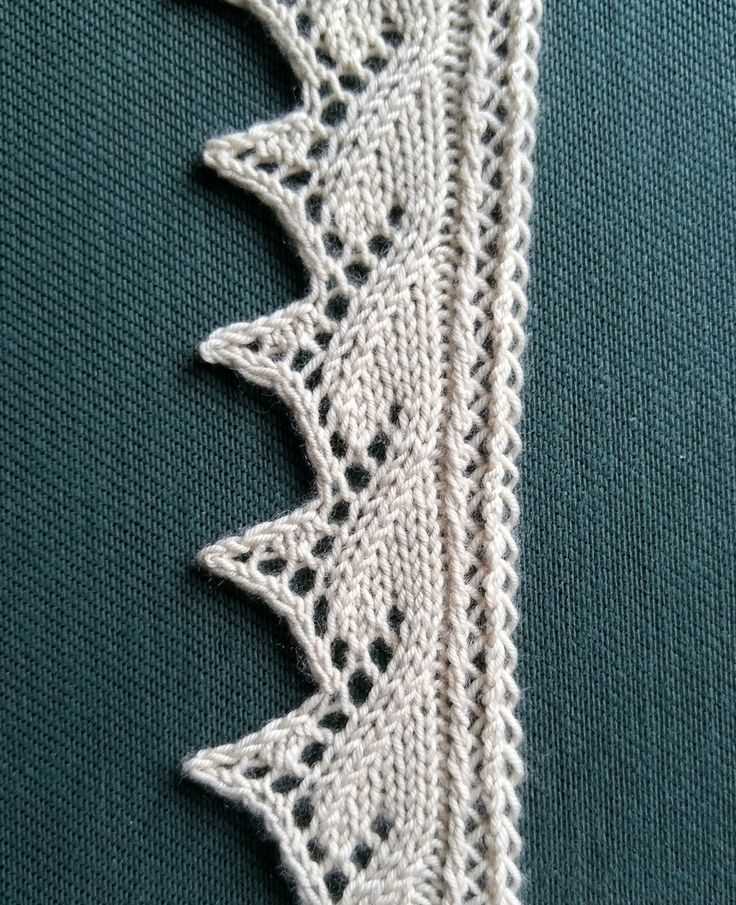
Lace edging patterns feature intricate and delicate designs, often resembling flowers or leaves. These patterns are typically worked using yarn overs and decreases to create holes and shapes. Lace edgings are versatile and can be used on a variety of projects, from shawls to baby blankets. They add a touch of elegance and femininity.
Cable Edging Patterns
Cables are a classic knitting technique that creates a raised and textured design. Cable edging patterns are perfect for adding a touch of sophistication and interest to your knitted items. These patterns typically involve crossing stitches over each other to create the cable effect. Cable edgings can be used on projects like sweaters, scarves, and hats.
Ribbing Edging Patterns
Ribbing is a common knitting technique that creates a stretchy and flexible fabric. Ribbing edging patterns are great for adding a snug and comfortable finish to your knitted items. These patterns typically involve alternating knit and purl stitches in specific sequences to create a ribbed effect. Ribbing edgings can be used on projects like socks, cuffs, and collars.
When choosing a knitting edging pattern, consider the overall style and look you want to achieve. Think about the texture, color, and yarn weight of your project, as well as the intended use of the item. Experiment with different edging patterns to find the one that best complements your knitting project and showcases your skills as a knitter.
Understanding Knitting Edgings
In knitting, edgings are decorative patterns that are added to the edges of a garment or accessory. They are usually worked in a contrasting color or stitch pattern to add visual interest and provide a finished look. Edgings can be used on a wide variety of projects, including shawls, scarves, blankets, and garments.
Types of Edgings: There are many different types of edgings that you can use in your knitting projects. Some popular options include lace edgings, cable edgings, picot edgings, and ribbed edgings. Each type of edging adds a unique look and texture to your finished piece.
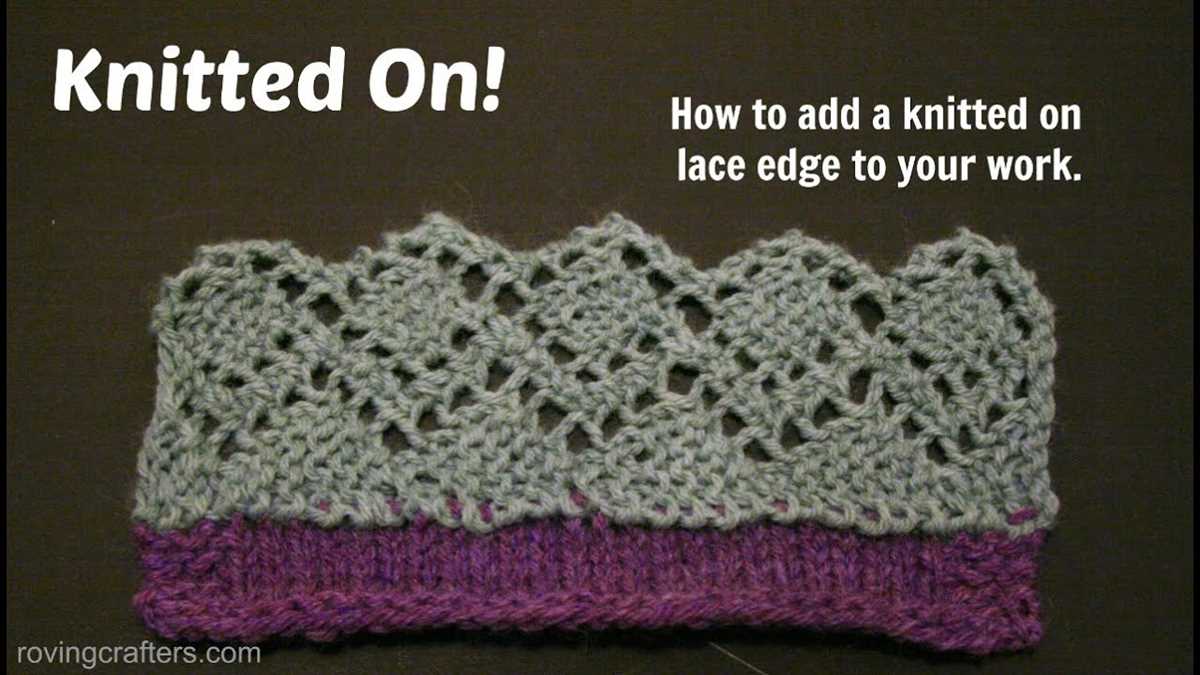
Adding Edgings: To add an edging to your knitting project, you will typically pick up stitches along the edge of your work and then work the desired pattern. This can be done by using a smaller needle or by using a crochet hook to slip stitch into the edge stitches. It’s important to make sure that you are picking up the correct number of stitches to ensure an even and tidy edge.
Design Considerations: When choosing an edging for your knitting project, there are a few factors to consider. First, you’ll want to think about the overall style and aesthetic of your project. A delicate lace edging may be more appropriate for a lightweight shawl, while a chunky cable edging might be better suited for a cozy blanket. Additionally, you’ll want to consider the difficulty level of the edging pattern and make sure it aligns with your knitting skills and experience.
Final Thoughts: Knitting edgings are a fun and creative way to add a special touch to your projects. Whether you choose a simple ribbed edging or an intricate lace pattern, edgings can elevate your knitting from ordinary to extraordinary. So next time you’re looking to finish off your project, consider adding a beautiful edging to give it that extra special touch.
Choosing the Right Yarn for Edgings
When it comes to knitting edgings, one of the most important factors to consider is the type of yarn you choose. The yarn you select will ultimately determine the overall look, feel, and durability of your edgings. Therefore, it is crucial to carefully consider your options and make an informed decision.
Fiber content: The first thing to consider when choosing yarn for edgings is the fiber content. Different fibers have different properties and will affect the appearance and performance of your edgings. For example, wool yarns are known for their warmth and elasticity, making them a good choice for cozy, stretchy edgings. On the other hand, cotton yarns are lightweight and breathable, making them ideal for delicate, summery edgings.
Weight: Another important consideration is the weight of the yarn. The weight of the yarn will determine the thickness and drape of your edgings. You will need to choose a yarn that is appropriate for the desired width and thickness of your edgings. For narrow and delicate edgings, a lace weight yarn might be suitable, while for wider, more substantial edgings, a worsted weight or bulky yarn may be more appropriate.
Texture: The texture of the yarn can also play a role in the overall look of your edgings. Smooth and glossy yarns can create a polished and refined appearance, while textured or boucle yarns can add interest and dimension to your edgings. Consider the effect you want to achieve and choose a yarn with a texture that complements your project.
Color: Finally, consider the color of the yarn for your edgings. The color can have a significant impact on the overall look and feel of your project. You can choose a yarn that complements or contrasts with the main fabric, or you can use multiple colors for a more vibrant and playful look. Experiment with different color combinations to find the one that best suits your style and project.
Essential Tools for Knitting Edgings
When it comes to knitting edgings, having the right tools can make all the difference in achieving a professional finish. Whether you’re adding a decorative edge to a sweater, shawl, or blanket, here are some essential tools to have on hand:
1. Knitting Needles:
Of course, the most basic tool you’ll need is a pair of knitting needles. For edging patterns, you’ll typically want to use smaller needles than what you used for the main body of your project. This will help create a tight and neat edge. Circular needles are often a good choice for longer edgings, as they can hold a large number of stitches.
2. Stitch Markers:
Stitch markers are invaluable when working on edgings, as they can help you keep track of where specific stitches or pattern repeats begin and end. They can also be used to mark the center of a shawl or other symmetrical designs.
3. Yarn Needle:
A yarn needle is essential for weaving in loose ends and seamlessly joining edging sections. Choose a blunt-end needle with a large eye to make it easier to thread and maneuver through stitches.
4. Row Counter:
A row counter can be a helpful tool for keeping track of the number of rows or repeats in your edging pattern. This will ensure consistency and help you stay on track with the design.
5. Blocking Tools:
Blocking is an important step in finishing any knitted project, including edgings. Investing in blocking tools such as blocking mats, T-pins, and a steam iron or steamer can help you shape and set your edgings for a polished and professional look.
By having these essential tools on hand, you’ll be well-equipped to tackle any knitting edging pattern and achieve beautiful results. So gather your supplies, choose your favorite edging pattern, and get ready to add a touch of elegance to your knitted creations!
Basic Stitches for Knitting Edgings
When it comes to knitting edgings, there are a variety of basic stitches that you can use to create beautiful borders and finishes on your projects. These stitches can add a decorative touch to anything from blankets and scarves to hats and sweaters. Here are some of the most commonly used basic stitches for knitting edgings:
1. Garter stitch
Garter stitch is one of the simplest and most versatile stitches for creating edgings. It is achieved by knitting every row, resulting in a ridged texture that adds both structure and visual interest to your project. Garter stitch edgings can be easily added to any project by simply knitting a few rows or repeating a designated number of rows along the border.
2. Seed stitch
The seed stitch is another popular choice for knitting edgings. It is created by alternating between knit and purl stitches in a specific pattern, resulting in a bumpy texture that resembles scattered seeds. The seed stitch can be used to create a neat and textured border that complements both simple and complex knitting patterns.
3. Ribbing
Ribbing is a common stitch pattern used for creating stretchy and elastic edgings. It is achieved by alternating between knit and purl stitches in a specific pattern, such as knit 2 stitches, purl 2 stitches. Ribbing can be used for cuffs, collars, and hems, as it provides a snug and comfortable fit. It is also commonly used to add depth and dimension to knitted accessories.
4. Lace stitches
Lace stitches can be used to create delicate and intricate edgings. These stitches involve creating yarn overs and decreases to form openwork patterns that resemble lace. Lace edgings can add a touch of elegance and femininity to any project, making them perfect for shawls, cardigans, and other delicate pieces.
These are just a few examples of the basic stitches commonly used for knitting edgings. By experimenting with different stitches and patterns, you can create unique and personalized finishes for your knitted projects. Whether you prefer simple and minimalistic borders or intricate lace details, the possibilities are endless when it comes to knitting edgings.
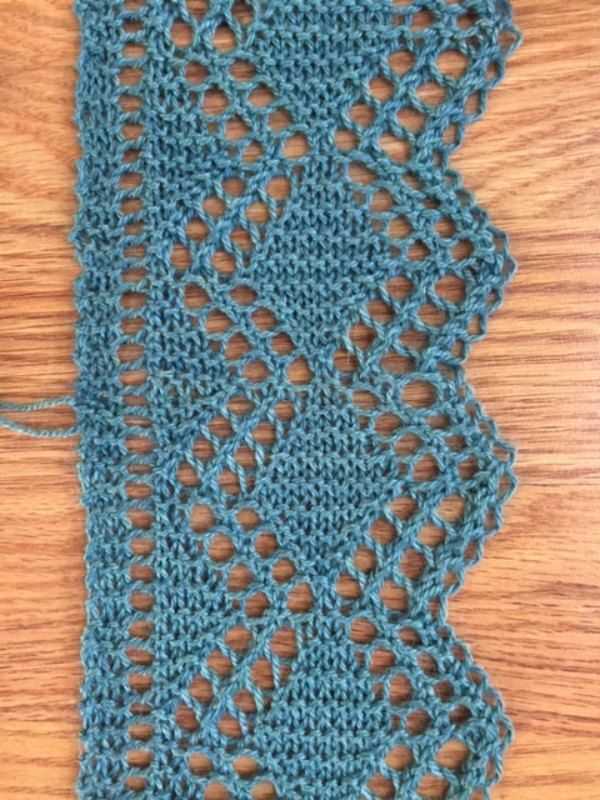
Simple Lace Edging Patterns
If you’re looking to add a touch of elegance to your knitting projects, simple lace edging patterns are the perfect choice. These patterns feature delicate and intricate designs that can elevate any project, from scarves and shawls to blankets and garments. Whether you’re a beginner or an experienced knitter, you’ll find that simple lace edging patterns are both satisfying to knit and beautiful to behold.
One popular lace edging pattern is the Feather and Fan stitch. This pattern consists of a repeating pattern of knit and purl stitches, creating a wave-like effect. It’s a versatile pattern that can be used to create a border on any project, and it’s especially stunning when used on shawls and blankets. The Feather and Fan stitch is easy to memorize, making it a great choice for those new to lace knitting.
Another simple lace edging pattern is the Eyelet Lace stitch. This pattern creates a delicate, lacy design featuring small holes or “eyelets” that add an airy quality to your project. The Eyelet Lace stitch is perfect for adding a feminine touch to garments and accessories like socks and gloves. With its simple four-row repeat, this pattern is easy to follow and can be adapted to different stitch counts.
If you’re looking for a more intricate lace edging pattern, the Leaves and Vines stitch might be the perfect choice. This pattern features a beautiful vine-like design with leaves branching off, creating a natural and organic look. The Leaves and Vines stitch requires a bit more attention and concentration, but the end result is well worth the effort. It’s ideal for adding a touch of nature-inspired beauty to your knitting projects.
In conclusion, simple lace edging patterns are a great way to add a touch of elegance and sophistication to your knitting projects. Whether you choose the Feather and Fan stitch, the Eyelet Lace stitch, or the Leaves and Vines stitch, you’ll find that these patterns are both enjoyable to knit and stunning to look at. So why not give lace knitting a try and create something truly beautiful?
Textured Edging Patterns
A well-chosen edging pattern can add a touch of elegance and interest to any knitted project. Textured edging patterns are particularly popular, as they create a visual and tactile contrast to the main body of the piece, drawing attention to the edges and highlighting the finer details of the design.
One popular textured edging pattern is the seed stitch. The seed stitch is created by alternating knit and purl stitches in a random pattern, which results in a nubby texture that is reminiscent of scattered seeds. This pattern works well as an edging because it lays flat and can be easily adjusted to fit any width or shape. Its simplicity also makes it a versatile choice that can complement various knitting projects, from scarves to blankets.
Textured Edging Patterns for Shawls and Wraps
For shawls and wraps, lace patterns are often used as edging to create a delicate and feminine look. The combination of yarnovers, decreases, and strategically placed increases results in a lacy design that adds a touch of elegance to the finished piece. Common lace patterns used for edgings include the feather and fan pattern, the diamond lace pattern, and the leaf lace pattern. These patterns can be combined or used individually to create unique and intricate borders.
Another popular choice for textured edging patterns, particularly for baby blankets and afghans, is the cable stitch. Cables create a three-dimensional texture that is visually appealing and adds depth to the edges of the project. The intricate twists and turns of the cables make them a stunning choice for showcasing the deliberate craftsmanship of the knitter. From simple braided cables to more complex Celtic knot designs, there is a wide range of cable patterns available to choose from.
In conclusion, when it comes to textured edging patterns, the possibilities are endless. Whether you prefer the simplicity of the seed stitch, the delicate beauty of lace, or the intricate charm of cables, there is a pattern out there that will perfectly complement your knitted project and take it to the next level.
Colorwork Edging Patterns
Colorwork edgings can add a beautiful and eye-catching detail to your knitting projects. Whether you’re adding a finishing touch to a sweater, blanket, or hat, incorporating colorwork into the edging can elevate the overall design. Here are a few colorwork edging patterns to inspire your next knitting project:
1. Fair Isle Border
A Fair Isle border is a classic colorwork pattern that features intricate geometric designs. Traditionally, it involves knitting with two colors, creating small repeating motifs. You can use this pattern to add a touch of elegance to cuffs, hems, or the edges of a shawl. Experiment with different color combinations to create a unique look.
2. Norwegian Selbu Edging
The Norwegian Selbu edging is another popular colorwork pattern that originates from the Selbu region in Norway. It typically features a snowflake motif and is known for its clean lines and symmetry. This edging is perfect for adding a touch of Scandinavian charm to your knitted accessories.
3. Intarsia Lace Border
If you’re looking for a more delicate and intricate colorwork pattern, try the Intarsia Lace border. This pattern combines the technique of intarsia with lace stitches, creating a stunning effect. The result is a beautiful edging that adds an air of sophistication to any knitting project.
These are just a few examples of the numerous colorwork edging patterns available. Whether you’re a beginner or an experienced knitter, experimenting with colorwork can bring a new level of creativity to your projects. Have fun exploring different patterns and color combinations to personalize your knitting creations.
Crochet Edging Patterns for Knitting Projects
If you enjoy knitting, you know that adding a crochet edging can be a beautiful finishing touch to your project. Whether you’re working on a blanket, a scarf, or a sweater, crochet edging can elevate the design and make it stand out. Here are some crochet edging patterns that you can use for your knitting projects.
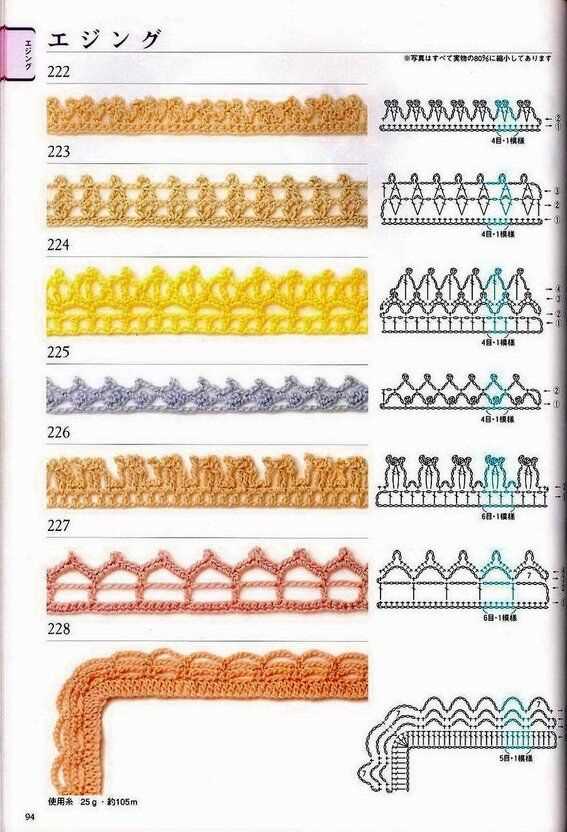
- Scallop Edging: This edging pattern creates a delicate and feminine look. It consists of a series of double crochet stitches, followed by a chain stitch and a slip stitch. Repeat this pattern to create a scalloped edge along your knitting.
- Picot Edging: Picot edging adds a dainty and decorative touch to your knitting. To create this pattern, you’ll work a series of single crochet stitches, followed by three chains and a slip stitch. Repeat this pattern to create a small picot at regular intervals along the edge.
- Ruffle Edging: If you’re looking to add some volume and drama to your knitting, try a ruffle edging. This pattern involves working multiple rows of double crochet stitches, increasing the number of stitches in each row. This creates a cascading effect that adds a whimsical touch to your project.
- Shell Edging: Shell edging creates a beautiful and intricate border. It consists of a series of double crochet stitches, followed by two chain stitches and another double crochet stitch. Repeat this pattern to create a shell-like shape along your knitting.
These are just a few examples of crochet edging patterns that you can use to enhance your knitting projects. Experiment with different patterns and combinations to create unique and personalized designs. Crochet edging not only adds visual interest to your knitting but also helps to prevent the edges from unraveling. So, get creative and have fun with your knitting and crochet!
Creating Scallop Edgings
Scallop edgings are a beautiful and feminine finishing touch to any knitting project. They add shape and interest to the edges of garments, blankets, and accessories. Creating these delicate scalloped edges requires only a basic knowledge of knitting stitches.
To create a scallop edging, you will need to cast on an odd number of stitches. The first row is typically a setup row, which establishes the pattern for the scallops. You can use a simple knit stitch or a combination of knit and purl stitches to create the desired effect. It is important to keep track of your stitches and make sure you are following the pattern correctly.
Basic Scallop Edging Pattern
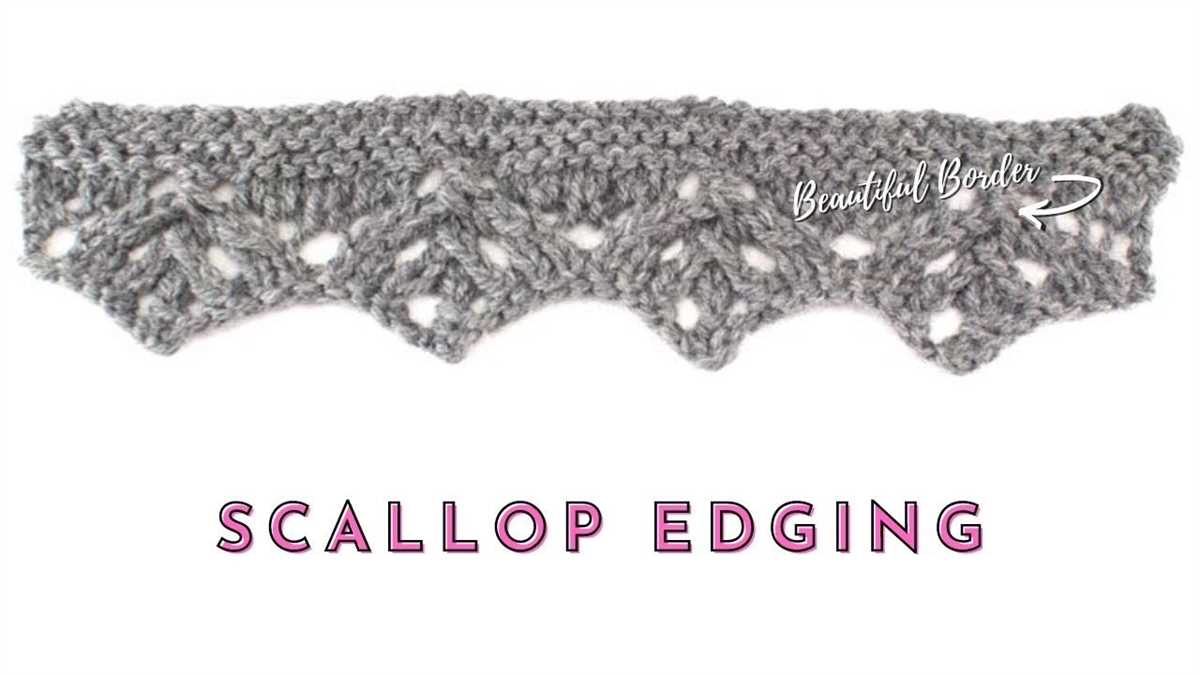
To create a basic scallop edging, follow these steps:
- Cast on an odd number of stitches.
- Row 1: Knit across all stitches.
- Row 2: This row defines the scallops. *K1, yo, k2tog; repeat from * to end of row.
- Repeat rows 1 and 2 until your edging reaches the desired length.
- Bind off all stitches using your preferred method.
This simple scallop pattern creates a nice, wavy shape along the edge of your project. If you want to add more depth and complexity to your scallop edging, you can experiment with different stitch combinations and increases or decreases. By varying the number of stitches between each yarn over and knit two together, you can create different sizes and shapes for your scallops.
Adding Beads to Knitting Edgings
Using beads in knitting projects can add a touch of glamour and elegance to your finished piece. When it comes to knitting edgings, adding beads can create a beautiful and eye-catching detail. Here are some tips and techniques for incorporating beads into your knitting edgings.
1. Preparing the Beads
Before you start knitting, it’s important to prepare your beads. Choose beads that are small enough to fit through the holes in your knitting needles, but large enough to make an impact. String the beads onto a beading thread or dental floss and tie a knot at the end to secure them. This will make it easier to add the beads to your knitting as you go.
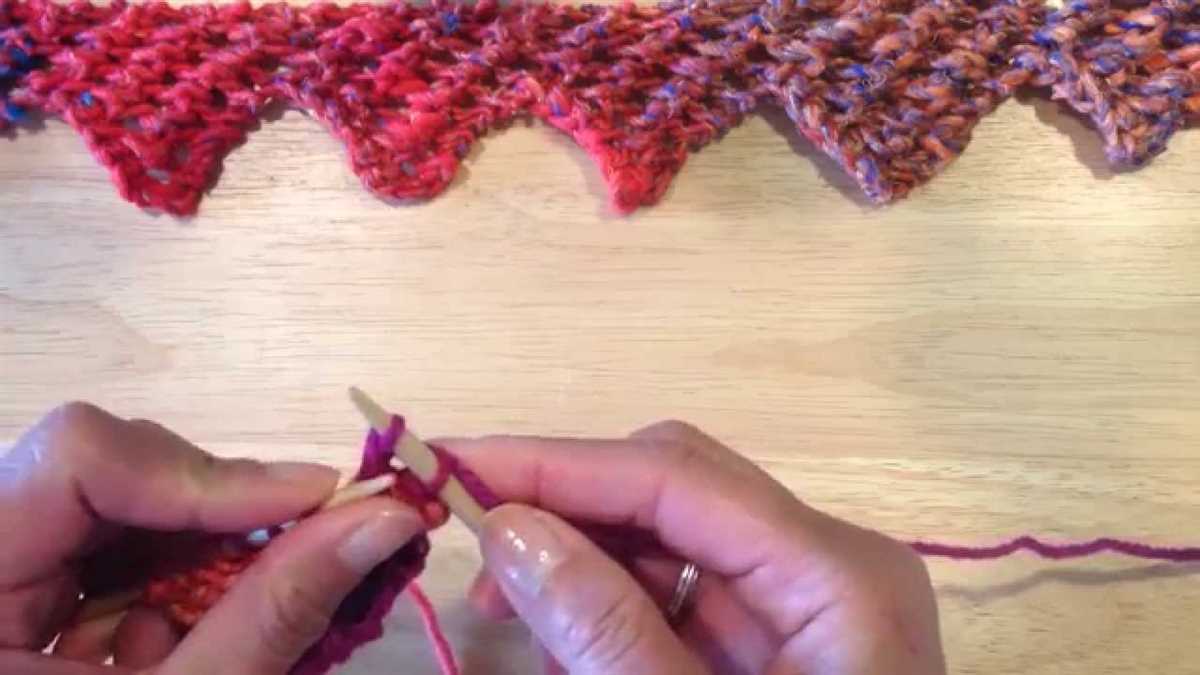
2. Pre-stringing Method
One way to add beads to your knitting edgings is by using the pre-stringing method. Simply slide a bead onto your knitting needle before you knit a stitch. Then, when you reach the stitch where you want to add a bead, bring the bead up to the stitch and slip it over the stitch as you knit it. This method allows you to control the placement of each bead and create unique patterns.
3. Hook or Crochet Method
If you find it difficult to add beads as you go, you can also use a crochet hook to add beads to your knitting edgings. With this method, you will use a crochet hook to slip each bead onto the stitch after it has been knitted. Simply insert the hook into the stitch, slide a bead onto the hook, and pull the bead through the stitch. Then, continue knitting as usual. This method allows for quick and easy bead placement.
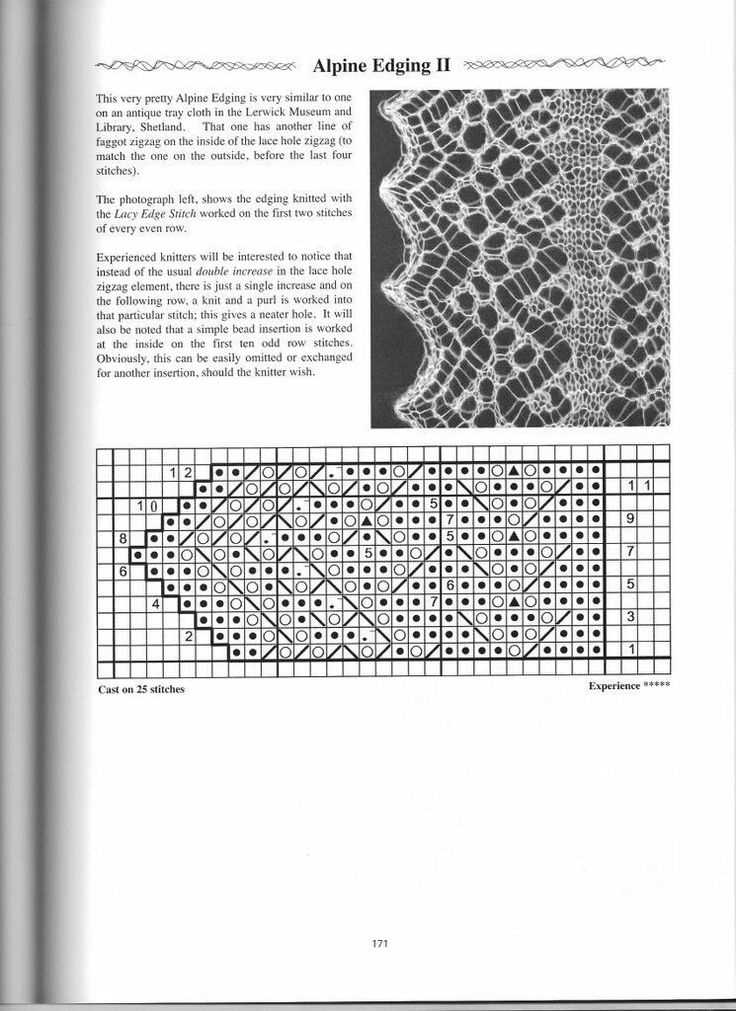
4. Charted Bead Patterns
To create intricate bead patterns in your knitting edgings, you can use a charted bead pattern. These patterns provide a visual representation of where each bead should be placed in the knitting. Follow the chart as you knit, placing the beads according to the symbols or colors indicated. This method is great for creating detailed and precise bead designs.
With these techniques, you can add beads to your knitting edgings and create stunning and unique pieces. Whether you choose to use the pre-stringing method, the hook method, or follow a charted bead pattern, adding beads can elevate your knitting to a whole new level of beauty.
Finishing and Blocking Knitting Edgings
Finishing and blocking are crucial steps in creating beautiful and professional-looking knitting edgings. These final touches not only enhance the overall appearance of the edging but also ensure that it lays flat and looks polished. Whether you are working on a lace edging or a simple ribbed border, taking the time to finish and block your knitting will make a significant difference.
When finishing a knitting edging, it is important to weave in any loose ends and secure them with a knot. This helps prevent the edging from unraveling and adds durability to the finished piece. Additionally, you may choose to reinforce the edges of the edging by adding a crochet border or sewing on a fabric lining.
To block a knitting edging, start by gently soaking it in lukewarm water with a mild detergent. Let it soak for about 10-15 minutes, then gently squeeze out the excess water. Lay the edging flat on a towel and reshape it to the desired dimensions. Pin the edges of the edging in place using rust-resistant blocking pins or T-pins.
For lace edgings, blocking is especially important to open up the lace pattern and reveal its full beauty. Stretch the edging gently in the desired shape, making sure to maintain the pattern’s alignment. Allow the edging to dry completely before removing the pins.
Blocking can also be used to adjust the length or width of a knitting edging. If the edging is too short, gently stretch it while blocking. If it is too wide, steam-blocking can help shrink it to the desired size. Be careful not to apply too much heat directly to the knitting to avoid damaging the fibers.
In conclusion, finishing and blocking are essential steps in creating a professional-looking knitting edging. By taking the time to weave in loose ends and secure the edging, as well as soak, reshape, and pin it in place, you can add the perfect finishing touch to your knitting project. Whether it’s a lace edging or a simple ribbed border, these techniques will enhance its appearance and ensure that it lays flat and looks polished.
Knitting Edgings: Incorporating them into Different Projects
Knitting edgings can add a beautiful finishing touch to various projects, including garments, accessories, and home decor items. With a wide range of edging patterns available, you can easily customize your projects to suit your personal style. Here are a few ideas on how to incorporate knitting edgings into different projects.
Garments: Adding a knitted edging to the cuffs, hemline, or neckline of a sweater can give it a polished look. You can choose a simple and subtle edging pattern for a classic look or opt for a more intricate design to make a statement. Additionally, knitted edgings can also be used to trim the edges of cardigans, jackets, or even dresses, adding an extra touch of elegance.
Accessories: Knitting edgings can be used to enhance the aesthetic appeal of accessories such as scarves, shawls, and hats. A delicate lace edging can transform a plain scarf into a stunning accessory, while a ribbed or picot edging can add a playful touch to a beanie or a headband. You can also use edgings to finish off the edges of mittens, gloves, or socks, adding both style and functionality.
Home Decor: Knitted edgings can be used to elevate the look of various home decor items. You can add a decorative edging to the edges of blankets, throws, or pillowcases, giving them a cozy and inviting feel. Additionally, you can use edgings to finish the edges of tablecloths, placemats, or even curtains, adding a touch of sophistication to your dining or living space.
When incorporating knitting edgings into different projects, it’s important to consider the overall design and style of the item. Choose an edging pattern that complements the project and enhances its look, rather than overpowering it. Additionally, consider the yarn weight and fiber content of the project, as different edging patterns may work better with certain yarn types.
Whether you’re a beginner or an experienced knitter, exploring different knitting edgings can open up a world of possibilities for your projects. Get creative and experiment with different patterns and techniques to add a unique and personal touch to your knitting creations.