
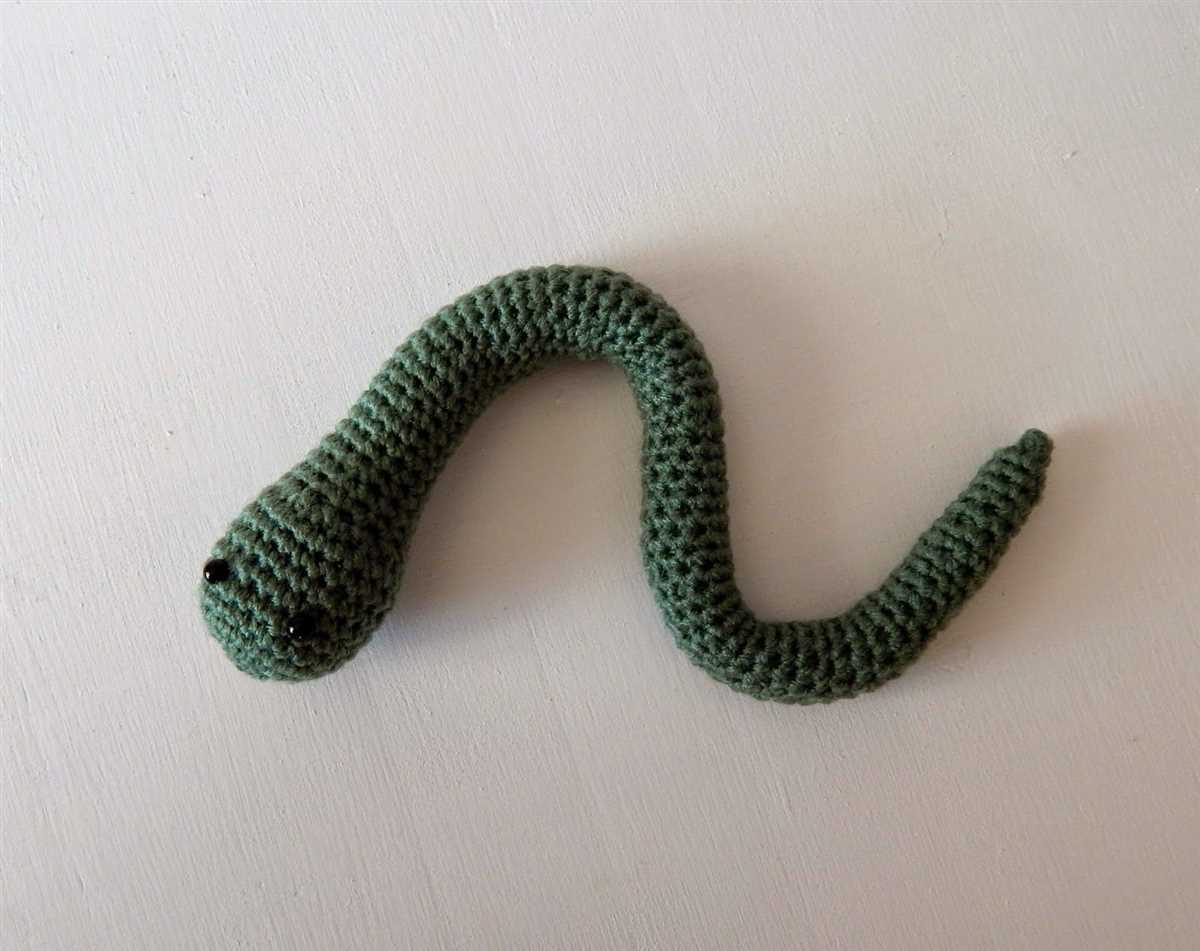
Knitting is a versatile and creative craft that allows you to create beautiful and unique items. One popular knitting project that has gained popularity in recent years is the knitted snake. Knitting a snake pattern allows you to create a fun and adorable toy that can be enjoyed by people of all ages.
A knitted snake can be a great way to practice your knitting skills and experiment with different stitches and techniques. Whether you are a beginner or an experienced knitter, you can easily create a knitted snake pattern that is customized to your liking. From the color and size of the snake to the unique pattern and stitch design, the possibilities are endless.
In addition to being a fun project to work on, a knitted snake can also be a thoughtful and unique gift. Whether you are making a snake toy for a child or a decorative piece for a friend, a knitted snake is sure to be cherished and appreciated. The softness and warmth of the knitted fabric make it perfect for cuddling and snuggling, while the intricate design and attention to detail make it a special and one-of-a-kind gift.
So, if you are looking for a new knitting project to sink your needles into, consider trying a knitted snake pattern. With its endless customization options and the joy it brings to both knitter and recipient, a knitted snake is a project that is sure to bring hours of creative fun and a beautiful end result.
Knitted Snake Pattern
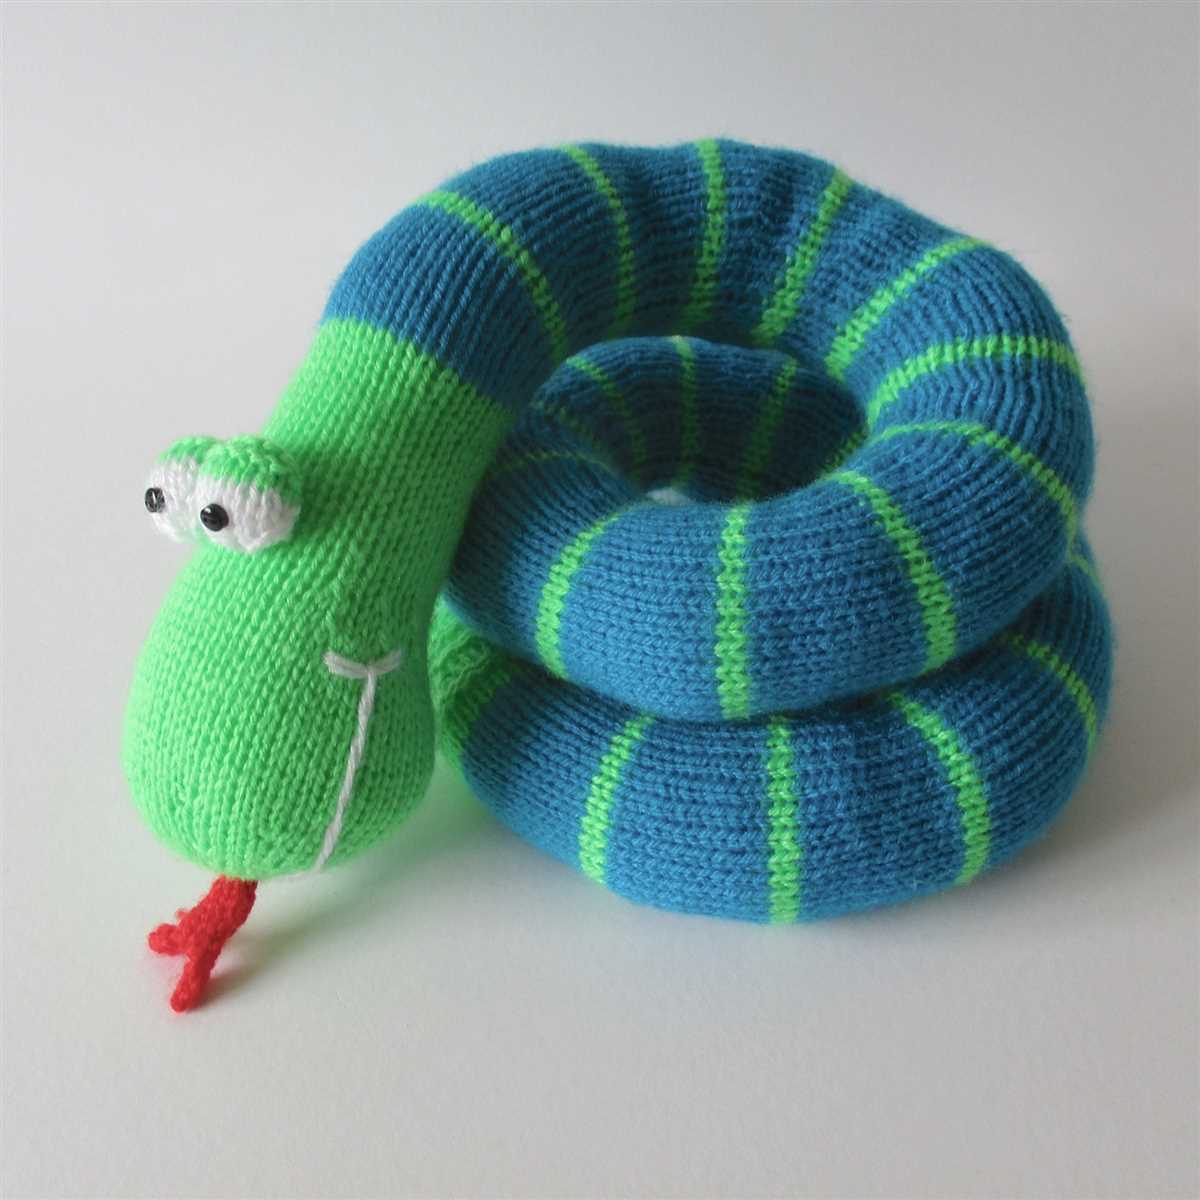
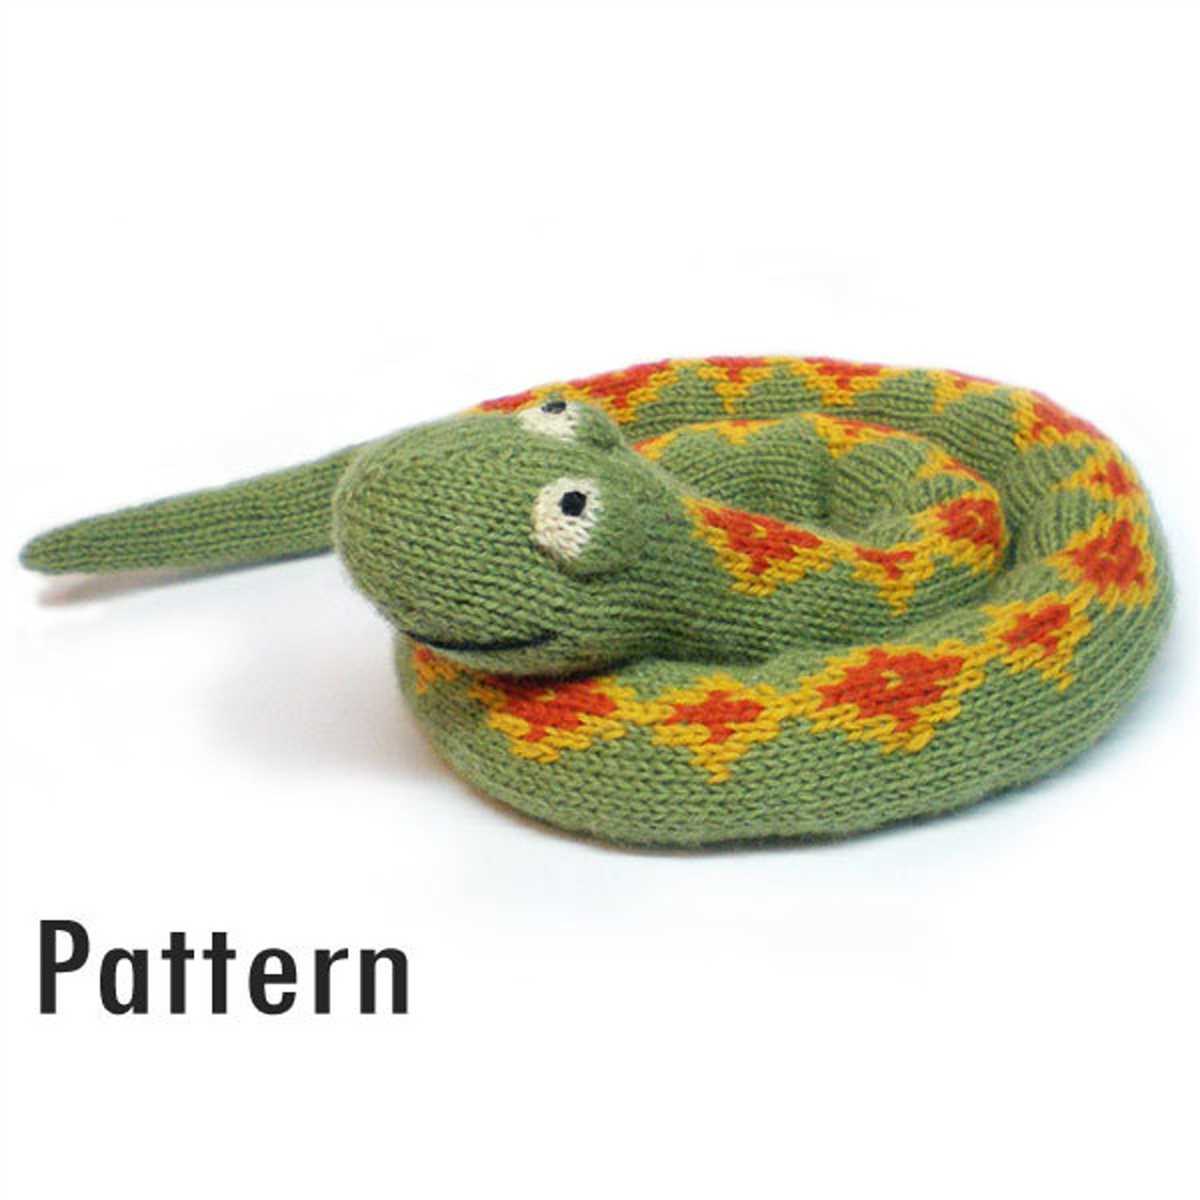
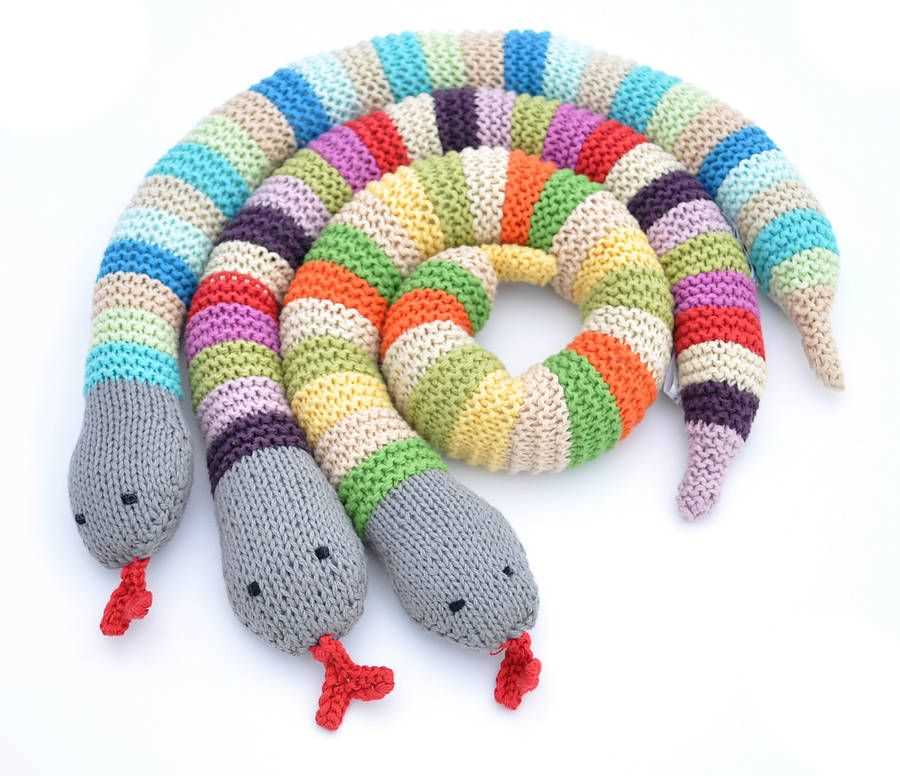
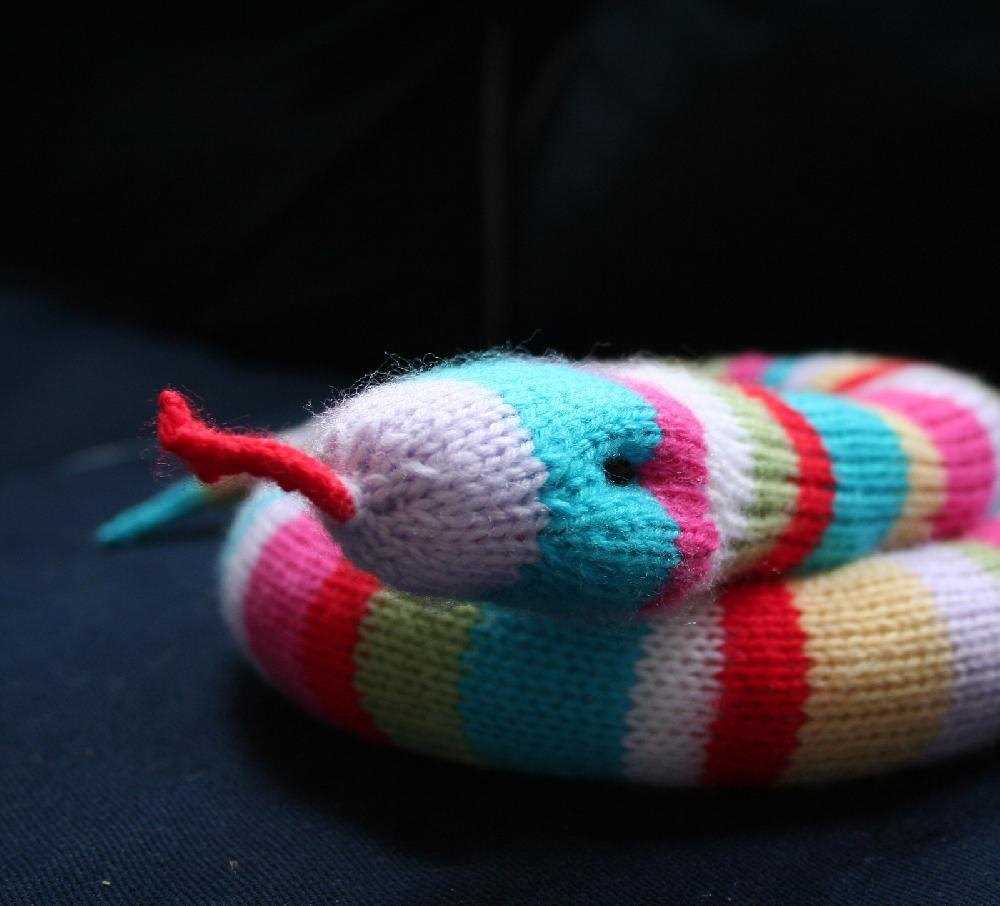
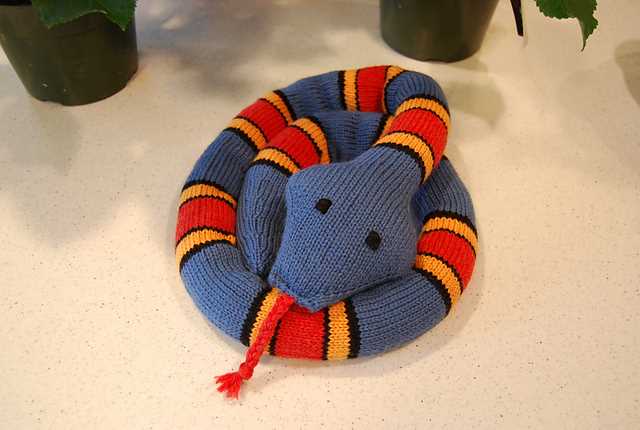
The knitted snake pattern is a fun and creative way to make a soft toy or decorative accessory. The pattern involves using basic knitting stitches to create a long, cylindrical shape that resembles a snake. This pattern is great for both beginners and experienced knitters, as it can be easily customized to create a variety of different snake designs. Whether you want to make a cute, colorful snake for a child or a more realistic looking snake for decoration, this pattern allows you to get creative and have fun with your knitting.
To start knitting the snake, you will need a set of knitting needles and some yarn in your desired colors. You can use any type of yarn, but a thicker yarn will make a bigger snake, while a thinner yarn will create a smaller snake. Begin by casting on an even number of stitches, about 30 or more depending on the desired length of your snake. Then, simply knit every row until your snake reaches the desired length. You can add stripes or other patterns by changing colors at different points in your knitting.
The knitted snake can be stuffed with fiberfill or other stuffing material to give it a plush, cuddly feel. Once your snake is finished, you can add eyes and a tongue using felt or other craft materials to give it a more realistic or playful look. You can also sew a loop at one end of the snake to turn it into a keychain or hang it up for decoration. With its unique and versatile design, the knitted snake pattern is a great project for knitters of all skill levels.
- Fun and creative way to make a soft toy or decorative accessory
- Can be easily customized to create a variety of different snake designs
- Great for both beginners and experienced knitters
- Requires knitting needles and yarn in desired colors
- Can be stuffed with fiberfill or other stuffing material
- Eyes and a tongue can be added for a more realistic or playful look
- Can be turned into a keychain or decoration
Materials needed for knitting a snake:
Knitting a snake requires a few essential materials to ensure a successful and enjoyable knitting experience. Here is a list of materials needed:
1. Yarn:
Choose a soft and smooth yarn: Select a yarn that is suitable for the desired size and texture of the snake. A soft and smooth yarn will ensure comfort and ease of knitting.
2. Knitting Needles:
Find the appropriate size of knitting needles: The size of the knitting needles will depend on the thickness of the chosen yarn. Refer to the yarn packaging or knitting pattern instructions to determine the recommended needle size.
3. Stitch Markers:
Use stitch markers for easy tracking: Stitch markers help keep track of specific stitches or sections in the knitting pattern. They are especially useful when working on complex patterns or increasing/decreasing stitches.
4. Scissors:
A pair of sharp scissors is essential: Scissors are needed for cutting the yarn, especially when changing colors or finishing the project. Make sure to use a pair of scissors that are sharp and suitable for cutting yarn.
5. Yarn Needle:
A yarn needle for finishing touches: A yarn needle is required for weaving in loose ends and sewing the snake’s parts together. Choose a needle with a large eye to easily thread the yarn.
6. Stuffing Material:
Choose an appropriate stuffing material: To give the knitted snake its shape and form, stuffing material is needed. Options include polyester fiberfill, yarn scraps, or foam pellets. Ensure the chosen stuffing material is safe and suitable for the intended use.
By gathering these materials, knitters can embark on an enjoyable journey of creating a knitted snake that can be utilized as a toy, decoration, or even a cozy companion.
How to choose the right yarn for a knitted snake:
When choosing yarn for a knitted snake, there are a few factors to consider to ensure the best results. The type of yarn you choose will affect the appearance, durability, and overall feel of the finished snake.
Consider the snake’s desired size and shape:
The first thing to consider is the size and shape of the knitted snake. If you want a larger snake with more volume, you will need a bulkier yarn. For a smaller snake with a thinner body, a lighter weight yarn will be more appropriate. It’s important to find a balance between the size and shape you want to achieve and the yarn’s thickness.
Think about the texture and appearance:
The texture and appearance of the yarn will also impact the final result. Smooth yarns will create a sleeker and more polished snake, while textured yarns can add depth and interest to the toy. Additionally, the color of the yarn is an important consideration. You can opt for a solid color for a more classic look or choose variegated yarn for a more playful and unique appearance.
Consider the safety and durability:
Since the knitted snake will likely be handled and played with, it’s important to choose a yarn that is durable and safe. Look for yarns that are machine washable and can withstand regular wear and tear. Acrylic yarns are a popular choice for knitted toys as they are both durable and easy to wash. Avoid using yarns with long fibers that can fray or shed, as this may pose a choking hazard.
In summary, when choosing yarn for a knitted snake, consider the desired size and shape, the texture and appearance, as well as the safety and durability. By selecting the right yarn, you can ensure that your knitted snake is not only visually appealing but also fun and safe to play with.
Knitting needle sizes for a snake pattern:
When knitting a snake pattern, it is important to choose the right size knitting needles in order to achieve the desired outcome. The size of the needles will directly affect the size of the stitches and the overall appearance of the knitted snake.
There are several factors to consider when selecting knitting needle sizes for a snake pattern. First, you need to choose the appropriate thickness or gauge of the yarn you plan to use. This will determine the recommended needle size range for that particular yarn.
Once you have determined the yarn gauge, you can refer to a needle size conversion chart to find the corresponding needle size in the system you are using (such as US, UK, or metric sizes). It is important to note that different knitting needle manufacturers may have slightly different sizing, so it is always a good idea to check the specific manufacturer’s recommendations.
Most snake patterns will recommend using a smaller needle size to create a tighter fabric and a more defined stitch pattern. This can be especially important if you are using a thin or slippery yarn that has a tendency to stretch or lose its shape. However, if you prefer a looser, drapier fabric, you can choose a larger needle size. Keep in mind that the final size of the knitted snake will also be affected by your tension and the number of stitches and rows you knit.
Ultimately, the choice of knitting needle sizes for a snake pattern will depend on your personal preference, the yarn you are using, and the desired outcome of your project. By experimenting with different needle sizes and gauges, you can create a snake that is just right for you.
Basic knitting stitches for a snake pattern:
When creating a knitted snake pattern, it’s important to have a good understanding of basic knitting stitches. These stitches will be used to form the body and any additional details of the snake. Here are some essential stitches to familiarize yourself with:
1. Knit stitch (k):
The knit stitch is the most basic stitch in knitting. It is created by inserting the right needle into the front of the stitch on the left needle, wrapping the yarn around the right needle, and pulling the loop through to create a new stitch. This stitch creates a smooth and flat appearance, perfect for the body of the snake.
2. Purl stitch (p):
The purl stitch is another essential stitch in knitting. It is the reverse of the knit stitch and creates a bumpy texture. To purl, insert the right needle into the front of the stitch on the left needle, wrap the yarn around the right needle counter-clockwise, and pull the loop through to create a new stitch. The purl stitch can add texture and detail to the snake’s body.
3. Yarn over (yo):
The yarn over stitch is often used to create increases in knitting. To yarn over, simply bring the yarn to the front of the work between the needles and then continue the next stitch. This creates an extra loop on the needle, which will form a new stitch on the next row. Yarn overs can be used to create decorative details on the snake’s body.
4. Slip stitch (sl):
The slip stitch is a common stitch used to move stitches from one needle to another without knitting or purling. To slip a stitch, insert the right needle into the stitch on the left needle as if to knit, but instead of working the stitch, simply transfer it from the left needle to the right needle. Slip stitches can be used to create smooth edges or to pass stitches over one another to create shaping or texture.
By mastering these basic knitting stitches, you will be well-equipped to tackle a knitted snake pattern and create a unique and adorable snake toy.
How to cast on for a knitted snake:
Knitting a snake can be a fun and unique project that allows you to showcase your knitting skills. To get started, you’ll need to cast on stitches to create the snake’s body. Here’s a step-by-step guide on how to cast on for a knitted snake:
Gather your materials:
Before you begin, make sure you have all the necessary materials. You’ll need a pair of knitting needles appropriate for the yarn weight you’re using, a skein of yarn in your preferred color, and a tapestry needle for finishing.
Choose a cast on method:
There are several cast-on methods you can use for your knitted snake. One popular option is the long-tail cast on, which creates a neat and stretchy edge. Another option is the knitted cast on, which is simple and beginner-friendly. Choose the method that you’re most comfortable with.
Estimate the number of stitches:
Decide on the length and thickness you want for your snake. If you’re following a pattern, it may provide guidance on the number of stitches to cast on. If you’re creating your own design, consider the desired length and the gauge you’re working with to estimate the number of stitches needed.
Begin the casting on process:
With your chosen cast on method, start by making a slip knot on one of your knitting needles. Then, insert the other needle into the slip knot and wrap the working yarn around both needles.
Continue by following the steps of your chosen cast on method. This may involve creating loops, knitting into existing stitches, or incorporating the yarn onto the needles in a specific manner. Repeat the steps until you have cast on the desired number of stitches.
Double-check your work:
Once you have cast on the required number of stitches, take a moment to ensure everything looks correct. Count the stitches to make sure you haven’t accidentally added or dropped any. Adjust as necessary before moving on to the next step.
Start knitting the snake:
Now that you have successfully cast on for your knitted snake, you’re ready to start knitting! Follow your chosen snake pattern or invent your own design to bring your snake to life. Have fun experimenting with different stitch patterns and colors to create a unique and personalized snake.
Knitting the body of the snake:
Once you have finished knitting the head of the snake, it’s time to move on to knitting the body. The body is made up of a long tube of stitches that will eventually be stuffed and sewn onto the head.
To start knitting the body, cast on the required number of stitches using the same yarn and needle size as for the head. You can choose to knit the body in a different color or continue with the same color as the head, depending on your preference.
To create the body, you will simply knit in the round using the stockinette stitch. This means that you will knit every stitch in every row. You can use double-pointed needles, a circular needle, or the magic loop method, depending on your personal preference and the size of your project.
Continue knitting the body until it reaches your desired length. Keep in mind that the body will be stuffed and will also need a tail at the end, so make sure to leave enough yarn at the end for finishing. You can check the length by comparing it to the head or measuring it against a ruler.
Once you have reached the desired length, it’s time to finish off the body. Cut the yarn, leaving a long tail for sewing. Thread the tail onto a yarn needle and carefully remove the stitches from the needle, threading the needle through each stitch. Pull tight to close off the end of the body.
Now that you have completed knitting the body of the snake, you can move on to stuffing it and sewing it onto the head. Refer to the pattern instructions for guidance on how to attach the body to the head. Enjoy watching your knitted snake come to life as you add each new section!
Increasing and decreasing stitches for shaping the snake:
The key to creating a realistic snake shape is to gradually increase and decrease stitches as needed. This will give the snake a tapered body and allow it to coil and slither realistically.
To increase stitches, you can use techniques such as knitting into the front and back of a stitch or making yarn overs. These increases can be placed strategically along the length of the snake to create wider sections for the body or the head.
When it comes to decreasing stitches, you can use techniques such as knitting two stitches together or slipping a stitch over another. Decreases are often used to create a narrowing effect, such as along the tail or towards the tip of the head.
It’s important to keep track of the number of stitches you are increasing or decreasing to ensure symmetry and balance in the snake’s shape. Using stitch markers or counting rows can help you keep track of the pattern.
Experiment with different types of increases and decreases to find the best technique for your snake pattern. By using these shaping techniques, you can create a lifelike and charming knitted snake.
How to knit eyes for a snake:
When knitting a snake, one of the important details to consider are its eyes. Knitted snake eyes can add character and make your snake toy look more lifelike. Here are a few steps to help you create eyes for your knitted snake:
Materials needed:
- Black yarn
- White yarn
- Knitting needles
- Embroidery needle
- Scissors
Instructions:
- Start by cutting a small length of both black and white yarn, about 6 inches each.
- Take the black yarn and using the knitting needles, cast on 6 stitches.
- Knit all the stitches in the first row.
- Continue knitting in the stockinette stitch for a few more rows until you have a square shape.
- Bind off the stitches and cut the yarn, leaving a long tail.
- Repeat the same process to knit another square using the white yarn.
- Position the black square on top of the white square, aligning the edges.
- Using the embroidery needle and the black yarn tail, sew the black square onto the white square, creating a round shape for the eye.
- Carefully sew the eye onto the snake’s head, making sure it is securely attached.
- Repeat the steps to create another eye for the other side of the snake’s head.
- Once both eyes are attached, weave in any loose yarn ends to finish.
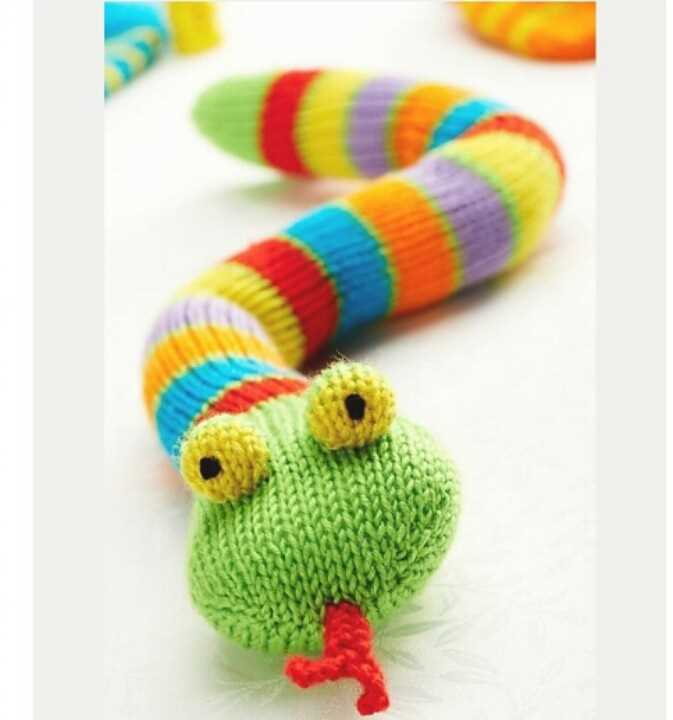
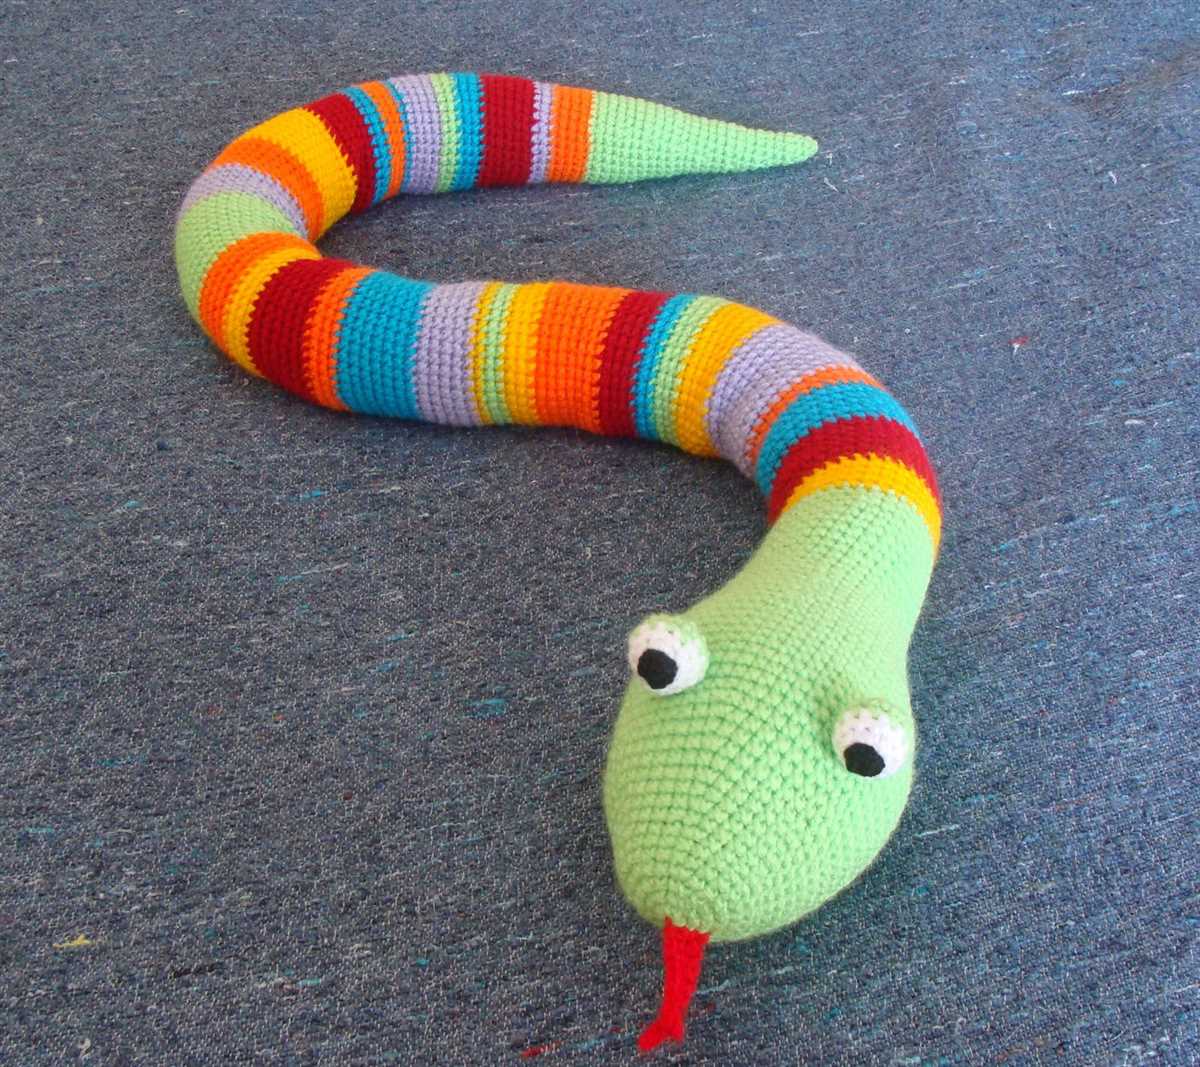
Following these steps, you can easily knit eyes for your snake toy. The contrasting colors of black and white will make the eyes stand out, giving your knitted snake a playful and realistic appearance.
Adding details to the snake’s body:
The knitted snake pattern is a fun and creative project that allows you to add various details to the snake’s body. These details can bring your knitted snake to life and make it more realistic and interesting.
One way to add details to the snake’s body is by using different colors of yarn. You can create a striped pattern by alternating between different colored yarns. This can give your snake a vibrant and eye-catching appearance. Additionally, you can use different textured yarns to create a unique and tactile experience for anyone who touches your knitted snake.
1. Scale patterns:
Another way to add details to the snake’s body is by adding scale patterns. You can achieve this by using a different stitch pattern, such as seed stitch or moss stitch, to create a textured pattern that resembles scales. You can place these scale patterns strategically along the snake’s body to give it a more realistic and reptilian look.
2. Facial features:
In order to make your knitted snake more expressive, you can add facial features such as eyes, tongue, and nostrils. You can use small buttons or beads for the eyes, or you can embroider them using colorful yarn. For the tongue, you can knit a small triangular shape and sew it onto the snake’s head. Adding these details will make your knitted snake more engaging and interactive.
3. Decorative accessories:
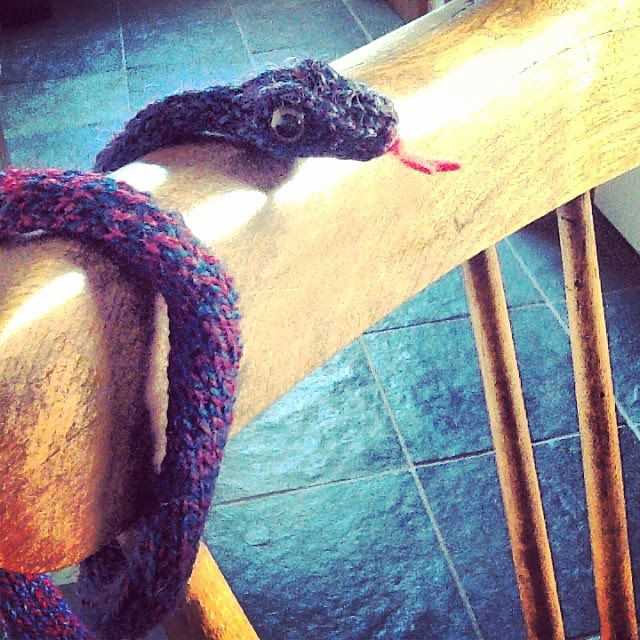
If you want to give your knitted snake a more playful and whimsical look, you can also add decorative accessories such as a bow tie, a hat, or even a miniature knitted scarf. These accessories can be easily made using small amounts of leftover yarn and can add a fun and personalized touch to your knitted snake.
Finishing the snake’s body:
Once you have completed knitting the main body of the snake, it’s time to finish it off. First, make sure that all loose ends and yarn tails are securely woven in so that they won’t come undone. This will help to give your snake a polished and professional finish.
Next, you can add any desired details or embellishments to your snake’s body. For example, you could embroider eyes or a mouth onto the head using a contrasting color of yarn. You could also add scales or other textures by sewing on small pieces of fabric or using different stitch patterns.
If you want to give your snake a more lifelike appearance, you can lightly stuff the body with polyester fiberfill or another soft filling material. Be careful not to overstuff it, as this could distort the shape of the snake. Use small amounts of stuffing and distribute it evenly throughout the body.
Finally, you can sew up the opening at the end of the snake’s body. Use a simple whipstitch or mattress stitch to close the seam neatly. Make sure to secure the thread securely at the end to prevent it from coming undone.
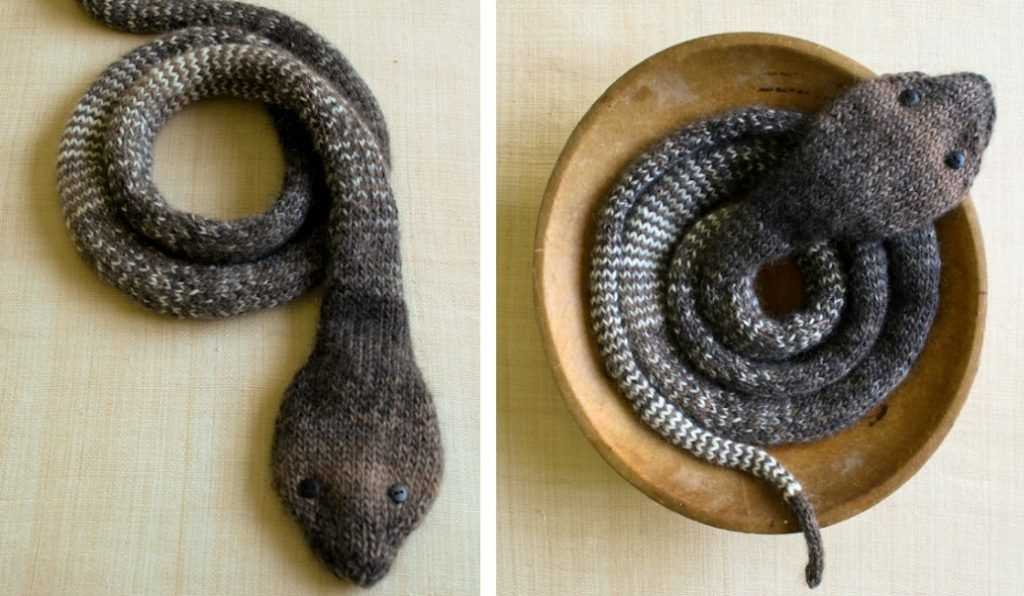
Once you have finished these steps, your knitted snake’s body should be complete and ready for the next phase of the project, such as adding a head, tail, or other details. With a little creativity and attention to detail, you can create a unique and charming knitted snake that will delight both children and adults.
How to sew and stuff the knitted snake:
Once you have completed knitting your snake, it’s time to sew it together and stuff it to give it a three-dimensional shape. Follow these steps to achieve the desired result:
1. Gather your materials:
Before you start sewing, make sure you have all the necessary materials handy. You will need a yarn needle, scissors, stuffing material such as polyester fiberfill, and pins to hold the pieces together temporarily.
2. Arrange the pieces:
If your knitted snake consists of multiple pieces, such as the head, body, and tail, lay them out in the desired order to ensure proper alignment. Use pins to hold the pieces together temporarily and adjust the placement if needed.
3. Sew the pieces together:
Thread the yarn needle with a strand of yarn that matches the color of your snake. Starting from one end, use a whipstitch or mattress stitch to sew the pieces together. Make sure to secure the yarn tightly, but not too tight that it distorts the shape of the snake.
4. Stuff the snake:
Once the pieces are securely sewn together, it’s time to stuff the snake. Take small amounts of polyester fiberfill and gently push it into the body of the snake, using the handle end of a crochet hook or your fingers. Make sure to evenly distribute the stuffing to create a consistent shape.
5. Finish sewing and add details:
After stuffing, continue sewing along the open edge of the snake to close it up. Make a knot to secure the yarn, cut off any excess, and weave in the loose ends. If desired, you can also embroider eyes, a mouth, or other details on the snake using a contrasting color of yarn.
Following these steps, you will be able to sew and stuff your knitted snake, giving it a finished and realistic appearance.
Suggestions for customizing your knitted snake:
Once you have mastered the basic knitted snake pattern, you can unleash your creativity and customize your snake in various ways. Here are some suggestions to get you started:
- Colorful patterns: Use different colors of yarn to create unique patterns on your snake. Experiment with stripes, polka dots, or even animal-inspired patterns like zebra or leopard print.
- Adding accessories: Give your snake some personality by adding accessories like bows, hats, or scarves. These little extras can make your snake look even more charming.
- Eyes and tongue: Embroider or sew on eyes and a tongue to give your snake a lively expression. You can use buttons, felt, or even beads to create different eye designs and expressions.
- Custom length: Modify the length of your snake according to your desired size. You can make a longer snake for a dramatic effect or a shorter one as a keychain or a little toy.
- Textured scales: Experiment with different stitch patterns and textures to create interesting scales on your snake. You can try ribbing, bobbles, or even lace stitches to give your snake a unique touch.
Remember, these are just suggestions to spark your creativity. Feel free to explore and come up with your own ideas for customizing your knitted snake. With endless possibilities, you can create a snake that is truly one-of-a-kind!