
Are you looking for a cozy and stylish accessory to keep your hands warm during the colder months? Look no further! We have a free knitting pattern for women’s mittens that is perfect for beginners and experienced knitters alike. Whether you are knitting for yourself or as a gift for a loved one, these mittens are sure to be a hit.
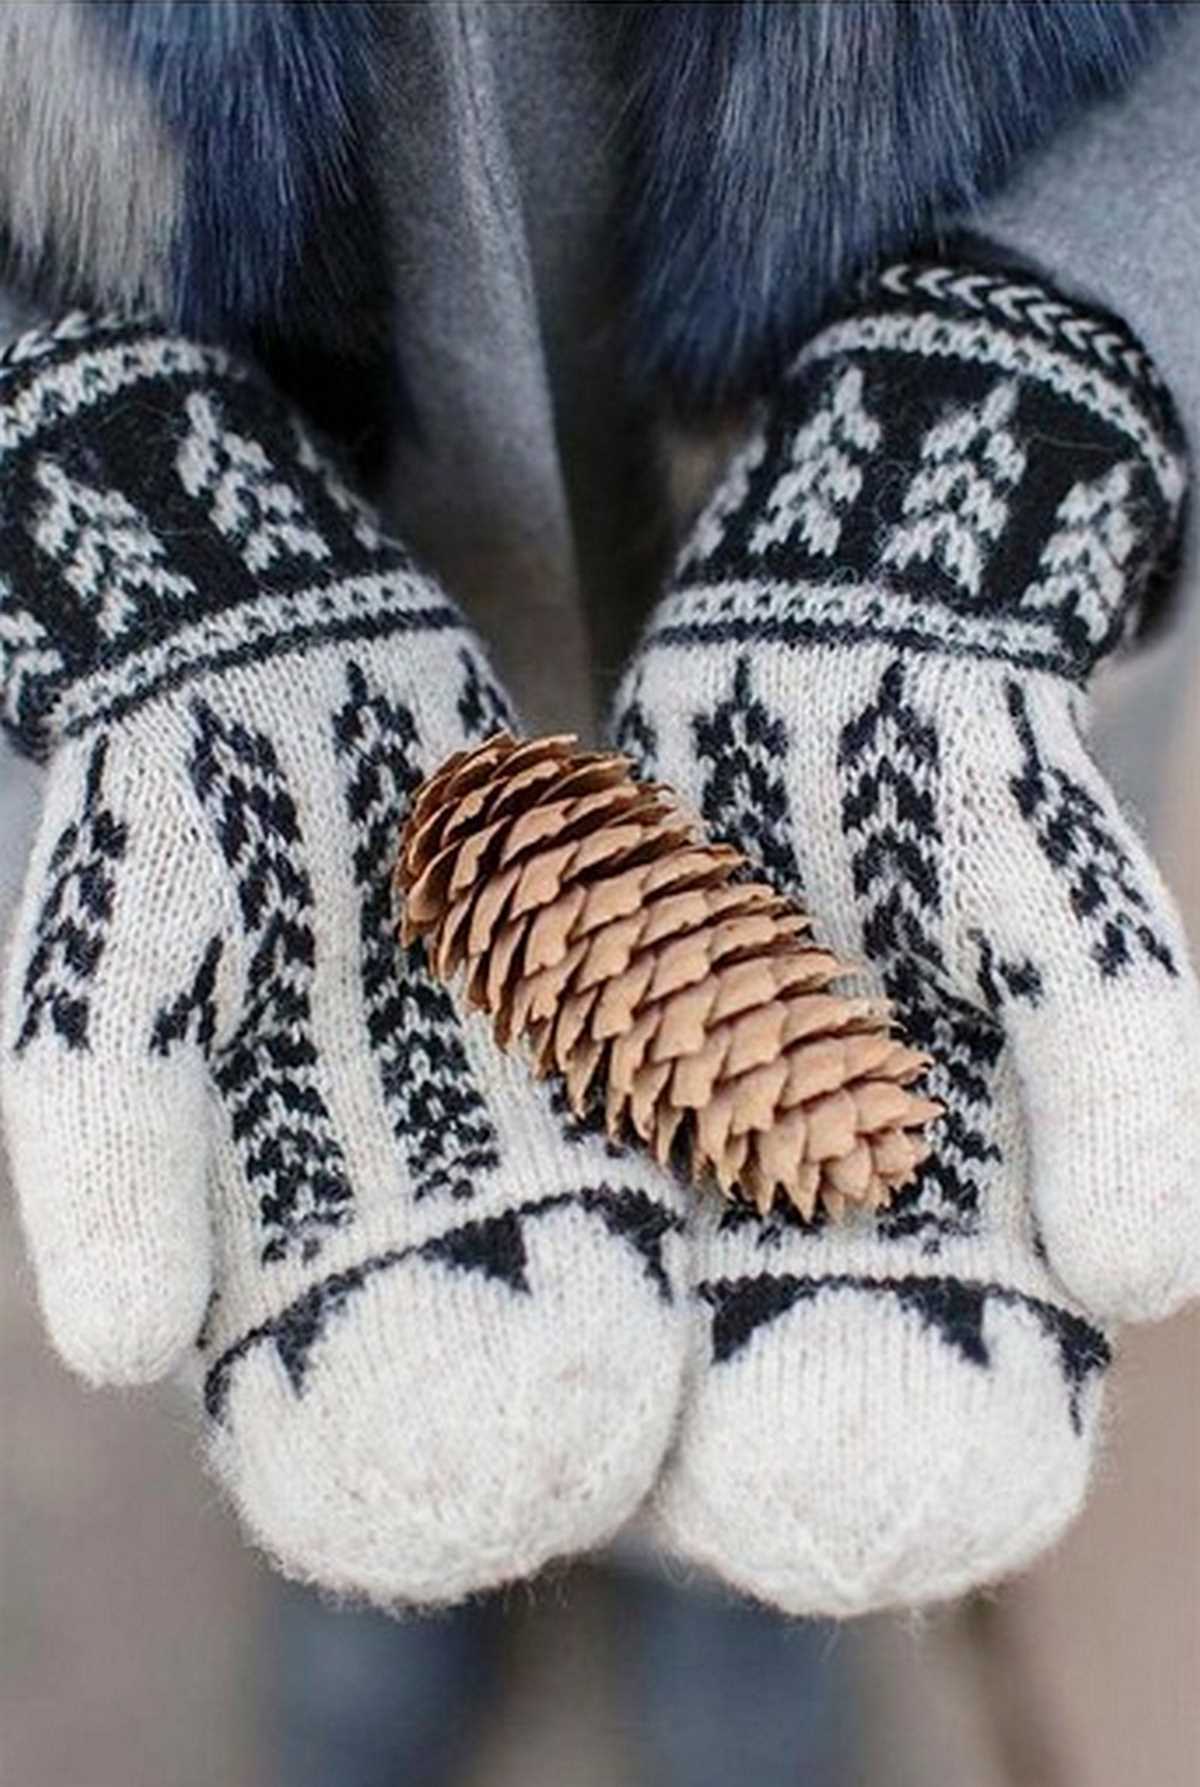
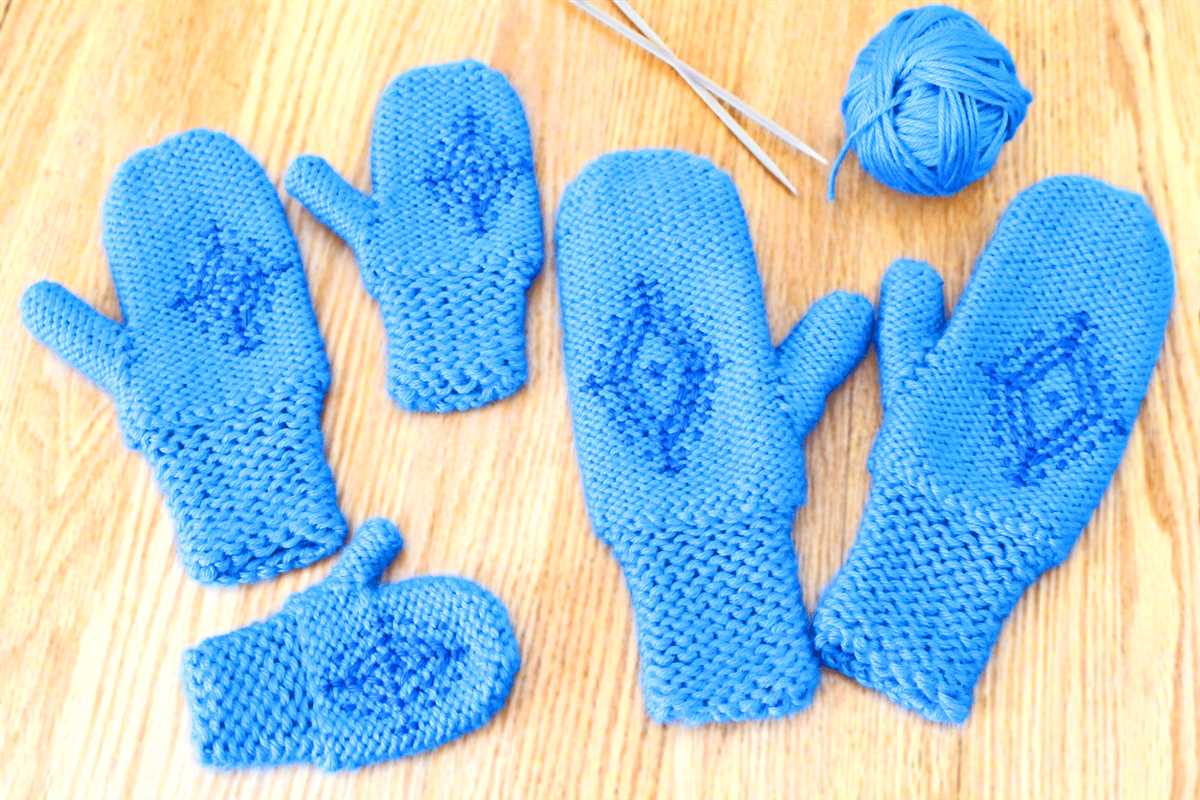
Our free knitting pattern features a timeless design with a classic cable knit pattern on the back of the hand. The mittens are knit in the round using double-pointed needles, which creates a seamless finish and ensures a snug fit. The soft and warm yarn makes these mittens perfect for everyday wear.
With our detailed instructions, you’ll be able to knit up a pair of these cozy mittens in no time. The pattern includes sizes for small, medium, and large hands, so you can easily customize the fit. Plus, we’ve included helpful tips and tricks to help you along the way, making this pattern suitable for knitters of all skill levels.
So, grab your knitting needles and get ready to create a pair of mittens that are not only functional but also fashionable. Download our free knitting pattern for women’s mittens today and enjoy the satisfaction of making something beautiful with your own two hands.
Free Knitting Pattern for Women’s Mittens
Are you looking for a free knitting pattern for women’s mittens? Look no further! We have the perfect pattern for you to create cozy and stylish mittens for yourself or as a gift.
This knitting pattern is suitable for knitters of all skill levels, from beginners to advanced. It includes step-by-step instructions and helpful tips to ensure your project turns out perfectly. The pattern uses basic knitting stitches, such as knit and purl, making it easy to follow along.
To begin, gather your materials: a pair of knitting needles (size will depend on your desired gauge), a skein of yarn in your chosen color, a stitch marker, and a yarn needle for finishing. You can also choose to use double-pointed needles or circular needles, depending on your preferred knitting method.
The pattern starts with casting on the required number of stitches and creating a ribbed cuff. Then, you’ll begin knitting in the round to create the body of the mitten, using a combination of knit and purl stitches to create a textured pattern. The thumb gusset is created by increasing stitches in a specific sequence.
Once the body of the mitten is complete, you’ll move on to the thumb section. This involves placing the thumb stitches on a separate set of stitches or waste yarn, knitting the hand section a bit further, and then coming back to create the thumb with the reserved stitches.
Finally, you’ll weave in any loose ends and seam the mitten closed. You can add decorative touches, such as a pom-pom or button, if desired. And there you have it – a beautiful pair of handmade mittens ready to keep your hands warm during the cold winter months!
So why wait? Download the free knitting pattern for women’s mittens today and get started on your next knitting project.
Basic Materials for Knitting Mittens
When it comes to knitting mittens, it’s important to have the right materials on hand to ensure a successful project. Here are the basic materials you will need:
Yarn:
Choose a soft and warm yarn that is suitable for making mittens. Opt for a yarn that is durable and easy to work with. You can use either acrylic or natural fibers such as wool or alpaca. Pick the color and thickness of yarn that suits your style and the desired warmth of the mittens.
Knitting Needles:
You will need a set of double-pointed knitting needles in the appropriate size for your chosen yarn. Generally, a size 5 or 6 needle is suitable for most worsted weight yarn. Make sure the needles are comfortable to hold and have a smooth surface for easy knitting.
Tape Measure or Ruler:
To ensure the mittens fit properly, you will need a tape measure or ruler to measure your hand size. This will help you determine the correct size to knit and adjust the pattern if needed.
Scissors:
A pair of sharp scissors is essential for cutting the yarn and trimming any excess threads. Choose a pair that is comfortable to handle and make clean cuts.
Stitch Markers:
Stitch markers are useful for marking the beginning of a round or any special stitches in the pattern. They can be as simple as small safety pins or specially designed knitting markers.
Yarn Needle:
A yarn needle with a large eye is needed for weaving in loose ends and sewing up the final seams. Look for a needle that is sturdy and easy to thread.
Having these basic materials at hand will ensure a smooth and enjoyable knitting experience as you create beautiful mittens for yourself or as a gift.
Choosing the Right Yarn for Women’s Mittens
When knitting mittens for women, choosing the right yarn is crucial to ensure comfort, warmth, and durability. The yarn you choose will determine the overall quality and appearance of the finished mittens. Here are a few important factors to consider when selecting yarn for women’s mittens.
1. Fiber Content
The fiber content of the yarn plays a significant role in determining the properties of the mittens. Natural fibers like wool offer excellent insulation and moisture-wicking properties, making them ideal for keeping hands warm and dry in cold weather. For extra warmth, you might consider using a yarn blend that includes alpaca or mohair. If you prefer a softer and more lightweight option, yarns made from cotton or bamboo fibers can be a great choice. Consider the preferences and needs of the wearer before making a decision.
2. Weight and Thickness
The weight and thickness of the yarn will impact the overall appearance and performance of the mittens. Thicker yarns create bulkier mittens that offer more insulation, while thinner yarns result in a more lightweight and flexible finished product. Consider the climate and intended use of the mittens when selecting the weight and thickness of the yarn. For colder climates, opt for thicker yarns with higher stitch counts, while for milder temperatures, thinner yarns with lighter weights may be suitable.
3. Durability
Mittens are subjected to constant friction and wear, so choosing a yarn that offers durability is essential. Look for yarns that are known for their sturdiness and resistance to pilling and stretching. Yarns with added nylon or other synthetic fibers can enhance durability, ensuring that the mittens maintain their shape and structure over time. Consider the care instructions of the yarn as well, as some may require special handling or have limitations on machine washing.
By considering the fiber content, weight and thickness, and durability of the yarn, you can select the perfect yarn for women’s mittens. Whether you prioritize warmth, softness, or longevity, there are numerous yarn options available to meet your specific needs and preferences. Experiment with different yarns to find the perfect combination of comfort, style, and functionality for your handmade mittens.
Knitting Needles for Mittens
When it comes to knitting mittens, choosing the right knitting needles is crucial for achieving the desired results. The size and material of the needles can greatly impact the final product.
Size: The size of the knitting needles will determine the gauge and the overall size of the mittens. Smaller needles, such as US size 1 or 2 (2.25mm-2.75mm), will produce tighter stitches and smaller mittens, while larger needles like US size 4 or 5 (3.5mm-3.75mm) will create looser stitches and larger mittens. It is important to check the pattern to determine the recommended needle size, as it may vary depending on the yarn weight and the desired fit of the mittens.
Material: The material of the needles can affect the texture and drape of the knitted fabric. Common knitting needle materials include metal, wood, and plastic. Metal needles, such as aluminum or stainless steel, are known for their durability and smoothness, allowing for faster knitting. Wood needles, like bamboo or birch, offer a warmer feel and a natural grip, making them a popular choice for many knitters. Plastic needles are lightweight and flexible, making them ideal for knitters who prefer a softer touch. Ultimately, the choice of material comes down to personal preference and the desired outcome of the mittens.
When selecting knitting needles for mittens, it is essential to consider both the size and material to achieve the desired gauge, size, and texture of the finished product. Experimenting with different needle options can help you find the perfect combination for your knitting project.
Gauge and Stitch Pattern for Women’s Mittens
When knitting women’s mittens, it is crucial to achieve the correct gauge in order to ensure a proper fit. This can be done by using the recommended needle size and yarn weight mentioned in the free knitting pattern. The gauge is typically given in the pattern, and it tells you how many stitches and rows should be in a certain measurement, usually 4×4 inches.
The stitch pattern used in women’s mittens can vary depending on the desired design and level of difficulty. Some common stitch patterns for mittens include ribbing, cables, and colorwork. Ribbing is often used at the cuffs to provide stretch and a snug fit. Cables can add texture and visual interest to the mittens, while colorwork allows for intricate designs and the use of multiple colors.
Ribbing Stitch Pattern: The ribbing stitch pattern is typically worked using a combination of knit and purl stitches. For example, a common ribbing pattern is k1, p1, which means knitting one stitch and then purling one stitch. This pattern is repeated across the round or row to create the ribbed effect. Ribbing is often used at the cuffs of mittens to provide stretch and a snug fit.
Cable Stitch Pattern: Cable stitch patterns involve crossing stitches over each other to create twists and cables. This adds texture and visual interest to the mittens. Cable patterns can vary in complexity, from simple two-stitch cables to more intricate designs. A cable needle is typically used to hold stitches out of the way while crossing others.
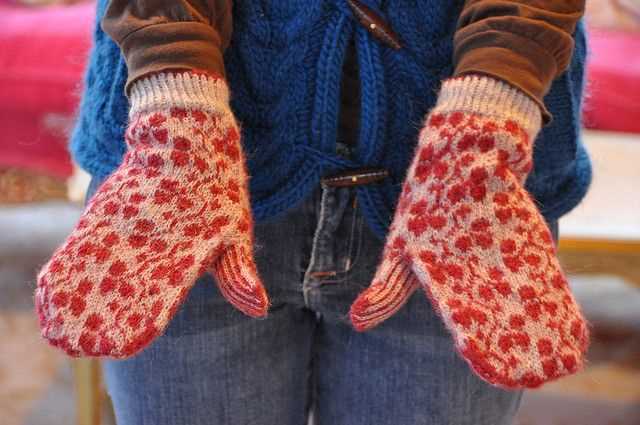
Colorwork Stitch Pattern: Colorwork stitch patterns involve using multiple colors to create patterns or motifs on the mittens. This can be done using stranded knitting, where two or more colors are carried along the back of the work, or intarsia, where separate yarn bobbins or balls are used for each color. Colorwork patterns can range from simple stripes to intricate Fair Isle or Norwegian designs.
By understanding the importance of gauge and the different stitch patterns that can be used for women’s mittens, you can create beautiful and well-fitting mittens for yourself or as gifts for others.
Casting on Stitches for Women’s Mittens
Step 1: To begin knitting your women’s mittens, you will first need to cast on a certain number of stitches. The number of stitches you need will depend on the size of the mitten you are making and the thickness of the yarn you are using. Check the pattern instructions to determine the correct number of stitches to cast on.
Step 2: Once you know how many stitches to cast on, you can use the long-tail cast-on method. This is a popular method for casting on stitches and creates a neat, flexible edge. To use the long-tail cast-on method, you will need to measure a length of yarn that is about three times the width of your finished mitten. This will give you enough yarn to work with while casting on.
Step 3: To begin the long-tail cast-on, make a slipknot near the end of the yarn. Insert your knitting needle into the slipknot, holding the needle in your right hand. Hold the working end of the yarn in your left hand. Make sure the tail of the yarn (the end without the slipknot) is positioned over your thumb.
Step 4: With your right hand, bring the needle up and over the tail of the yarn, catching the yarn with the tip of the needle. Now, bring the needle back down and behind the thumb, catching the yarn as you go. This creates a loop of yarn on the needle.
Step 5: Continue making loops in this way until you have cast on the required number of stitches. Take your time and make sure each loop is snug but not too tight. The loops should slide easily along the needle.
Step 6: Once all the stitches are cast on, you can begin knitting your women’s mittens according to the pattern instructions. The cast-on edge will form the cuff of the mitten, so make sure it is neat and even. If you prefer, you can also use a different cast-on method, such as the cable cast-on or the knitted cast-on, depending on your preference and the desired edge finish.
By following these steps and casting on the correct number of stitches, you will be well on your way to knitting a cozy and stylish pair of women’s mittens.
Knitting the Cuff for Women’s Mittens
When knitting women’s mittens, one of the first steps is to start with the cuff. The cuff not only adds a decorative touch but also provides a snug fit around the wrist to keep the cold air out. There are different patterns and techniques you can use to create the perfect cuff for your mittens.
Ribbed Cuff: One of the most common cuff patterns is the ribbed cuff. This pattern creates a stretchy and flexible cuff that can easily fit different wrist sizes. To knit a ribbed cuff, you can use a combination of knit and purl stitches in a regular pattern, such as knitting two stitches and purling two stitches. This creates alternating columns of knit and purl stitches, giving the cuff a ribbed texture.
Folded Cuff: Another option for a women’s mitten cuff is the folded cuff. This cuff adds an extra layer of warmth and insulation to the wrist area. To create a folded cuff, you will need to knit a longer cuff that is folded in half before attaching it to the body of the mitten. This technique can be used with different stitch patterns, such as ribbing or a simple stockinette stitch.
- Seed Stitch Cuff: The seed stitch is a popular stitch pattern that creates a textured fabric with small, raised bumps. To knit a seed stitch cuff, alternate between knitting and purling stitches in a regular pattern. This creates a cuff with an interesting texture that adds a unique touch to your mittens.
- Cable Cuff: If you want to add some intricate detail to your women’s mittens, you can consider knitting a cable cuff. Cables are created by crossing stitches over each other to create a twisted effect. This technique requires a bit more skill and attention, but the result is a stunning cuff that adds a touch of elegance to your mittens.
Whether you choose a ribbed cuff, folded cuff, seed stitch cuff, or cable cuff, the cuff of your women’s mittens is an important part of the overall design. It not only adds style but also ensures a comfortable and secure fit. Experiment with different cuff patterns to find the one that suits your knitting style and the overall look you want to achieve for your mittens.
Shaping the Thumb Opening for Women’s Mittens
When knitting women’s mittens, one of the key steps is shaping the thumb opening. This is where you create a gap in the knitting to accommodate the thumb. The thumb opening is essential for ensuring a comfortable fit and ease of movement.
To shape the thumb opening, you will typically place a certain number of stitches on scrap yarn or stitch holders. This will create a gap in the knitting where the thumb will eventually be inserted. The number of stitches you set aside will depend on the pattern and the size of the mittens you are making.
Once the stitches for the thumb opening have been set aside, you will continue knitting the rest of the mitten as instructed in the pattern. This may involve shaping the hand portion of the mitten, creating a cuff, or adding any decorative elements.
Once the rest of the mitten is complete, you will then return to the thumb opening. This is where you will pick up the stitches that were set aside on scrap yarn or stitch holders. Carefully remove the scrap yarn or stitch holders and transfer the stitches back onto the knitting needles.
From there, you will follow the pattern instructions to knit the thumb. This may involve decreasing or increasing stitches to shape the thumb, creating a gusset, or adding any desired details. Be sure to carefully follow the pattern and check your gauge to ensure a proper fit for the thumb.
Shaping the thumb opening for women’s mittens is an important step in the knitting process. It allows for a comfortable fit and ensures that the mittens will be functional and practical. With the right technique and attention to detail, you can create a thumb opening that enhances the overall design and functionality of the finished mittens.
Knitting the Hand for Women’s Mittens

When it comes to knitting women’s mittens, one of the most important parts to focus on is the hand section. The hand section needs to fit comfortably and provide warmth, while also allowing for flexibility and movement. Knitting this section requires attention to detail and careful measurement to ensure the perfect fit.
To begin knitting the hand section, cast on the desired number of stitches using your chosen yarn and needle size. It is recommended to use a stitch marker to mark the beginning of the round. Knit in the round until the desired length is reached, typically measuring from the base of the thumb to just below the fingertips.
Thumb Gusset: To create a thumb gusset, increases are needed to allow for the thumb to fit comfortably within the mitten. It is important to plan the location and number of increases based on the desired size and shape of the thumb. Popular methods include using yarn overs or knitting into the front and back of a stitch. These increases are usually placed along the side of the hand, near the base of the thumb.
Shaping the Top: Once the hand section is complete, it is time to shape the top of the mitten. This involves decreasing stitches gradually to create a rounded or pointed top, depending on the desired look. Common decrease methods include knitting two stitches together or slipping a stitch knit-wise and knitting the next stitch, then passing the slipped stitch over.
Finishing: Finally, finish off the hand section by binding off all stitches. Make sure to leave a long tail for seaming later on. To give the mittens a polished look, weave in all loose ends using a tapestry needle. This will ensure that the mittens are neat and tidy, ready to be worn and enjoyed.
Overall, knitting the hand section of women’s mittens requires attention to detail and skill. By following a pattern or using measurements, you can create mittens that are not only warm and comfortable, but also fit perfectly. Whether you’re an experienced knitter or just starting out, knitting mittens can be a rewarding project that results in a cozy accessory for the cold winter months.
Decreasing Stitches for the Mitten Top
When you reach the desired length for your mitten, it’s time to start decreasing the stitches for the mitten top. This is done to create the rounded shape that fits snugly on your hand. Here’s how you do it:
1. Begin by knitting the first two stitches together. Slide the right needle into the first two stitches on the left needle, knit them together as if they were one stitch. This decreases the stitch count by one.
2. Continue knitting the following stitches until you reach the marker that indicates the center of the mitten. This can vary depending on the pattern, so make sure to follow the instructions or count the stitches to find the center marker.
3. Once you reach the center marker, it’s time to start decreasing stitches again. Knit the next two stitches together, just like in step 1. This decreases the stitch count by one.
4. Continue knitting the remaining stitches until you reach the end of the row.
5. On the next row, repeat steps 1 to 4. Knit the first two stitches together, knit until the center marker, knit the next two stitches together, and knit to the end of the row.
6. Repeat these decreasing steps on every other row until you have the desired number of stitches left for the mitten top. This will create a rounded shape that fits your hand comfortably. Each row of decreases will reduce the stitch count by two.
7. Once you have the desired number of stitches, cut the yarn, leaving a tail long enough to weave in later. Thread the tail through the remaining stitches on the needle, pull it tight, and secure it in place.
Congratulations! You have successfully decreased the stitches for the mitten top. Now you can finish off the mitten by weaving in any loose ends and adding any desired embellishments.
Finishing the Women’s Mittens
Once you have completed knitting both mittens following the pattern, it’s time to finish them off and make them wearable. Here are the final steps for finishing the women’s mittens:
1. Weave in the yarn ends
Using a yarn needle, carefully weave in all yarn ends on the wrong side of the mitten. Make sure to secure the ends by weaving through the stitches to prevent them from unraveling.
2. Block the mittens (optional)
If desired, you can block the mittens to give them a more polished and professional look. To block the mittens, soak them in lukewarm water for about 15 minutes. Gently squeeze out the excess water and lay them flat on a towel. Shape the mittens to the desired size and let them dry completely.
3. Sew the thumb seam
Place the thumb stitches onto double-pointed needles or a spare circular needle. Using a yarn needle and the same yarn used for the mittens, sew the seam of the thumb closed by weaving the needle in and out of the stitches. Make sure to fasten off securely at the end.
4. Add any desired embellishments (optional)
If you want to add any embellishments to the mittens, such as buttons, bows, or embroidery, now is the time to do so. Sew them onto the mitten securely using a needle and thread or embroidery floss.
5. Enjoy your finished women’s mittens!
Once you have completed all the finishing touches, your women’s mittens are ready to be worn and enjoyed. You can pair them with any winter outfit and keep your hands warm and cozy during the cold weather. These mittens also make great gifts for friends and family.
Follow these steps to complete your women’s mittens and showcase your knitting skills. Whether you are a beginner or an experienced knitter, these mittens are a fun and rewarding project that will keep you warm for many winters to come.