
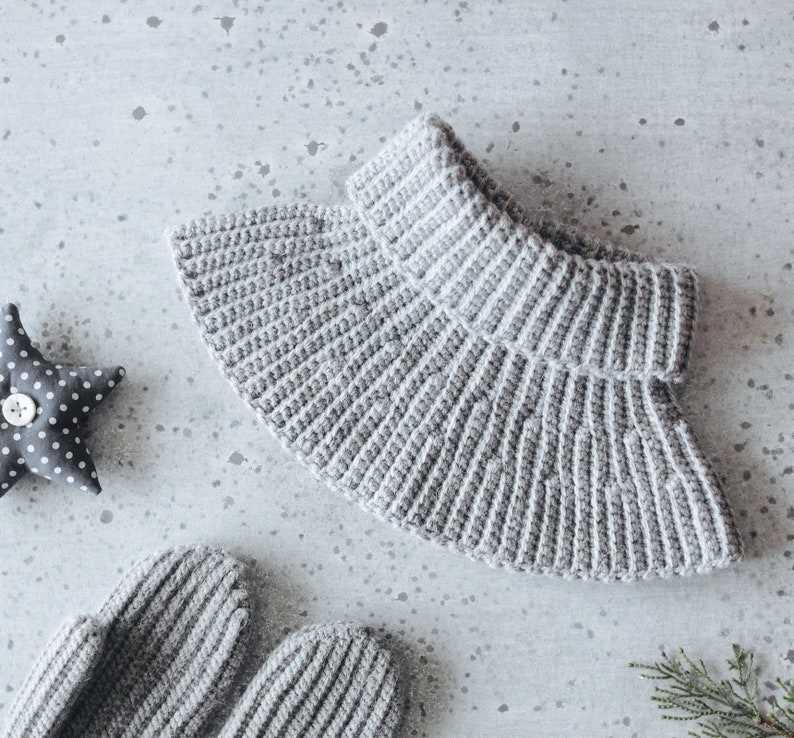
Winter is the perfect time to bundle up and keep warm, and what better way to do so than with a cozy knitted neck warmer? These versatile accessories not only keep you snug and protected from the cold, but they also add a stylish touch to any outfit. Whether you’re a knitting enthusiast looking for a new project or someone looking to add some warmth to your winter wardrobe, knitted neck warmers are a must-have accessory.
There are countless patterns available for knitted neck warmers, ranging from simple and classic designs to more intricate and detailed styles. Whether you prefer a basic stockinette stitch, a cable pattern, or even a lace design, there is a pattern out there to suit your skill level and personal style. Many patterns also allow you to customize the size, length, and width of the neck warmer to ensure a perfect fit.
Knitted neck warmers are not only fashionable and cozy but also make for great gifts. Their versatility and simplicity make them a popular choice for knitters of all levels, and they can be completed in just a few hours or over the course of a few evenings. With so many options available, you can easily create a unique and personalized neck warmer for yourself or someone special.
Knitted Neck Warmer Patterns
Knitted neck warmers are a stylish and cozy accessory to add to your winter wardrobe. Whether you’re knitting for yourself or as a gift, there are countless patterns available to suit every style and skill level.
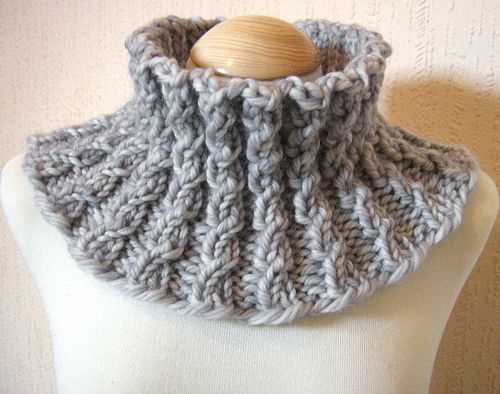
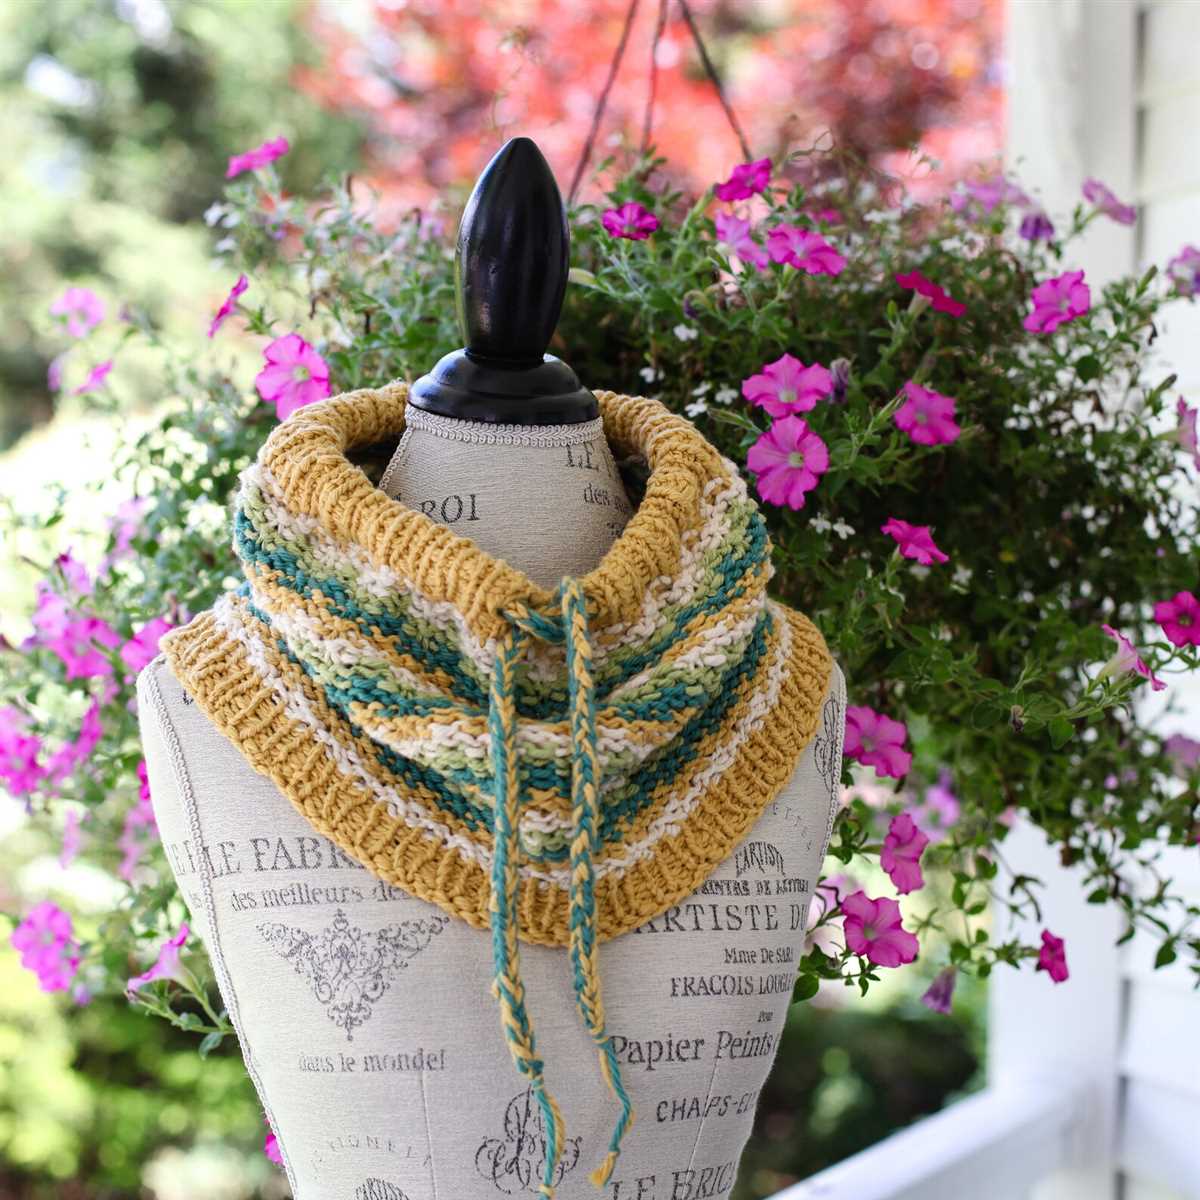
One popular pattern is the classic cowl design. This simple and versatile neck warmer is knitted in the round, creating a seamless tube that can be worn loosely draped around the neck or pulled up to cover the lower face. The cowl can be made with a variety of stitch patterns, such as ribbing, cables, or lace, to add texture and interest. It can be knitted with a chunky yarn for extra warmth or a lighter yarn for a more delicate look.
Pattern Example: Ribbed Cowl
Materials:
- US size 10 circular knitting needles
- 200 yards of bulky weight yarn
- Cable needle
- Tapestry needle
Instructions:
- Cast on 120 stitches.
- Join in the round, being careful not to twist the stitches.
- Knit in a *K2, P2* ribbing pattern for 8 inches.
- Next, work a cable pattern for 6 rows, crossing every 8 stitches to the right.
- Continue knitting in the ribbing pattern for another 8 inches.
- Bind off all stitches and weave in ends.
This ribbed cowl pattern is just one example of the many possibilities when it comes to knitted neck warmers. With a wide range of yarns and stitch patterns to choose from, you can customize your neck warmer to fit your personal style and keep you warm and cozy all winter long.
Learning the Basics of Knitting
Knitting is a popular craft that involves the creation of fabric by interlocking loops of yarn with knitting needles. It is both a practical skill and a creative outlet, allowing individuals to create unique and personalized garments and accessories. In order to get started with knitting, it is important to learn the basics.
Gathering Materials
Before you begin knitting, you will need to gather a few basic materials. This includes knitting needles, which come in a variety of sizes and materials. Additionally, you will need yarn, which also comes in various thicknesses, colors, and textures. It is a good idea to start with a medium-weight yarn and a pair of needles that are comfortable for you to hold.
Understanding the Stitches
One of the most important aspects of knitting is understanding the different stitches. The two main types of stitches are knit stitches and purl stitches. Knit stitches create a smooth and tightly woven fabric, while purl stitches create a bumpy texture. By combining these two basic stitches, you can create a variety of patterns and textures in your knitting projects.
Learning Basic Techniques
Once you have a basic understanding of stitches, you can begin learning some of the fundamental knitting techniques. This includes casting on, which is how you start your knitting project, and binding off, which is how you finish it. Other important techniques to learn include increasing and decreasing stitches, which allow you to shape your knitted fabric, and knitting in the round, which is used for creating seamless projects like hats and socks.
Practice and Patience
Like any new skill, knitting takes practice and patience. Don’t be discouraged if your first few projects don’t turn out perfect – it’s all part of the learning process. Start with simple projects, such as scarves or dishcloths, and gradually work your way up to more complex designs. As you gain experience and confidence, you’ll be able to tackle more advanced knitting patterns and create beautiful, one-of-a-kind pieces.
Types of Yarn for Neck Warmers
When it comes to knitting neck warmers, it is important to choose the right type of yarn that not only provides warmth but also complements the overall design. There are several different types of yarn to consider, each with its own unique characteristics and qualities.
1. Merino Wool
Merino wool is a popular choice for neck warmers due to its softness, warmth, and natural elasticity. This type of yarn is derived from the Merino breed of sheep, known for their fine and high-quality wool. Merino wool is known for its excellent insulation properties, making it perfect for keeping the neck warm in cold weather.
2. Alpaca Yarn

Alpaca yarn is another excellent choice for neck warmers. It is soft, lightweight, and provides excellent warmth even in extremely cold conditions. Alpaca fiber is hypoallergenic, making it an ideal choice for those with sensitive skin. Additionally, alpaca yarn comes in a wide range of natural colors, allowing for beautiful patterns and color combinations.
3. Mohair Yarn
Mohair yarn is made from the fleece of Angora goats. It is known for its lustrous sheen and silky texture. Mohair yarn is highly durable and has excellent insulating properties, making it a great choice for neck warmers. It also has a natural stretch, ensuring a comfortable fit around the neck.
4. Cotton Yarn
Cotton yarn is a lightweight and breathable option for neck warmers, making it suitable for transitional seasons or cooler summer evenings. It is soft and gentle on the skin, making it a great choice for those with allergies or sensitivities. Additionally, cotton yarn comes in a wide range of colors, allowing for endless possibilities in terms of design and style.
5. Silk Yarn
Silk yarn is a luxurious choice for neck warmers. It is known for its smooth, shiny, and soft texture. Silk yarn provides excellent insulation and warmth while adding an elegant touch to any neck warmer design. It is also naturally hypoallergenic, making it suitable for those with sensitive skin.
When selecting yarn for neck warmers, it is important to consider factors such as warmth, softness, breathability, and personal preferences. Each type of yarn offers its own unique qualities, allowing for endless possibilities in terms of design and comfort.
Choosing the Right Needles

When it comes to knitting a neck warmer, choosing the right needles is crucial. The size and material of the needles can greatly affect the outcome of your project.
One important factor to consider is the size of the needles. Different needle sizes create different stitch sizes, which can result in a tighter or looser knit. If you want a denser, warmer neck warmer, you may want to opt for smaller needles. On the other hand, if you prefer a more open, airy design, larger needles may be the better choice.
Material
Another consideration is the material of the needles. Knitting needles are available in a variety of materials, including metal, wood, and plastic. Each material has its own unique properties that can impact your knitting experience. Metal needles are known for their smoothness and durability, but they can also be slippery, making it easier for stitches to slide off. Wood needles offer a warm, natural feel and provide a good grip on the stitches, but they may not glide as smoothly as metal needles. Plastic needles are lightweight and affordable, but they can be less durable and may break under pressure.
Circular or Straight?
Finally, you’ll need to decide whether to use circular needles or straight needles for your neck warmer. Circular needles are a popular choice for knitting in the round, as they eliminate the need to seam the project later. They also provide more flexibility in terms of the length of the project and can accommodate a larger number of stitches. Straight needles, on the other hand, are better suited for knitting flat pieces and can be more comfortable for some knitters. Ultimately, the choice between circular and straight needles depends on your personal preference and the specific design of your neck warmer pattern.
By carefully considering the size, material, and type of needles, you can ensure that you choose the right tools to create a beautiful and functional knitted neck warmer.
Simple Knitted Neck Warmer Pattern
If you’re looking for a quick and easy knitting project that will keep you warm during the colder months, then a knitted neck warmer is the perfect choice. This simple pattern is great for beginners and can be completed in just a few hours.
To start, you’ll need some chunky yarn and a pair of knitting needles. Choose a yarn color that matches your style and personality. You’ll want to cast on about 24 stitches, but you can adjust the number to make it wider or narrower to fit your preference.
Once you have cast on your stitches, you can start knitting in a basic rib stitch pattern. This will create a stretchy and cozy fabric for your neck warmer. Simply knit the first two stitches, then purl the next two stitches. Repeat this pattern across the row until you reach the end.
Continue knitting in this rib stitch pattern for about 8 inches, or until your neck warmer reaches the desired length. You can try it on as you go to make sure it fits comfortably around your neck.
Once you’ve reached the desired length, it’s time to bind off your stitches. Cut the yarn, leaving a long tail, and thread it through your final stitch. Pull tight to secure the end. You can then sew the two ends of your neck warmer together to create a loop shape.
Your simple knitted neck warmer is now complete! It’s the perfect accessory to keep you warm and stylish during the colder months. You can wear it alone or layer it with other winter accessories for extra warmth.
- Materials needed:
- Chunky yarn
- Knitting needles
- Instructions:
- Cast on 24 stitches
- Knit 2, Purl 2 across the row
- Continue knitting in rib stitch pattern for 8 inches
- Bind off stitches and sew ends together
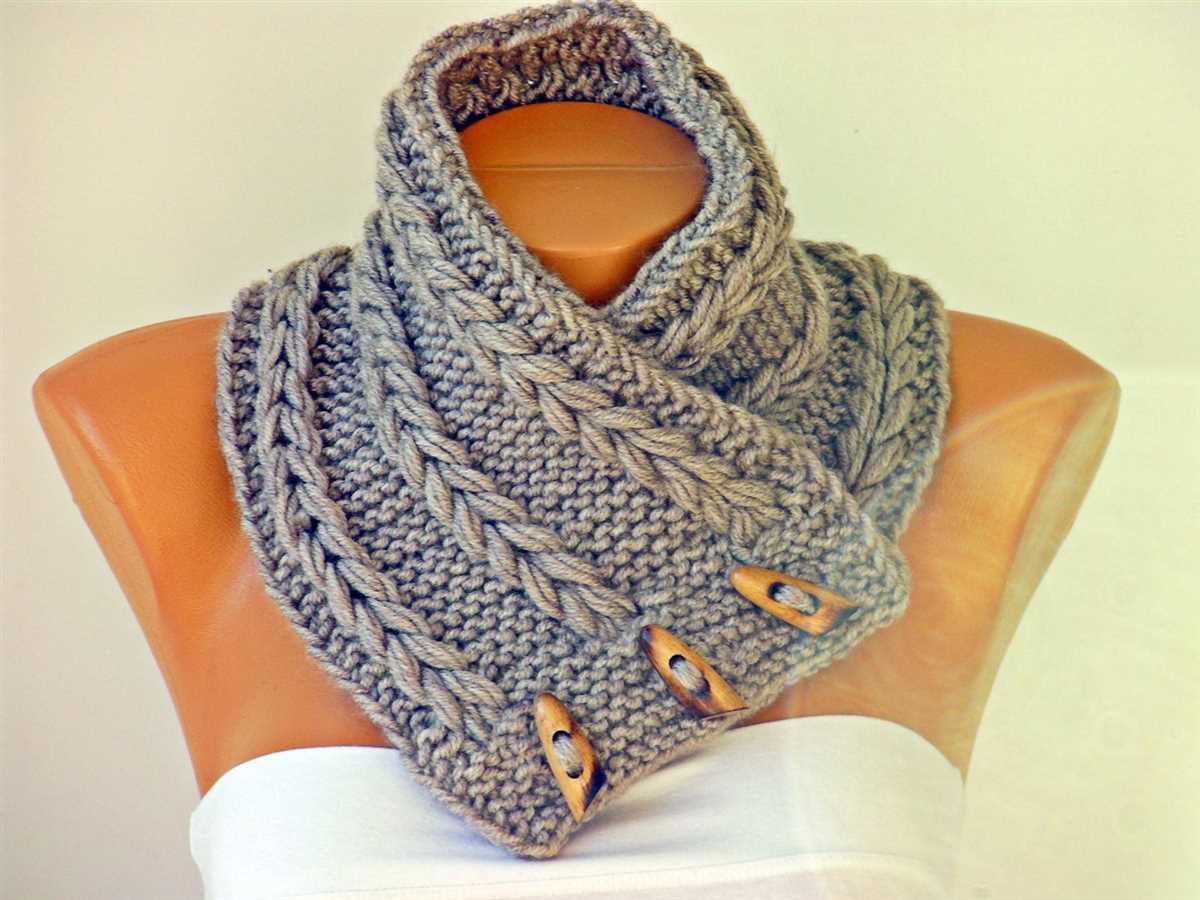
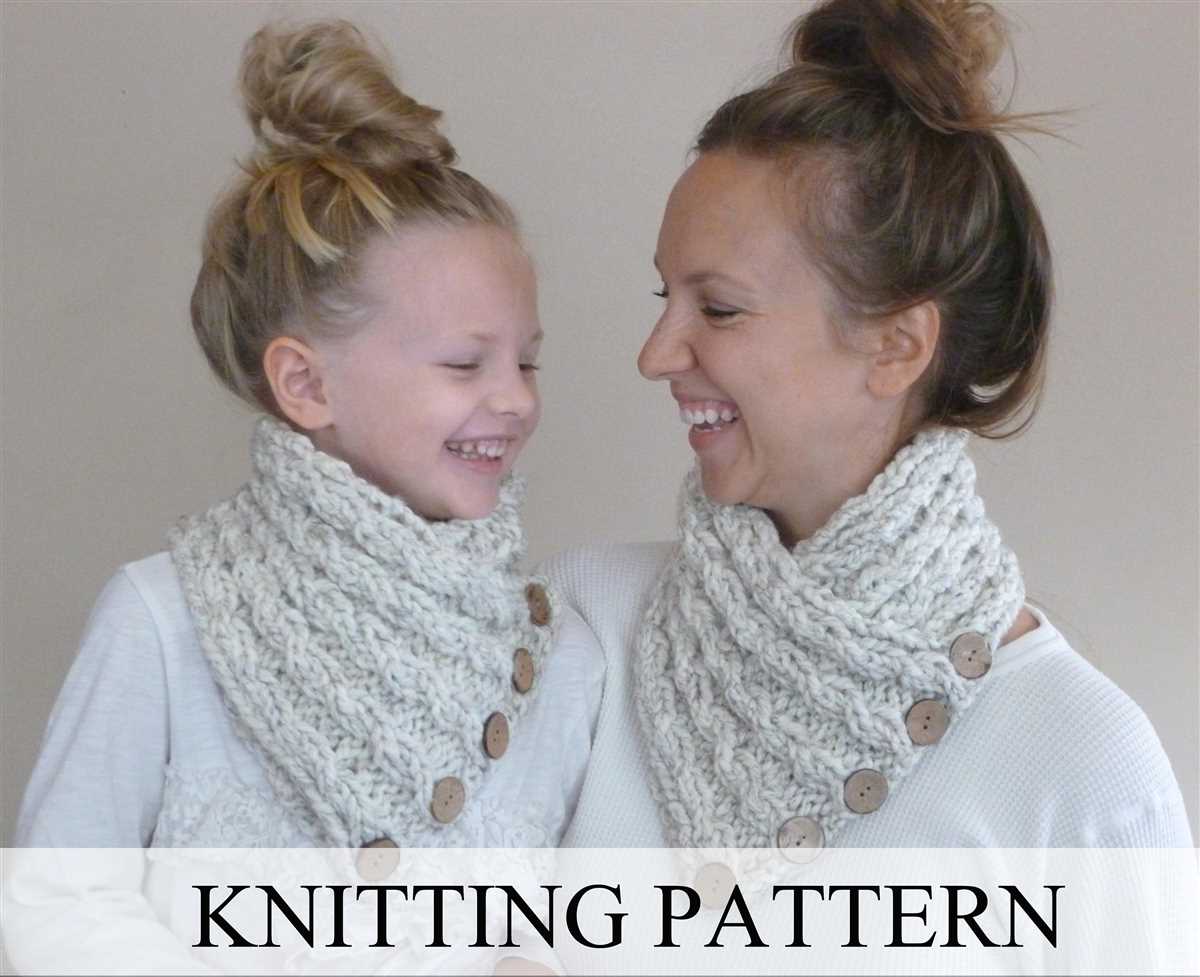
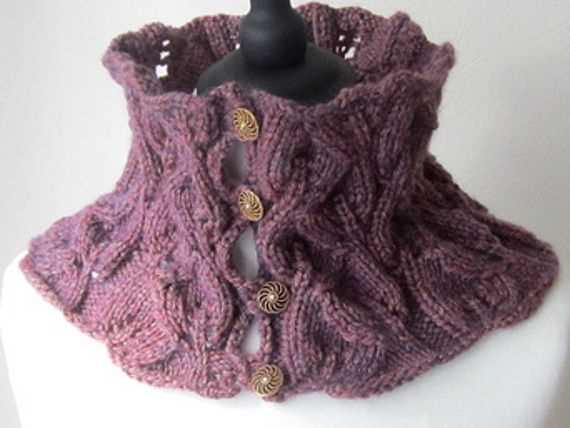
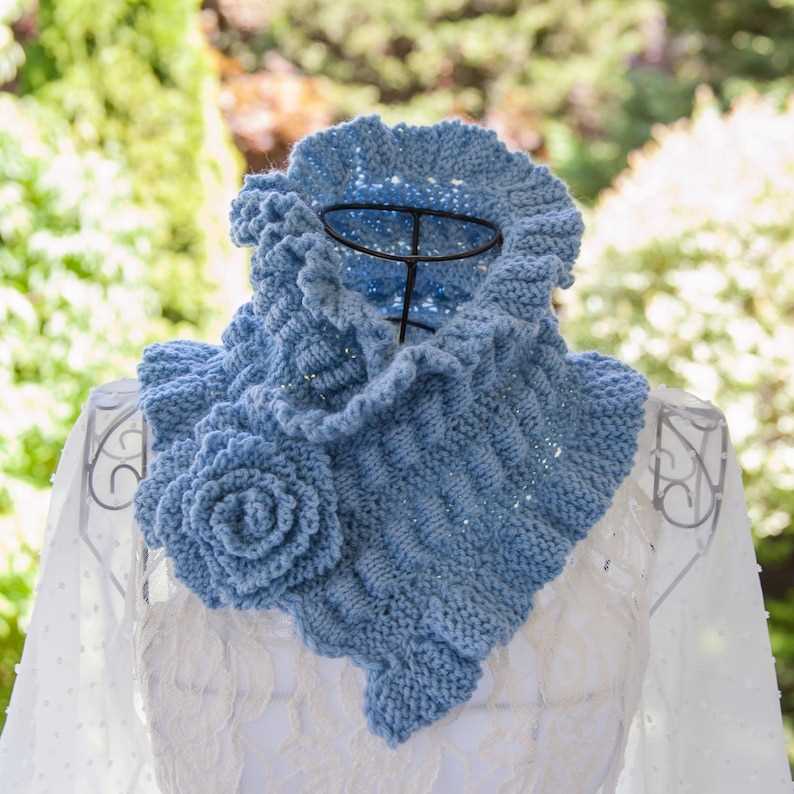
Cable Knit Neck Warmer Pattern
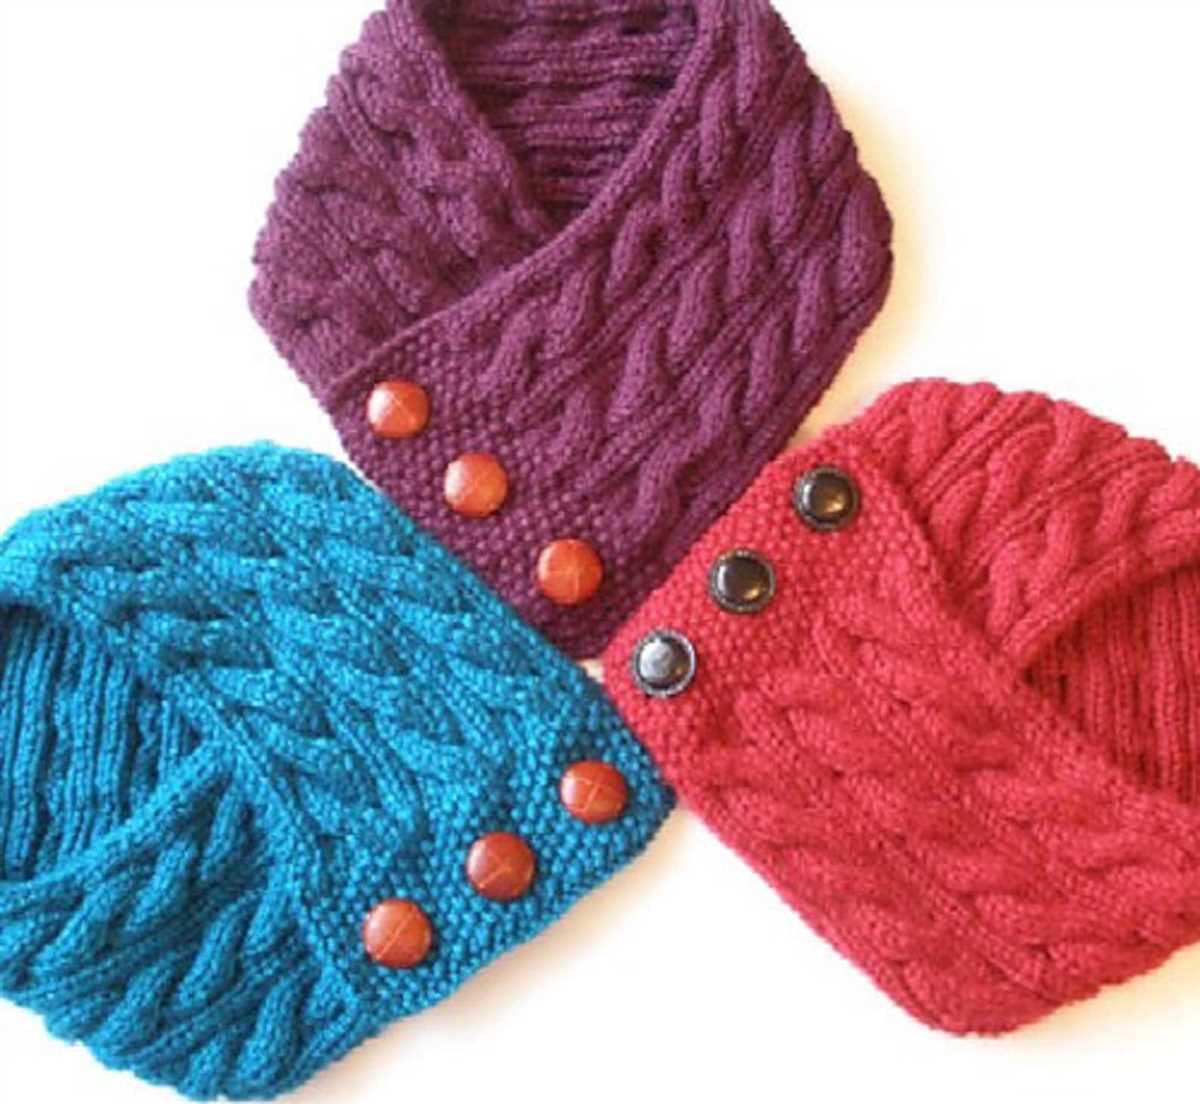
If you’re looking for an elegant and cozy accessory for the winter season, a cable knit neck warmer is an excellent choice. This pattern features intricate cables that add texture and visual interest to the piece. The neck warmer is perfect for keeping your neck warm and stylish during chilly days.
To create this cable knit neck warmer, you will need a set of knitting needles and a skein of chunky yarn. The pattern starts with a ribbed edging, which gives the neck warmer a snug fit. Then, the main body of the neck warmer consists of a repeating cable pattern, creating a beautiful texture. The pattern is suitable for intermediate or advanced knitters who are comfortable working with cables.
When you finish knitting the neck warmer, you can customize it by adding a button or a toggle closure. This will help keep the neck warmer secure and in place while adding a stylish touch. Alternatively, you can leave it as an open-ended design, which allows for easy wearing and removal.
The cable knit neck warmer is not only a practical accessory but also a fashionable one. It can be paired with a variety of outfits, from casual to dressy. The chunky cable design adds a touch of sophistication and warmth to any look. Whether you’re running errands or attending a winter party, this neck warmer is sure to keep you cozy and stylish throughout the season.
In conclusion, the cable knit neck warmer pattern is a great choice for knitters who want to create a fashionable and functional accessory. With its intricate cable design and cozy texture, this neck warmer will keep you warm and stylish all winter long. So grab your knitting needles and start creating your own cable knit neck warmer today!
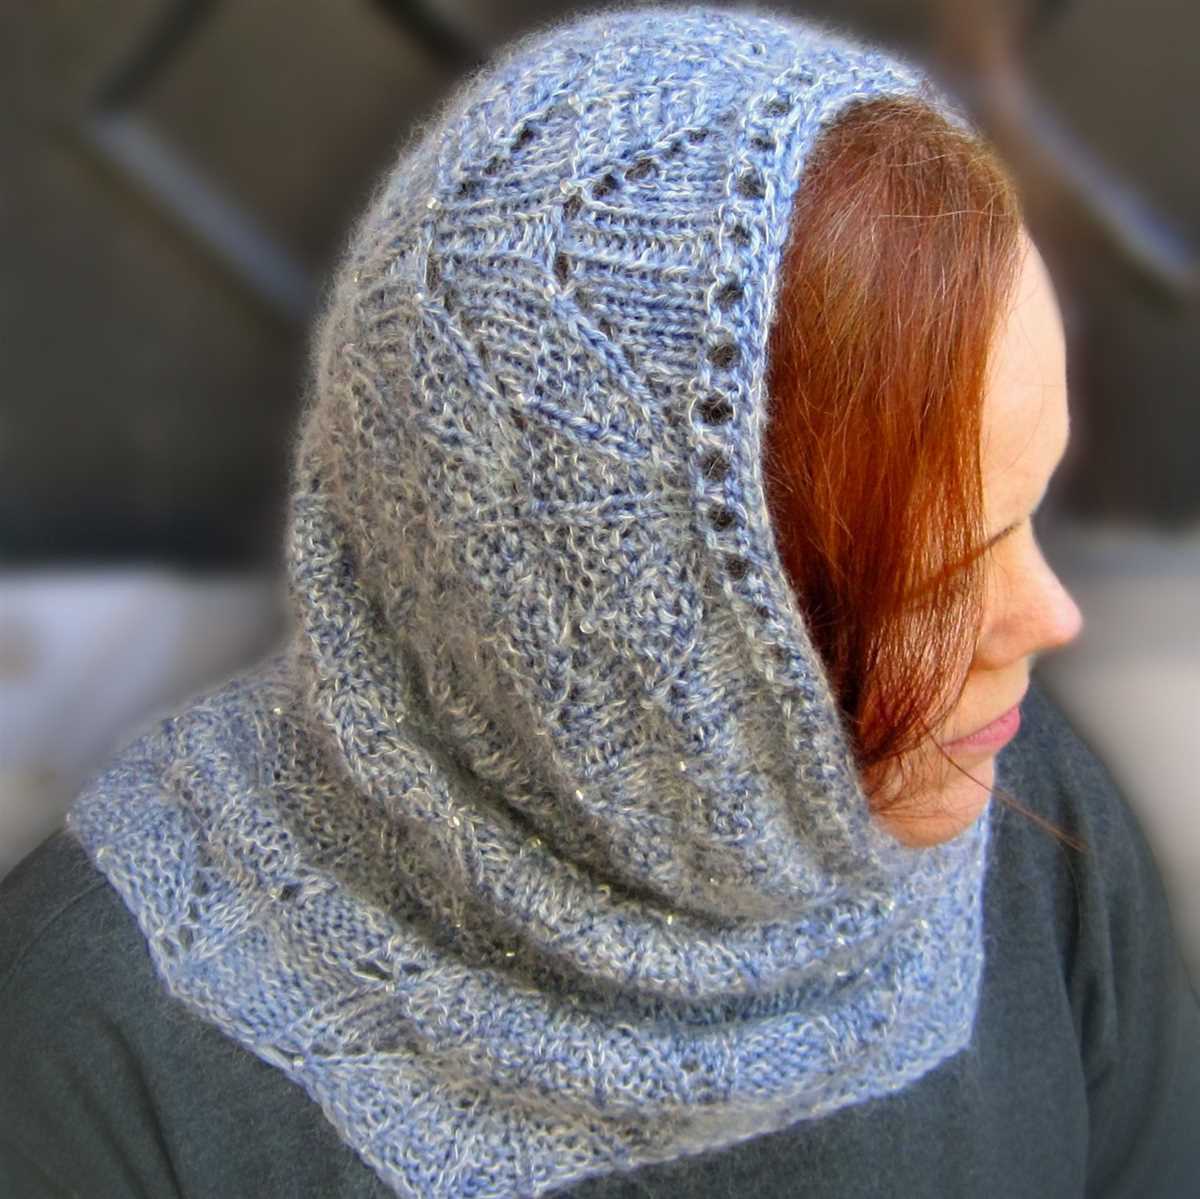
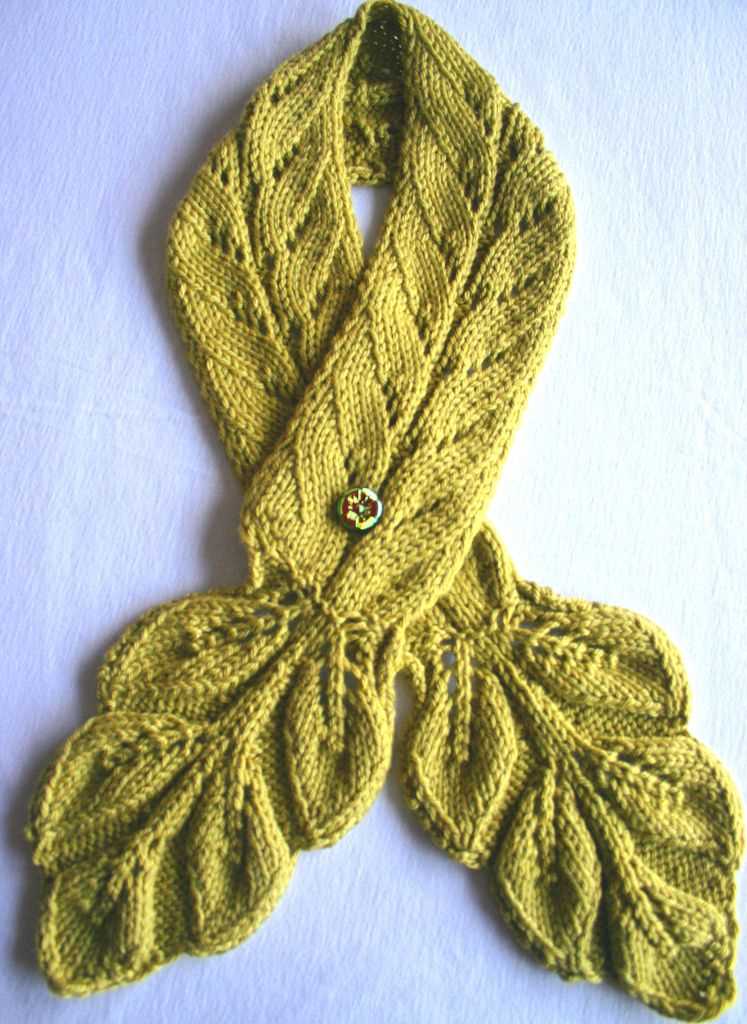
Lace Knit Neck Warmer Pattern
A lace knit neck warmer is a stylish and practical accessory that can add a touch of elegance to any winter outfit. Whether you’re a beginner or an experienced knitter, this pattern offers a great opportunity to showcase your skills and create a beautiful piece.
To start, you’ll need the following materials: a set of knitting needles, a skein of lace weight yarn, a tapestry needle, and scissors. Choose a yarn color that complements your wardrobe or opt for a neutral shade that goes with everything.
Begin by casting on a multiple of stitches (typically around 60-80 stitches) using the long-tail cast-on method. This will ensure a stretchy and comfortable fit around your neck. For an extra touch of elegance, consider using a provisional cast-on to create a seamless look.
Once you’ve cast on, it’s time to start working the lace pattern. There are various lace stitch patterns you can choose from, such as the feather and fan stitch or the diamond lace stitch. Follow the instructions for your chosen stitch pattern, and don’t be intimidated if it looks complex at first – lace knitting is all about creating beautiful designs using simple techniques.
As you progress, you’ll notice that the lace pattern creates a delicate and airy fabric. This is perfect for a neck warmer, as it provides warmth without being too bulky. Continue knitting in the lace pattern until the neck warmer reaches your desired length.
Once you’re satisfied with the length, it’s time to bind off your stitches. Use a stretchy bind off method to ensure a comfortable fit around your neck. Cut the yarn, leaving a long tail for sewing up any seams if necessary.
To finish your neck warmer, weave in any loose ends using a tapestry needle. If desired, you can add buttons, snaps, or a decorative closure to give your neck warmer a personalized touch. Try it on and admire your handiwork – you now have a beautiful lace knit neck warmer to keep you stylish and cozy during the colder months!
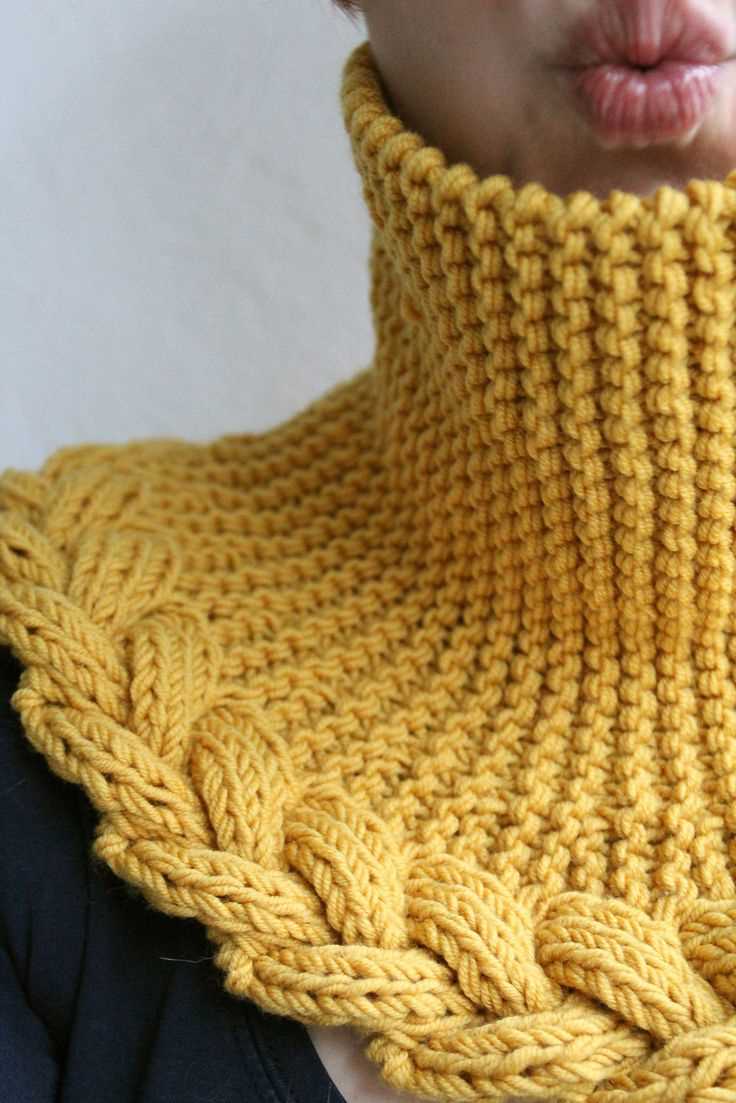
Chunky Knit Neck Warmer Pattern
A chunky knit neck warmer is a cozy and stylish accessory that can keep you warm during the colder months. With its thick and soft texture, it provides added warmth and comfort to your neck area. Making your own chunky knit neck warmer is a fun and rewarding project. You can customize it to match your style, and it also makes a great handmade gift.
To create a chunky knit neck warmer, you will need chunky yarn and large knitting needles or a knitting loom. The chunkier the yarn, the quicker the project will be. You can choose from a variety of colors and textures to suit your preferences.
Materials:
- Chunky yarn
- Knitting needles or knitting loom
- Tapestry needle
Instructions:
- Start by casting on the desired number of stitches, depending on the width you want for your neck warmer. Make sure to leave a long tail for sewing the ends together later.
- Knit in your desired stitch pattern until the neck warmer reaches the desired length. You can choose simple knit or purl stitches, or experiment with more complex stitch patterns like cables or seed stitch.
- Once you have reached the desired length, bind off the stitches and cut the yarn, leaving a long tail.
- Thread the tapestry needle with the yarn tail and seam the two ends of the neck warmer together using a whip stitch or mattress stitch.
- Weave in any loose ends and trim excess yarn.
Once your chunky knit neck warmer is complete, you can wear it by wrapping it around your neck and securing the ends together. It will provide warmth and add a touch of style to your winter outfits. Whether you make one for yourself or as a gift, a chunky knit neck warmer is a must-have accessory for the colder months.
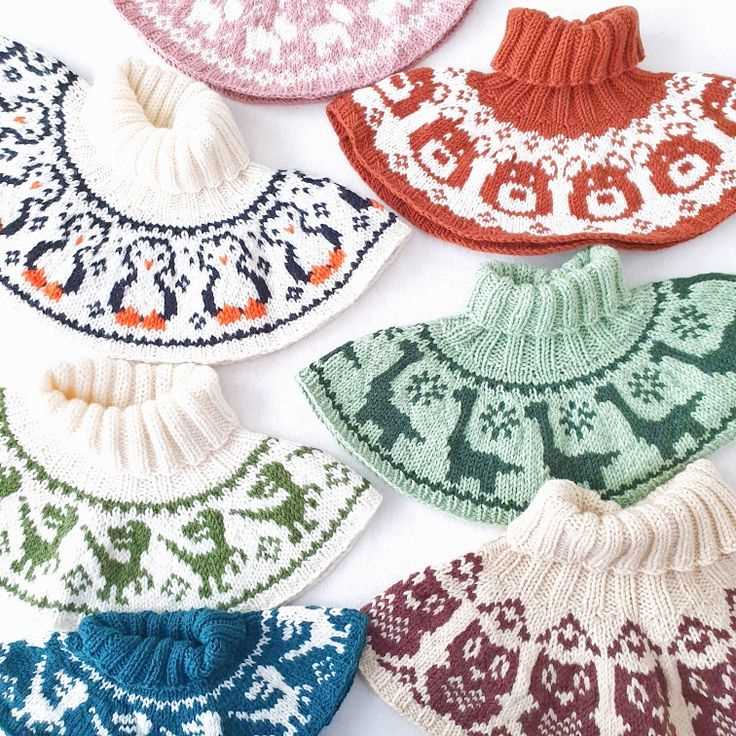
Fair Isle Knit Neck Warmer Pattern
When the temperatures drop, keeping warm becomes a priority. One stylish and practical accessory that can help is a knitted neck warmer. The Fair Isle knit pattern is a popular choice for neck warmers as it creates a beautiful design with multiple colors and intricate patterns.
To create your own Fair Isle knit neck warmer, you will need a selection of yarn in different colors and a set of knitting needles. The beauty of the Fair Isle pattern is that you can choose any combination of colors to personalize your neck warmer. From vibrant and bold to subtle and muted, the choice is yours.
Begin by casting on the desired number of stitches, usually around 100-120, depending on the desired width of your neck warmer. From there, you can start knitting using the Fair Isle pattern. The Fair Isle technique involves knitting with two colors at a time, creating small floats or strands of yarn on the back of the work.
If you’re new to the Fair Isle technique, it may take some practice to get comfortable with knitting with two colors simultaneously. However, once you get the hang of it, you’ll be able to create intricate patterns with ease. Remember to keep your tension even and to carry the unused color loosely across the back of your work to prevent it from pulling too tightly.
As you knit your Fair Isle neck warmer, you can experiment with different stitch patterns, such as stripes, geometric designs, or traditional Fair Isle motifs. The possibilities are endless, allowing you to create a unique and eye-catching accessory.
Once you have completed your knitting, you can finish off your neck warmer by binding off the stitches. To give the edges a neat and polished look, you can also add a border using a contrasting color or a ribbed stitch pattern.
A Fair Isle knit neck warmer is not only a functional accessory for staying warm during the colder months but also a fashionable addition to any outfit. Whether you choose to wear it over a coat or on its own, your Fair Isle neck warmer will undoubtedly draw attention and admiration.
Colorwork Knit Neck Warmer Pattern
A colorwork knit neck warmer is a versatile and stylish accessory that can add a pop of color and interest to any outfit. With its intricate patterns and different color combinations, it is a fun project for knitters of all skill levels.
To create a colorwork knit neck warmer, you will need two or more colors of yarn and knitting needles. The most common colorwork technique used for this pattern is stranded knitting or Fair Isle knitting, where multiple colors are worked in a row and the unused colors are carried behind the work. This creates a double-layered fabric that is warm and cozy.
Start by choosing your colors. You can either go for a simple contrast with two colors or create a more intricate design with multiple colors. Once you have your colors, cast on the desired number of stitches for your neck warmer. It is recommended to use a circular needle to accommodate the large number of stitches.
Begin the colorwork pattern by following the chart or written instructions. You will need to carry the unused colors along the back of your work, ensuring that the floats (the strands of yarn not in use) are not too long or too tight. Practice tension and even knitting to achieve a smooth and even fabric.
Continue knitting in the colorwork pattern until your neck warmer reaches the desired length. Remember to keep an eye on your tension and adjust if necessary. Once you are happy with the length, bind off your stitches and weave in any loose ends.
A colorwork knit neck warmer is a great project to showcase your knitting skills and create a unique accessory that will keep you warm and stylish during the colder months. Whether you choose a simple design or go for a more intricate pattern, your neck warmer is sure to be a standout piece in your wardrobe.
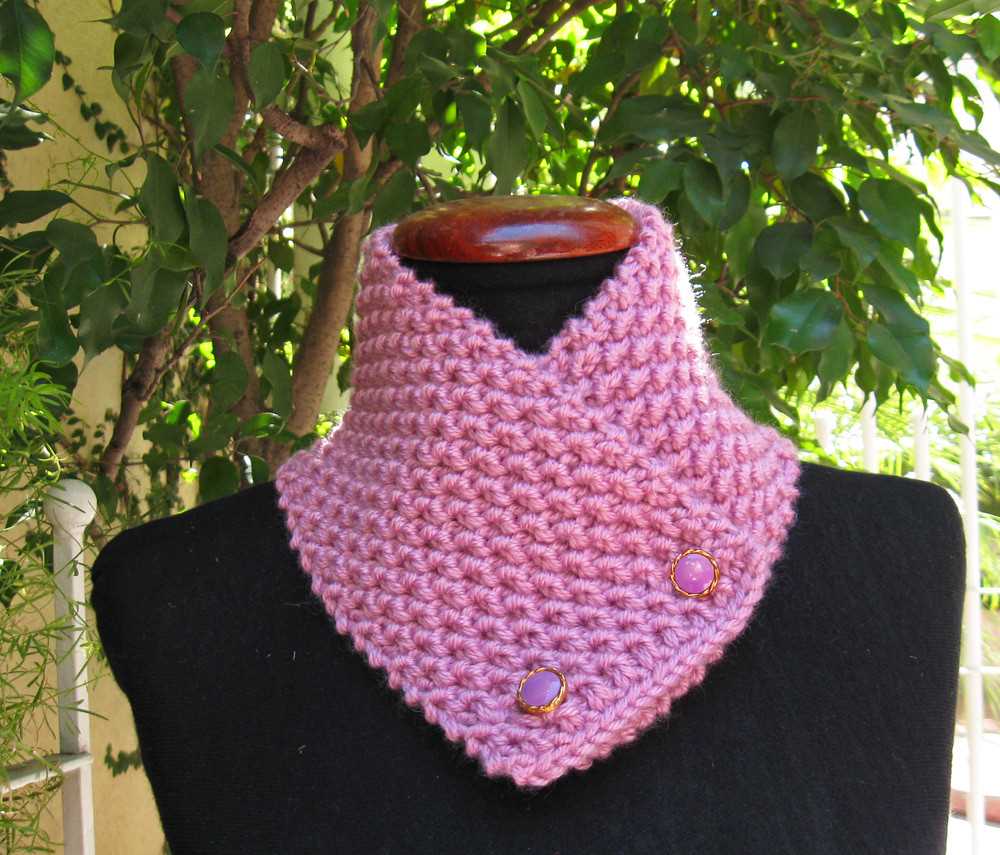
Embellishments for Knitted Neck Warmers
Knitted neck warmers are not only practical accessories for keeping your neck warm and cozy during the winter months, but they can also be stylish and personalized with various embellishments. Whether you prefer a simple and classic design or want to add some extra flair to your neck warmer, there are plenty of options to choose from.
Buttons: Adding buttons to your knitted neck warmer can be a great way to add visual interest and customize your accessory. You can choose buttons in different shapes, sizes, and colors to match your personal style and the overall design of your neck warmer. Sew the buttons onto your neck warmer using matching yarn or contrasting thread to make them stand out.
Embossed designs: If you want to elevate the look of your knitted neck warmer, consider adding embossed designs using techniques such as cable knitting or lace knitting. These designs create texture and dimension, making your neck warmer more visually appealing. You can choose from various embossed patterns, such as cables, lace stitches, or even simple ribbing.
Pom-poms and tassels: For a playful and whimsical touch, consider attaching pom-poms or tassels to the ends of your knitted neck warmer. These embellishments not only add a fun element to your accessory but also create movement and visual interest. You can make your own pom-poms using yarn in complementary colors or choose pre-made pom-poms for convenience.
Embroidery: Another way to personalize your knitted neck warmer is through embroidery. You can add intricate designs, monograms, or even simple motifs using embroidery thread. This allows you to create a unique and one-of-a-kind neck warmer that truly reflects your style and personality. Embroidery can be done directly onto the knitted fabric or onto a separate patch that is attached to the neck warmer.
Contrasting yarn: If you want to add a pop of color to your knitted neck warmer, consider using contrasting yarn for small details or accents. This could be in the form of stripes, color blocks, or even geometric patterns. By combining different colors and textures, you can create a visually striking accessory that stands out.
Tips and Tricks for Knitting Neck Warmers
Knitting neck warmers can be a fun and rewarding project, but it’s important to keep some tips and tricks in mind to ensure success. Here are some key pointers:
Choose the right yarn: Selecting the right yarn is crucial for creating a comfortable and durable neck warmer. Consider choosing a soft and warm yarn that is suitable for the winter season.
Use circular needles: Circular needles are ideal for knitting neck warmers because they allow you to easily work in the round and create a seamless finished product. They also distribute the weight of your project more evenly, making it more comfortable to work with.
Check your gauge: Before starting your neck warmer, it’s essential to check your gauge to ensure that your finished piece will be the right size. Use a gauge swatch and adjust your needle size if necessary to achieve the correct stitches per inch.
Experiment with stitch patterns: Neck warmers are a great opportunity to practice new stitch patterns and techniques. Consider trying out different stitch patterns, such as cables or lace, to add interest and texture to your design.
Add buttons or closures: To make your neck warmer not only practical but also stylish, consider adding buttons or other closures. This will allow you to wear the neck warmer in different ways and add a personal touch to your finished piece.
Don’t forget blocking: Blocking your finished neck warmer is essential to even out stitches and give it a professional look. Take the time to gently steam or wet block your project according to the yarn’s recommendations.
Remember, practice makes perfect. Don’t be afraid to experiment and try new techniques to create unique and beautiful neck warmers. With these tips and tricks, you’ll be knitting cozy neck warmers in no time!