
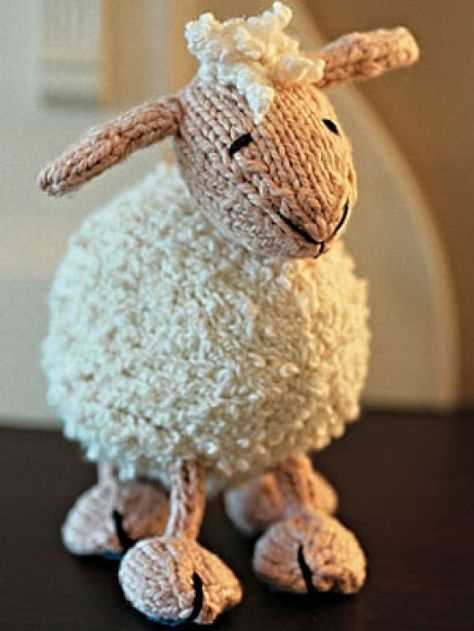
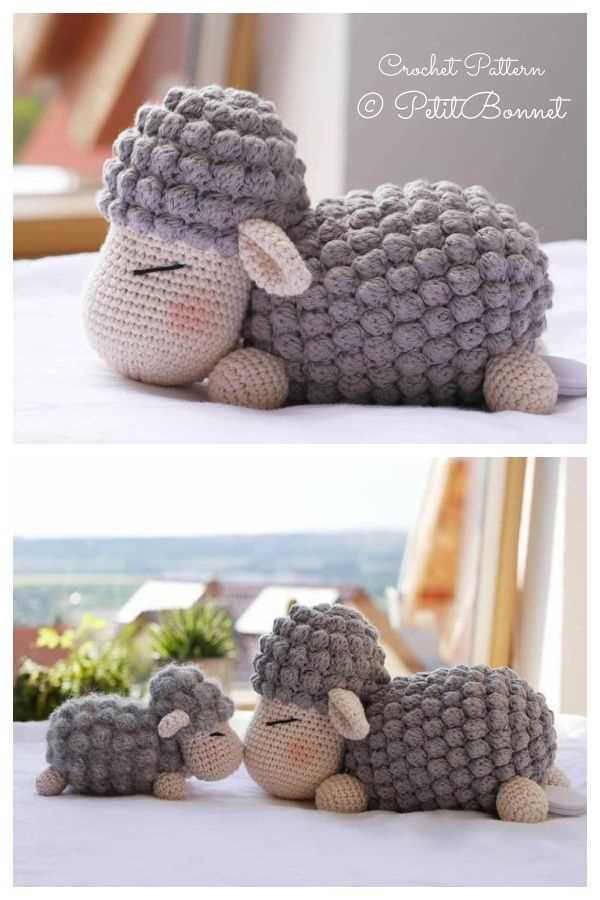
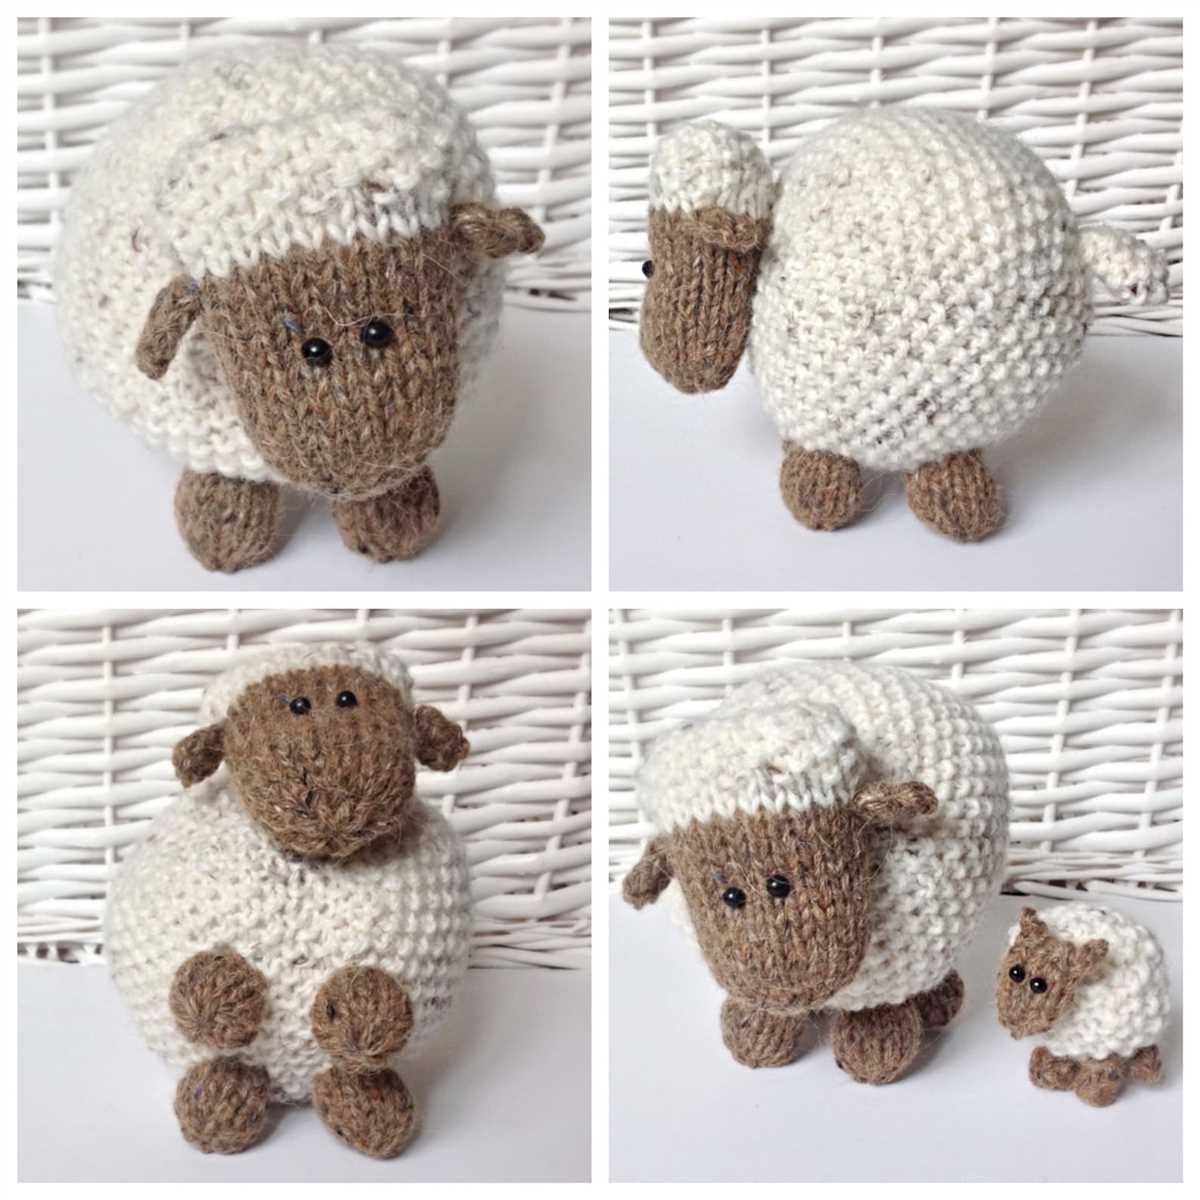
If you enjoy knitting and are looking for a new project, why not try knitting a cute and cuddly lamb? In this article, we will provide you with a free knitted lamb pattern that you can download and use to create your own adorable lamb.
Knitting stuffed animals is a popular hobby, and for good reason. Not only is it a fun and creative way to pass the time, but it also allows you to make unique and personalized gifts for your friends and family. Plus, there’s nothing quite as satisfying as seeing your finished creation come to life.
Our free knitted lamb pattern is perfect for knitters of all skill levels. Whether you are a beginner or an experienced knitter, you will find this pattern easy to follow and enjoyable to make. The pattern provides detailed instructions and includes a list of materials and tools you will need.
So, if you’re ready to get started on your next knitting project, download our free knitted lamb pattern and get knitting today. We can’t wait to see your adorable lamb come to life!
Knitted Lamb Pattern Free
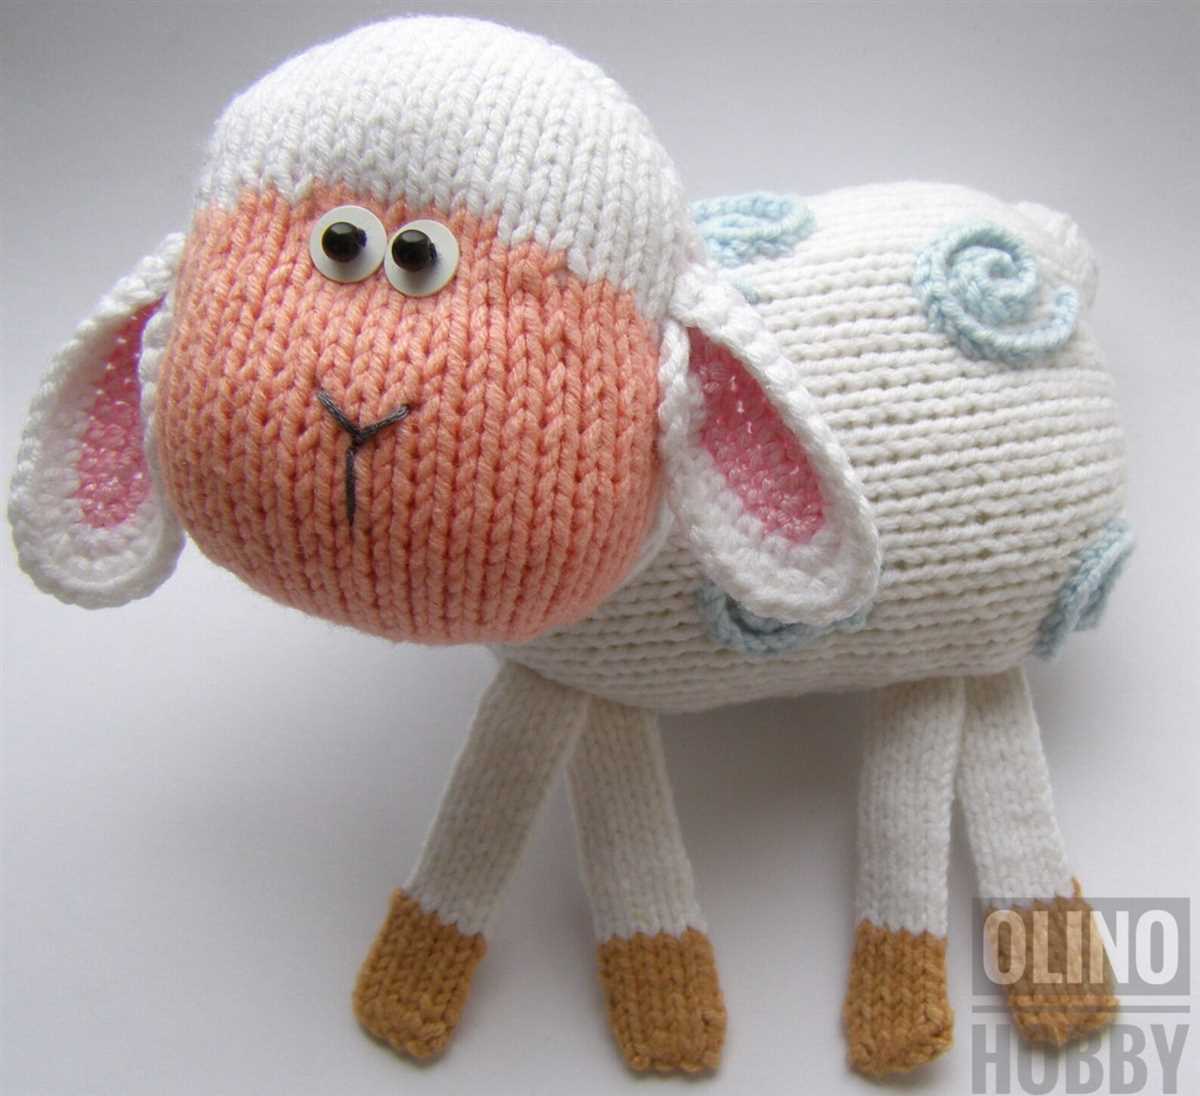
Are you looking for a free knitting pattern to make your own adorable lamb toy? Look no further! We have a knitted lamb pattern that you can use to create your very own cuddly lamb. Whether you are an experienced knitter or just starting out, this pattern is suitable for all skill levels.
Materials:
- Yarn: You will need a soft and fluffy yarn in white for the body, and a small amount of black yarn for the eyes and nose.
- Needles: We recommend using size US 5 (3.75mm) straight knitting needles or double-pointed needles.
- Stuffing: To give your lamb its huggable shape, you will need stuffing material such as polyester fiberfill.
- Scissors and a yarn needle for finishing.
Instructions:
- Cast on 50 stitches with the white yarn.
- Knit 10 rows in garter stitch (knit every row).
- Switch to stockinette stitch (knit one row, purl one row) and continue for 40 rows.
- Next, decrease one stitch at the beginning and end of every knit row until you have 10 stitches left on your needle. Cut the yarn, leaving a long tail.
- Using the yarn needle, thread the tail through the remaining stitches and pull tight to close the top of the lamb’s head.
Note: This is just a small portion of the complete knitted lamb pattern. For the full pattern and detailed instructions on how to create the lamb’s body, legs, and ears, please visit our website or consult a knitting pattern book.
Once you have finished knitting all the components of the lamb, sew them together using the yarn needle and the white yarn. Don’t forget to embroider the lamb’s eyes and nose with the black yarn. Finally, stuff the lamb with the polyester fiberfill, making sure to shape it into a fluffy and huggable toy.
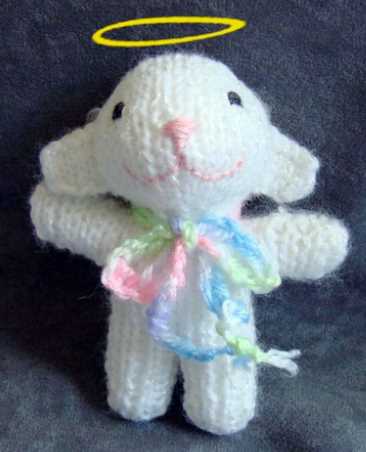
With this free knitted lamb pattern, you can create a cute and lovable lamb toy that is perfect for cuddles and playtime. It also makes a thoughtful handmade gift for a baby shower or a child’s birthday. Happy knitting!
Materials Needed
Before starting your knitting project, make sure you have all the necessary materials on hand. Here is a list of items you will need:
- Yarn: Choose a soft and durable yarn that is suitable for knitting toys. The yarn should be of medium weight, preferably in a light color.
- Knitting Needles: You will need a pair of knitting needles in the appropriate size for your chosen yarn. For this lamb pattern, a pair of US size 6 (4mm) needles should work well.
- Sewing Needle: A large-eye sewing needle will be needed for sewing the knitted pieces together.
- Stuffing: You will need a polyester fiberfill or other suitable stuffing material to fill the knitted lamb.
- Scissors: A pair of sharp scissors will be needed for cutting the yarn and trimming any excess.
- Stitch Markers: These can be helpful for marking the beginning of rounds or specific sections of the pattern, especially if you are a beginner.
- Embroidery Floss: If you want to add facial features or other details to your lamb, you may choose to use embroidery floss in coordinating colors.
Once you have gathered all the necessary materials, you will be ready to start knitting your adorable lamb! Make sure to read through the pattern instructions carefully before beginning, and always double-check your gauge to ensure your finished lamb will turn out the correct size.
Step-by-Step Instructions
To knit a lamb using the free pattern, follow these step-by-step instructions:
1. Gather your materials
Before you begin, make sure you have all the necessary materials. This includes yarn (in the colors of your choice), knitting needles (appropriate for the yarn), stuffing, safety eyes or buttons for the eyes, and a sewing needle.
2. Read through the pattern
Take the time to carefully read through the free pattern. Familiarize yourself with the different sections and instructions before you begin knitting.
3. Cast on
Using your chosen yarn and knitting needles, cast on the required number of stitches as indicated in the pattern. This will be the foundation of your lamb.
4. Knit the body
Follow the pattern instructions to knit the body of the lamb. This may involve knitting in the round or using flat knitting techniques. Pay close attention to any shaping or pattern changes as you go along.
5. Stuff and shape the body
Once you have completed knitting the body of the lamb, carefully stuff it with the desired amount of stuffing to give it a three-dimensional shape. Use the sewing needle to sew up any openings.
6. Knit the head and ears
Use the pattern instructions to knit the head and ears of the lamb separately. These pieces will add character to your knitted lamb and give it a more realistic appearance. Again, pay attention to any shaping or pattern changes in these sections.
7. Sew the head and ears onto the body
Using the sewing needle and matching yarn, attach the head and ears to the body of the lamb. Make sure they are securely attached and positioned as desired.
8. Add eyes and other details
Using safety eyes or buttons, attach the eyes onto the face of the lamb. You can also embroider a nose or mouth using the sewing needle and yarn. Feel free to get creative and add any other details or accessories to personalize your knitted lamb.
9. Finish off
Once you are satisfied with your knitted lamb, weave in any loose ends and make sure all the seams are secure. Give your lamb a final check for any adjustments or finishing touches.
Choosing the Right Yarn
When it comes to knitting, one of the most important decisions to make is choosing the right yarn for your project. The type of yarn you choose can greatly impact the final result and the overall look and feel of your knitted item. There are a few factors to consider when selecting yarn, including the fiber content, weight, and texture.
Fiber Content
The fiber content of the yarn will determine many things, including the durability, warmth, and drape of the finished project. There are various types of yarn available, such as wool, cotton, acrylic, and blends of different fibers. Each type of fiber has its own unique properties, so it’s important to consider how you want the finished item to look and feel. For example, wool yarn is known for its warmth and elasticity, while cotton yarn is lightweight and cool to the touch.
Weight
The weight of the yarn refers to its thickness or gauge. Yarns are typically categorized into different weight classes, such as lace, fingering, sport, worsted, and bulky. The weight of the yarn you choose will determine the size of the knitting needles or crochet hook you need, as well as the overall look of the finished project. For example, lace-weight yarn is perfect for delicate shawls or lacy patterns, while bulky yarn is great for cozy winter accessories.
Texture
The texture of the yarn can also greatly impact the appearance and feel of the knitted item. Yarns can be smooth, fluffy, or textured in various ways, such as boucle, chenille, or tweed. The texture of the yarn can add visual interest and dimension to your knitting, but it’s important to consider how it will affect the stitch definition and any pattern details. For example, a highly textured yarn may obscure intricate lace or cable patterns.
Conclusion
Choosing the right yarn is a crucial step in any knitting project. By considering the fiber content, weight, and texture of the yarn, you can ensure that your finished item will look and feel exactly as you envision. Remember to also consider the care instructions of the yarn, as different fibers may require special handling. With the right yarn, you’ll be able to create beautiful and cozy knitted items to enjoy or give as cherished gifts.
Gauge and Tension
Gauge and tension are important factors in knitting a successful project. They refer to the number of stitches and rows per inch that you achieve with a specific needle size and yarn. It is crucial to match the gauge stated in the pattern, as it ensures the correct size and fit of the finished garment or item.
To determine your gauge, begin by knitting a swatch using the recommended needle size and yarn. Measure the swatch without stretching it, counting the number of stitches and rows within a 4-inch square. If your stitch and row count match the gauge specified in the pattern, you have achieved the correct tension. However, if your stitch and row count differs, you may need to adjust your needle size.
It is worth noting that achieving the correct gauge is not only about needle size; the way you knit can also have an impact. Therefore, it is advisable to knit the swatch, measure it, and adjust your knitting technique if necessary. Keep in mind that changing the needle size may not be enough to achieve the correct gauge, especially if you knit tightly or loosely.
Regularly checking your gauge as you knit is important, especially if you are working on a large project. Take the time to measure your stitches and rows after a few inches to ensure that you are on track. Making adjustments early on can prevent the frustration of having to re-knit or end up with a finished piece that doesn’t fit properly.
Abbreviations
When it comes to knitting, there are a lot of abbreviations used in patterns that can be confusing for beginners. These abbreviations are used to save space and simplify the instructions. It is important to understand what each abbreviation means in order to successfully complete a knitting project.
Here are some common abbreviations you may come across in a knitting pattern:
- k: knit
- p: purl
- yo: yarn over
- ssk: slip slip knit
- pm: place marker
- sl: slip
- tbl: through the back loop
- k2tog: knit two stitches together
- sssk: slip slip slip knit
These abbreviations are used to indicate different knitting techniques or stitches. For example, the abbreviation “k” means knit, so if you see “k5”, it means to knit 5 stitches. Similarly, “p” stands for purl, so “p3” would mean to purl 3 stitches. The yarn over (yo) technique is used to create an extra stitch and is often used in lace knitting patterns.
It is important to refer to the pattern’s key or glossary at the beginning of the pattern for any abbreviations that you are unsure of. This will ensure that you are able to follow the instructions correctly and create a beautiful knitting project.
Knitting Techniques
Knitting is a popular craft that allows you to create beautiful and cozy items using just two needles and some yarn. There are various techniques you can learn to enhance your knitting skills and create more intricate designs.
Casting on: The casting on technique is the first step in any knitting project. It creates the foundation row of stitches on your needle. There are different methods of casting on, such as the long-tail cast on and the cable cast on. Each method creates a different edge and has its own advantages.
Knit stitch: The knit stitch is the most basic stitch in knitting. It is created by inserting the right-hand needle into the front of the stitch on the left-hand needle, wrapping the yarn around the right-hand needle, and pulling the loop through. This creates a new stitch on the right-hand needle. The knit stitch is often used to create smooth and flat fabric.
Purl stitch: The purl stitch is the reverse of the knit stitch. It creates a bumpy texture on the fabric. To purl, you insert the right-hand needle from right to left into the front of the stitch on the left-hand needle, wrap the yarn around the right-hand needle, and pull the loop through. This creates a new stitch on the right-hand needle. Combining knit and purl stitches allows you to create various stitch patterns and textures.
Decreasing: Decreasing is a technique used to reduce the number of stitches in a row. This is often done to shape the fabric or create specific patterns. There are different methods of decreasing, such as the knit-two-together (K2tog) and slip-slip-knit (SSK) decreases. These techniques create a decrease in stitches while maintaining the continuity of the pattern.
Colorwork: Colorwork involves knitting with multiple colors to create patterns and designs in the fabric. There are different colorwork techniques, such as intarsia, stranded knitting (also known as Fair Isle knitting), and slip-stitch colorwork. These techniques allow you to create beautiful and intricate patterns using different colors of yarn.
Finishing techniques: After completing the main body of a knitting project, there are various finishing techniques you can use to give your project a polished look. This includes techniques like binding off, blocking, and seaming. Binding off is the process of creating an edge on your project to prevent the stitches from unraveling. Blocking involves shaping and stretching the fabric to achieve the desired dimensions and shape. Seamomg is the process of joining different pieces of knitted fabric together.
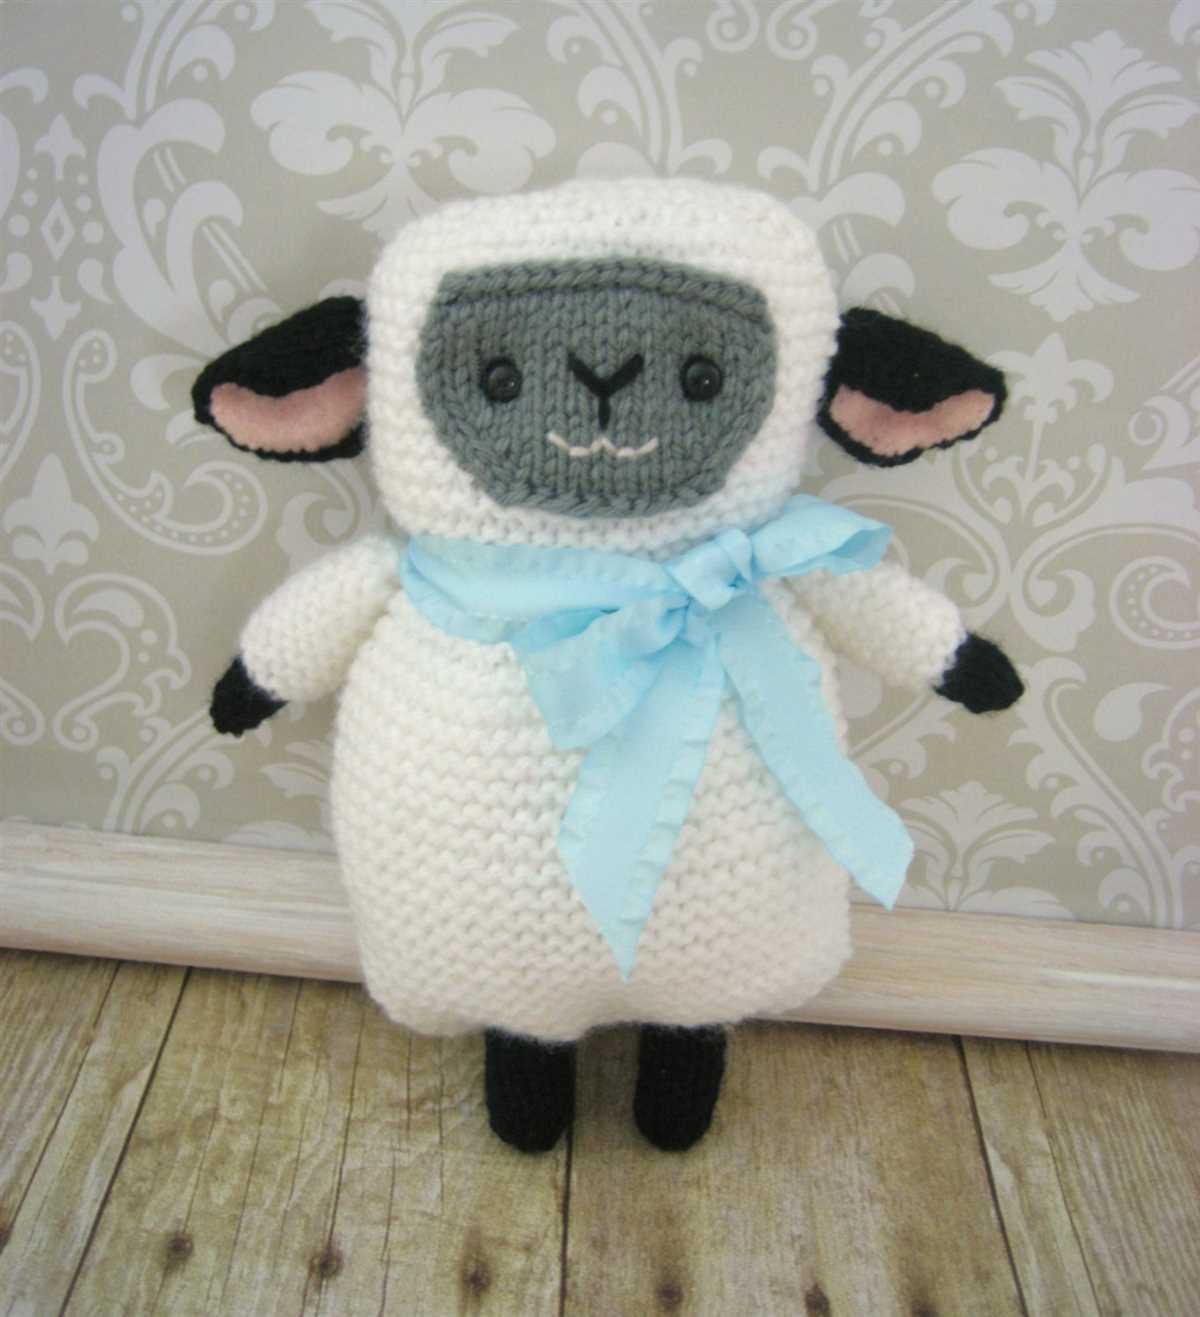
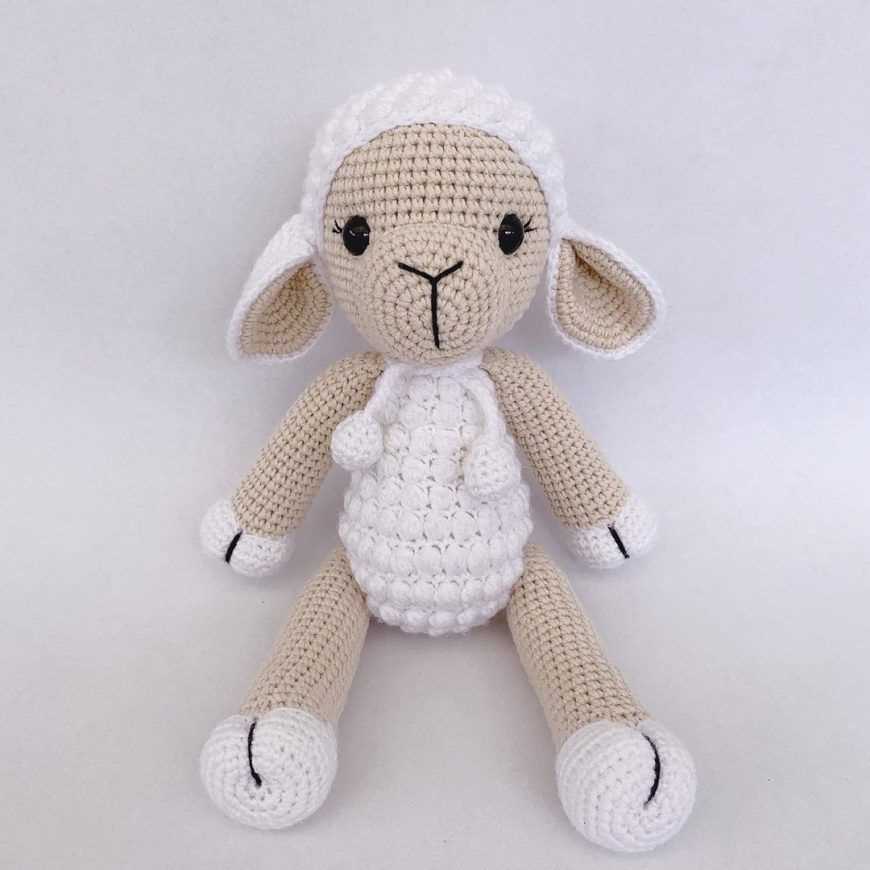
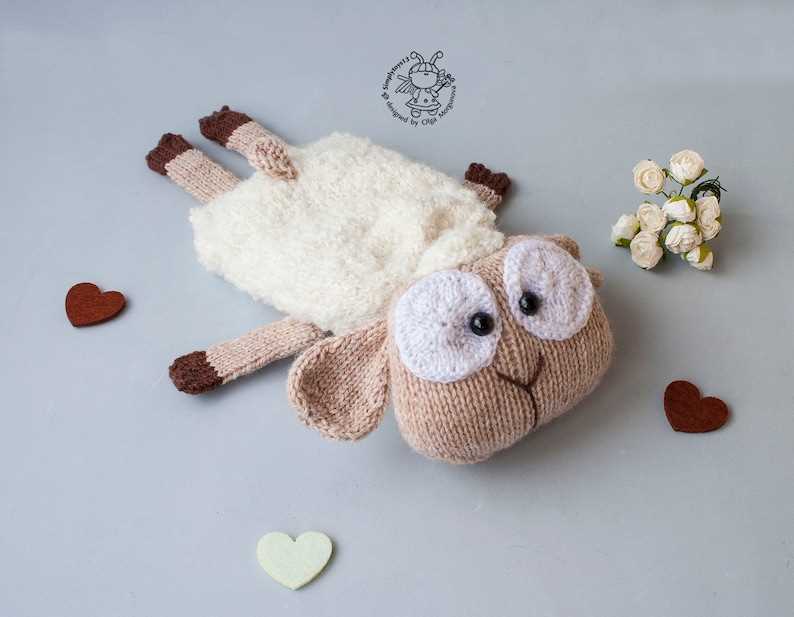
Adding the Facial Features
Once you have completed knitting the body of the lamb, it’s time to add the facial features. This step will bring your knitted lamb to life and give it a cute and adorable appearance. Here’s how you can add the eyes, nose, and mouth:
1. Eyes:
Start by choosing the desired size and color of the eyes for your knitted lamb. You can use small black buttons, safety eyes, or even embroider the eyes using black yarn. Place the eyes symmetrically on the face of your lamb and secure them in place using a needle and thread. Make sure they are evenly spaced and securely attached to prevent any choking hazards.
2. Nose:
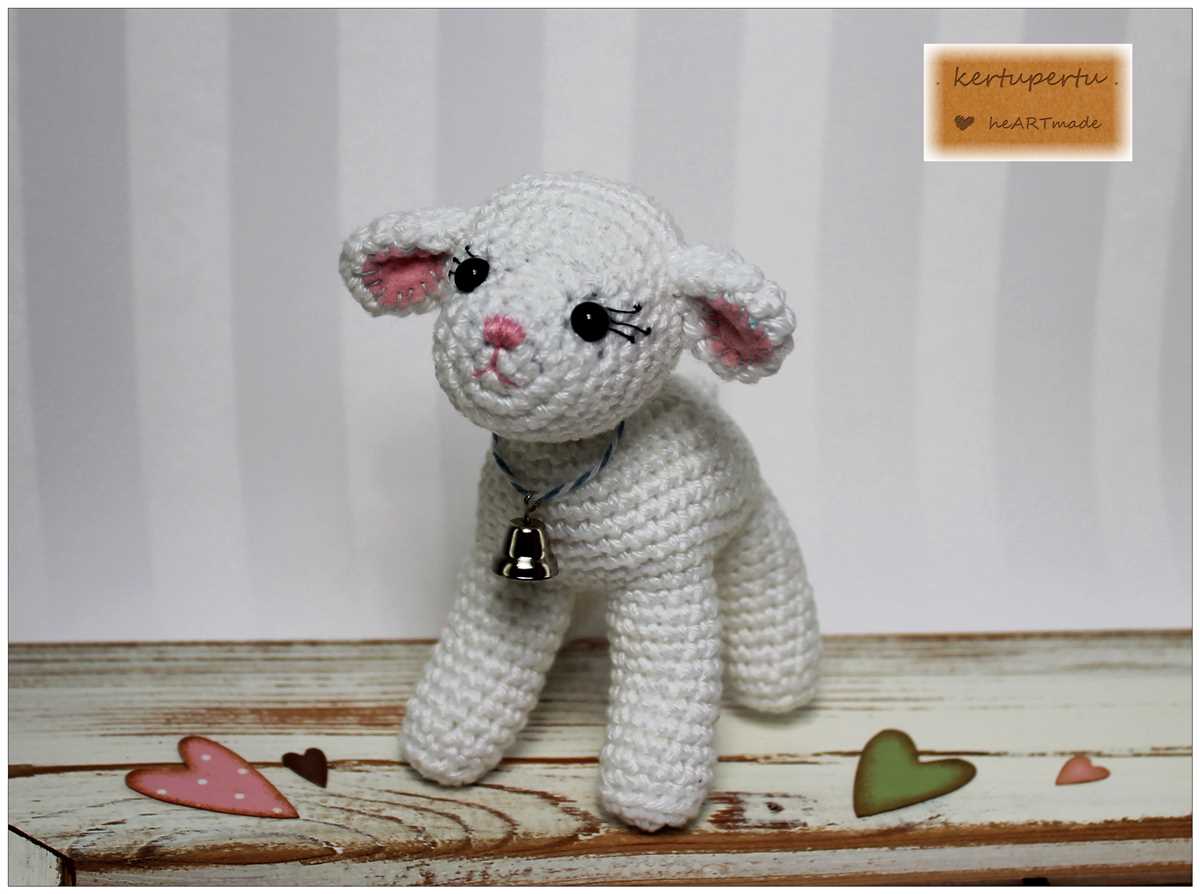
For the nose, you can use a small piece of black yarn and embroider a triangular shape at the center of the lamb’s face. Use a tapestry needle to stitch the nose firmly in place. Alternatively, if you prefer a more pronounced nose, you can use a small black pom-pom or a button. Attach the nose securely and make sure it is centered and aligned with the eyes.
3. Mouth:
To add the mouth, you can use a tapestry needle and a contrasting color of yarn. Start by creating a small straight line horizontally below the nose to form the lamb’s mouth. You can then stitch a small curved line at each end of the straight line to create a smiling or neutral mouth expression. Adjust the length and shape of the mouth as desired to give your lamb a unique personality.
Once you have added the facial features, step back and admire your adorable knitted lamb. The facial features add the perfect finishing touch and bring your creation to life!
Finishing Touches
Once you have completed knitting your adorable lamb, it’s time to add the finishing touches to give it that extra charm and personality. These last details will really bring your knitted lamb to life and make it stand out.
Eyes: Choose small black buttons or stitch on small black beads for the eyes. Alternatively, you can use embroidery thread to stitch on the eyes.
Nose: Embroider a small triangular or oval shape using pink or black yarn for the nose. Experiment with different sizes and shapes to give your lamb a unique expression.
Mouth: Use black embroidery thread to stitch a small smile or gentle curve for the mouth. You can make it simple or get creative with a more detailed expression.
Ears: Attach the ears to the head of the lamb using a simple whip stitch or ladder stitch. Make sure they are securely attached and positioned symmetrically for a balanced look.
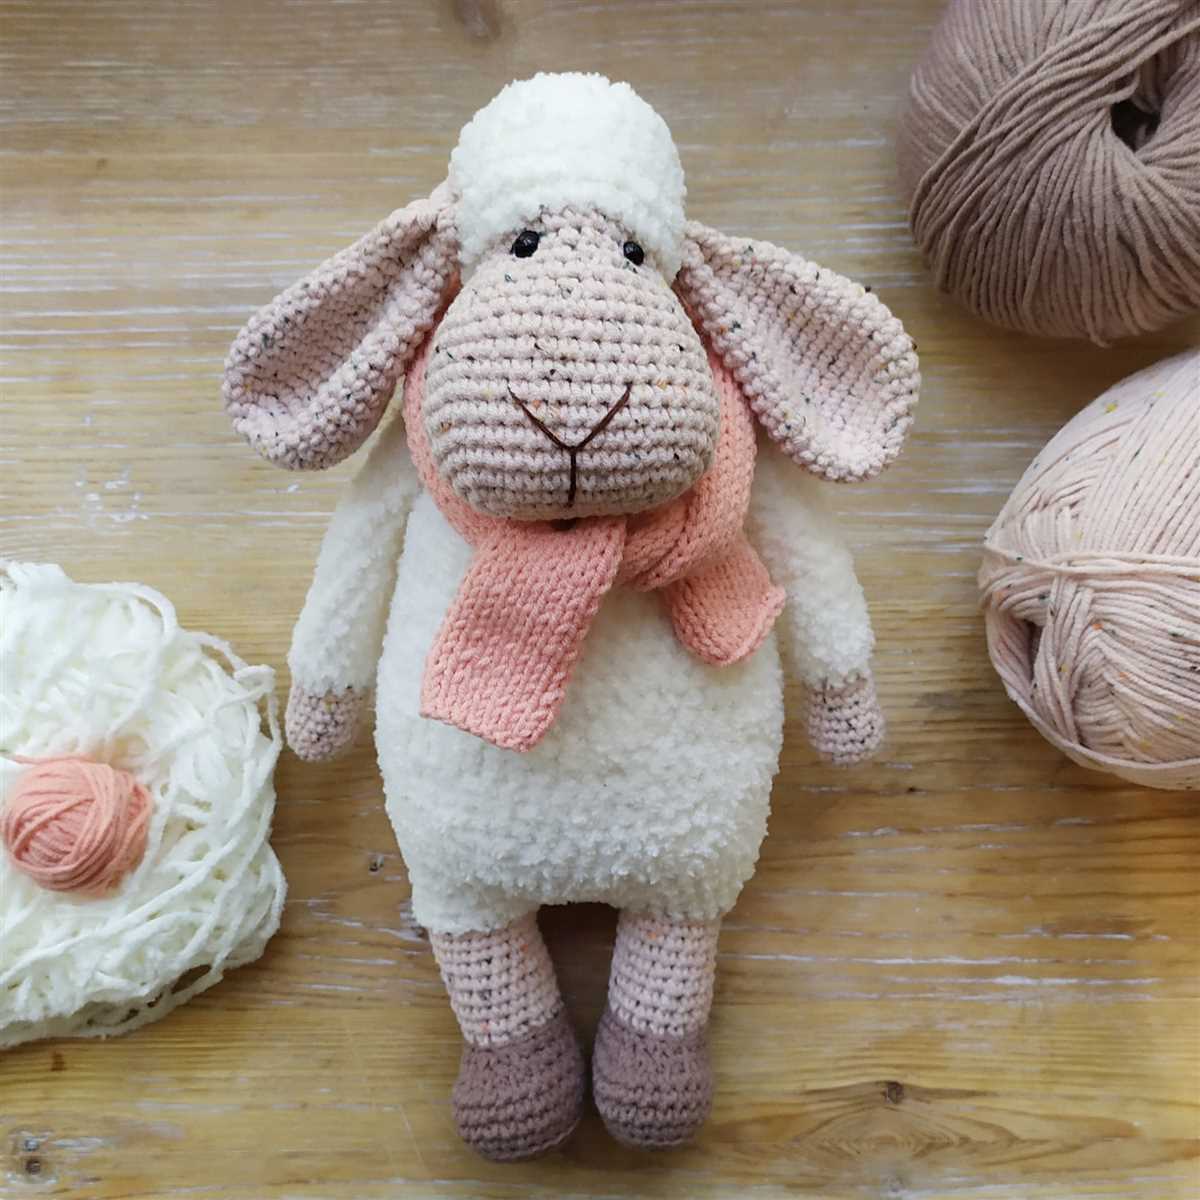
Bow or Scarf: Add a cute touch to your knitted lamb by knitting or crocheting a small bow or scarf. Use contrasting or coordinating yarn colors to enhance the overall appearance.
Final Touches: Once you have added all the desired details, give your lamb a gentle fluff by using a soft brush or comb. This will help bring out the texture and make it look even more cuddly.
Remember, the finishing touches are what truly make your knitted lamb unique. Have fun experimenting and personalizing your creation to make it truly your own.
Tips and Tricks
If you’re new to knitting or just looking for some helpful tips and tricks for knitting a lamb, you’ve come to the right place! Whether you’re following a knitted lamb pattern or creating your own design, these tips will help you achieve a beautiful and cuddly lamb.
1. Choose the Right Yarn
When knitting a lamb, it’s important to choose a soft and fluffy yarn that will give your lamb a cozy and snuggly feel. Look for yarns that are specifically designed for baby projects, as they tend to be extra soft and gentle on the skin. Acrylic or cotton blends are also great options, as they are easy to care for and come in a wide variety of colors.
2. Use Safety Eyes and Noses
To give your knitted lamb a more realistic look, consider using safety eyes and noses instead of sewing or embroidering them. Safety eyes are easy to attach and provide a secure and durable finish. Make sure to choose eyes and noses that are appropriate for the size of your lamb and follow the manufacturer’s instructions for attaching them.
3. Stuff Your Lamb Properly
Proper stuffing is essential for creating a plush and well-shaped knitted lamb. Use a soft polyester fiberfill or stuffing specifically designed for toys to give your lamb a firm and cuddly feel. Take your time when stuffing and distribute the filling evenly throughout the body and limbs. Avoid overstuffing, as it can cause your lamb to lose its shape.
4. Practice Different Stitch Techniques
Knitting a lamb offers an opportunity to practice different stitch techniques and add texture to your project. Consider using techniques such as bobbles, cables, or lace patterns to give your lamb an extra touch of uniqueness. Experiment with different stitch combinations and gauge swatches to achieve the desired texture and appearance.
5. Finish with Care
Once you have completed knitting your lamb, take the time to finish it with care. Weave in all loose ends and trim any excess yarn. Give your lamb a final inspection to ensure all seams are secure and there are no visible mistakes. If desired, you can also add embellishments such as a ribbon or bow around your lamb’s neck to give it a personalized touch.
With these tips and tricks in mind, you’ll be well on your way to knitting a beautiful and huggable lamb. Enjoy the process and have fun bringing your knitted lamb to life!
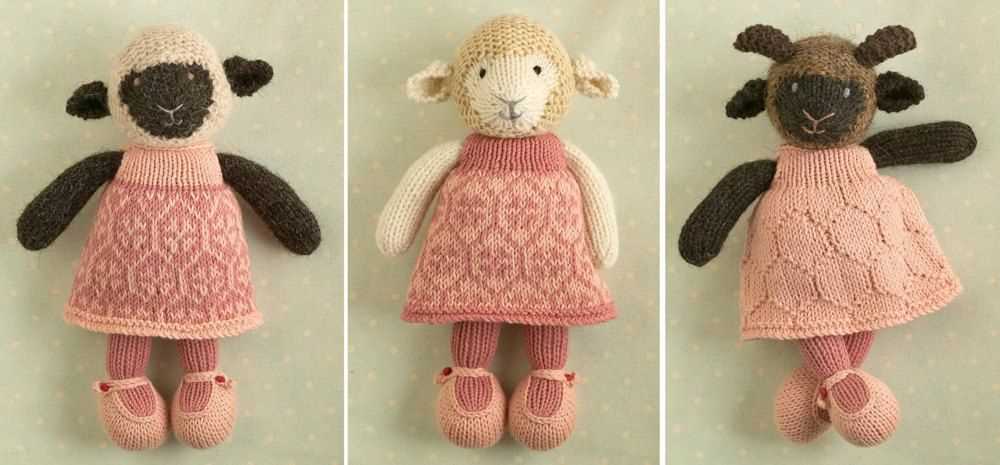
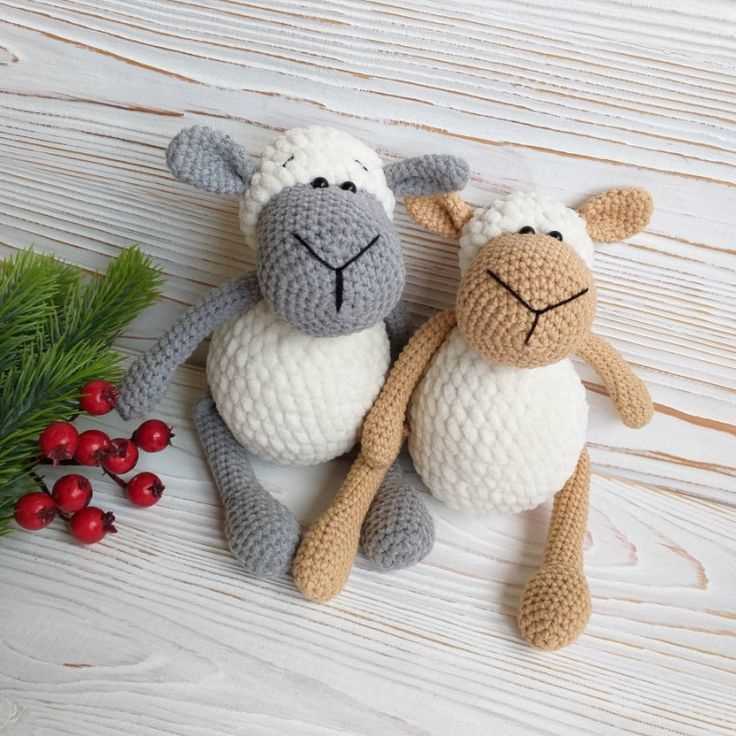
Variations
There are endless possibilities when it comes to variations of the knitted lamb pattern. Here are a few ideas to get you started:
- Color variations: Experiment with different colors of yarn to create lambs in various shades. You can stick to traditional white for a classic look or go for bright and vibrant colors for a more modern twist.
- Size variations: Adjust the size of the pattern to create different sizes of lambs. You can make smaller ones as keychains or larger ones as cuddly toys.
- Pattern variations: Play around with different patterns and stitch combinations to create unique textures and designs for your lambs. You can incorporate cables, lace, or even colorwork.
- Accessories: Add cute accessories to your knitted lambs, such as bows, ribbons, or tiny knitted scarves. These little details can enhance the charm and personality of each lamb.
Remember, this knitted lamb pattern is just a starting point. Don’t be afraid to get creative and make it your own. Have fun exploring different variations and enjoy the process of knitting these adorable lambs!