
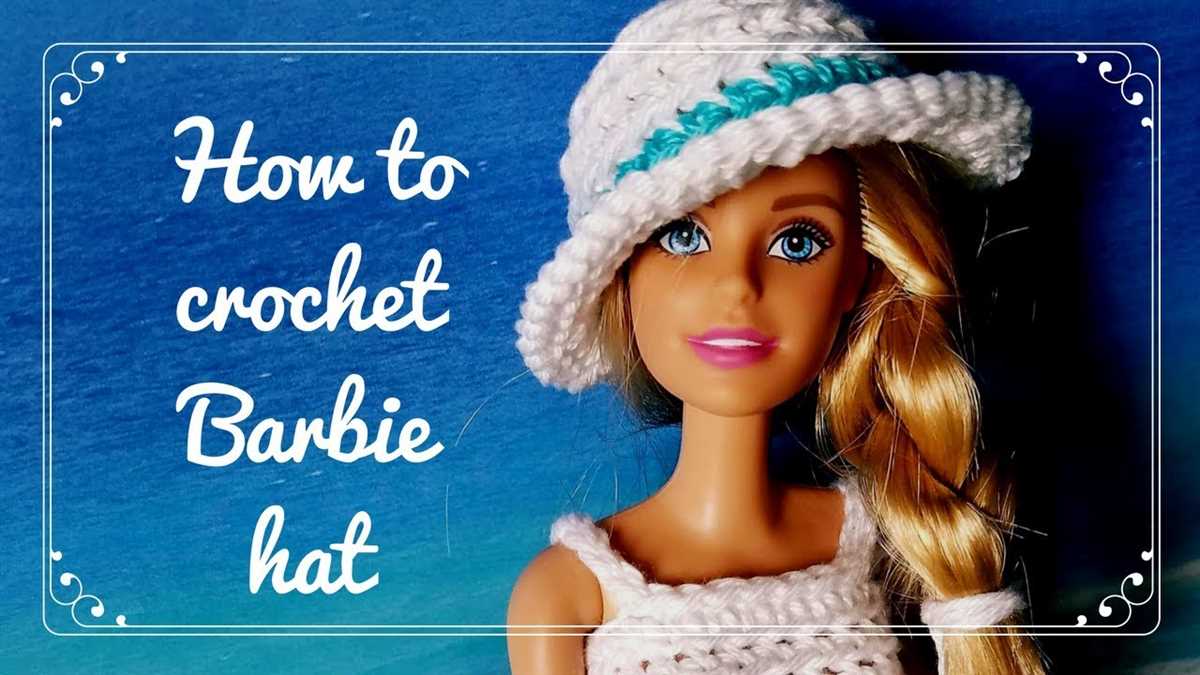
Barbie dolls have been a popular toy for girls for decades, and one way to make these dolls even more special is by crafting accessories for them. One accessory that many girls enjoy making is a knitted hat. Knitting a hat for Barbie can be a fun and rewarding project, and there are several patterns available to help you create the perfect hat for your doll.
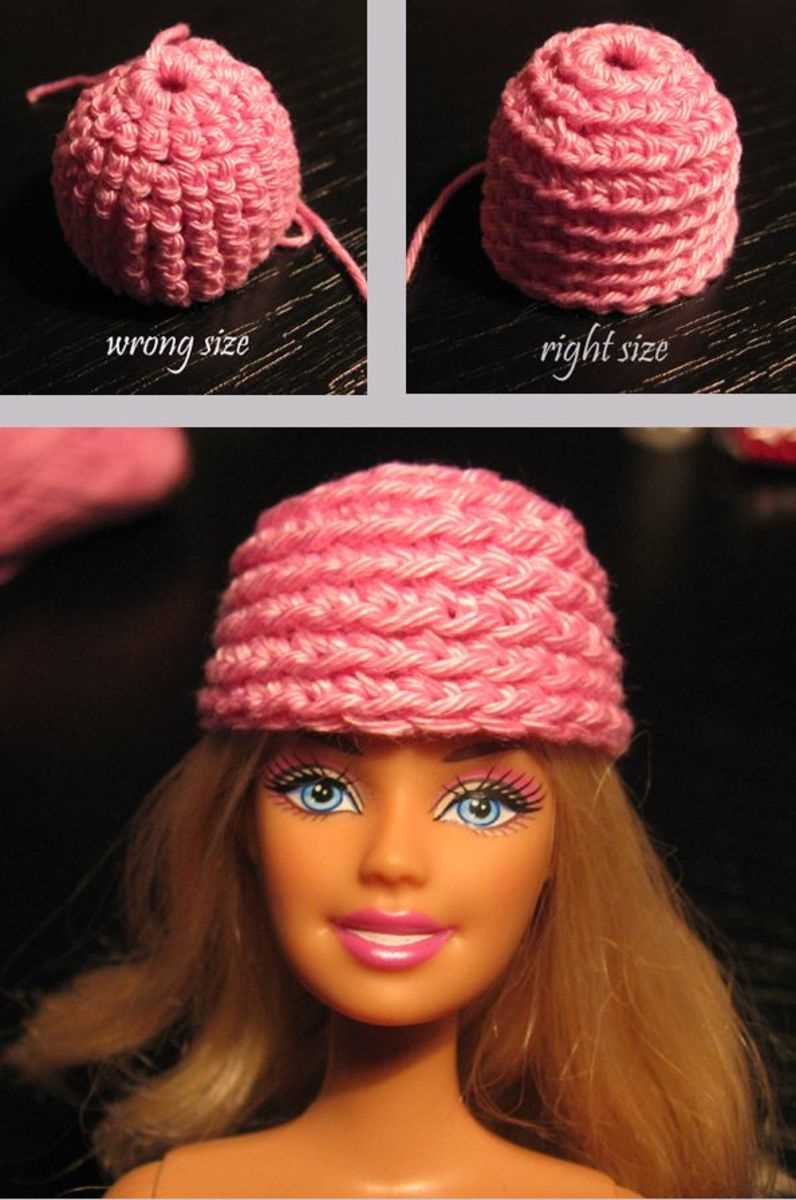
When choosing a knitting pattern for a Barbie hat, it’s important to consider the size of the doll’s head. Barbie dolls have a smaller head circumference than a regular human head, so you’ll need to choose a pattern that is designed specifically for these dolls. One popular pattern is a simple beanie-style hat that fits snugly on Barbie’s head. This pattern typically uses small needles and thin yarn to ensure a perfect fit.
Knitting a Barbie hat is a great way to practice your knitting skills on a small scale. The small size of the project makes it quick and easy, allowing you to experiment with new stitches and techniques without committing to a larger project. Additionally, the finished hat can be a great gift for a young girl who loves her Barbie doll, or a charming addition to your own doll collection.
In this article, we will showcase a basic knitted Barbie hat pattern that you can easily follow to create your own doll-sized hats. The pattern will include step-by-step instructions and helpful tips to ensure you create a hat that fits Barbie perfectly. So grab your knitting needles, choose your favorite yarn, and get ready to create some adorable hats for your Barbie doll!
Knitted Barbie Hat Pattern: Step-by-Step Guide
Knitting a hat for your Barbie doll is a fun and rewarding project that allows you to showcase your knitting skills and create a stylish accessory for your doll. In this step-by-step guide, we will provide you with detailed instructions on how to knit a Barbie hat.
Materials:
- Yarn: Choose a soft and lightweight yarn in your desired color.
- Knitting needles: Use size 4 or 5 needles, depending on your yarn thickness.
- Tapestry needle: This will be used for sewing the hat together.
- Scissors: To cut the yarn.
Step 1: Cast on stitches
Start by casting on 48 stitches onto your knitting needles. Make sure to leave a long tail of yarn, as you will need it later for sewing the hat.
Step 2: Knit in the round
Join the stitches in a circle and begin knitting in the round. Use the knit stitch for every round until the hat measures approximately 2 inches in length.
Step 3: Decrease stitches
Switch to the decrease stitch pattern to shape the crown of the hat. Knit 6 stitches, then knit 2 stitches together. Repeat this pattern until the end of the round. You should have 42 stitches remaining on your needles.
Step 4: Continue decreasing
Continue knitting in the decrease stitch pattern for the next few rounds until you have 24 stitches remaining.
Step 5: Bind off
Bind off the remaining stitches and cut the yarn, leaving a long tail for sewing.
Step 6: Sew the hat
Using the tapestry needle, sew the top of the hat closed by pulling the yarn through the remaining stitches. Then, sew the sides of the hat together using the long tail of yarn.
Once you have finished sewing, weave in any loose ends and trim off excess yarn.
Step 7: Optional embellishments
If desired, you can add embellishments to your Barbie hat such as a pom-pom, a flower, or a bow. Get creative and have fun personalizing your hat!
Materials Needed
If you want to create a knitted Barbie hat, you will need a few essential materials to get started. Here is a list of what you will need:
- Knitting needles: You will need a set of knitting needles to work with. Choose a size that is suitable for the yarn you will be using.
- Yarn: Select a soft and lightweight yarn in the color of your choice. Make sure it is suitable for knitting and will create a comfortable hat for Barbie.
- Tape measure: This will come in handy when measuring your gauge and the size of the hat.
- Scissors: You will need a pair of scissors to cut the yarn and any excess threads.
- Darning needle: A darning needle is essential for weaving in the ends of the yarn and finishing off your hat.
- Stitch markers: If you are working with a pattern that requires stitch markers, be sure to have a few on hand.
- Optional embellishments: If you want to add some extra flair to your Barbie hat, consider using ribbons, buttons, or other decorative elements.
Having these materials ready will ensure that you have everything you need to start knitting your Barbie hat. So gather your supplies and get ready to create a fashionable accessory for your Barbie doll!
Choosing the Right Yarn
When it comes to knitting a Barbie hat, choosing the right yarn is essential. The type of yarn you use will affect the finished look and feel of the hat, as well as its durability. To ensure that your Barbie hat turns out just right, consider these factors when selecting your yarn:
1. Fiber Content:
The fiber content of the yarn will determine how soft, warm, and stretchy the hat will be. Common options for Barbie hats include acrylic, cotton, and wool. Acrylic yarn is often budget-friendly and easy to care for, but it may not be as soft as natural fibers. Cotton yarn is great for warmer weather as it is breathable, while wool yarn provides extra warmth. Consider the preferences of the recipient and the hat’s intended use when choosing the fiber content.
2. Weight and Gauge:
The weight of the yarn refers to its thickness and is typically labeled from 0 (lace weight) to 7 (jumbo weight). For a Barbie hat, you will want to use a yarn in the fine or light weight category (e.g., sport weight, fingering weight). Additionally, pay attention to the gauge listed on the yarn label, which indicates the number of stitches and rows needed to create a 4×4 inch square. Matching the gauge specified in the pattern will help ensure that your hat turns out the correct size.
3. Color and Texture:
Consider the color and texture of the yarn, as these elements can greatly impact the overall look of the hat. Bright and vibrant colors may be more suitable for playful or dress-up hats, while softer and more muted tones can create a more elegant and sophisticated look. The texture of the yarn, such as smooth, fluffy, or textured, can add visual interest to the hat as well.
4. Price and Availability:
Lastly, take into account the price and availability of the yarn. Different brands and types of yarn vary in price, so consider your budget when making your selection. Additionally, some specialty yarns may only be available in limited quantities or at specific locations. Plan ahead and check the availability of the yarn you have in mind to avoid any unexpected delays or difficulties.
By considering the fiber content, weight and gauge, color and texture, as well as the price and availability of the yarn, you can choose the perfect yarn for your Barbie hat project. Remember to check the pattern requirements and have fun experimenting with different yarns to create unique and beautiful hats for your Barbie dolls!
Choosing the Right Needles
When knitting a hat for your Barbie doll, it is important to choose the right needles to ensure a perfect fit and an attractive finished product. The needles you select will play a crucial role in determining the size and tension of your stitches, as well as the overall appearance of the hat. Here are a few factors to consider when choosing your needles:
1. Size:
The size of your needles refers to the diameter of the shaft. For a Barbie hat, you will typically want to use smaller needles, such as US size 1 (2.25mm), as they will create tighter and more delicate stitches. This will ensure that the hat fits snugly on Barbie’s head and looks proportional to her size.
2. Material:
The material of your needles will also affect the outcome of your knitting project. Metal needles, such as aluminum or stainless steel, are popular choices for their smooth surface, which allows the yarn to glide easily. Bamboo needles, on the other hand, provide a bit more grip, making them ideal for beginners or those who prefer a slower pace. Consider your personal preference and the type of yarn you are working with when selecting the material.
3. Length:
The length of your needles will depend on the type of knitting technique you plan to use. For knitting the hat in the round, you will need a set of double-pointed needles or circular needles. Double-pointed needles come in various lengths, typically ranging from 4 to 8 inches, and are used when knitting small items like doll hats. Circular needles, which have a flexible cable connecting two needle tips, are a good option if you prefer working with longer needles or if you plan to knit multiple hats at once.
By taking into account these factors and choosing the right needles, you can ensure a successful and enjoyable knitting experience while creating a beautiful knitted hat for your Barbie doll.
Knitting Gauge
When it comes to knitting, gauge is an important factor to consider. It refers to the number of stitches and rows that can be produced within a specific measurement, usually given in inches or centimeters. The gauge determines the size of the final knitted piece and ensures that it matches the pattern’s specifications.
To determine gauge, it is recommended to swatch or knit a small sample using the same yarn and needles that will be used for the project. The sample should be a square shape, around 4 inches or 10 centimeters in size. The number of stitches and rows in this sample are then counted and compared to the gauge stated in the pattern.
Gauge is influenced by several factors, including the thickness of the yarn, the type of stitch used, and the size of the needles. Choosing the right yarn and needle size is crucial to achieving the correct gauge. If the stitches and rows in the sample are fewer than stated in the pattern, it means that the knitter’s gauge is too loose. In this case, switching to smaller needles or using a thicker yarn can help achieve the correct gauge. On the other hand, if there are more stitches and rows in the sample, the knitter’s gauge is too tight, and switching to larger needles or using a thinner yarn can help adjust the gauge.
It is important to achieve the correct gauge, as it determines the size and fit of the finished knitted piece. Deviating from the specified gauge can result in a garment that is too large or too small. Furthermore, gauge is not only about size but also affects the drape and overall appearance of the knitted fabric. A looser gauge may result in a more airy and drapey fabric, while a tighter gauge can make the fabric sturdier and denser.
Knitting the Hat Brim
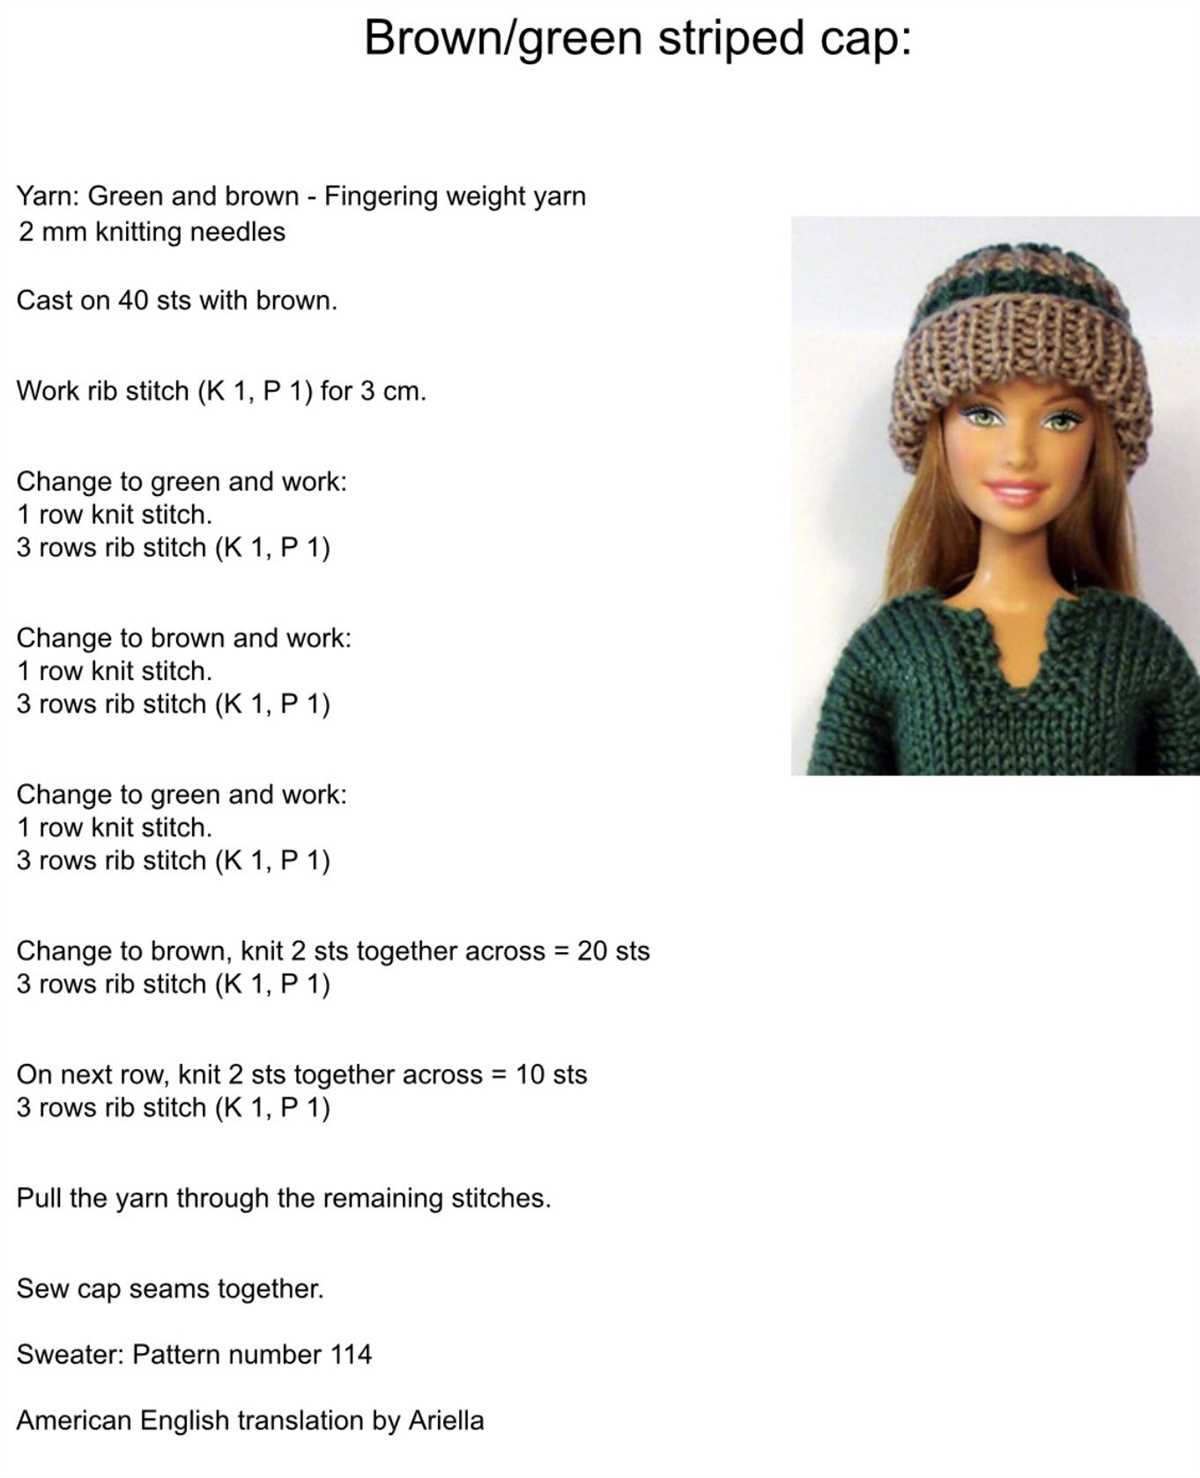
When knitting a hat, one of the first steps is to create the brim. The brim is the edge of the hat that sits on the forehead and provides structure and stability to the hat. There are different techniques for knitting the brim, but one common method is to use ribbing.
Ribbing is a type of stitch pattern that creates a stretchy and flexible fabric. It is often used for cuffs, collars, and, of course, hat brims. The most basic ribbing pattern is the 1×1 rib, where alternating knit and purl stitches are worked across the row. This creates a ribbed texture that stretches easily and molds to the shape of the head.
To knit the brim of a hat, you will need to cast on the desired number of stitches, usually a multiple of two. Then, you will begin working the ribbing pattern, starting with a knit stitch followed by a purl stitch. Repeat this sequence until you reach the end of the row. When you turn the work and begin the next row, you will continue the knit and purl sequence, but this time you will purl the stitches that were knit in the previous row and knit the stitches that were purled.
It’s important to maintain the ribbing pattern consistently throughout the brim to ensure a uniform and stretchy fabric. The length of the brim can vary depending on personal preference and hat design. Some hats have a short brim, while others have a longer brim that can be folded up for added warmth or style.
Overall, knitting the hat brim is an essential step in creating a well-fitted and comfortable hat. By using ribbing, you can achieve a stretchy and flexible fabric that hugs the head and stays in place. Whether you’re knitting a hat for yourself or someone else, the brim adds a finishing touch to the overall design and enhances the overall look and fit of the hat.
Knitting the Body of the Hat
Once you have completed the brim of your Barbie hat, it’s time to move on to knitting the body of the hat. This is where you will really start to see the hat taking shape and coming together.
To begin, you will need to continue using your chosen yarn and knitting needles. If you are following a specific pattern, make sure to follow the instructions for the body section. Otherwise, you can create your own design by continuing to knit in your desired stitch pattern.
If you are using a pattern, it may specify a specific stitch pattern for the body of the hat. This could be stockinette stitch, ribbing, or even a textured stitch pattern. Make sure to follow the pattern instructions carefully to achieve the desired effect.
If you are creating your own design, you can experiment with different stitch patterns to create a unique look. Consider using a combination of knit and purl stitches, or even try incorporating cables or lace patterns for added interest.
As you knit the body of the hat, make sure to regularly try it on your Barbie doll to check the fit and adjust as needed. This will ensure that the hat is the perfect size and shape for your doll.
Continue knitting until the body of the hat reaches the desired length. This will depend on your personal preference and the style of hat you are creating. Some Barbie hat patterns may call for a shorter length, while others may have a slouchy or oversized fit.
Remember to keep track of your stitches and row count as you knit the body of the hat. This will help ensure that both sides of the hat are symmetrical and that the shaping is even.
Once you have completed knitting the body of the hat, you can move on to the final steps of finishing and adding any desired embellishments. This could include adding a pom-pom, creating a decorative edging, or even attaching a small bow or flower.
Shaping the Crown
When knitting a hat, creating the crown is an essential step that gives the hat its distinctive shape and fit. The crown is the top part of the hat that covers the head, and it can be shaped in various ways depending on the desired style and design. By following a knitted barbie hat pattern, you can learn how to shape the crown to achieve a beautiful and snug-fitting hat for your Barbie doll.
To shape the crown of the knitted barbie hat, you will typically need to decrease the number of stitches as you move towards the top. This is done by knitting two stitches together, also known as k2tog, or using other decreasing techniques such as slip-slip-knit (ssk). These decreases create a tapered effect that allows the hat to fit snugly on Barbie’s head while maintaining its stylish look.
One common method for shaping the crown is to use a decrease round. In this round, you will knit a certain number of stitches, then decrease stitches evenly across the round by knitting two stitches together. This process is repeated until the desired number of stitches is reached. For example, if you have 60 stitches at the start of the decrease round and want to decrease to 30 stitches, you would knit two stitches together every other stitch on the round.
The shaping of the crown can also vary depending on the knitting pattern you are using. Some patterns may instruct you to decrease stitches more rapidly, creating a more pointed or rounded crown shape. Others may incorporate different stitch patterns or color changes to add more visual interest to the crown. Regardless of the specific instructions, shaping the crown requires careful attention to detail and following the pattern’s instructions accurately to achieve the desired result.
In conclusion, shaping the crown is an important step in knitting a barbie hat. By carefully decreasing stitches and following the pattern’s instructions, you can create a crown that fits snugly and adds a stylish finishing touch to your Barbie doll’s outfit.
Adding Embellishments
When knitting a Barbie hat, adding embellishments can take it from simple to stunning. There are various ways to enhance the hat with decorative elements that will make it stand out and reflect your personal style.
Buttons: Sewing buttons onto the hat can add an adorable touch. Choose buttons in different sizes, shapes, and colors to create a unique and eye-catching design. You can sew them in a pattern or scatter them randomly across the hat.
Ribbons: Adding a ribbon to the brim or crown of the Barbie hat can instantly make it look more elegant and feminine. Choose a ribbon that complements the color of the hat and tie it in a bow or knot for a delicate finishing touch.
Bows: Knitting a small bow separately and attaching it to the hat can elevate its appearance. You can choose to knit the bow in a contrasting color or use the same yarn as the hat for a cohesive look.
Embroidery: Incorporating embroidery into the design of the hat can create intricate and beautiful patterns. You can use different colored yarns to embroider flowers, hearts, or any other design that brings a touch of whimsy to the hat.
Pom-poms: Attaching a pom-pom to the crown of the Barbie hat adds a playful and fun element. You can use a pom-pom maker or make one by wrapping yarn around your fingers and securing it tightly before cutting the loops and fluffing the pom-pom.
Sequins or beads: Sewing sequins or beads onto the hat adds a touch of sparkle and glamour. Choose sequins or beads that match the color scheme of the hat and sew them in a design or scatter them randomly for a dazzling effect.
Whichever embellishments you choose to add to your Barbie hat, remember to secure them tightly to prevent them from coming loose during playtime or display. Have fun experimenting with different embellishments and find the ones that reflect your personal style and make your Barbie hat truly unique!
Finishing Touches
After you have completed knitting the Barbie hat pattern, it’s time to add the finishing touches to make it even more beautiful and unique. There are several ways you can enhance the hat’s appearance and add extra flair.
1. Embellish with decorations:
You can use small decorations, such as beads, sequins, or buttons, to add some sparkle and personality to the hat. Sew them onto the hat using a matching thread or yarn to create eye-catching designs or patterns. Be creative and experiment with different placement and combinations to achieve the desired effect.
2. Add a pom-pom:
A classic and fun addition to any knitted hat is a pom-pom. You can easily make your own pom-pom using yarn in a contrasting color. Attach it to the top of the hat by sewing it securely in place. The pom-pom adds a playful touch and can complement the colors used in the hat.
3. Create a decorative edge:
To give the hat a more polished look, consider adding a decorative edge. You can use a contrasting yarn color or a different stitch pattern to create a unique border. Options include ribbing, picot edging, or scalloped edges. Follow a pattern or use your creativity to experiment with different techniques.
4. Personalize with embroidery:
If you want to add a personal touch to the hat, consider embroidering a name, initials, or a small design onto it. Use a tapestry needle and embroidery floss in a complementary color to stitch the desired pattern. This adds a sentimental touch and makes the hat truly one-of-a-kind.
5. Line the hat:
If you want to add extra warmth and comfort to the hat, you can line it with a soft fabric. Measure the inside circumference of the hat and cut a piece of fabric that matches those measurements. Sew the fabric lining to the inside of the hat, and it will not only provide additional insulation but also give a polished finish to the hat’s interior.
With these finishing touches, your knitted Barbie hat will be transformed into a stunning and personalized accessory that your Barbie doll will love to wear. Don’t be afraid to get creative and experiment with different techniques to make the hat truly unique.
Tips and Tricks
Creating beautiful knitted Barbie hats can be a fun and rewarding experience. Here are a few tips and tricks to help you along the way:
1. Choose the Right Yarn
When selecting yarn for your Barbie hat, make sure to use a lightweight and soft yarn that is suitable for small-scale projects. Acrylic blends or baby weight yarn are great options. Avoid bulky or heavy yarns, as they may overwhelm the small scale of the Barbie doll.
2. Use Appropriate Needles

Choose needles that are appropriate for the yarn you have selected. For lightweight yarns, use smaller needles such as size 2 or 3. This will help create a tight and even fabric for your Barbie hat.
3. Gauge Matters
Take the time to swatch and check your gauge before starting your Barbie hat. Knitting with the correct gauge will ensure that the hat fits properly on your doll. Adjust your needle size accordingly to achieve the desired gauge.
4. Experiment with Patterns
There are countless patterns available for knitted Barbie hats. Don’t be afraid to experiment with different stitch patterns, colorwork, or embellishments. This is a great opportunity to get creative and showcase your knitting skills.
5. Pay Attention to Proportions
Keep in mind that you are knitting for a small-scale doll. Take note of the doll’s proportions and adjust your hat pattern accordingly. A hat that fits well and complements the doll’s features will look much more appealing.
6. Finish with Care
Take the time to properly finish your Barbie hat. Weave in all loose ends and block the hat if necessary. This will give your project a polished and professional look.
7. Share Your Creations
Don’t forget to share your knitted Barbie hat creations with others! You can inspire and encourage fellow knitters by posting your projects on social media or joining online knitting communities. It’s always great to see the different variations and styles that can be achieved with a simple Barbie hat pattern.
Conclusion
In conclusion, knitting Barbie hats can be a fun and creative project. By following these tips and tricks, you can create beautiful hats that will fit and flatter your Barbie dolls. So gather your supplies, choose your favorite pattern, and start knitting!