
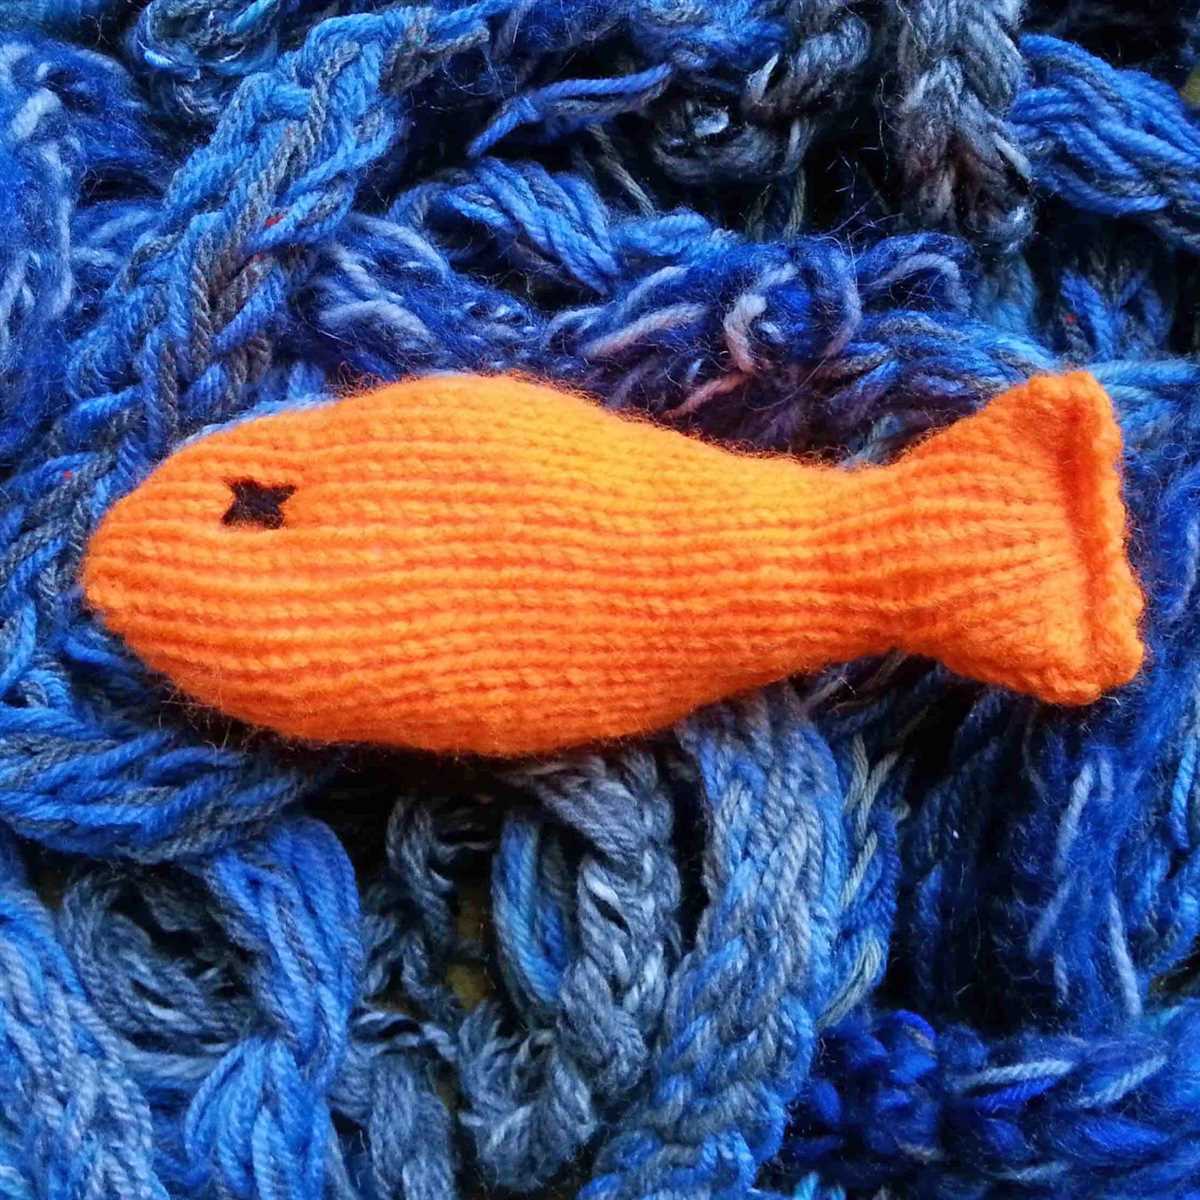
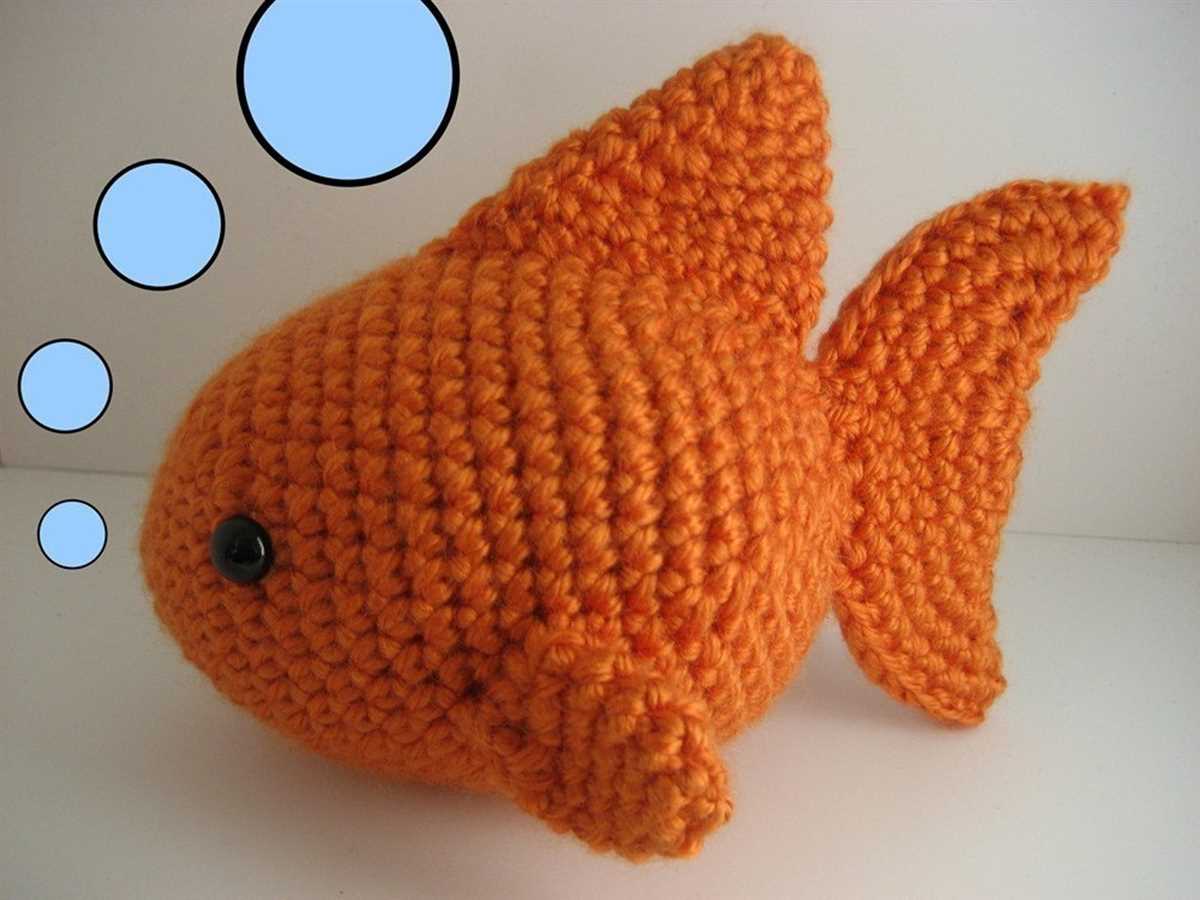
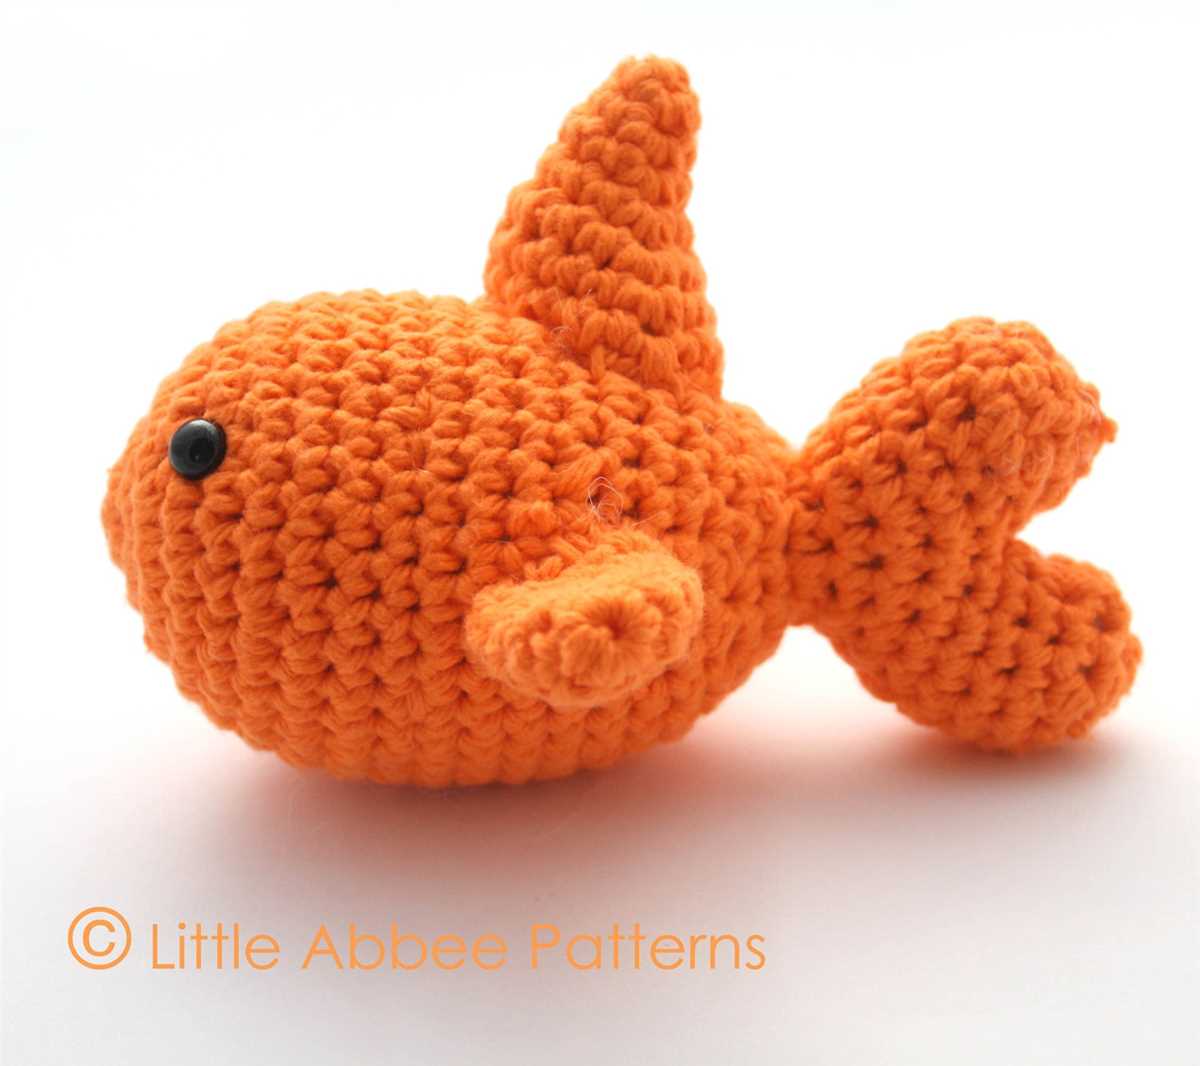
If you’re a fan of knitting and cute little crafts, then you’ll love this knitted goldfish pattern. Knitting is a popular hobby that allows people to create beautiful and unique items with just a few yarn and needles. This pattern is perfect for beginners or experienced knitters who are looking for a fun and adorable project.
The knitted goldfish pattern is designed to create a soft and cuddly toy that resembles a goldfish. The pattern includes detailed instructions and step-by-step photos to guide you through the process. With a little patience and practice, you’ll soon have your very own knitted goldfish.
Not only is this pattern a great way to practice your knitting skills, but it also makes for a wonderful gift. Whether you’re making it for a child or an adult, the knitted goldfish is sure to bring a smile to their face. You can customize the colors to match the recipient’s preferences or make it in traditional goldfish colors.
What is a knitted goldfish pattern?
A knitted goldfish pattern is a set of instructions and guidelines for creating a knitted toy or decoration in the shape of a goldfish. It typically includes details on the type and size of yarn to use, the knitting techniques involved, and step-by-step instructions for creating the various parts of the goldfish.
The pattern may also include information on any additional materials needed, such as knitting needles, stuffing for the toy, and any embellishments or finishing touches to add to the final product. Some patterns may also provide tips and tricks for customizing the goldfish, such as different color variations or added details like fins or scales.
To follow a knitted goldfish pattern, one would typically need basic knitting skills, including knowledge of common knitting stitches such as knit, purl, and increasing or decreasing stitches. The pattern will guide the knitter through the process, providing detailed instructions and often including charts or diagrams to help visualize the steps.
Knitting a goldfish using a pattern can be a great way to create a unique and personalized item. The finished goldfish can be used as a decorative item in a child’s room, as a toy, or even as a gift. Some people may even choose to sell their knitted goldfish creations at craft markets or online platforms.
Materials needed
To make a knitted goldfish, you will need the following materials:
- Yarn: Choose a soft, medium-weight yarn in orange for the body of the goldfish. You will also need a small amount of white yarn for the eyes and fins.
- Knitting Needles: Use a pair of size 4mm knitting needles or the appropriate size for your selected yarn.
- Tapestry Needle: This will be used for sewing the pieces together.
- Stuffing: You will need a small amount of polyester fiberfill or any other suitable stuffing material.
- Scissors: A pair of sharp scissors will be required for cutting the yarn.
- Stitch Holder: This will help you hold stitches when working on different sections of the goldfish.
These materials are readily available at most craft stores or can be purchased online. Ensure that the yarn you select is appropriate for the pattern and that your knitting needles match the suggested size for your chosen yarn. Having all the necessary materials prepared before starting will help you work smoothly and complete your knitted goldfish with ease.
Knitting techniques
Knitting is a versatile craft that allows you to create beautiful and intricate designs using just a pair of needles and some yarn. There are several knitting techniques that you can use to bring your projects to life, and each technique has its own unique style and characteristics. Whether you’re a beginner or an experienced knitter, it’s important to familiarize yourself with these techniques to expand your repertoire and take your knitting skills to the next level.
1. Knit and purl stitches: The knit and purl stitches are the basic building blocks of knitting. The knit stitch creates a smooth, v-shaped pattern, while the purl stitch creates a bumpy, horizontal line. By combining these two stitches in various patterns, you can create different textures and designs in your knitting.
2. Cabling: Cabling is a technique that involves crossing stitches over each other to create a twisted pattern. It adds depth and interest to your knitting, and can be used to create intricate cable designs such as ropes, braids, and diamonds. Cabling requires the use of a cable needle or a double-pointed needle to hold the stitches in place while you work.
3. Lace knitting: Lace knitting involves creating deliberate holes and openings in your knitting to form intricate lace patterns. This technique requires careful attention to detail and often involves working with lace-weight yarn and smaller needles to create delicate and airy designs. Lace knitting can be used to create shawls, scarves, and other delicate garments.
4. Fair Isle knitting: Fair Isle knitting, also known as stranded knitting, is a technique that involves working with two or more colors of yarn at the same time. The colors are carried along the back of the work, creating a stranded or float effect. Fair Isle knitting is commonly used to create colorful and geometric patterns, such as the traditional Fair Isle designs of Scotland.
5. Intarsia knitting: Intarsia knitting is a technique that allows you to create large, solid blocks of color in your knitting. It involves using separate balls or bobbins of yarn for each color and twisting the yarns at the color changes to prevent holes. Intarsia knitting is often used to create pictorial designs, such as animals or objects, in the fabric of your knitting.
These are just a few of the many knitting techniques that you can explore and incorporate into your knitting projects. With practice and experimentation, you can create beautiful and unique designs that showcase your creativity and skill as a knitter.
Why make a knitted goldfish?
Knitting is a versatile craft that allows you to create a wide range of beautiful and unique items. One interesting project that you can undertake is knitting a goldfish. By making a knitted goldfish, you can showcase your knitting skills while also creating a fun and adorable toy or decoration.
One reason to make a knitted goldfish is that it can serve as a wonderful gift. Whether you’re knitting it for a child or an adult, a knitted goldfish can be a thoughtful and personalized present. It shows that you’ve put time and effort into creating something special that the recipient will appreciate. Plus, a knitted goldfish can be a great alternative to traditional stuffed animals or other toys.
Additionally, knitting a goldfish can be a fun and challenging project. The intricate details and shaping required to create a realistic-looking fish can be an exciting and rewarding task for experienced knitters. It offers an opportunity to learn or practice new techniques, such as shaping fins or creating textured scales. Moreover, the finished goldfish can serve as a unique addition to your collection of knitted creations.
Furthermore, a knitted goldfish can also be used as a decorative item. You can display it on a shelf, hang it from a mobile or use it as a prop in a themed event or photoshoot. Its vibrant colors and playful design can bring a touch of whimsy and charm to any space. Whether you want to add a pop of color or showcase your love for marine life, a knitted goldfish can be a delightful addition to your home decor.
In conclusion, making a knitted goldfish offers a variety of benefits. It allows you to showcase your knitting skills, create a personalized gift, challenge yourself with a fun project, and add a unique decorative item to your collection. Whether you’re a seasoned knitter or just starting out, a knitted goldfish can be a rewarding and enjoyable project to undertake.
Step-by-step instructions for knitting a goldfish
If you want to create a unique and adorable knitted goldfish, follow these step-by-step instructions. With a little patience and some basic knitting skills, you’ll have a charming goldfish in no time!
Materials you will need:
- Double-pointed knitting needles size 4mm
- Worsted weight yarn in orange and white
- Tapestry needle
- Stuffing
- Safety eyes or buttons
- Scissors
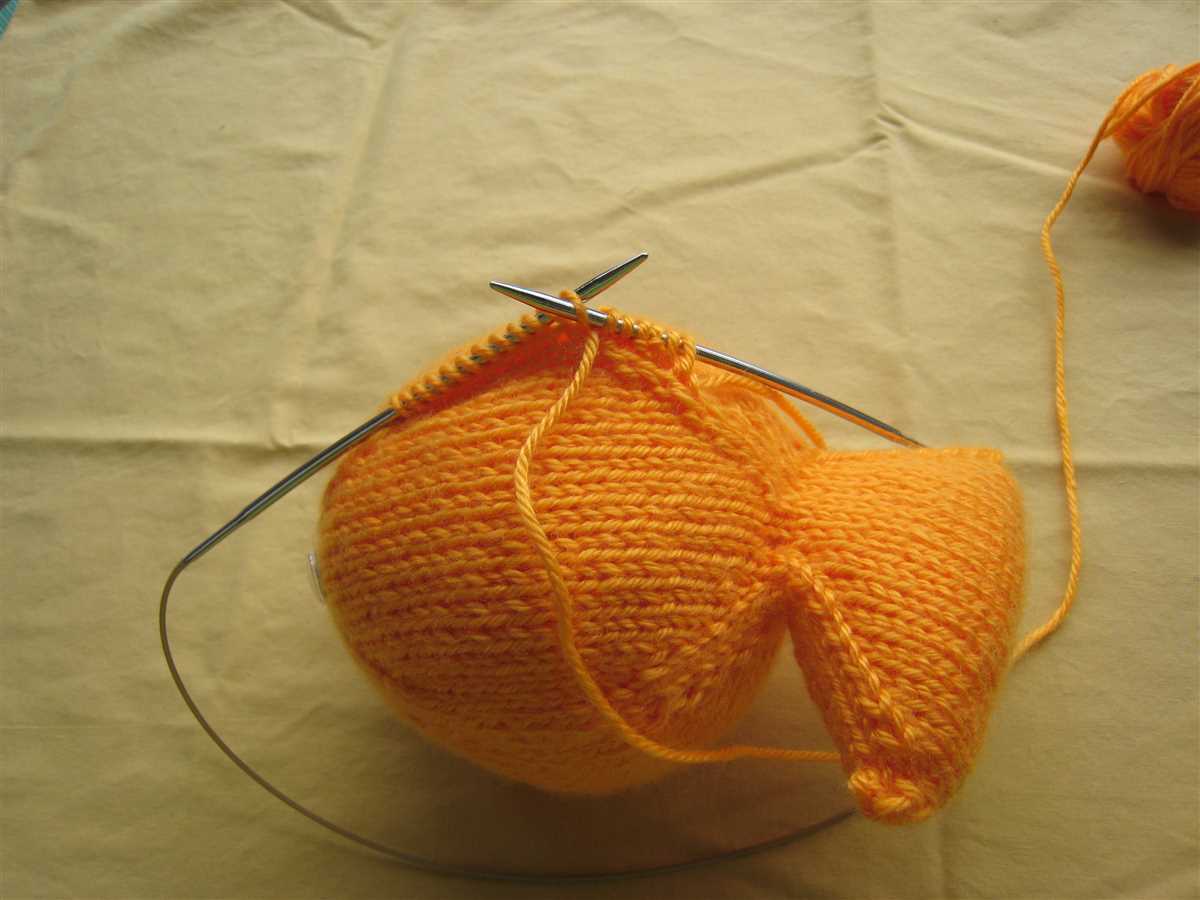
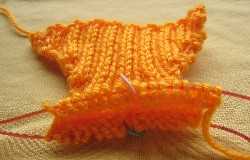
Step 1: Cast on and knit body
Begin by casting on 24 stitches using the orange yarn. Knit in the round for approximately 6 inches to create the body of the goldfish. Once you’ve reached the desired length, bind off the stitches.
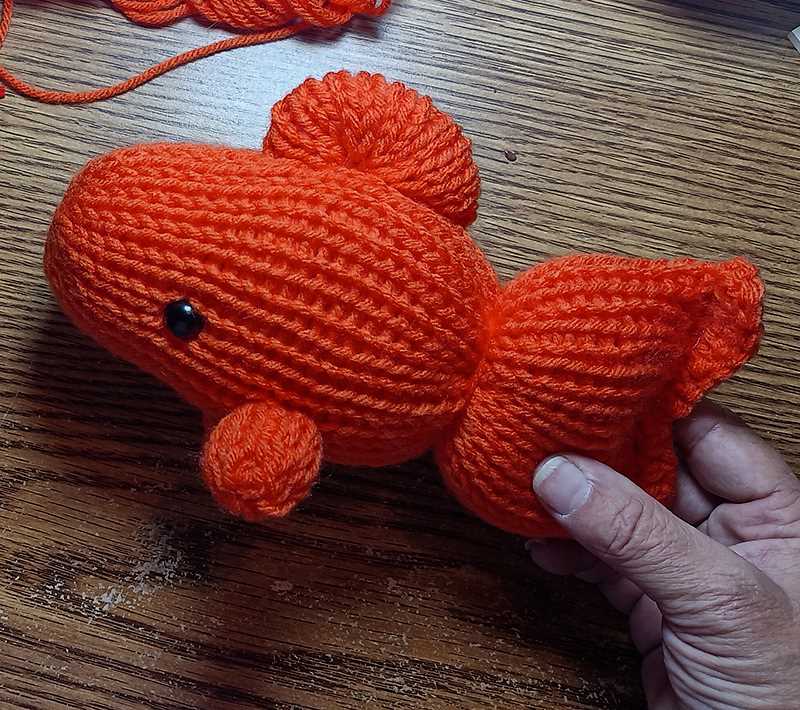
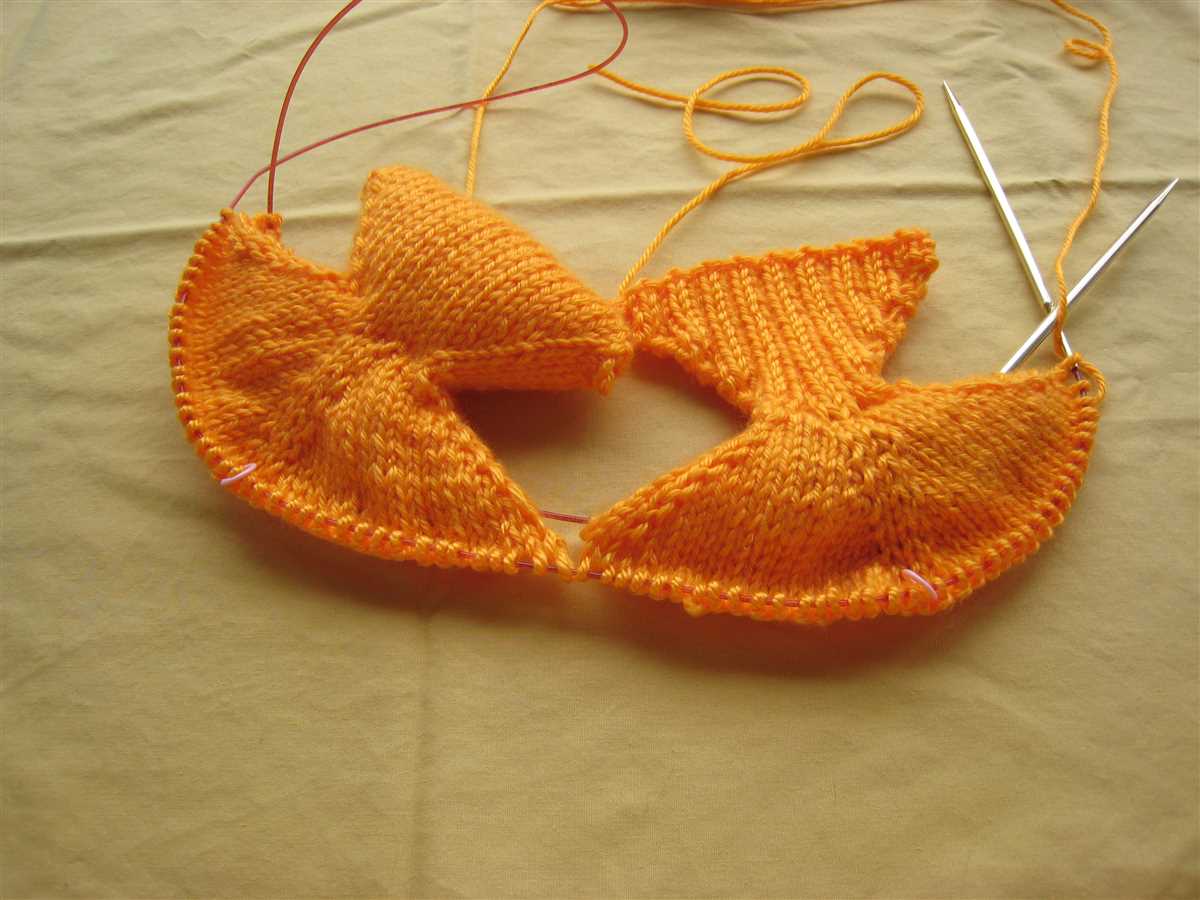
Step 2: Knit tail and fins
Using the orange yarn, cast on 8 stitches. Knit in garter stitch (knit every row) for approximately 3 inches to create the tail. Bind off the stitches and set it aside.
For the fins, cast on 5 stitches using the orange yarn. Knit in garter stitch for 2 inches and then bind off. Repeat this step to create a total of 2 fins.
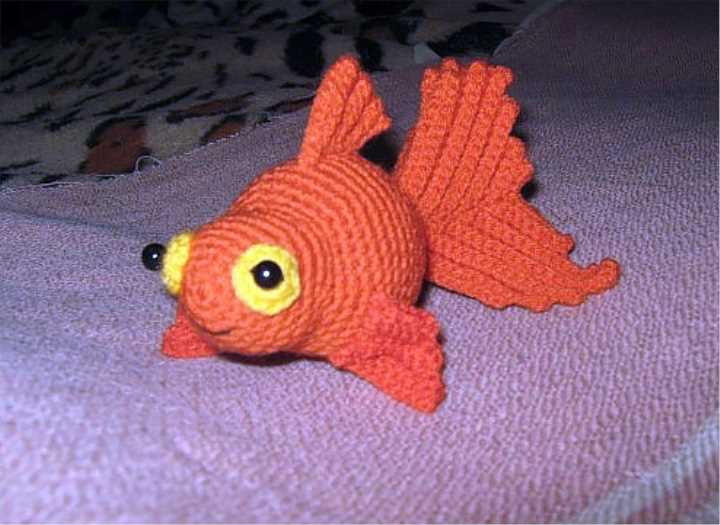
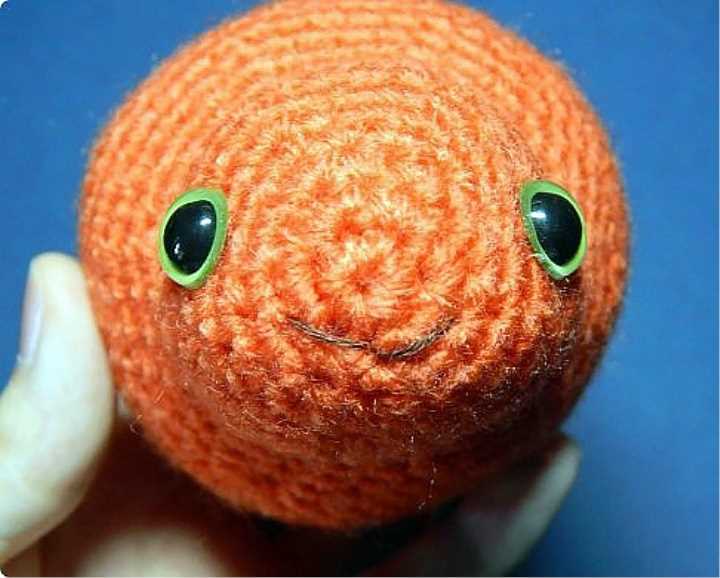
Step 3: Create face and features
Using the white yarn, cast on 6 stitches. Knit in stockinette stitch (knit one row, purl one row) for approximately 1 inch to create the face. Bind off the stitches and sew it onto the body of the goldfish.
Attach the safety eyes or buttons to the face, and use embroidery floss to create a smile and other features if desired.
Step 4: Assemble the goldfish
Start by sewing the tail onto the back of the goldfish, positioning it near the end of the body. Next, sew the fins onto the sides of the goldfish, aligning them with the body. Leave a small opening at the top for stuffing.
Stuff the goldfish lightly with stuffing, making sure to distribute it evenly. Once the goldfish is stuffed, sew the opening closed.
Step 5: Finishing touches
Trim any excess yarn and weave in any loose ends. Give your goldfish a gentle squeeze to shape it, and adjust the position of the fins and tail as desired. Your knitted goldfish is now complete!
Casting on
When starting a knitting project, one of the first steps is casting on. This is the process of creating the first row of stitches on the knitting needle. There are several methods for casting on, and the choice of which one to use depends on the desired effect and personal preference.
One common method of casting on is the long-tail cast on. This method creates a neat and elastic edge, which is ideal for many projects. First, a slip knot is created on the needle, leaving a long tail. Then, the yarn is wrapped around the thumb and the needle, creating a loop. This loop is then transferred to the needle, and the process is repeated until the desired number of stitches is cast on.
Another method is the knit cast on, which is a simple and quick way to cast on stitches. To begin, the yarn is wrapped around the needle and pulled through the loop, creating a new stitch. This process is repeated until the desired number of stitches is cast on.
It is important to cast on the correct number of stitches for the project, as this sets the foundation for the pattern. The pattern or knitting instructions will specify the number of stitches needed, and it is important to double-check this before starting the casting on process. Once the stitches are cast on, the knitting can begin!
Knitting the Body
Once you have completed knitting the head of the goldfish, it’s time to move on to knitting the body. The body of the goldfish is made using basic knitting techniques and simple stitches.
To start, cast on the required number of stitches according to the pattern. It is important to ensure that your cast on edge is neat and even. You can use a long-tail cast on method or any other method of your choice. Once the stitches are cast on, join them in the round, making sure not to twist the stitches.
Continue knitting in the round, following the pattern’s instructions for the body. This may include knitting straight for a certain number of rounds or working increases and decreases to shape the fish body. Pay close attention to the pattern’s stitch counts and markers, if any, to ensure accuracy in your knitting.
As you knit the body, take the time to periodically check your gauge to ensure that the size and proportions of the goldfish are as intended. Adjust your tension if necessary.
If the pattern calls for any specific stitch patterns or textures for the body, be sure to follow those instructions carefully. This could include simple ribbing, seed stitch, or any other decorative stitch pattern. These elements can add texture and visual interest to the finished goldfish.
Once the body is complete, bind off the stitches according to the pattern. Weave in any loose ends and prepare the body for the next steps in the pattern, such as adding fins or attaching the head.
Finishing touches
Once you have completed knitting your goldfish, there are a few finishing touches you can add to make it even more adorable and lifelike. These final steps will give your knitted goldfish its unique character and make it stand out.
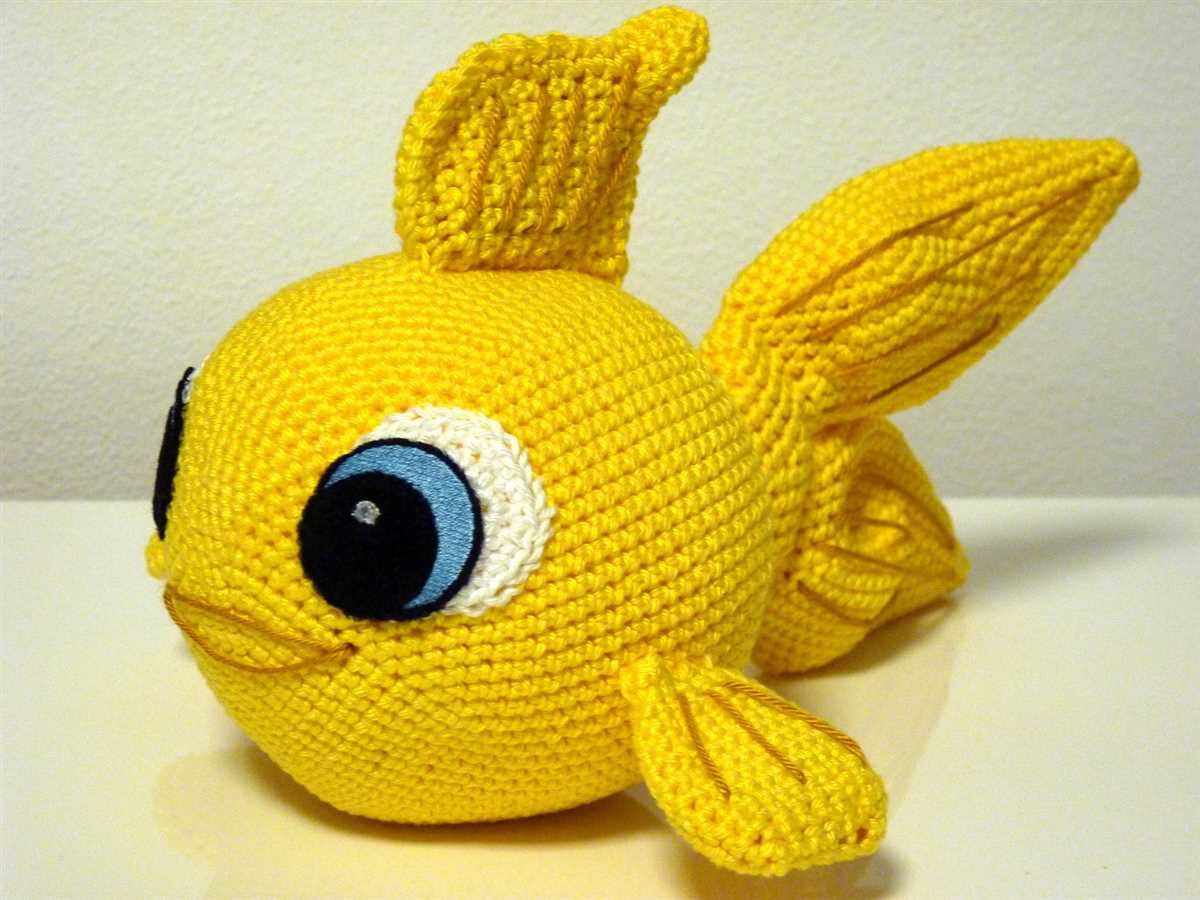
1. Embroidered details: To add more realism to your knitted goldfish, you can embroider details such as the eyes, mouth, and scales. Use a contrasting color yarn and carefully stitch the details using small, straight stitches. This will bring your goldfish to life and make it look more like a real fish.
2. Stuffing: Before you close up your goldfish, make sure it is firmly stuffed to give it a nice shape and plumpness. Use polyester fiberfill or any other stuffing material of your choice. Fill the body and fins evenly, but avoid overstuffing, as this can distort the shape of your goldfish.
- In the eyes, use black embroidery floss to create a small circle for the pupils.
- For the mouth, use a red or orange embroidery floss and stitch a simple, smiling curve.
- To create the scales, use a contrasting color yarn and embroider small V shapes along the body of the fish.
3. Blocking: To give your knitted goldfish its final shape, blocking is essential. Gently steam or wet block your goldfish by laying it flat on a blocking mat or towel and pinning it into the desired shape. Allow it to dry completely before removing the pins for the best results.
4. Finishing touches: Finally, add any additional embellishments you desire, such as sequins or beads, to give your goldfish some extra sparkle. Use fabric glue or a needle and thread to secure the embellishments in place.
With these finishing touches, your knitted goldfish will be complete and ready to be displayed or given as a unique gift. Enjoy the process and have fun making your little fish come to life!
Tips and Tricks
Knitting a goldfish pattern can be a fun and rewarding project. Here are some tips and tricks to help you create a beautiful knitted goldfish:
- Choose the right yarn: When selecting yarn for your goldfish, opt for a soft and lightweight yarn with good stitch definition. This will help bring out the details of your pattern.
- Use appropriate knitting needles: The size of your knitting needles will determine the size and tension of your stitches. Refer to the pattern’s gauge or instructions to determine the correct needle size to use.
- Check your tension: It’s important to maintain consistent tension throughout your knitting. If your tension is too loose or too tight, it can affect the overall shape and size of your goldfish. Take the time to check your tension and make adjustments as needed.
- Follow the pattern carefully: Knitted patterns can be intricate, so it’s essential to follow the instructions closely. Pay attention to stitch counts, increases, decreases, and any special techniques mentioned in the pattern.
- Use stitch markers: Stitch markers can be handy tools for keeping track of specific sections or stitch patterns in your goldfish. They can help you stay organized and prevent mistakes.
- Add embellishments: Once you have completed your goldfish, consider adding some embellishments to enhance its appearance. You can attach sequins for eyes or thread a small fishhook to make it look more realistic.
- Block your finished piece: Blocking is the process of shaping and stretching your knitted item to give it a professional and polished look. It can help smooth out any uneven stitches or edges and improve the overall appearance of your goldfish.
By following these tips and tricks, you can create a beautiful and realistic knitted goldfish that will make a delightful addition to any collection or gift.
Variations
There are countless ways to customize your knitted goldfish pattern to make it unique. Here are some ideas for variations:
Color variations
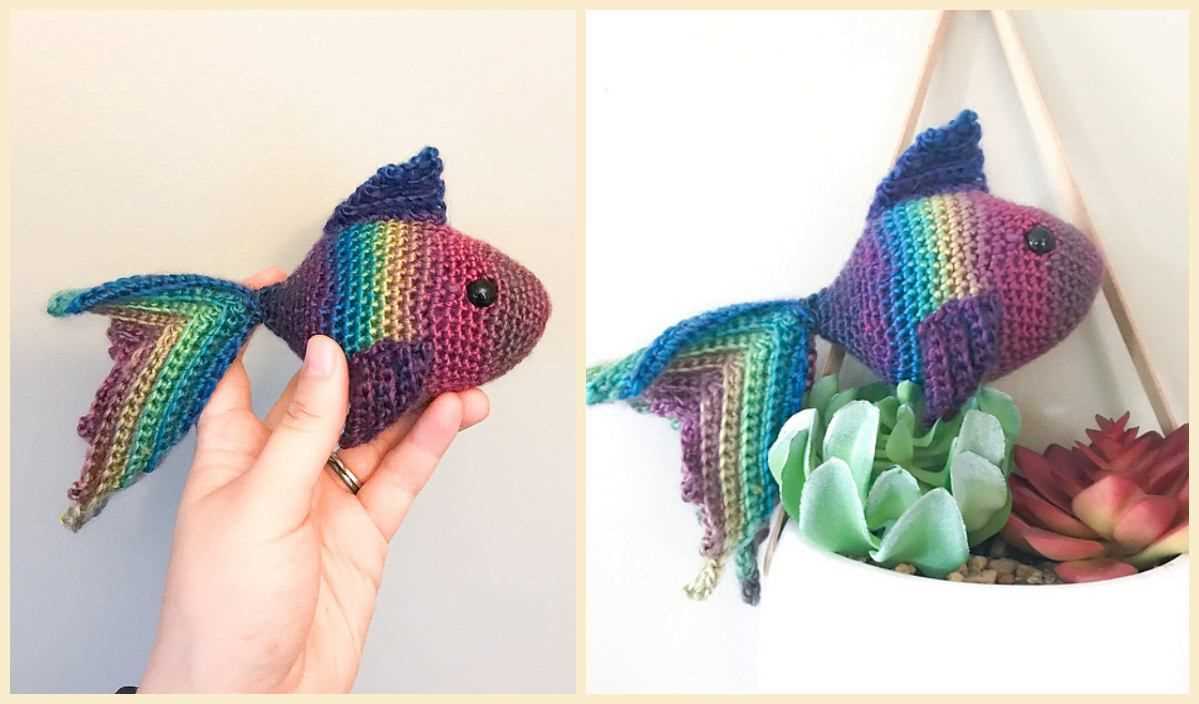
Create your goldfish using different colors of yarn to give it a unique look. You can use traditional gold and orange colors for a realistic design, or get creative and use bold, bright colors for a more whimsical effect.
Size variations
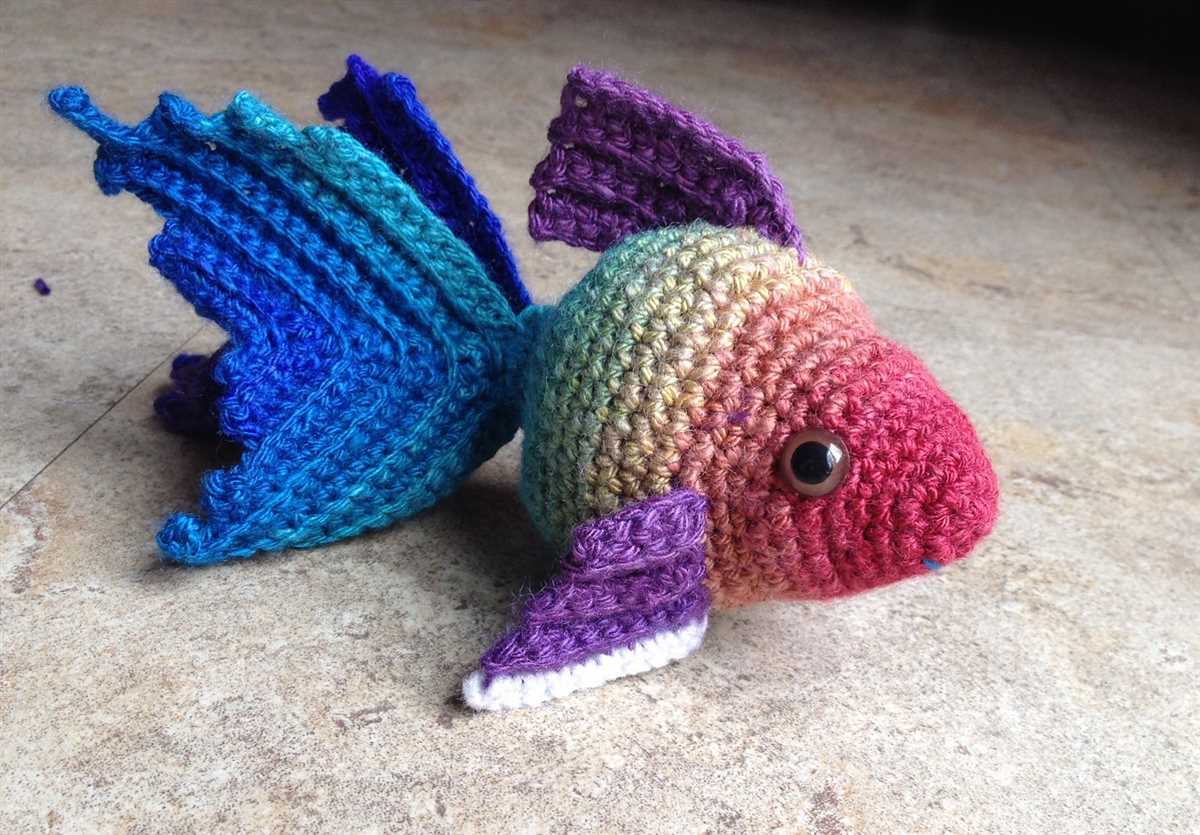
Experiment with different yarn weights and needle sizes to create goldfish in various sizes. You can make tiny goldfish as keychain charms, or larger ones to use as home decor pieces.
Pattern variations
Once you have mastered the basic goldfish pattern, you can explore different stitch patterns to add texture and detail to your fish. Try using different types of stitches or incorporating cables or lace motifs into your design.
Accessories variations
Add a touch of personality to your knitted goldfish by giving it accessories. You can knit a tiny bow tie or a hat, or even create a little fishbowl or pond to display your goldfish in.
With so many possibilities for customization, you can create a whole school of unique knitted goldfish that showcase your creativity and knitting skills.