
Knitted headbands are a fashionable accessory that will keep you warm and stylish during the colder months. If you’re looking for a new project to practice your knitting and crochet skills, then this knitted crochet headband pattern is perfect for you.
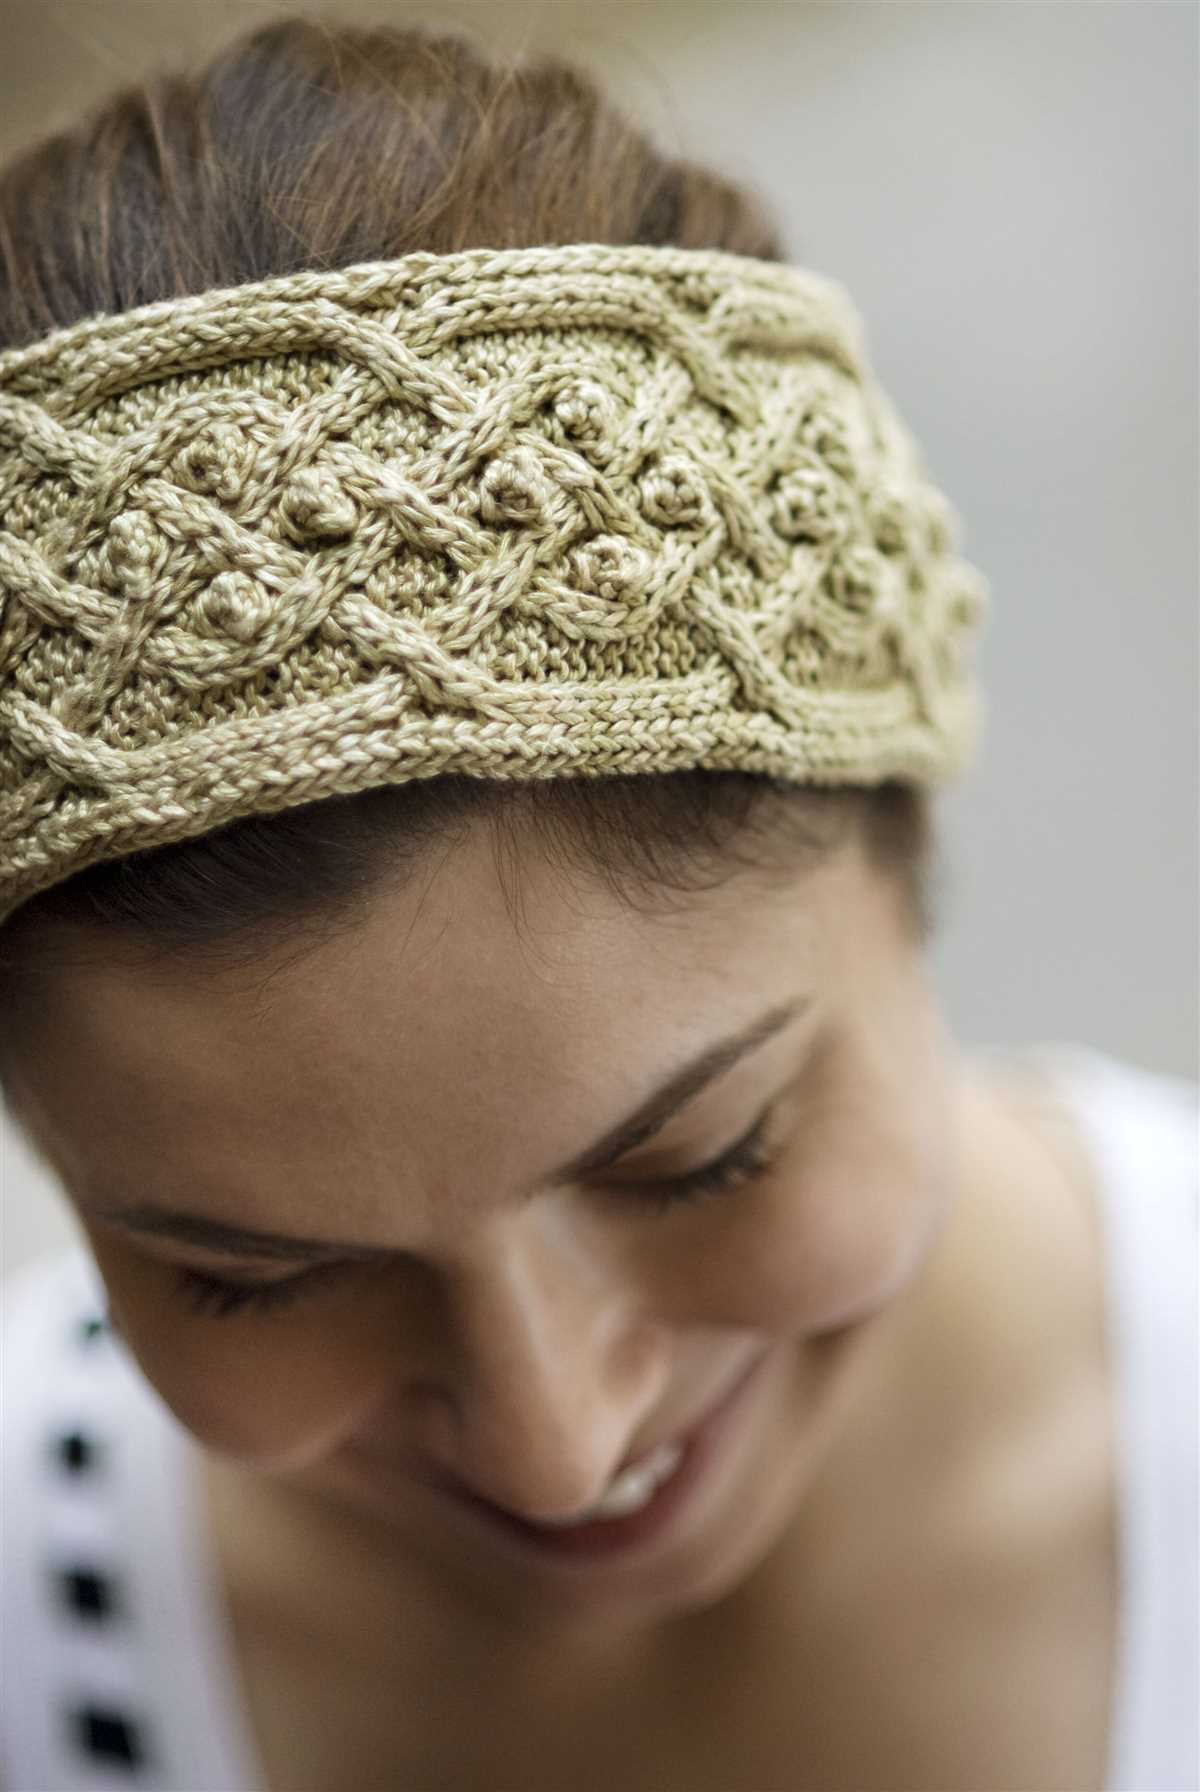
This pattern is suitable for knitters of all skill levels, from beginners to advanced. It features a beautiful cable design that adds texture and visual interest to the headband. The cable pattern may look complex, but it’s actually quite simple to create, making it a great project for knitters who are new to cables.
The headband is knit in the round using a circular needle, which makes it seamless and comfortable to wear. The pattern includes instructions for different sizes, so you can easily customize it to fit your head circumference. And since it’s made with soft and warm yarn, it’ll keep your ears cozy and protect them from the chilly wind.
Whether you’re making it for yourself or as a gift for a loved one, this knitted crochet headband pattern is sure to impress. So grab your needles and get ready to create a stylish and practical accessory that you’ll love wearing all winter long!
Choosing the right yarn and needles
When it comes to knitting or crocheting a headband, choosing the right yarn and needles is crucial. The type of yarn and the size of the needles directly affect the final outcome of the headband, including its fit, texture, and overall appearance.
One of the first things to consider when selecting yarn is its weight or thickness. Thicker yarns, such as bulky or super bulky, will create a chunkier and warmer headband, while thinner yarns, like fingering or sport weight, will result in a more delicate and lightweight headband. Assessing the desired look and function of the headband will help determine the appropriate yarn weight to choose.
Another factor to consider is the fiber content of the yarn. Natural fibers, such as wool or cotton, provide warmth and breathability, making them good choices for headbands. Synthetic fibers, like acrylic or nylon, offer durability and easy care, which may be more suitable for headbands that will be frequently worn or washed. It’s important to keep in mind any sensitivities or allergies to certain fibers when selecting yarn.
The size of the needles will also impact the final result. Larger needles will create a looser and more open stitch, resulting in a stretchier headband. Smaller needles will produce a tighter and denser stitch, resulting in a firmer and less stretchy headband. Consider the desired fit and style of the headband when choosing the needle size.
Overall, finding the right yarn and needle combination for a knitted or crocheted headband requires careful consideration of factors such as yarn weight, fiber content, and needle size. By considering these aspects, crafters can ensure that the finished headband meets their desired look, functionality, and comfort.
Getting started with the basic stitches
When it comes to knitting or crocheting a headband, it is essential to familiarize yourself with the basic stitches. These stitches will be the foundation of your project and understanding how they work is crucial to creating a beautiful and functional headband.
The most common stitches used in knitting and crocheting are the single crochet, double crochet, and slip stitch. The single crochet stitch is a simple and versatile stitch that creates a tight and compact fabric. It is often used for creating the body of the headband. The double crochet stitch, on the other hand, is taller and creates a looser fabric, perfect for adding texture and dimension to your headband. The slip stitch is commonly used to join stitches or create decorative edging.
When starting your headband project, it is important to choose the appropriate size of crochet hook or knitting needles. The size will depend on the thickness and texture of the yarn you are using. Thicker yarns might require bigger hooks or needles, while thinner yarns will require smaller ones. Make sure to check the recommended hook or needle size indicated on the yarn label.
To start your headband, you will first need to make a foundation chain. This chain will determine the width of your headband. The next step is to work the stitches into the chain, following the pattern instructions. Remember to keep an even tension on your yarn to ensure a uniform and professional-looking result.
Once you have mastered the basic stitches and have completed your headband, you can experiment with different stitch patterns, colors, and embellishments to create unique and personalized designs. The possibilities are endless, and with practice, you will be able to create beautiful headbands that reflect your own style and creativity.
Creating the foundation row
Before you start crocheting your headband, you’ll need to create the foundation row. This row sets the stage for the rest of your project, so it’s important to get it right.
To begin, gather your materials – a crochet hook, your chosen yarn, and a yarn needle. Choose a crochet hook size that is appropriate for your yarn, typically indicated on the yarn label.
Once you have your materials ready, it’s time to start creating the foundation row. Begin by making a slip knot with the yarn, leaving a long tail for later. Then, insert the crochet hook into the slip knot and tighten it around the hook. Hold the slip knot and the starting tail in your non-dominant hand, and the crochet hook in your dominant hand.
The next step is to chain stitch across the row. To do this, yarn over by bringing the working yarn over the top of the crochet hook from back to front. Then, using the hook, pull the yarn through the slip knot loop and the loop on the hook. This completes one chain stitch. Repeat this process until you have reached the desired number of stitches for your headband.
Working the body of the headband
Once you have completed the beginning chain and the foundation row, you are ready to start working the body of the headband. This is where the pattern really starts to take shape and you will begin to see the beautiful design emerge.
First, you will need to refer to the stitch pattern provided in the pattern instructions. This will outline the specific combination of stitches that you will need to use to create the desired texture and design. Make sure to follow the pattern carefully, as each stitch will have a specific number of repetitions and may require certain techniques.
As you work the body of the headband, you will continue to repeat the stitch pattern until you reach your desired length. This will create a consistent and cohesive design throughout the headband. Be sure to check your gauge periodically to ensure that the headband is the correct size and that you are maintaining the correct tension.
The body of the headband is where you can really get creative and experiment with different colors, stitches, and textures. You may choose to alternate colors or use different stitch patterns to create a unique and personalized headband. Don’t be afraid to try new things and make the pattern your own!
Once you have completed the body of the headband, you will move on to the finishing steps. This may involve weaving in any loose ends, blocking the headband to shape, or adding any additional embellishments such as buttons or beads. Follow the pattern instructions to ensure that your finished headband looks as beautiful as possible.
Adding Texture and Patterns
When creating a knitted crochet headband, adding texture and patterns can elevate the design from simple and plain to eye-catching and intricate. There are various techniques and stitches that can be incorporated to achieve different textures and patterns, allowing you to customize the headband to your desired style.
1. Ribbing Stitch:
The ribbing stitch is a popular choice for adding texture to a headband. This stitch creates a stretchy and flexible fabric with alternating columns of knit and purl stitches. The ribbing stitch not only adds visual interest but also helps the headband stay in place and fit comfortably on the wearer’s head.
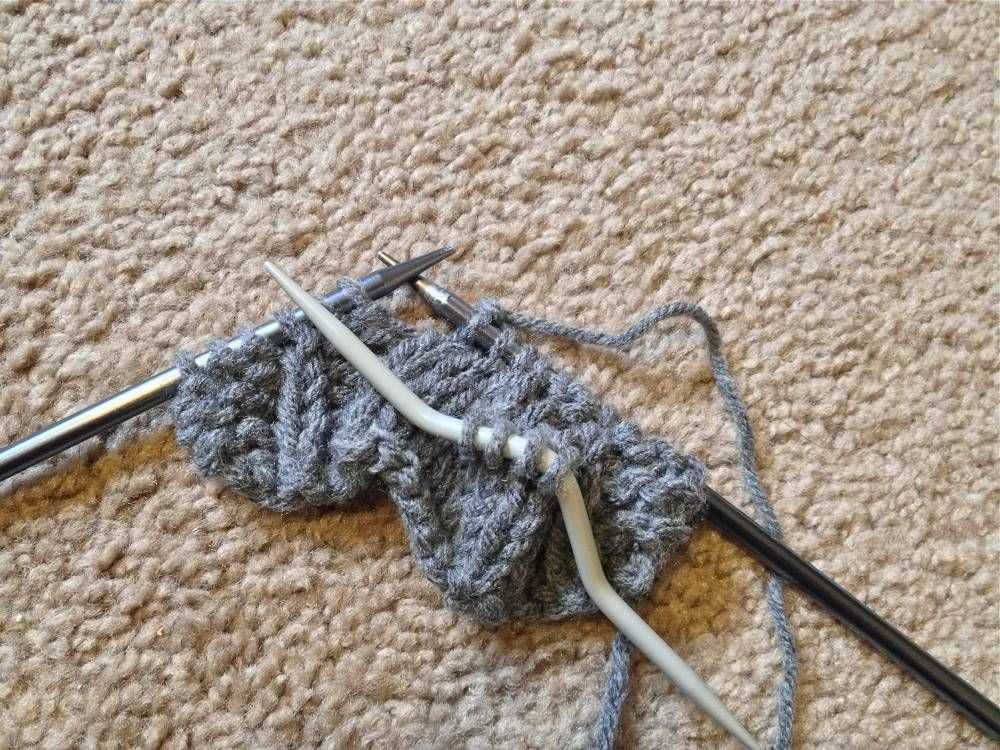
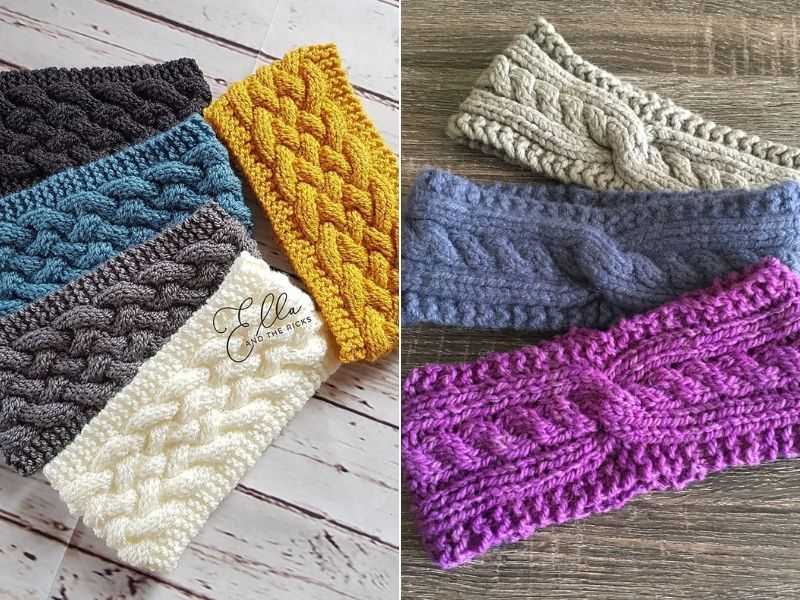
2. Cable Stitch:
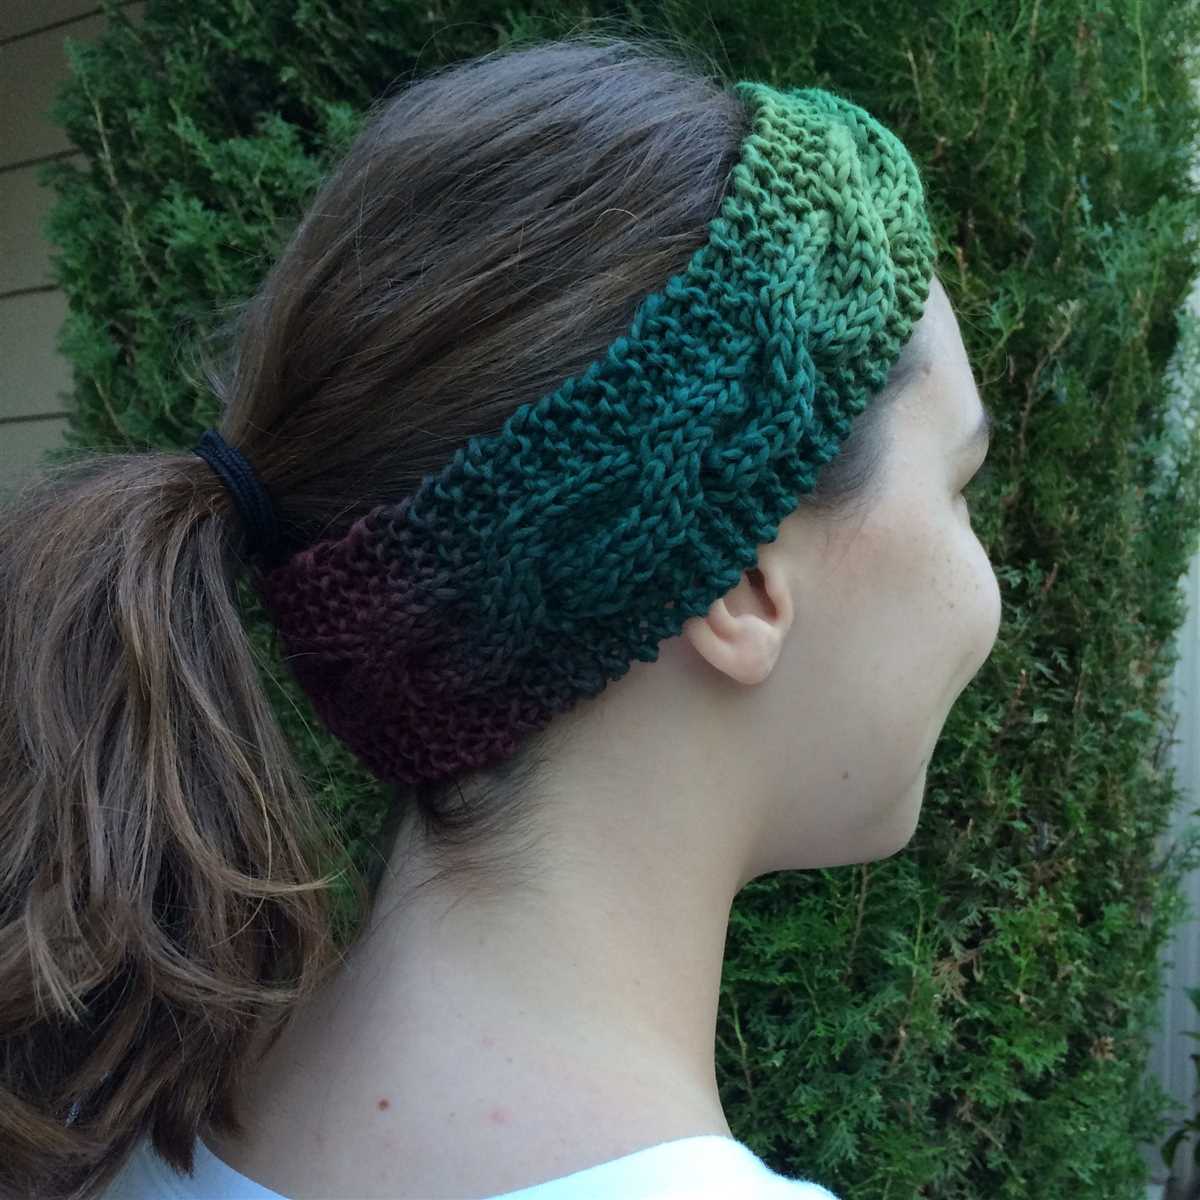
The cable stitch is another technique that can add both texture and pattern to a knitted crochet headband. By crossing stitches over each other, intricate cable patterns can be created, giving the headband a more sophisticated and intricate look. This stitch requires a bit more skill and practice but the end result is worth the effort.
3. Colorwork:
Introducing different colors can also add texture and pattern to a knitted crochet headband. Fair Isle and stranded knitting techniques involve knitting with two or more colors in the same row, creating patterns and motifs. This allows for endless possibilities in terms of design and adds a pop of color to the headband.
By incorporating these techniques and stitches into your knitted crochet headband, you can create a unique and visually appealing accessory that not only keeps your ears warm but also adds a touch of style to any outfit.
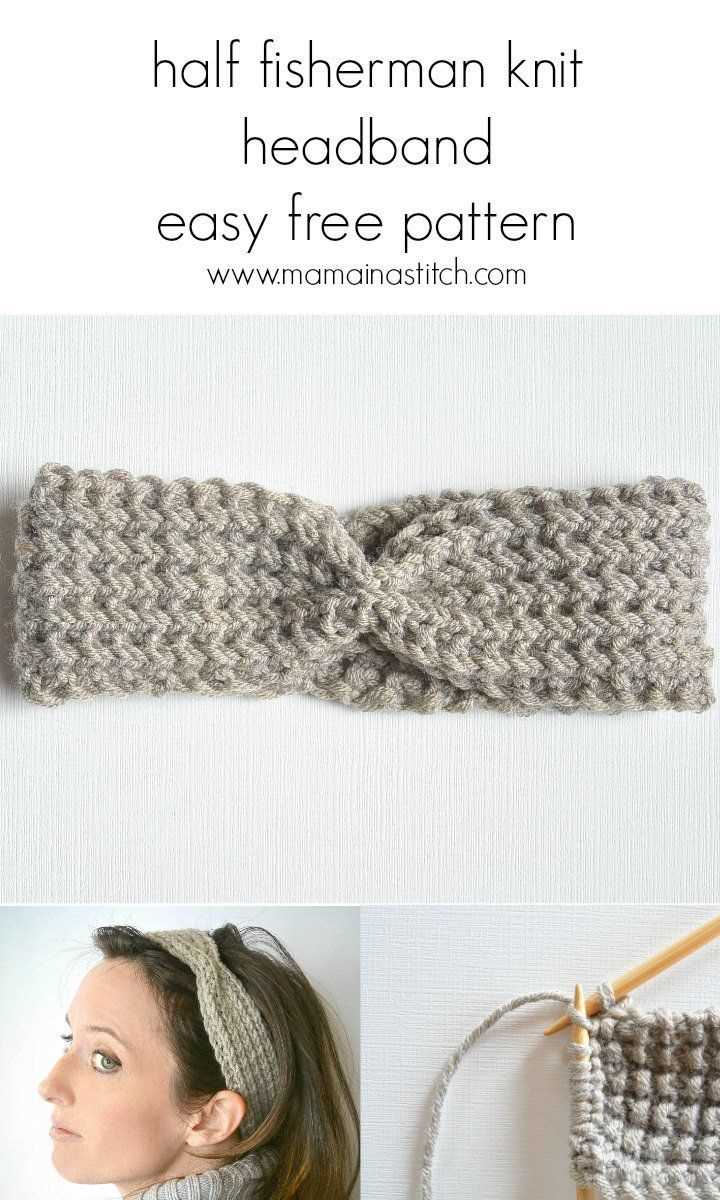
Creating a Ribbed or Cable Headband
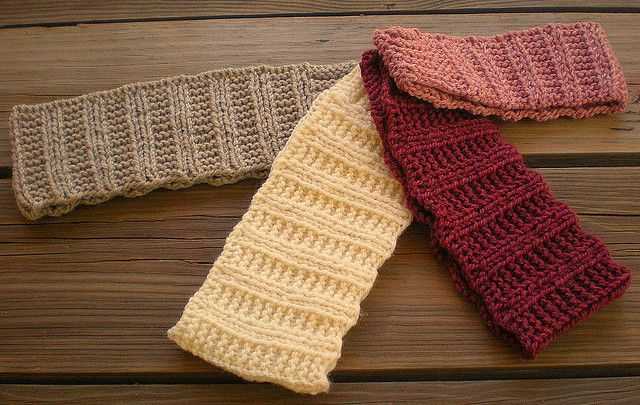
When it comes to knitting or crocheting a headband, there are many different patterns and styles to choose from. One popular option is to create a ribbed or cable headband, which adds texture and interest to the finished piece.
To create a ribbed headband, you will need to use a stitch pattern that alternates between knit and purl stitches. This creates a stretchy and textured fabric that is perfect for keeping your ears warm on chilly days. You can easily adjust the width of the headband by adding or subtracting stitches, depending on your desired size.
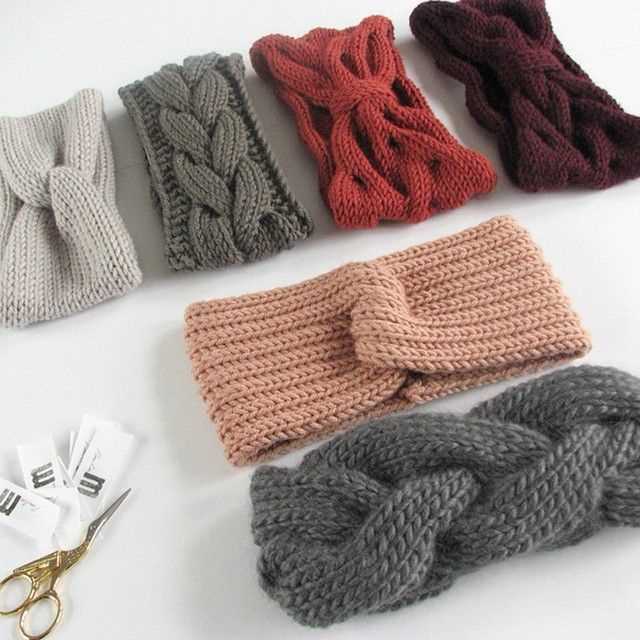
If you’re feeling more adventurous, you can try creating a cable headband. This involves crossing stitches over one another to create a braided or twisted pattern. Cable patterns can be a bit more challenging to master, but with practice, you can create beautiful and intricate designs. There are many cable stitch patterns to choose from, ranging from simple two-stitch cables to more complex designs with multiple crossing points.
When choosing yarn for your ribbed or cable headband, it’s important to select a yarn that is soft and comfortable to wear. Look for yarns that are specifically designed for accessories, such as headbands, as they will be more durable and less likely to stretch out with wear. Consider the color and texture of the yarn as well, as this will affect the overall look of your finished headband.
Whether you choose to create a ribbed or cable headband, the end result will be a stylish and functional accessory. These headbands are perfect for keeping your ears warm during the colder months, and they also make great gifts for friends and family. With the right pattern and yarn, you can create a headband that is uniquely yours.
Shaping the headband
When knitting or crocheting a headband, shaping is an important step to ensure a comfortable and snug fit. There are several ways to shape a headband, depending on the desired style and design.
One common method is to start with a foundation chain or row and gradually decrease or increase stitches to create the desired width and shape. This can be done by skipping or adding stitches at regular intervals, or by working increases or decreases at the edges of the piece.
Decreasing:
- To decrease stitches, you can work a single or double crochet decrease by combining two stitches into one. This can be done by inserting the hook into the designated stitch, yarning over, pulling through, and then repeating the process in the next stitch.
- Another way to decrease is by skipping stitches. This can be done by simply passing over a certain number of stitches when working a row or round.
Increasing:
- To increase stitches, you can work a single or double crochet increase by working two stitches into the same stitch. This can be done by inserting the hook into the designated stitch, yarning over, pulling through, and then repeating the process in the same stitch.
- Another way to increase is by adding stitches at the edges. This can be done by working multiple stitches into the same stitch at the beginning or end of a row or round.
By using these shaping techniques, you can create a headband that fits comfortably and stays securely in place. Whether you’re following a pattern or creating your own design, always remember to check your gauge and adjust your shaping accordingly to achieve the desired fit.
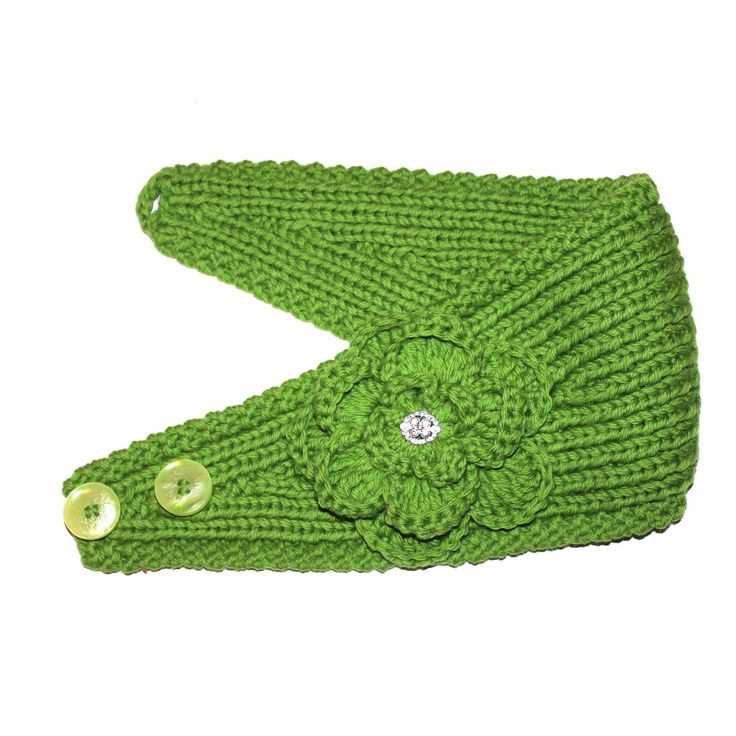
Adding a button or tie closure
Adding a button or tie closure to your knitted crochet headband can add both functionality and a decorative element to your finished piece. There are several ways you can incorporate a closure into your headband, depending on your personal preference and the style of the pattern.
If you prefer a button closure, you can simply add a buttonhole to one end of the headband. To do this, create a row of chain stitches that is wide enough to accommodate your chosen button. Then, continue with the pattern as usual, working the stitches around the buttonhole. You can sew the button onto the opposite end of the headband to secure it in place.
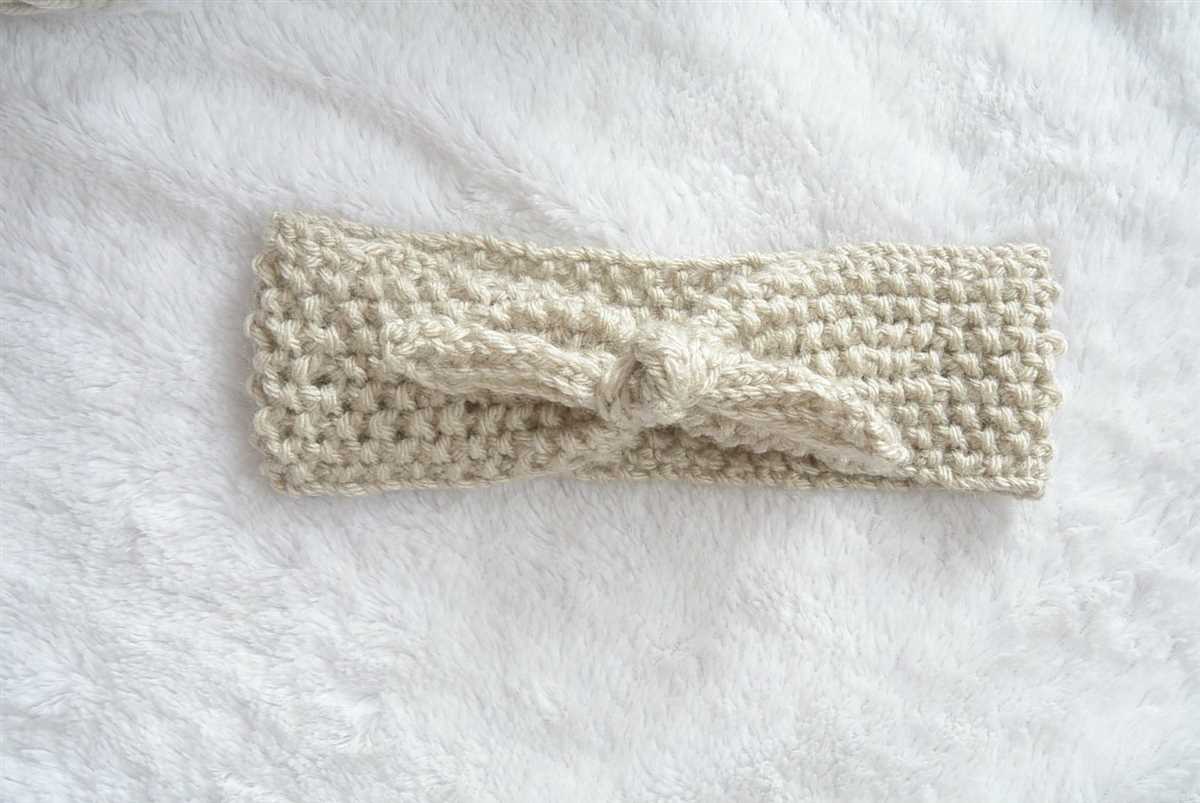
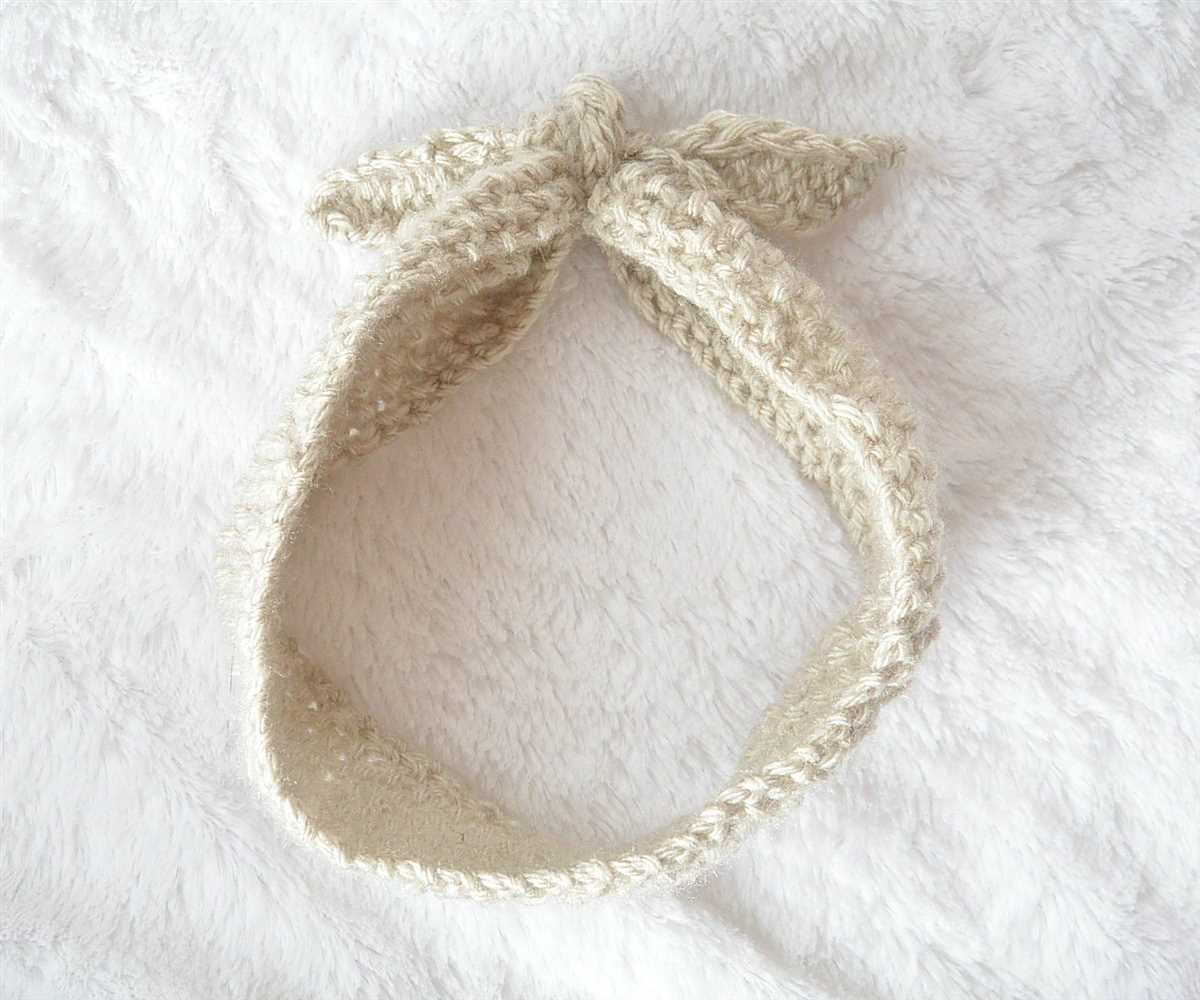
Another option is to add a tie closure to your headband. This can be done by creating two long strands of chain stitches at both ends of the headband. You can then tie these strands into a bow or knot to secure the headband in place. This type of closure allows for adjustable sizing and can add a feminine touch to your finished piece.
Remember to consider the overall style and design of your knitted crochet headband when choosing a closure method. A decorative button can add a pop of color or a vintage flair, while a tie closure can enhance the femininity and versatility of the piece. Whatever closure method you choose, it’s important to secure it properly to ensure that your headband stays in place during wear.
Finishing off and weaving in ends
Once you have completed your knitted crochet headband pattern, it is important to properly finish off your work and weave in any loose ends to ensure a polished final product. This process involves securing the remaining stitches and threads to prevent unraveling or fraying.
To finish off your headband, start by cutting the yarn, leaving a tail of at least 6 inches. Thread the tail onto a yarn needle, and carefully weave the needle through the remaining stitches on your knitting needles. This will help secure the stitches and prevent them from coming undone.
Weaving in Ends
After finishing off your headband, you may have some loose ends from color changes or other yarn joins. It is important to weave in these ends to create a neat and professional-looking finished piece. To weave in the ends, thread your yarn needle with the loose end and carefully weave the needle through the nearby stitches. Make sure to go in different directions to secure the end tightly.
- For color changes, weave in the ends along the corresponding color section on the wrong side of your headband.
- If you have multiple loose ends, trim them to about half an inch and weave each end separately.
- Make sure to pull the yarn tight enough to prevent any loose ends from peeking through to the right side of your headband.
Once all the loose ends are woven in, gently stretch and block your headband if needed to even out the stitches and give it a finished look. Now you have a beautiful knitted crochet headband that is ready to be worn or gifted to someone special!
Blocking and Caring for Your Headband
After completing your knitted crochet headband, it is important to properly block it to achieve the desired shape and size. Blocking is the process of shaping and setting the stitches using water or steam, which helps to enhance the overall appearance of the headband.
To block your headband, you will need a clean towel or blocking mats, rust-proof T-pins, and a spray bottle filled with water. Start by soaking your headband in lukewarm water for about 10-15 minutes. Gently squeeze out the excess water and lay it flat on the towel or blocking mats. Using the T-pins, gently stretch the headband to the desired dimensions, making sure to keep the edges straight and even. Mist the headband with water using the spray bottle, being careful not to saturate the stitches. Allow the headband to dry completely before removing the pins.
When it comes to caring for your knitted crochet headband, it is important to follow some steps to ensure its longevity and pristine condition. >
- First and foremost, always check the yarn label for washing instructions. Some yarns may require gentle handwashing, while others can be machine washed.
- If handwashing is recommended, fill a basin or sink with lukewarm water and a small amount of mild detergent. Gently agitate the headband in the water, being careful not to stretch or twist the stitches. Rinse the headband thoroughly with clean water to remove any soap residue.
- If machine washing is allowed, place the headband in a mesh laundry bag to avoid any snagging or stretching. Select a gentle cycle with cold water and a mild detergent. Avoid using bleach, fabric softener, or harsh chemicals, as they can damage the headband.
- After washing, reshape the headband and lay it flat on a clean towel to air dry. Avoid hanging it, as this can cause the headband to stretch.
- If necessary, you can lightly press the headband with a steam iron on a low setting. Place a clean cloth or pressing cloth between the iron and the headband to protect it from direct heat.
By following these blocking and caring tips, your knitted crochet headband will stay in excellent condition and provide you with warmth and style for many seasons to come.
Adding Embellishments and Decorations
Once you have finished creating your knitted crochet headband, you can add embellishments and decorations to make it even more unique and stylish. There are various options available to enhance the appearance of your headband and customize it to your liking.
Buttons: Sewing buttons onto your headband can add a whimsical and playful touch. You can choose buttons of different colors, shapes, and sizes to create a visually appealing design. Arrange them in a pattern or randomly scatter them across the headband for a fun look.
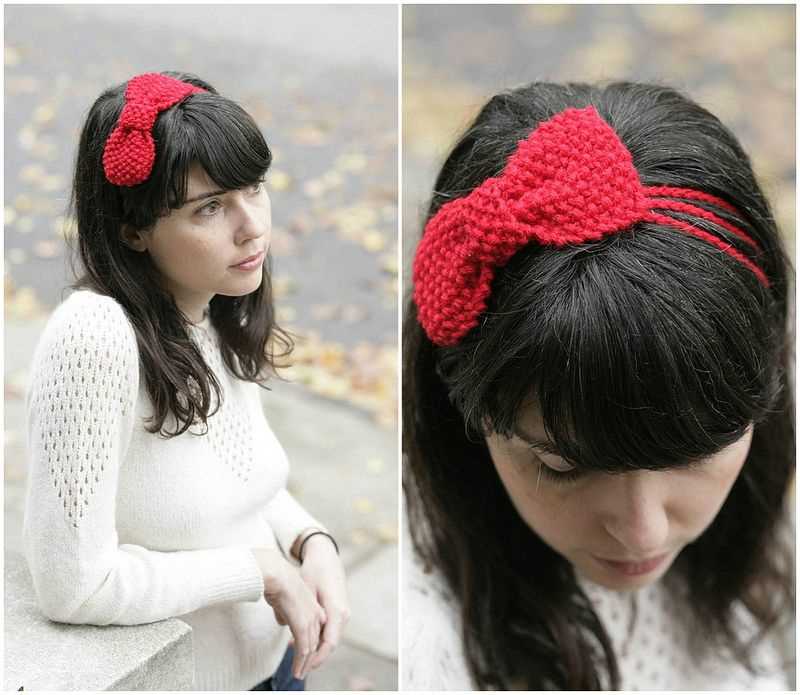
Ribbons: Attaching ribbons to your headband can add a feminine and elegant touch. You can tie a bow using a satin ribbon and sew it onto the side or center of the headband. Alternatively, you can sew the ribbon along the edges of the headband for a more subtle embellishment.
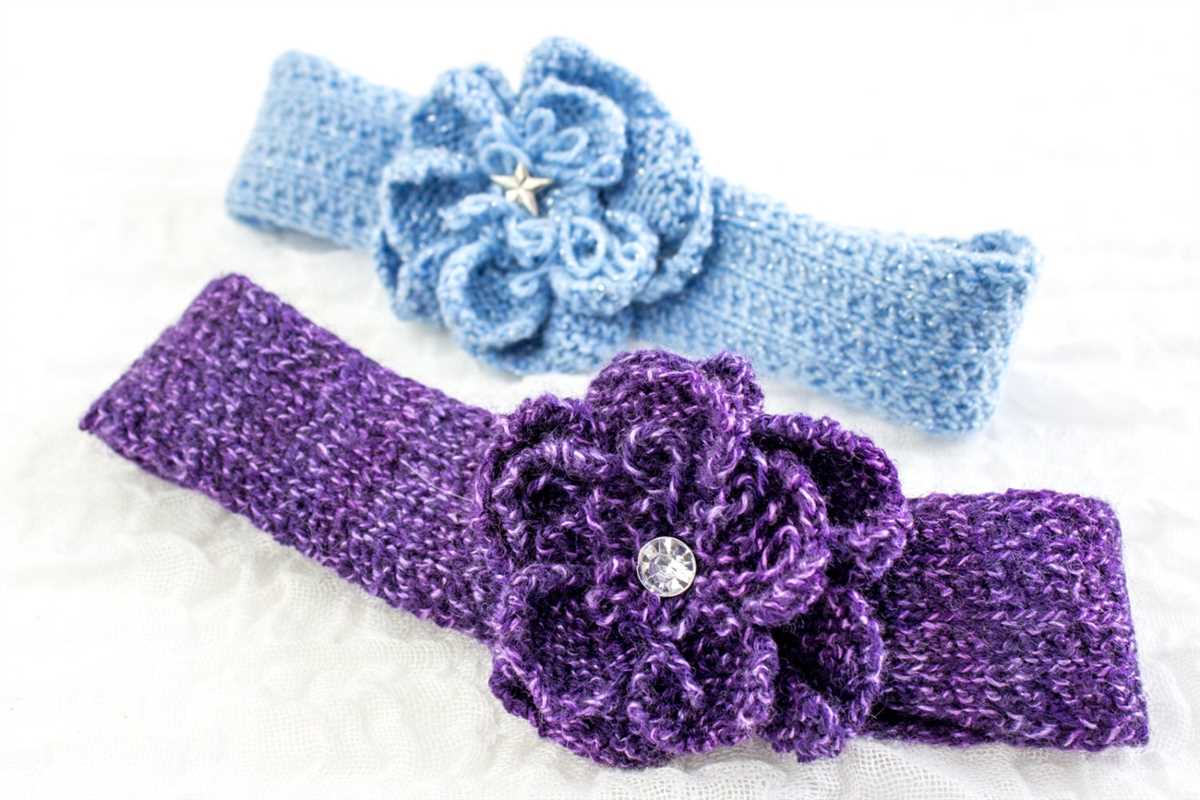
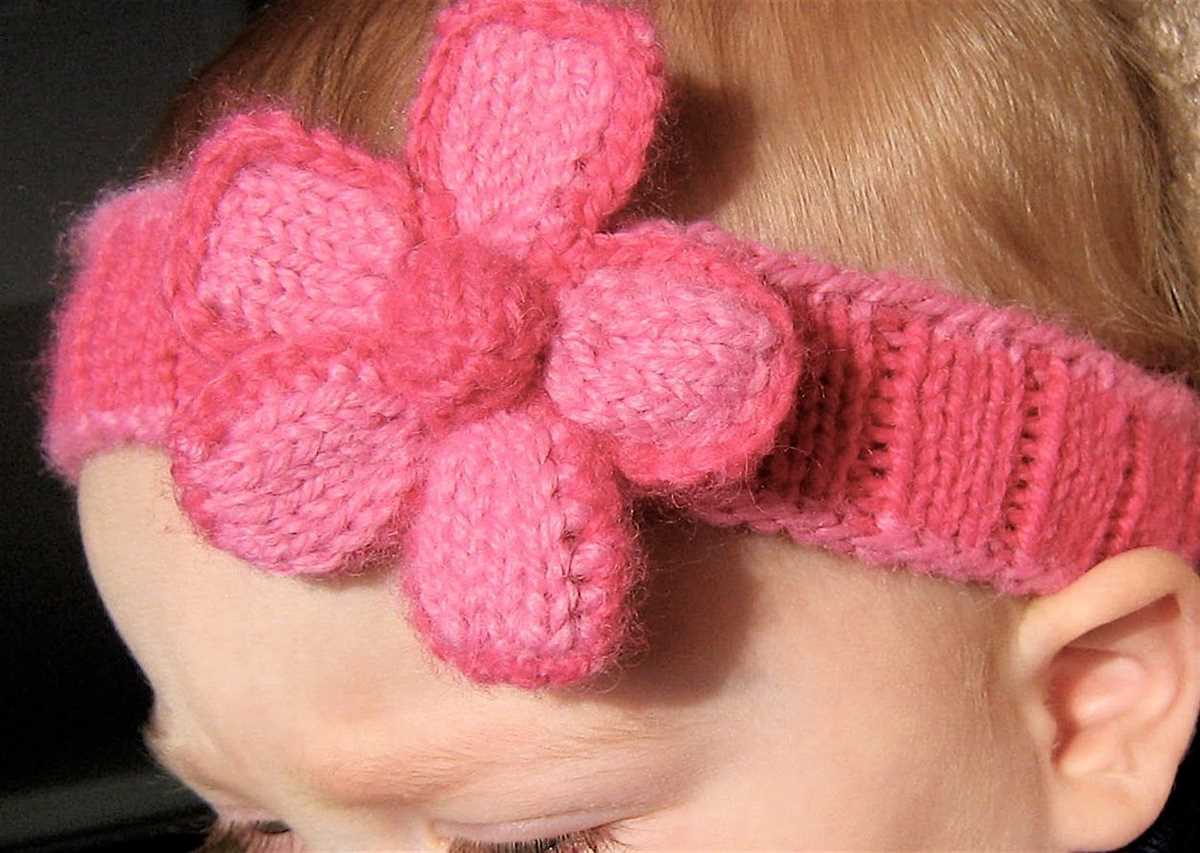
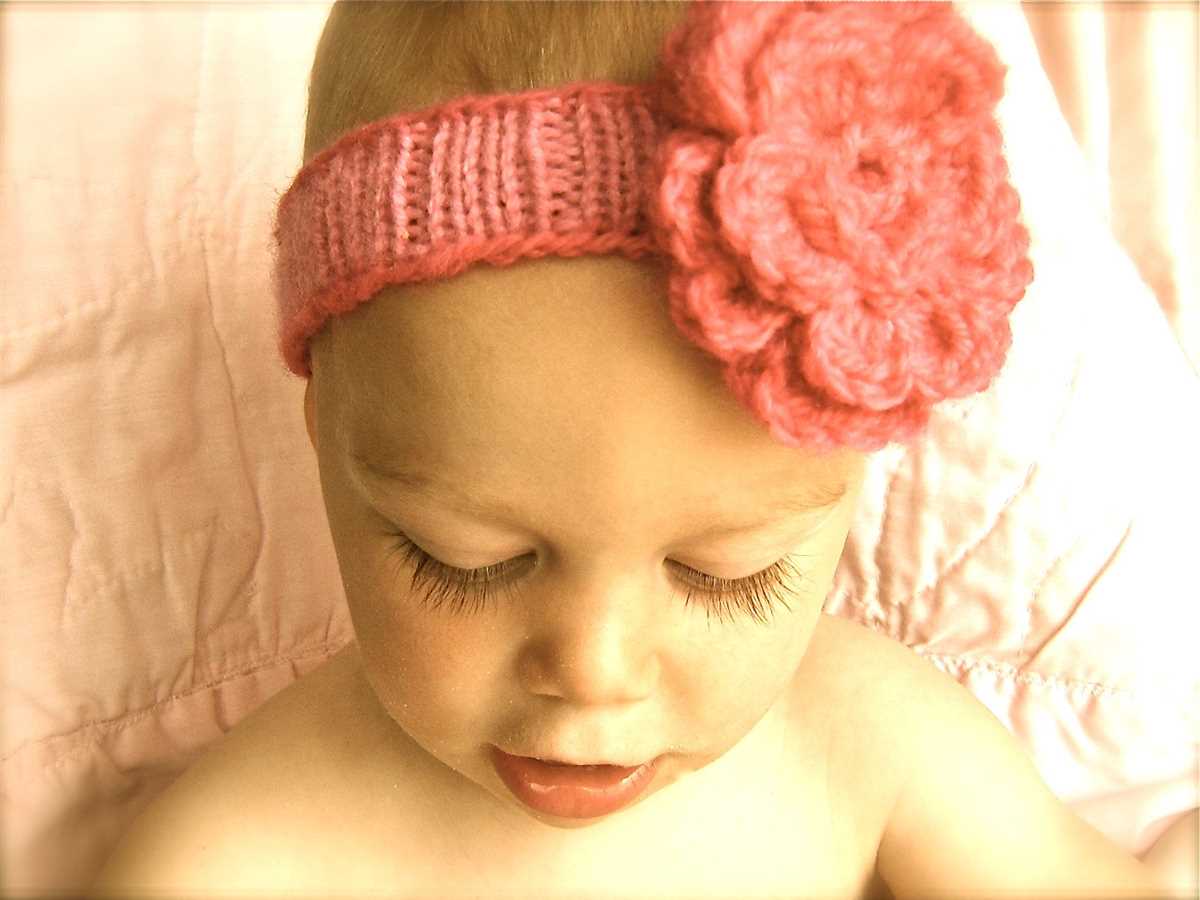
Flowers: Crocheted or fabric flowers can be a beautiful addition to your headband. You can create your own flowers using leftover yarn or fabric, or you can purchase pre-made flowers from a craft store. Attach them to the headband using a needle and thread, or use a hot glue gun for a quick and secure attachment.
Beads and Sequins: Adding beads or sequins to your headband can add a touch of sparkle and glamour. You can sew them onto the headband individually or create a pattern using different shapes and sizes. Beadwork and sequins can be used to create intricate designs or simply add a subtle shimmer to your headband.
Embroidery: If you have basic embroidery skills, you can embellish your headband with hand-stitched designs. You can create floral motifs, geometric patterns, or personalized monograms. Use colorful threads to add pops of color or opt for metallic threads for a more eye-catching effect.
Lace: Adding lace trims or appliques to your headband can create a delicate and feminine look. You can sew a lace trim along the edges of the headband or attach lace appliques to specific sections. Lace can add a touch of elegance and vintage charm to your headband.
With these various embellishment options, you can transform a simple knitted crochet headband into a stylish and personalized accessory. Let your creativity shine as you experiment with different decorations and create a headband that is uniquely yours.
Alternative styles and variations
If you’re looking for alternative styles and variations for your knitted crochet headband, there are plenty of options to choose from. Here are a few ideas to inspire you:
1. Wide headband:
A wide headband provides more coverage and can be a great option for those who want to keep their ears warm during colder months. You can simply increase the width of your chosen pattern or select a pattern specifically designed for a wide headband.
2. Textured headband:
Add some texture to your headband by incorporating different stitches, such as cables or bobbles. This can give your headband a unique and intricate look.
3. Colorful headband:
Experiment with different colors and create a headband that matches your personal style. You can use a solid color, or try a multicolored yarn or stripes for a fun and vibrant look.
4. Embellished headband:
If you want to add some extra flair to your headband, consider adding embellishments such as flowers, bows, or buttons. This can make your headband even more eye-catching and personalized.
With endless possibilities, you can customize your knitted crochet headband to reflect your own individual style. Whether you prefer a classic design or want to add some unique touches, the choices are limitless.