
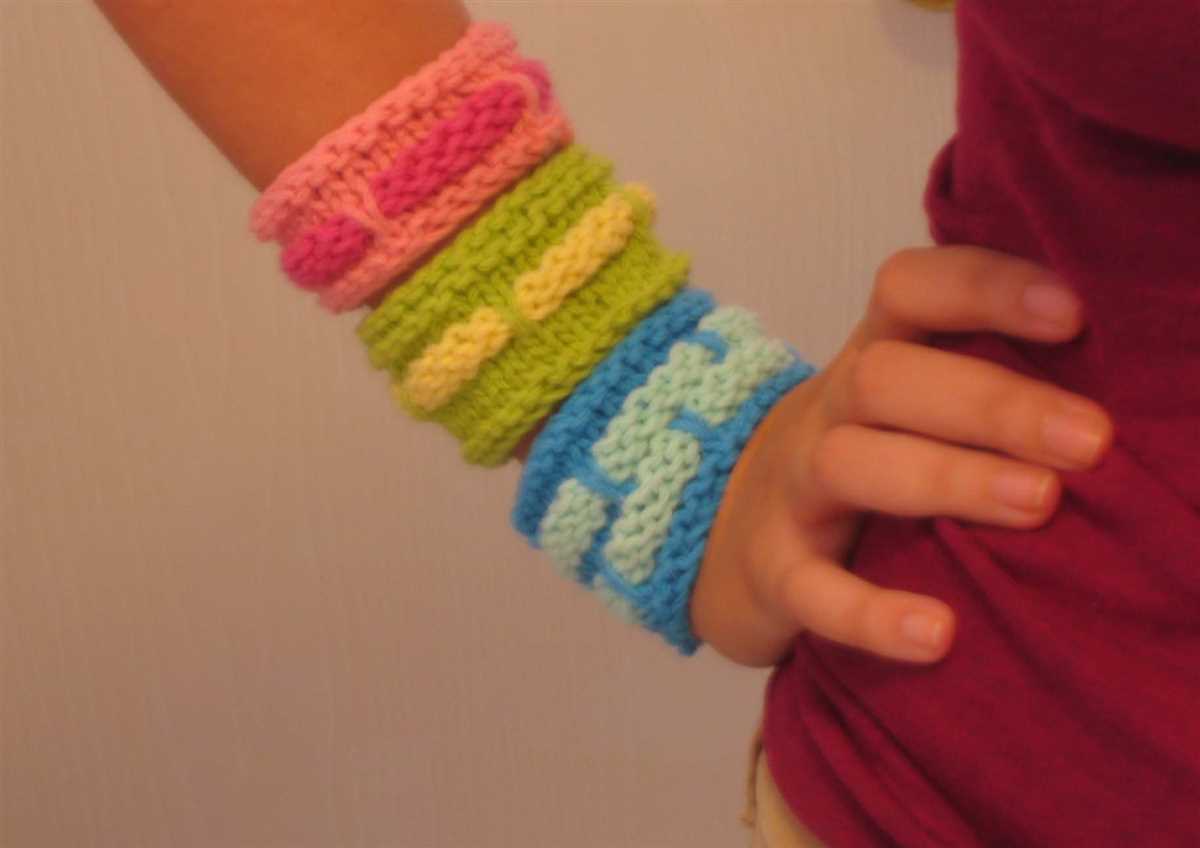
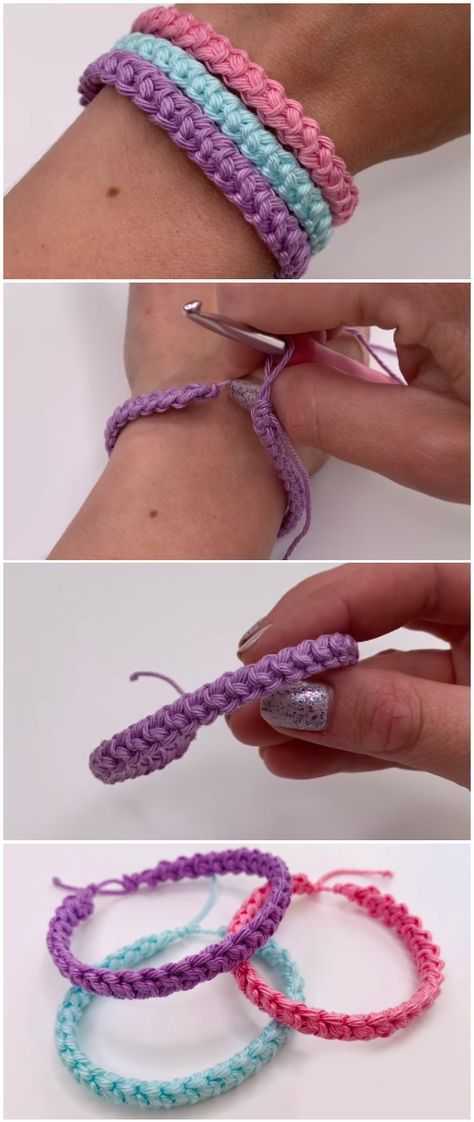
Knitting is not limited to just scarves and hats – there are countless patterns and projects to explore! One such project is the knitted bracelet, a trendy and stylish accessory that can add a unique touch to any outfit. Whether you’re a knitting novice or an experienced crafter, this pattern is simple enough for anyone to follow.
To get started, you’ll need a few basic knitting supplies, including a set of knitting needles and some colorful yarn. Choose a yarn in your favorite color or experiment with multiple colors to create a vibrant and eye-catching bracelet. The pattern itself is straightforward and can be customized to fit your wrist perfectly.
Begin by casting on the desired number of stitches, depending on the width you want for your bracelet. Then, work in a simple knit stitch until you reach the desired length. Finish off by binding off your stitches, and voila – you’ve created a beautiful knitted bracelet!
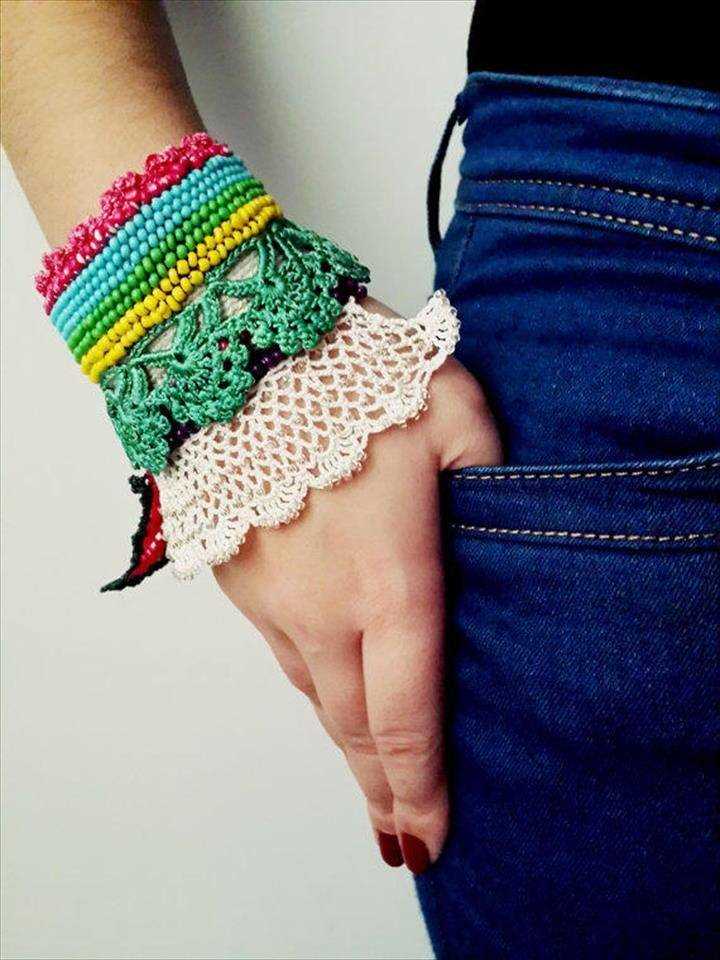
Once you’ve mastered the basic pattern, don’t be afraid to get creative and experiment with different stitch patterns or embellishments. You can add beads, buttons, or even embroidery to make your bracelet truly one-of-a-kind. With endless possibilities for customization, knitted bracelets are a fantastic way to showcase your personal style and creativity.
So why not give this knitted bracelet pattern a try? It’s a fun and rewarding project that will impress your friends and add a touch of handmade charm to your jewelry collection. Grab your knitting needles and yarn, and let your imagination run wild as you create your own unique knitted bracelets!
How to Make a Knitted Bracelet: Step-by-Step Guide
Knitting bracelets can be a fun and creative way to accessorize your outfits. Whether you’re a beginner or an experienced knitter, making a knitted bracelet is a simple and enjoyable project. In this step-by-step guide, we’ll walk you through the process of creating your own knitted bracelet.
Materials:
- Knitting needles (size will depend on the thickness of your yarn)
- Yarn in the color of your choice
- A clasp or button for closure
- Tapestry needle
- Scissors
Step 1: Choose Your Yarn
Start by selecting the yarn you want to use for your bracelet. You can choose a soft acrylic yarn, a luxurious silk blend, or even a sparkly metallic yarn for a special occasion. Consider the color and texture that will complement your style.
Step 2: Measure Your Wrist
Using a tape measure or a piece of string, measure your wrist to determine the length of your bracelet. Add an inch or two for a comfortable fit. Keep in mind that the bracelet will stretch slightly when worn.
Step 3: Cast On Stitches
Using your chosen knitting needles, cast on the desired number of stitches. The number of stitches will depend on the thickness of your yarn and the width of your desired bracelet. As a general guideline, you can start with around 20-30 stitches.
Step 4: Knit in the Desired Pattern
Once you’ve cast on your stitches, you can begin knitting in the desired pattern. You can choose simple stockinette stitch, rib stitch, or even a more intricate lace pattern. Experiment with different stitch patterns to create unique designs.
Step 5: Bind Off
When you’ve reached your desired bracelet length, it’s time to bind off your stitches. Knit the first two stitches, then use your tapestry needle to pass the first stitch over the second stitch. Continue to do this until you have one stitch remaining. Cut the yarn, leaving a tail, and pull it through the last stitch to secure it.
Step 6: Attach the Clasp
Once your stitches are bound off, it’s time to attach the clasp or button for closure. Sew the clasp onto one end of the bracelet using your tapestry needle and yarn. Ensure that the clasp is securely attached.
Step 7: Finishing Touches
One final step is to weave in any loose ends of yarn using your tapestry needle. Trim any excess yarn and give your knitted bracelet a final inspection to make sure everything is secure.
Congratulations! You’ve successfully made your own knitted bracelet. Now it’s time to show off your creation and wear it with pride. You can make multiple bracelets in different colors and styles to match your outfits or give them as thoughtful handmade gifts.
Materials and Tools You Will Need
Before you start knitting your bracelet, make sure you have all the necessary materials and tools. Here is a list of what you will need:
Materials:
- Yarn: Choose a soft and durable yarn in your preferred color. It is important to select a yarn that is suitable for knitting.
- Knitting Needles: You will need a pair of knitting needles that are appropriate for the yarn you have chosen. The size of the needles will depend on the desired thickness of your bracelet.
- Scissors: Keep a pair of sharp scissors handy for cutting the yarn.
Tools:
- Tape Measure: Use a tape measure to determine the length of your bracelet and ensure it fits your wrist perfectly.
- Stitch Markers: Stitch markers will help you keep track of your progress and mark important points in the pattern.
- Yarn Needle: A yarn needle with a large eye will be needed for weaving in loose ends and finishing touches.
- Row Counter: A row counter can be useful in keeping track of the number of rows knitted, especially if the pattern involves intricate designs or stitch changes.
Having these materials and tools ready will make the knitting process smooth and enjoyable. Now you are all set to start creating your beautiful knitted bracelet!
Choosing the Right Yarn and Needles
When embarking on a knitting project, choosing the right yarn and needles is crucial for achieving the desired results. The type of yarn and needles you select will determine the texture, drape, and overall appearance of the knitted bracelet.
Yarn: There are various types of yarn available, including cotton, wool, acrylic, and blends. For a knitted bracelet, it’s important to choose a yarn that is durable, lightweight, and comfortable to wear. Cotton yarn is often a popular choice for bracelets as it is soft, breathable, and hypoallergenic. Wool yarn can provide warmth and insulation, making it suitable for cooler climates. Acrylic yarn is a budget-friendly option that offers versatility and easy care.
Needles: The size and material of the needles can greatly impact the stitch definition and tension of your knitting. Generally, smaller needles will produce tighter stitches, while larger needles will create looser, more open stitches. For a knitted bracelet, it’s recommended to use small-sized needles, such as US size 2 or 3 (2.75mm or 3.25mm), to achieve a tight, snug fit. Circular or double-pointed needles can be used depending on your preferred knitting method.
It’s important to consider the pattern you will be using when selecting the yarn and needles. Some patterns may require specific yarn weights or needle sizes in order to achieve the desired gauge. Taking the time to properly choose the right yarn and needles for your knitted bracelet will help ensure a successful and beautiful end result.
Casting On: The First Step in Knitting
When starting a knitting project, the first step is casting on. This is the process of creating the first row of stitches on the knitting needle. The method you choose for casting on will depend on the type of project you are doing and the desired finished look. There are several different casting on methods to choose from, each with its own advantages and uses.
One of the most common casting on methods is the long-tail cast on. This method creates a sturdy and elastic edge, making it suitable for a wide variety of projects. To do the long-tail cast on, you will need to estimate the amount of yarn you need to create the desired number of stitches, as you will be using both the working yarn and a tail of yarn. This method can take a bit of practice to get the tension right, as it involves both your knitting needle and the tail of yarn.
Other Casting On Methods
Another popular casting on method is the knit cast on, which is also known as the backward loop cast on. This method is quick and easy to do, making it great for beginners or when you need to add stitches to your work in the middle of a row. The knit cast on creates a looser edge, so it may not be ideal for projects that require a more secure edge.
There are also tubular cast on methods, such as the Italian tubular cast on, that create a neat and stretchy edge, perfect for ribbing. These methods involve working with both the working yarn and a waste yarn, and can be a bit more advanced and time-consuming. However, the finished result is worth the extra effort.
Overall, casting on is an essential step in knitting that sets the foundation for your project. Choosing the right casting on method will depend on the type of project and the desired finished look. With practice and experimentation, you will discover which casting on method works best for you and your knitting projects.
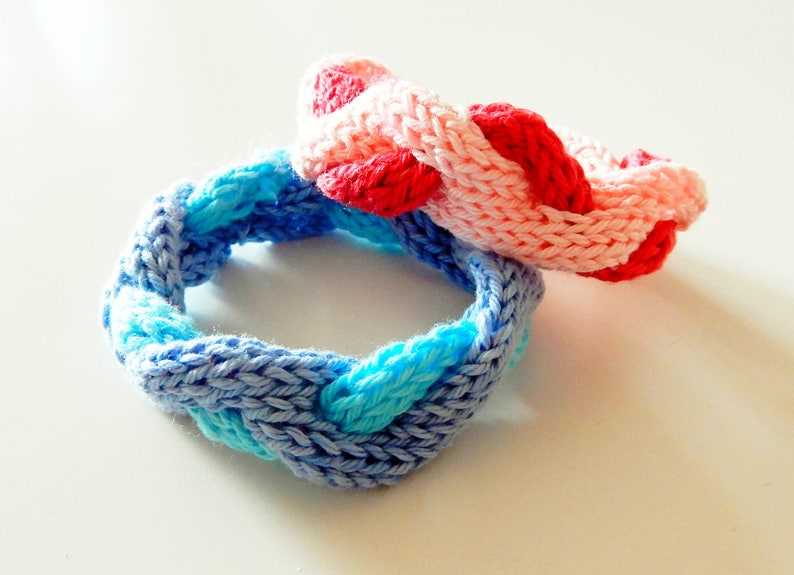
Knitting the Main Body of the Bracelet
Once you have cast on the desired number of stitches for your bracelet, you can begin knitting the main body. The pattern for the main body is simple and repetitive, making it a great project for beginners or for those looking for a quick and easy knit.
Start by knitting every row in the same stitch pattern until you reach your desired length. You can choose to knit in garter stitch, which creates a textured fabric with ridges, or in stockinette stitch, which creates a smooth, flat fabric. Both options will give you a beautiful and stylish bracelet.
If you choose to knit in garter stitch, simply knit every row. This stitch pattern creates a fabric that is reversible, meaning both the right side and wrong side of the bracelet will look the same. It has a bouncy and textured appearance.
If you choose to knit in stockinette stitch, you will need to alternate between knitting rows and purling rows. Knit one row, then purl one row, and continue repeating these two rows until you reach your desired length. This stitch pattern creates a fabric that is smooth and flat on the right side, and has a slightly bumpy texture on the wrong side.
Remember to periodically measure the length of your bracelet as you knit to ensure it will fit comfortably around your wrist. Once you are satisfied with the length, you can then move on to finishing the bracelet, which typically involves binding off the stitches and sewing the ends together.
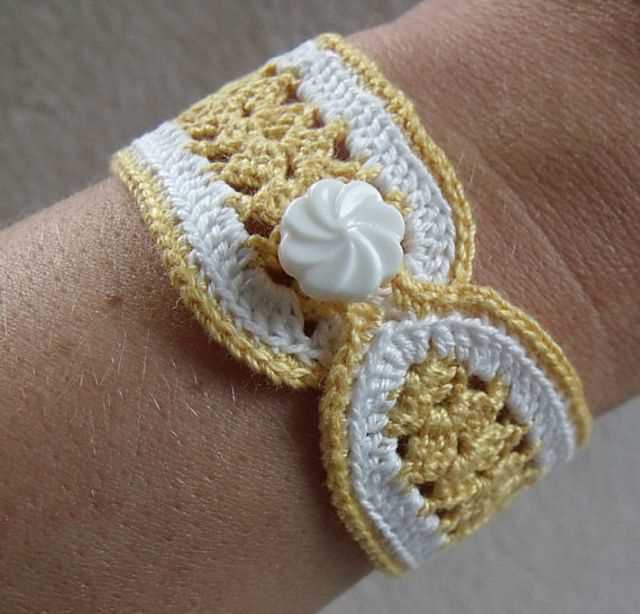
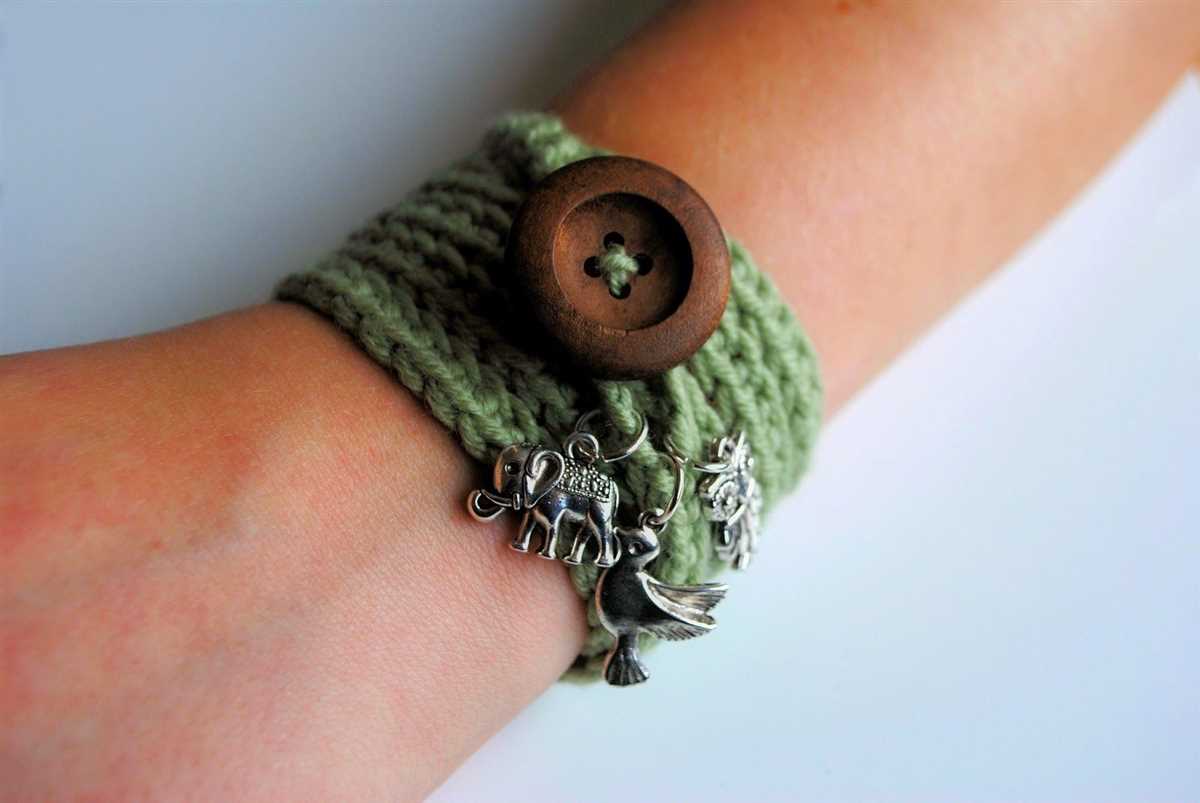
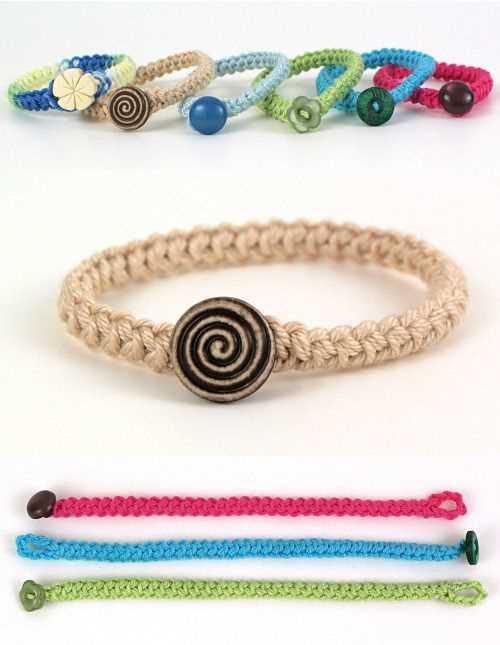
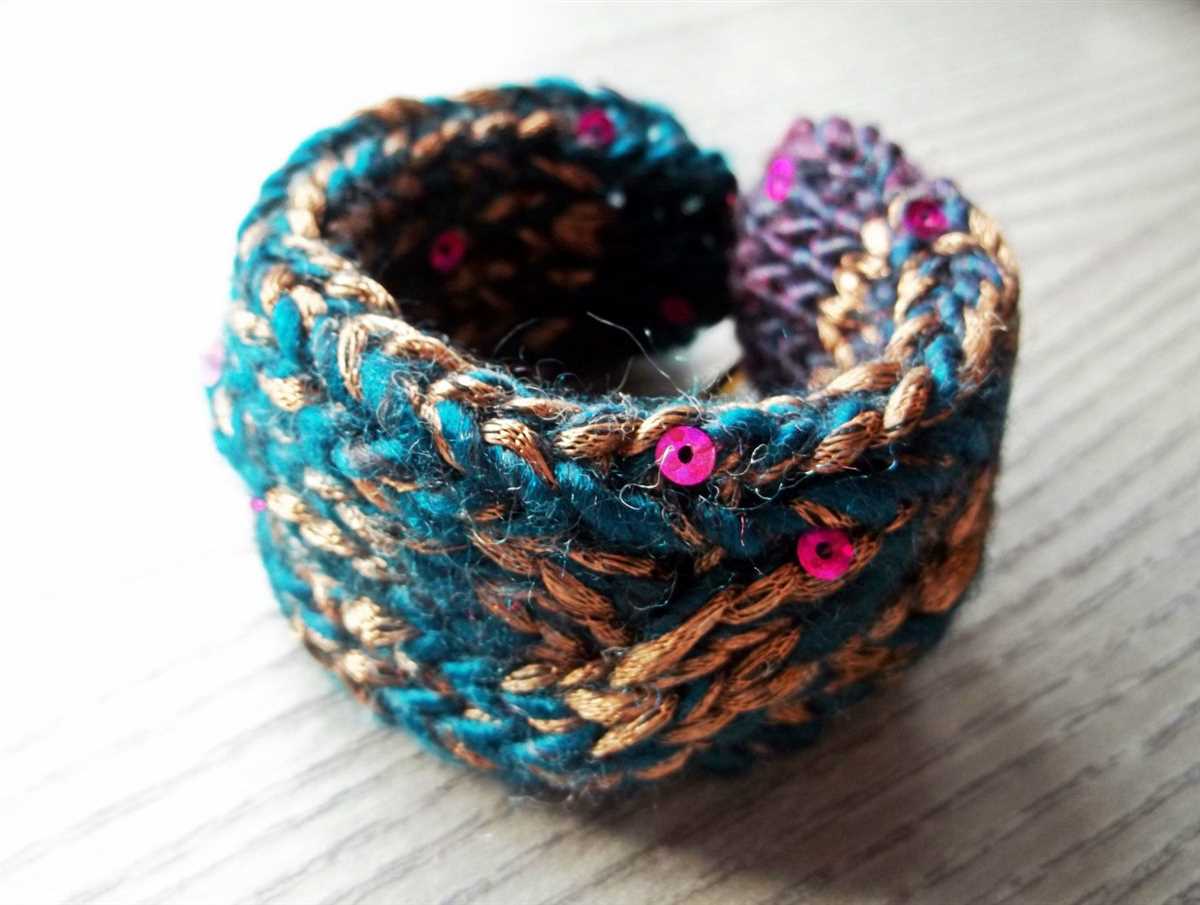
Adding Beads or Charms for Decoration
Adding beads or charms to your knitted bracelet can be a fun and creative way to personalize your design. There are several techniques you can use to incorporate these decorative elements into your project.
Using beads: One way to add beads to your knitted bracelet is by threading them onto your yarn before you start knitting. You can choose to add beads at regular intervals or create a pattern by following a specific sequence. When you come across a bead in your knitting, simply slip it off the needle and let it rest on your working yarn until you’re ready to use it. Then, when you reach the stitch where you want to place the bead, slide it up onto the stitch and continue knitting as usual. This method allows the beads to sit on top of the fabric, creating a raised embellishment.
Attaching charms: Another option for adding decoration to your knitted bracelet is by attaching charms directly to the finished piece. You can either sew them onto the fabric using a needle and thread, or use jump rings or split rings to attach them to the stitches. Charms can be found in various shapes, sizes, and designs, allowing you to customize your bracelet to your liking. Just make sure to securely fasten the charms to prevent them from coming loose.
- When adding beads or charms to your knitted bracelet, it’s important to consider their weight. Too many heavy embellishments may cause your bracelet to stretch or sag over time.
- Experiment with different bead or charm placements to create unique patterns or designs. You could even use multiple colors or sizes for a more eye-catching effect.
- If you’re new to working with beads, start with a simple pattern or design to get the hang of it before attempting more intricate patterns.
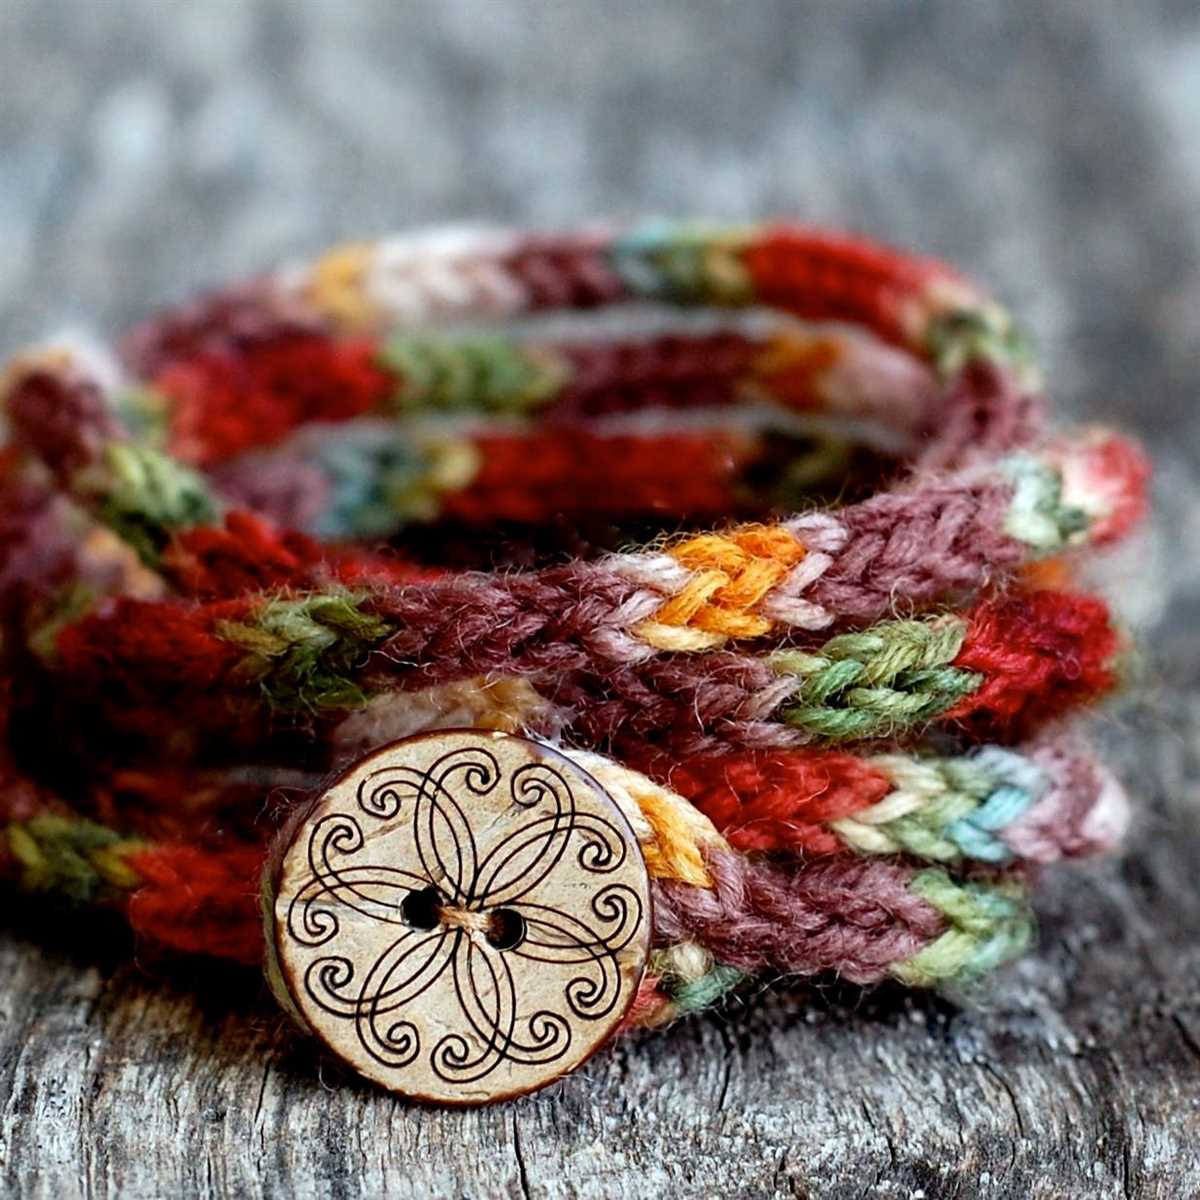
Creating a Buttonhole for Closure
When knitting a bracelet, you may want to add a buttonhole for closure. This allows you to easily fasten and unfasten the bracelet, ensuring a secure fit. Creating a buttonhole is a simple process that can be done in a few easy steps.
To create a buttonhole, you will need to determine the desired size of the buttonhole and the placement on the bracelet. Once you have decided on the size and placement, you can begin knitting the buttonhole.
Step 1: Marking the Buttonhole
First, mark the location for the buttonhole on your knitting. This can be done using a stitch marker or by simply making a small loop with some yarn and securing it to the knitting. Make sure that the mark is located where you want the buttonhole to be.
Step 2: Decrease Stitches
Next, you will need to decrease stitches to create the buttonhole opening. This is typically done by knitting two stitches together, creating a single stitch. Repeat this decrease process until you reach the marked buttonhole location.
Step 3: Create a Gap
Once you have reached the marked buttonhole location, you will need to create a gap in your knitting. This can be done by binding off several stitches, creating an opening between the two sides of the buttonhole.
Step 4: Resume Knitting
After creating the gap, you can then continue knitting the remaining stitches as normal. This will complete the buttonhole and allow you to continue working on your bracelet pattern.
With these steps, you can easily create a buttonhole for closure on your knitted bracelet. Remember to adjust the size and placement of the buttonhole to fit the button you plan to use. Enjoy adding this functional and decorative element to your knitting project!
Finishing Off: Binding Off and Weaving in Ends
Finishing off your knitted bracelet is an important step to ensure that it looks neat and professional. There are two main techniques you will need to know: binding off and weaving in ends.
Binding Off
Binding off is the process of closing off your stitches so that they do not unravel. To bind off, knit the first two stitches as normal. Then, using your left needle, lift the first stitch over the second stitch and off the right needle. This effectively binds off one stitch. Continue knitting the next stitch and binding off until you have only one stitch left on your right needle. Cut the yarn, leaving a long tail, and pull it through the last stitch to secure it.
Weaving in Ends
Weaving in ends is the process of hiding the loose yarn tails from your knitting. To weave in ends, thread the yarn tail onto a tapestry needle. Insert the needle into the back of your work, following the path of the stitches for a few centimeters. Bring the needle back out through the fabric a short distance away. Repeat this process a few times, weaving the yarn in different directions, to secure the end. Trim any excess yarn close to the fabric.
Blocking and Shaping the Bracelet
Blocking is an important step in the knitting process that helps give your finished project a professional look. In the case of a knitted bracelet, blocking can help shape the piece and ensure it lays flat on the wrist. To block the bracelet, you’ll need a blocking mat or towels, rustproof pins, and a spray bottle filled with water.
To begin, soak the knitted bracelet in lukewarm water for about 15 minutes, allowing the fibers to relax and become more pliable. Gently squeeze out the excess water, being careful not to wring or twist the fabric.
Next, lay the bracelet on a blocking mat or towels, making sure it’s in the desired shape and size. Use rustproof pins to secure the edges and corners of the bracelet, stretching it slightly if necessary.
After pinning, mist the bracelet with water using a spray bottle. This will help the fibers reestablish their new shape. Let the bracelet dry completely before removing the pins, usually overnight or for about 24 hours.
Once the bracelet is dry, you can remove the pins and admire your beautifully blocked and shaped piece. The blocking process will help the bracelet maintain its shape and ensure it fits comfortably on the wrist.
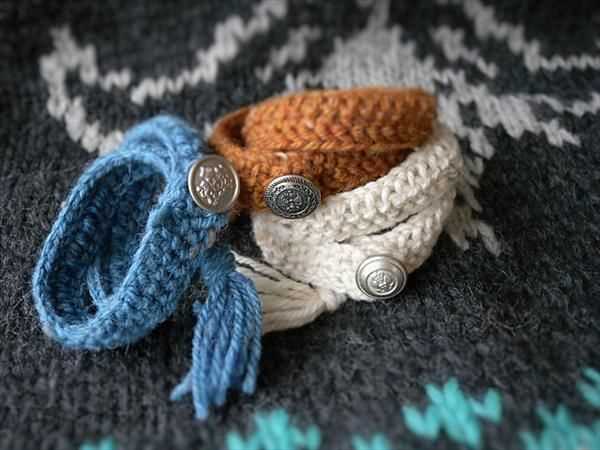
Adding a Clasp or Button for Closure
When you have finished knitting your bracelet, you may want to add a clasp or button for closure. This can give your bracelet a more finished look and make it easier to put on and take off. There are several options for adding a clasp or button, depending on your personal preference and the style of the bracelet.
One option is to use a lobster clasp. This type of clasp has a spring mechanism that allows you to easily open and close it. To attach a lobster clasp, thread one end of the bracelet through the loop on the clasp, then fold the end back and sew it securely in place. Repeat the same process with the other end of the bracelet and the other side of the clasp. Make sure the ends are sewn tightly to prevent the clasp from coming undone.
Another option is to use a toggle clasp. This type of clasp consists of a bar and a loop, and it has a decorative element that can add a unique touch to your bracelet. To attach a toggle clasp, sew one end of the bracelet to the bar, making sure it is securely attached. Then loop the other end of the bracelet through the loop of the clasp and sew it in place. The toggle clasp should be able to slide easily through the loop, but it should also be secure enough to prevent the bracelet from coming undone.
If you prefer a more rustic or bohemian look, you can also add a button closure to your knitted bracelet. To do this, sew a button onto one end of the bracelet, making sure it is securely attached. On the other end of the bracelet, sew a loop or a braided cord that will fit around the button. This will create a loop and button closure that is both functional and stylish.
Overall, adding a clasp or button for closure to your knitted bracelet can enhance its appearance and make it more practical to wear. Consider the style of your bracelet and choose a closure option that complements it. Whether you choose a lobster clasp, toggle clasp, or button closure, make sure it is securely attached to prevent the bracelet from coming undone.
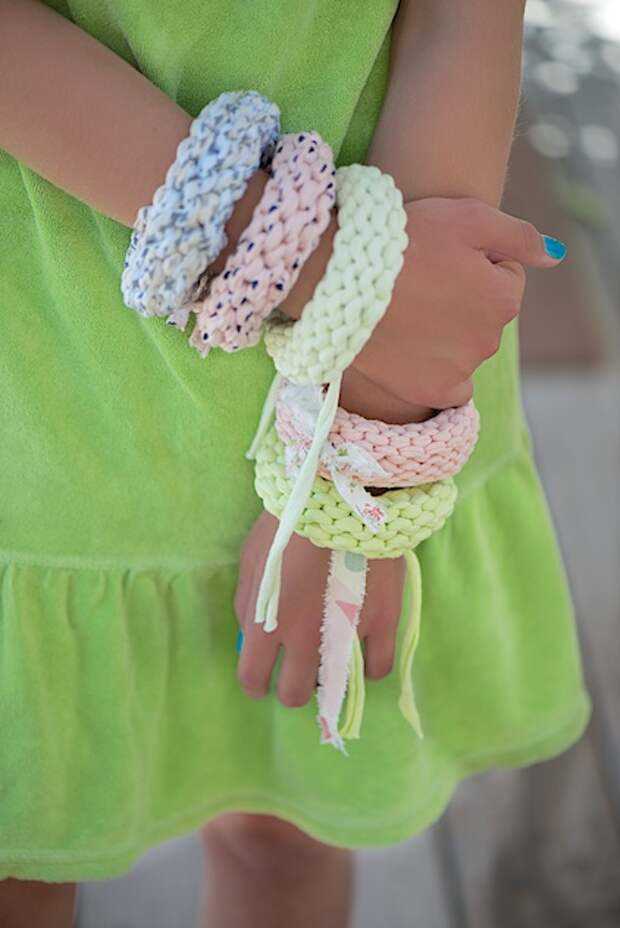
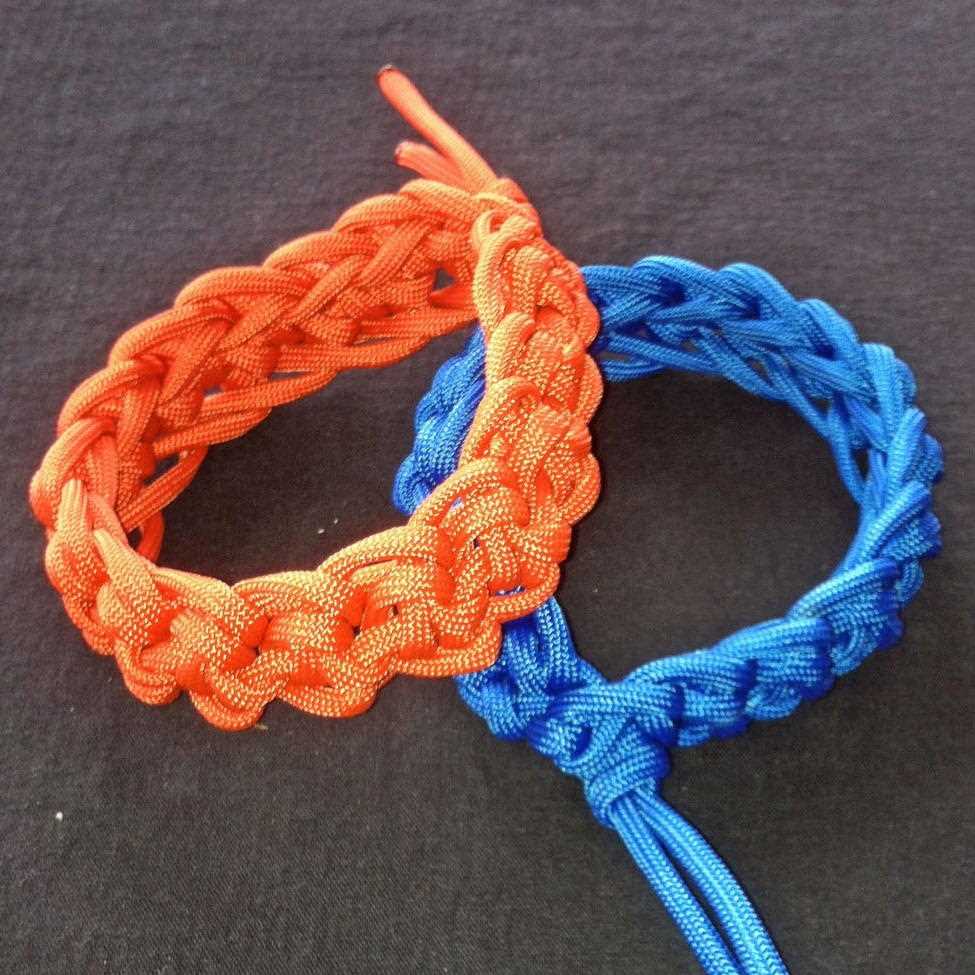
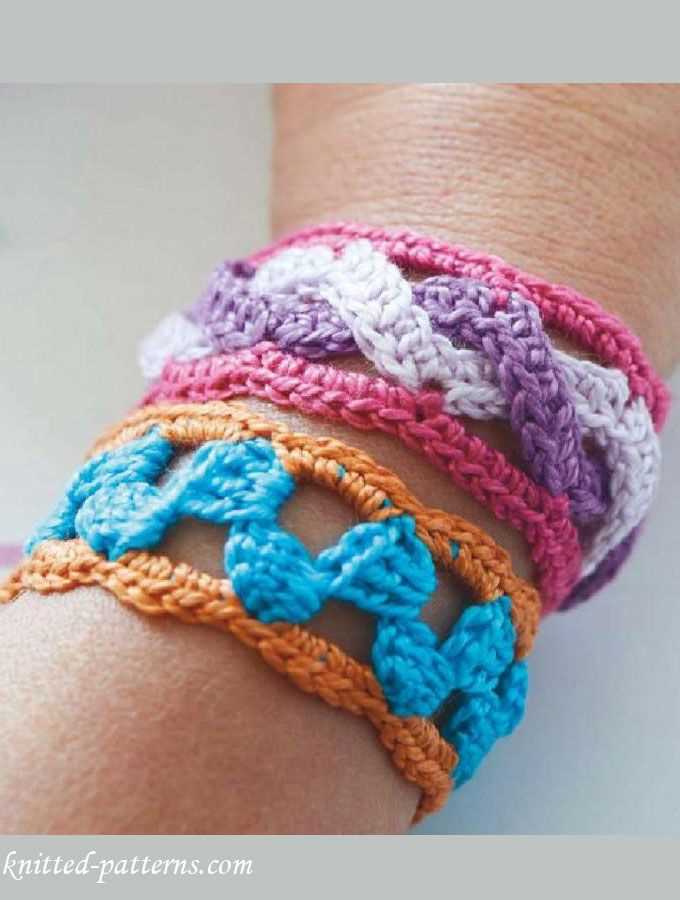
Variations and Ideas for Customizing Your Bracelet
Knitting a bracelet can be a fun and creative project. There are endless possibilities for customizing your design to create a unique and personal piece of jewelry. Whether you prefer a simple and elegant look or a bold and colorful statement, here are some variations and ideas to inspire your creativity.
1. Color combinations:
One of the easiest ways to customize your bracelet is by playing with different color combinations. You can choose contrasting colors for a striking effect or opt for a monochromatic palette for a more understated look. Consider using variegated yarns to add a touch of excitement to your design.
2. Embellishments:
Add some extra flair to your bracelet by incorporating embellishments. You can sew on small buttons or beads to enhance the texture and visual interest. Experiment with different materials and colors to find the perfect combination that reflects your personal style.
3. Pattern stitch variations:
While the classic garter stitch is a popular choice for knitted bracelets, don’t be afraid to try different pattern stitches to add more complexity to your design. Consider using ribbing, cables, or lace patterns to create a more intricate and decorative bracelet.
4. Personalization:
Make your bracelet truly unique by incorporating personalization. You can knit initials or names into the design using intarsia or duplicate stitch techniques. This adds a thoughtful and sentimental touch, making the bracelet a meaningful gift for yourself or a loved one.
5. Adjustable closure:
An adjustable closure adds versatility to your bracelet, allowing you to wear it at different lengths or even as an anklet. You can use a button and loop closure, a sliding knot, or even a magnetic clasp for a sleek and modern look. This way, you can easily customize the fit to suit your preference.
- In conclusion, there are countless ways to customize your knitted bracelet. Whether you play with color, add embellishments, experiment with different pattern stitches, or personalize the design, the possibilities are endless. Let your creativity soar and create a bracelet that reflects your unique style and personality.
Tips and Tricks for Successful Knitted Bracelet Making
Knitting bracelets can be a fun and rewarding project for any knitting enthusiast. Whether you are a beginner or an experienced knitter, there are some tips and tricks that can help ensure your knitted bracelet turns out beautifully. Here are some key tips to keep in mind:
Choose the Right Yarn and Needles
When knitting a bracelet, it is important to choose the right yarn and needles for the project. Depending on the desired look and feel of the bracelet, you may want to opt for a thinner or thicker yarn. Additionally, using the right needle size will help you achieve the desired tension and ensure that your stitches are not too loose or too tight.
Pay Attention to Gauge
Before you start knitting, make sure to check your gauge. Gauge refers to the number of stitches and rows per inch in your knitting. A different gauge can result in a bracelet that is too small or too large. To obtain the correct gauge, it is advised to knit a gauge swatch using the yarn and needles you plan to use for the bracelet.
Use Stitch Markers
When knitting a bracelet with a pattern, stitch markers can be incredibly helpful. These small plastic or metal rings can be placed between stitches to help you keep track of pattern repeats or major stitch changes. They are especially useful when working with complex patterns or multiple stitch types.
Consider Color and Texture
When choosing a pattern for your knitted bracelet, consider the colors and textures of the yarn you will be using. Variegated yarns can create interesting color patterns, while textured stitches can add depth and dimension to your bracelet. Experiment with different combinations to create unique and eye-catching designs.
Add Embellishments

If you want to take your knitted bracelet to the next level, consider adding embellishments. Beads, buttons, charms, or even embroidery can add a touch of personalization and make your bracelet truly one-of-a-kind. Just make sure that the embellishments are securely attached to prevent them from falling off or getting snagged on clothing.
By following these tips and tricks, you will be well on your way to creating beautiful and unique knitted bracelets. Have fun experimenting with different yarns, patterns, and techniques, and don’t be afraid to let your creativity shine through!