
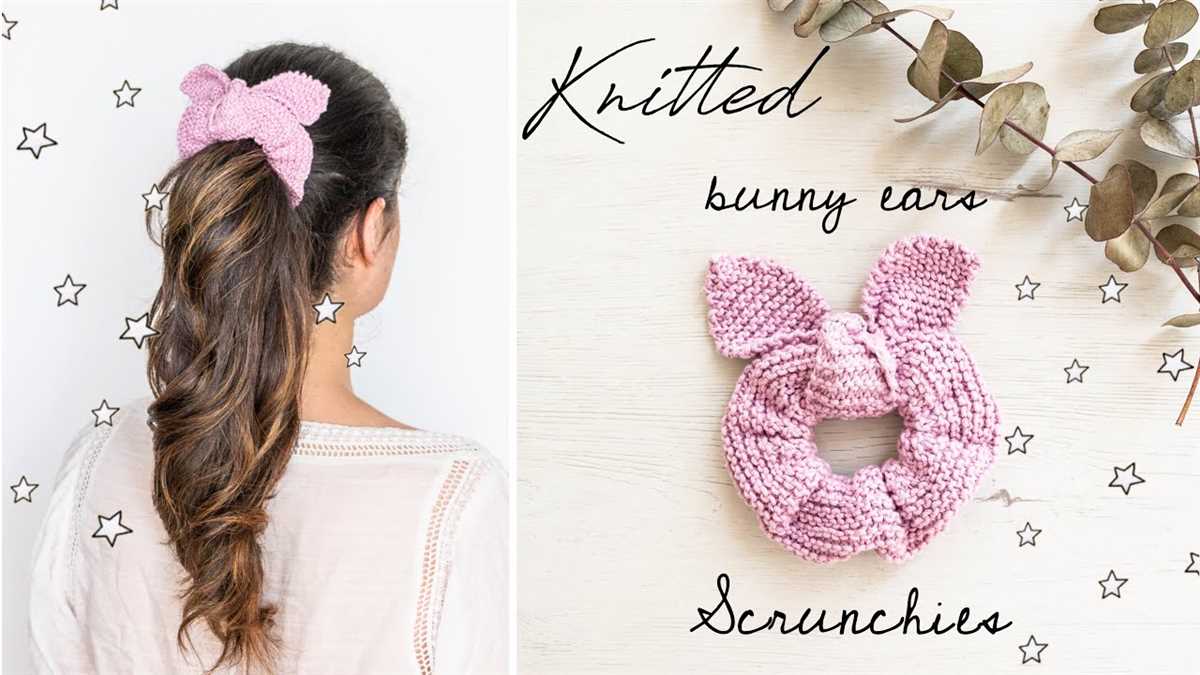
Looking for a fun and adorable knitting project? Look no further! With this knit bunny ears pattern, you can create a cute and cozy accessory that will add a touch of whimsy to any outfit. Whether you want to make a pair of bunny ears for a costume or simply want to embrace your inner child, this pattern is perfect for knitters of all levels.
To begin, you’ll need a few basic knitting supplies, including yarn and a pair of knitting needles. The pattern itself calls for a specific type and weight of yarn, but feel free to get creative and experiment with different colors and textures. Once you have all your materials ready, it’s time to dive into the knitting process.
This pattern utilizes a combination of simple knitting stitches, such as knit and purl, to create the iconic shape of bunny ears. With step-by-step instructions and detailed illustrations, even beginners can confidently tackle this project. And with a little bit of time and effort, you’ll have a finished pair of bunny ears that are sure to make you smile.
Materials needed
To knit bunny ears, you will need the following materials:
- Yarn: Choose a soft and fluffy yarn in any color you prefer. The thickness of the yarn will determine the size of the bunny ears.
- Knitting needles: Use knitting needles that are appropriate for the thickness of your chosen yarn. Circular or straight needles can be used, depending on your preference.
- Tapestry needle: This needle will be used for weaving in the loose ends of the yarn and sewing the finished bunny ears together.
- Scissors: You will need a pair of scissors to cut the yarn and trim any excess.
- Stitch markers: These small plastic or metal rings can be placed on your knitting needles to help you keep track of your stitches.
- Stuffing: To give the bunny ears a fluffy and three-dimensional shape, you will need some stuffing material, such as polyester fiberfill.
- Optional: Ribbon or elastic: If you plan to attach the bunny ears to a headband or hat, you may want to have some ribbon or elastic on hand for securing them.
Casting On
Casting on is the first step in knitting bunny ears. It is the process of creating the foundation row of stitches on the knitting needle. There are different methods for casting on, but the most common one is the long-tail cast on. To begin, you will need a long tail of yarn, approximately three times the width of the finished project.
To start the long-tail cast on, make a slipknot and place it on the knitting needle. Hold the needle in your right hand and the tail end of the yarn in your left hand. Insert the right-hand needle into the slipknot from left to right and with the working yarn behind the needle. Use your left thumb and index finger to hold the yarn tail and the working yarn. With your right hand, bring the needle under the yarn tail and pick up the working yarn.
Next, bring the working yarn over the needle to create a new loop. Place this loop on the left-hand needle, tightening it slightly. Repeat this process until you have cast on the required number of stitches for your bunny ears pattern. Make sure to keep the tension of the stitches even throughout the casting on process.
Once you have finished casting on, you can move on to the next step in the pattern, which may involve knitting or purling the stitches. Casting on is an essential skill in knitting, and mastering different casting on techniques will allow you to create a variety of projects. Practice the long-tail cast on method and explore other casting on techniques to expand your knitting repertoire.
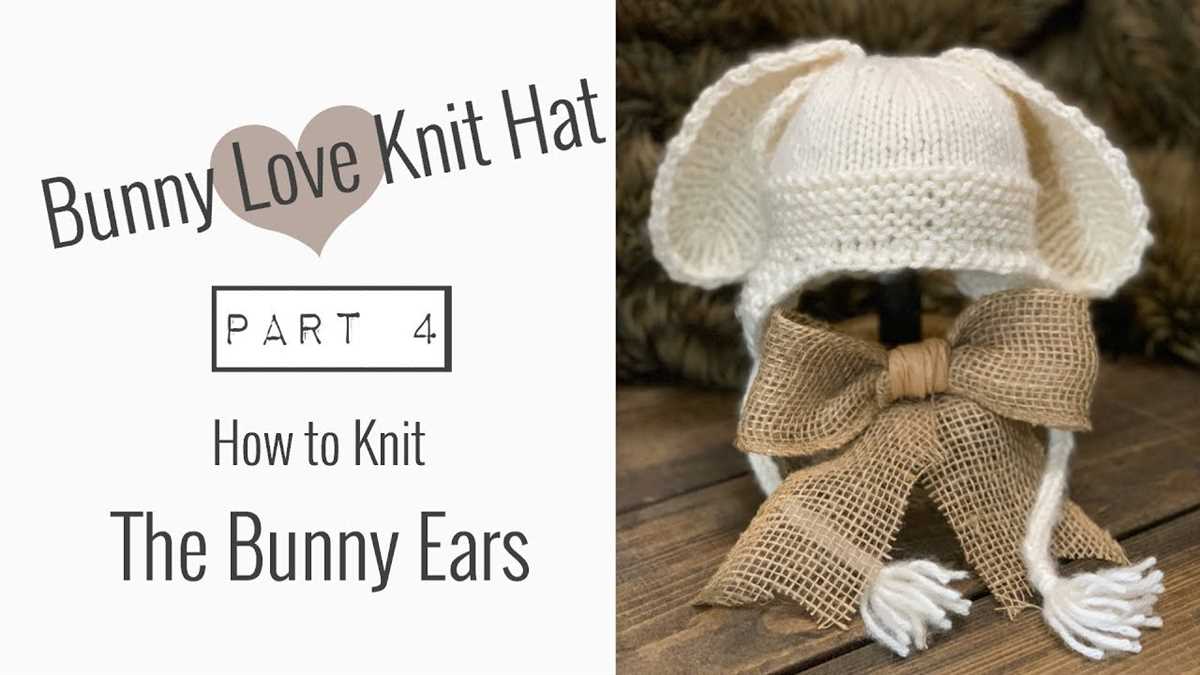
Knitting the base
When knitting bunny ears, the first step is to create the base. The base will serve as the foundation for the ears and will determine their shape and size. To start, gather your materials, including the appropriate yarn and knitting needles. It’s important to choose a yarn that is soft and durable, as the ears will need to withstand some wear and tear. Additionally, selecting the right size needles will ensure that your stitches are the correct tension and that the finished ears have a nice drape.
Once you have your materials ready, you can begin casting on. To do this, make a slipknot and place it onto one of your knitting needles. Then, use your second knitting needle to create the first stitch. Repeat this process until you have the desired number of stitches for the base. It’s important to keep your tension even while casting on to ensure that the base is not too tight or too loose.
Row 1:
After casting on, you will begin working the first row. This is typically done in a knit stitch, but you can also use other stitches depending on the desired texture and look of the ears. Knit each stitch across the row until you reach the end. You may find it helpful to use stitch markers to keep track of your progress and make it easier to count your stitches later on.
Row 2:
Once you have completed the first row, you will move on to the second row. This row is typically worked in the purl stitch, creating a stockinette stitch pattern. Purl each stitch across the row until you reach the end. This alternating pattern of knitting and purling will create a smooth and even texture for the base of the bunny ears.
Continue repeating rows 1 and 2 until the base reaches the desired length for your bunny ears. Keep in mind that the length of the base will determine the height and shape of the finished ears. Once the base is complete, you can move on to shaping and finishing the bunny ears.
Shaping the ears
When knitting bunny ears, it’s important to shape them properly to achieve the desired look. The shaping process involves increasing and decreasing stitches in a specific pattern to create the signature bunny ear shape.
To begin shaping the ears, start by knitting a specified number of stitches. Then, increase stitches evenly across the row using a specific type of increase, such as a knit-front-and-back (KFB) or make-one (M1) increase. This will add more stitches and make the ear wider at the base.
Once the desired width at the base is reached, you will need to decrease stitches to taper the ear towards the top. Decreases can be done using methods like knit-two-together (K2TOG) or slip-slip-knit (SSK) to reduce the number of stitches and create a pointed tip for the ear.
It’s important to follow the pattern instructions carefully to ensure the proper number of increases and decreases are made at the correct intervals. This will ensure that both ears are symmetrical and have a consistent shape.
To finish off the shaping, bind off the stitches when the desired length of the ear is reached. Then, repeat the shaping process for the second ear to complete the pair.
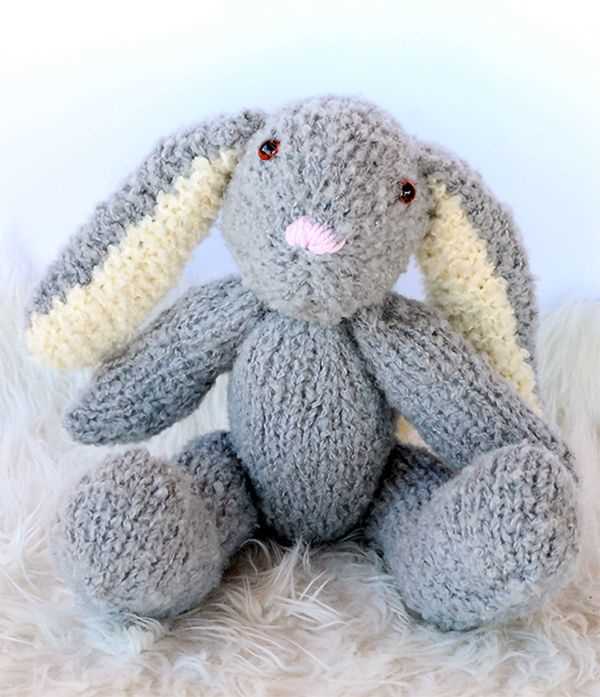
Adding the inner ear color
Once you have finished knitting the main bunny ears in the base color, it’s time to add the inner ear color to create a cute contrast. To do this, you will need a different color of yarn and a pair of knitting needles in the appropriate size.
To begin, take your contrasting color yarn and make a slipknot. Insert your knitting needle into one of the stitches on the edge of the bunny ear and use your slipknot to create a loop on the needle. This will be the first stitch of the inner ear color.
Continue knitting the inner ear color by following the knitting pattern for the specific design you are using. This may involve knitting rows or rounds in a certain stitch pattern or following a specific colorwork chart. Make sure to keep track of your stitches and rows as you go.
If you are working in rows, remember to turn your work at the end of each row and follow the pattern instructions for each row. If you are working in rounds, use a stitch marker to mark the beginning of each round and continue knitting in a circular motion.
Once you have completed the inner ear color section, you can finish off the yarn by cutting it and leaving a tail to weave in later. Make sure to securely fasten the yarn to prevent unraveling. Your bunny ears should now have a delightful pop of color in the inner ear area!
Sewing the ears
In order to complete your knit bunny ears, you will need to sew them onto the bunny head. Start by positioning the ears on either side of the head, making sure they are placed symmetrically. Use a few pins to hold the ears in place before sewing.
Next, thread a needle with a matching yarn or thread and tie a knot at the end. Begin sewing the ears to the head by making small stitches along the edge of the ear, going through both the ear and the head fabric. Take care to sew close to the edge to ensure a neat and secure attachment.
Note: If you prefer a more pronounced ear shape, you can stuff them lightly with polyester fiberfill before sewing them to the head. This will give the ears some extra volume and make them stand out.
Continue sewing all the way around the ear until you reach the starting point. Tie a secure knot and cut off any excess yarn or thread. Repeat the same process for the second ear, ensuring it is positioned at the same height and angle as the first ear.
Optional: If you want to add some decorative elements to your bunny ears, you can sew on some small buttons, beads, or bows. This will give your knit bunny a personalized touch and make it extra cute.
Once you have finished sewing the ears, step back and admire your adorable knit bunny with its floppy ears. The ears add a playful and charming element to the overall look of the toy, making it even more huggable and lovable. Now you can enjoy your new creation or gift it to someone special.
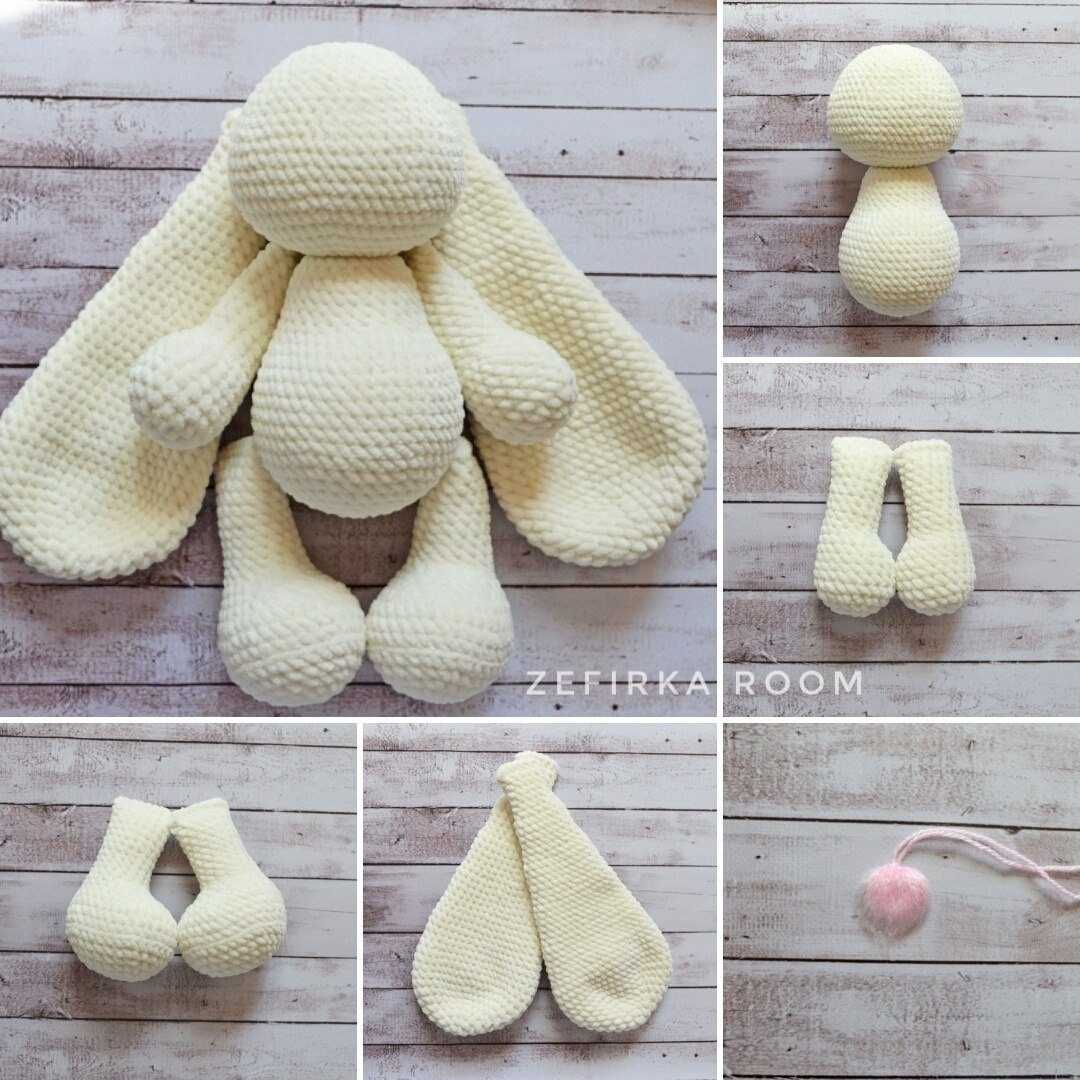
Attaching the ears to the base
Once you have completed knitting the bunny ears according to the pattern, it’s time to attach them to the base of your bunny toy. Here are the steps to follow:
1. Position the ears: Place the base of your bunny toy on a flat surface, with the front side facing up. Decide on the placement of the ears, keeping in mind the desired look and position. You can position them closer to the center for a more upright look, or angle them outwards for a playful appearance.
2. Secure with pins: Once you are happy with the placement, use small sewing pins to secure the ears in place. Insert the pins vertically through the base and into the sides of the ears. Make sure that the pins are securely holding the ears in place, but be careful not to stretch or distort the base fabric.
3. Sew the ears: Thread a needle with the same yarn used for knitting the bunny toy. Starting from the underside of the base, carefully stitch the ears to the base using a whip stitch or a small running stitch. Make sure to catch both the base fabric and the sides of the ears with each stitch, securely attaching them together.
4. Knot and secure: Once you have sewn along the entire length of the ears, make a small knot on the underside of the base to secure the thread. Trim any excess yarn, and repeat the process for the second ear.
5. Finishing touches: After attaching the ears, inspect the placement and make any necessary adjustments. Gently fluff and shape the ears to enhance their appearance. You can also sew a small decorative stitch along the bottom edge of each ear to add a touch of detail if desired.
By following these steps, you will successfully attach the knitted bunny ears to the base of your toy, completing the adorable look of your knit bunny.
Finishing touches
Once you have finished knitting the bunny ears, it’s time to add some finishing touches to make them look even more adorable. Here are a few suggestions:
Add a pompom
One way to add a playful touch to your bunny ears is by attaching a small pompom at the tip. This can be done by sewing it securely using a needle and thread. Choose a color that complements the color of your knit bunny ears, or go for a contrasting color for a fun and quirky look.
Sew on a button
Another way to add some extra charm to your bunny ears is by sewing on a button at the base. This can act as a decorative element and also provide a practical function, allowing you to secure the ears in place when wearing them. Choose a button of the appropriate size and color to complement your bunny ears.
Embroider details
If you want to add some intricate details to your bunny ears, consider embroidering small designs using colorful thread. You can create patterns such as flowers, stars, or even little bunny faces. This will give your knit bunny ears a personalized touch and make them truly one-of-a-kind.
Attach ribbons
To give your bunny ears a touch of elegance, consider attaching ribbons to the base. You can choose satin ribbons in a coordinating color or opt for patterned ribbons for a more whimsical look. Simply tie the ribbons in a bow or knot to secure them in place.
With these finishing touches, your knit bunny ears will be complete and ready to be worn with pride. Whether you’re making them as a gift or for yourself, these little details can make all the difference in adding that extra charm to your knitted creation.
Optional Embellishments
Once you have completed knitting the bunny ears, there are several optional embellishments that you can add to make them even more adorable. These embellishments can be added using simple embroidery techniques or by attaching small accessories such as buttons or ribbons.
Embroidery: You can use embroidery floss in coordinating colors to add cute details to the bunny ears. For example, you can add a small triangle to represent the bunny’s nose, or stitch on a pair of eyes. You can also use a contrasting color of floss to create a crisscross pattern on the ears to give them a textured look.
Buttons: Sewing on small buttons can add an extra touch of charm to the bunny ears. You can either sew them on as eyes or as a decorative element on the ears themselves. Be sure to choose buttons that are securely attached so that they don’t pose a choking hazard if the bunny ears are given to small children.
Ribbons: Attaching a small ribbon bow to the base of the bunny ears can give them a feminine and playful look. You can choose a ribbon that matches the color of the yarn or opt for a contrasting color for added visual interest. The ribbon can be secured with a small stitch or a dab of fabric glue.
Pom-poms: Adding a pom-pom to the top of each bunny ear can make them look extra fluffy and cute. To make a pom-pom, simply wrap yarn around a pom-pom maker or your fingers until you have your desired thickness, then tie it off and trim the ends. Attach the pom-pom securely to the top of each ear using a needle and thread.
- Embroidery floss in coordinating colors
- Small buttons
- Ribbons
- Pom-pom maker or your fingers
These optional embellishments are a fun way to personalize your knit bunny ears and add your own creative touch. Use your imagination and have fun experimenting with different materials and techniques to make your bunny ears truly unique.
Tips and Tricks
Knitting bunny ears can be a fun and rewarding project, but it can also come with its challenges. Here are some tips and tricks to help you along the way:
Use the right materials

When knitting bunny ears, it’s important to use the right materials for the best results. Choose a soft and fluffy yarn that will give the ears a nice texture. Make sure to use the appropriate knitting needles for your chosen yarn, as this will affect the overall appearance of the ears.
Start with a gauge swatch
Before you begin knitting the actual ears, it’s a good idea to start with a gauge swatch. This will help you determine the correct tension and ensure that your finished bunny ears will be the right size. Keep in mind that different knitters may have different tension, so it’s always best to check your gauge before diving into the project.
Pay attention to shaping
When knitting bunny ears, shaping is key to getting the right bunny ear look. Pay attention to the pattern instructions and make sure to follow them precisely. Use increases and decreases to create the desired shape. Pay attention to the placement of these shaping techniques, as it can greatly affect the final look of the ears.
Finishing touches matter
The finishing touches can make all the difference in the final appearance of your bunny ears. Take the time to carefully sew any seams and weave in any loose ends. Use a steam iron to block and shape the ears, if necessary. Don’t forget to add any embellishments or details, such as a small pom-pom for the center of the ears or a cute bow.
Practice makes perfect
Knitting bunny ears, like any other knitting project, requires practice. If your first attempt doesn’t turn out exactly how you envisioned it, don’t get discouraged. Keep practicing and refining your technique. With time and patience, you’ll be able to knit beautiful bunny ears that will delight both kids and adults alike.
Remember, knitting bunny ears is a creative and enjoyable project. Have fun with it and don’t be afraid to experiment and make it your own!
Variations
If you want to add a unique touch to your knit bunny ears, there are several variations you can try. Here are some ideas to inspire you:
Color variations:
- Contrasting colors: Instead of using the same color for all parts of the bunny ears, you can use contrasting colors for the inner and outer sections. This will make the ears stand out and add visual interest to your finished project.
- Gradient effect: If you have multiple shades of the same color, you can create a gradient effect by using lighter or darker shades for different sections of the bunny ears. This will give them a more dynamic and eye-catching appearance.
Embroidery variations:
- Embroidered patterns: Once you have finished knitting the bunny ears, you can add embroidered patterns to them to create a personalized look. You can use simple stitches like French knots or cross stitches to create flowers, stars, or any other designs you like.
- Contrasting thread: Using a contrasting color of embroidery thread can make your designs pop and add a playful touch to the bunny ears. You can choose a thread color that complements the main color of the ears or opt for a bold contrast for a more striking effect.
Accessories variations:
- Bow or ribbon: To give your bunny ears a girly or festive look, you can attach a small bow or ribbon to the base of each ear. This accessory will add charm and personality to your finished project.
- Flower embellishments: Another way to decorate your bunny ears is by adding small knitted or fabric flowers as embellishments. These can be sewn onto the base of each ear or attached with a clip for a removable option.
These variations allow you to customize your knit bunny ears to suit your style or the occasion. Don’t be afraid to get creative and experiment with different colors, embroidery designs, and accessories. Have fun making your bunny ears truly unique!
Final Thoughts

In conclusion, the knit bunny ears pattern is a fun and cute project that can be enjoyed by both beginners and experienced knitters. Whether you are making them for yourself or as a gift for someone special, these bunny ears are sure to bring joy and a touch of whimsy to any occasion.
This pattern is highly customizable and can be adapted to suit your personal preferences. You can choose different yarn colors and textures to create unique variations of the bunny ears. Additionally, you can adjust the size of the ears by modifying the number of stitches and rows.
While the pattern itself is relatively simple, it does require some basic knitting skills. If you are new to knitting, don’t be discouraged! There are plenty of resources available online and in books that can help you learn the necessary techniques. With a little practice and patience, you’ll be able to master this pattern and create beautiful bunny ears.
Overall, the knit bunny ears pattern is a delightful and enjoyable knitting project that will allow you to showcase your creativity and love for handmade items. So grab your knitting needles, choose your favorite yarn, and get ready to hop into the world of cute and cuddly bunny ears!
Q&A:
Where can I find a knit bunny ears pattern?
You can find a knit bunny ears pattern on various knitting websites, such as Ravelry or KnittingPatternCentral. You can also try searching on Pinterest or Etsy for downloadable patterns.
Is it difficult to knit bunny ears?
The difficulty level of knitting bunny ears depends on your knitting skills and experience. If you are a beginner, it may be a bit challenging, but with practice and following the pattern correctly, you should be able to successfully knit bunny ears.
What materials do I need to knit bunny ears?
To knit bunny ears, you will need yarn in your desired color, knitting needles, a yarn needle for sewing, and stuffing for the ears. Depending on the pattern, you may also need stitch markers or other accessories.
Can I customize the size of the bunny ears?
Yes, you can customize the size of the bunny ears by adjusting the number of stitches and rows in the pattern. If you want larger or smaller ears, you can modify the pattern accordingly.
Are there any tips for knitting bunny ears?
Some tips for knitting bunny ears include reading the pattern thoroughly before starting, using stitch markers to keep track of your stitches, and using a soft and fluffy yarn to give the ears a cute and fuzzy texture. It is also important to stuff the ears evenly to achieve a symmetrical look.
Where can I find a knit bunny ears pattern?
You can find a knit bunny ears pattern on various websites like Ravelry or Etsy. Additionally, many knitting blogs and online communities offer free bunny ears patterns that you can easily access.