
Knitting is a popular craft that involves using yarn and needles to create fabric. One of the most basic knitting techniques is a knit and purl stitch pattern. This pattern is widely used by knitters of all skill levels to create a variety of designs and textures.
The knit stitch is the foundation of knitting, and it creates a smooth, flat surface. It is performed by inserting the right needle into the front of the stitch on the left needle and pulling the yarn through. The purl stitch, on the other hand, creates a raised, textured surface. It is done by inserting the right needle into the front of the stitch on the left needle, but instead of pulling the yarn through, the yarn is wrapped around the needle before being pulled through.
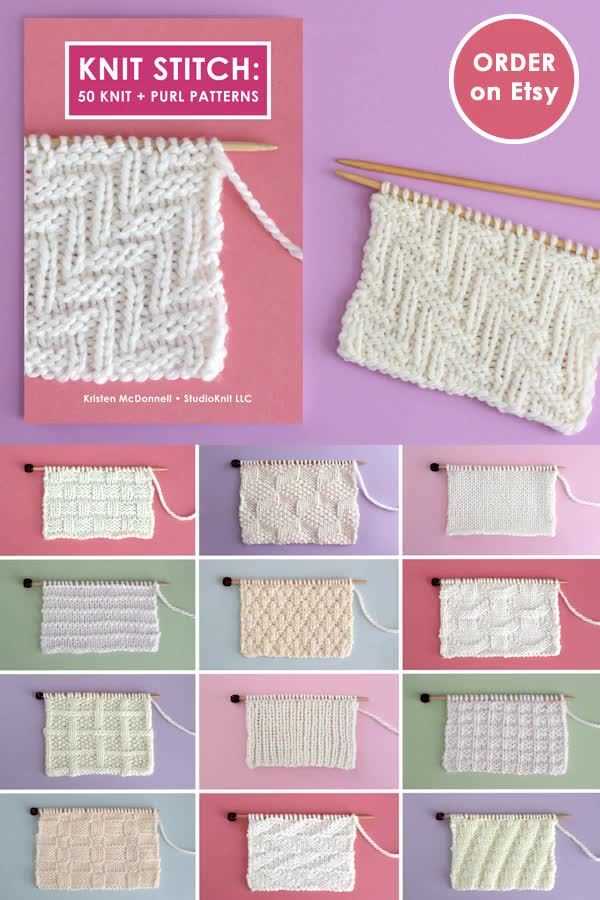
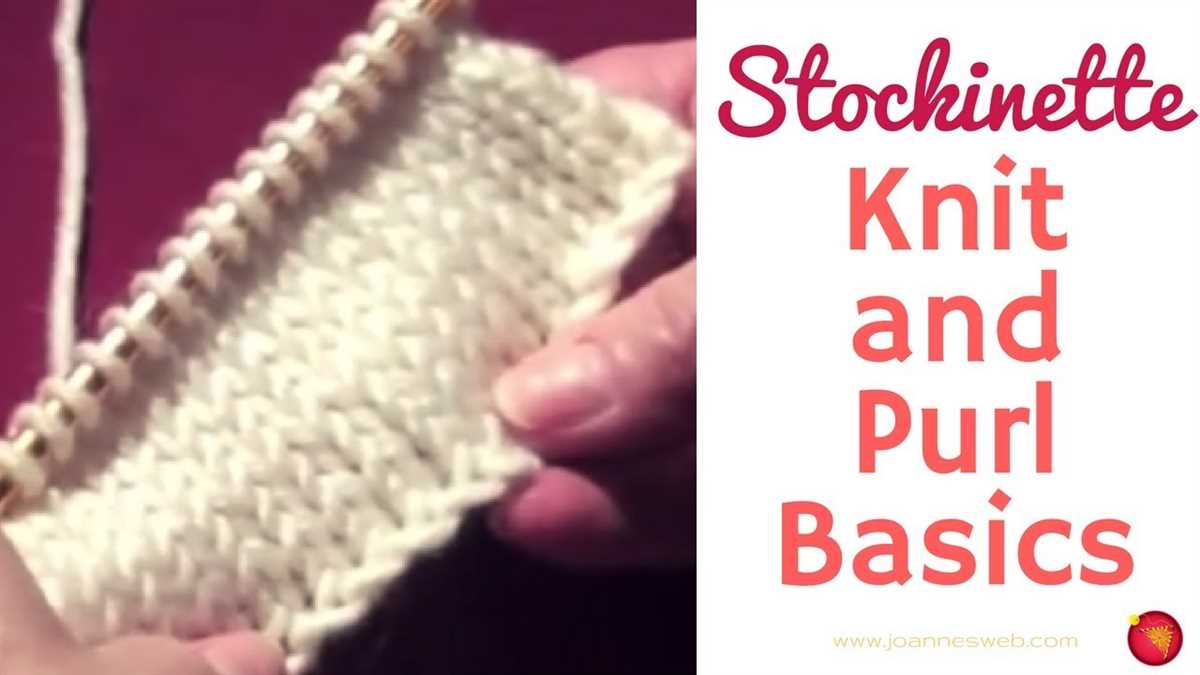
By combining these two stitches in different sequences and patterns, an endless variety of textures and designs can be created. The most commonly used knit and purl pattern is the stockinette stitch, which is created by knitting one row and purling the next row. This creates a smooth side (the knit side) and a textured side (the purl side).
Knit and purl patterns can be simple or complex, depending on the desired outcome. They can be used to create simple, classic designs like ribbing or more intricate patterns like cables and lace. Beginners often start with simple knit and purl patterns to practice their technique and develop their skills before moving on to more advanced projects.
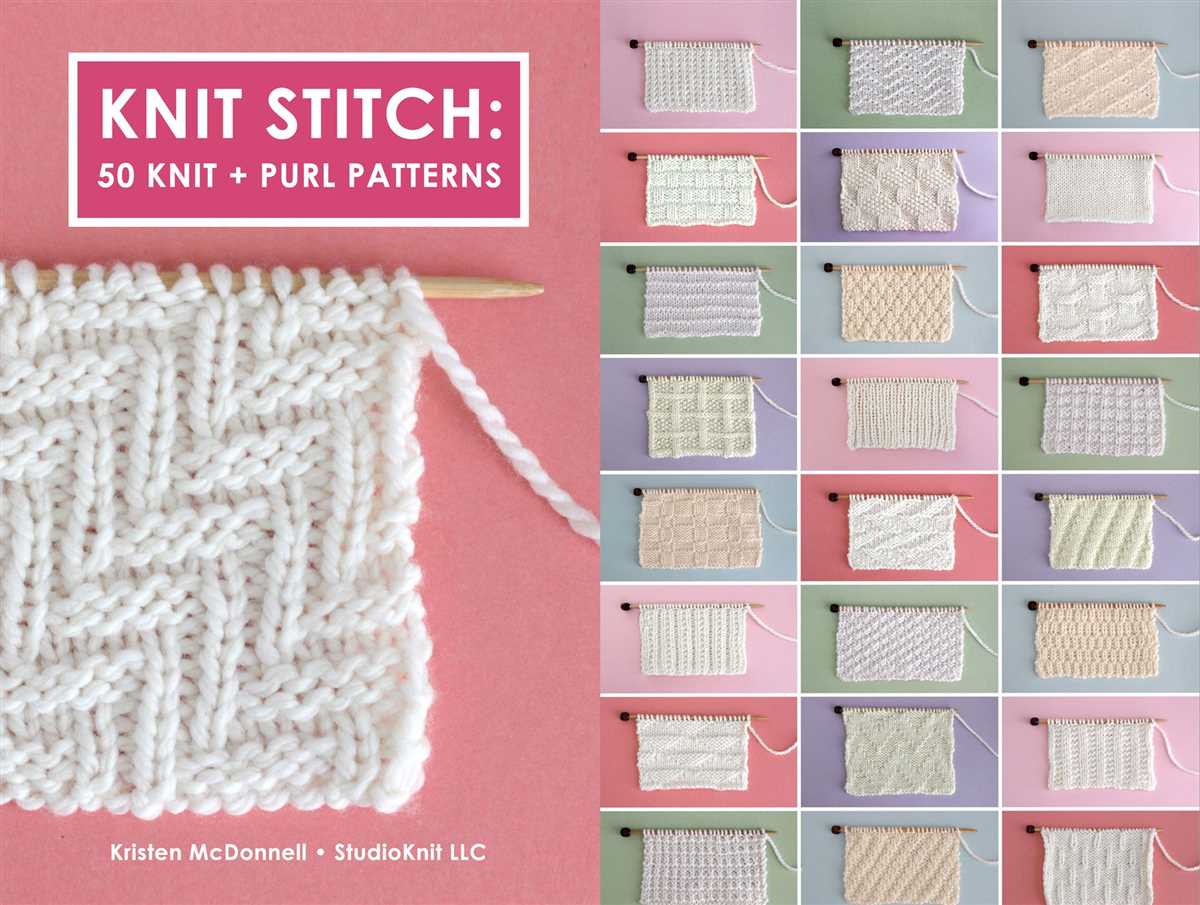
Knit and Purl Pattern: A Beginner’s Guide

Knitting is a popular craft that allows you to create beautiful and functional items using just a pair of needles and some yarn. One of the most basic and essential techniques in knitting is the knit and purl pattern. It forms the foundation for a wide range of stitch patterns and designs, making it a must-learn for beginners.
The Knit Stitch: The knit stitch is the foundation of knitting. To make a knit stitch, insert the right-hand needle into the first stitch on the left-hand needle from left to right. Wrap the yarn around the right-hand needle counterclockwise and pull it through the stitch, bringing it onto the right-hand needle. Repeat this process for each stitch on the left-hand needle.
The Purl Stitch: The purl stitch is the second basic stitch in knitting. To create a purl stitch, insert the right-hand needle into the first stitch on the left-hand needle from right to left. Wrap the yarn around the right-hand needle clockwise and pull it through the stitch, bringing it onto the right-hand needle. Repeat this process for each stitch on the left-hand needle.
By combining the knit and purl stitches in different ways, you can create a variety of patterns and textures. The most common combination is the stockinette stitch, which alternates rows of knit stitches with rows of purl stitches. This creates a smooth, flat fabric with the knit stitches forming “V” shapes on the right side and the purl stitches creating horizontal bars on the wrong side.
As a beginner, it’s important to practice the knit and purl stitches until you feel comfortable with them. Start by knitting a simple swatch, alternating between knit and purl stitches to practice the basic pattern. Once you’ve mastered these stitches, you can explore more advanced patterns and techniques, such as ribbing, cables, and lace.
In conclusion, the knit and purl pattern is the foundation of knitting and an essential technique for beginners to learn. With practice and patience, you can create beautiful and intricate designs using these two simple stitches. So grab your needles and yarn, and start knitting your way to a world of creativity!
What is Knit and Purl?
The knit and purl pattern is a fundamental technique in knitting, used to create different textures and patterns in the fabric. It involves working with two basic stitches: the knit stitch and the purl stitch. These stitches are the building blocks of most knitting projects and can be combined in various ways to create a wide range of patterns.
The knit stitch is created by inserting the right-hand needle into the front of the stitch on the left-hand needle, wrapping the yarn around the needle, and pulling it through the stitch to create a new loop. This creates a smooth, V-shaped stitch on the right side of the fabric. The purl stitch, on the other hand, is created by inserting the right-hand needle into the front of the stitch on the left-hand needle, but this time from right to left. The yarn is then wrapped around the needle in the opposite direction and pulled through the stitch to create a bump or purl on the right side of the fabric.
To create a knit and purl pattern, a combination of knit and purl stitches is used. For example, a common pattern is the stockinette stitch, which is created by knitting one row and purling the next row. This results in a smooth, flat fabric on the right side and a bumpy, purl fabric on the wrong side. Other patterns, such as ribbing or seed stitch, can be created by alternating knitted and purled stitches in different sequences.
The knit and purl pattern is versatile and can be used to create a wide variety of textures and designs in knitting. It is commonly used in sweaters, scarves, hats, and many other types of garments and accessories. Whether you are a beginner or an experienced knitter, mastering the knit and purl pattern is essential to expanding your knitting skills and creating beautiful, intricate projects.
Essential Knitting Terminology
When you first start knitting, it can feel like you’re learning a whole new language. Knitting has its own set of terminology that may sound unfamiliar at first. However, once you familiarize yourself with these key terms, you’ll be able to understand knitting patterns and instructions with ease.
Here are some essential knitting terms to know:
1. Knit Stitch
The knit stitch is one of the basic stitches in knitting. It is created by inserting the right needle into the front of the stitch on the left needle, wrapping the yarn around the right needle, and pulling it through to create a new stitch. The knit stitch is often represented in patterns as “K”.
2. Purl Stitch
The purl stitch is another basic stitch in knitting. It is created by inserting the right needle into the front of the stitch on the left needle, but instead of wrapping the yarn around the right needle, the yarn is wrapped counterclockwise behind the right needle. The purl stitch is often represented in patterns as “P”.
3. Stockinette Stitch
The stockinette stitch is a classic knitting pattern that is created by alternating rows of knit and purl stitches. In this pattern, the knit stitches create a smooth “v” pattern on one side, while the purl stitches create a bumpy texture on the other side.
4. Casting On
Casting on is the process of creating the first row of stitches on the needle. It is the starting point for any knitting project. There are various methods for casting on, such as the long-tail cast on, the knit cast on, and the cable cast on.
5. Binding Off
Binding off, also known as casting off, is the process of finishing the last row of stitches and securing them so that they don’t unravel. It is the final step in completing a knitting project. Binding off can be done in different ways, such as the basic bind off, the stretchy bind off, or the picot bind off.
6. Gauge
Gauge refers to the number of stitches and rows per inch in a knitted fabric. It is an important measurement to ensure that your finished garment or project matches the size stated in the pattern. The gauge is usually determined by using a specific size of knitting needles and the recommended yarn.
7. Yarn Over
A yarn over is a technique used to create an extra stitch and form decorative holes or eyelets in the knitting. It is accomplished by simply wrapping the yarn around the right needle before or after a specific stitch.
8. Decrease
A decrease is a technique used to reduce the number of stitches in a row. It is often used to shape the knitting or create decorative patterns. There are different methods for decreasing, such as knitting or purling two stitches together, or slipping stitches.
By familiarizing yourself with these essential knitting terms, you will be well-equipped to take on any knitting project and effectively follow knitting instructions. Happy knitting!
Choosing the Right Yarn and Needles
When it comes to knitting, choosing the right yarn and needles is essential in achieving the desired result. The type of yarn you choose will determine the overall feel and appearance of your project, while the size of the needles will affect the tension and gauge of your stitches.
Yarn: When selecting yarn for your knit and purl pattern, consider the fiber content, weight, and texture. Different fibers have different properties, such as warmth, softness, and durability. For example, wool yarn is known for its warmth and elasticity, while cotton yarn is cool and breathable. Consider the weight of the yarn as well, as it will determine how fine or bulky your finished project will be. Additionally, the texture of the yarn, such as smooth, fluffy, or textured, will add a unique touch to your knitting.
Needles: The size of your needles is crucial in achieving the right tension and gauge for your knit and purl pattern. The recommended needle size for a particular yarn is typically listed on the yarn label or in the pattern instructions. Generally, thicker yarns require larger needles, while finer yarns require smaller needles. However, it is important to consider your own knitting style and tension. If you tend to knit tightly, you may need to use slightly larger needles to achieve the desired gauge. Similarly, if you knit loosely, using smaller needles may help you achieve the correct tension.
When choosing the right yarn and needles for your knit and purl pattern, it is important to consider both the aesthetic and functional aspects of your project. Experimenting with different yarns and needle sizes can lead to unique and personalized results, allowing you to create a knitted piece that is truly your own.
Getting Started with a Basic Knit Stitch
Learning how to knit is a fun and rewarding hobby that allows you to create beautiful and cozy items. One of the first stitches every knitter learns is the basic knit stitch. Mastering this stitch is essential for creating a wide range of knitting patterns and projects.
To get started with the basic knit stitch, you will need a pair of knitting needles and yarn. Choose a size of knitting needles that is appropriate for the weight of your yarn. Thicker yarn usually requires larger needles, while thinner yarn requires smaller needles. Once you have your materials ready, you are ready to begin knitting.
Start by making a slipknot on one of the knitting needles. This is a loop that will serve as the first stitch of your knitting. Hold the needle with the slipknot in your right hand, and insert the other needle into the slipknot from left to right, going under the first needle.
Hold the second needle (empty needle) with your left hand, and use it to wrap the yarn around the back of the first needle counterclockwise. The wrapped yarn should be behind both needles.
Now, bring the second needle (with the wrapped yarn) through the slipknot, from front to back. This will create a new loop on the second needle. Slip the new loop onto the first needle, and pull the stitch tight.
Congratulations! You have just completed your first knit stitch. Repeat these steps to create more knit stitches, and you will soon have a beautiful piece of knitting. With practice, your knitting will become more even and smooth, and you will be able to tackle more advanced knitting techniques and patterns.
Mastering the Purl Stitch
The purl stitch is one of the fundamental stitches in knitting, and mastering it is essential for creating a variety of patterns and textures in your projects. It is the reverse of the knit stitch, creating a loop on the front of the fabric rather than the back. Learning to purl opens up a world of possibilities in your knitting repertoire.
To execute the purl stitch, first, insert the right needle into the first stitch on the left needle from right to left, going through the front of the stitch. Wrap the yarn around the right needle counterclockwise, making sure to hold it in front of the needles. Then, slide the right needle down and under the left needle, pulling the new loop through the old stitch. Finally, slip the old stitch off the left needle, completing the purl stitch.
While the motion of the purl stitch may seem awkward and tricky at first, practice and repetition will help you develop muscle memory and make the process smoother. Remember to maintain a steady tension with your yarn, not too loose or tight, to ensure consistent and even stitches.
The purl stitch is incredibly versatile and can be used in a variety of patterns and designs. When combined with the knit stitch, it opens up endless possibilities for creating unique textures, ribbing, and patterns. With practice and patience, you can master the purl stitch and explore the world of knitting possibilities it offers.
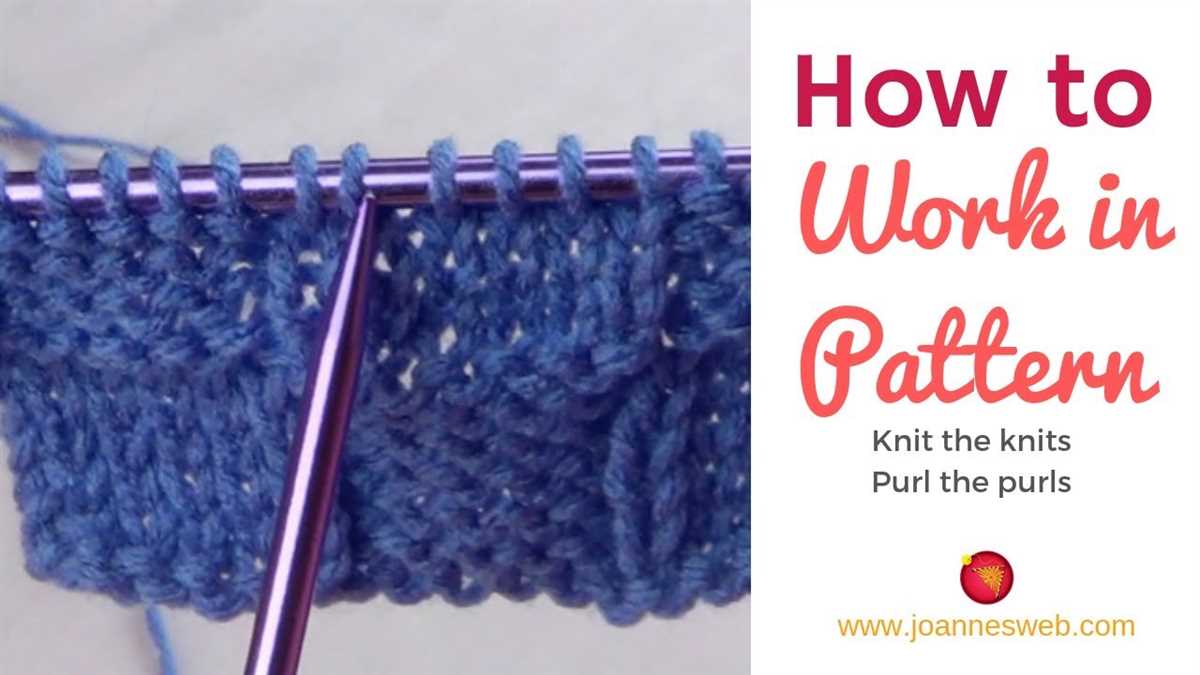
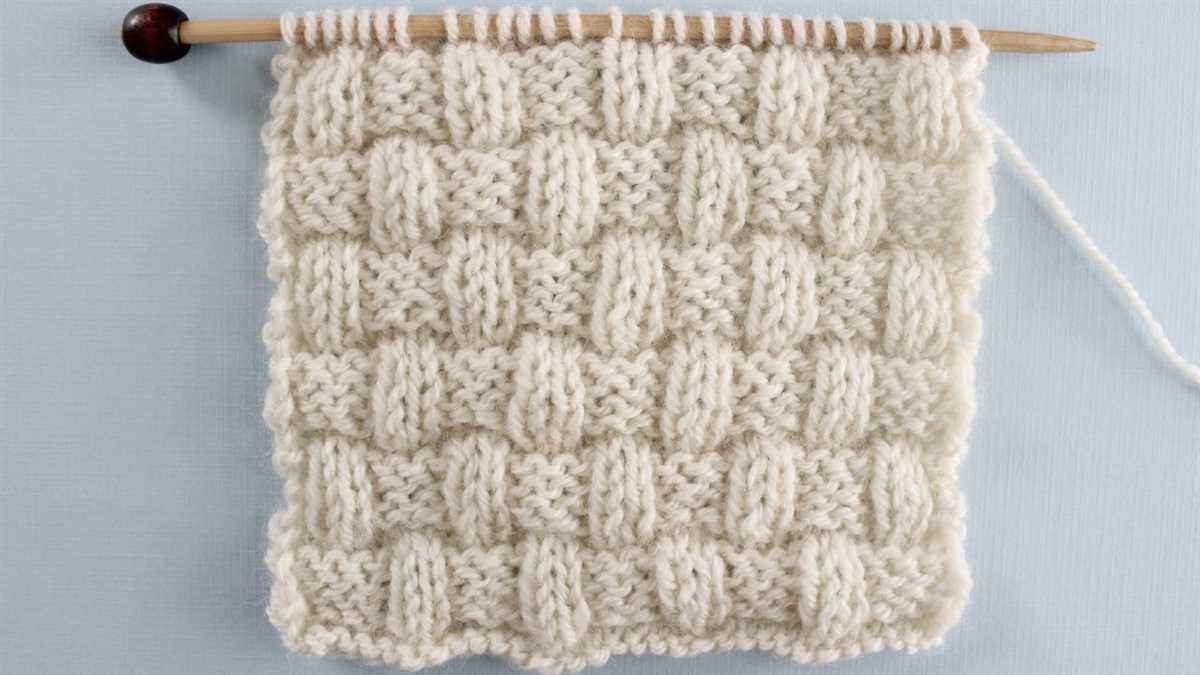
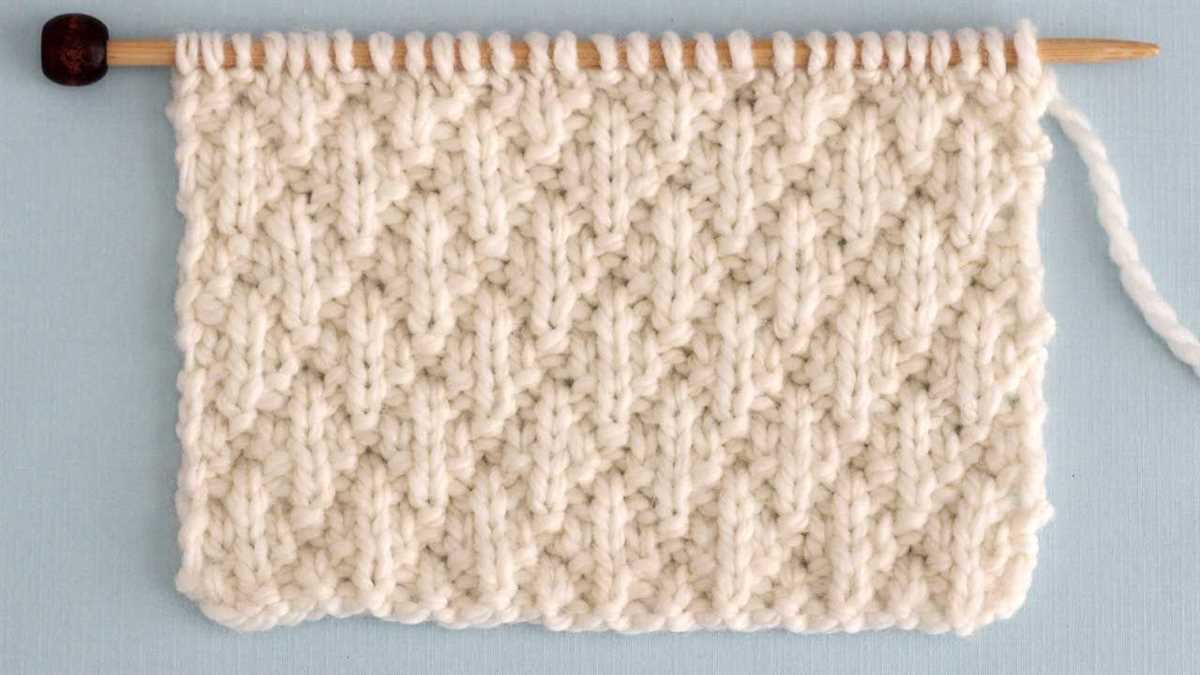
Combining Knit and Purl Stitches
In knitting, there are two basic stitches that form the foundation of most patterns: the knit stitch and the purl stitch. These stitches can be combined in various ways to create different textures and designs in your knitting projects. Understanding how to combine knit and purl stitches will open up a world of possibilities for your knitting creations.
The stockinette stitch: One of the most common ways to combine knit and purl stitches is to create the stockinette stitch. This stitch is created by knitting one row and purling the next. By alternating between these two stitches, you can achieve a smooth and uniform fabric with a distinct right side (the knit side) and wrong side (the purl side). The stockinette stitch is commonly used for garments like sweaters and scarves.
Combining knit and purl stitches in patterns:
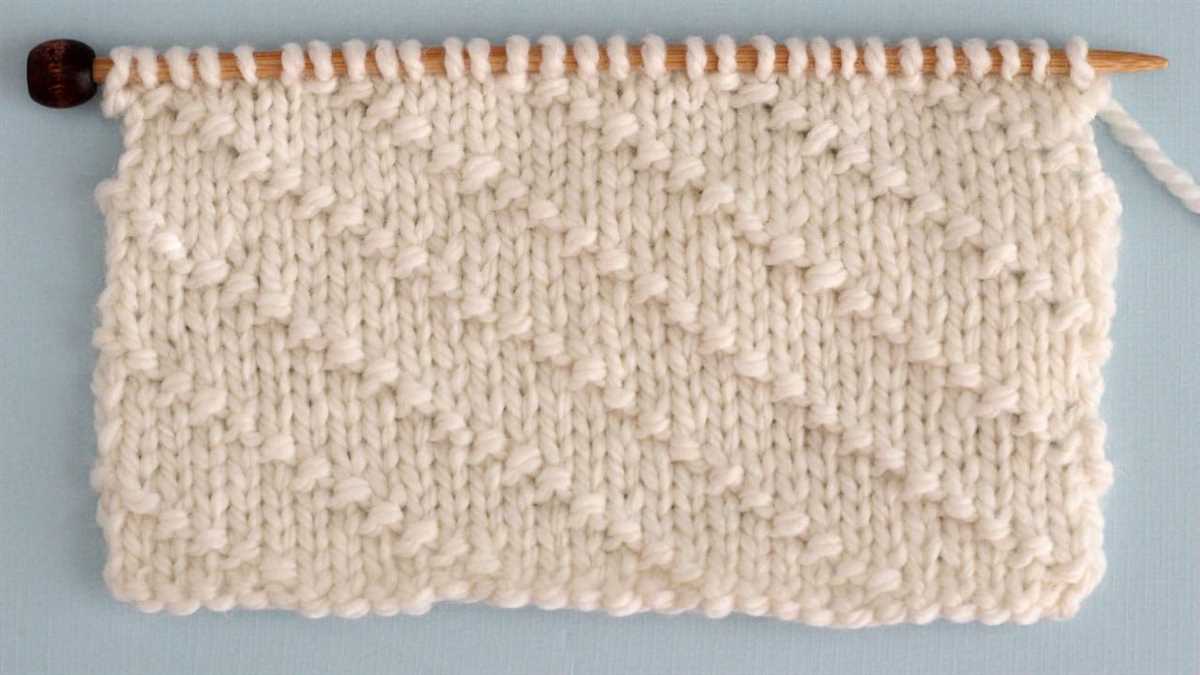
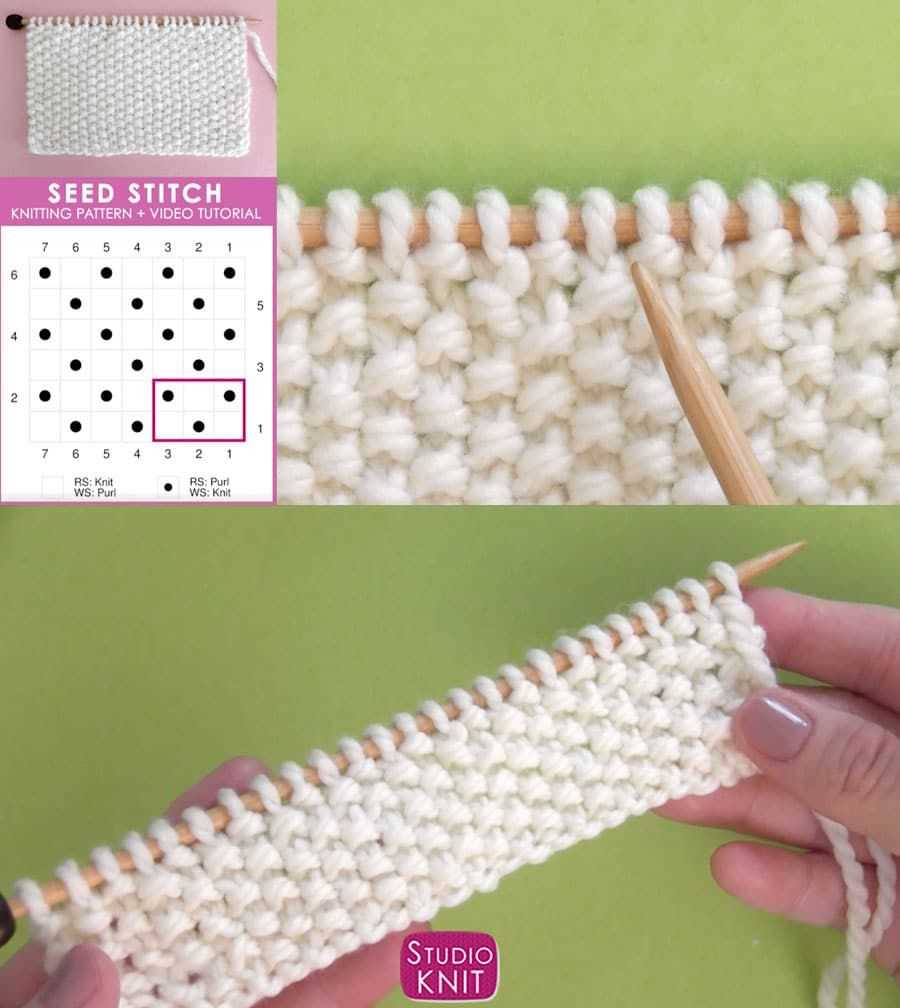
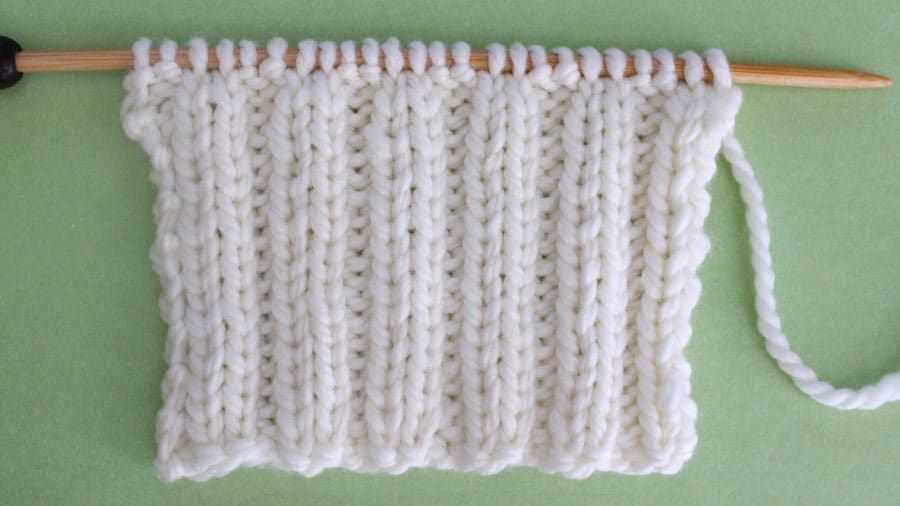
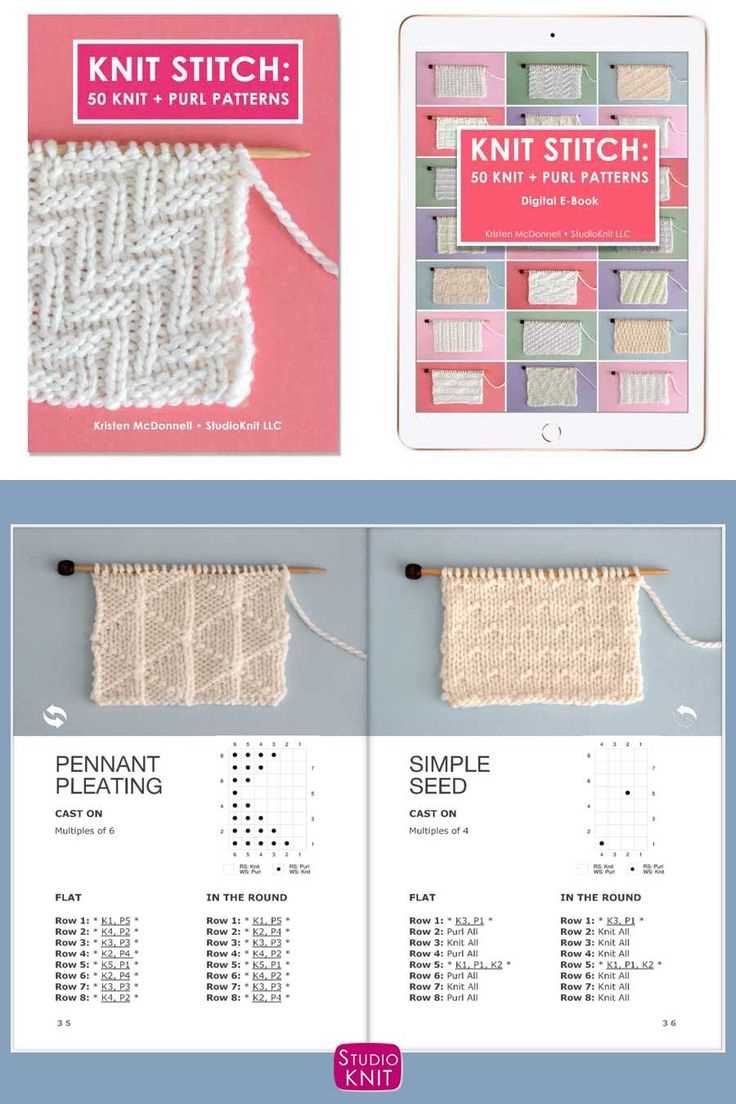
There are countless ways to combine knit and purl stitches to create beautiful and intricate patterns. For example, the seed stitch is created by alternating knit and purl stitches in a checkerboard-like pattern. This stitch creates a textured fabric that is commonly used for borders and edgings. Another example is the rib stitch, which is created by alternating knit and purl stitches in a specific pattern. The rib stitch is commonly used for cuffs, collars, and hems.
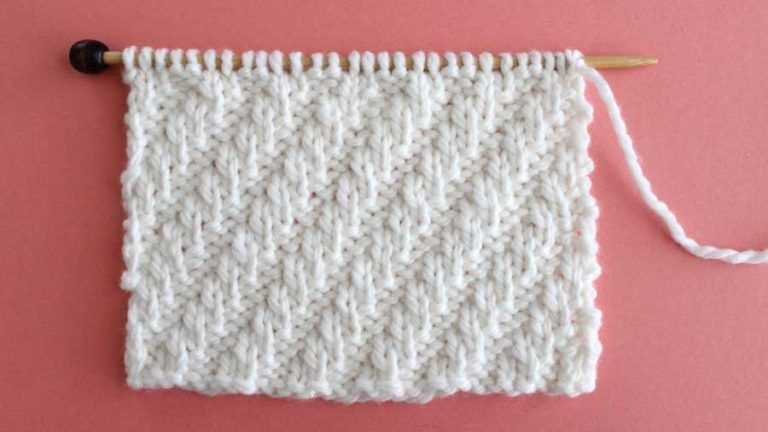
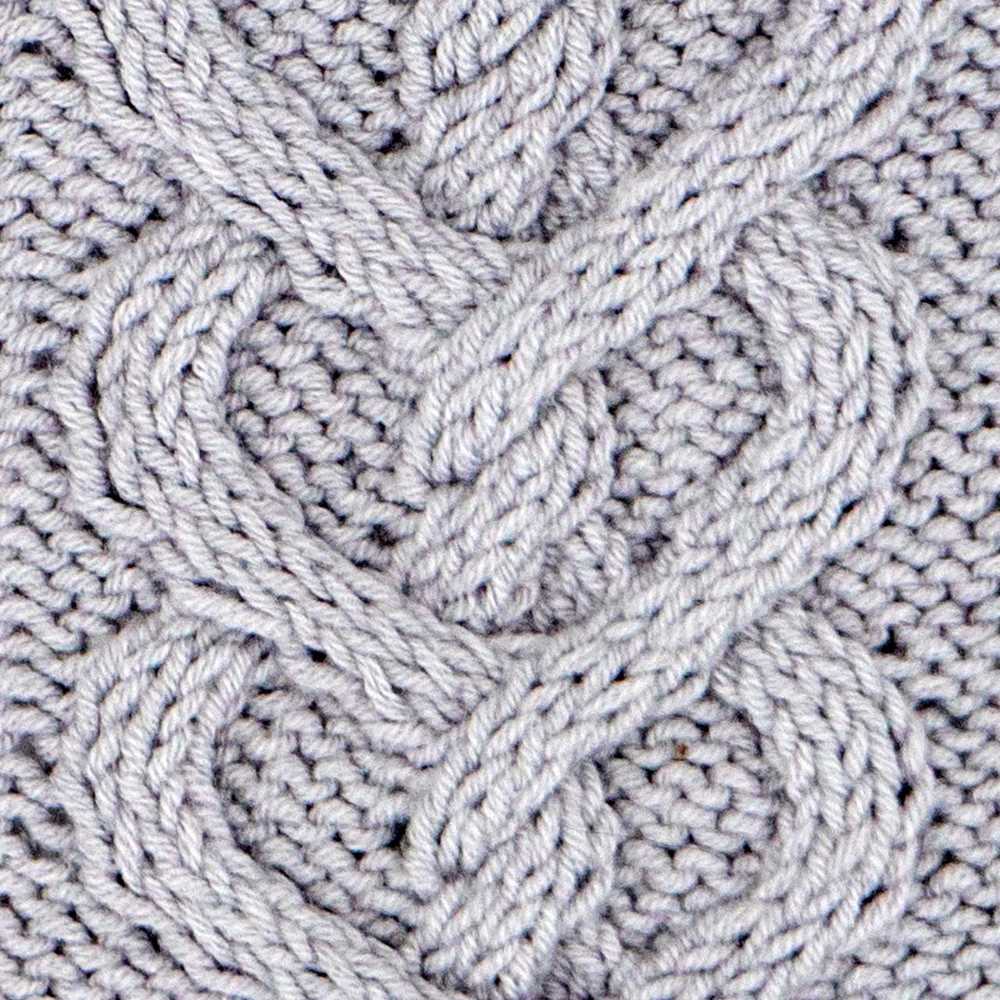
Using knit and purl stitches for cables: Knit and purl stitches can also be combined to create cables, which are a popular design element in knitting. By changing the order of the stitches and crossing them over each other, you can create intricate cable patterns. This technique requires a cable needle or a special technique called “cabling without a cable needle.” Cables add depth and texture to your knitting projects.
Whether you’re a beginner or an experienced knitter, learning how to combine knit and purl stitches is essential for creating a wide range of patterns and designs. Experimenting with different combinations will allow you to personalize your knitting projects and create unique and stunning pieces. So grab your needles and start exploring the endless possibilities of knit and purl stitches!
Creating Patterns with Knit and Purl Stitches
Knitting is a versatile craft that allows you to create a wide variety of patterns and designs using just two basic stitches: knit and purl. These two stitches can be combined in different ways to create intricate patterns, textures, and shapes in your knitting projects.
One of the simplest ways to create a pattern with knit and purl stitches is by alternating between the two. This creates a classic pattern known as stockinette stitch, where the knit stitches form smooth v-shaped ridges on the right side of the fabric and the purl stitches create a bumpy texture on the wrong side. Stockinette stitch is commonly used for sweaters, scarves, and other garments.
To add more complexity to your patterns, you can experiment with different combinations of knit and purl stitches. For example, you can create ribbing by alternating between knit and purl stitches in a specific sequence. This creates a stretchy fabric that is often used for cuffs, collars, and waistbands. You can also create more intricate patterns like cables, lace, and colorwork by combining knit and purl stitches in specific arrangements.
If you’re feeling more adventurous, you can even create your own unique stitch patterns by combining and modifying the knit and purl stitches. By adding increases and decreases, you can create shaping and create three-dimensional textures in your knitting. The possibilities are endless when it comes to creating patterns with knit and purl stitches, so don’t be afraid to experiment and let your creativity run wild!
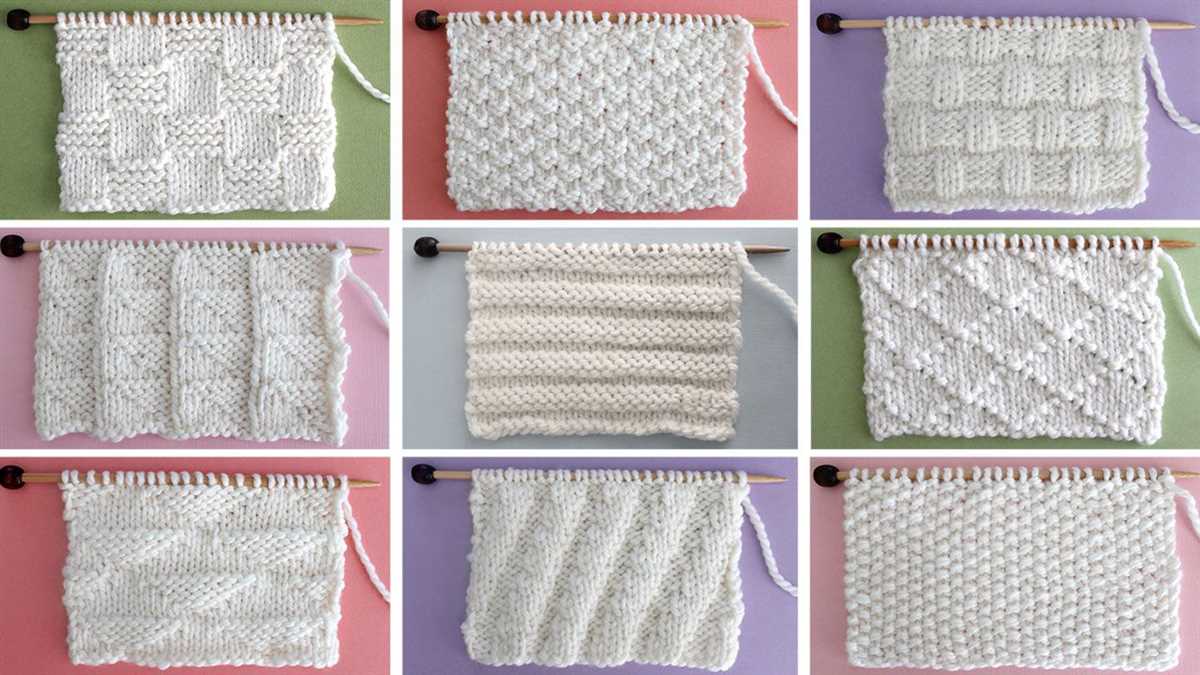
Some examples of patterns created with knit and purl stitches:
- Seed stitch: Alternating between knit and purl stitches in a 1×1 sequence creates a textured pattern with small seed-like bumps.
- Moss stitch: Alternating between knit and purl stitches in a 2×2 sequence creates a textured pattern with larger bumps.
- Ribbing: Alternating between knit and purl stitches in a specific sequence creates a stretchy fabric often used for cuffs, collars, and waistbands.
- Cables: Crossing stitches over each other creates a braided or twisted pattern.
- Lace: Using yarn overs and decreases creates an open and delicate pattern.
- Colorwork: Combining different colors of yarn creates patterns and designs.
Fixing Common Knit and Purl Mistakes
1. Dropped Stitches
Accidentally dropping a stitch while knitting or purling is a common mistake, but it’s fixable. The key is to catch it early. If you notice a dropped stitch, use a crochet hook or a spare knitting needle to carefully pick up the dropped stitch and place it back on the needle. Make sure to secure it by knitting or purling it as required in the pattern.
2. Twisted Stitches
Twisted stitches can happen when you accidentally twist the stitch on the needle while knitting or purling. This can lead to an uneven appearance in your knitting. To fix this, identify the twisted stitch and carefully unravel it to the row where it was formed. Then, insert the needle into the stitch correctly and knit or purl it as required.
3. Accidental Holes
If you’ve accidentally made a hole in your knitting or purling, don’t panic. This can happen if you accidentally skip a stitch or make a wrong yarn over. To fix it, use a crochet hook or a spare knitting needle to pick up the live stitches around the hole and secure them by knitting or purling as required. Make sure to check your pattern for any specific instructions on fixing accidental holes.
Remember, it’s normal to make mistakes while knitting or purling. The key is not to get discouraged and to take your time fixing the mistakes. With some practice and patience, you’ll become more skilled at identifying and fixing common knit and purl mistakes. Happy knitting!
Project Ideas for Knit and Purl Patterns
When it comes to knitting, the knit and purl stitch patterns offer a world of possibilities for creating beautiful and intricate designs. Whether you are a beginner or an experienced knitter, there are plenty of project ideas that you can explore using these basic stitches. Here are some inspiring ideas to get you started:
1. Scarves and Shawls
Scarves and shawls are classic knitwear items that can showcase the beauty of knit and purl patterns. You can experiment with different combinations of stitches to create various textures and designs. From simple garter stitch scarves to more complex lace shawls, the options are endless.
2. Sweaters
Knitting a sweater with knit and purl patterns can give you a garment that is not only warm and cozy but also visually appealing. You can use these stitches to create interesting patterns on the body, sleeves, or neckline of the sweater. Whether you prefer a simple textured design or an intricate cable pattern, there are plenty of options to explore.
3. Hats and Beanies
A hat or beanie knitted with knit and purl patterns can be a trendy addition to your winter wardrobe. You can experiment with different stitch patterns to create unique designs on the crown or brim of the hat. Adding a pom-pom or a decorative button can further enhance the look of your knitted accessory.
4. Blankets and Throws
Creating a cozy blanket or throw using knit and purl patterns can be a rewarding project. You can combine different stitch patterns to create a visually appealing design that will keep you warm on chilly days. The texture and depth created by these stitches will add an extra touch of comfort to your home.
5. Baby Clothing
Knit and purl patterns are perfect for creating adorable baby clothing items. Whether it’s a cute little cardigan, a cozy onesie, or a pair of tiny booties, the possibilities for using these stitches are endless. The softness and warmth of the fabric created by knit and purl stitches make them ideal for delicate baby skin.
- Experiment with different combinations of knit and purl stitches to create unique patterns.
- Try incorporating other techniques like cables or lace into your knit and purl projects for added interest.
- Don’t be afraid to get creative with color – you can knit with multiple colors or use variegated yarn to add depth to your designs.
Remember, knitting is all about creativity and having fun. So grab your needles, some yarn, and start exploring the world of knit and purl patterns!
Further Resources and Inspiration
Now that you have learned the basics of knit and purl patterns, there are many resources available to help you further develop your knitting skills and find inspiration for your projects.
Here are some recommended resources:
- Knitting Books: There are countless knitting books available that can provide you with detailed instructions, patterns, and inspiration. Some popular ones include “Knitting Without Tears” by Elizabeth Zimmermann, “The Knitter’s Book of Knowledge” by Debbie Bliss, and “The Principles of Knitting” by June Hemmons Hiatt.
- Online Knitting Communities: Joining online knitting communities can help you connect with other knitters, learn new techniques, and find inspiration for your projects. Websites like Ravelry, KnittingHelp, and LoveKnitting provide forums, patterns, and tutorials.
- YouTube Tutorials: YouTube is a great platform for finding video tutorials that demonstrate various knitting techniques. Channels like VeryPink Knits, KnitPicks, and Purl Soho offer step-by-step instructions for different knitting stitches and patterns.
- Knitting Magazines: Subscribing to knitting magazines, such as Interweave Knits, Vogue Knitting, or Simply Knitting, can keep you updated on the latest trends and provide you with new patterns and inspiration.
- Local Knitting Groups: Joining a local knitting group or attending knitting workshops can be a fun way to meet other knitters, learn new techniques, and get inspired by their projects.
- Online Pattern Repositories: Websites like Knitting Pattern Central, Knitty, and Lion Brand Yarns offer a wide range of free knitting patterns. Browse through their collections to find new projects to try.
Remember, practice makes perfect! The more you knit and experiment with different knit and purl patterns, the more confident and skilled you will become. Don’t be afraid to try new things and make mistakes along the way. Knitting is not only a craft but also a creative outlet, so have fun and enjoy the process!