
Knitting is a popular pastime that allows you to create beautiful and unique items, such as sweaters, scarves, and hats. However, when you first start out, reading a knit pattern can be a bit intimidating. With all of the abbreviations and symbols, it can seem like another language. But fear not! Learning how to read a knit pattern is easier than you might think. In this article, we’ll break down the basic components of a knit pattern and explain how to interpret them.
The first thing you’ll notice when you look at a knit pattern is the list of materials you’ll need. This will typically include the type and weight of yarn, as well as the size and type of needles. It’s important to choose the correct materials, as they will affect the final result of your project. If you’re unsure, consult the gauge section of the pattern, which will give you an idea of how many stitches and rows should be in a certain measurement of fabric.
Next, you’ll come across the instructions for the pattern itself. These will be written in a combination of abbreviations and English words. The abbreviations are a shorthand way of indicating a certain stitch or technique. You’ll need to refer to a key, often provided at the beginning of the pattern, to decode these abbreviations. Once you understand the abbreviations, the instructions will make much more sense.
As you read through the pattern, you’ll also notice that there are often multiple sizes or variations of the same item included. Make sure you’re following the instructions for your desired size or variation. If there are different sections for each size, such as “Small (Medium, Large),” be sure to read the instructions for your chosen size. It’s also a good idea to highlight or circle the instructions that pertain to your size to avoid confusion later on.
Understanding a Knit Pattern: A Step-by-Step Guide
Knitting patterns can sometimes be intimidating, with their abbreviations, symbols, and jargon. However, understanding how to read a knit pattern is an essential skill for any knitter and can open up a world of possibilities for creating beautiful and intricate designs. In this step-by-step guide, we will break down the components of a knit pattern and explain how to decipher them.
1. Start with the Materials and Gauge:
Before diving into a knit pattern, it’s crucial to check the required materials and gauge. The materials list will specify the type and amount of yarn, as well as the recommended needle size. Make sure to have the necessary materials ready before starting. The gauge refers to the number of stitches and rows per inch achieved by the pattern’s recommended needle and yarn. Check your tension by knitting a gauge swatch to ensure your finished project will be the correct size and fit.
2. Read the Instructions:
The instructions section of the knit pattern provides a detailed explanation of how to create the desired item. It includes step-by-step instructions, often divided into sections such as “cast on,” “body,” “sleeves,” and “finishing.” Each section will have its own set of instructions, abbreviations, and any necessary stitch patterns. Take the time to read through the instructions carefully before beginning, making note of any unfamiliar terms or techniques.
3. Understand the Abbreviations:
Knit patterns use a range of abbreviations to save space and make the instructions easier to read. Become familiar with common knitting abbreviations such as “k” for knit, “p” for purl, “yo” for yarn over, and “sl” for slip. The pattern will typically include a key or glossary at the beginning or end, explaining the meaning of each abbreviation used. Always refer back to the key if you encounter an abbreviation you’re unsure about.
4. Decipher the Stitch Patterns:
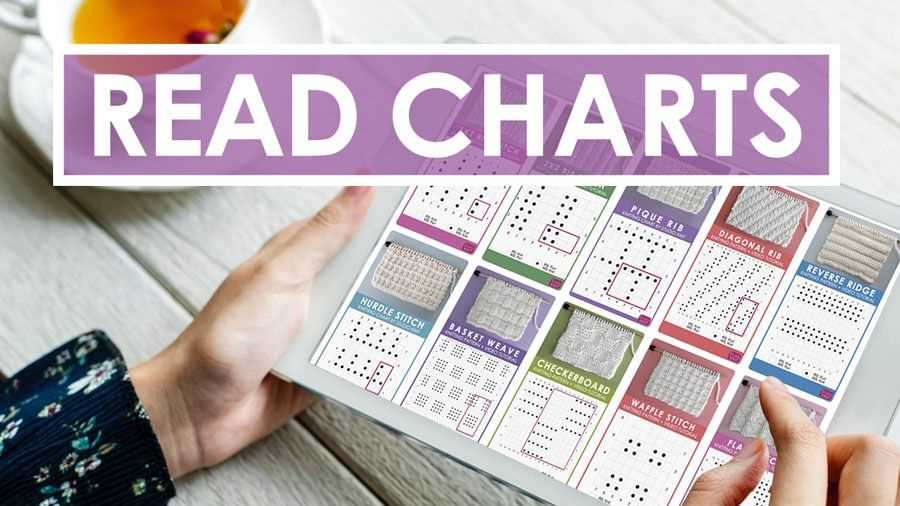
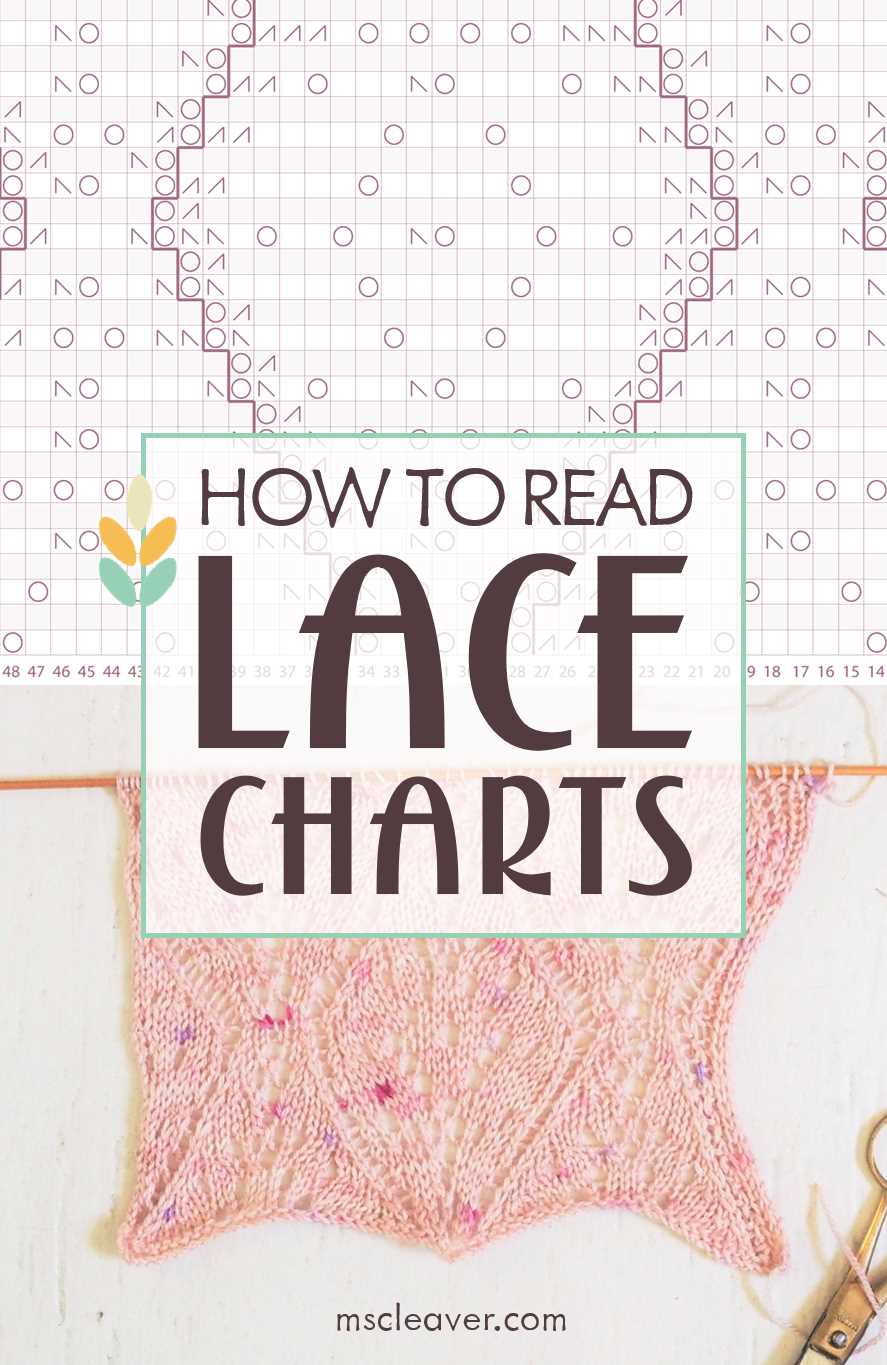
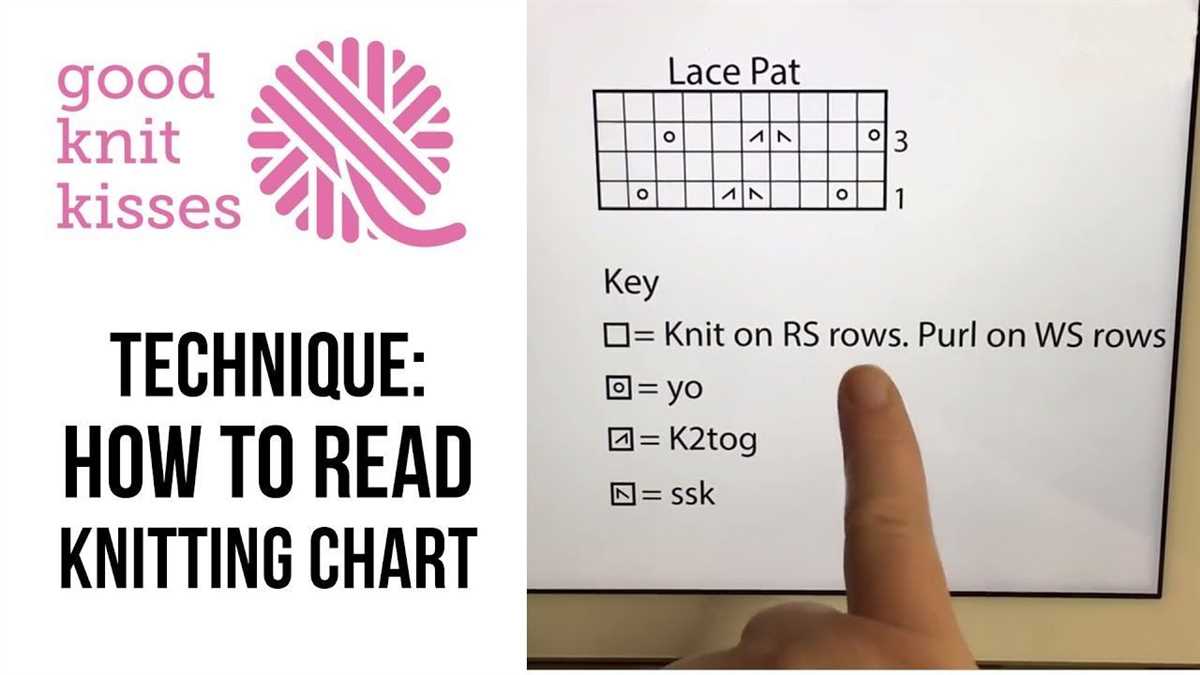
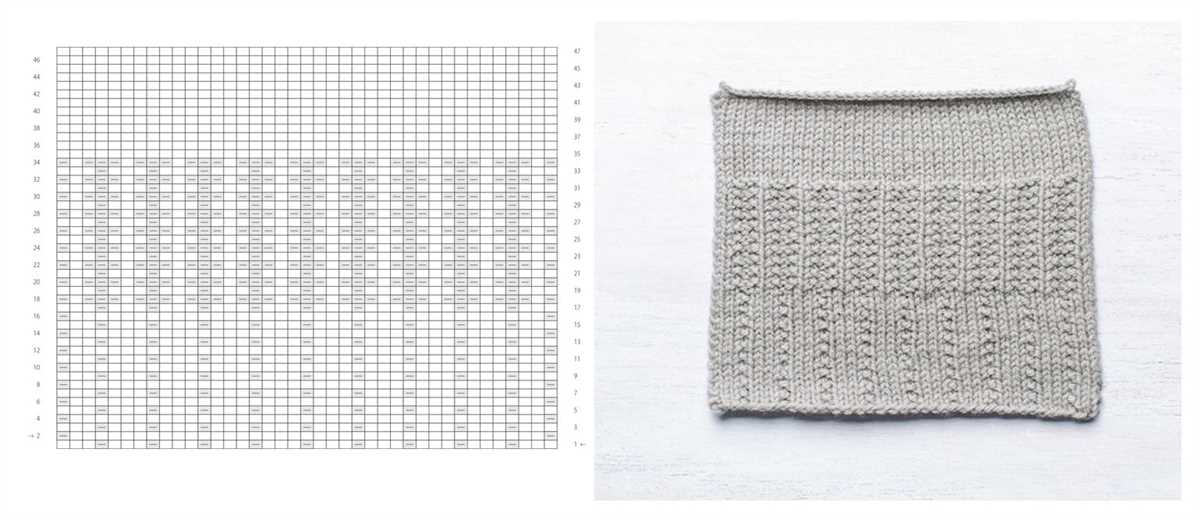
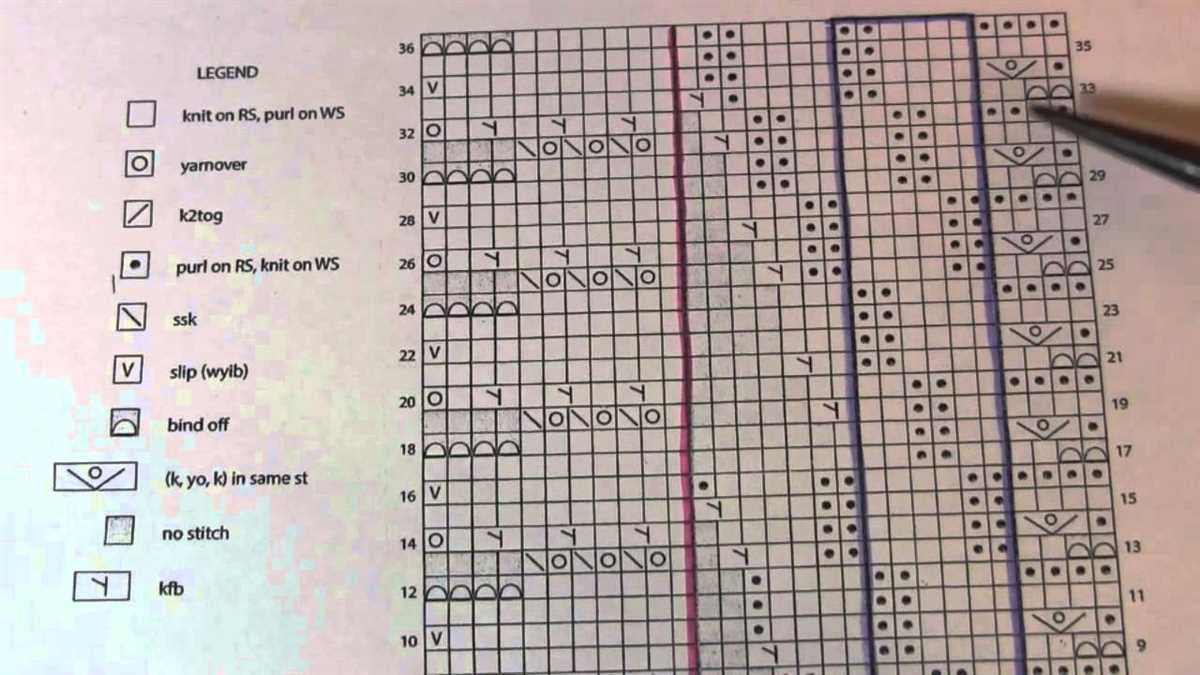
Many knit patterns feature stitch patterns that add texture, color, or design elements to the finished piece. Stitch patterns are typically given in chart or written form. Charts use symbols to represent each stitch, while written instructions spell out each step. Pay close attention to the stitch pattern section of the pattern and follow the instructions carefully to achieve the desired effect.
By following these steps and taking the time to understand the components of a knit pattern, you’ll be well-equipped to tackle any knitting project with confidence. With practice, reading knit patterns will become second nature, and you’ll be able to bring a wide variety of beautiful designs to life with your knitting needles. Happy knitting!
Getting Started: Materials and Tools You’ll Need

Before diving into reading a knit pattern, it’s important to gather all the necessary materials and tools. Having everything on hand will make the process much smoother and help you stay organized.
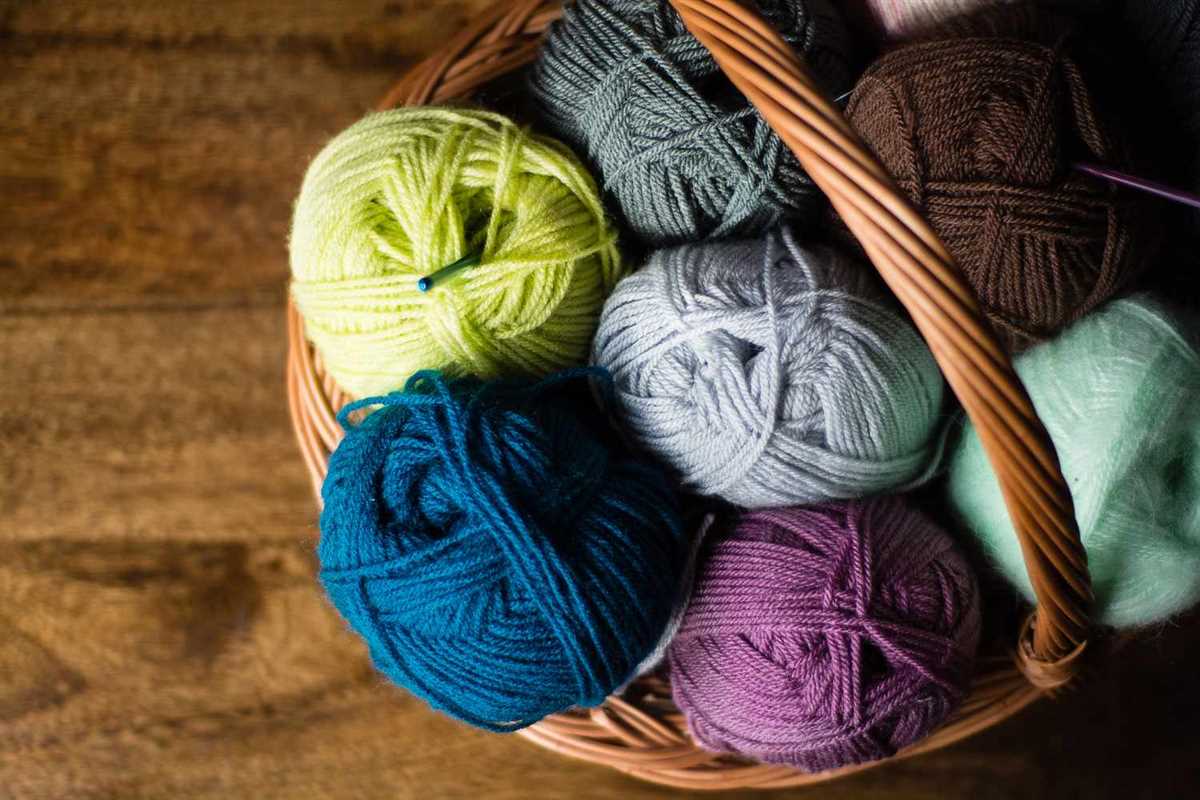
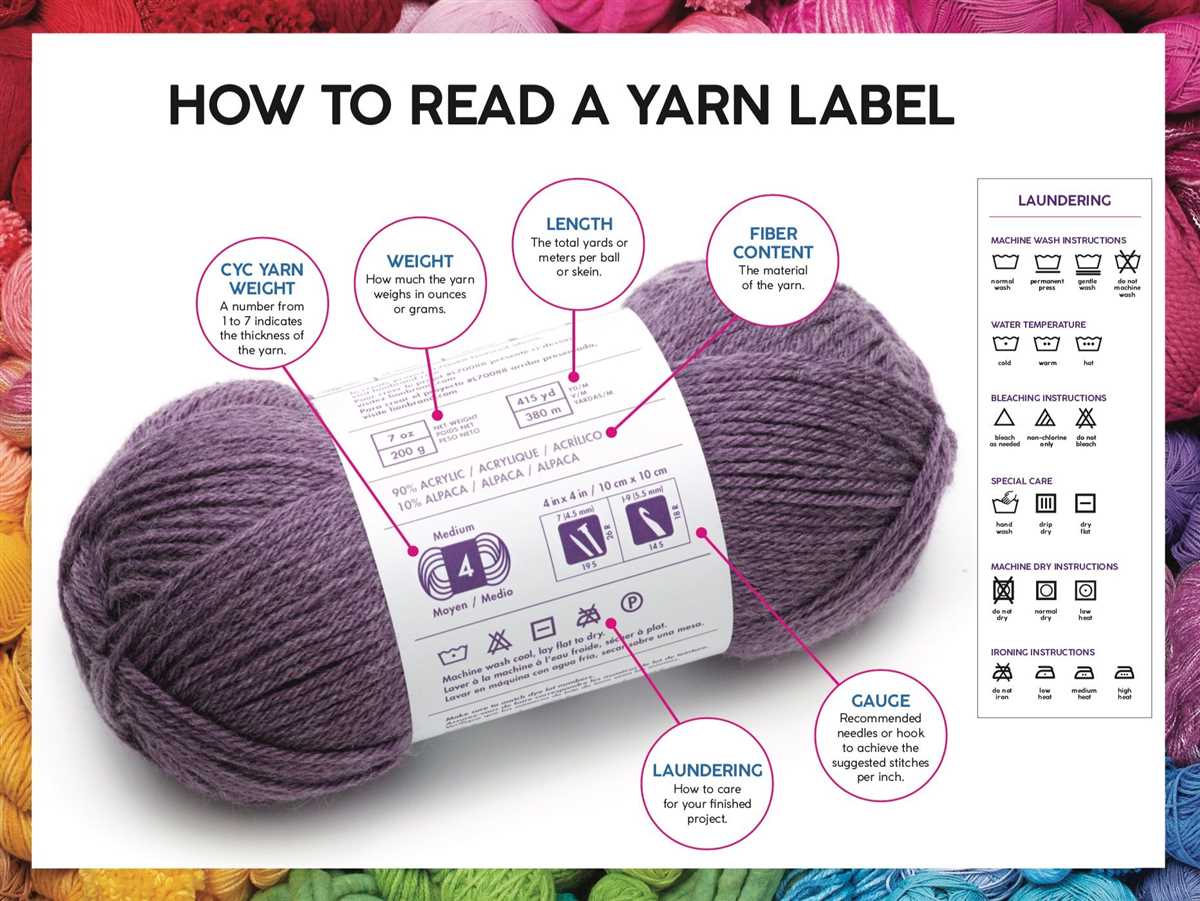
Yarn: The first thing you’ll need is the yarn specified in the pattern. Yarn comes in different weights, which are categorized by numbers. Make sure to choose the right weight as indicated in the pattern. Additionally, consider the fiber content and color of the yarn to match your desired project.
Knitting Needles: Next, you’ll need a pair of knitting needles. The pattern will specify the needle size, which is usually indicated by a number or letter. The needle size will dictate the gauge, or the number of stitches and rows per inch. Make sure to use the correct size to achieve the desired results.
Tape Measure: A tape measure is an essential tool for knitting. It allows you to check your gauge and measure your progress as you go along. It’s important to keep track of your measurements to ensure the final product fits properly.
Stitch Markers: Stitch markers are used to mark specific stitches or sections in your pattern. They come in different sizes and shapes, and you can choose which ones work best for you. Stitch markers are particularly helpful when working with complex patterns or repetitive sections.
Darning Needle: A darning needle, also known as a yarn needle or tapestry needle, is used for sewing in loose ends and seaming pieces together. It’s important to choose a needle with a large enough eye to accommodate the yarn thickness.
Scissors: Finally, a pair of sharp scissors is essential for cutting yarn and trimming loose ends. It’s important to keep your scissors sharp to ensure clean and precise cuts.
By having these materials and tools ready, you’ll be well-equipped to read and follow a knit pattern with confidence. As you gain more experience, you may find additional tools that work best for you. Don’t be afraid to experiment and find your own knitting style!
Decoding the Abbreviations: Understanding the Language of Knit Patterns
When you first start reading a knit pattern, it may seem like you’re looking at a foreign language. The patterns are often filled with abbreviations that can be confusing if you’re not familiar with them. However, once you understand the language of knit patterns, it becomes much easier to follow along and create beautiful knitted pieces.
1. Stitch Abbreviations: One of the first things you’ll encounter in a knit pattern are stitch abbreviations. These abbreviations represent different knitting techniques and stitches. Some common stitch abbreviations include “k” for knit stitch, “p” for purl stitch, “yo” for yarn over, and “k2tog” for knit two stitches together. It’s important to become familiar with these abbreviations so that you can easily understand the instructions and perform the necessary stitches.
2. Decrease and Increase Abbreviations: Knit patterns often include instructions for decreasing or increasing the number of stitches in a row. Decrease abbreviations such as “k2tog” or “ssk” indicate that you need to decrease the number of stitches, while increase abbreviations like “m1” or “yo” mean that you need to increase the number of stitches. Understanding these abbreviations is crucial for creating the correct shape and size of your knitted piece.
3. Repeat and Parentheses: Knit patterns often include instructions for repeating a set of stitches or for working stitches within parentheses. The repeat symbol, usually indicated by an asterisk (*) or a number, tells you to repeat a specific set of stitches or instructions multiple times. Parentheses are used to group stitches or instructions and are often used for shaping or decorative purposes. Paying attention to the repeat symbols and parentheses will help you follow the pattern accurately.
Reading the Schematic: Interpreting the Visual Representation of the Pattern

When working with a knit pattern, it is important to understand how to read the schematic. The schematic is a visual representation of the pattern, showing the dimensions, stitch counts, and placement of different elements such as increases, decreases, and shaping. By learning how to interpret the schematic, you can better follow the instructions and achieve the desired outcome.
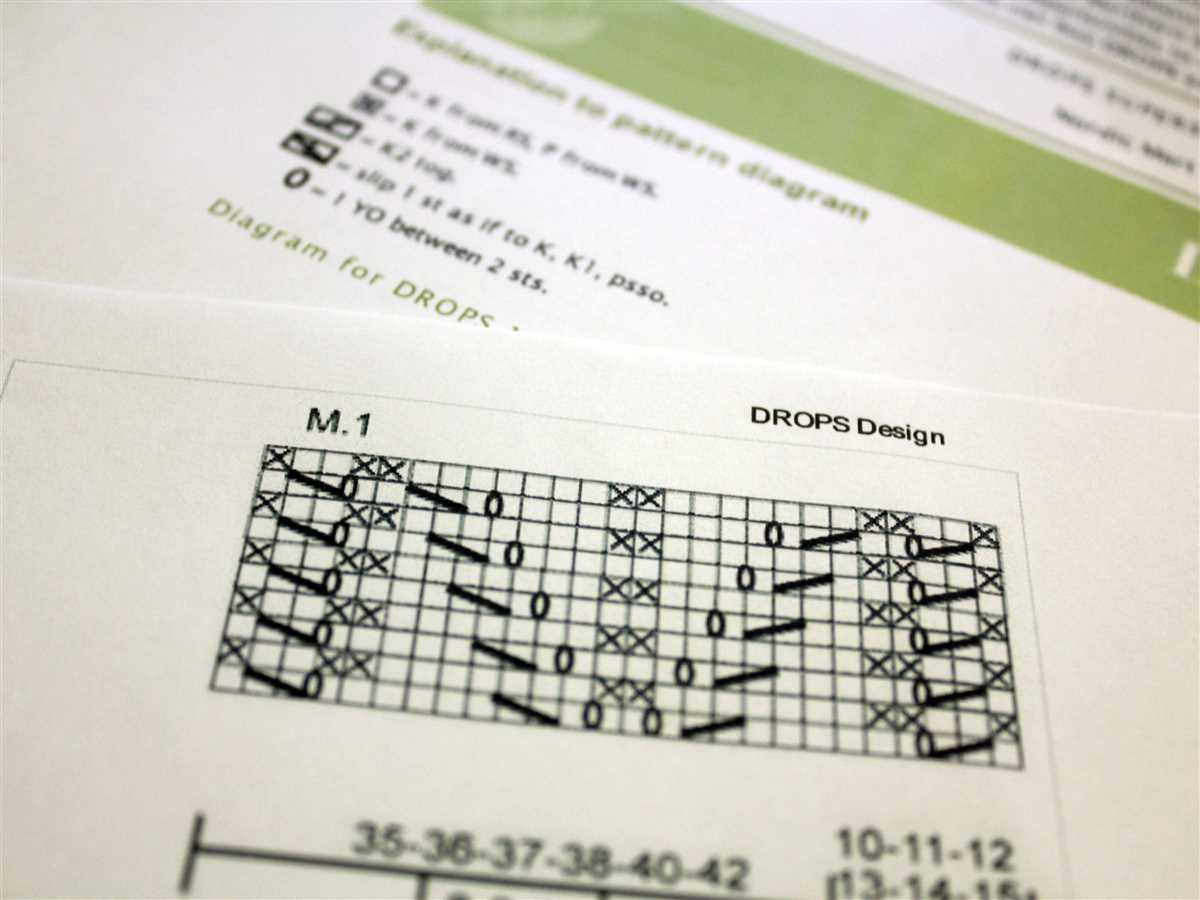
Understanding the symbols: The schematic uses various symbols to represent different stitches and techniques. It is important to familiarize yourself with these symbols before starting your knitting project. Common symbols include circles or filled-in squares to represent knit stitches, empty squares for purl stitches, arrows for increases or decreases, and dotted lines for shaping.
Dimensions and stitch counts: The schematic will specify the dimensions of the finished project, such as the width and length of a sweater or the circumference of a hat. It will also provide stitch counts for different sections, indicating how many stitches should be on your needles at various points in the pattern. Understanding these measurements and stitch counts will help you ensure that your project turns out the correct size.
Shape and construction: The schematic will show the overall shape and construction of the project. It may include lines or arrows to indicate where shaping occurs, such as waist decreases or sleeve increases. By studying the schematic, you can visualize how the project is assembled and anticipate any changes in stitch count or pattern that may be required at different stages.
Add-ons and details: The schematic may also include additional information or details, such as buttonhole placement, pocket placement, or neckline shaping. These details are important for achieving the desired finished look and should be carefully followed when knitting the project.
In summary, learning how to read and interpret the schematic of a knit pattern is essential for successfully completing your project. By understanding the symbols, dimensions, shaping, and details provided in the schematic, you can follow the instructions accurately and achieve the desired outcome. Take the time to study the schematic before starting your project, and refer to it frequently as you work through the pattern.
Understanding the Gauge: Why It’s Important and How to Measure Yours
When it comes to knitting, understanding the gauge is essential for achieving the correct size and fit of your finished project. The gauge refers to the number of stitches and rows per inch that you should aim to achieve when following a knit pattern. While it may seem like an insignificant detail, ignoring or incorrectly measuring the gauge can lead to a garment that is too loose, too tight, or completely off in size.
To measure your gauge, you will need a knitting needle size that is recommended in the pattern, as well as the specified yarn. Start by creating a small swatch of knit fabric using the recommended stitch pattern. Make sure to cast on enough stitches to create a square or rectangular shape that is at least 4 inches wide and 4 inches tall.
Once you have your swatch, use a ruler or a gauge measuring tool to count the number of stitches and rows within a 1-inch section. To count the stitches, place the ruler or tool horizontally across the fabric, aligning it with the bottom of a stitch. Count the number of stitches that fit within the 1-inch section, but be careful not to include any partial stitches.
Next, to count the rows, place the ruler or tool vertically along the side of the fabric, aligning it with the side of a row. Count the number of rows that fit within the 1-inch section, again making sure not to include any partial rows. Once you have these measurements, compare them to the gauge specified in the pattern.
If your stitch and row count match the pattern’s gauge, congratulations! You can confidently move forward with the pattern, knowing that your finished project should come out as intended. However, if your gauge is off, you may need to adjust your needle size or tension in order to correct it.
Remember, the gauge is not just a suggestion–it is crucial to achieving the desired outcome of your knitting project. Taking the time to measure and adjust your gauge can make all the difference in the final fit and appearance of your finished garment. So don’t skip this important step, and happy knitting!
Casting On: Mastering the First Step of Every Knit Project
Casting on is the foundational technique that every knitter must master in order to start any knitting project. It is the first step in creating a row of stitches on the needles and sets the stage for the rest of the project. Without a proper cast on, the entire project can be compromised. Therefore, it is important to understand different casting on methods and choose the one that best suits the project at hand.
There are various methods of casting on, each with its own advantages and specific uses. The most common casting on method is the long-tail cast on, which creates a stretchy and flexible edge. It involves creating a slipknot and then using both yarn ends to create the stitches. Another popular method is the knitted cast on, which is great for adding stitches to an already knitted row. It is simple to do and creates a more firm and structured edge.
When starting a new knitting project, it is important to pay attention to the pattern instructions for the recommended casting on method. Different patterns may require different cast on techniques to achieve the desired results. Additionally, the number of stitches to cast on will also be specified in the pattern, so it is crucial to count carefully to ensure accuracy.
It is helpful to practice different casting on methods and become comfortable with them before starting a new project. By mastering the art of casting on, knitters can ensure that their projects start off on the right foot and set themselves up for success.
Some tips for successful casting on:
- Make sure to leave a long enough tail when using the long-tail cast on method to avoid running out of yarn
- Practice maintaining consistent tension while casting on to create an even row of stitches
- Use stitch markers or count the stitches as they are cast on to ensure accuracy
- Experiment with different cast on methods to find the one that works best for you and the project at hand
Knit Stitches: Identifying and Executing Different Types
When reading a knit pattern, it’s important to understand the different types of knit stitches that may be used. By familiarizing yourself with these stitches, you’ll be better equipped to identify and execute them correctly in your own projects.
1. Knit Stitch (k)
The knit stitch, often denoted as “k” in patterns, is the most basic stitch in knitting. To execute a knit stitch, simply insert the right-hand needle into the front loop of the stitch on the left-hand needle, from left to right. Then, bring the working yarn over the right-hand needle and through the stitch, creating a new loop.
2. Purl Stitch (p)
The purl stitch, denoted as “p” in patterns, is the reverse of the knit stitch. To purl, insert the right-hand needle from right to left through the front loop of the stitch on the left-hand needle. Then, bring the working yarn under the right-hand needle and through the stitch, creating a new loop.
3. Yarn Over (yo)
A yarn over creates an extra stitch and is often used to make decorative holes or increase stitches. To execute a yarn over, simply bring the working yarn from the back to the front of the work, without inserting the needle into a stitch. This creates a new loop on the right-hand needle.
4. Slip Stitch (sl)
A slip stitch involves moving a stitch from the left-hand needle to the right-hand needle without working it. This can be done by inserting the right-hand needle into the front loop of the stitch on the left-hand needle, from left to right, and sliding the stitch onto the right-hand needle.
These are just a few examples of the different knit stitches you may encounter in a pattern. By understanding how to identify and execute these stitches, you’ll be well on your way to becoming a skilled knitter.
Purl Stitches: Adding Texture and Depth to Your Work
When it comes to knitting, purl stitches are an essential technique that can add texture and depth to your work. Unlike knit stitches, which create a smooth surface, purl stitches create a bumpy, raised surface that can add visual interest and complexity to your knitting projects.
One of the great things about purl stitches is their versatility. They can be used to create a wide range of stitch patterns, from simple ribbing to more intricate cable designs. By combining purl stitches with knit stitches, you can create a variety of textures and patterns that can make your knitting truly unique.
One popular use of purl stitches is in creating ribbing. Ribbing is a pattern often used at the edges of garments, such as cuffs, hems, and collars. It is created by alternating knit stitches and purl stitches in a specific pattern. The purl stitches create raised columns or ridges, while the knit stitches blend in and create a smooth surface. Ribbing not only adds stretch and flexibility to your knitted pieces but also gives them a polished and finished look.
In addition to ribbing, purl stitches can be used in a variety of other stitch patterns to create different effects. For example, seed stitch is a pattern that alternates knit and purl stitches in a checkerboard-like pattern, creating a textured and slightly bumpy surface. Moss stitch, on the other hand, is created by alternating knit and purl stitches in a different pattern, creating a more raised, pebble-like texture.
By learning different stitch patterns that incorporate purl stitches, you can add depth and dimension to your knitted projects. Whether you’re creating a cozy sweater, a warm blanket, or a stylish scarf, purl stitches can take your knitting to the next level and make your work truly stand out.
Increasing and Decreasing: Shaping Your Knitting
When knitting a garment, it is essential to understand how to increase and decrease stitches to shape your project. Increasing and decreasing techniques are used to add or remove stitches, creating curves, angles, and various patterns in your knitting.
Increasing Stitches
Increasing stitches is done to add width or create a shape in your knitting. There are several common methods for increasing stitches, including:
- Knit Front and Back (KFB): This method involves knitting into the front and back loops of the same stitch, effectively creating two stitches from one.
- Make One (M1): With this technique, you can create a new stitch by picking up the horizontal yarn between two stitches and knitting into it.
- Yarn Over (YO): A yarn over involves wrapping the yarn around the needle, creating an extra stitch.
By using these techniques strategically in your knitting pattern, you can increase the number of stitches and shape your project accordingly.
Decreasing Stitches
Decreasing stitches is necessary when you want to shape your knitting by reducing the number of stitches. Common methods for decreasing stitches include:
- Knit Two Together (K2Tog): This technique involves knitting two stitches together as one, effectively decreasing the stitch count by one.
- Slip, Slip, Knit (SSK): SSK also decreases the stitch count by knitting two stitches together but with a slightly different method, creating a left-leaning decrease.
- Knit Three Together (K3Tog): This technique is similar to K2Tog but involves knitting three stitches together as one.
By using these decreasing techniques strategically in your pattern, you can shape your knitting to create angles, tapering, or any desired effect.
Understanding how to increase and decrease stitches is crucial for following knitting patterns correctly and achieving the intended shape and fit of your project. By practicing these techniques and learning to read the instructions in your knitting pattern, you will gain confidence in shaping your knitting and be able to take on more complex projects with ease.
Knit Pattern Directions: Following Along Step by Step
When starting to knit a new pattern, it’s important to carefully read and understand the instructions provided. Knit pattern directions may seem complicated at first, but by following along step by step, you can successfully create beautiful knitted projects.
1. Familiarize yourself with the abbreviations and symbols: Knit patterns often include abbreviations and symbols that represent different knitting stitches and techniques. Before you begin, take the time to review the key or legend provided in the pattern. This will help you understand what each abbreviation or symbol means and how to perform the corresponding stitch or technique.
2. Start with the materials and gauge instructions: Before diving into the pattern itself, make sure you have the necessary materials, such as the recommended yarn weight and needle size. Pay attention to the gauge instructions, which indicate the number of stitches and rows needed to achieve a specific measurement. Knitting a gauge swatch will help ensure that your finished project turns out the correct size.
3. Read the pattern line by line: Take it one step at a time and read the pattern instructions line by line. Pay close attention to any special instructions, repeats, or changes in stitch pattern. It can be helpful to underline or highlight the current row you are working on to keep track of your progress.
4. Use stitch markers: Stitch markers can be invaluable when following along with a knit pattern. They can help you keep track of stitch pattern repeats, mark important sections, or indicate where shaping occurs. Place a stitch marker where indicated in the pattern and move it along as you progress through the project.
5. Take notes and mark your progress: It can be helpful to jot down notes or make annotations directly on the pattern as you go. This can include counting rows, keeping track of stitch counts, or any modifications you make. Keeping organized notes will make it easier to retrace your steps or make adjustments if needed.
6. Seek clarification if needed: If you come across any confusing or ambiguous instructions, don’t hesitate to seek clarification. You can consult online knitting resources, forums, or even reach out to the pattern designer or other experienced knitters for assistance. Understanding the instructions fully will prevent mistakes and frustration.
7. Practice makes perfect: Following knit pattern directions may be challenging at first, but with practice, it becomes easier. As you complete more projects and become familiar with different stitch techniques, you’ll gain confidence in your ability to read and execute knit patterns accurately.
Finishing Techniques: Binding Off, Weaving in Ends, and Blocking
When you finish knitting a project, there are a few important finishing techniques to complete before your work is truly complete. These techniques include binding off, weaving in ends, and blocking. These steps ensure that your knitted piece looks polished and professional, and they also help to secure your stitches and prevent unraveling.
Binding Off
Binding off, also known as casting off, is the method used to finish the last row of stitches in your knitting. To bind off, simply knit two stitches, then use the left needle to lift the first (leftmost) stitch you knit over the second stitch and off the right needle. Repeat this process until you have one stitch remaining, then cut the yarn, leaving a tail. Finally, pull the tail through the last stitch to secure it.
Weaving in Ends
After binding off, you will have two loose ends of yarn: the tail from binding off and the yarn tail from when you started the project. To weave in these ends, thread each tail onto a tapestry needle and weave it back and forth through the stitches on the wrong side of the fabric. Be sure to weave the ends in securely to prevent them from coming loose over time.
Blocking
Blocking is the final step to give your knitted piece its desired shape and to even out any inconsistencies in tension. To block, you will need to wet your knitted piece in cold water, gently squeeze out the excess water, and then lay it flat to dry. You can use blocking mats or towels to help shape the piece and pin it in place if necessary. Once the piece is dry, it will hold its shape better and any lace or cable patterns will appear more defined.
By following these finishing techniques of binding off, weaving in ends, and blocking, you can ensure that your knitted projects have a clean and professional look. These steps may seem small, but they make a big difference in the final appearance of your knitting. So take the time to finish your projects properly and enjoy the satisfaction of a beautifully completed piece.
Troubleshooting: Fixing Common Mistakes and Misunderstandings
Knitting can be a challenging craft, and even experienced knitters can make mistakes or misunderstand patterns. Fortunately, many common knitting mistakes can be fixed with a little patience and some simple techniques. Here are some troubleshooting tips to help you fix common mistakes and resolve pattern misunderstandings.
1. Tangled or Dropped Stitches
Tangled or dropped stitches can be a frustrating issue, but they are easily fixable. If you notice a stitch has dropped or become unraveled, you can use a crochet hook or a smaller knitting needle to pick up the stitch and place it back on the needle. If the dropped stitch has run several rows down, you can ladder up the stitches by carefully picking up the horizontal bars between the stitches and working them back up to the needle.
2. Uneven Tension
Uneven tension can result in noticeable differences in the size or appearance of your stitches. To fix this, you can try adjusting your knitting technique, such as loosening or tightening your grip on the yarn. You can also block your finished project to even out the tension. Blocking involves wetting or steaming the finished piece and shaping it to the desired dimensions.
3. Miscounted Stitches
If you realize that you have miscounted your stitches and your pattern is not aligning correctly, you can unravel your work back to the point of the mistake. Carefully undo the stitches stitch by stitch until you reach the mistake, and then re-knit the correct number of stitches. To avoid miscounting, it is helpful to use stitch markers or keep track of your progress with a row counter.
4. Misinterpreted Pattern Instructions
Understanding knitting patterns can sometimes be challenging, especially for beginners. If you are struggling to understand a particular instruction, try reading it several times or looking for explanations or tutorials online. You can also seek help from more experienced knitters or join knitting forums or groups where you can ask questions and get advice.
Summary:
Reading and understanding a knit pattern can be a rewarding and enjoyable experience once you become familiar with the various symbols, abbreviations, and techniques. By breaking down the pattern into sections and using stitch guides and notes, you can navigate through any pattern and create beautiful knitted projects. Remember to take your time, practice, and don’t be afraid to ask for help when needed. Happy knitting!