
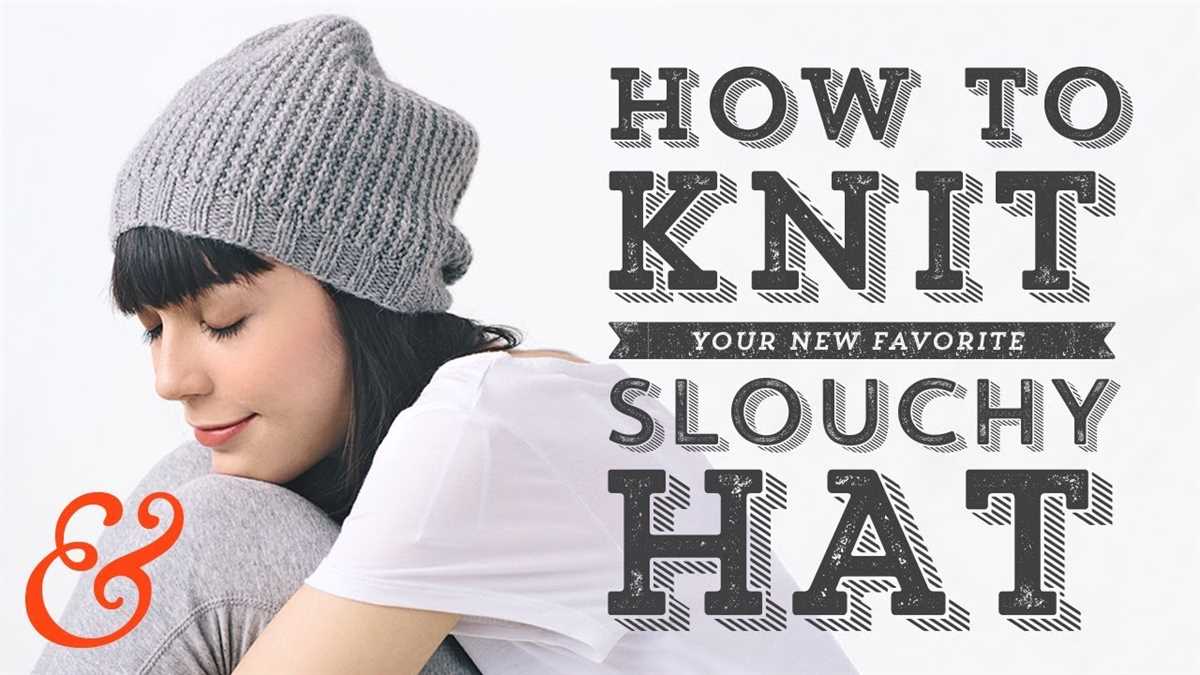
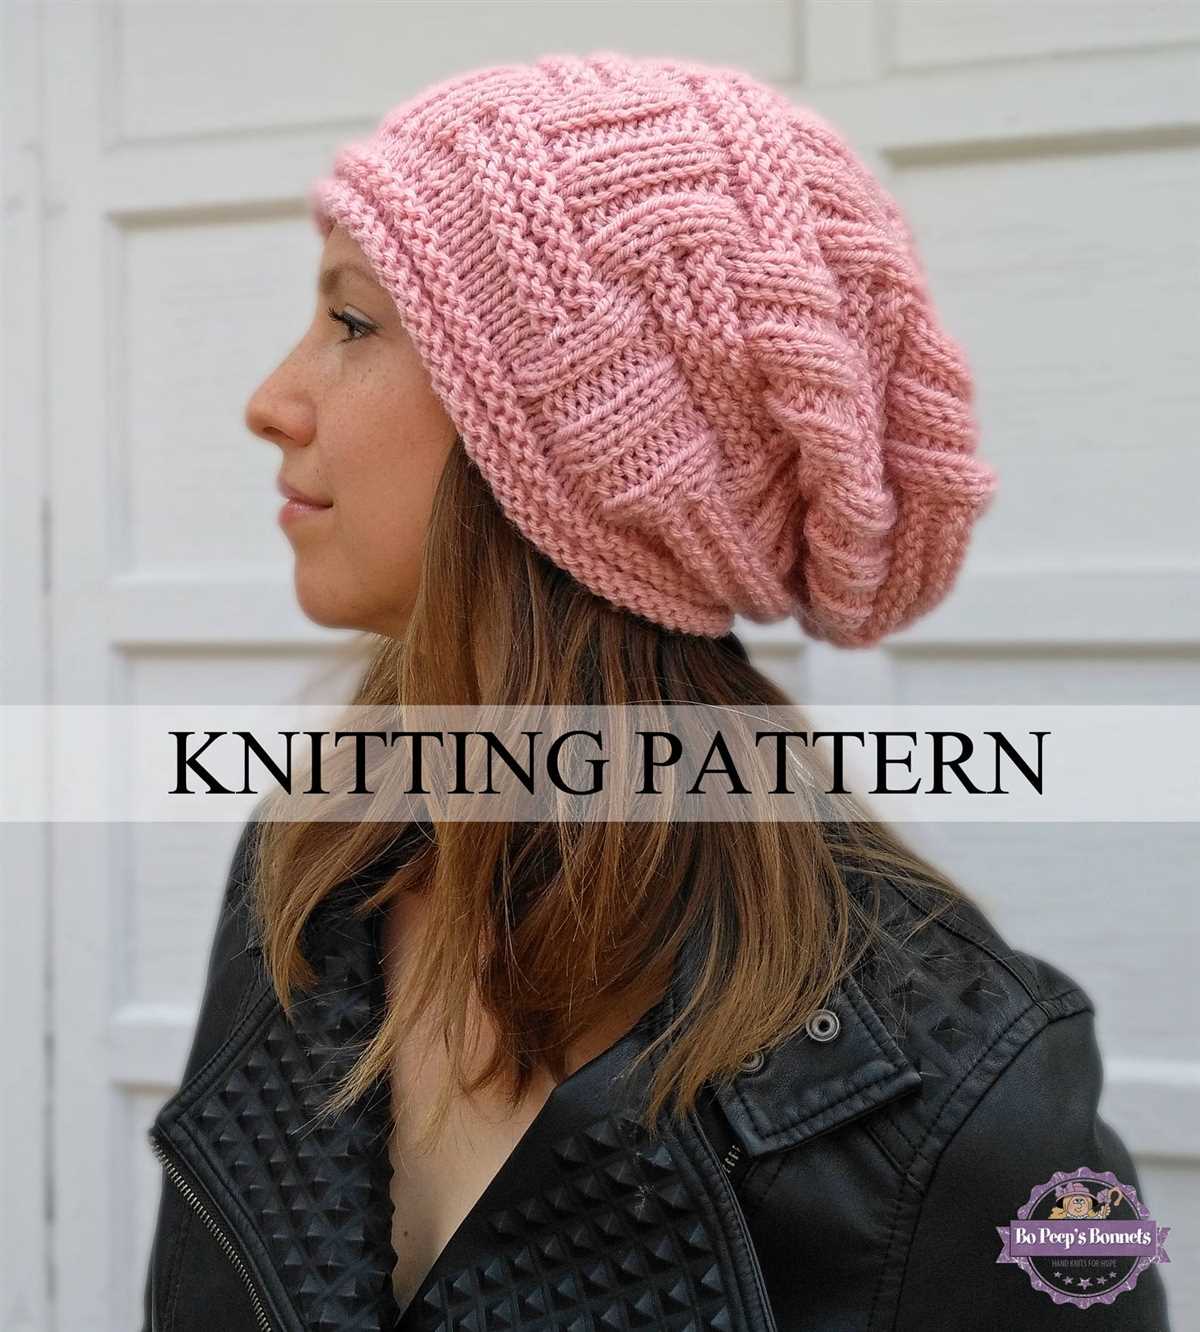
Knitting is a popular hobby that allows crafters to create unique and stylish accessories. One of the most popular knitting patterns amongst modern fashionistas is the hipster beanie. This trendy and versatile hat has become a go-to accessory for both men and women, adding a touch of cool and sophistication to any outfit.
Knitting your own hipster beanie is not only a fun and creative project, but it also allows you to customize the design to perfectly match your style and personality. Whether you prefer a classic solid color or a bold and vibrant pattern, the possibilities are endless.
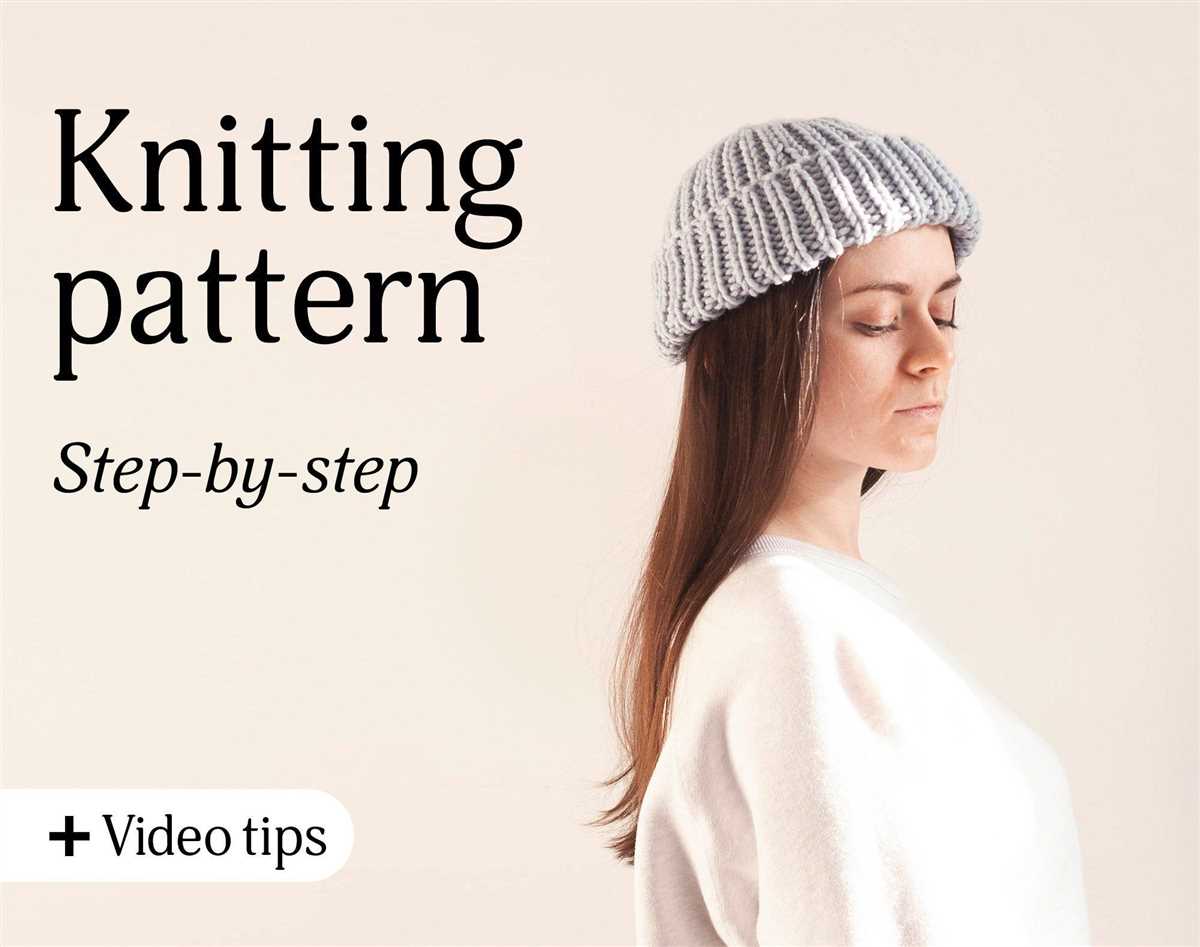
This article will provide you with a step-by-step guide on how to knit your own hipster beanie. From choosing the right yarn and needles to mastering essential knitting techniques, you’ll have all the information you need to create your very own fashion-forward hat.
Hipster Beanie Knitting Pattern
If you’re looking for a trendy and stylish accessory to add to your wardrobe, a hipster beanie is just what you need. With its unique and eye-catching design, this beanie is sure to turn heads wherever you go. Plus, with the right knitting pattern, you can easily create your own hipster beanie in no time.
To get started, you’ll need a few basic knitting supplies. This includes yarn in your desired color, knitting needles in the appropriate size, and a yarn needle for finishing touches. You’ll also need to choose a knitting pattern that suits your style. There are plenty of free patterns available online, or you can create your own custom design.
When knitting your hipster beanie, it’s important to pay attention to gauge. This ensures that your finished product will fit snugly and comfortably on your head. Start by creating a swatch using your chosen yarn and needles, and adjust your needle size as needed to achieve the correct gauge.
Once you have your supplies and gauge figured out, you can begin knitting your hipster beanie. Most patterns will start with casting on the desired number of stitches, and then working in a ribbing or pattern stitch until the desired length is reached. You’ll then shape the crown of the beanie by decreasing stitches until only a few remain. Finally, you’ll finish off the beanie by sewing up any seams and weaving in loose ends.
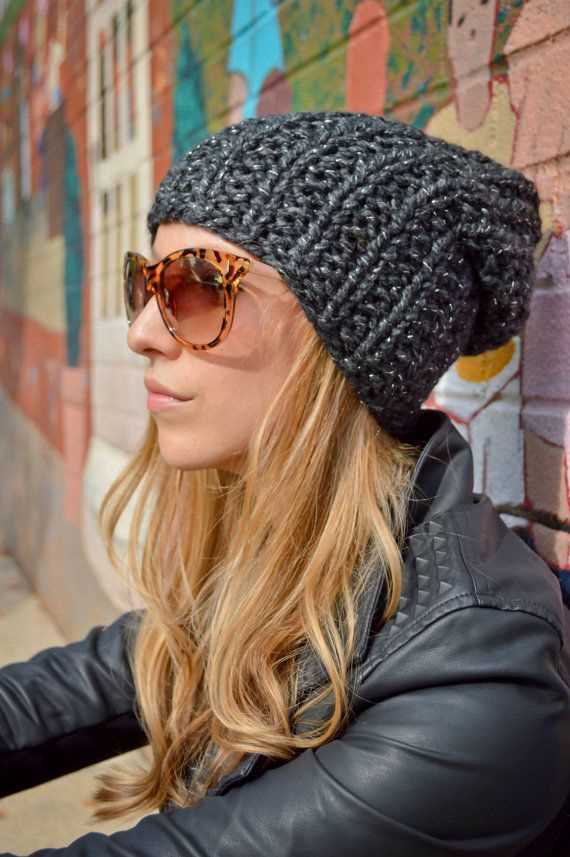
With your hipster beanie complete, you’ll have a fashionable accessory that adds a touch of style to any outfit. Whether you choose to wear it slouchy or fitted, this beanie is sure to keep you warm and on-trend all winter long. So grab your knitting needles and get started on your hipster beanie today!
Materials Needed
Before you start knitting your hipster beanie, make sure you have the following materials on hand:
- Yarn: Choose a soft, medium-weight yarn in your preferred color. You will need approximately 200 yards of yarn to complete this project.
- Knitting Needles: Use size 8 (5mm) knitting needles or size needed to obtain gauge. You can use either straight or circular needles, depending on your preference.
- Tapestry Needle: A tapestry needle with a large eye is essential for weaving in ends and finishing the beanie.
- Stitch Markers: Use stitch markers to help keep track of your stitches and mark important sections of the pattern.
- Scissors: A sharp pair of scissors is necessary for cutting yarn and trimming any stray threads.
- Measuring Tape: Keep a measuring tape handy to ensure that your beanie is the correct size and to measure the length of the brim.
Once you have gathered all the necessary materials, you are ready to start knitting your hipster beanie!
Casting On
Casting on is the first step in starting your knitting project. It creates the foundation row of stitches that you will build upon as you knit. There are several methods of casting on, but the most common one used for the hipster beanie knitting pattern is the long-tail cast on.
Long-Tail Cast On: To start, you will need a long tail of yarn, approximately three times the length of the desired width of your project. Make a slipknot at the end of the yarn and place it on one of the knitting needles. Hold the needle with the slipknot in your right hand and the other needle in your left hand.
- Position your left thumb and forefinger between the two strands of yarn, with the tail end wrapped around your thumb and the working yarn (attached to the ball of yarn) wrapped around your forefinger.
- Using the needle in your right hand, insert it between the two strands of yarn from front to back, going under the strand on your thumb and over the strand on your forefinger.
- Slide the needle from your right hand to the left, bringing the loop of yarn you just created onto the needle.
- Repeat these steps until you have the desired number of cast on stitches.
Once you have completed the cast on, you are ready to begin knitting the first row of your hipster beanie. The long-tail cast on provides a neat and elastic edge, making it perfect for hats and other accessories. Now that you have mastered the casting on technique, you can confidently move on to the next step of your knitting project.
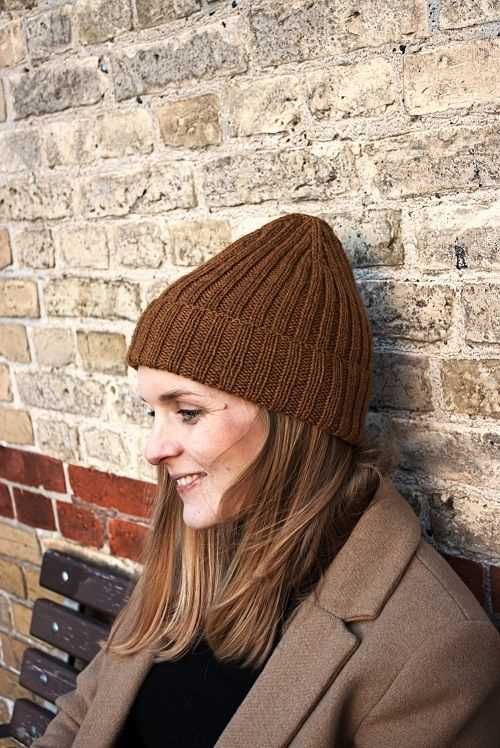
Ribbed Brim
The ribbed brim is an essential part of the hipster beanie knitting pattern. It adds a stylish touch to the hat and provides a snug fit around the head. The ribbed brim is achieved by using a combination of knit and purl stitches, creating a stretchy and textured fabric.
To create the ribbed brim, you will need to cast on an even number of stitches. The most common way to create a ribbed brim is by alternating between knit and purl stitches in a specific pattern. One popular pattern is the 2×2 rib, where you knit two stitches and purl two stitches in a repeating sequence.
Step 1: Begin by casting on the desired number of stitches using your preferred method. Make sure to use an even number of stitches to maintain the ribbed pattern.
Step 2: Start the ribbed brim pattern by knitting the first two stitches. Insert the right needle into the front of the first stitch and knit as usual. Repeat this step for the second stitch.
Step 3: Purl the next two stitches. Insert the right needle into the front of the third stitch, but instead of knitting, bring the yarn to the front of the work and purl the stitch. Repeat this step for the fourth stitch.
Step 4: Continue alternating between knitting and purling two stitches until you reach the end of the row. Make sure to maintain the pattern so that the knit stitches are always followed by purl stitches and vice versa.
Step 5: Repeat steps 2-4 for the desired number of rows to create the ribbed brim. The number of rows will depend on your desired brim width. It is common to have a ribbed brim that is around 1-2 inches in width.
Once you have completed the ribbed brim, you can continue knitting the rest of the hipster beanie pattern according to your desired style and size.
Main Body
In order to knit a hipster beanie, it is important to follow a specific pattern that will result in the desired style and fit. The main body of the beanie is typically knitted in a rib stitch, which creates a stretchy and snug fabric. The rib stitch is achieved by alternating knit and purl stitches in a specific pattern.
To begin the main body of the beanie, cast on the required number of stitches using a circular knitting needle. The number of stitches will depend on the size of the beanie and the gauge of your knitting. Once the stitches are cast on, join them in the round, being careful not to twist the stitches.
The main body of the beanie is typically worked in a rib stitch pattern, such as a 2×2 rib or a 1×1 rib. In a 2×2 rib, you will alternate two knit stitches with two purl stitches, repeating this pattern until the desired length is achieved. In a 1×1 rib, you will alternate one knit stitch with one purl stitch, repeating this pattern.
Continue working in the rib stitch pattern for the designated number of rounds or until the desired length of the beanie is reached. The rib stitch creates a stretchy and textured fabric that is perfect for a hipster beanie. Once the main body is complete, you can then move on to the crown shaping and finishing touches of the beanie.
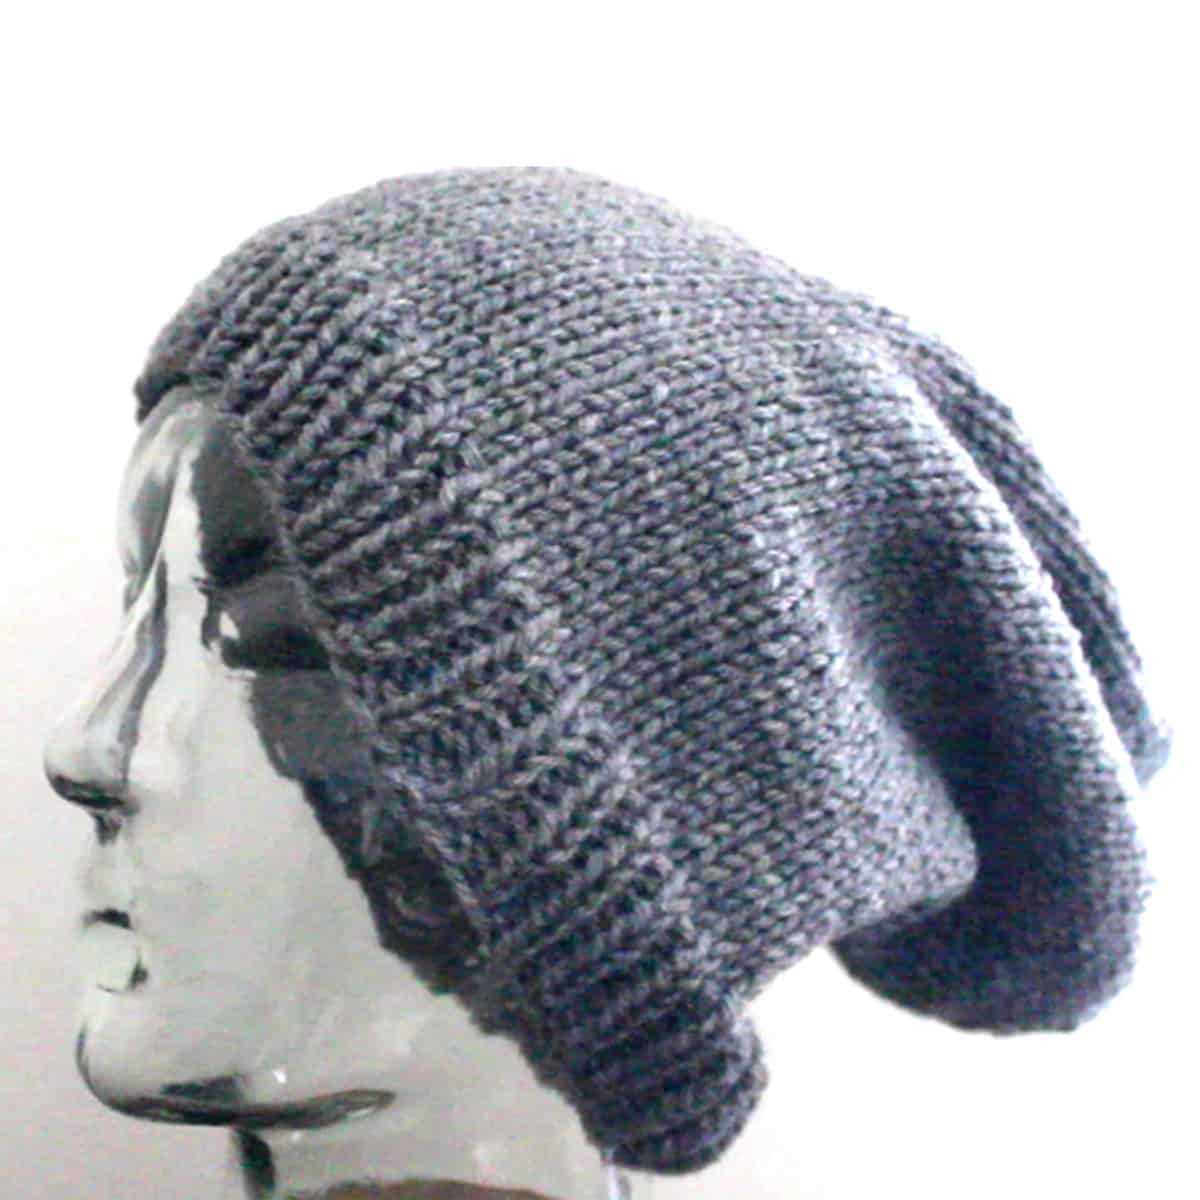
Decreasing Rows
When knitting a hipster beanie, the decreasing rows are an essential part of shaping the crown. Decreasing rows help create the slouchy look of the beanie by gradually reducing the number of stitches. Here is a step-by-step guide on how to work the decreasing rows:
1. Determine the number of stitches to decrease
In order to maintain the desired slouchy shape, it is important to choose the right number of stitches to decrease. This will depend on the gauge of your knitting and the size of the beanie. Typically, you will decrease approximately 8-10 stitches per row.
2. Begin the decreasing pattern
Start the decreasing pattern by knitting two stitches together (k2tog) at the beginning of the row. This will decrease the stitch count by one. Repeat this decrease at the end of the row as well. These decreases will create a tapered effect, shaping the crown of the beanie.
3. Continue the decreasing pattern
For the next row, knit one stitch, then knit two stitches together. Repeat this pattern until you reach the end of the row. Each row should decrease the stitch count by the chosen number of stitches.
4. Adjust the decreasing pattern as needed
Depending on the desired slouchiness and fit of the beanie, you may need to make adjustments to the decreasing pattern. If the beanie is too loose, you can increase the number of stitches decreased per row. Alternatively, if the beanie is too tight, you can decrease the number of stitches decreased per row. It is recommended to try on the beanie as you go to ensure the desired fit is achieved.
Switching Colors
Switching colors is an important technique when knitting a hipster beanie. It allows you to create different patterns and add visual interest to your project.
To switch colors, start by knitting until you reach the last stitch of the row with the current color. Before you knit the last stitch, place the new color yarn over the right needle, and then complete the stitch with the new color. This will create a clean color transition.
When switching colors, it’s important to carry the unused color yarn along the back of the work, so it doesn’t show on the front. You can do this by either twisting the two yarns together at the beginning of each row or by catching the unused color yarn in every few stitches.
To create stripes, simply switch colors at the beginning of each row or as desired. If you want to create a specific pattern, you can refer to a knitting chart or create your own. Just make sure to carefully follow the chart or pattern instructions for when to switch colors.
Remember to always leave a long enough tail of yarn when switching colors, so you can weave in the ends later to secure the color changes. This will ensure that your hipster beanie will have a neat and professional finish.
Switching colors gives you endless possibilities to customize your hipster beanie and make it truly unique. Have fun experimenting with different color combinations and patterns to create a beanie that reflects your personal style. Happy knitting!
Adding Patterns or Designs
Adding patterns or designs to your hipster beanie can add a unique touch and make it stand out from the rest. There are many different ways to incorporate patterns or designs, whether it’s through colorwork, texture, or embellishments.
Colorwork: One popular way to add patterns to your hipster beanie is through colorwork. This can be done using different colored yarns and techniques such as stranded knitting or intarsia. You can create stripes, checks, or even intricate motifs using this method. Experiment with different color combinations to create a visually appealing design.
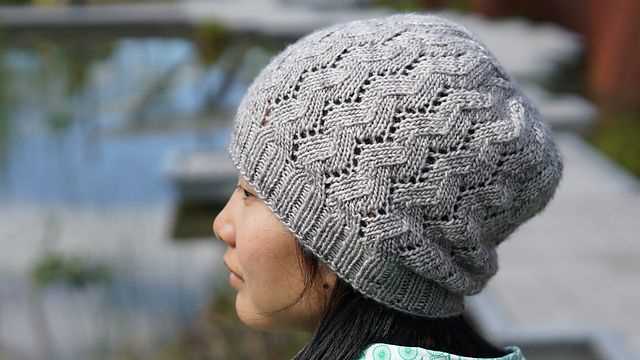
Texture: Another way to add patterns to your beanie is through texture. You can use different knitting stitches or techniques to create ribbing, cables, or even lace patterns. These textures can add depth and visual interest to your beanie, making it even more stylish.
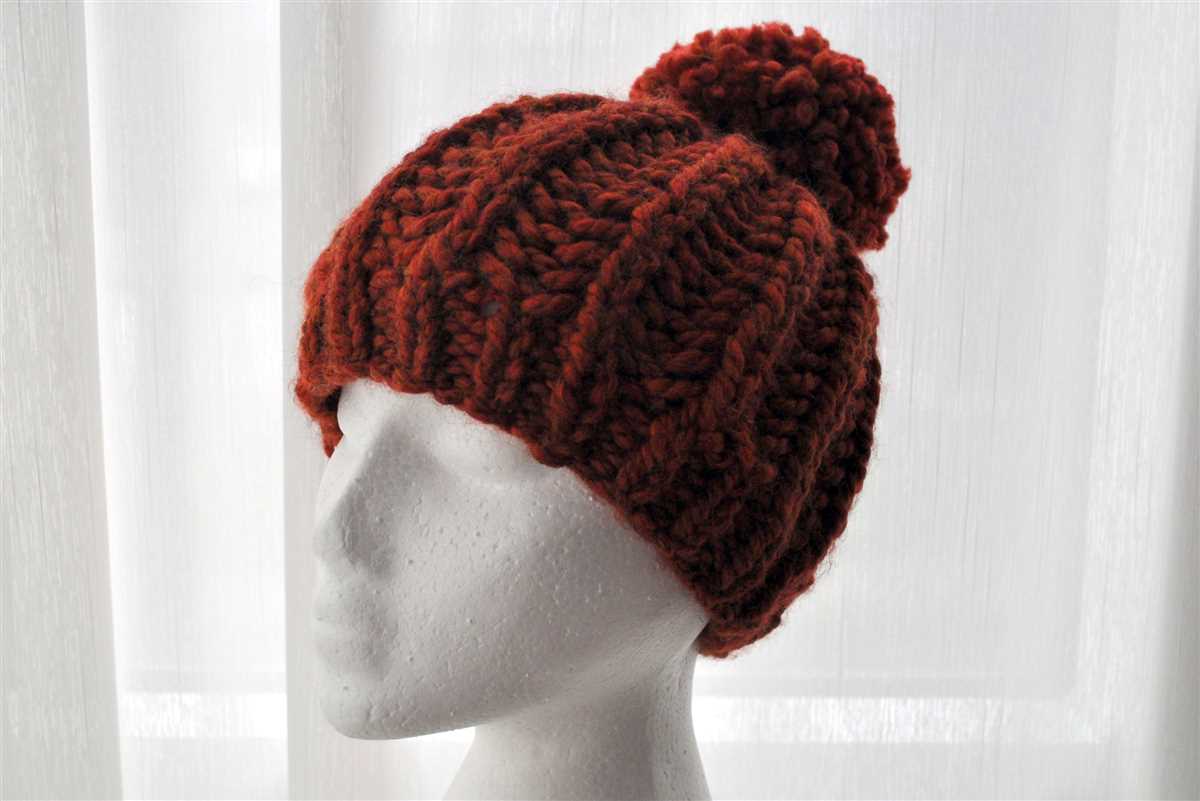
Embellishments: If you want to add some extra flair to your hipster beanie, consider adding embellishments. This could include buttons, pom-poms, or even embroidery. These small details can make your beanie truly unique and personalized.
When adding patterns or designs to your hipster beanie, it’s important to consider the overall aesthetic you’re going for. Choose patterns or designs that complement your personal style and the look you want to achieve. Don’t be afraid to get creative and experiment with different techniques to create a truly one-of-a-kind hipster beanie.
Finishing Off
Once you have completed knitting your hipster beanie, it’s time to finish off the project. Finishing off involves some final steps to give your beanie a polished and professional look. Here are some essential finishing off techniques for your hipster beanie knitting project:
1. Weaving in the ends: Trim the yarn, leaving a tail of about 6 inches. Use a yarn needle to weave the tail into the stitches on the wrong side of the beanie. This will secure the yarn and prevent it from unravelling. Repeat this process for any remaining loose ends.
2. Blocking:
Blocking is an important step to ensure that your beanie retains its shape and size. To block your beanie, follow these steps:
- Fill a basin with lukewarm water and add a small amount of mild soap.
- Place your beanie in the water, gently squeezing it to make sure it is fully submerged. Let it soak for about 10 minutes.
- Remove the beanie from the water and squeeze out the excess water. Avoid wringing or twisting the beanie, as this can damage the fibers.
- Place a clean towel on a flat surface and lay the beanie on top.
- Gently shape the beanie to your desired size and dimensions, making sure the ribbing is aligned properly.
- Allow the beanie to dry completely before wearing or storing it.
3. Sewing on any additional embellishments: If desired, you can sew on buttons, labels, or patches to personalize your beanie even further. Use a needle and thread that match the colors of your beanie to secure these embellishments.
By following these finishing off techniques, you can ensure that your hipster beanie looks professional and is ready to be worn or gifted. Take your time and enjoy the process of giving your knitting project that final touch!
Blocking and Care Instructions
Before wearing your newly knitted hipster beanie, it is important to block it to ensure the best shape and fit. Blocking is the process of shaping the knitted fabric by wetting it and then allowing it to dry while stretched to the desired dimensions. This helps to even out any uneven stitches and give the beanie a professional finish.
To block your hipster beanie, follow these steps:
- Fill a basin or sink with lukewarm water and add a few drops of gentle wool wash or shampoo appropriate for hand-knits.
- Gently immerse the beanie in the water, making sure it is fully submerged.
- Let the beanie soak for about 10-15 minutes, ensuring that the water penetrates the fibers fully.
- Remove the beanie from the water and gently squeeze out any excess moisture. Do not wring or twist the beanie.
- Place the damp beanie on a clean towel and roll it up tightly to remove even more moisture.
- Unroll the towel and lay the beanie flat on a blocking mat or any clean, flat surface.
- Using rustproof pins, gently stretch the beanie to the desired dimensions, making sure to maintain the overall shape.
- Leave the beanie to dry completely, preferably in a well-ventilated area, away from direct sunlight or heat sources.
- Once dry, remove the pins and your hipster beanie is ready to be worn and enjoyed.
In terms of care, it is best to hand wash your hipster beanie to ensure its longevity. Use lukewarm water and a gentle wool wash or shampoo, and gently squeeze out the excess water. Avoid wringing or twisting the beanie as this can cause stretching and misshaping. Lay flat to dry and store in a cool, dry place to prevent any potential damage.
Remember to handle your knitted hipster beanie with care, as the delicate nature of the yarn can be easily damaged by rough handling or washing methods. Taking the time to block and properly care for your beanie will ensure that it remains looking and feeling its best, allowing you to enjoy its warmth and style for years to come.
Variations and Customization
When it comes to knitting a hipster beanie, there are endless possibilities for variations and customization. With just a few tweaks to the pattern and choice of yarn, you can create a beanie that is unique to your personal style and taste.
Yarn Choice
The yarn you choose for your hipster beanie can completely change the look and feel of the finished product. You might opt for a soft and cozy cashmere blend for a luxurious feel, or choose a variegated yarn to create a colorful and playful beanie. The possibilities are endless, and the yarn you choose can truly make your beanie one-of-a-kind.
Pattern Modifications
While the basic hipster beanie knitting pattern is a great starting point, you can easily modify it to suit your preferences. For example, you might decide to add a ribbed brim or a decorative border to give your beanie an extra touch of style. You could also experiment with different stitch patterns, like a cable or lace motif, to create a more intricate design.
Try also experimenting with different sizes and shapes. For a slouchier beanie, simply add a few extra rows or increase the number of stitches. If you prefer a more fitted look, you can decrease the number of stitches or tighten the tension of your knitting.
Embroidery and Embellishments
If you’re feeling crafty, you can take your hipster beanie to the next level by adding embroidery or other embellishments. Consider embroidering a fun design or pattern onto the brim or adding buttons, patches, or pom-poms for a touch of whimsy. These small details can make a big difference and truly make your beanie stand out.
Final Thoughts
The beauty of knitting your own hipster beanie is that you have full control over the finished product. By choosing the right yarn, making pattern modifications, and adding unique embellishments, you can create a beanie that reflects your personal style and individuality. So grab your knitting needles and get ready to unleash your creativity!
FAQs
Here are some frequently asked questions about the Hipster Beanie knitting pattern:
Can I use any type of yarn for this pattern?
No, it is recommended to use medium weight yarn (also known as worsted or aran weight) for this pattern. Using a different weight yarn may alter the size and fit of the beanie.
Do I need to know advanced knitting techniques to make this beanie?
No, this pattern is suitable for intermediate knitters. It does require basic knitting skills such as casting on, knitting and purling, and decreasing stitches. If you are comfortable with these techniques, you should be able to make the beanie.
How long does it take to knit this beanie?
The time it takes to knit the beanie will depend on your knitting speed and the amount of time you have available for knitting. On average, it may take a few hours to complete, but this can vary.
Can I customize the size of the beanie?
Yes, the pattern includes instructions for making the beanie in multiple sizes. You can choose the size that best fits your head circumference. It is recommended to measure your head circumference before starting the project to ensure the correct size.
How can I access the pattern?
The Hipster Beanie knitting pattern is available as a digital download. Once you complete the purchase, you will receive a link to download the pattern file. It can be opened and printed using a PDF reader on your computer or device.
Can I sell the beanies made from this pattern?
Yes, you can sell the beanies made from this pattern. However, please do not distribute or sell the pattern itself. Instead, direct others to the original source or purchase their own copy of the pattern.
Can I share my finished beanie on social media or websites?
Absolutely! You are encouraged to share your finished beanie on social media and websites. It’s always fun to see different interpretations and color choices of the pattern. Don’t forget to use the hashtag #HipsterBeaniePattern to join the community and inspire others!
Final Thoughts
Knitting your own hipster beanie can be a fun and rewarding project. Not only do you have the satisfaction of creating something with your own hands, but you also have the opportunity to personalize the design and choose the colors and yarn that speak to you. This hipster trend has taken the fashion world by storm, and by knitting your own beanie, you can join in on the trend while adding your own unique touch.
Whether you are a beginner or an experienced knitter, this knitting pattern provides clear instructions and tips to help you create the perfect beanie. The use of different stitches and techniques adds texture and interest to the finished product, making it a stylish accessory for any outfit. Additionally, this pattern is versatile, allowing you to make adjustments to fit your personal style and preferences.
As you embark on this knitting journey, don’t forget to have fun and enjoy the process. Knitting is not only a way to create functional and fashionable items but also a way to relax and destress. Take your time, experiment, and don’t be afraid to make mistakes – after all, that’s how we learn and grow as knitters.
So grab your knitting needles, choose your favorite yarn, and get ready to create a hipster beanie that will turn heads and keep you cozy all winter long!
Q&A:
Where can I find a hipster beanie knitting pattern?
You can find hipster beanie knitting patterns on various knitting websites, as well as on platforms like Etsy and Ravelry. There are also many knitting books and magazines that feature hipster beanie patterns.
What materials are needed for knitting a hipster beanie?
The materials needed for knitting a hipster beanie typically include yarn (preferably a medium weight yarn), knitting needles in the appropriate size, scissors, and a tapestry needle. Some patterns may also require additional materials such as stitch markers or a cable needle, depending on the design.
Are hipster beanies suitable for beginners?
Hipster beanie patterns can vary in difficulty, but there are many patterns available that are suitable for beginners. Look for patterns labeled as “easy” or “beginner-friendly” and make sure to read the instructions and gauge recommendations before starting your project. It’s always a good idea to practice basic knitting skills before attempting more intricate patterns.
Can I customize my hipster beanie?
Absolutely! One of the great things about knitting is that you can customize your projects to fit your own personal style. You can experiment with different yarn colors and textures, add embellishments like buttons or patches, or even modify the pattern to create your own unique design. Just make sure to adjust your gauge accordingly if you make any changes to the pattern.