
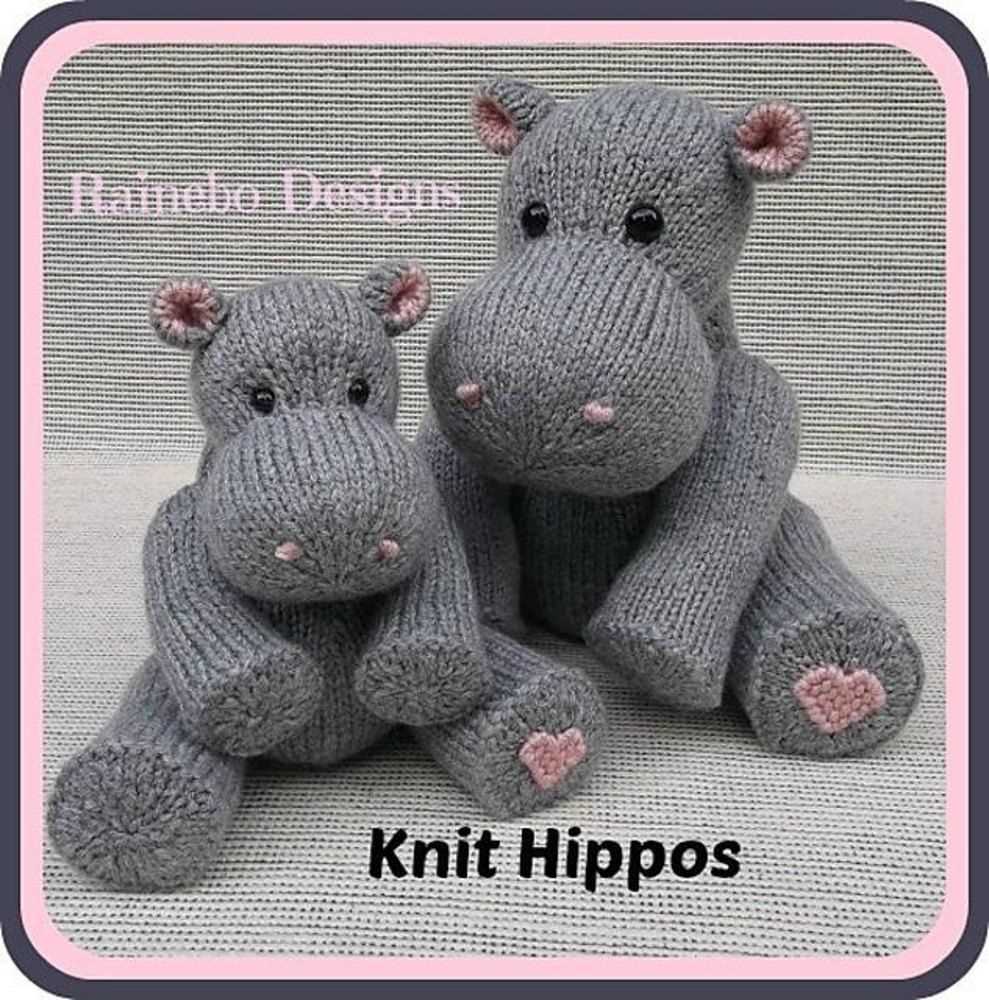
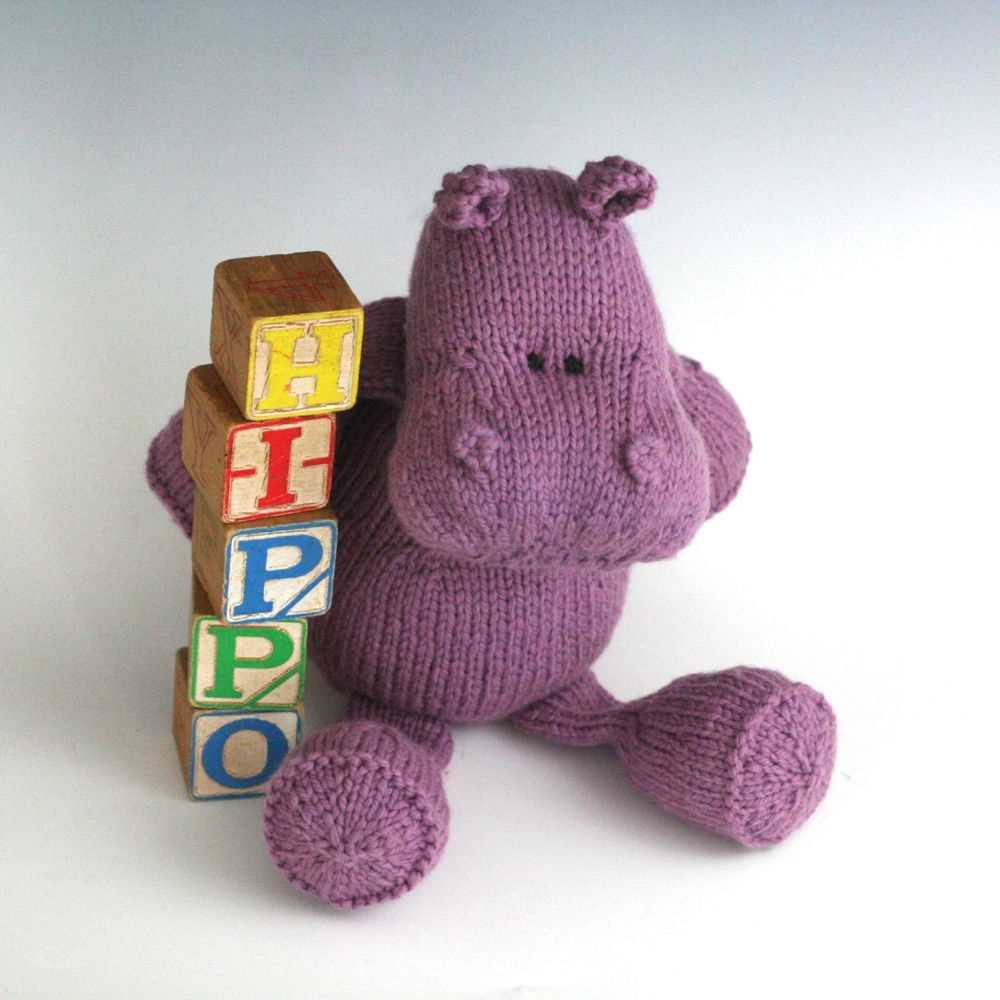
If you are a knitting enthusiast looking for a new project, why not try your hand at knitting a cute hippo? These adorable creatures have become increasingly popular in the world of crafting, and with a free knitting pattern, you can create your very own hippo without breaking the bank. Whether you are an experienced knitter or a beginner, this pattern is sure to bring you joy and satisfaction as you watch your hippo come to life.
Knitting a hippo may seem like a daunting task, but fear not! This free pattern provides step-by-step instructions and helpful tips to guide you through the process. From selecting the right yarn and needles to mastering various knitting techniques, you will learn everything you need to know to create a beautiful hippo. Whether you prefer knitting in the round or using straight needles, this pattern offers options for both methods.
Not only will you be able to create a unique and personalized hippo for yourself, but you can also gift these adorable creatures to your loved ones. Handmade gifts are always special, and a knitted hippo is sure to bring a smile to anyone’s face. So, gather your knitting supplies and get ready to embark on a delightful hippo-knitting adventure!
Hippo Knitting Pattern Free
If you love knitting and adorable animals, then a hippo knitting pattern is the perfect project for you! With a free pattern, you can create your own adorable knitted hippo to gift or keep for yourself. The pattern includes step-by-step instructions and materials list, so you can easily follow along and create your own cute hippo in no time.
To get started with the hippo knitting pattern, you will need basic knitting skills such as casting on, knitting, purling, and decreasing. The pattern may also include techniques such as knitting in the round or using double-pointed needles, so make sure to read through the entire pattern before beginning. Additionally, you will need the appropriate yarn and knitting needles specified in the pattern.
Materials Needed:
- Yarn: You will need a specific type and color of yarn as indicated in the pattern. The yarn should be soft and suitable for knitting with the chosen needle size.
- Knitting Needles: The size of the knitting needles will be specified in the pattern. Make sure to use the correct size to achieve the desired gauge.
- Stuffing: You will need stuffing material to fill the knitted hippo and give it a plush and cuddly appearance.
- Yarn Needle: A yarn needle is essential for weaving in loose ends and assembling different parts of the hippo.
- Scissors: Sharp scissors will be needed for cutting yarn and trimming any excess.
The hippo knitting pattern will typically include detailed instructions for knitting and assembling the various parts of the hippo, such as the head, body, legs, and ears. It may also provide guidance on adding finishing touches, such as embroidered eyes or other embellishments.
Once you have completed all the steps in the pattern and assembled the pieces, you will have your very own knitted hippo! This adorable creation can be a great gift for children or anyone who appreciates handmade crafts. You can also customize your hippo by choosing different colors of yarn or adding unique accessories.
With a hippo knitting pattern free, you can enjoy the relaxing and rewarding experience of knitting while creating an adorable stuffed animal. Whether you are new to knitting or an experienced knitter, this project will surely bring joy and satisfaction as you see your hippo come to life.
Why Knit a Hippo?
Knitting is a popular hobby that allows people to create unique and personalized items. While there are many patterns and designs to choose from, knitting a hippo can be a fun and rewarding project for several reasons.
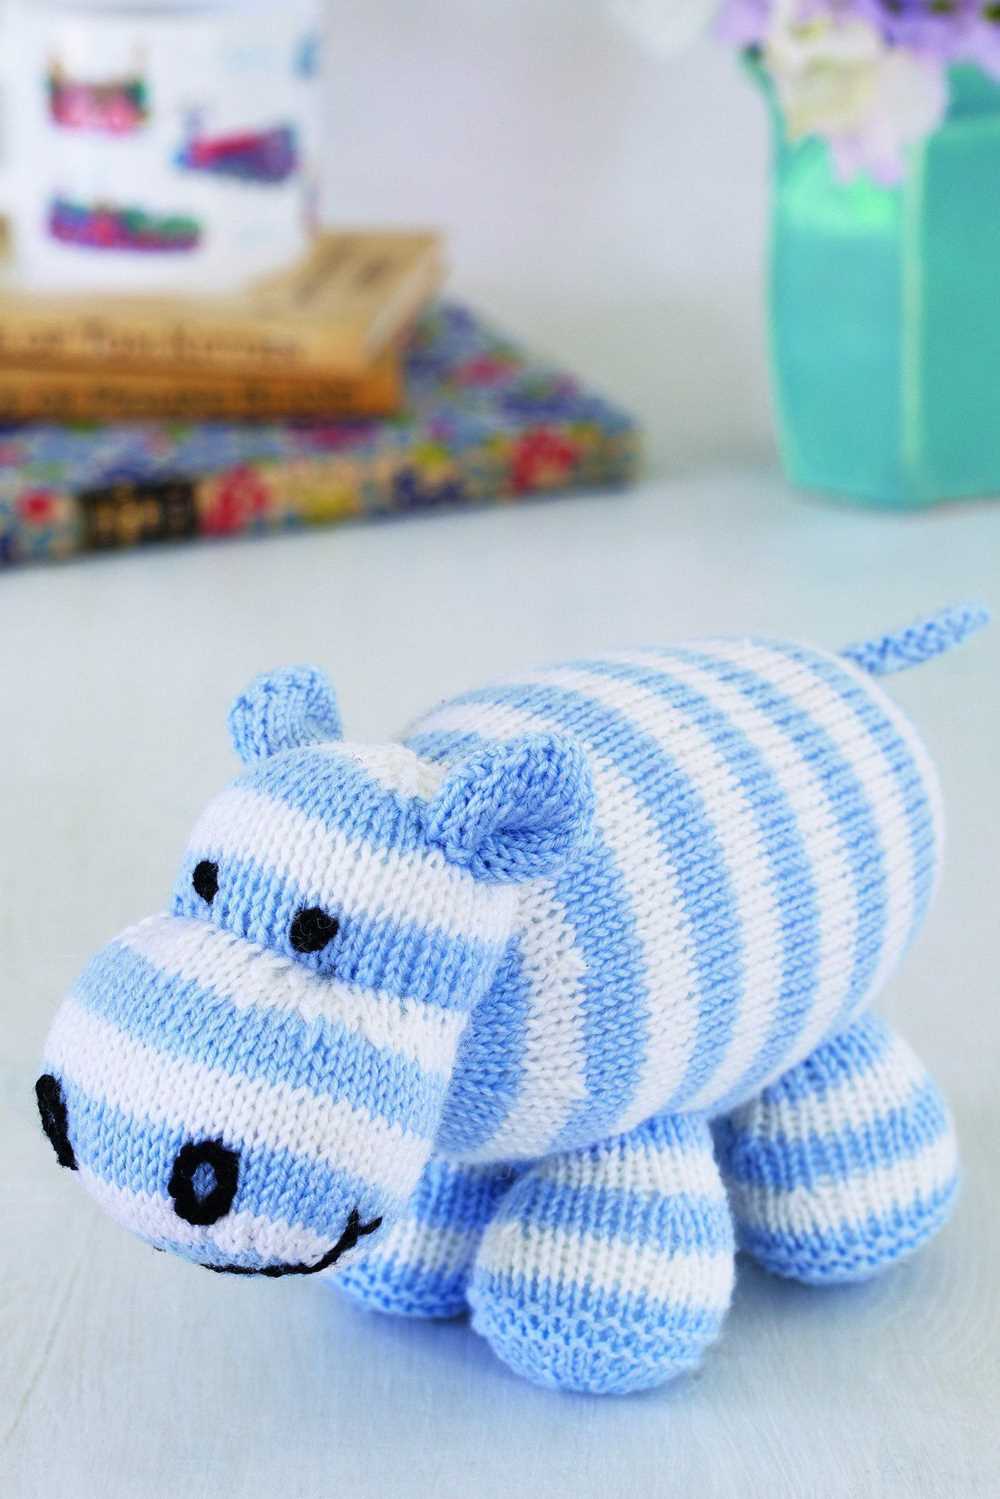
1. Adorable and Unique: Hippos are not commonly seen as a typical knitting project, making them a unique choice that is sure to stand out. Their round and chubby bodies, along with their large snouts and cute expressions, make them incredibly adorable creations.
2. Gift Ideas: Knitting a hippo can be a great gift idea for both children and adults. These cuddly creatures can bring joy and comfort to anyone who receives them. Whether it’s a baby shower gift, a birthday present, or just a surprise for a loved one, a hand-knit hippo is sure to be cherished.
- 3. Skill Building:
3. Skill Building: Knitting a hippo requires various techniques, such as increasing and decreasing stitches, knitting in the round, and creating different textures for the body and snout. By taking on this project, knitters can challenge themselves and enhance their skills.
- 4. Therapeutic Benefits:
4. Therapeutic Benefits: Knitting has been proven to provide numerous therapeutic benefits, such as reducing stress, promoting relaxation, and improving focus and concentration. The repetitive motions and the rhythmic nature of knitting can be calming and help knitters to unwind. Knitting a hippo allows individuals to combine their love for the craft with the soothing effects it brings.
Whether you are an experienced knitter or just starting, knitting a hippo can be a fun and fulfilling project. It allows you to create something unique and special, while also honing your skills and enjoying the therapeutic benefits of knitting. So why not give it a try and embark on a hippo-knitting adventure?
Materials Needed
To create your own adorable hippo, you will need the following materials:
- Yarn: Choose a soft and durable yarn in colors of your choice. You will need approximately 200g of main color yarn and smaller amounts of contrasting colors for the details.
- Knitting Needles: Use the appropriate size of knitting needles for your yarn. The recommended size is usually mentioned on the yarn label.
- Stuffing: You will need a stuffing material to fill the body and limbs of the hippo. Polyester fiberfill or cotton stuffing are common choices.
- Yarn Needle: A yarn needle with a large eye is essential for sewing the different pieces together and adding the finishing touches.
- Scissors: A pair of sharp scissors will be needed for cutting the yarn and trimming any excess.
- Stitch Markers: These small clips or loops can be used to mark the beginning or end of a round, or any other important points in your pattern.
- Buttons or Safety Eyes: If you want to add an extra touch to your hippo, you can use buttons or safety eyes for the eyes. Make sure they are securely attached.
With these materials in hand, you’ll be ready to follow the knitting pattern and create your very own cute hippo!
Finding the Perfect Hippo Pattern
When it comes to knitting a hippo, finding the perfect pattern is essential. With so many options available, it can be overwhelming to choose the right one. However, by considering a few key factors, you can easily find the ideal hippo knitting pattern that will result in a cute and cuddly finished product.
Difficulty Level: The first thing to consider when searching for a hippo knitting pattern is your skill level. If you’re a beginner, look for patterns that are labeled as easy or beginner-friendly. These patterns typically have simpler instructions and fewer intricate details. On the other hand, if you’re an experienced knitter, you may want to challenge yourself with a more advanced pattern that includes intricate stitch patterns or unique shaping techniques.
Style:
The style of the hippo pattern is another important factor to consider. Are you looking for a realistic and detailed hippo or something more whimsical and cartoonish? Take a look at different pattern options and decide which style aligns with your preferences. Some patterns may also include different variations, such as different sizes or poses, so you can choose the one that suits your vision.
Materials and Techniques: Another aspect to consider is the materials and techniques used in the pattern. Check if the pattern specifies the type of yarn and knitting needles required, and make sure you have them on hand or can easily obtain them. Additionally, if you have a preference for a particular knitting technique, such as knitting in the round or using cables, look for a pattern that incorporates these techniques.
Reviews and Recommendations: Lastly, take the time to read reviews and recommendations from other knitters who have tried the pattern. This can give you valuable insights into the pattern’s clarity, accuracy, and any potential challenges you may encounter. Look for patterns that have positive feedback and multiple completed project pictures for added confidence.
By considering these factors and doing some research, you can find the perfect hippo knitting pattern that will bring joy and satisfaction as you create your own adorable hippo friend.
Getting Started
If you’re looking for a cute and cuddly project for your next knitting adventure, look no further than this free hippo knitting pattern! Whether you’re an experienced knitter or just starting out, this pattern is perfect for all skill levels. With its clear instructions and simple techniques, you’ll have a finished hippo in no time.
To get started, you’ll need some basic knitting supplies. This includes a pair of knitting needles, yarn in the colors of your choice, a tapestry needle for sewing up seams, and stuffing to give your hippo its soft and huggable shape. Make sure to choose yarn that is suitable for the knitting needle size recommended in the pattern.
Step 1: Casting on
Begin by casting on the required number of stitches onto your knitting needles. This will create the foundation row for your hippo’s body.
Step 2: Knitting the body
Follow the pattern instructions to knit the body of your hippo, which will usually involve alternating between knit and purl stitches to create the desired texture. Be sure to read each row carefully and mark your progress as you go.
Step 3: Shaping the head and limbs
Once you’ve completed the body, it’s time to shape the head and limbs of your hippo. This may involve decreasing stitches or adding extra rows to create the desired proportions. Pay close attention to the pattern instructions to achieve the correct shape.
Step 4: Finishing touches
After you’ve finished knitting all the separate pieces of your hippo, it’s time to sew them together. Use a tapestry needle and the same yarn you used for knitting to carefully stitch the pieces together. Remember to leave an opening for stuffing before closing up the seams.
Finally, stuff your hippo with fiberfill or stuffing of your choice to give it a plush and cuddly feel. Once you’re happy with the stuffing, sew up the remaining opening and tidy up any loose ends.
And voila! You’ve successfully completed your adorable hippo using this free knitting pattern. Now you can enjoy the satisfaction of creating your own handmade toy or gift, or perhaps even start a collection of knitted animals. Happy knitting!
By following the pattern instructions and taking your time, you’ll soon have your very own hippo to cuddle up with or give as a heartfelt gift to someone special.
Knitting the Body

After completing the head and the snout of your hippo knitting project, it’s time to move on to knitting the body. The body of the hippo is typically larger than the head and snout, so you’ll need to use larger knitting needles and bulkier yarn.
Materials: For knitting the body, you will need bulky weight yarn in your desired color, a pair of size 9 knitting needles, a stitch marker, and a tapestry needle for sewing up the seams.
Step 1: Cast on stitches: To begin knitting the body, cast on the required number of stitches onto your knitting needle. The number of stitches will depend on the size of your hippo and the thickness of your yarn. Make sure to leave a long enough tail for sewing up the seam later.
Step 2: Knit in stockinette stitch: Once you have cast on the stitches, you will need to knit in stockinette stitch for the body. This means that you will knit one row and purl the next row. Continue knitting in this pattern until the body reaches your desired length.
Step 3: Shape the body: After knitting the required length of the body, you will need to shape it. To do this, you can decrease stitches evenly across the row. This will give the body a tapered shape. Alternatively, you can also increase stitches to make the body wider if desired.
Step 4: Bind off: Once you are satisfied with the shape and size of the body, you can bind off the stitches. Cut the yarn, leaving a long tail for sewing up the seam.
Step 5: Sew up the seams: Using a tapestry needle, sew up the seams of the body using the long tail of yarn. Make sure to secure the stitches tightly to ensure that the stuffing doesn’t come out. Leave a small opening at the bottom of the body for stuffing later.
Now that you have finished knitting the body of your hippo, you can move on to knitting the arms, legs, and tail. Stay tuned for the next steps in completing your adorable hippo knitting project!
Shaping the Head and Limbs
When knitting a hippo, shaping the head and limbs is an important step to give the toy its characteristic features. To start, it is necessary to follow the knitting pattern and instructions provided.
Head
To shape the head, the pattern may include decreasing and increasing stitches in specific rows. This creates the rounded shape of the hippo’s head. It is important to follow the pattern carefully to ensure the correct dimensions are achieved.
Additionally, details such as the eyes, nose, and mouth can be added to give the hippo its facial expression. These can be embroidered or stitched onto the knitted head, following the guidance provided in the pattern.
Limbs
The limbs of the hippo, including the arms and legs, can also be shaped using increases and decreases in the knitting pattern. This gives the toy a more realistic appearance and allows it to be posed in various positions.
To create the limbs, the pattern may instruct to knit separate pieces that will later be attached to the body. This allows for more flexibility in the knitting process and ensures the limbs are securely attached to the toy.
Overall, shaping the head and limbs of a knitted hippo is an essential step in creating a lifelike and adorable toy. Following the knitting pattern and carefully shaping the different parts will result in a finished product that is both visually appealing and enjoyable to play with.
Adding the Details
Now that you have completed the basic body and head of the hippo, it’s time to add the details to bring your knitting project to life. Adding the details will give your hippo character and make it even more adorable. Here are a few steps to follow:
1. Embroidering the Face
Using your favorite embroidery thread and a needle, carefully embroider the eyes and mouth of the hippo. Start by stitching two small circles for the eyes using a satin stitch or French knots. Then, embroider a small smile beneath the eyes using a backstitch or running stitch. Be sure to place the face details in the right position to create the desired expression for your hippo.
2. Adding Ears and Horns
Next, knit two small triangles for the ears of the hippo. Attach them to the sides of the head, ensuring that they are symmetrical. You can sew the ears in place using a yarn needle and the same yarn used to knit the body. Additionally, if you want to give your hippo a unicorn twist, you can knit a small horn and attach it to the center of the head above the eyes.
3. Creating Arms and Legs
To create the arms and legs, you will need to knit four separate pieces. These should be long and narrow, resembling sausage shapes. Attach two pieces to the sides of the body for the arms and two to the underside for the legs. Use a yarn needle to sew the pieces securely in place.
Once you have added all the necessary details, take a moment to admire your finished hippo. It’s amazing how a few small additions can completely transform a knitted toy. Your hippo is now ready to be cuddled and loved!
Finishing Touches
As you near the end of your hippo knitting project, it’s time to add those final finishing touches that will bring your creation to life. Whether you’re making a stuffed animal or a decorative piece, these details can make all the difference in the final result.
Eyes: The eyes are often one of the most important features of any knitted creature. They can give your hippo a cute and friendly look or a mischievous and playful expression. You can choose from a variety of materials for the eyes, such as plastic safety eyes, buttons, or even embroidery stitches.
Nose: The nose is another important detail that can help define the character of your knitted hippo. You can use a small pom-pom, a circle of felt, or even embroider a nose using a contrasting yarn color.
Embroidery: Embroidery can be used to add extra details and texture to your knitted hippo. You can use embroidery stitches to stitch on a smile, create a pattern on the body, or add small details like freckles or eyelashes.
Accessories: To give your knitted hippo even more personality, you can add accessories like a scarf, a bow tie, or a hat. These small additions can make your hippo unique and add an extra touch of charm.
Finishing the seams: Once you have completed all the knitting and added the necessary details, it’s important to finish the seams neatly. This will ensure that your hippo has a polished and professional appearance. You can use a whip stitch or mattress stitch to sew the seams together, depending on your preference.
Blocking: Finally, once your hippo is complete, you may want to consider blocking it to give it a more even shape and to smooth out any wrinkles. Blocking involves wetting the knitted piece, shaping it, and allowing it to dry in the desired shape.
Tips and Tricks
If you’re just starting out with knitting, it’s important to remember that practice makes perfect. Don’t be discouraged if your first few attempts don’t turn out as expected. With time and patience, you’ll improve your skills and create beautiful knitted pieces.
Here are some tips and tricks to help you along the way:
- Choose the right materials: Select the appropriate yarn and knitting needles for your project. Different yarn weights and needle sizes can give different results in terms of gauge and finished size.
- Follow the pattern: Read the knitting pattern carefully before starting. Make sure you understand all the abbreviations and instructions. Take the time to familiarize yourself with the pattern and make any necessary adjustments before beginning.
- Practice basic stitches: Mastering the basic knitting stitches, such as knit and purl, will give you a solid foundation for more complex patterns. Practice these stitches until you feel comfortable and confident with them.
- Count your stitches: Counting your stitches regularly will help you keep track of your progress and ensure that you don’t make any mistakes. Use stitch markers or a row counter to help you stay organized.
- Take breaks and relax: Knitting can be a soothing and enjoyable activity, but it’s important to take breaks and give your hands and wrists a rest. Stretching exercises can also help prevent stiffness and strain.
- Join online knitting communities: There are many online forums, groups, and social media platforms dedicated to knitting. Joining these communities can provide you with support, inspiration, and valuable tips and tricks from experienced knitters.
- Experiment and have fun: Don’t be afraid to deviate from the patterns and get creative with your knitting. Try different stitches, colors, and yarns to personalize your projects. Remember, knitting is a form of self-expression and should be enjoyable!
With these tips and tricks in mind, you’re ready to tackle the hippo knitting pattern and create your very own adorable knitted hippo. Happy knitting!