
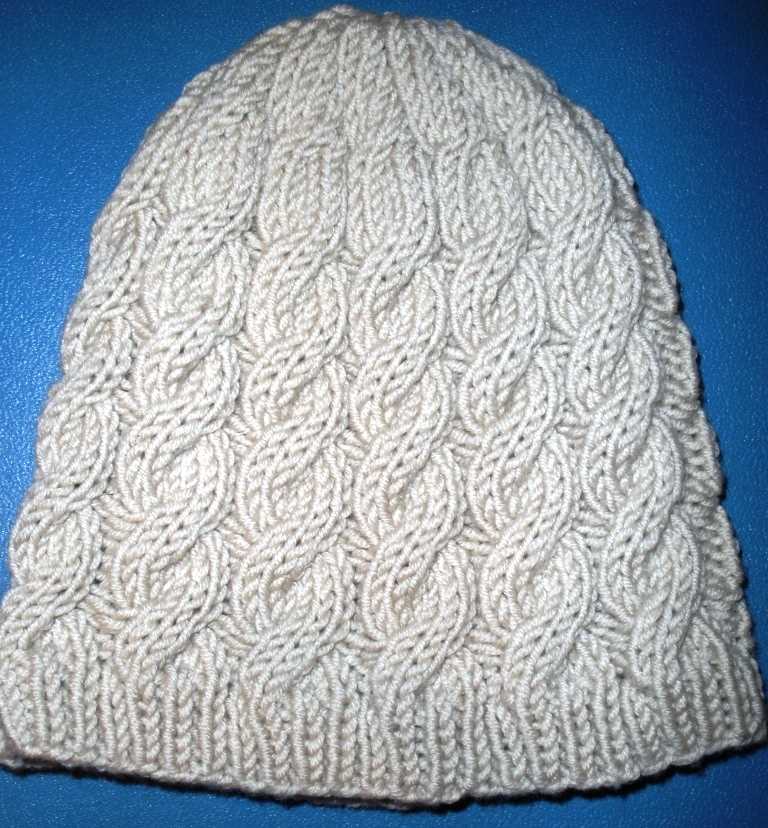
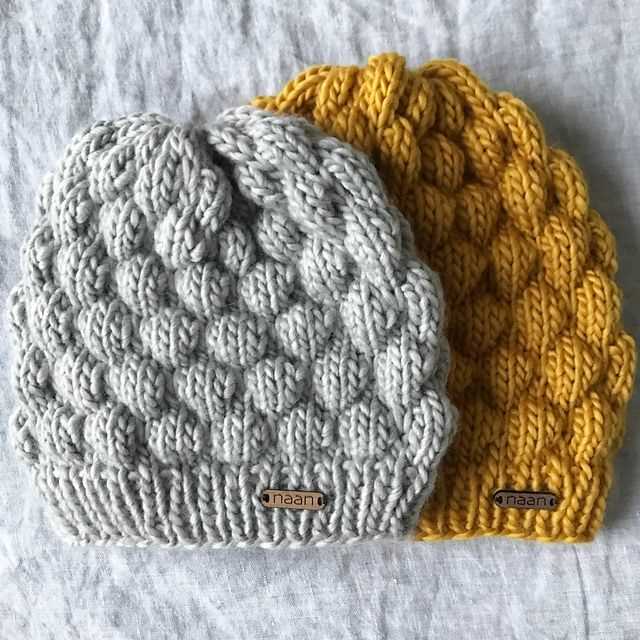
Are you looking for a cozy and stylish hat that you can make yourself? Look no further! In this article, we will share a cable knit crochet hat pattern that is completely free. Whether you are a beginner or an experienced crocheter, this pattern is perfect for you!
The cable knit pattern adds a beautiful and intricate detail to the hat, making it stand out from the crowd. It gives the hat a classic and timeless look, making it a perfect accessory for any outfit. The best part is that you don’t need any special equipment or skills to make this hat – just some basic crochet stitches and a little bit of patience!
We will provide you with step-by-step instructions and helpful tips along the way. By the end of this article, you will have a gorgeous cable knit crochet hat that you can wear with pride or give as a thoughtful handmade gift. So grab your crochet hook and let’s get started on this exciting project!
Cable Knit Crochet Hat Pattern Free
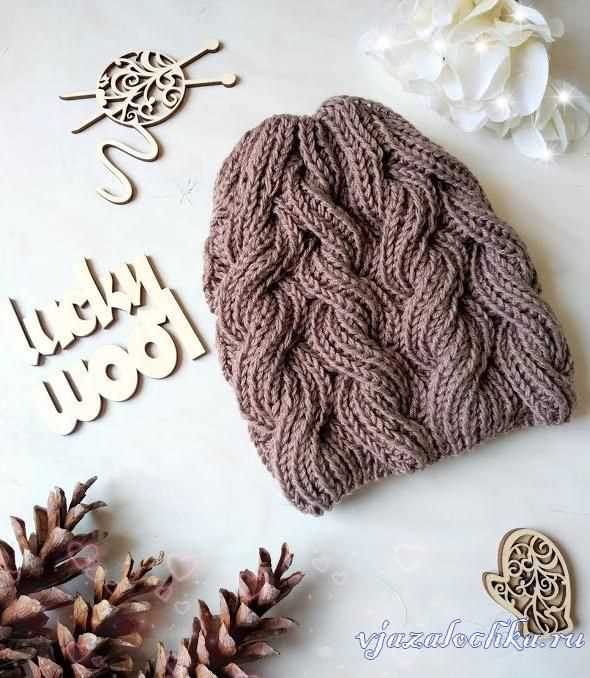
If you’re in search of a cozy and stylish hat pattern, look no further than the cable knit crochet hat pattern. This pattern combines the classic look of cable knitting with the warmth and versatility of crochet. And the best part? It’s absolutely free!
The cable knit crochet hat pattern is perfect for intermediate to advanced crocheters who are looking to challenge themselves and create a beautiful and intricate design. The pattern typically includes a combination of stitches such as front post double crochet, back post double crochet, and cables, which create the distinctive cable knit texture.
Materials
- Medium weight yarn in your choice of color
- Crochet hook size that matches the yarn weight
- Cable needle
- Yarn needle
- Scissors
Instructions
- Start by making a foundation chain of the desired length for the hat’s circumference. Join the chain with a slip stitch to form a ring.
- Work single crochet stitches in the round until the hat reaches the desired length.
- Begin the cable stitch pattern by working a set of front post double crochet stitches, followed by back post double crochet stitches. Repeat this pattern for the desired number of rounds.
- Continue alternating between front post and back post double crochet stitches to create the cable knit texture. Use a cable needle to hold stitches at the front or back as needed.
- Complete the hat by working single crochet stitches in the round for a few more rounds. Fasten off and weave in any loose ends.
This cable knit crochet hat pattern is a great way to stay warm and stylish during the colder months. Whether you’re gifting it to a friend or keeping it for yourself, this hat is sure to be a favorite. So grab your crochet hook and start stitching!
Overview:
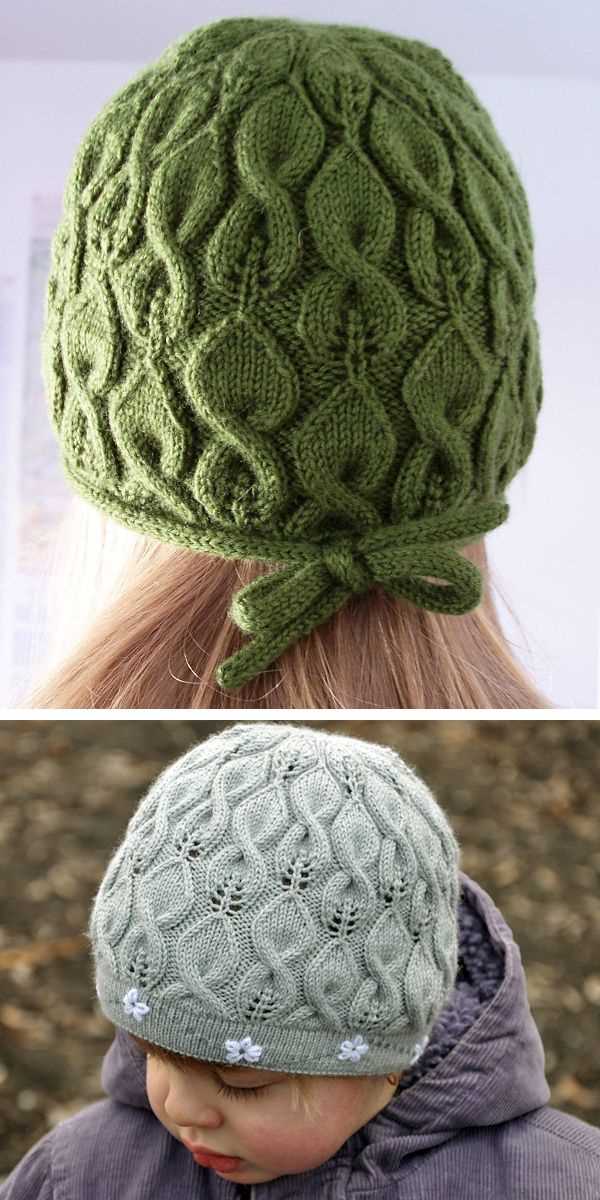
Looking for a free pattern to crochet a cable knit hat? You’ve come to the right place! In this article, we will provide you with an overview of a cable knit crochet hat pattern that you can follow to create a cozy and stylish hat for yourself or as a gift.
The cable knit crochet hat pattern we will be discussing is perfect for beginners and advanced crocheters alike. It features a classic cable knit design that adds texture and interest to the hat. The pattern uses basic crochet stitches such as single crochet, double crochet, and front post treble crochet, making it accessible to crocheters of all skill levels.
Here is a breakdown of the steps involved in creating the cable knit crochet hat:
- Start by gathering the necessary materials, including a crochet hook, yarn, stitch markers, and a yarn needle.
- Next, make a slip knot and create a foundation chain using the specified number of stitches.
- Work the first row of stitches, following the pattern’s instructions for the specific stitch pattern used.
- Continue working rows, following the pattern’s stitch sequence and increasing or decreasing stitches as required to shape the hat.
- Once the desired length is reached, finish off the hat by fastening off the yarn and weaving in any loose ends.
- Finally, try on your completed cable knit crochet hat and make any necessary adjustments for a perfect fit.
This cable knit crochet hat pattern is a great project for anyone looking to expand their crochet skills or create a unique accessory. With just a few hours of work, you’ll have a stylish and cozy hat that you can wear all winter long.
Materials Needed:
In order to create a cable knit crochet hat, you will need a few essential materials. These materials will help you achieve the desired texture and appearance of a cable knit pattern.
1. Yarn:
Choose a soft and warm yarn in the color of your choice. Ensure that the yarn is suitable for crochet work and has enough yardage for your project.
2. Crochet Hook:
Select a crochet hook appropriate for the weight of your yarn. The size of the hook will determine the size of your stitches and the overall tension of your hat.
3. Cable Needle:
A cable needle is an essential tool for creating the cable knit pattern. It helps you hold stitches while you work on other parts of the pattern.
4. Stitch Markers:

Stitch markers are used to keep track of specific stitches or sections in your hat pattern. They can be helpful when working on complex cable patterns.
5. Scissors:
A pair of sharp scissors is necessary for cutting the yarn and trimming any excess at the end of the project.
6. Tapestry Needle:
A tapestry needle is used for weaving in loose ends and finishing touches. It helps to neatly secure any loose yarn tails and give your hat a polished look.
7. Measuring Tape:
A measuring tape is useful for checking the gauge of your crochet work and ensuring that your hat will fit properly.
With these materials on hand, you are ready to start working on your cable knit crochet hat pattern.
Step-by-Step Instructions:
1. Gather your materials: To start this cable knit crochet hat pattern, you will need yarn, a crochet hook, and a pair of scissors. Choose a yarn color and weight that you like, and select an appropriate crochet hook size based on the yarn label.
2. Start with a foundation chain: Begin by making a foundation chain that is long enough to fit around your head comfortably. The exact number of chains will depend on your crochet tension and desired hat size. For a standard adult size hat, a foundation chain of about 100-120 chains should work.
3. Join the chain: Once you have made your foundation chain, join it into a ring by slip stitching into the first chain. This will create the base of your hat.
4. Work the ribbing: Next, work several rounds of ribbing to create the brim of the hat. You can use a simple stitch pattern like single crochet or half double crochet to create the ribbing effect. Work the ribbing for about 1-2 inches, or until you reach your desired brim length.
5. Switch to the cable stitch: After completing the ribbing, it’s time to switch to the cable stitch pattern. This will create the intricate twisted cable design on your hat. Follow the cable stitch pattern instructions, which typically involve a combination of front post and back post stitches, to create the cables. Repeat the cable stitch pattern for several rounds, or until you reach your desired hat height.
6. Shape the crown: Once you have reached your desired hat height, it’s time to shape the crown. This usually involves decreasing stitches evenly across each round to create a tapered shape. You can use simple stitches like single crochet or double crochet to decrease the stitches. Continue decreasing stitches until you have a small opening at the top of your hat.
7. Finish off: To finish off your cable knit crochet hat, cut the yarn leaving a long tail. Thread the tail through the last loop on your hook and pull tight to secure. Weave in any loose ends using a yarn needle. Your cable knit crochet hat is now complete and ready to wear!
Choosing the Right Yarn and Hook:
When it comes to crocheting a cable knit hat, choosing the right yarn and hook is crucial to achieving the desired result. The yarn you select will greatly affect the overall appearance and texture of the hat, while the hook size determines the gauge and size of the finished project.
1. Yarn:
For a cable knit hat, it is best to choose a yarn that is thick and warm, such as a bulky or super bulky weight yarn. These yarns will create a cozy and chunky texture that is perfect for winter accessories. Look for yarns that are labeled as “cable knit” or “knit look” to ensure that they will give your hat the desired cable stitch effect.
Additionally, consider the fiber content of the yarn. Wool and acrylic blends are popular choices for hats as they provide warmth and durability. However, if you prefer a softer texture, you can opt for yarns made from alpaca, cashmere, or bamboo.
2. Hook:
The size of the hook you use will determine the gauge and size of your hat. For a cable knit hat, it is best to use a hook that is slightly larger than what is recommended on the yarn label. This will create a looser tension and allow the cables to stand out more prominently.
A good starting point is to use a hook size that is one or two sizes larger than what is recommended for the yarn. However, keep in mind that every crocheter has a unique tension, so it is important to make a gauge swatch before starting your hat. This will help you determine if you need to adjust your hook size to achieve the desired gauge.
In summary, when choosing the right yarn and hook for a cable knit hat, opt for a thick and warm yarn that will create a cozy texture. Consider the fiber content based on your preference for warmth and softness. Use a hook size that is slightly larger than what is recommended to allow the cables to stand out. Remember to make a gauge swatch to ensure your hat turns out the right size.
Creating the Ribbed Band:
To start your cable knit crochet hat, you will first need to create the ribbed band that goes around the bottom of the hat. This band will provide a stretchy and comfortable fit for the hat.
To create the ribbed band, you will need to work in rows. Start by chaining a multiple of stitches that will fit comfortably around your head. This will ensure that the ribbed band is the correct size. Once you have chained the desired number of stitches, join the last stitch to the first stitch with a slip stitch to create a ring.
Next, you will need to work in the round. Begin by chaining one to serve as the first stitch. Then, alternate between single crochet and front post double crochet stitches around the ring. The single crochet stitches will create the ribbing, while the front post double crochet stitches will give the band its stretchiness.
Repeat this pattern of single crochet and front post double crochet stitches until you have reached the desired width for your ribbed band. Once you are satisfied with the width, fasten off the yarn and weave in any loose ends to secure the band in place.
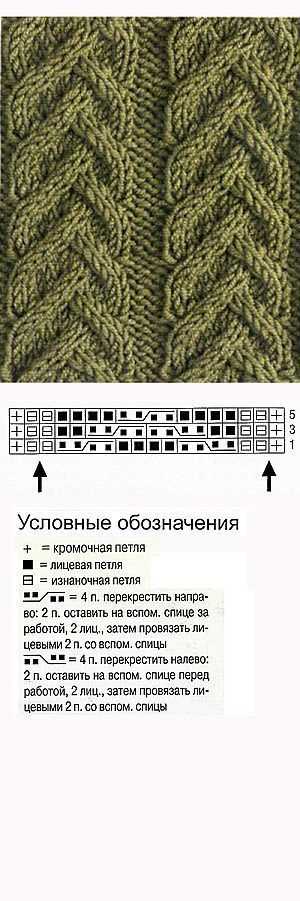
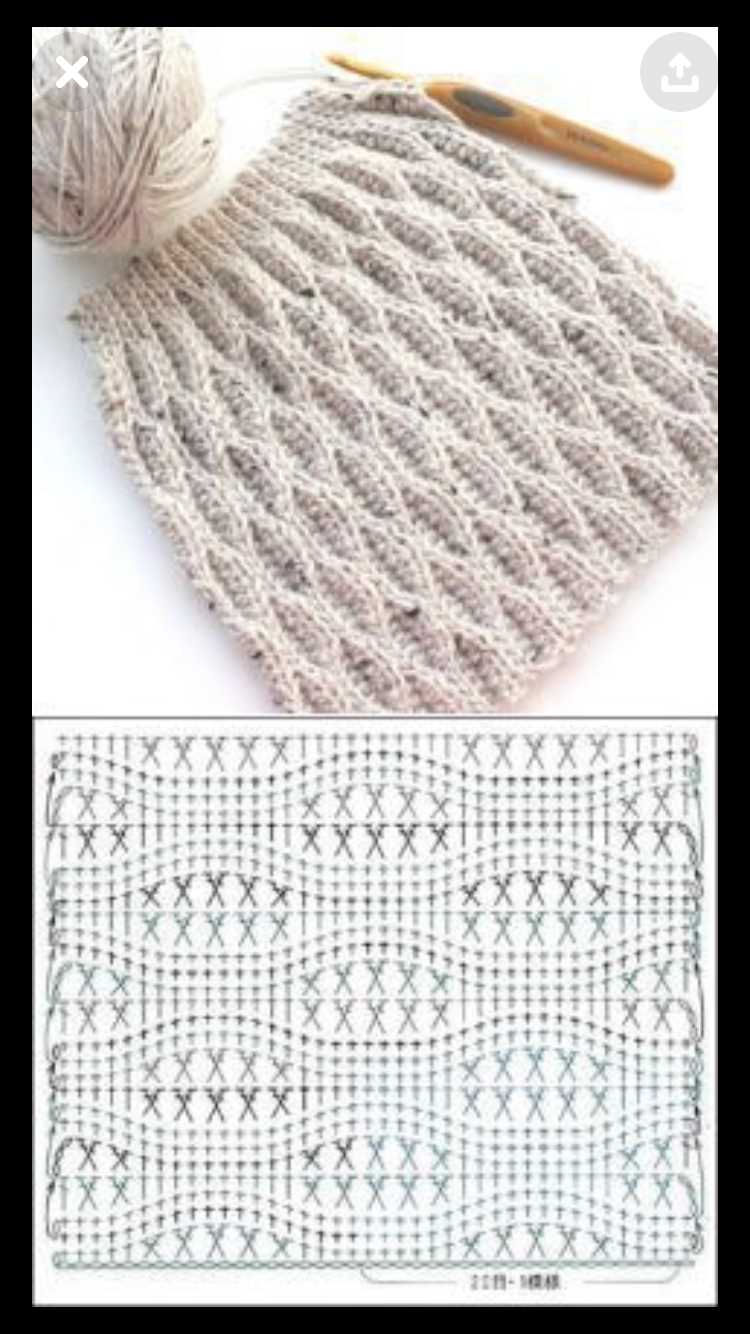
Working the Cable Knit Stitch:
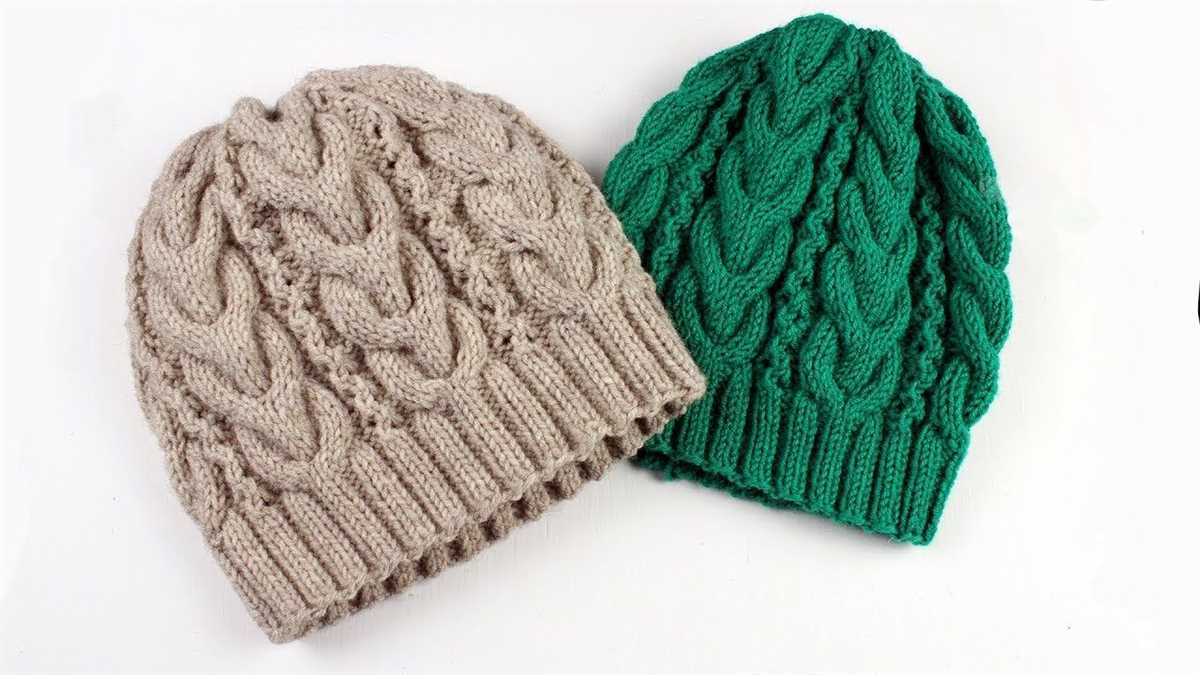
The cable knit stitch is a classic and timeless technique in knitting and crochet. It creates a beautiful and textured pattern that looks like interwoven cables, adding depth and interest to your projects. While it may appear complicated, it is actually quite simple to learn and master.
To start working the cable knit stitch, you will need a cable needle, which is a short double-pointed needle with a curve in the middle. This needle is used to hold the stitches while you work the crossing cables. Additionally, you will need a set of regular knitting or crochet needles, depending on the method you are using.
Begin by casting on the required number of stitches for your project. The cable knit stitch typically requires a multiple of a certain number of stitches, such as 4 or 6, so make sure to check your pattern instructions to determine the right number for your project.
Once you have the right number of stitches, you can start working the cable knit stitch. The first step is to knit or crochet a few rows of the basic stitch pattern, which usually consists of a combination of knits and purls. This creates a solid foundation for the cables to be worked on.
To create the cable pattern, you will need to follow the chart or written instructions provided in your pattern. These instructions will indicate which stitches need to be crossed over each other and in what direction. Typically, the cable stitches are held on the cable needle, and then the next set of stitches on the regular needle is worked. After completing these stitches, the cable stitches are then worked from the cable needle, creating the crossover effect.
Continue following the pattern instructions, repeating the cable crossings as necessary, until you have completed the desired length of your project. Make sure to finish off your work with a few rows of the basic stitch pattern to create a clean and polished edge.
With a little practice and patience, you will soon be able to create stunning cable knit designs in your knitting or crochet projects. Whether you are making a cozy hat, a warm sweater, or a stylish scarf, the cable knit stitch adds a touch of elegance and sophistication to any piece.
Shaping the Crown:
Once you have completed the brim and reached the desired length for your hat, it’s time to start shaping the crown. To create the cable knit pattern, you will need to decrease stitches gradually until you reach the top. This will give your hat a snug fit and a seamless finish.
Decreasing Stitches:
To begin shaping the crown, you will need to decrease stitches evenly around the hat. This can be done by working a series of decreases at regular intervals. The exact number of decreases will depend on the size of your hat and the desired fit. You can use a tape measure or a hat sizing chart to determine the number of stitches to decrease.
One common method for decreasing stitches is to work a knit two together (k2tog) or a purl two together (p2tog) decrease at regular intervals. This can be done on every other round or every few rounds, depending on the desired rate of decrease. Another option is to work a centered double decrease (CDD) to create a more pronounced decrease at specific points in the pattern.
Creating the Hat Top:
As you continue to decrease stitches, the top of your hat will gradually close up. Once you have reached a small enough number of stitches, you can thread the yarn through the remaining stitches and pull tight to close the top. Alternatively, you can continue to decrease until only a few stitches remain, and then cut the yarn, leaving a long tail. Thread the tail through a tapestry needle and weave it through the remaining stitches to close the top.
Finishing Touches:
Now that you’ve completed your cable knit crochet hat, it’s time to add the finishing touches to make it truly special. Here are some ideas to consider:
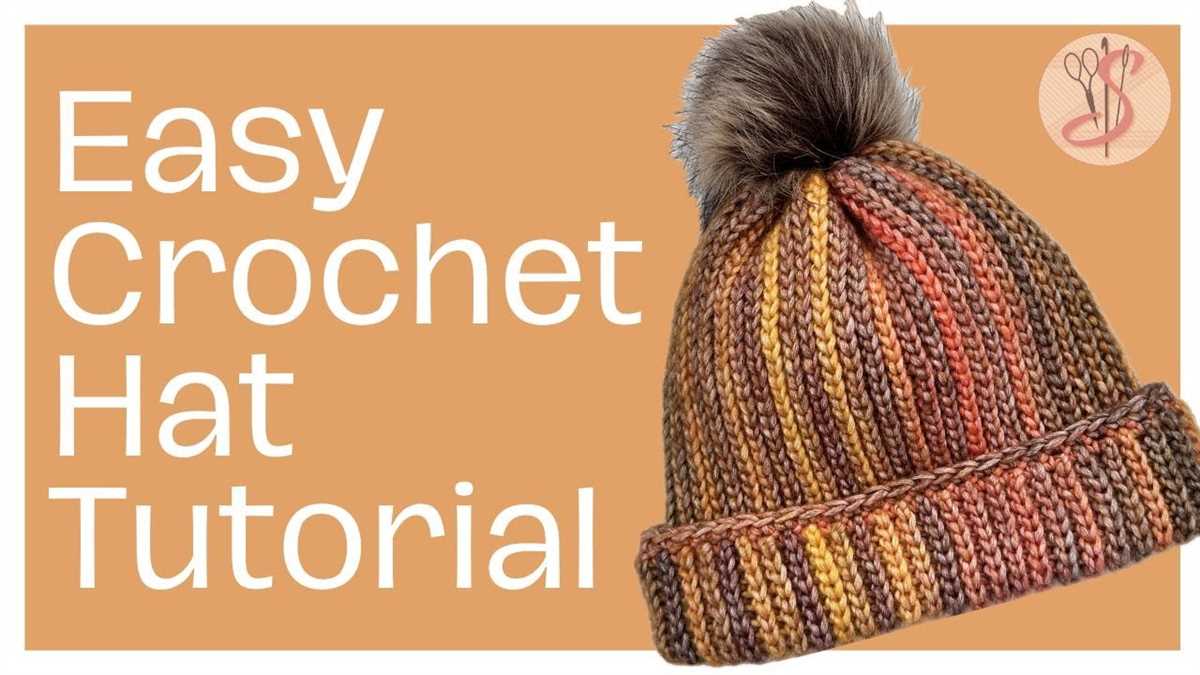
1. Pom Pom
Add a pom pom to the top of your hat for a fun and playful touch. You can use yarn in a contrasting color to create a statement, or match it to the color of your hat for a more subtle look. You can make your own pom pom using a pom pom maker or simply by wrapping yarn around your fingers and then tying it tightly in the middle.
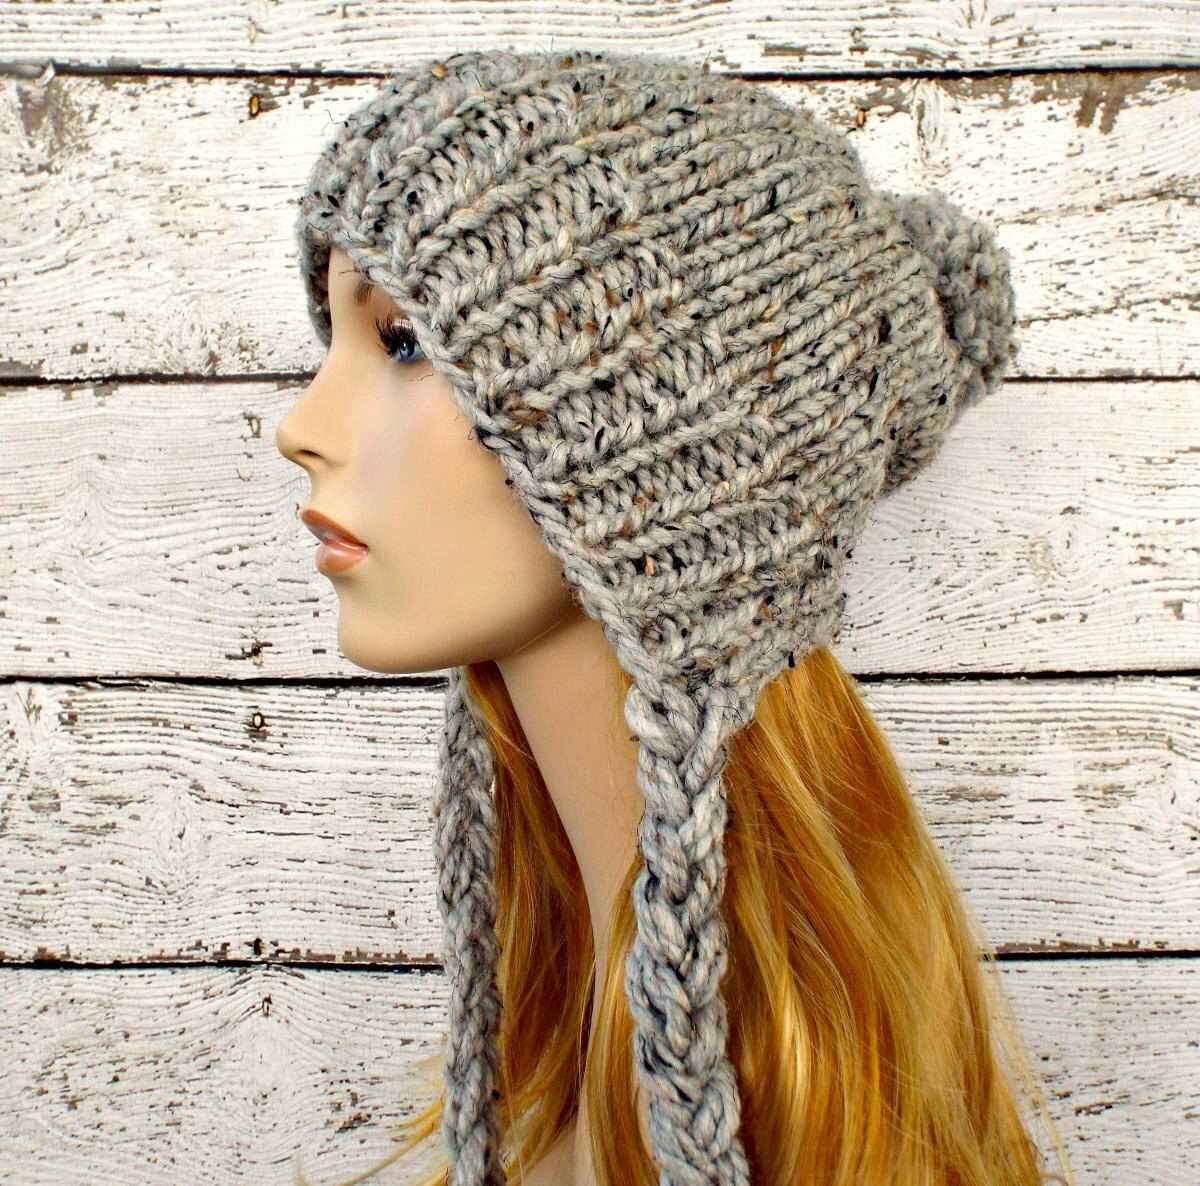
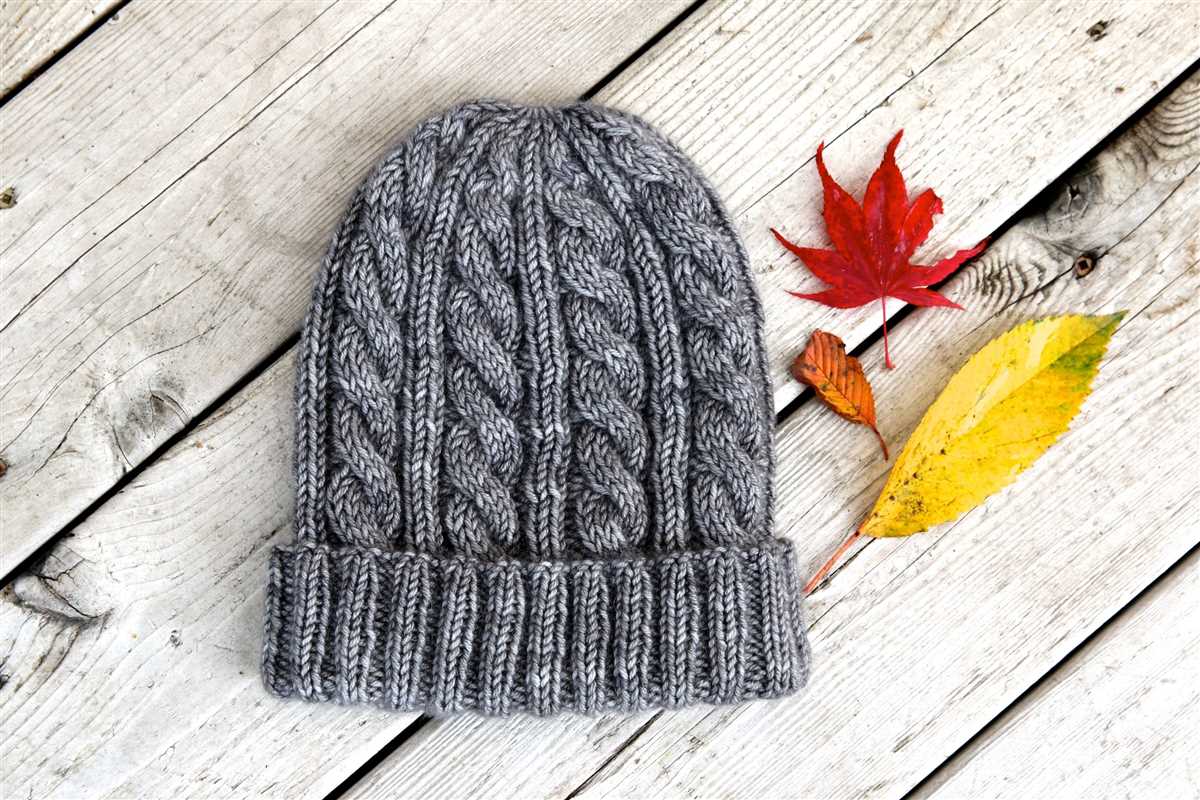
2. Ribbed Brim
Give your hat a more finished look by adding a ribbed brim. This can be done by switching to a smaller crochet hook and working a few rows of ribbing stitch, such as single crochet or half double crochet in the back loop only. This will create a stretchy and comfortable brim that will keep the hat in place on your head.
3. Embellishments
Get creative and add some embellishments to your hat. You can sew on buttons, beads, or even crochet flowers to give your hat a unique and personalized touch. Make sure to choose embellishments that are securely attached and won’t come off during wear and washing.
4. Lining
If you want to add some extra warmth and comfort to your hat, consider adding a lining. This can be done by sewing in a fabric lining or using a fleece or flannel material. A lining will not only make your hat cozier to wear, but it will also add more structure and durability to your crochet work.
5. Blocking
After completing your hat, you may want to consider blocking it to give it a more polished look. Blocking involves wetting your crochet piece, shaping it, and then allowing it to dry in the desired shape. This can help smooth out any uneven stitches and give your hat a more professional finish.
Tips and Tricks
When it comes to crocheting a cable knit hat, there are a few tips and tricks that can help you achieve the best results. Whether you are an experienced crocheter or a beginner, these tips will come in handy.
1. Use the right materials
Choosing the right yarn and hook size is crucial for creating a cable knit hat with a nice texture and fit. Opt for a medium-weight yarn that is durable and soft, and use a crochet hook that matches the recommended gauge for the pattern.
2. Familiarize yourself with cable stitch techniques
Cable stitch patterns can be intimidating for beginners, but with practice, they become easier to master. Take the time to familiarize yourself with cable stitch techniques, such as front post double crochet and back post double crochet, as these are the building blocks of cable knits.
3. Use stitch markers
When working on a cable knit hat pattern, using stitch markers can help you keep track of the pattern repeats and prevent mistakes. Place a stitch marker at the beginning of each cable section to ensure that you are following the pattern correctly.
4. Block your finished hat
Blocking your finished hat can make a huge difference in its appearance. To block a cable knit hat, wet it gently, reshape it to the desired size, and let it dry flat. This will help even out any uneven stitches and give your hat a professional finish.
5. Add personal touches
Don’t be afraid to add your own personal touches to a cable knit hat pattern. Whether it’s a pom-pom, a decorative button, or a contrasting color for the ribbed brim, adding these small details can make your hat unique and special.
- Use the right materials
- Familiarize yourself with cable stitch techniques
- Use stitch markers
- Block your finished hat
- Add personal touches
Variations and Customizations:
There are many ways to customize and personalize your cable knit crochet hat. Here are a few ideas:
- Color variations: Experiment with different colors of yarn to create unique and vibrant hats. You can choose a single color, create stripes, or even use variegated yarn for a beautiful effect.
- Pom pom: Add a fun and playful touch to your hat by attaching a pom pom on top. You can make a pom pom using yarn or purchase pre-made pom poms in various colors and sizes.
- Embroidery: Personalize your hat by adding embroidered designs or initials. You can use different colored yarns to create intricate patterns or simply add a monogram for a classy touch.
- Buttons: Sewing buttons onto your hat can enhance its aesthetic appeal. Choose buttons that complement the color and style of your hat or use contrasting buttons for an eye-catching effect.
- Decorative stitches: Experiment with different crochet stitches to create unique textures on your hat. You can try out popcorn stitches, bobbles, or even incorporate lace-like stitches for an elegant look.
By customizing and adding your own personal touches, you can create a cable knit crochet hat that reflects your style and individuality. Get creative and have fun with your designs!
Thank you for reading our article on cable knit crochet hat patterns. We hope you found the instructions and tips helpful. Happy crocheting!