
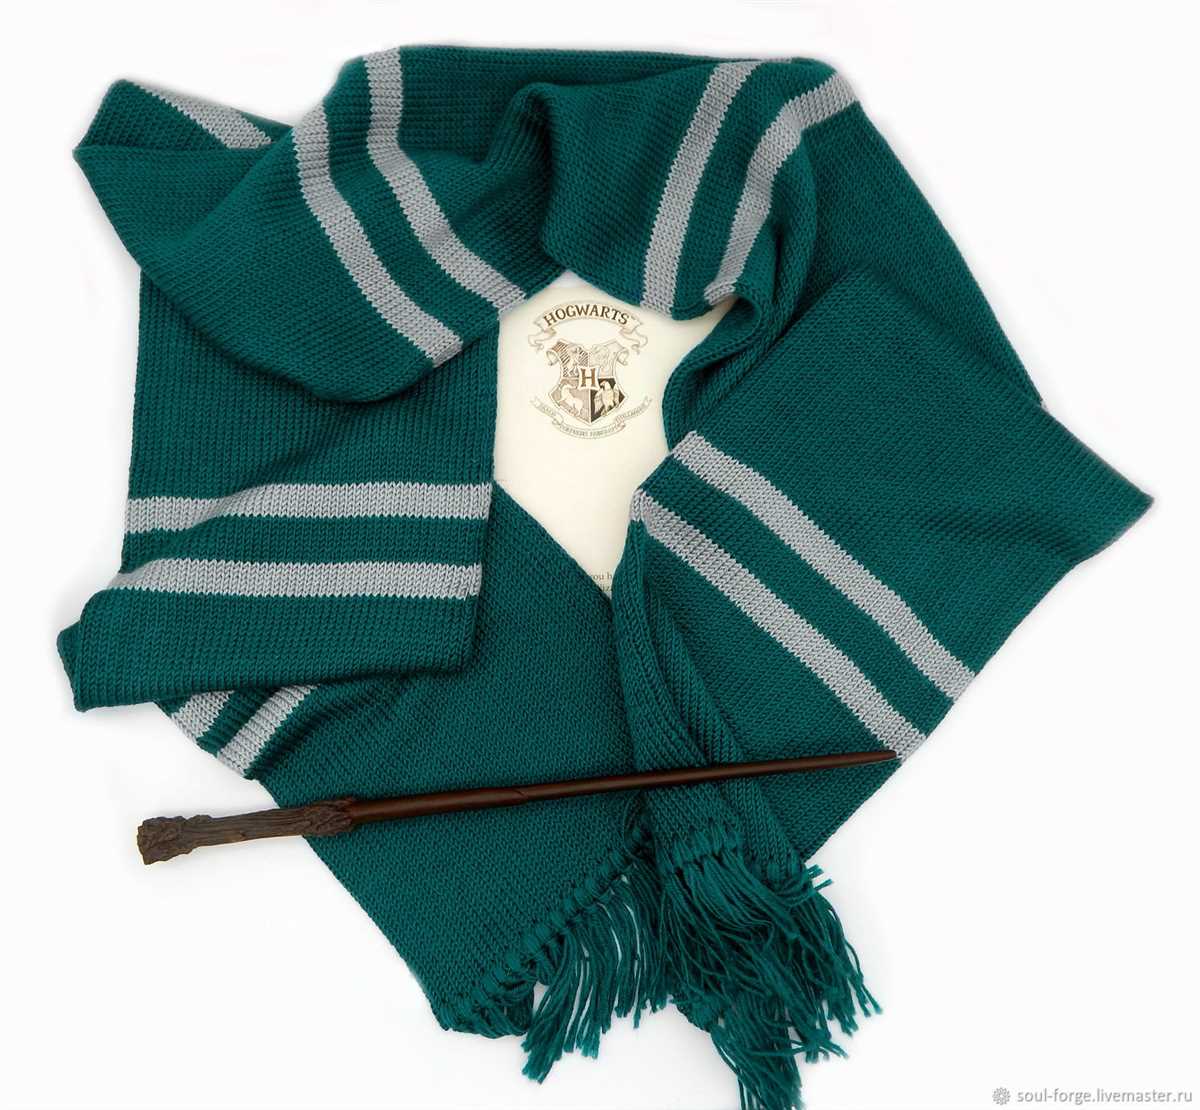
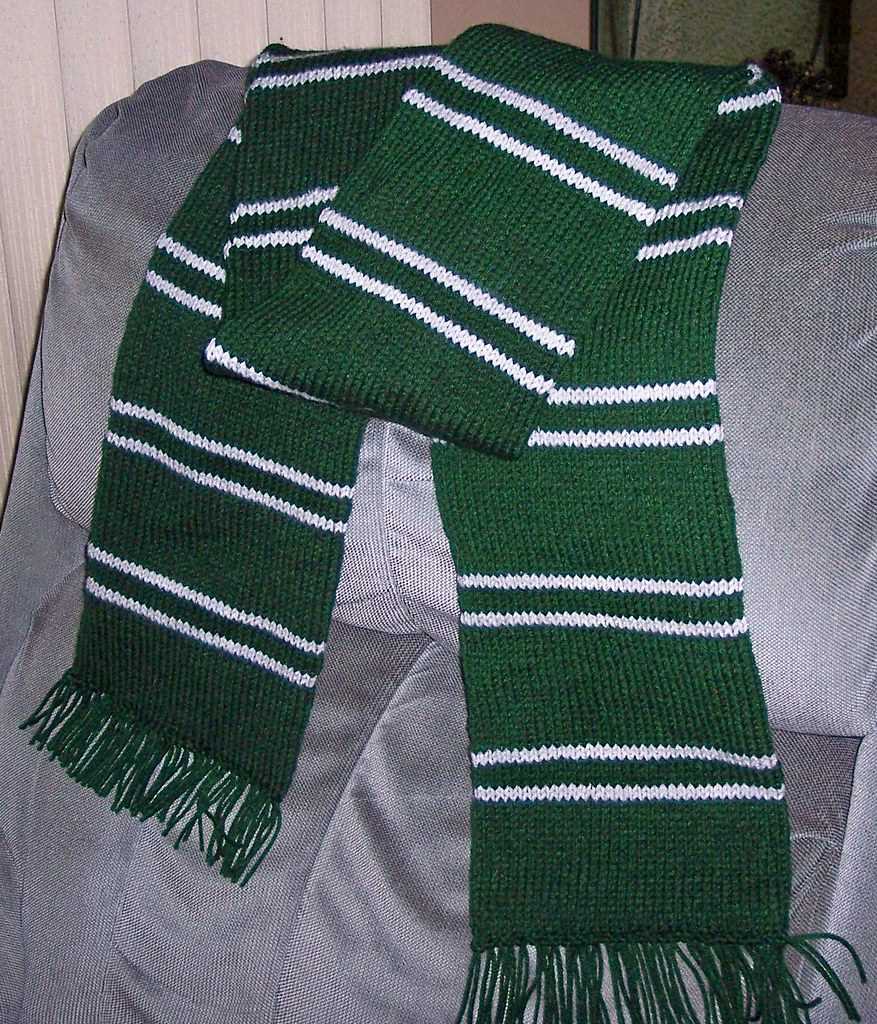
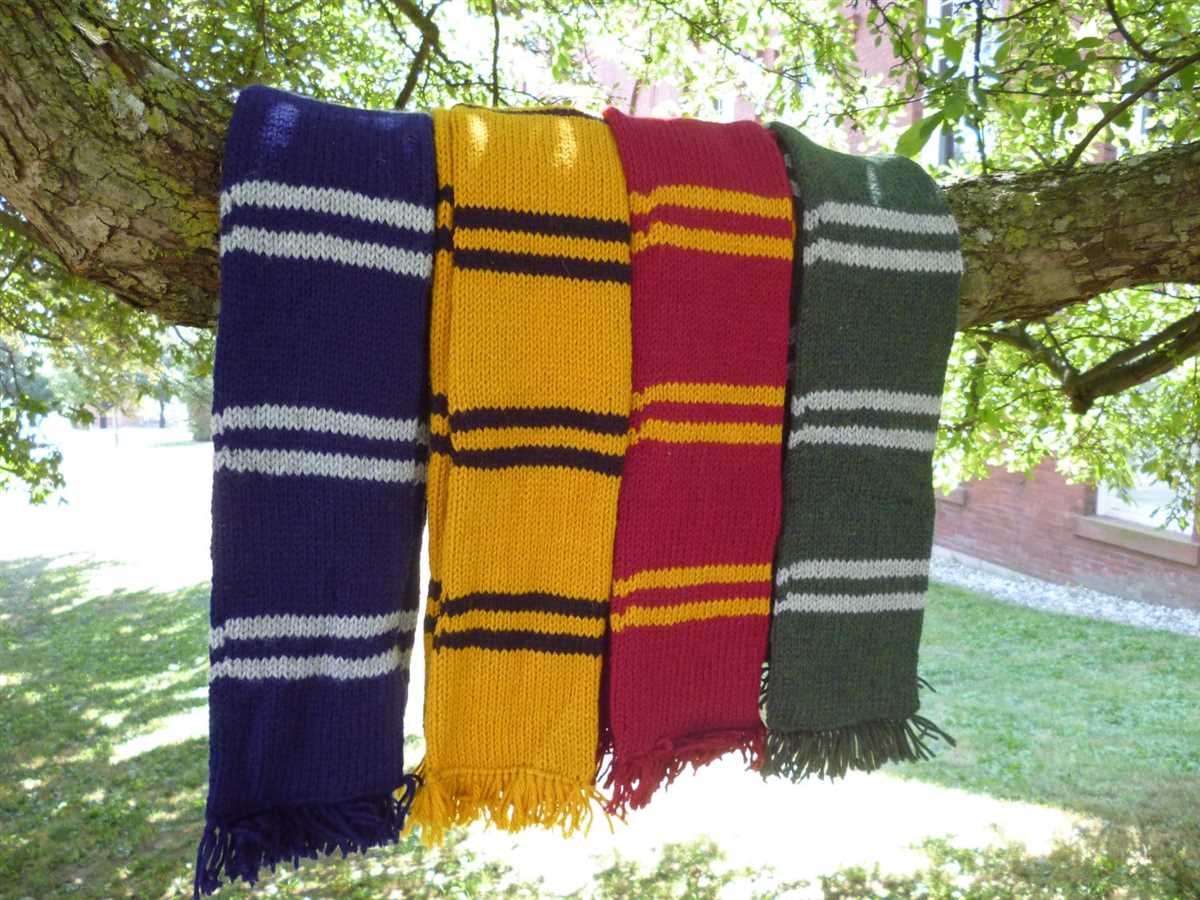
If you’re a fan of the Harry Potter series and want to show your support for the Slytherin House, then why not make your own Slytherin scarf? Knitting patterns are a great way to bring your favorite fictional world to life and create a unique accessory that showcases your love for the magical universe.
The Slytherin House, known for its cunning and ambition, has a distinct color scheme of green and silver. The scarf worn by members of Slytherin is a stylish accessory that can be worn with pride. By following this knitting pattern, you can recreate the iconic Slytherin scarf and add a touch of magic to your winter wardrobe.
This knitting pattern is suitable for beginners and is a great way to practice your knitting skills. Whether you’re a seasoned knitter or just starting out, this project is a fun and rewarding way to create your own Slytherin scarf. So grab your knitting needles and get ready to show off your Hogwarts pride!
Harry Potter Slytherin Scarf Knitting Pattern

Are you a fan of the Harry Potter series and the Slytherin House? If so, then you’ll love this knitting pattern for a Slytherin scarf! This pattern will allow you to create a beautiful and cozy scarf that represents your love for all things Slytherin.
Materials:
- Worsted weight yarn in Slytherin house colors (green and silver)
- US size 8 knitting needles
- Yarn needle
Instructions:
- Cast on 40 stitches using the green yarn.
- Knit every row using the garter stitch pattern until the scarf reaches the desired length.
- Switch to the silver yarn and knit every row using the garter stitch pattern for 10 rows.
- Switch back to the green yarn and continue knitting every row using the garter stitch pattern for another 10 rows.
- Repeat steps 3 and 4 until the scarf is the desired length.
- Bind off all stitches and weave in any loose ends using the yarn needle.
This Slytherin scarf knitting pattern is perfect for fans of the series who want to show their support for the ambitious and cunning house. Not only will you stay warm and cozy, but you’ll also be showcasing your love for the Harry Potter universe. So grab your knitting needles and get started on your very own Slytherin scarf today!
Materials Needed to Knit a Harry Potter Slytherin Scarf
Knitting a Harry Potter Slytherin scarf requires a few specific materials to capture the essence of the house’s colors and symbols. Here is a list of the essential items you will need:
- Yarn: To create a Slytherin scarf, you will need two different colors of yarn – green and grey. The green yarn should be a shade of dark green, while the grey yarn should be a medium to dark grey.
- Knitting Needles: Choose a pair of knitting needles that are appropriate for the weight of your yarn. Scarves are typically made with medium weight yarn, so choose a pair of size 8 (5mm) knitting needles.
- Tapestry Needle: A tapestry needle is necessary for weaving in loose ends and sewing the scarf pieces together. Choose a needle with a large eye to accommodate the yarn.
- Measuring Tape or Ruler: A measuring tape or ruler will help you keep track of the length and width of your scarf as you knit. This is especially important if you want to ensure that your scarf matches the dimensions of the one featured in the Harry Potter series.
- Scissors: A pair of sharp scissors is essential for cutting your yarn and trimming any excess.
- Pattern: Lastly, you will need a knitting pattern or instructions to guide you through the process of creating the Slytherin scarf. There are many free patterns available online, or you can create your own if you are an experienced knitter.
Step-by-Step Guide to Knitting a Harry Potter Slytherin Scarf
Are you a fan of Harry Potter and a member of the Slytherin House? If so, knitting your own Slytherin scarf is a great way to show your house pride. With this step-by-step guide, you’ll be able to create your very own Slytherin scarf in no time.
Materials needed:
- Green and silver yarn
- Knitting needles (size 8)
- Tape measure
- Scissors
Instructions:
- Start by casting on 40 stitches using the green yarn. This will be the width of your scarf.
- Knit using the stockinette stitch for the first 10 rows. This means knitting one row and purling the next.
- Switch to the silver yarn and knit two rows using the stockinette stitch.
- Switch back to the green yarn and knit four rows using the stockinette stitch.
- Repeat steps 3 and 4 until you have reached the desired length for your scarf.
- Finish off your scarf by knitting 10 more rows using the stockinette stitch with the green yarn.
- Bind off your stitches and weave in any loose ends.
Tips:
- Make sure to check the gauge of your stitches to ensure that your scarf is the correct size.
- Feel free to customize your scarf by adding fringe or other embellishments.
- If you’re new to knitting, practice the stockinette stitch and casting on and off before starting your scarf.
Now that you have the instructions, it’s time to grab your materials and get knitting! Before you know it, you’ll have a beautiful Slytherin scarf to wear and show off your house pride.
Choosing the Right Yarn for Your Harry Potter Slytherin Scarf
When knitting a Harry Potter Slytherin scarf, one of the most important factors to consider is the choice of yarn. The yarn you choose will not only determine the overall look and feel of the scarf but also affect its durability and warmth. To ensure your scarf captures the essence of Slytherin house, it’s essential to select the right colors and materials.
For a Slytherin scarf, you’ll need yarn in shades of green and silver, representing the house colors. Look for yarns that offer a rich, vibrant green color that closely matches the Slytherin crest. For the silver accents, opt for a metallic or shimmering yarn to add a touch of magic and authenticity to your scarf.
1. Worsted Weight Yarn:
Worsted weight yarn is a popular choice for scarves due to its versatility and accessibility. This medium weight yarn offers a balance between warmth and comfort, making it suitable for those transitional seasons. When selecting a worsted weight yarn for your Slytherin scarf, opt for a blend that incorporates wool or acrylic for added warmth and durability.
2. Sport Weight Yarn:
If you desire a lighter, more delicate scarf, sport weight yarn can be a perfect choice. Sport weight yarns are thinner and lighter, making them ideal for scarves that can be worn in milder weather or as a fashion accessory. Look for sport weight yarns that offer a wide range of green shades to achieve the perfect Slytherin look.
3. Super Bulky Yarn:
If you want a chunky and cozy scarf to showcase your Slytherin pride, super bulky yarn is the way to go. This thick yarn creates a warm and snuggly scarf perfect for wintertime. The bulkiness of the yarn also allows you to work up the scarf quickly, making it an excellent option for those who want to finish their project in no time.
- 4. Cotton Yarn:
- 5. Silk Yarn:
- 6. Alpaca Yarn:
Ultimately, the choice of yarn for your Harry Potter Slytherin scarf comes down to personal preference and the desired outcome. Experiment with different yarn weights and materials to find the perfect combination that not only reflects the house colors but also meets your knitting skill level and comfort preferences. Remember, knitting a Slytherin scarf is not just about creating a fashionable accessory; it’s about embracing the magical world of Harry Potter and showing your love for the Hogwarts houses.
How to Cast On Stitches for Your Harry Potter Slytherin Scarf
Knitting your own Harry Potter Slytherin scarf is a fun and creative project that allows you to show off your love for the Slytherin house. One of the first steps in knitting the scarf is casting on stitches. Casting on is the process of creating the foundation row of stitches that will be worked into the scarf.
To cast on stitches for your Harry Potter Slytherin scarf, you will need your chosen yarn in the colors of green and silver or black, and a pair of appropriately sized knitting needles. You will begin by making a slipknot with the green yarn and placing it on one of the needles. This slipknot will be the first stitch of your scarf.
Next, hold the needle with the slipknot in your right hand and the other needle in your left hand. Insert the left-hand needle from front to back into the slipknot, then wrap the green yarn around the tip of the left-hand needle. Pull the loop of yarn through the slipknot, creating a new stitch on the left-hand needle.
Continue this process, inserting the left-hand needle into the new stitch on the right-hand needle, wrapping the green yarn around the tip of the left-hand needle, and pulling the loop of yarn through to create a new stitch. Repeat these steps until you have cast on the desired number of stitches for your Harry Potter Slytherin scarf.
Once you have cast on all the stitches, you can begin knitting the body of the scarf using the desired stitch pattern. The cast-on stitches will form the bottom edge of the scarf, and you can continue working in your chosen stitch pattern to create the Gryffindor scarf design.
Remember to keep track of your stitch count as you cast on to ensure that you have the correct number of stitches for your scarf. With a little practice, you’ll soon be on your way to knitting a beautiful Slytherin scarf to proudly display your Hogwarts house pride!
Knitting the Body of Your Harry Potter Slytherin Scarf
After completing the ribbed section at the beginning of your slytherin scarf, it’s time to move on to knitting the body. The body of the scarf is where you will create the signature green and silver stripes that represent the Slytherin house.
To start, you’ll need two colors of yarn: green and silver. You can choose the shade of green that matches the Slytherin house colors, and for the silver, a light grey or metallic silver yarn will work well. It’s important to use a yarn weight and needle size that will create a fabric with a drape that you like.
Begin by knitting a certain number of rows with the green yarn, depending on your desired stripe width. You can refer to the pattern for the specific number of rows, but a common width is around eight rows. Make sure to keep track of your rows by counting or using a row counter.
After knitting the green section, switch to the silver yarn and knit the same number of rows. This will create the first stripe of your Slytherin scarf. Repeat this pattern, alternating between the green and silver yarn, for the desired length of your scarf. You can refer to the pattern for the recommended length, but a standard scarf length is around 60-70 inches.
Remember to always switch colors at the beginning of a row and carry the yarn along the side of your work, twisting it every few stitches to prevent long floats. This will ensure that your stripes are clean and neat.
Once you have reached your desired length, knit a few more rows with the green yarn to match the ribbed section at the beginning of the scarf. This will create a cohesive finish to your Slytherin scarf. Bind off the stitches and weave in any loose ends.
Congratulations! You have now completed the body of your Harry Potter Slytherin scarf. The iconic green and silver stripes will make you feel like a true Slytherin, ready to show off your house pride.
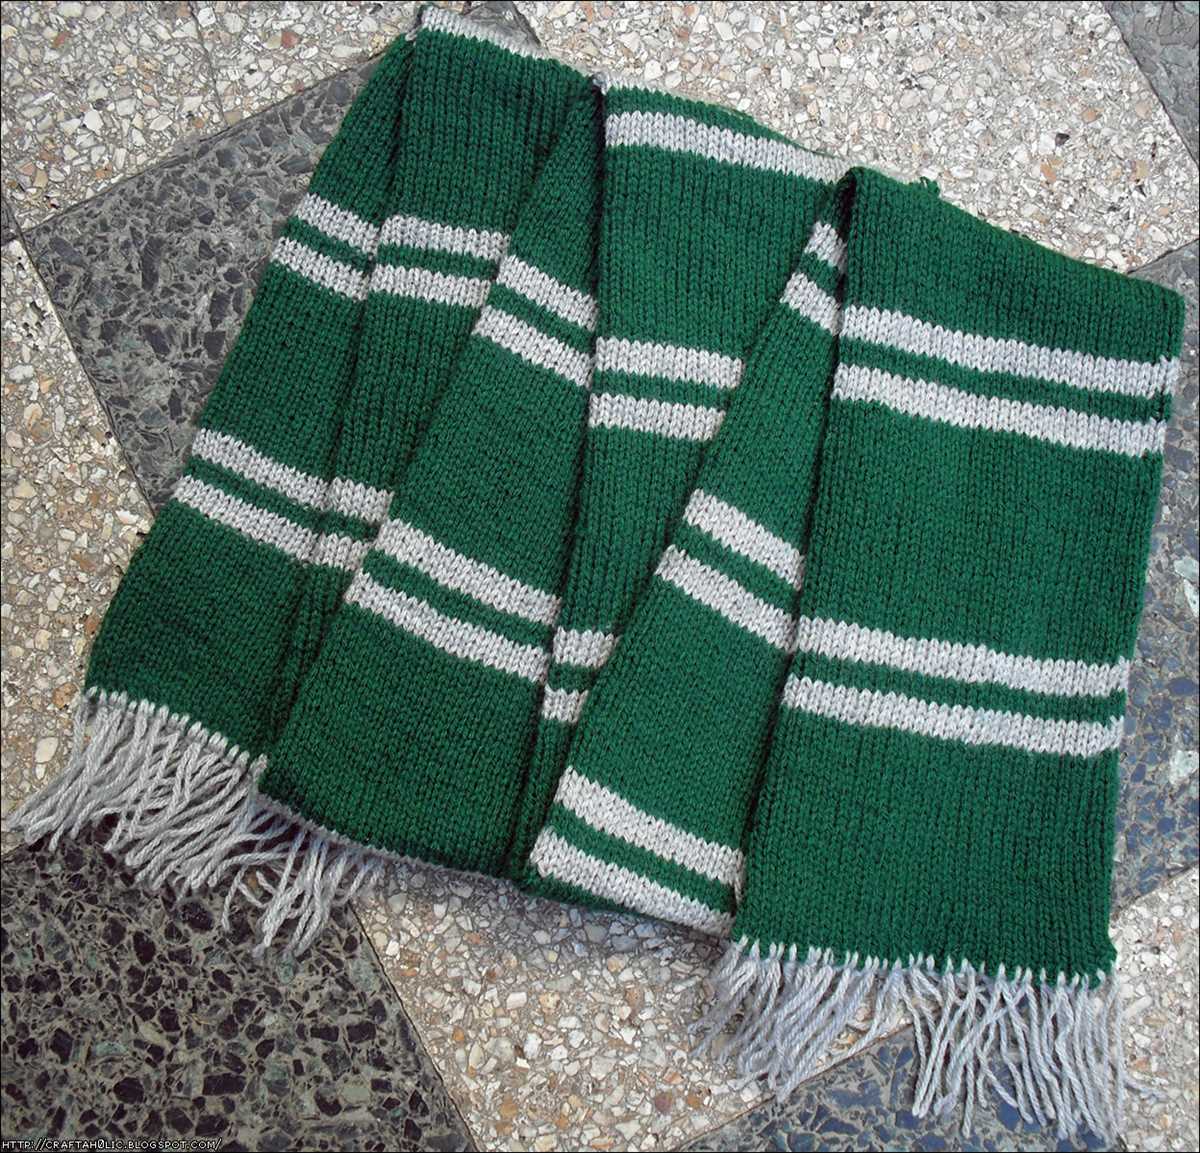
Adding the Stripes to Your Harry Potter Slytherin Scarf
Once you have completed the main body of your Harry Potter Slytherin scarf, it’s time to add the iconic green and gray stripes that are characteristic of the house. These stripes will give your scarf the authentic look of the one worn by the Slytherin students at Hogwarts.
To start, you will need two additional yarn colors: a dark emerald green and a light gray. Make sure to choose yarns that are similar in weight and texture to the yarn you used for the main body of the scarf. This will ensure a consistent appearance and feel throughout the entire project.
1. Marking the placement of the stripes:
Before you begin knitting the stripes, take a moment to plan out their placement on the scarf. The Slytherin scarf typically features several evenly spaced stripes along the length of the scarf. You can use a tape measure or ruler to determine the desired spacing between each stripe. Mark these measurements with stitch markers or safety pins to guide your knitting.
2. Knitting the green stripes:
Start by attaching the dark emerald green yarn to one end of the scarf using the method of your choice. Knit a row in the green yarn, making sure to keep your tension consistent with the rest of the scarf. Repeat this process for each green stripe, knitting the desired number of rows for each stripe before switching back to the main color.
3. Knitting the gray stripes:
Once you have finished knitting the green stripes, it’s time to move on to the light gray yarn. Attach the gray yarn to the scarf and knit a row in the gray yarn, again maintaining a consistent tension. Continue knitting the desired number of rows for each gray stripe, alternating between the gray and green yarns as you move along the scarf.
4. Finishing touches:
After you have completed all the green and gray stripes, it’s time to bind off your scarf and weave in any loose ends. Take care to secure the ends of each stripe so that they do not unravel over time. Once everything is properly finished, you will have a beautiful and authentic Harry Potter Slytherin scarf to wear proudly!
Knitting the Tassels for Your Harry Potter Slytherin Scarf
If you’re a fan of the Harry Potter series and the house of Slytherin, knitting your own Slytherin scarf is a great way to show off your love for the magical world. One important detail that completes the look of your scarf is the tassels. Tassels not only add a touch of authenticity to your Slytherin scarf but also give it a unique and stylish finishing touch.
To start knitting the tassels, you’ll need a few essential materials. These include green and grey yarn, scissors, a crochet hook, and a tapestry needle. It’s important to ensure that the yarn you choose matches the colors of the Slytherin house. Once you have gathered all the necessary materials, it’s time to begin.
Instructions:
- Measure and cut the yarn: Start by measuring and cutting six strands of green yarn and six strands of grey yarn, each measuring around 12 inches in length.
- Group the strands together: Take three strands of green yarn and three strands of grey yarn and align them together. Hold the strands together and ensure that they are evenly aligned.
- Tie a knot: Near one end of the aligned strands, tie a knot to secure them together. This knot will act as the base of your tassel.
- Create the loop: After tying the knot, fold the strands in half so that they form a loop at the top. Make sure that the knot is at the base of the loop.
- Create the tassel body: Take another strand of green yarn and wrap it around the bundle of aligned strands, about half an inch below the loop. Continue wrapping the green yarn tightly until you reach the desired length for your tassel body.
- Tie off the tassel body: Once you have reached the desired length, tie a knot with the green yarn to secure the tassel body. Trim any excess yarn if needed.
- Trim the tassel: Using your scissors, trim the ends of the tassel to create a uniform and neat appearance. You can trim the ends straight across or at an angle for a more stylized look.
- Repeat for the remaining tassels: Follow the same steps to create the remaining tassels for your Slytherin scarf. Ensure that each tassel is the same length and has a uniform appearance.
Once you have knitted all the tassels, you can attach them to the ends of your Slytherin scarf. Using a tapestry needle, thread the loose ends of each tassel through the edge of the scarf. Secure them by tying knots or weaving the strands through the scarf to ensure they are firmly attached.
With your tassels attached, your Harry Potter Slytherin scarf will be complete. Wear it with pride and show off your love for the Slytherin house and the magical world of Harry Potter.
How to Block and Finish Your Harry Potter Slytherin Scarf
Once you have finished knitting your Harry Potter Slytherin scarf, the final step is to block and finish it. Blocking is an important process that helps to shape and set your scarf, giving it a professional and polished look. Here is a step-by-step guide to help you block and finish your Slytherin scarf:
1. Soak the Scarf
Start by filling a sink or basin with lukewarm water and a gentle wool wash or detergent. Gently submerge your scarf in the water, making sure it is fully saturated. Allow it to soak for about 15-20 minutes to remove any dirt or excess dye. Avoid agitating or twisting the scarf to prevent felting or distortion.
2. Rinse and Squeeze
After the soaking time is up, carefully lift the scarf out of the water, supporting its weight to prevent stretching. Rinse it with clean lukewarm water until all the soap is gone. Gently squeeze out the excess water, being careful not to wring or twist the fabric.
3. Layout and Shape
Next, lay a clean towel on a flat surface and place the damp scarf on top of it. Smooth out any wrinkles and gently shape the scarf to the desired length and width. If necessary, use rust-proof pins to secure the edges in place.
4. Let it Dry
Allow the scarf to air dry completely. Avoid hanging it up, as this can cause stretching. Instead, leave it flat on the towel and flip it over after a few hours to ensure even drying. Depending on the climate and humidity level, drying may take anywhere from 24 to 48 hours.
5. Finishing Touches
Once the scarf is dry, remove the pins and give it a final inspection for any loose ends or uneven stitches. Take the time to weave in any loose yarn tails and use a tapestry needle to tidy up any imperfections. Lastly, steam the scarf with a hot iron on a low setting, hovering over the fabric without applying pressure. This will help to smooth out any remaining wrinkles.
Following these steps will ensure that your Harry Potter Slytherin scarf looks its best and is ready to be worn with pride. Enjoy showing off your knitting skills and representing the Slytherin house in style!
Tips and Tricks for Knitting a Harry Potter Slytherin Scarf
Knitting a Harry Potter Slytherin scarf can be both a fun and rewarding project for fans of the series. Whether you’re knitting it for yourself or as a gift, here are some tips and tricks to help you create a scarf that is true to the Slytherin house colors and design.
Choose the Right Yarn
When knitting a Slytherin scarf, it’s important to select yarn in the correct shades of green and silver. Look for a dark forest green for the main color and a light silver or gray for the accent color. Make sure the yarns you choose are compatible with the scarf pattern and the needle size you plan to use.
Use the Right Needle Size
The right needle size can make a big difference in the appearance and feel of your Slytherin scarf. Depending on the yarn weight and your personal knitting style, you may need to experiment with different needle sizes to achieve the desired gauge. Consider using a slightly larger needle size to create a looser and more comfortable fabric.
Keep Track of Your Rows

With the striped pattern of a Slytherin scarf, it’s important to keep track of your rows to maintain consistency. Consider using stitch markers or a row-counting tool to help you stay organized. This will ensure that your scarf has the correct number of stripes and that they align properly along the length of the scarf.
Block Your Scarf
Once you’ve finished knitting your Slytherin scarf, it’s important to block it to give it a professional and polished look. Blocking involves washing the scarf gently and then reshaping it while it dries. This will help to even out the stitches and make the scarf more drapey and wearable.
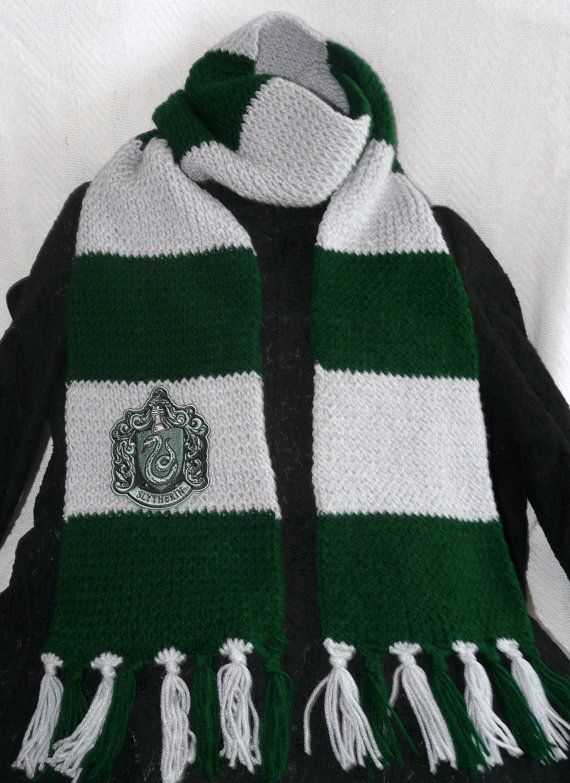
Add the Slytherin Logo
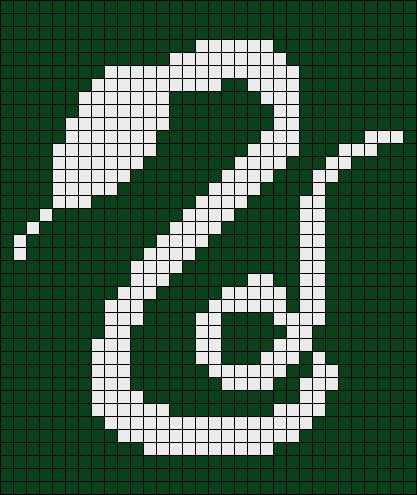
To truly capture the spirit of Slytherin, consider adding the house logo to your scarf. This can be achieved through embroidery or by knitting an intarsia or Fair Isle pattern. Research different techniques and find one that suits your skill level and preferences. Adding the logo will make your scarf a true representation of Slytherin pride.
With these tips and tricks, you’ll be well-equipped to tackle the challenge of knitting a Harry Potter Slytherin scarf. Remember to have fun with the process and embrace the creativity and magic that comes with knitting your own Hogwarts-inspired accessory.
Where to Find Harry Potter Slytherin Scarf Knitting Patterns
Knitting a Harry Potter Slytherin scarf can be a rewarding and fun project for fans of the series. Whether you’re a seasoned knitter or just starting out, there are plenty of resources available to help you find the perfect pattern to create your own Slytherin scarf.
If you’re looking for free knitting patterns, there are several websites and online communities that offer a variety of options. Ravelry, a popular knitting and crochet community, has a wide range of Slytherin scarf patterns to choose from. You can browse through user-submitted projects and find patterns that suit your skill level and preferences. Another website, AllFreeKnitting, also offers a collection of free Harry Potter-inspired knitting patterns, including Slytherin scarves.
For those who prefer purchasing patterns, there are also several online stores that offer Slytherin scarf knitting patterns for a fee. Etsy is a great platform to find unique and handmade patterns created by independent designers. You can search for “Slytherin scarf knitting pattern” on Etsy and explore the different options available. Additionally, popular knitting pattern websites like LoveCrafts and KnitPicks offer a variety of Harry Potter-inspired patterns, including Slytherin scarves.
Summary
Whether you’re looking for a free pattern or don’t mind investing in a paid one, there are plenty of resources available to help you find a Harry Potter Slytherin scarf knitting pattern. Online communities like Ravelry and websites like AllFreeKnitting offer free options, while platforms like Etsy and knitting pattern websites provide a wide range of patterns for purchase. So grab your knitting needles and get ready to create your own Slytherin scarf!
Q&A:
Where can I find a Harry Potter Slytherin scarf knitting pattern?
You can find a Harry Potter Slytherin scarf knitting pattern on various websites and crafting platforms. Some popular options include Ravelry, Etsy, and Pinterest. These platforms have a wide range of patterns, both free and for purchase, which you can use to create your own Slytherin scarf.
What type of yarn is typically used for knitting a Slytherin scarf?
Typically, a Slytherin scarf is knit with worsted weight yarn. The specific shade of green used for the scarf is dark green, which represents the Slytherin house. You can choose a yarns in this shade that is both warm and soft, such as wool or acrylic blends, to ensure the scarf is cozy and comfortable.
Is there a specific stitch pattern I should use for the Slytherin scarf?
Yes, there is a specific stitch pattern that is commonly used for the Slytherin scarf. The most popular stitch pattern is a simple two-row repeat, alternating between the knit and purl stitches. This creates a textured look, similar to a ribbed pattern, which gives the scarf a nice drape and adds to its visual appeal.
How long should a Slytherin scarf be when I finish knitting it?
The length of a Slytherin scarf can vary depending on personal preference. However, a typical length for an adult-sized scarf is around 60-70 inches. This allows for the scarf to be wrapped around the neck and still have enough length to hang down and showcase the Slytherin colors and emblem.
Can I modify the Slytherin scarf knitting pattern to make it longer or shorter?
Yes, you can definitely modify the Slytherin scarf knitting pattern to make it longer or shorter. If you prefer a longer scarf, you can simply continue knitting until it reaches your desired length. If you want a shorter scarf, you can knit fewer rows or decrease the number of stitches to your liking. Just be sure to maintain the stitch pattern and color scheme to keep the Slytherin look intact.