
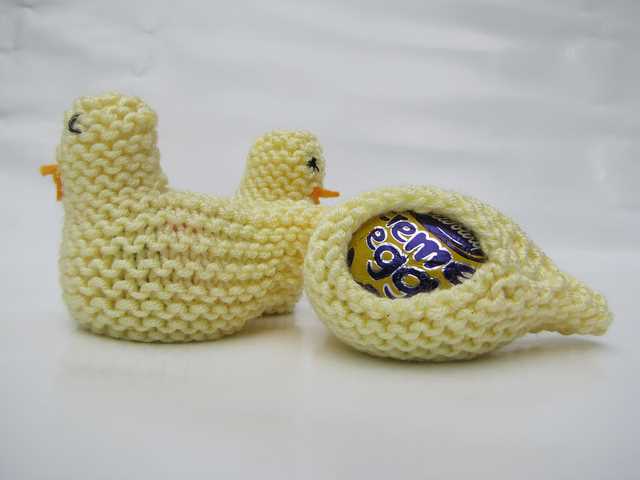
With Easter just around the corner, it’s time to get creative with your knitting needles and create some adorable holiday-themed goodies. One fun and easy project is knitting a cute little bunny cover for your creme eggs. Not only will these adorable covers add a festive touch to your Easter baskets, but they also make great gifts for friends and family.
Knitting these bunny covers is a great way to use up any leftover yarn you may have lying around. Plus, they are quick to make, so you can whip up a whole bunch of them in no time. Whether you’re an experienced knitter or a beginner looking for a fun and rewarding project, this free knitting pattern is perfect for you.
To get started, you’ll need some basic knitting supplies, including yarn in your desired colors, knitting needles, and a tapestry needle for finishing touches. The pattern itself uses simple stitches and techniques, making it suitable for knitters of all skill levels. With step-by-step instructions and clear illustrations, you’ll have no trouble creating these adorable bunny creme egg covers.
What is an Easter bunny creme egg cover?
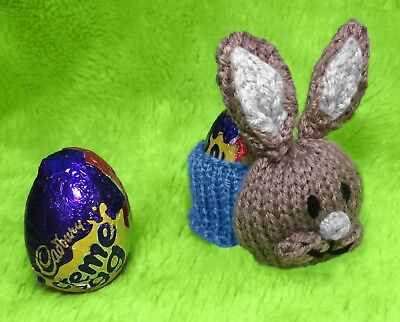
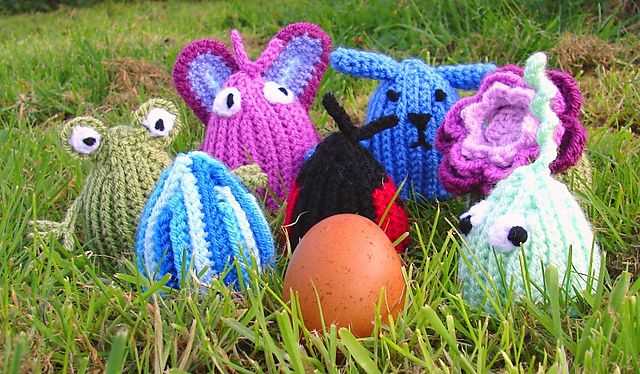
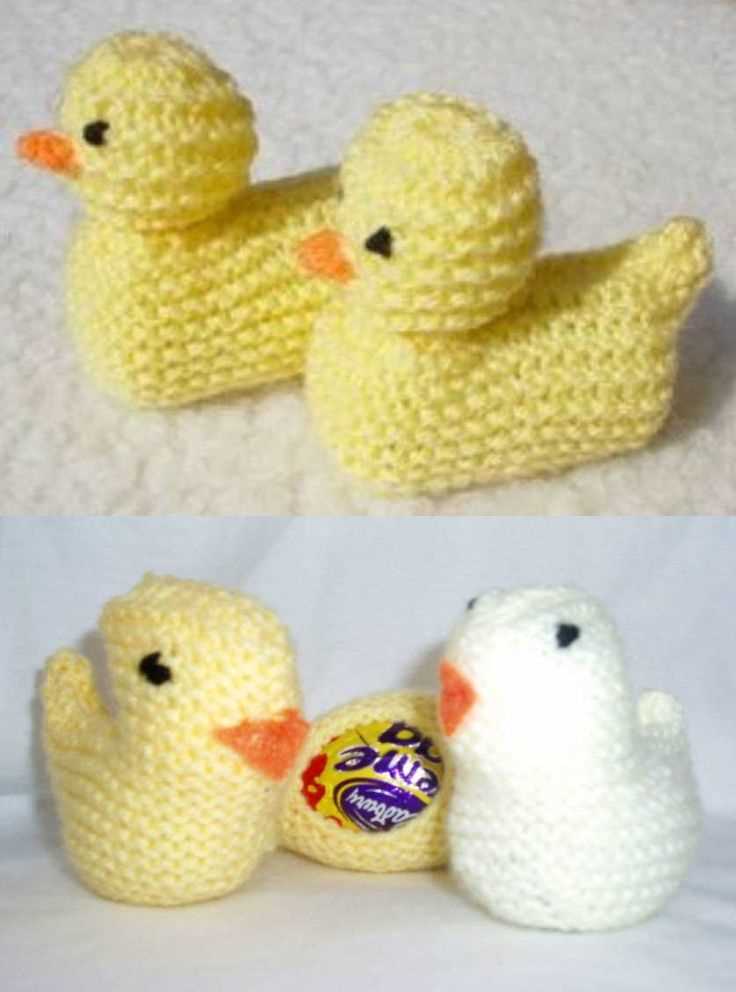
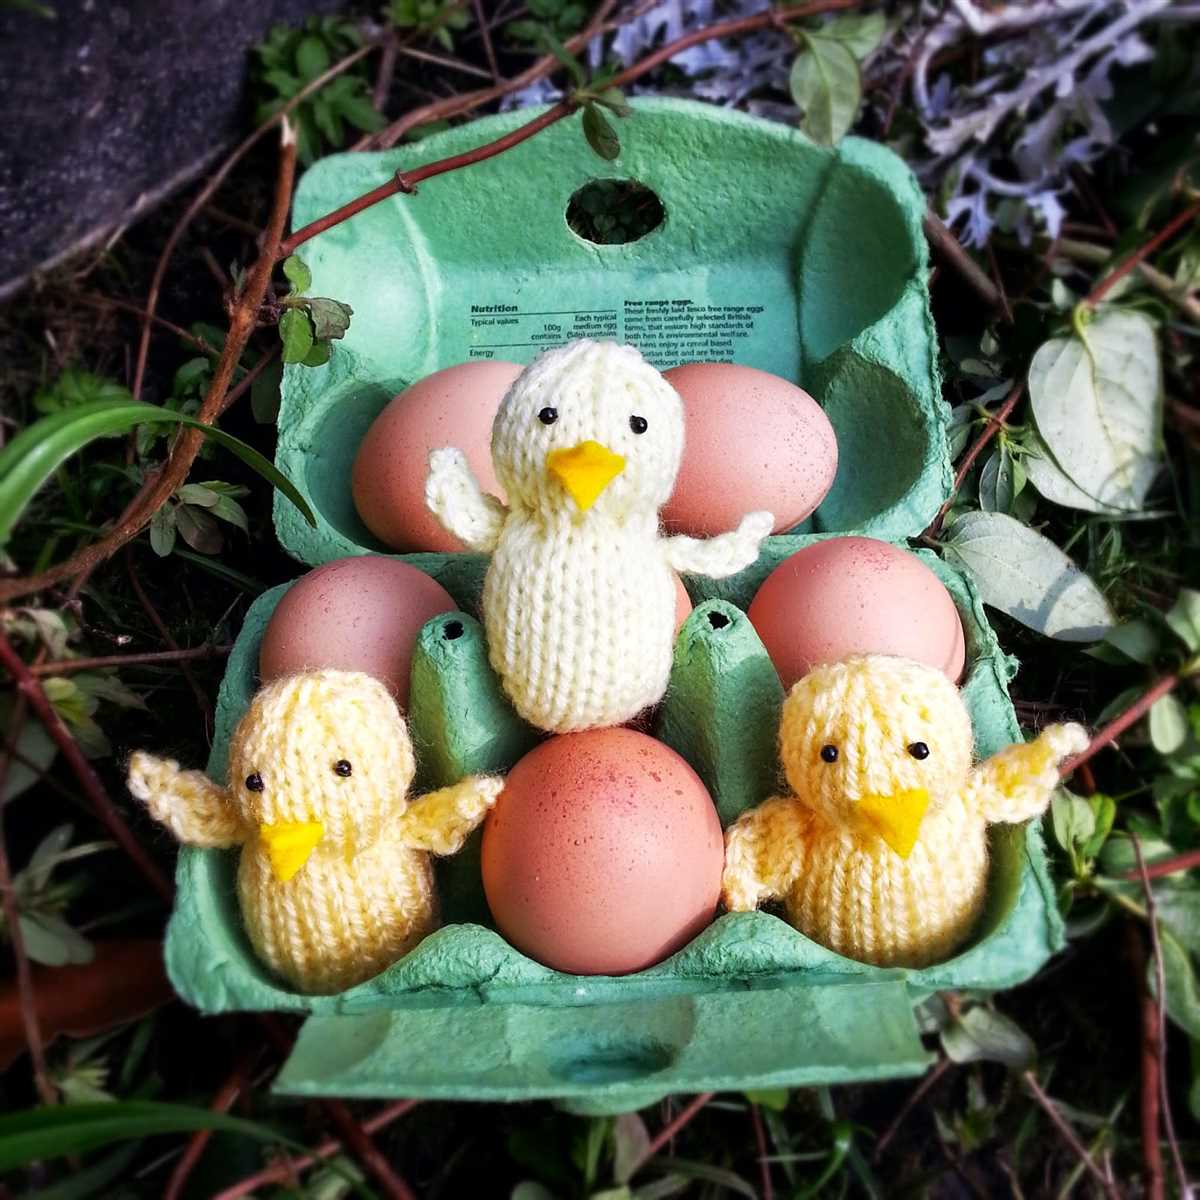
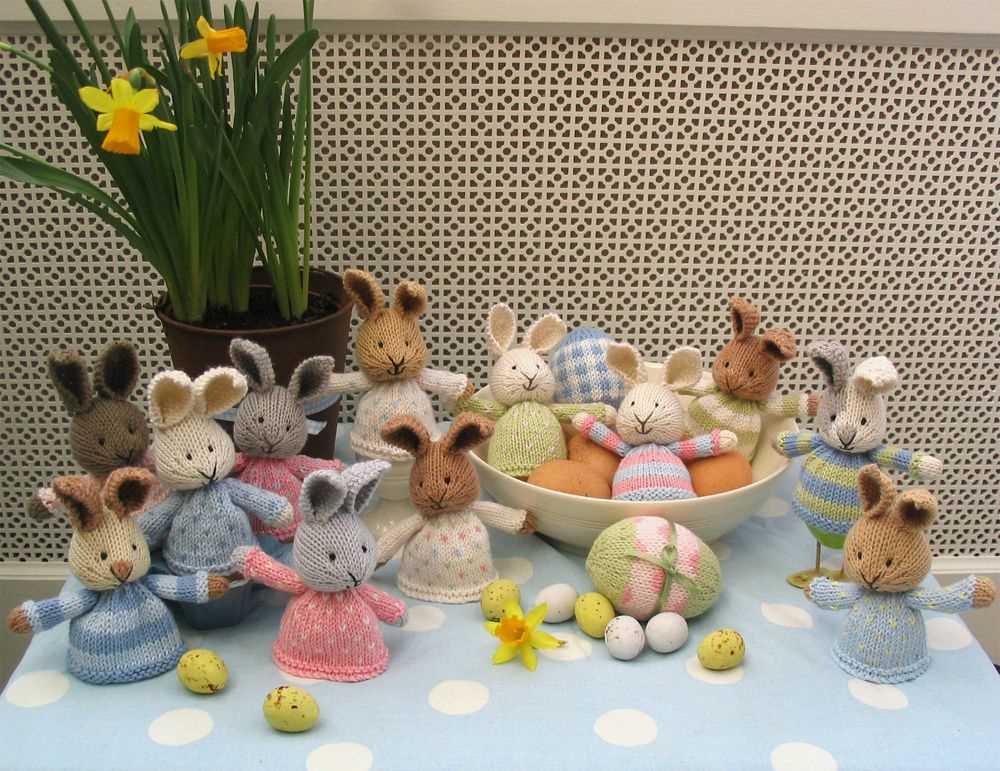
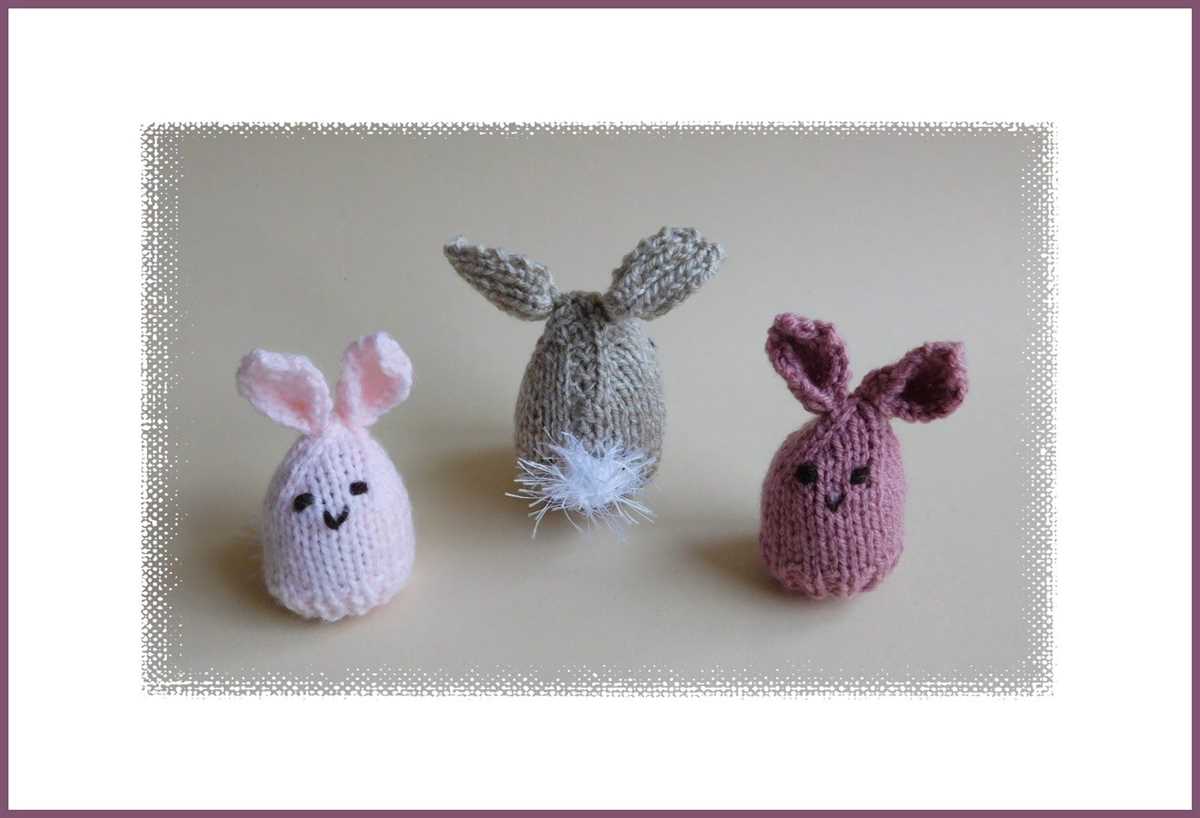
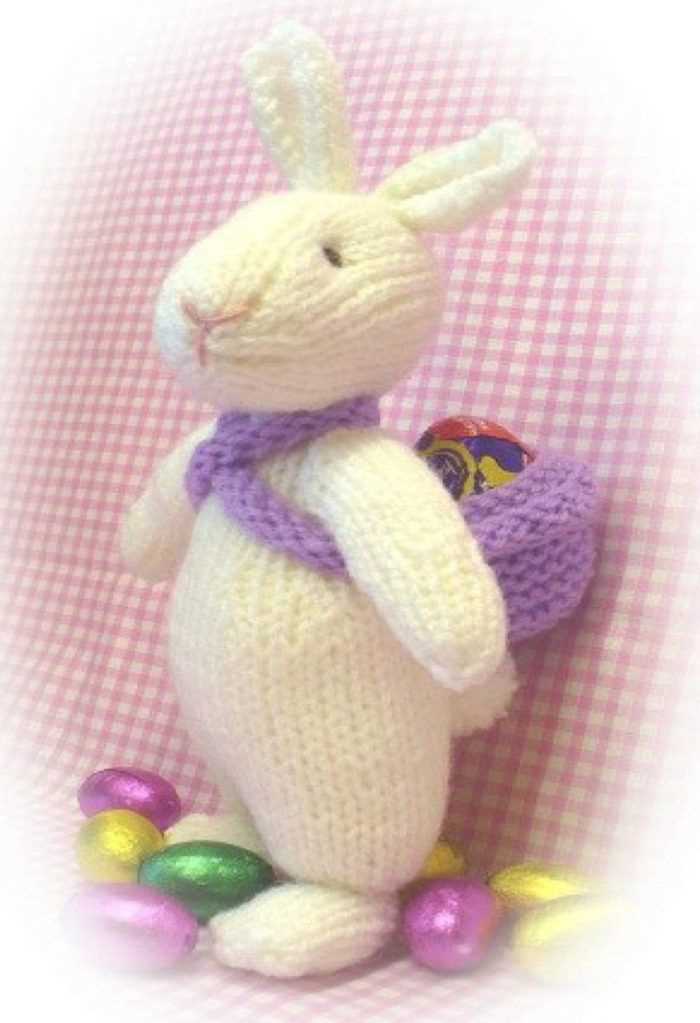
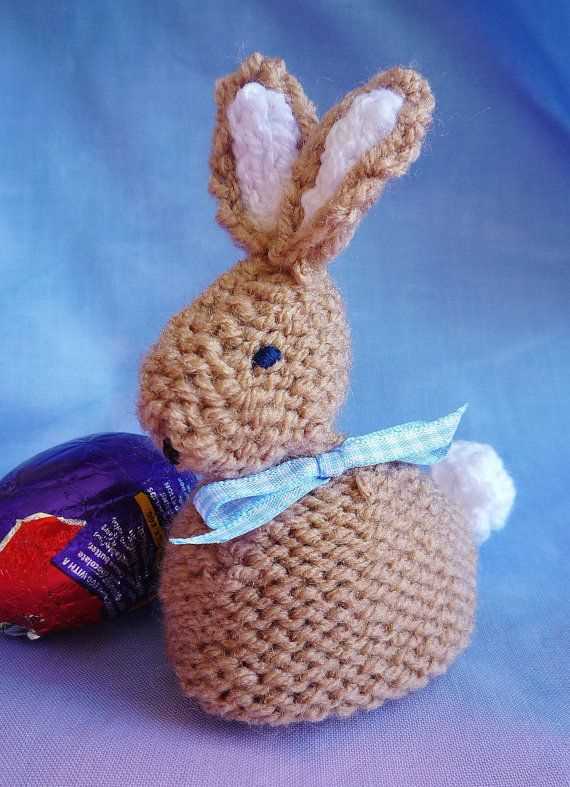
An Easter bunny creme egg cover is a small knitted or crochet accessory that is designed to fit over a chocolate creme egg. It is typically shaped like a bunny rabbit, with floppy ears and a little tail, and is used as a decorative and fun way to dress up these popular Easter treats.
The cover is usually made using soft yarn in pastel colors, such as pink, blue, or yellow, which are commonly associated with the spring season and Easter. It is often adorned with additional details, such as embroidered eyes and nose, to give the bunny a cute and whimsical appearance.
These Easter bunny creme egg covers can be made by following a free knitting or crochet pattern, which provides step-by-step instructions on how to create the bunny shape and attach any embellishments. They are a popular project for crafters and can be a fun activity to do with children in preparation for Easter.
The covers can be used as decorations for an Easter basket or table centerpiece, or they can be given as small gifts or party favors during Easter celebrations. They add a touch of charm and personality to the traditional chocolate creme eggs, making them even more delightful to give and receive during the holiday season.
Why use a free knitting pattern?
There are several reasons why using a free knitting pattern can be beneficial. Firstly, it allows you to save money. By using a free pattern, you don’t have to spend any extra cash on purchasing a pattern. This is especially useful if you’re on a tight budget.
Secondly, using a free knitting pattern gives you the opportunity to try out a new design or technique without any financial commitment. If you’re not sure if you’ll enjoy knitting a certain project, using a free pattern allows you to test it out before investing in a paid pattern or expensive yarn.
- Variety: There is a wide variety of free knitting patterns available online. Whether you’re looking for accessories, home decor items, or clothing, you’ll be able to find a free pattern that suits your tastes and preferences.
- Accessibility: Free knitting patterns are accessible to everyone, regardless of their skill level or experience. You don’t need to be an expert knitter to use a free pattern and create beautiful finished projects.
- Community: The knitting community is incredibly supportive and often shares free patterns with each other. By using a free pattern, you can become a part of this community and connect with other knitters who have similar interests and passions.
Overall, using a free knitting pattern is a cost-effective and accessible way to explore new designs and connect with the knitting community. Whether you’re a beginner or an experienced knitter, there’s a free pattern out there waiting for you to try.
Materials needed for knitting
In order to knit the Easter bunny creme egg cover, you will need a few materials. Here is a list of everything you will need:
- Yarn: You will need a small amount of yarn in the color of your choice to knit the bunny cover. It is recommended to use a soft and lightweight yarn that is suitable for knitting small pieces.
- Knitting needles: You will need a pair of knitting needles in the appropriate size for your chosen yarn. The size of the needles will depend on the gauge you want to achieve.
- Tapestry needle: A tapestry needle is essential for weaving in the loose ends of yarn and seaming the knitted pieces together. Make sure to choose a needle with a large eye that can accommodate the yarn.
- Scissors: A pair of scissors will be needed to cut the yarn and trim any excess ends.
- Toy stuffing: In order to stuff the bunny cover and give it a three-dimensional shape, you will need some toy stuffing. Make sure to choose a stuffing that is safe and hypoallergenic.
- Creme eggs: The main purpose of knitting the bunny cover is to create a cute and decorative holder for creme eggs. Make sure to have a few creme eggs on hand to place inside the knitted cover.
With these materials, you will have everything you need to knit the Easter bunny creme egg cover. Make sure to gather all the materials before starting your project, so you can have a smooth and enjoyable knitting experience.
Yarn
Yarn is a versatile material that is commonly used in knitting and crocheting projects. It is made from different types of fibers, such as wool, cotton, acrylic, or nylon, which give it different qualities and textures.
There are various types of yarn available, including different weights and thicknesses. The weight of the yarn refers to how thick or thin it is, with thinner yarns being lighter in weight and thicker yarns being heavier. This can affect the drape and warmth of the finished project.
When choosing yarn for a particular project, it is important to consider factors such as the desired outcome, the level of comfort, and the ease of care. For example, wool yarn can be warm and cozy, but it may require more delicate care than acrylic yarn, which is often machine washable.
Yarn comes in a wide range of colors and patterns, allowing knitters and crocheters to create unique and vibrant designs. Some yarns even have special effects, such as metallic or variegated colors, which can add extra interest to a project.
Whether you’re a beginner or an experienced crafter, yarn is an essential material for creating beautiful and functional items. With so many options available, it’s easy to find the perfect yarn for any project.
Knitting needles
Knitting needles are essential tools for any knitting project. They come in a variety of sizes and materials, allowing knitters to create different textures and gauge in their work. Whether you are a beginner or an experienced knitter, having the right set of knitting needles is crucial for achieving the desired results in your projects.
When choosing knitting needles, it is important to consider the size of the needles. The size of the needle determines the gauge of your knitting, which affects the size and tension of your stitches. Typically, the size of the needles is indicated by a number or letter, and different needle sizes are used for different yarn weights. For example, thicker yarns require larger needles, while thinner yarns require smaller needles.
Knitting needles can be made from various materials, each with its own benefits. Metal needles, such as stainless steel or aluminum, are durable and smooth, allowing the yarn to glide easily across the needles. This makes them great for intricate stitch patterns and fast knitting. On the other hand, wooden needles are lightweight and warm to the touch, making them comfortable to work with for extended periods of time. They also provide more grip, which can be helpful for slippery yarns.
Additionally, there are circular needles and double-pointed needles available for specific knitting techniques. Circular needles are used for knitting in the round and for larger projects, while double-pointed needles are used for knitting small circumferences, such as socks or mittens.
Overall, the right choice of knitting needles depends on personal preference and the specific project at hand. It is always a good idea to have a variety of needle sizes and materials in your collection, so you can experiment and find the ones that work best for you.
Other supplies
Aside from knitting needles and yarn, there are a few other supplies you will need to complete this Easter bunny creme egg cover pattern. These additional supplies include:
- Scissors: You will need a pair of sharp scissors to cut the yarn and trim any loose ends.
- Tapestry needle: A tapestry needle, also known as a yarn needle, is used to weave in the loose yarn ends and sew any parts of the pattern together.
- Stitch markers: While not necessary, stitch markers can be helpful for keeping track of certain stitches or sections of the pattern.
- Measuring tape: A measuring tape or ruler will come in handy for taking measurements and ensuring your project is the correct size.
- Stuffing: You will need some stuffing to fill the bunny’s body and head. This can be polyester fiberfill or any other suitable stuffing material you have on hand.
With these additional supplies, you’ll be ready to start knitting your Easter bunny creme egg cover. Make sure to gather everything together before you begin, so you have everything you need within reach.
Getting Started
If you love Easter and enjoy knitting, then you’ll have a blast making these adorable Easter Bunny Creme Egg Covers. These little bunny covers are a fun and unique way to dress up your Easter eggs and make them extra special. Plus, they make perfect little gifts for friends and family.
To get started, you’ll need a few basic knitting supplies. Make sure you have a pair of knitting needles and some yarn in the colors of your choice. You’ll also need a tapestry needle for sewing up the seams and adding any additional details, such as eyes or a nose.
Once you have your supplies ready, it’s time to choose your pattern. There are plenty of free knitting patterns available online for Easter Bunny Creme Egg Covers. You can find patterns that are simple and easy to follow, as well as more intricate designs for those who are more experienced knitters. Take your time to browse through the different options and choose a pattern that you love.
Gauge and Measurements
Before you start knitting, it’s important to check your gauge and measurements. This will ensure that your bunny covers turn out the right size and fit snugly around the Creme Eggs. The pattern you choose should provide specific gauge information, such as the number of stitches and rows per inch.
It’s also a good idea to take measurements of your Creme Eggs, so you know how big to make your bunny covers. Measure the length and circumference of the egg, as well as the height of the egg including the top knob. Keep these measurements handy as you start knitting.
Once you have all your supplies and measurements ready, you can begin casting on and knitting your Easter Bunny Creme Egg Covers. Follow the pattern instructions carefully, and don’t be afraid to ask for help if you need it. Before you know it, you’ll have a whole collection of adorable bunny covers to decorate your Easter eggs!
Choosing the right yarn and needles
When it comes to knitting the perfect Easter bunny creme egg cover, choosing the right yarn and needles is essential. The yarn you choose will determine the texture and appearance of the finished product, while the needles will affect the gauge and size of your project. Here are some factors to consider when selecting your materials:
Yarn:
- Fiber Content: It’s important to choose a yarn with the right fiber content for the project. For the Easter bunny creme egg cover, a soft and lightweight yarn is ideal. Acrylic or cotton blends are popular choices as they provide a good balance of durability and softness.
- Weight: Consider the weight of the yarn you want to use. A medium or worsted weight yarn works well for this project, as it will give the bunny cover enough structure without making it too heavy.
- Color: You can get creative with the color of your yarn! Opt for pastel shades like pink, blue, or yellow to give your bunny a festive Easter look. Alternatively, you can choose neutral colors or even try variegated yarn for a unique effect.
Needles:
- Size: The size of your needles will determine the gauge of your knitting. For the Easter bunny creme egg cover, a pair of US size 4 or 5 (3.5 – 3.75 mm) knitting needles are recommended. However, if you prefer a tighter or looser stitch, you can adjust the needle size accordingly.
- Type: Circular or double-pointed needles can be used for this project, depending on your preference. Circular needles are great for knitting in the round, while double-pointed needles are handy for smaller, tube-like projects like the bunny ears.
- Material: Choose needles made from a material you’re comfortable working with. Bamboo or wooden needles offer a warm and lightweight feel, while metal needles provide smooth and quick knitting. The choice is yours!
By considering these factors and selecting the right yarn and needles, you’ll be well on your way to creating your own adorable Easter bunny creme egg cover.
Understanding the knitting pattern
In order to successfully create the Easter bunny creme egg cover, it is important to understand the knitting pattern and the instructions provided. The pattern starts by listing the materials needed, including the type of yarn and the recommended needle size. It is crucial to gather all the necessary supplies before starting the project.
The pattern then provides a step-by-step guide on how to create the bunny cover. It begins with casting on a specific number of stitches, followed by knitting rows in various stitches such as knit, purl, and increases. The pattern also includes instructions on how to shape the ears, body, and head of the bunny using different knitting techniques.
Throughout the pattern, certain abbreviations and terms may be used. It is important to refer to the provided key or glossary to understand the meaning of these terms. For example, “k” stands for knit, “p” stands for purl, and “inc” stands for increase.
Additionally, the pattern may include specific measurements or gauge requirements. It is important to follow these measurements accurately to ensure the bunny cover turns out the desired size. It may be helpful to use a ruler or measuring tape while knitting to ensure accuracy.
To make the knitting process easier to follow, the pattern may also include charts or diagrams. These visual aids provide a visual representation of the stitches and can help with understanding the pattern and keeping track of progress.
By carefully reading and understanding the knitting pattern, one can successfully create the Easter bunny creme egg cover and enjoy a fun and crafty project. It is recommended to take the time to read through the entire pattern before starting and to refer back to it as needed during the knitting process.
Casting on and making the body
Before you start knitting the Easter bunny creme egg cover, you will need to cast on the required number of stitches. The size of the bunny will depend on the number of stitches you cast on. The pattern suggests 24 stitches for a small bunny and 36 stitches for a larger bunny.
To cast on, make a slip knot and place it on your knitting needle. Then, using your preferred method of casting on, such as the long tail cast on, begin casting on the required number of stitches. Make sure to keep your tension even as you cast on, so that the stitches are not too tight or too loose.
Once you have cast on the desired number of stitches, you can begin knitting the body of the bunny. The pattern suggests using stocking stitch, also known as stockinette stitch, which is worked by knitting one row and purling the next row. The body is worked in the round, so you will need to join the cast on stitches to form a circle, either by using a circular needle or transferring the stitches onto double-pointed needles.
Continue knitting in stocking stitch for the required number of rounds or until the body measures the desired length. You can adjust the length of the body by adding or subtracting rounds as needed. Make sure to keep track of your rounds by using a stitch marker or a piece of contrasting yarn to mark the beginning of each round. Once the body is complete, you can proceed to knitting the other parts of the bunny, such as the head, ears, and tail.
Step-by-step instructions for casting on
Before you start knitting your Easter bunny creme egg cover, you will first need to cast on your stitches to create the foundation for your project. Here is a step-by-step guide on how to cast on:
1. Make a slipknot
Start by making a slipknot, which will be the first stitch on your knitting needle. To make a slipknot, place the end of your yarn over your index and middle fingers. Cross the end of the yarn over the working yarn, and insert your crochet hook under the working yarn. Pull the working yarn through the loop on your hook to create a slipknot.
2. Insert the needle
Next, insert your knitting needle into the slipknot loop from front to back, with the slipknot positioned towards the right-hand side of the needle. Hold the end of the slipknot and the working yarn in your right hand, and gently pull the slipknot tight around the needle.
3. Create the first stitch
To create the first stitch, bring the yarn over the needle from back to front, making a loop. Insert the needle into this loop from left to right, and then pull the working yarn gently to tighten the stitch on the needle. This completes your first cast-on stitch.
4. Repeat the process
Continue to repeat the process of creating stitches by bringing the yarn over the needle from back to front, inserting the needle into the loop, and pulling the working yarn tight to create the stitch. Keep casting on the desired number of stitches for your pattern, following any specific instructions provided.
Once you have successfully cast on all your stitches, you are ready to start knitting your Easter bunny creme egg cover! Happy knitting!
Knitting the body of the bunny creme egg cover
Once you have gathered all the necessary materials and familiarized yourself with the basic knitting techniques, you are ready to start knitting the body of the bunny creme egg cover. This adorable little cover will give your Easter treats a festive and cuddly touch.
Begin by casting on 24 stitches with your chosen yarn color. It is recommended to use a medium weight or worsted weight yarn for this project. You can use either circular or straight needles, whichever you prefer.
Once you have cast on the stitches, you can start knitting in the round. Use a stitch marker to mark the beginning of each round. Knit all the stitches in every round until the body measures approximately 1.5 inches in length. This will create a snug fit for the creme egg.
Next, you will begin decreasing stitches to shape the bunny’s body. Knit 2 stitches together at the beginning and end of each round until you have 8 stitches remaining. This will create a tapered shape for the bunny’s body.
Continue knitting these 8 stitches for a few more rounds to create the bunny’s neck. Then, bind off all the stitches and cut the yarn, leaving a long tail for sewing.
To finish off the body, use a tapestry needle to weave in the loose ends. Fold the knitted piece in half and sew the sides together using the long tail of yarn. Make sure to leave the bottom open so that you can easily insert the creme egg.
Now that you have completed the body of the bunny creme egg cover, you can move on to knitting the bunny’s ears and face. Stay tuned for the next set of instructions to complete your adorable Easter project!
Shaping the Bunny Ears
Now it’s time to shape the bunny ears. Follow these steps to create adorable floppy ears for your Easter bunny creme egg cover:
Step 1:
Divide your stitches in half, marking the middle stitch. This will help you create symmetrical ears.
Step 2:
Working on one side of the middle stitch, decrease one stitch at the beginning and end of the row. Repeat this decrease row every 2 rows until you have reached your desired ear length.
Step 3:
Repeat Step 2 on the other side of the middle stitch to create the second ear.
Once you have completed shaping the bunny ears, fasten off the yarn and weave in any loose ends.
Congratulations! Your Easter bunny creme egg cover is now complete and ready to be filled with a delicious chocolate creme egg. This cute and festive cover makes for a perfect Easter gift or decoration.
Remember, you can get creative with different colors and embellishments to make your bunny unique. Happy knitting!