
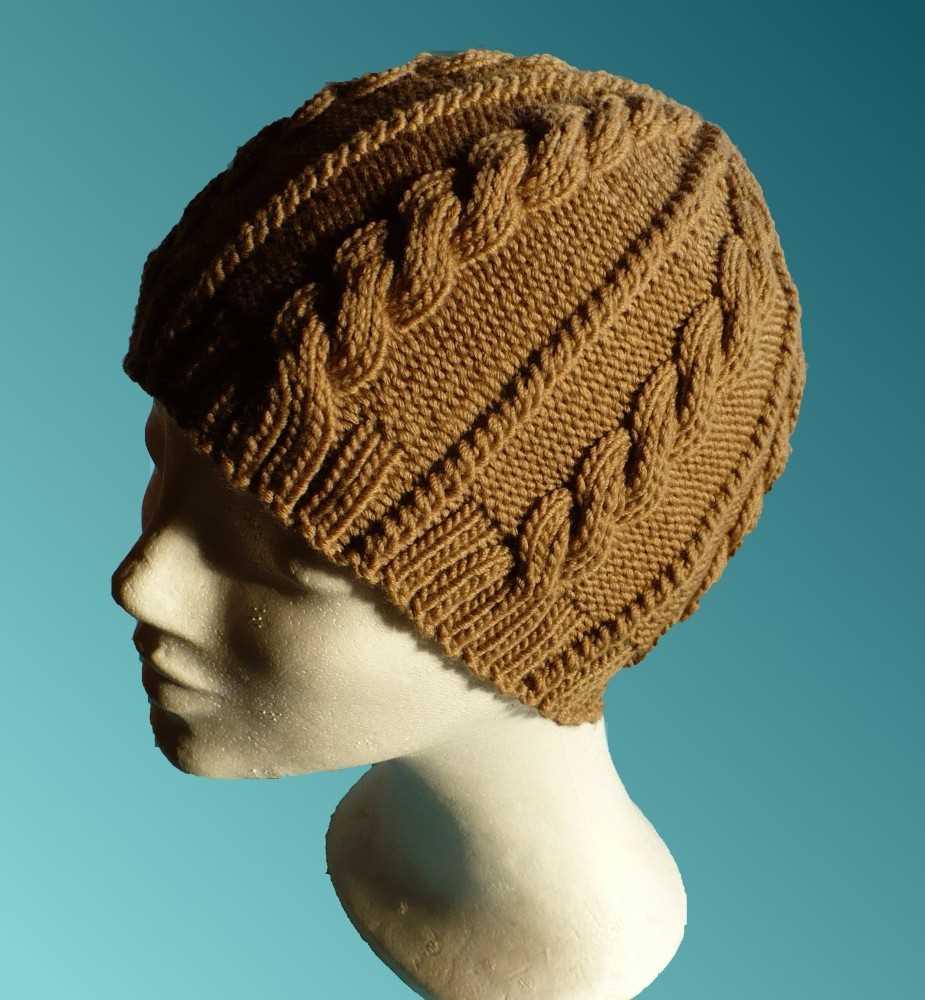
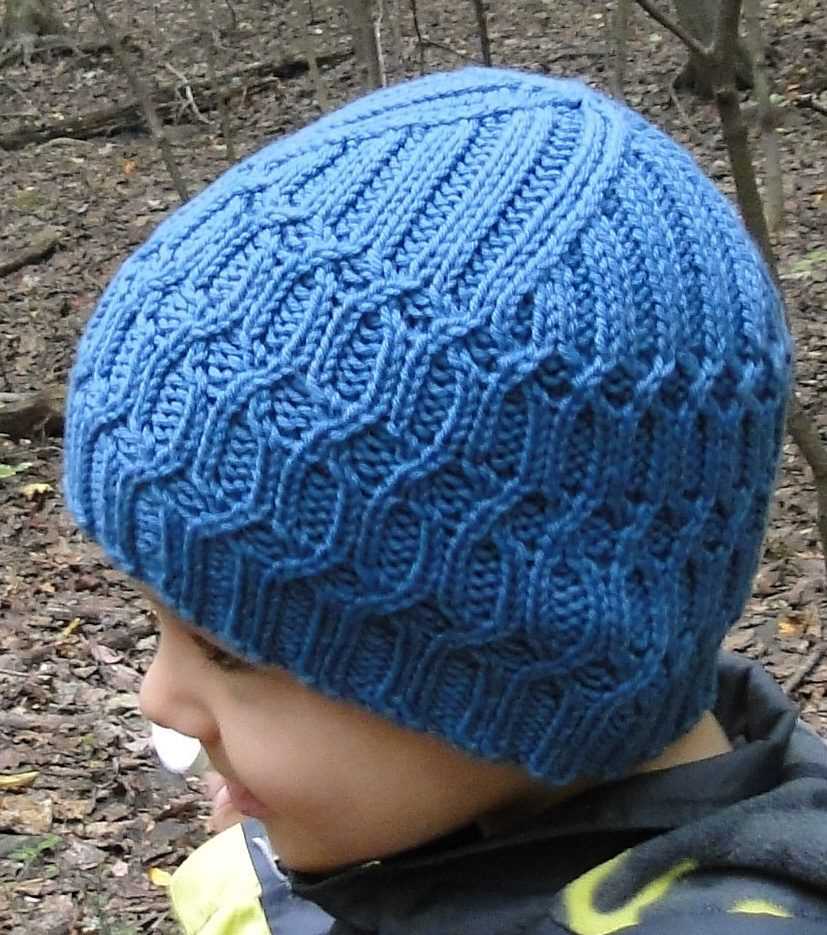
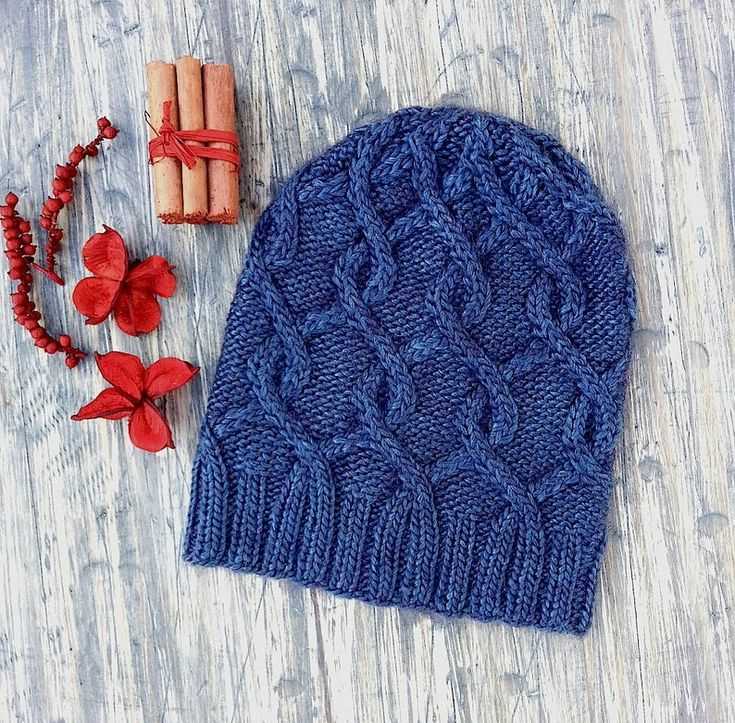
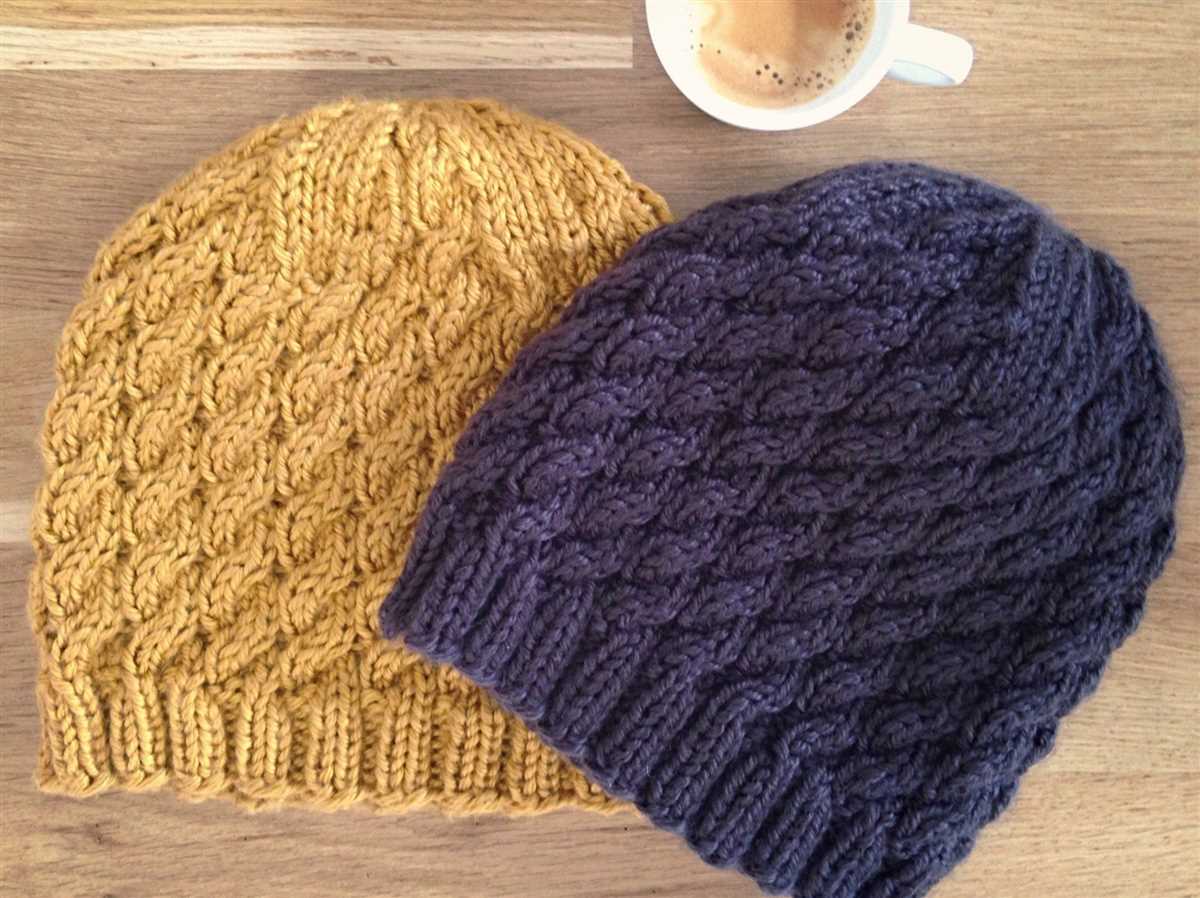
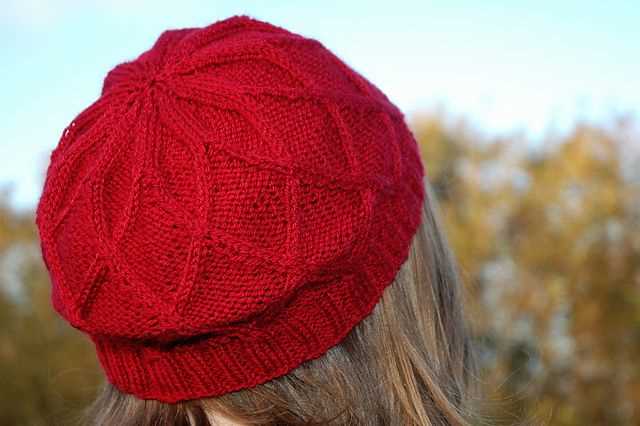
When the weather starts to turn chilly, there’s nothing better than a warm and cozy hat to keep you snug. And what’s more, there’s nothing quite as satisfying as knitting your own hat – especially when you can follow a free pattern to create a stunning cable design.
This free knitting pattern for a cable hat is perfect for knitters of all skill levels. Whether you’re just starting out or you’re an experienced knitter looking for a new project, this pattern is easy to follow and results in a beautiful finished product.
The cable design adds a touch of elegance to the hat, making it perfect for both everyday wear and special occasions. And with the wide range of yarn colors available, you can easily customize the hat to match your personal style. So grab your knitting needles and get ready to create a hat that is not only practical but also a fashionable accessory to complete any winter outfit.
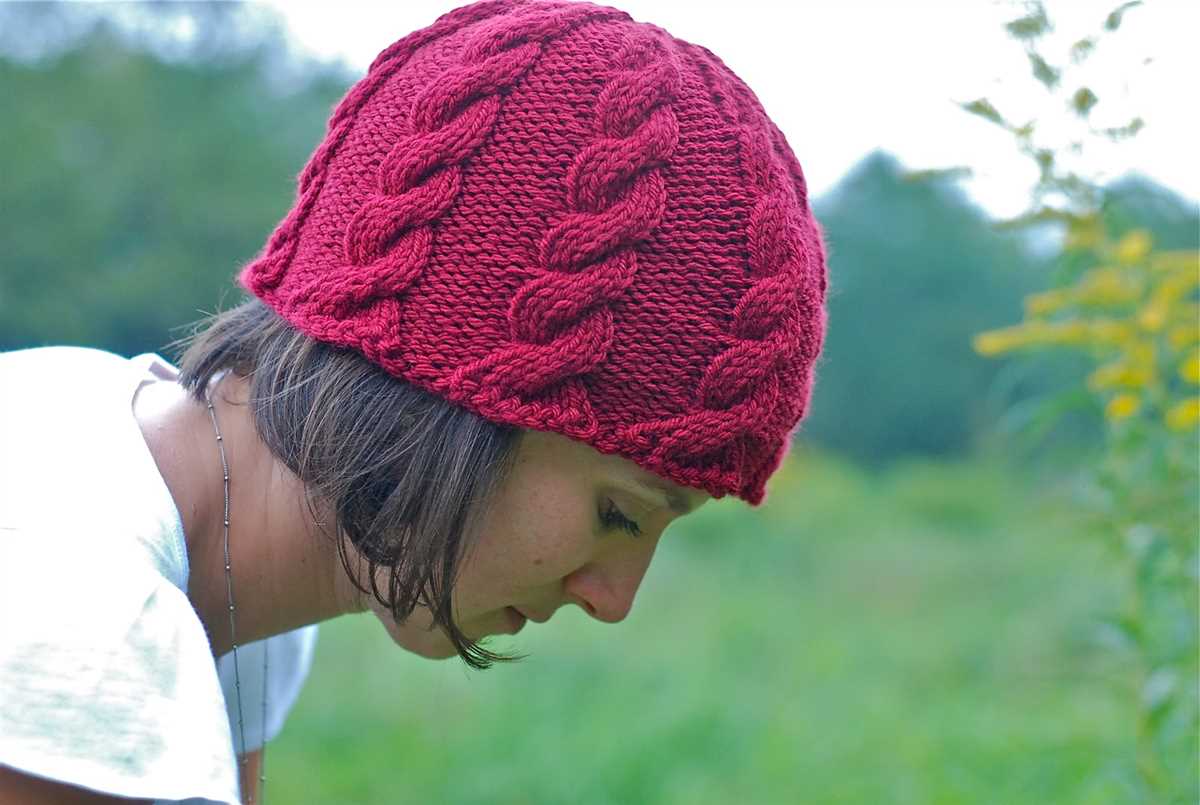
Free Knitting Pattern for Cable Hat
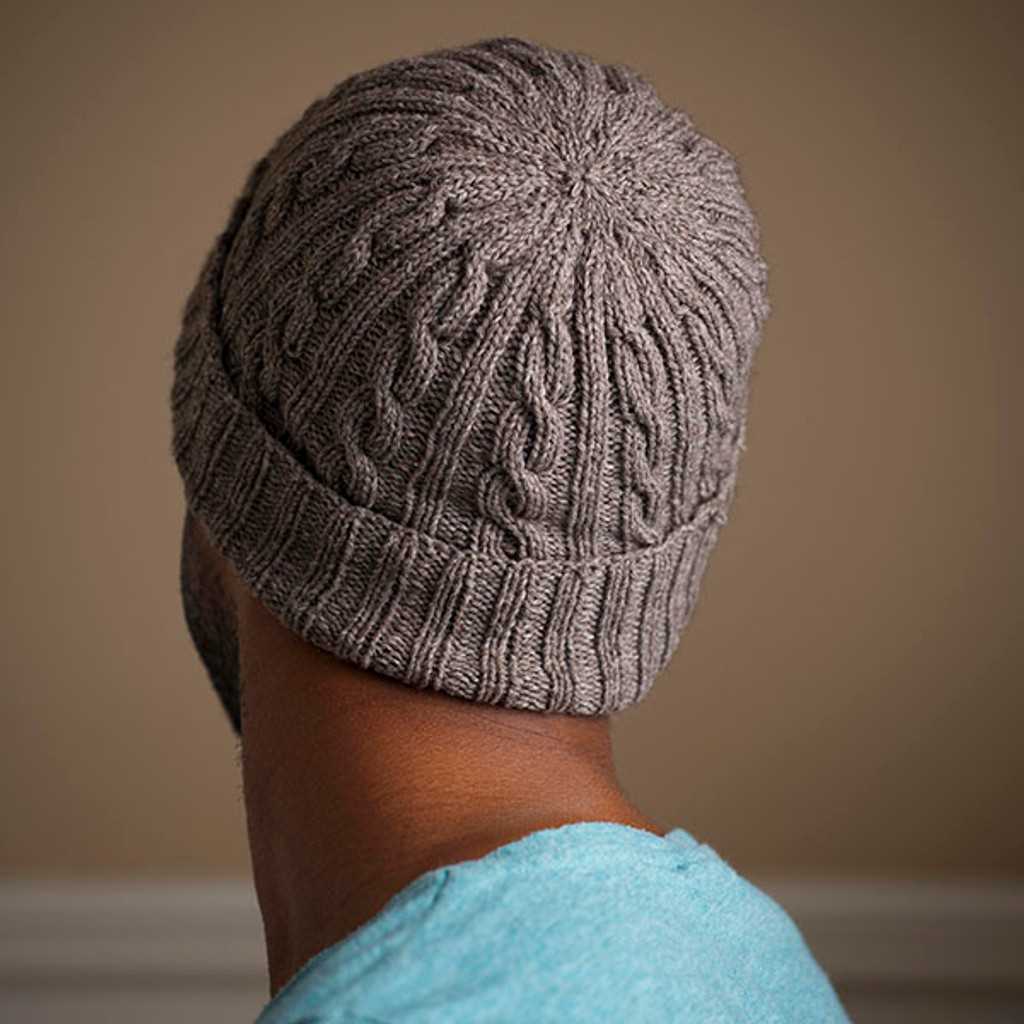
If you’re looking for a stylish and cozy hat to knit, this free cable hat pattern is perfect for you. The intricate cable design adds a touch of elegance and complexity to the hat, making it a great accessory for fall and winter. Whether you’re an experienced knitter or just starting out, this pattern is suitable for all skill levels.
To get started, you’ll need a set of circular knitting needles and a cable needle. The pattern calls for a worsted weight yarn in your favorite color, making it easy to customize the hat to your personal style. With step-by-step instructions and detailed stitch diagrams, you’ll be able to confidently knit the cable hat without any difficulties.
Materials:
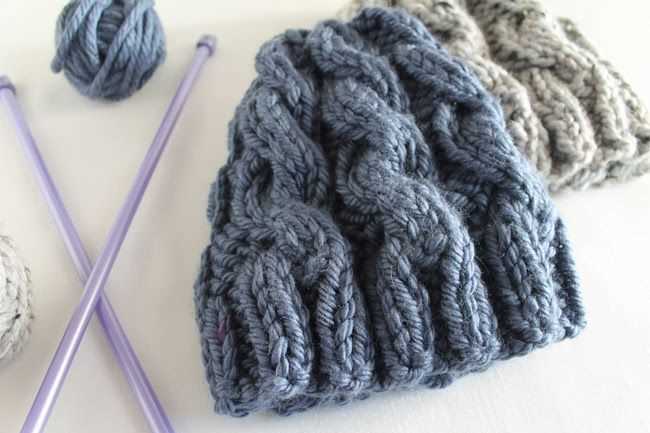
- Worsted weight yarn (approx. 200 yards)
- Size 8 (5mm) circular knitting needles
- Cable needle
- Stitch markers
- Tapestry needle
- Scissors
Instructions:
- Cast on 80 stitches with the circular knitting needles.
- Place a stitch marker to indicate the beginning of the round.
- Knit 2 stitches, purl 2 stitches in a ribbing pattern for 2 inches.
- Begin the cable pattern by following the stitch diagram:
| Row 1: | Knit 2, slip 2 stitches onto cable needle and hold in front, knit 2 from left-hand needle, knit 2 from cable needle. |
| Row 2: | Purl all stitches. |
| Row 3: | Knit 2, slip 2 stitches onto cable needle and hold in back, knit 2 from left-hand needle, knit 2 from cable needle. |
| Row 4: | Purl all stitches. |
| Repeat rows 1-4 |
- Continue the cable pattern until the hat measures approximately 8 inches from the cast-on edge.
- Switch to double-pointed needles when necessary.
- Decrease 8 stitches evenly across the round.
- Continue decreasing until only a few stitches remain.
- Cut the yarn, leaving a long tail. Thread the tail through the remaining stitches and pull tight to close the top of the hat.
- Weave in any loose ends and block the hat if desired.
With this free knitting pattern for a cable hat, you’ll have a functional and fashionable accessory that will keep you warm throughout the colder months. Whether you’re knitting one for yourself or as a gift, this pattern is sure to impress. Happy knitting!
Choose Your Yarn and Needles
When starting a knitting project, one of the first decisions you will need to make is which yarn and needles to use. The choice of yarn and needles can greatly impact the look and feel of your finished hat, so it’s important to choose wisely.
There are many factors to consider when selecting yarn for your cable hat. The weight of the yarn will determine the thickness of the hat, with lighter weight yarn creating a more lightweight and breathable hat, and heavier weight yarn resulting in a warmer and chunkier hat. The fiber content of the yarn will also play a role in the final product, with wool providing warmth and structure, while acrylic yarns offer durability and easy care. Consider the season and climate you will be wearing the hat in, as well as any personal preferences for texture and appearance.
Choosing the right needles is also important for a successful cable hat project.
Needles come in different sizes and materials, and the size you choose will depend on the gauge of your chosen yarn. The gauge is the number of stitches and rows per inch in your knitting, and it is important to match the gauge specified in the pattern to ensure the correct fit of your hat. If your gauge differs from the pattern, you may need to switch to a larger or smaller needle size to achieve the correct gauge.
When it comes to needle material, there are a few options to consider. Metal needles are often favored for their smoothness and durability, while bamboo or wooden needles can provide a more comfortable grip for some knitters. The choice of needle material is largely a matter of personal preference, so it’s a good idea to try out different types to see which you prefer.
Gauge Swatch
A gauge swatch is an essential tool for every knitter. It allows you to determine the correct tension and ensure that your finished project will have the desired measurements. To create a gauge swatch, you will need the recommended yarn and appropriate knitting needles for the project.
Start by casting on the required number of stitches specified in the pattern instructions. Typically, this is around 20-30 stitches. Knit a few rows in the chosen stitch pattern as indicated in the pattern. Then, work in a stockinette stitch for a few inches.
Measure the gauge:
Using a ruler or a gauge measuring tool, count the number of stitches and rows within a 1-inch square. Compare this measurement to the gauge specified in the pattern. If your swatch doesn’t match the desired gauge, you may need to adjust your needle size or tension to achieve the correct gauge.
Note:
Keep in mind that different knitters may have different tension, so it’s crucial to create a gauge swatch to ensure a proper fit. Additionally, the gauge may vary depending on the yarn and needle combination used. Make sure to block your swatch before measuring, as it can affect the gauge.
Cast On and Ribbing
When starting a knitting project, the first step is to cast on. For this cable hat pattern, you will need to cast on a certain number of stitches, depending on the size of hat you want to make. Follow the instructions in the pattern to determine the correct number of stitches to cast on. Make sure your yarn is not twisted and hold the yarn in your right hand.
To cast on, create a slipknot by making a loop with the yarn and inserting the end of the yarn through the loop. Tighten the loop around the knitting needle, making sure it is not too tight or too loose. Hold the knitting needle with the slipknot in your right hand.
Next, insert the right needle into the loop of the slipknot from left to right, keeping the slipknot on the left needle. With your right hand, use the yarn to wrap around the right needle from back to front and pull the loop through the slipknot. This forms the first stitch. Repeat this process until you have cast on the required number of stitches.
Once you have cast on all the stitches, it’s time to start the ribbing. Ribbing is a stretchy pattern commonly used for cuffs and borders. In this cable hat pattern, the ribbing is used at the brim of the hat to provide a snug fit. The most common ribbing pattern is the knit 1, purl 1 pattern.
To create the ribbing, start by knitting the first stitch. To knit, insert the right needle from left to right into the first stitch on the left needle. With your right hand, wrap the yarn around the right needle from back to front and pull it through the stitch, transferring it from the left needle to the right needle. This is called a knit stitch. Now, purl the next stitch by inserting the right needle from right to left into the second stitch on the left needle, wrapping the yarn from front to back, and pulling it through the stitch.
Repeat the knit and purl stitches alternately across the entire row. When you reach the end, turn the work and start the next row by knitting the first stitch and purling the second stitch. Continue this pattern of alternating knit and purl stitches for the desired length of ribbing, usually about 1 inch or 2.5 cm for a hat.
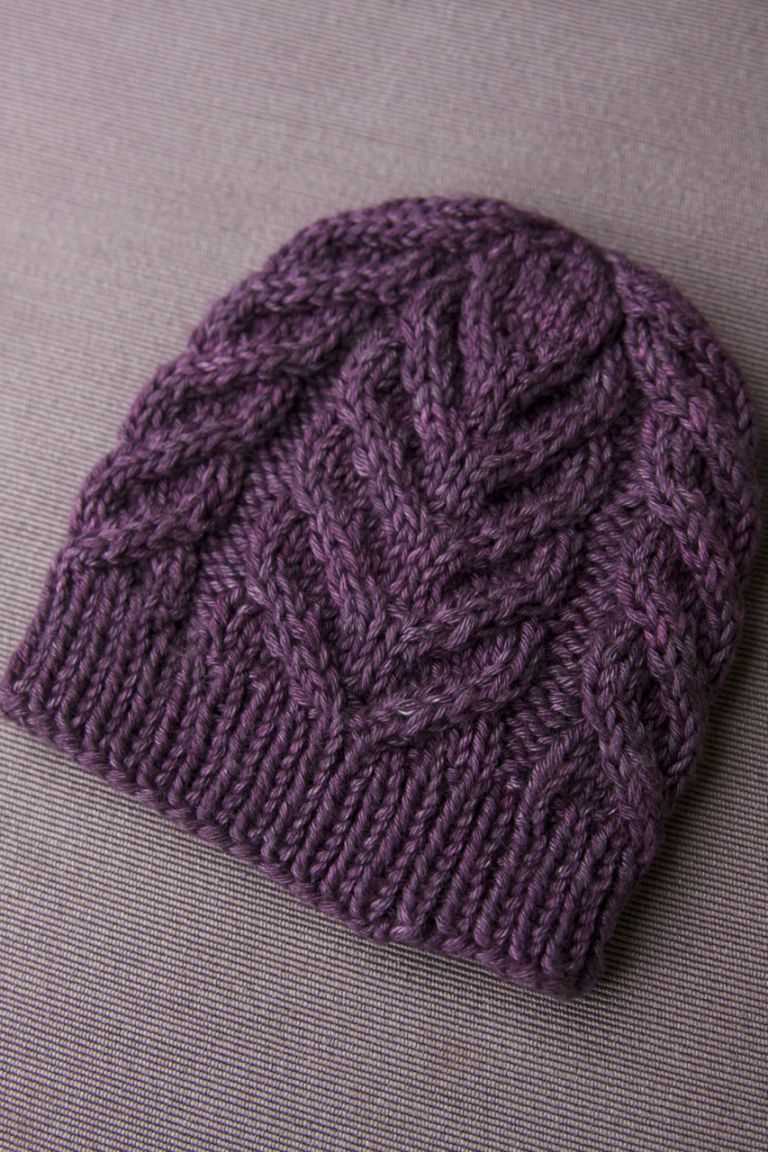
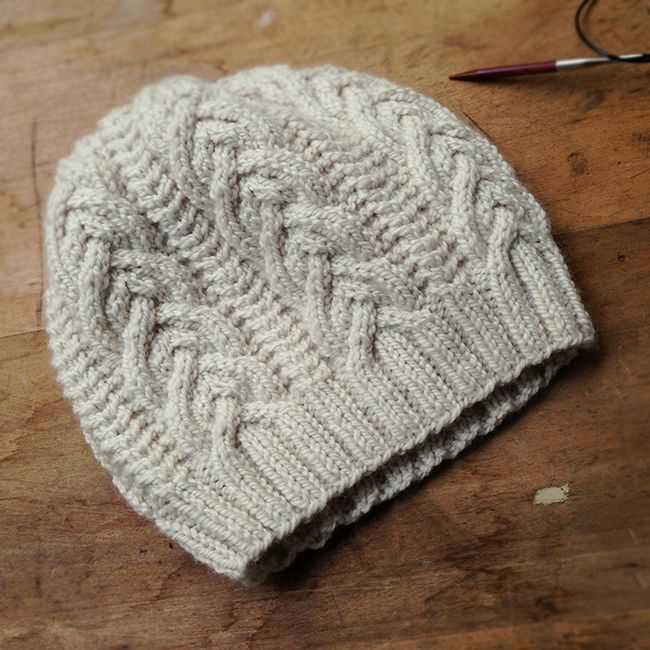
Start the Cable Pattern
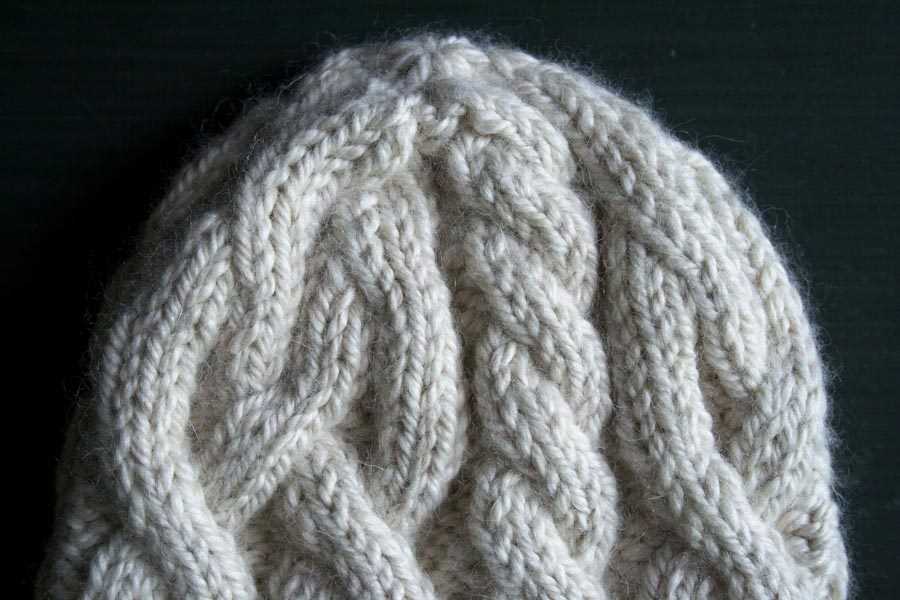
Once you have cast on the desired number of stitches for your cable hat, it’s time to start the cable pattern. This pattern will create the beautiful cable design that makes the hat unique and stylish.
To begin, you will need to identify the stitches that will be involved in the cable pattern. Typically, the cable pattern will be centered on the hat and will consist of a specific number of stitches. These stitches will be worked differently than the rest of the hat.
Once you have identified the cable stitches, you will need to follow the specific instructions for your chosen cable pattern. These instructions will typically include a combination of knitting and purling stitches, as well as cable twists. It’s important to carefully read and understand the pattern before you begin, as this will ensure that you are able to create the cable design correctly.
- Step 1: Start by knitting or purling the specified number of stitches as indicated in the pattern.
- Step 2: Next, you will create the cable twist by working the stitches in a specific order. This may involve slipping stitches onto a cable needle or rearranging the order of the stitches on your knitting needle.
- Step 3: Continue following the pattern instructions, repeating the cable twists as necessary to create the desired design.
As you work through the cable pattern, keep in mind that tension is important. Make sure to knit or purl your stitches evenly to maintain a consistent tension throughout the pattern. This will help ensure that your cable design looks neat and well-defined.
Once you have completed the cable pattern for the designated number of rows, you can then move on to the next section of the hat pattern. Following the instructions carefully and paying attention to your tension will result in a beautifully knitted cable hat.
Knit in Rounds
The cable hat pattern is designed to be knit in rounds, which means that you will be knitting in a continuous spiral rather than back and forth like in traditional flat knitting. This method is commonly used for creating seamless and circular projects, such as hats, socks, and cowls.
To knit in rounds, you will need a set of double-pointed needles or a circular needle with a long enough cable to accommodate the number of stitches for your project. The stitches are evenly distributed around the needles, and you simply continue knitting round after round until the desired length is reached.
One advantage of knitting in rounds is that it eliminates the need for seaming. Since you are continuously knitting in a circular motion, there are no side seams to sew together once the project is complete. This results in a clean and professional-looking finish.
Another benefit of knitting in rounds is that it allows for more complex stitch patterns, such as cables, to be easily incorporated into your project. In the cable hat pattern, the cables are created using a combination of knit and purl stitches worked over a specific number of rounds. This technique adds texture and visual interest to the hat.
When knitting in rounds, it is important to keep track of your progress, especially if you are following a pattern with multiple stitch repeats or shaping instructions. Markers can be placed to indicate the beginning of each round or section, making it easier to follow the pattern and ensure accuracy.
Continue the Cable Pattern
Once you have completed the ribbing and the hat body, it’s time to continue with the cable pattern. The cable pattern adds a beautiful texture and dimension to the hat, and it’s a great way to showcase your knitting skills.
To continue the cable pattern, you will need to follow the instructions provided in the knitting pattern. Make sure you have the necessary supplies, including the right size of knitting needles and yarn, before you begin.
Step 1: Start the cable row
To start the cable row, slip the first stitch purlwise with the yarn in front. This will create a neat edge for your cable pattern. Then, you can begin working the cable pattern as specified in the pattern instructions.
Step 2: Work the cable stitches
The cable pattern typically involves crossing stitches over each other to create the cable effect. This is done by either slipping stitches onto a cable needle and holding them in the front or back, or by working the stitches out of order. Follow the pattern instructions carefully to perform the correct cable stitches.
Step 3: Continue the pattern
Repeat the cable pattern for the specified number of rows or until the cable section is complete. Make sure to maintain the correct stitch count and keep an eye on your tension and gauge to ensure the hat turns out the right size.
By following these steps and continuing the cable pattern as instructed, you will be able to create a stunning cable hat that is sure to impress. Enjoy the process of working the intricate cable stitches and see your hat come to life!
Shape the Crown
Once you have completed the cable pattern section of the hat, it’s time to shape the crown. This is where the hat begins to taper in towards the top, creating a snug and stylish fit.
To start shaping the crown, you will need to decrease stitches. This is typically done by knitting two stitches together (k2tog) at regular intervals throughout the row. The exact spacing and number of decreases will depend on the size of your hat and the desired fit. You can refer to the pattern instructions for specific guidance on decreasing stitches.
To ensure a smooth and even decrease, it’s a good idea to distribute the decreases evenly across each row. This can be achieved by dividing the total number of stitches by the number of decrease rows and spacing the decreases out accordingly. For example, if you have 80 stitches and are doing 8 decrease rows, you would decrease 10 stitches on each decrease row.
Continue decreasing stitches as instructed until you reach the final few stitches. Once you have a small number of stitches remaining, usually around 6-8, cut the yarn, leaving a long tail. Thread the tail through a yarn needle and slip it through the remaining stitches, pulling tight to close up the crown of the hat.
Your cable hat is now complete, and you can weave in any remaining ends and block it if desired. Enjoy your cozy and stylish new accessory!
Decrease Rounds
To shape the crown of the hat, you will need to decrease stitches. This will give the hat its snug fit at the top. Here is how to work the decrease rounds:
Round 1:
Knit 2 together across the round. This will reduce the number of stitches by half.
Round 2:

Knit all stitches.
Round 3:

Knit 2 together across the round again to further decrease the number of stitches.
Repeat Rounds 2 and 3:
Continue knitting all stitches in Round 2 and then decreasing in Round 3 until you have reached the desired number of stitches for the crown of your hat.
Once you have completed the decrease rounds, you can continue knitting the remaining rounds according to the pattern instructions to finish your cable hat.
Final Decrease Rounds
Once you have completed all the cable pattern rounds and reached the desired height for your hat, it’s time to start the final decrease rounds. These rounds will shape the crown of your hat and create a snug fit.
Begin the first decrease round by knitting two stitches together (k2tog) across the entire row. This will reduce the total number of stitches on your needles by half. Repeat this decrease round once more for a total of two decrease rounds.
Next, switch to using double-pointed needles or a circular needle with the magic loop method if your current needle is too long. Divide the remaining stitches evenly onto three or four needles, depending on your preference.
Continue the decrease rounds by knitting two stitches together (k2tog) at the beginning of each needle. Knit across the remaining stitches on that needle until you reach the last two stitches. Knit these two stitches together as well. Repeat this decrease round on each needle until you have only a few stitches remaining on each needle.
Finally, cut the yarn, leaving a long tail. Thread the tail through a yarn needle and slip the needle through the remaining stitches, removing them from the needles. Pull the yarn tight to close the top of the hat and secure the end by weaving it in. Trim any excess yarn and your cable hat is complete!
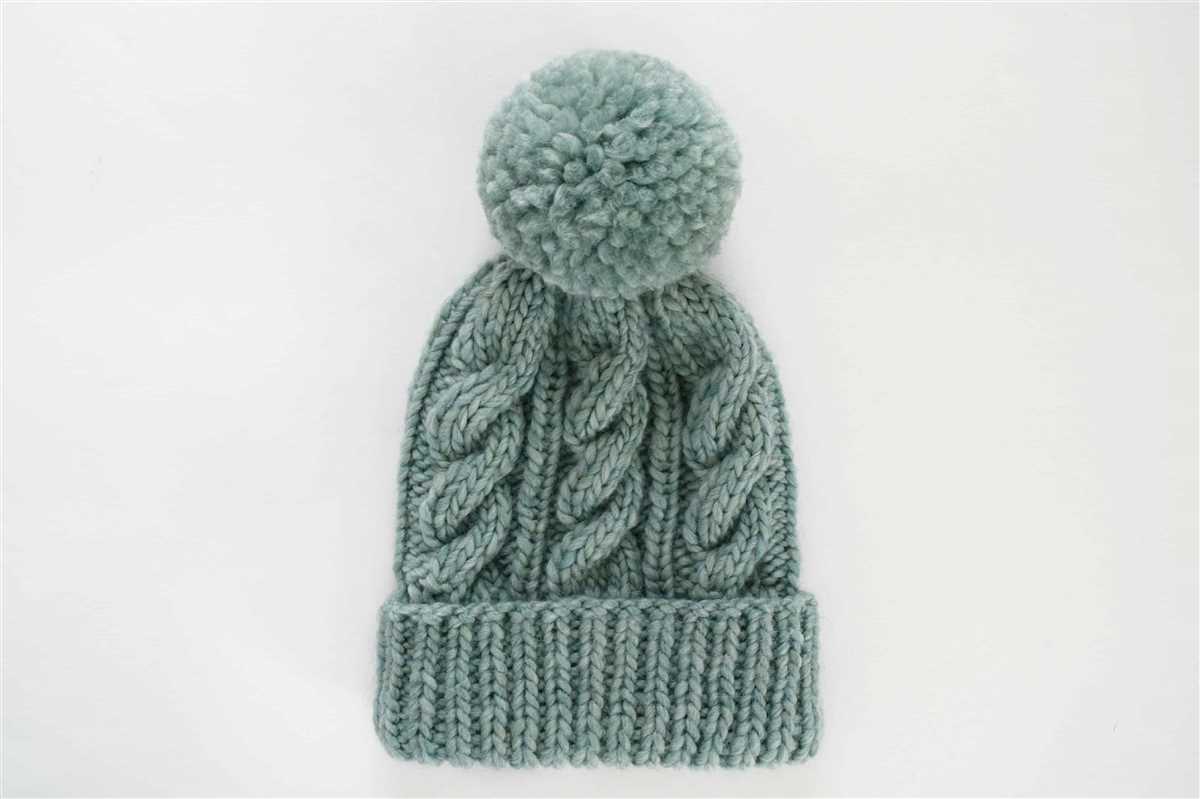
Finish the Hat
Once you have completed knitting the cable hat according to the provided pattern, it’s time to finish it off and make it ready to wear. The finishing steps involve blocking the hat to ensure its shape and size, weaving in any loose ends, and adding any additional details or embellishments if desired.
Blocking: Blocking is an important step to give your cable hat its final shape and size. It involves wetting the hat gently and then stretching it out to the desired dimensions. You can use blocking mats or towels to lay the hat flat and pin it down to maintain its shape while it dries. This process helps to even out any uneven stitches and makes the cable pattern more defined.
Weaving in Ends: Once the hat is blocked and dry, it’s time to weave in any loose ends to ensure the hat’s durability and neatness. Use a tapestry needle and thread the loose ends through several stitches on the wrong side of the hat. Make sure to secure the ends tightly so that they won’t come undone with wear.
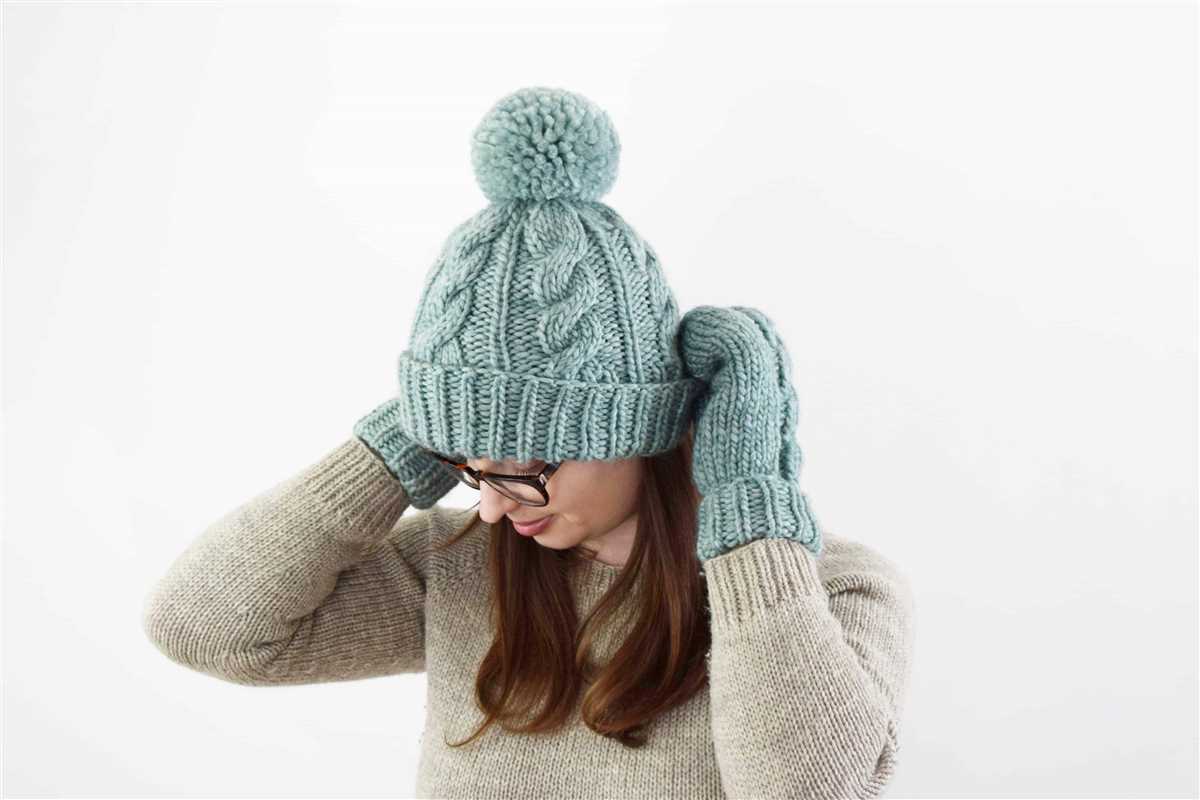
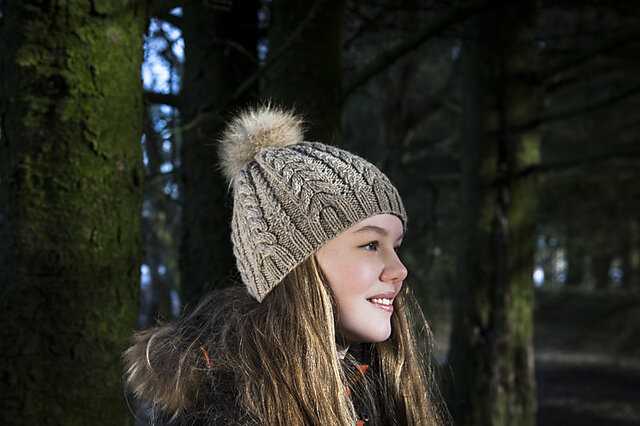
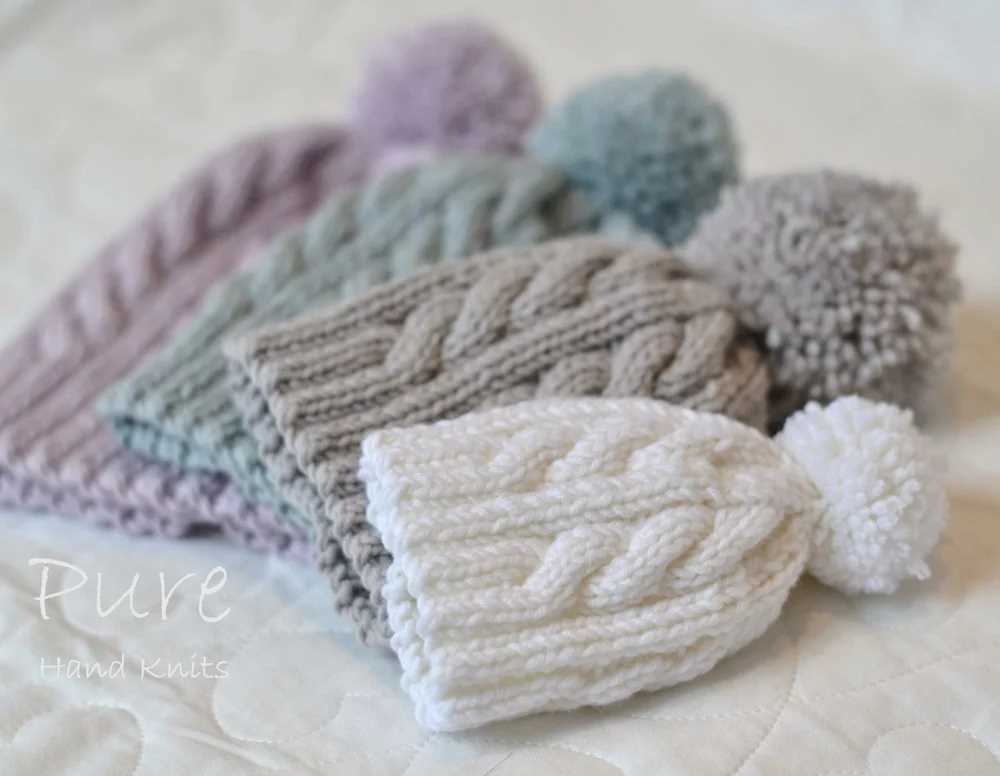
Additional Details: If you want to add any extra details or embellishments to your cable hat, now is the time to do so. You can attach a pom-pom to the top of the hat, sew on a decorative button, or even add a contrasting ribbed edge. Be creative and make the hat uniquely yours!
By following these finishing steps, you will have a beautifully knitted cable hat that is ready to keep you warm and stylish during the colder months. Enjoy wearing your homemade creation or gift it to someone special!
Blocking and Final Touches
Once you have finished knitting your cable hat, it’s time to give it some final touches to make it look even better. One important step in the finishing process is blocking. Blocking is a technique used to shape and straighten the knitted fabric, ensuring that the stitches are even and the hat fits properly. It helps to give the hat a more professional and polished look.
To block your cable hat, you will need to soak it in water and then gently squeeze out the excess moisture. Lay the hat flat on a clean towel and use pins to shape it to the desired size and shape. Make sure to smooth out any wrinkles or uneven areas. Allow the hat to dry completely before removing the pins. This will help set the stitches and give the hat its final shape.
Once your hat is blocked and dry, you can add any final touches to personalize it. You may want to sew a decorative button or pompom to the top of the hat, or add a contrasting color trim around the brim. These small details can make your cable hat truly unique and add a touch of flair.
Before wearing your cable hat, make sure to try it on and adjust the fit if needed. If the hat feels a bit loose, you can sew in an elastic band around the inside brim to help keep it in place. Alternatively, if the hat feels too tight, you can gently stretch the fabric while it is still damp to loosen it up.
Finally, give your cable hat a thorough inspection to check for any loose ends or mistakes. Take the time to weave in any loose threads and make any necessary repairs. This will ensure that your hat is in perfect condition and ready to be worn.
Now that your cable hat is complete, you can proudly wear it and show off your knitting skills. Remember to take care of it by hand washing and storing it properly to keep it looking its best for years to come.
Enjoy Your New Cable Hat!
Now that you have completed your cable hat, it’s time to enjoy it! Put it on and show off your knitting skills to your friends and family. Not only will you look stylish, but you’ll also stay warm and cozy during the colder months. Whether you wear it for a casual outing or a formal event, this cable hat is sure to be a hit.
Don’t forget to take care of your new hat to ensure its longevity. Hand wash it gently using mild detergent and lukewarm water. Avoid twisting or wringing it to maintain its shape. Once washed, lay it flat to dry. Avoid exposing it to direct sunlight, as it may cause the colors to fade.
If you enjoyed knitting this cable hat, why not try your hand at other knitting projects? There are countless patterns available online, from scarves and mittens to sweaters and blankets. Knitting not only allows you to create unique and personalized items but also provides a calming and meditative hobby.
Thank you for following this pattern and creating your very own cable hat. We hope you had a great experience and that you love your new accessory. Happy knitting!