
Get into the holiday spirit with this adorable knitted turkey dishcloth pattern. Perfect for adding a festive touch to your kitchen or as a gift for friends and family, this pattern is a fun and quick project for knitters of all skill levels.
With Thanksgiving just around the corner, what better way to celebrate than with a cute and practical addition to your kitchen decor? This knitted turkey dishcloth is not only functional but also adds a touch of holiday cheer to your space. Plus, the pattern is free and easy to follow, making it a great project for beginners and experienced knitters alike.
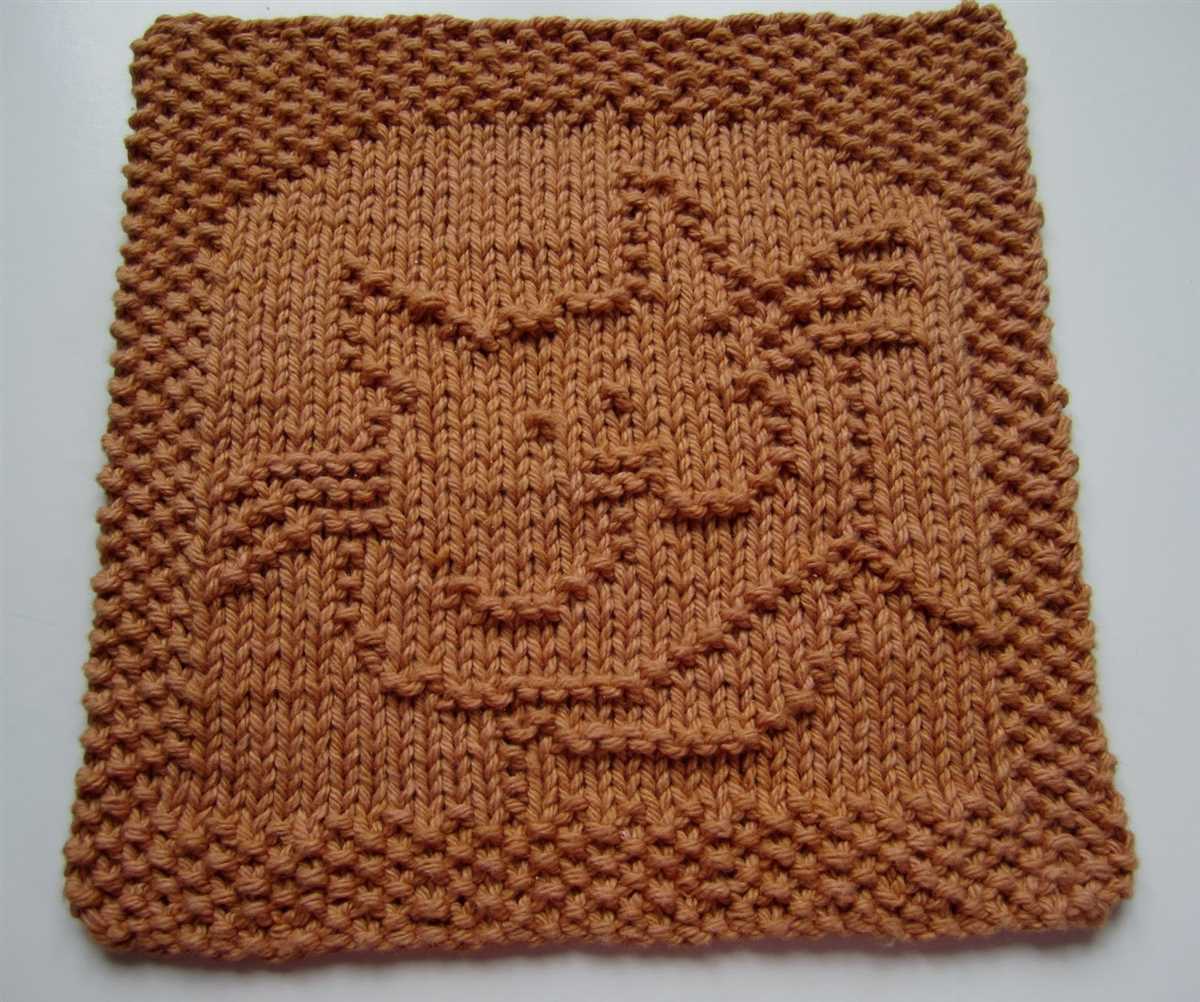
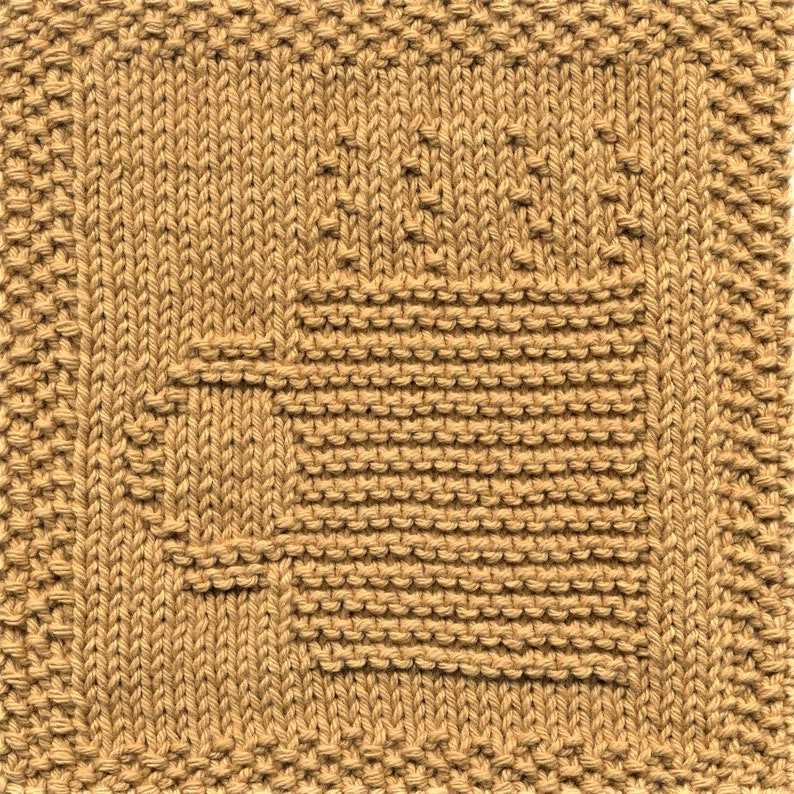
Made with basic knitting stitches and simple color changes, this dishcloth pattern is a great way to practice your skills and create something special for the holiday season. The finished dishcloth features a charming turkey design that will bring a smile to your face every time you use it.
Learn how to create a free knitted turkey dishcloth pattern
If you’re looking to add a festive touch to your Thanksgiving celebrations, why not try creating a knitted turkey dishcloth pattern? These charming dishcloths not only make practical additions to your kitchen, but they also add a touch of holiday cheer.
To get started, you’ll need some basic knitting skills and a few essential supplies. Gather your knitting needles, yarn in various colors, scissors, and a darning needle. You can choose to use traditional fall colors like brown, orange, and red, or get creative and experiment with different shades.
Begin by casting on the required number of stitches for your dishcloth. You can find a variety of free patterns online that provide detailed instructions for each step of the process. Once you have your stitches cast on, follow the pattern’s instructions to create the turkey design, using different colors to define the different elements of the turkey’s body.
As you knit, you’ll start to see the turkey design take shape. The pattern may include techniques such as increasing and decreasing stitches to create the desired shape and texture. Don’t worry if these techniques are new to you – there are plenty of beginner-friendly patterns available that provide clear explanations and step-by-step instructions.
Once you’ve finished knitting the turkey design, it’s time to bind off your stitches. Cut the yarn, leaving a long enough tail to weave in later. Using your darning needle, carefully weave the tail through the remaining stitches to secure them. Trim any excess yarn.
Your knitted turkey dishcloth is now ready to be used in your kitchen or given as a thoughtful handmade gift. The dishcloth can be used for washing dishes, wiping countertops, or even as a decorative element for your Thanksgiving table. Show off your creativity and holiday spirit with this fun and practical knitting project!
Gather your supplies
If you’re looking to knit a turkey dishcloth, here’s a list of supplies you’ll need to have on hand:
- Yarn: Choose a yarn that is suitable for dishcloths and in colors that resemble a turkey, such as brown, orange, yellow, and red. You’ll need small amounts of each color.
- Knitting needles: Use knitting needles that are appropriate for the yarn you’ve chosen. Generally, size US 7 or 8 needles work well for dishcloths.
- Tapestry needle: You’ll need a tapestry needle with a large eye to weave in your loose ends.
- Scissors: A pair of sharp scissors will be handy for cutting your yarn.
- Stitch markers: While not essential, stitch markers can be useful for keeping track of stitch counts or marking specific sections of your pattern.
Once you have gathered all of your supplies, you’ll be ready to start knitting your turkey dishcloth. The process of creating a cozy and functional dishcloth is both enjoyable and rewarding, and you’ll soon have a fun and festive addition to your kitchen. So gather your supplies and get ready to embark on this knitting adventure!
Understand the basic knitting stitches
Knitting is a versatile craft that allows you to create beautiful and functional items, such as dishcloths, scarves, and sweaters. Whether you are a beginner or an experienced knitter, understanding the basic knitting stitches is essential for creating successful projects.
There are four fundamental knitting stitches: the knit stitch, the purl stitch, the yarn over, and the slip stitch. The knit stitch is the foundation of knitting and is achieved by inserting the right needle into the front of the stitch on the left needle, wrapping the yarn around the right needle counterclockwise, and pulling the new loop through. The purl stitch is the reverse of the knit stitch and is achieved by inserting the right needle into the front of the stitch on the left needle, wrapping the yarn around the right needle clockwise, and pulling the new loop through.
The yarn over is a decorative stitch that creates an extra loop on the needle and is commonly used to create eyelets or increase stitches. It is accomplished by simply wrapping the yarn around the right needle from back to front. The slip stitch is used to move a stitch from one needle to the other without working it. It is often used for decorative purposes or to create interesting textures. To perform a slip stitch, you simply insert the right needle into the stitch on the left needle as if to knit, and slide it onto the right needle without knitting or purling.
By mastering these basic knitting stitches, you will be able to create a wide variety of patterns and designs. With practice, you will become more comfortable and confident in your knitting abilities, allowing you to take on more complex projects. Whether you are knitting a cozy blanket or a delicate lace shawl, understanding the basic knitting stitches is the first step towards success.
Start with a slipknot
The first step in knitting your turkey dishcloth is to start with a slipknot. This will create a loop that you will use to begin your stitches. To make a slipknot, hold the end of your yarn in one hand and create a loop by crossing the yarn over itself. Insert your knitting needle through the loop and pull the yarn snug. This will create a secure knot that you can use as your starting point.
Once you have made your slipknot, hold the knitting needle with the slipknot in your right hand and the other knitting needle in your left hand. Insert the right needle into the slipknot from front to back, bringing it under the left needle. Take the yarn and wrap it counterclockwise around the right needle, crossing it over the left needle.
Next, pull the right needle through the loop of yarn, bringing it up and over the left needle. This will create a new loop on the right needle. Continue this process of wrapping the yarn counterclockwise around the right needle and pulling it through the loop until you have the desired number of stitches for your dishcloth.
Cast on your stitches

Before you can start knitting your turkey dishcloth, you’ll need to cast on your stitches. The number of stitches you cast on will depend on the size of turkey dishcloth you want to create.
To cast on, hold your knitting needle in your right hand with the tip pointing to the right. Take the working yarn in your left hand and create a slipknot. Slip the knot onto the needle and pull it tight.
Hold the needle with the slipknot in your right hand. With your left hand, take the working yarn and wrap it around your left thumb. Insert your right hand needle into the loop created by the working yarn on your left thumb. Use your left thumb to push the loop off and onto the needle. Repeat this process until you have the desired number of stitches on your needle.
Note: Make sure to keep your stitches loose and even. If your stitches are too tight, it will be difficult to knit and the final dishcloth may not lay flat. If your stitches are too loose, the fabric may be too stretchy.
Tip: If you’re new to knitting or need a refresher, there are many online tutorials and videos available that can help you with casting on and other knitting techniques. Take your time and practice until you feel comfortable with the process.
Knit the foundation rows
Before you start knitting your turkey dishcloth, you will need to knit the foundation rows. These are the initial rows that create the base of your dishcloth and set the pattern for the rest of the project.
To begin, cast on the required number of stitches onto your knitting needles. The exact number will depend on the size of dishcloth you want to make and the thickness of your yarn. Make sure to leave a long enough tail at the end for weaving in later.
Once you have cast on your stitches, you can begin knitting the foundation rows. In this pattern, the first row is a knit row, which means you will knit each stitch across the row. This creates a smooth and even foundation for your dishcloth.
After completing the first row, you will move on to the second row. This row is a purl row, which means you will purl each stitch across the row. Purling creates a textured surface on the fabric, which adds interest to your dishcloth design.
Continue alternating between knit and purl rows for the specified number of rows, depending on the pattern instructions. This creates the foundation for your dishcloth and prepares it for the next steps in the knitting process.
Remember to always keep track of your stitch count and follow the pattern instructions carefully. Knitting the foundation rows accurately will ensure that your turkey dishcloth turns out well and has a clean and cohesive look. Happy knitting!
Begin the turkey pattern
Once you have gathered all the necessary materials for the knitted turkey dishcloth, you can begin the pattern. First, cast on the required number of stitches using the specified yarn and needle size. Make sure to leave a long tail for weaving in later.
The pattern will start with the turkey’s body, so begin by knitting the first row in the designated stitch pattern. The body is usually worked in a combination of knit and purl stitches to create a textured effect. Follow the pattern instructions carefully, making sure to keep track of any stitch pattern repeats.
Body: The body section typically consists of a series of rows worked in the stitch pattern specified in the pattern instructions. Repeat these rows until the body reaches the desired length. Remember to switch between knit and purl stitches as directed by the pattern.
Head and neck: After completing the body, you will move on to knitting the turkey’s head and neck. This section is usually worked separately and then attached to the body later. Follow the pattern instructions to knit the required number of stitches and rows for the head and neck.
Feathers: The final step is to add the turkey’s feather details. These are typically created by knitting additional rows or stitches in a contrasting color or stitch pattern. The pattern instructions will guide you on how to incorporate the feather details into your dishcloth.
Once you have finished knitting all the required sections, carefully bind off your stitches to secure the edges. Weave in any loose ends and shape the dishcloth as necessary. Your knitted turkey dishcloth is now ready to be used or gifted!
Knit the turkey body

To create the body of the knitted turkey dishcloth, you will first need to gather your materials. You will need a pair of knitting needles (size 8 or 9 recommended), a ball of brown yarn, and a tapestry needle for finishing. Once you have gathered your materials, you can begin knitting the body of the turkey.
Start by casting on 36 stitches using the long-tail cast-on method. This will serve as the foundation for your turkey body. Once you have cast on your stitches, you can begin the first row of knitting. Knit the first row in a basic knit stitch, keeping your tension even and your stitches tight. After completing the first row, turn your work and begin the second row.
For the second row, you will need to purl the entire row. Purl stitches create a smooth texture on the opposite side of the work. Continue to alternate between knitting and purling rows until your work measures approximately 5 inches in length. This will create the body of the turkey dishcloth.
Once your body is the desired length, you can bind off your stitches using a basic bind-off method. Cut your yarn, leaving a long tail for finishing. Thread the tail through the tapestry needle and weave it through the remaining stitches, pulling tight to secure the edge. Trim any excess yarn, and your knitted turkey body is complete.
Add the turkey details
To complete your knitted turkey dishcloth, you will need to add the turkey details. These details will bring your dishcloth to life and make it look like a cute little turkey.
Start by embroidering the turkey’s eyes. You can use small black buttons or black yarn to create the eyes. Sew them onto the dishcloth in the appropriate position, making sure they are symmetrical.
Next, you can add the turkey’s beak. Cut a small triangle shape out of orange felt or fabric. Sew or glue the beak onto the dishcloth, positioning it just below the eyes. This will give your turkey a cute and playful expression.
To create the turkey’s body, you can use a few additional knitted pieces. Cut out two small circles or ovals from brown felt or fabric. Sew or glue these onto the dishcloth to represent the turkey’s wings. Place them on either side of the body, just below the eyes and beak.
Finally, you can add some feather details to complete your knitted turkey dishcloth. Cut out smaller pieces of colored felt or fabric in the shape of feathers. Sew or glue these onto the dishcloth, arranging them in a fan-like pattern on the top of the turkey’s body. You can use different colors to create a colorful and festive look.
Bind off your stitches
To finish your knitted turkey dishcloth, you need to bind off your stitches. This is the final step in completing your project and will give it a neat finished edge.
To bind off, start by knitting the first two stitches as normal. Then, insert the left needle into the first stitch on your right needle and lift it over the second stitch and off the right needle. This creates one bound off stitch.
Continue binding off stitches in this manner until you reach the end of your row. Make sure to keep your tension consistent to ensure an even edge.
If you want to add a decorative touch to your dishcloth, you can use a different bind off method. One option is the picot bind off, which creates a small looped edge. To do this, knit the first two stitches as normal, then bind off the second stitch by lifting it over the first stitch and off the right needle. Then, using the left needle, pick up the first stitch and knit it again. Repeat this process until all stitches are bound off.
Once you have bound off all your stitches, cut the yarn, leaving a tail of about 6 inches. Pull the tail through the last stitch and tighten to secure. Weave in any remaining ends and your knitted turkey dishcloth is complete!
Finishing touches and care instructions
Once you have completed knitting the turkey dishcloth, it’s time to add the finishing touches. You can use a tapestry needle and some leftover yarn to sew in any loose ends and secure the edges. This will give your dishcloth a polished and neat look.
When it comes to caring for your knitted turkey dishcloth, it’s important to note that it is made from natural fibers and needs to be handled with care. Here are some care instructions to ensure your dishcloth stays in good condition:
- Hand wash the dishcloth in lukewarm water using a mild detergent.
- Gently squeeze out any excess water and avoid wringing or twisting the fabric.
- Lay the dishcloth flat to dry on a clean towel or drying rack.
- Avoid using bleach or harsh chemicals on the dishcloth, as this can damage the fibers.
- Store the dishcloth in a dry and well-ventilated area to prevent mold or mildew.
A knitted turkey dishcloth can make a great addition to your Thanksgiving or fall decor, or it can be a lovely handmade gift for family and friends. With this free pattern and a little bit of time and effort, you can create a practical and festive item that can be enjoyed for years to come.
Q&A:
What is a knitted turkey dishcloth pattern?
A knitted turkey dishcloth pattern is a set of instructions for knitting a dishcloth in the shape of a turkey. This pattern typically includes details on the materials needed, the stitches used, and the step-by-step instructions to create the dishcloth.
Where can I find a free knitted turkey dishcloth pattern?
You can find free knitted turkey dishcloth patterns on various knitting websites, blogs, and online communities. Some popular websites to find free knitting patterns include Ravelry, AllFreeKnitting, and KnittingPatternCentral.
What materials do I need to knit a turkey dishcloth?
To knit a turkey dishcloth, you will need a set of knitting needles, yarn in various colors (such as brown, red, and yellow), a tapestry needle for sewing, and scissors. The exact materials needed may vary depending on the specific pattern you choose.
Are knitted turkey dishcloths practical for everyday use?
Knitted turkey dishcloths can be both practical and decorative. While they can be used for everyday dishwashing, they can also make a great addition to your Thanksgiving table as a festive and functional decoration. They also make for thoughtful handmade gifts.
How difficult is it to knit a turkey dishcloth?
The difficulty level of knitting a turkey dishcloth may vary depending on your skill level as a knitter and the specific pattern you choose. Some patterns may be more advanced and require knowledge of certain stitches or techniques, while others may be suitable for beginners. It is recommended to choose a pattern that matches your skill level.
Where can I find a free knitted turkey dishcloth pattern?
You can find a free knitted turkey dishcloth pattern on various websites that offer knitting patterns. Some popular websites include Ravelry, AllFreeKnitting, and LoveKnitting. You can search for “knitted turkey dishcloth pattern” on these websites and you should be able to find a free pattern to download or access.